Tag: hallway design

  • Dado Rail Paneling Ideas: How to Update Half-Height Wall Paneling

    Dado Rail Paneling Ideas: How to Update Half-Height Wall Paneling

    Dado rail paneling is one of the oldest wall treatments in domestic architecture, but it’s gone through a significant design evolution. What was once almost exclusively a traditional feature — painted woodwork, raised panels, deep architraves — has become a versatile format that works in everything from period properties to contemporary hallways. At The Panel Hub, we see dado rail paneling as one of the smartest ways to use wood wall panels — it adds character and depth while leaving the upper wall free to breathe.

    What Is Dado Rail Paneling

    Dado rail paneling refers to wall treatment applied to the lower portion of the wall — typically from the skirting board up to around 90–110cm, where it’s capped with a horizontal rail (the dado rail). The treatment below the rail can be flat paneling, raised or recessed panels, tongue-and-groove boarding, or — increasingly — contemporary slat or textured panels. The upper wall is usually left plain or painted in a contrasting or complementary colour.

    The dado rail itself can be a traditional wooden moulding or a simple square-edged timber batten in more contemporary schemes.

    Why Dado Rail Paneling Works in Hallways

    Hallways are high-traffic areas where lower walls take the most abuse — scuffs, marks, and wear from bags, coats, and passing contact. Dado rail paneling solves this practically while creating strong visual interest. It also helps with proportions: in hallways that feel narrow or tall, adding a horizontal break at dado height grounds the space and makes it feel more inhabitable.

    Our hallway wall panels are particularly well suited to dado rail schemes because they add texture at exactly the height where it creates the most visual impact.

    Dado Rail Panel Styles to Consider

    Modern slat panels below dado height

    Vertical slat panels installed from skirting to dado rail height is the most contemporary interpretation of dado paneling. The slats read as texture and warmth, the upper wall remains clean and open, and the overall effect is modern without being cold. This approach works in both period properties and new-builds. Our SoundPanel™ acoustic slat panels work well in this format — they can be cut to height and finished cleanly at the dado rail line.

    Traditional painted timber panels

    In period properties, raised or recessed timber panels painted in a deep tone — navy, forest green, charcoal — below a white dado rail is a classic combination. The paint finish unifies the panel detail and the architectural elements without competing with the wall colour above.

    Textured lower panels

    For a contemporary interpretation, textured panels — such as our RockSurface® stone-effect panels — below a simple square dado rail create a strong material contrast with the plain plaster above. This approach works well in hallways where the brief is to make a bold first impression.

    Heights and Proportions

    The traditional dado rail height is around 90–100cm — roughly chair-back height, which is where the term originates (dado rails protected plaster from chair backs in dining rooms). In contemporary schemes, this height is usually appropriate. For rooms with higher ceilings or wider hallways, a slightly higher dado at 110–120cm can improve proportions. For very low-ceilinged spaces, keeping the dado at 80cm or below makes the ceiling feel higher.

    Colour Choices for Dado Rail Paneling

    The most effective colour combinations for dado rail schemes are those that create clear contrast between the lower panel and the upper wall. A mid-toned or dark panel colour below a light upper wall is the most common approach. If the panels are natural wood (rather than painted), allow the timber tone to be the contrast element and keep both upper wall and trim colours neutral — off-white, warm stone, or soft grey all work well.

    Getting Started With Dado Rail Panels

    Choose your dado height first — mark it with a spirit level and chalk line before any installation begins. Then select a panel style that works from skirting to that height. The dado rail itself can be fitted after the panel is installed, covering the top raw edge of the panel cleanly.

    Browse our hallway wall panels and the full wood wall panel collection to find a style that suits your space.
  • How to Panel a Hallway: A Practical Guide to Hallway Wall Paneling

    How to Panel a Hallway: A Practical Guide to Hallway Wall Paneling

    A paneled hallway makes a better first impression than almost any other single change you can make to a home’s interior. At The Panel Hub, hallways are one of the most common spaces where customers install wood wall panels — and for good reason. The results are dramatic, the installation is manageable for a competent DIYer, and the improvement to both aesthetics and acoustics is immediate. This guide covers everything from choosing the right panel to getting a clean finish.

    Why Hallways Benefit From Wall Paneling

    Hallways are transition spaces — the first room you see when you enter a home and the last before you leave. They’re often narrow, poorly lit, and acoustically hard (bare plaster, hard flooring, reflective surfaces). Wall paneling addresses all of these: it adds visual depth to narrow spaces, introduces warmth that artificial lighting can pick up, and absorbs the echo and footstep noise that makes a hallway feel echoey and clinical.

    Our hallway wall panels are designed to perform in exactly these conditions.

    Choosing the Right Panel for a Hallway

    Full-height vs half-height panels

    Full-height panels (floor to ceiling) make a dramatic statement and suit wider or taller hallways. Half-height panels (to dado height) work better in narrow hallways where floor-to-ceiling paneling on both walls can feel enclosed. In very narrow hallways — under 1m wide — consider paneling just one wall, typically the longest wall or the one directly facing the front door.

    Slat panels

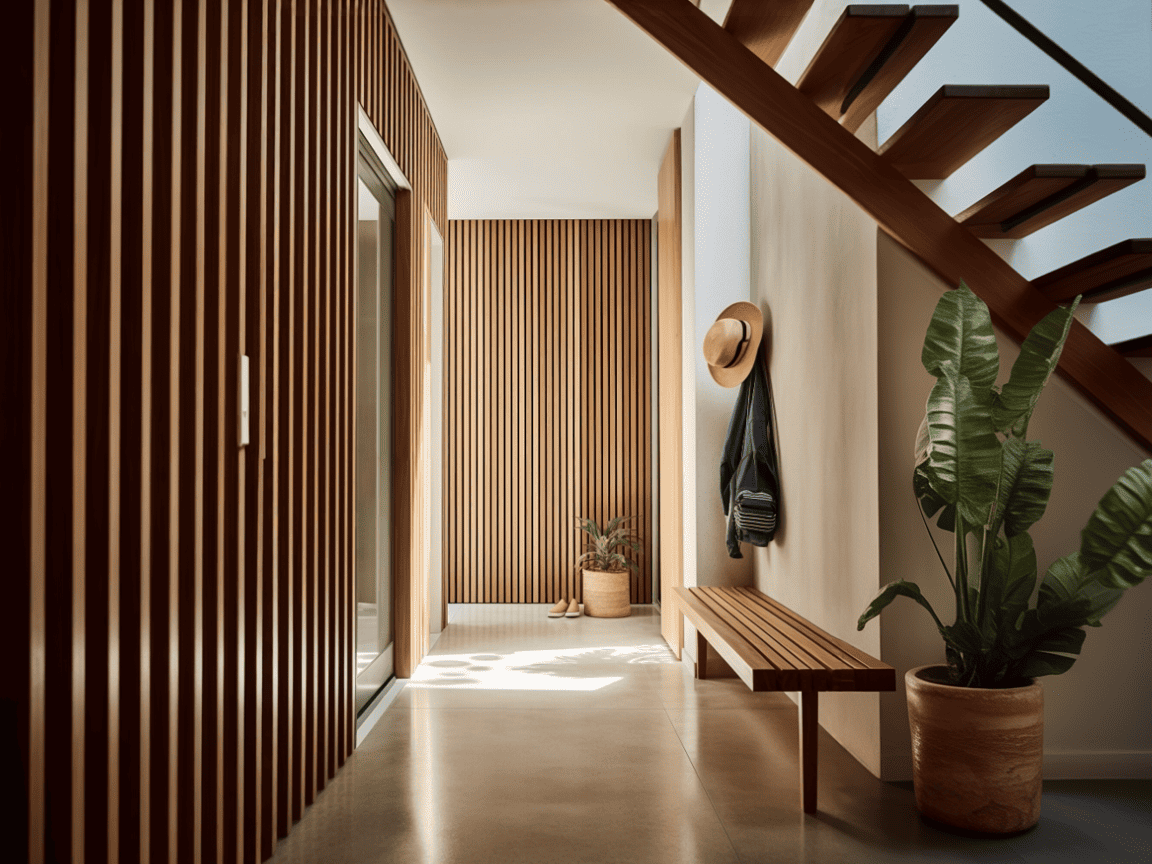
    Vertical slat panels are the most popular hallway choice. The vertical lines draw the eye upward and make the hallway feel taller. Fine-profile slats — narrow channels between the slats — add texture without visual bulk, which is important in confined spaces. Our SoundPanel™ acoustic slat panels are particularly effective in hallways because they reduce the echo and sound reflection common in bare-plaster hallways.

    Mosaic panels

    For a more textured, layered look, our GroovePanel® mosaic panels add depth and character and suit hallways where a more statement finish is desired. These work well in wider hallways or on a single feature wall (the wall facing the front door) rather than both sides.

    Preparing the Wall

    Panels need a flat, sound substrate. Fill any significant holes or cracks and allow filler to dry fully. In older properties, check that the plaster is firmly bonded — any loose or hollow sections should be repaired before installation. If the wall has significant undulation (common in older buildings), you may need to fix a timber batten framework first to create a flat surface for the panels to fix to.

    Remove skirting boards before installation if you’re installing floor-to-ceiling panels. If you’re installing half-height panels, you can often work over the skirting by cutting the panel to sit against the skirting face and then finishing with a cap rail above.

    The Installation Process

    Measure the wall height and width carefully and plan your panel layout before cutting. For slat panels, start from a plumb vertical line rather than working from the corner — corners are rarely perfectly square. Use panel adhesive and fixing pins for secure attachment. Butt panels tightly together (or with the specified gap depending on the panel type) and check for level frequently as you work across the wall.

    Finish the top edge with a cap rail or dado moulding. Fill any nail holes. Prime and seal the panels according to the manufacturer’s guidance if painting — for natural wood finishes, a clear hardwax oil is recommended.

    Common Hallway Paneling Mistakes

    The most common mistakes are: not checking for plumb on the first panel (errors compound across the wall); cutting panels too short and leaving gaps at the top or bottom; using too much adhesive and creating bleed-out between panels; and failing to finish the top edge cleanly. Take time over the first panel, use a spirit level constantly, and plan the finishing details before you start.

    Finishing Touches

    Hallway paneling benefits from complementary lighting. Picture lights, wall sconces, or downlights positioned to graze the panel surface enhance the texture and make the paneling perform far better visually. Pair with a warm-toned rug and natural-material accessories for a cohesive result.

    Browse our hallway wall panels and the full wood wall panel collection to plan your project.