Category: Uncategorized

  • Two-Tone Wall Panels: How to Mix Materials and Finishes Successfully

    Two-Tone Wall Panels: How to Mix Materials and Finishes Successfully

    Why Two-Tone Works

    A wall with two complementary materials or tones creates visual complexity in a way that a single material cannot — the juxtaposition of two things makes both read more clearly. The contrast of a dark lower panel section against a light upper wall makes both the panel and the wall colour more vivid; the combination of wood and plaster reads as more designed than either element alone.

    Done well, two-tone panel walls are some of the most considered-looking results in residential design. Done poorly, they look indecisive. The difference is in the principles.

    Two-Tone Approach 1: Wainscoting (Panels Below, Painted Above)

    The most classical two-tone approach: timber panels covering the lower half of the wall (to dado height, typically 90–100cm) with painted plaster above. The contrast can be subtle (natural oak below, warm white above) or dramatic (dark painted panels below, bold colour above).

    The proportional principle: the dado rail height should not land at eye level when seated — it creates a visual horizon line that divides the room uncomfortably. Either bring it up to standing-height wainscoting (120cm+) or keep it at true chair-rail height (90cm). Our wainscoting ideas guide covers the full range of proportions and styles.

    Two-Tone Approach 2: Contrasting Panel Species

    Using two different wood species side-by-side on the same feature wall — most commonly a lighter and a darker wood alternated in panels or sections. This requires careful execution: the species should have enough contrast to read as deliberate rather than mismatched stock.

    Combinations that work:

    • Natural oak + walnut: warm honey tones against rich chocolate. Classic, resolved, elegant.
    • Ash + smoked oak: pale cool grey-white against warm grey-brown. More contemporary, more unusual.
    • Light oak + ebonised oak: maximum contrast in the same species — dramatic but cohesive.

    Our walnut vs oak comparison shows the specific tonal differences between these species in detail.

    Two-Tone Approach 3: Panel + Plaster (Mixed Material)

    A feature wall that combines a panel section (acoustic slat, fluted, or reeded) with a plaster section — either textured lime plaster, polished Venetian plaster, or even painted smooth plaster. The wall reads as designed at every angle, with the natural material of the wood complemented by the craft character of the plaster.

    The typical composition: full-height slat panels on the central section of a wide feature wall, with flanking plaster sections. Or slat panels on the left two-thirds of the wall, with a single vertical column of contrasting material at the right. The asymmetry creates movement and interest.

    Two-Tone Approach 4: Painted Panel Below, Natural Wood Above

    An inversion of the standard wainscoting formula: painted (usually dark, saturated) panels at the base of the wall, transitioning to natural wood veneer panels above. Less common but striking — the dark base visually anchors the room while the natural wood above creates warmth and lightness at the level where most light falls.

    The Two Rules for Two-Tone Success

    1. The transition line must be decisive: A clear, clean junction — a dado rail, a shadow gap, a contrasting trim piece — is non-negotiable. An ambiguous transition line where the two materials blur into each other looks unfinished.
    2. Both materials must be at the same quality level: A premium slat panel wall with budget painted MDF below reads as inconsistent. Both elements need to earn their place in the composition.

    For the full context on panel material choices and how finishes interact with each other, our complete wood wall panel guide covers the material decisions behind two-tone installations.

  • Wainscoting Ideas: Classic and Modern Styles for Every Room

    Wainscoting Ideas: Classic and Modern Styles for Every Room

    What Is Wainscoting?

    Wainscoting is a form of wall panelling that covers the lower portion of a wall — typically the bottom third to half — leaving the upper section finished separately in paint, wallpaper, or plain plaster. The term originally referred to oak panelling used in high-status rooms, but today it encompasses a broad range of panel styles from raised-and-fielded traditional designs to sleek contemporary flat panels.

    Beyond aesthetics, wainscoting provides practical protection for walls in high-traffic areas like hallways, dining rooms, and children’s rooms, where scuffs and marks are inevitable.

    Types of Wainscoting

    Raised Panel Wainscoting

    The most traditional style, featuring panels with a raised centre section set within a framed surround. Common in Georgian, Victorian, and Colonial-style homes. Usually painted white or a light tone and finished with a cap rail at chair height.

    Flat Panel (Shaker) Wainscoting

    A simplified version with flat-recessed panels within a framed surround. Associated with Shaker and Arts & Crafts interiors, flat panel wainscoting translates beautifully into modern and transitional homes. Cleaner and less ornate than raised panel, it suits contemporary interiors without looking out of place.

    Beadboard

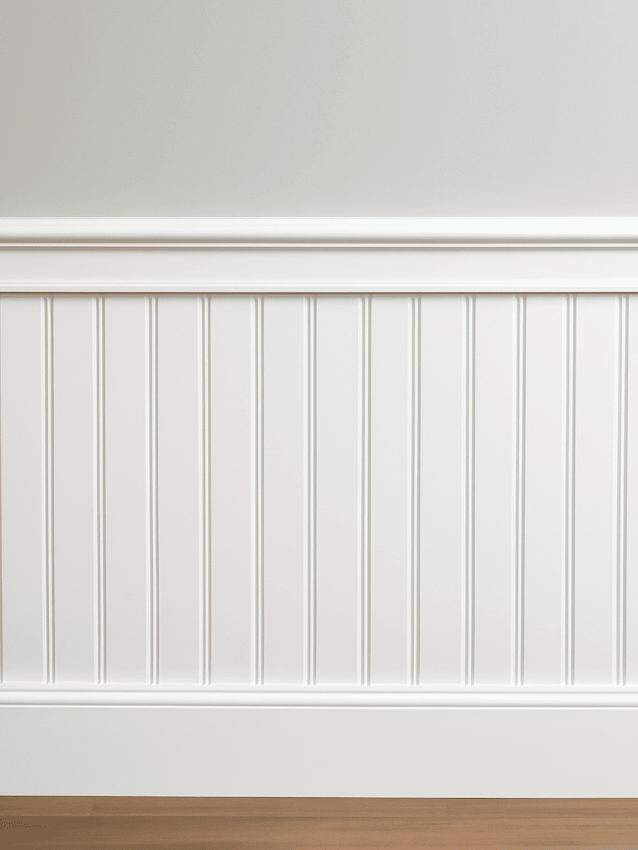
    Vertical planks with a small bead between each plank. Classic in farmhouse, coastal, and cottage interiors. Available in real wood, MDF, and PVC — with PVC being the most moisture-resistant for bathroom and kitchen applications.

    Board and Batten

    Wide vertical boards with narrow batten strips covering the joints. Creates a bold, graphic, farmhouse-inspired look. Works equally well at full wall height (as an accent wall treatment) or as traditional wainscoting on the lower wall.

    Modern Flat Rail Wainscoting

    A contemporary take that uses a simple horizontal rail at two-thirds height with flat paint or wallpaper above, and a contrasting tone below. No panels at all — purely architectural by use of colour blocking and a trim rail.

    Wainscoting Ideas by Room

    Hallway Wainscoting

    Hallways take the most daily wear of any space in the home — doors, bags, children, pets. Wainscoting in a hallway protects the lower wall and creates a composed, architectural welcome. Keep it classic: white raised panel or Shaker flat panel with a dark paint above for drama in a narrow space.

    Dining Room Wainscoting

    Traditional wainscoting at chair-rail height (approx. 36 inches) in a dining room is one of the most enduringly elegant combinations in interior design. Pair with a bold wallpaper or strong paint colour above the rail for impact.

    Bedroom Wainscoting

    In a bedroom, wainscoting behind the bed can replace a traditional headboard. Board and batten or flat-panel wainscoting running the full height of the headboard wall creates a tailored, built-in look. Paint in the same colour as the wall for a tone-on-tone effect.

    Bathroom Wainscoting

    Beadboard or PVC-based flat panels are the most practical choices for bathrooms — moisture-resistant and easy to clean. Combine with hexagonal or penny-round floor tiles for a classic period bathroom feel.

    Living Room Wainscoting

    In living rooms, full-height picture-frame moulding (sometimes called board-and-frame) creates a formal, architectural effect without committing to full wainscoting. Alternatively, use wood wall panels from floor to ceiling on the feature wall for a modern take on the same principle.

    Modern Alternatives to Traditional Wainscoting

    If traditional wainscoting feels too formal for your interior, consider these modern alternatives:

    • Wood slat panels at lower wall height — the same horizontal division as wainscoting, but with the warmth and texture of acoustic wood panels.
    • Lime plaster lower panel — smooth lime plaster in a contrasting tone below the rail, painted plaster above.
    • Fluted panels as half-height feature — fluted wood panels from floor to chair-rail height create a modern, architectural version of traditional wainscoting.

    Whatever style you choose, the principle behind wainscoting remains the same: use the lower wall as a practical, design-forward space that protects, frames, and elevates everything above it.

    How to Choose the Right Wainscoting Height for Your Space

    One of the most important decisions when installing wainscoting is choosing the correct height. The traditional rule is to set the top rail at chair height — approximately 32 to 36 inches from the floor — which gives the classic proportions seen in Georgian and Victorian interiors. However, modern spaces benefit from bespoke heights that relate to the room’s own proportions rather than a fixed measurement.

    In rooms with standard 8-foot ceilings, wainscoting at one-third wall height looks balanced and keeps the upper portion feeling open and airy. For rooms with higher ceilings (9 feet or more), pushing the wainscoting to half-height — or even two-thirds — fills the space more confidently and prevents the wall treatment from looking lost in a tall room. In hallways where verticality is already emphasised by narrow widths, full-height board and batten panelling is an increasingly popular choice, turning the entire wall into a design feature rather than a protective lower panel.

    Always consider what sits above the wainscoting line. If you plan to hang art, keep the cap rail low enough that frames clear it with ease. If the upper wall will be papered in a strong pattern, a higher wainscoting line that leaves less pattern exposed will feel less busy. Sketch the proportions on paper before committing — a simple line drawn in pencil on the wall can transform an uncertain decision into a confident one.

    Wainscoting FAQs

    Is wainscoting only suitable for period-style homes?
    Not at all. While wainscoting originated in traditional architecture, contemporary interpretations — such as minimal flat-panel designs, simple horizontal rail dividers, and full-height board and batten — sit comfortably in modern and Scandinavian-inspired interiors. The key is matching the panel profile and finish to the room’s existing character.

    Can I install wainscoting over existing wallpaper?
    It is generally better to remove wallpaper before installing wainscoting panels, particularly if using adhesive-fixed MDF or wood panels. Wallpaper surfaces are often uneven and may lift over time, taking your new panels with them. For rooms where removal is impractical, use mechanical fixings (screws and plugs) in addition to adhesive to ensure panels stay firmly in place.

    What is the best paint finish to use on wainscoting?
    Eggshell and satin finishes are the most popular choices for wainscoting. They are more durable than matt emulsions, wipe clean easily, and offer a subtle sheen that picks up light without becoming glossy. High-gloss finishes are reserved for dramatic period-style rooms where the lacquered look is intentional.

    How long does it take to install wainscoting in a typical room?
    For an experienced DIYer fitting pre-made panels in a standard bedroom, expect a full day’s work including measuring, cutting, fitting, and caulking. A professional installer will complete the same job in a morning. Rooms with alcoves, chimney breasts, or radiator pipework will take longer due to the need for precise templating around obstacles.

    Shop Wainscoting Panels

    Browse the complete wood wall panel collection at The Panel Hub for panels suited to wainscoting applications — from smooth-face MDF systems to real wood veneer profiles. For design inspiration beyond wainscoting, our interior slat wall ideas guide covers full-wall and feature treatments across every room. If sound absorption is also a priority, the acoustic panel buyer’s guide explains how acoustic slat panels compare on performance as well as looks.
  • Wall Panel vs Wallpaper vs Paint: Which Is Right for You?

    Wall Panel vs Wallpaper vs Paint: Which Is Right for You?

    The Three Main Wall Treatments

    When it comes to updating your walls, three options dominate the market: paint, wallpaper, and wall panels. Each has its advantages, its limitations, and its ideal use cases. Choosing the wrong one can mean spending more than necessary, committing to something hard to reverse, or missing out on a functional benefit that your space genuinely needs.

    Here’s a direct comparison across the categories that matter most.

    Cost Comparison

    Treatment DIY Cost (per wall) Professional Cost (per wall)
    Paint $30–$100 $150–$400
    Wallpaper $80–$400 $300–$800
    Wall Panels $200–$1,000+ $600–$2,000+

    Winner for budget: Paint. But panels deliver considerably more value per dollar over time due to longevity and functional benefits.

    Durability

    • Paint: Scuffs, marks, and fades within 3–7 years depending on finish. Flat paints mark easily; eggshell and satin are more durable.
    • Wallpaper: Quality wallpaper lasts 10–15 years but is susceptible to moisture, peeling at seams, and fading in direct sunlight.
    • Wall panels: Engineered wood panels with hard veneer surfaces last 20+ years, are resistant to scuffs and daily wear, and don’t fade.

    Winner for durability: Wall panels.

    Installation Difficulty

    • Paint: Easiest. Most homeowners can paint a room in a few hours with basic prep.
    • Wallpaper: Moderate to difficult. Matching patterns, handling paste, and dealing with bubbles and seams requires patience and skill.
    • Wall panels: Beginner–intermediate. Modern adhesive panel systems are DIY-friendly and most feature walls take under two hours to complete.

    Winner for ease: Paint. But panels are far easier than wallpaper for most people.

    Aesthetic Options

    • Paint: Unlimited colour options. Limited texture unless you use specialist techniques (limewash, rag roll, etc.).
    • Wallpaper: Huge variety of patterns, textures, and effects. Excellent for feature walls with high visual impact.
    • Wall panels: Real material texture — wood grain, stone, geometric shapes. Three-dimensional quality that paint and wallpaper can’t replicate.

    Winner for aesthetics: Tie between wallpaper and wall panels depending on style.

    Acoustic Performance

    • Paint: Zero acoustic benefit. Hard painted surfaces actually reflect sound.
    • Wallpaper: Negligible acoustic benefit.
    • Acoustic wall panels: Significant sound absorption (NRC 0.65–0.85). Genuinely reduces echo, flutter echo, and reverberation in rooms with hard surfaces.

    Winner for acoustics: Wall panels — by a significant margin.

    Ease of Removal / Reversal

    • Paint: Easily painted over. Fully reversible.
    • Wallpaper: Difficult to remove, especially older paste-applied types. Risk of damaging drywall underneath.
    • Wall panels: Adhesive panels can be removed but may leave marks. Some panel systems use mechanical fixings that are fully removable.

    Winner for reversibility: Paint.

    Maintenance

    • Paint: Touch-ups are easy but marks show quickly. High-traffic walls need repainting every 2–3 years.
    • Wallpaper: Difficult to repair. Damaged sections often require full panel replacement.
    • Wall panels: Wipe clean with a damp cloth. Real wood veneer panels can be lightly sanded and re-oiled if scratched.

    Winner for maintenance: Wall panels.

    Which Should You Choose?

    • Choose paint if you want maximum flexibility, lowest cost, and easy reversal.
    • Choose wallpaper if you want pattern, print, or a mural effect that can’t be achieved with texture alone.
    • Choose wall panels if you want longevity, real material texture, acoustic performance, and a treatment that adds tangible value to the room.

    For most feature walls in living rooms, bedrooms, and home offices, acoustic wood slat panels deliver the highest combination of aesthetic impact, functional benefit, and long-term durability — making them the strongest single investment of the three.

    Explore Wall Panels at The Panel Hub

    If panels are the right choice for your project, browse the complete wood wall panel collection at The Panel Hub. The SoundPanel™ acoustic slat range is a good starting point — panels that combine strong visual impact with genuine acoustic performance. For design inspiration, our 50+ slat wall ideas guide shows real applications across every room type, and the acoustic panel buyer’s guide explains the performance side in plain English.

    Room-by-Room Recommendations: Panel vs Wallpaper vs Paint

    Living room: Wall panels are the strongest choice for a living room feature wall where longevity, texture, and impact matter. A quality slat or fluted panel wall photographs well, ages gracefully, and adds material depth that neither paint nor wallpaper can match. For the remaining walls, paint provides a neutral backdrop without competing for attention. Wallpaper works well in a living room that needs pattern and colour rather than texture.

    Bedroom: Paint is the most versatile choice for bedrooms — low cost, easily changed with repainting, and available in the range of calming neutral tones that bedrooms typically require. A panel feature wall behind the bed adds depth and replaces the need for a headboard. Wallpaper is a strong choice for a bedroom that benefits from pattern — botanical prints, geometric repeats, or textured grasscloth can define a bedroom’s character in a way that paint alone cannot.

    Hallway: Panels are the most practical choice for hallways due to their durability under the daily impact of coats, bags, and passing traffic. Paint in hallways requires repainting every two to three years in high-traffic homes. Wallpaper in hallways is generally a poor choice unless the traffic level is low — it marks, lifts at corners, and repairs badly. A wainscoting panel to mid-height with paint above is the classic compromise that provides durability where it matters and allows colour freedom above.

    Kitchen: Paint and panelling work best in kitchens. In wet areas close to the sink and hob, water-resistant PVC panels are the practical choice. Wallpaper in kitchens is challenging — steam, moisture, and grease shorten its lifespan considerably. Painted splashbacks are practical but require a glass or tile surface near cooking zones. PVC panels provide a seamless, waterproof surface that cleans easily and never requires repainting.

    Wall Panel vs Wallpaper vs Paint FAQs

    Is wallpaper always more expensive than paint?
    For mid-range to high-quality wallpaper, yes — costs typically run £30–£100+ per roll, with a full room requiring 10–15 rolls plus installation (if not DIY). Quality paint covers the same room for a fraction of the cost, though premium paints with specialist finishes close the gap somewhat. Wall panels sit above both on cost for a feature wall treatment but below wallpaper for a full-room treatment in most quality categories.

    Can I put panels on top of existing wallpaper?
    It is possible but not recommended. Panels fixed over wallpaper rely on the adhesion of the wallpaper to the wall, which is always weaker than a panel fixed directly to plaster or board. If the wallpaper lifts over time, it takes the panels with it. The correct approach is to remove the wallpaper first, allowing the adhesive or mechanical fixings to bond directly to a sound, clean substrate.

    Does paint always look cheap compared to panels or wallpaper?
    No — well-executed paint finishes in considered colours can be deeply sophisticated. The limitation of paint is that it provides colour without texture or material depth, which means a painted room relies entirely on the quality of the colour selection, lighting, and furniture to create atmosphere. In minimalist interiors where the design confidence is high, paint can be more successful than panels or wallpaper. Where texture and material richness are needed, panels deliver what paint cannot.

    Which is easiest for a first-time DIYer?
    Paint is the most accessible — mistakes are low-stakes and easily corrected with an additional coat. Peel-and-stick wallpaper has made wallpaper accessible to confident DIYers, though traditional paste wallpaper requires patience and practice to hang well. Slat panels with adhesive installation are manageable for a competent DIYer, particularly on a straightforward flat wall. The difficulty increases significantly for wallpaper in rooms with many corners and obstacles, and for panels requiring precise cuts around sockets, switches, and architectural details.

  • Wall Paneling Ideas for Staircase: How to Transform the Most Overlooked Space

    Wall Paneling Ideas for Staircase: How to Transform the Most Overlooked Space

    Why Staircase Paneling Makes Such a Difference

    The staircase wall is often the largest continuous wall surface in a home — running from ground floor to upper landing, it’s visible from multiple vantage points and experienced multiple times every day. Yet it’s routinely left plain. Painting it the same magnolia as every other wall is a missed opportunity; paneling it creates a visual journey through the home that signals design consideration in every room beyond it.

    Staircase paneling is challenging to install — the angled ceiling line, the varying heights, and the awkward access make it more demanding than a standard feature wall. But the result, done well, is one of the most striking transformations available in any home.

    Design Ideas for Staircase Wall Paneling

    American Golden Acoustic Slat Wood Wall Panels | SoundPanel®.

    Continuous Slat Panels Following the Stair Pitch

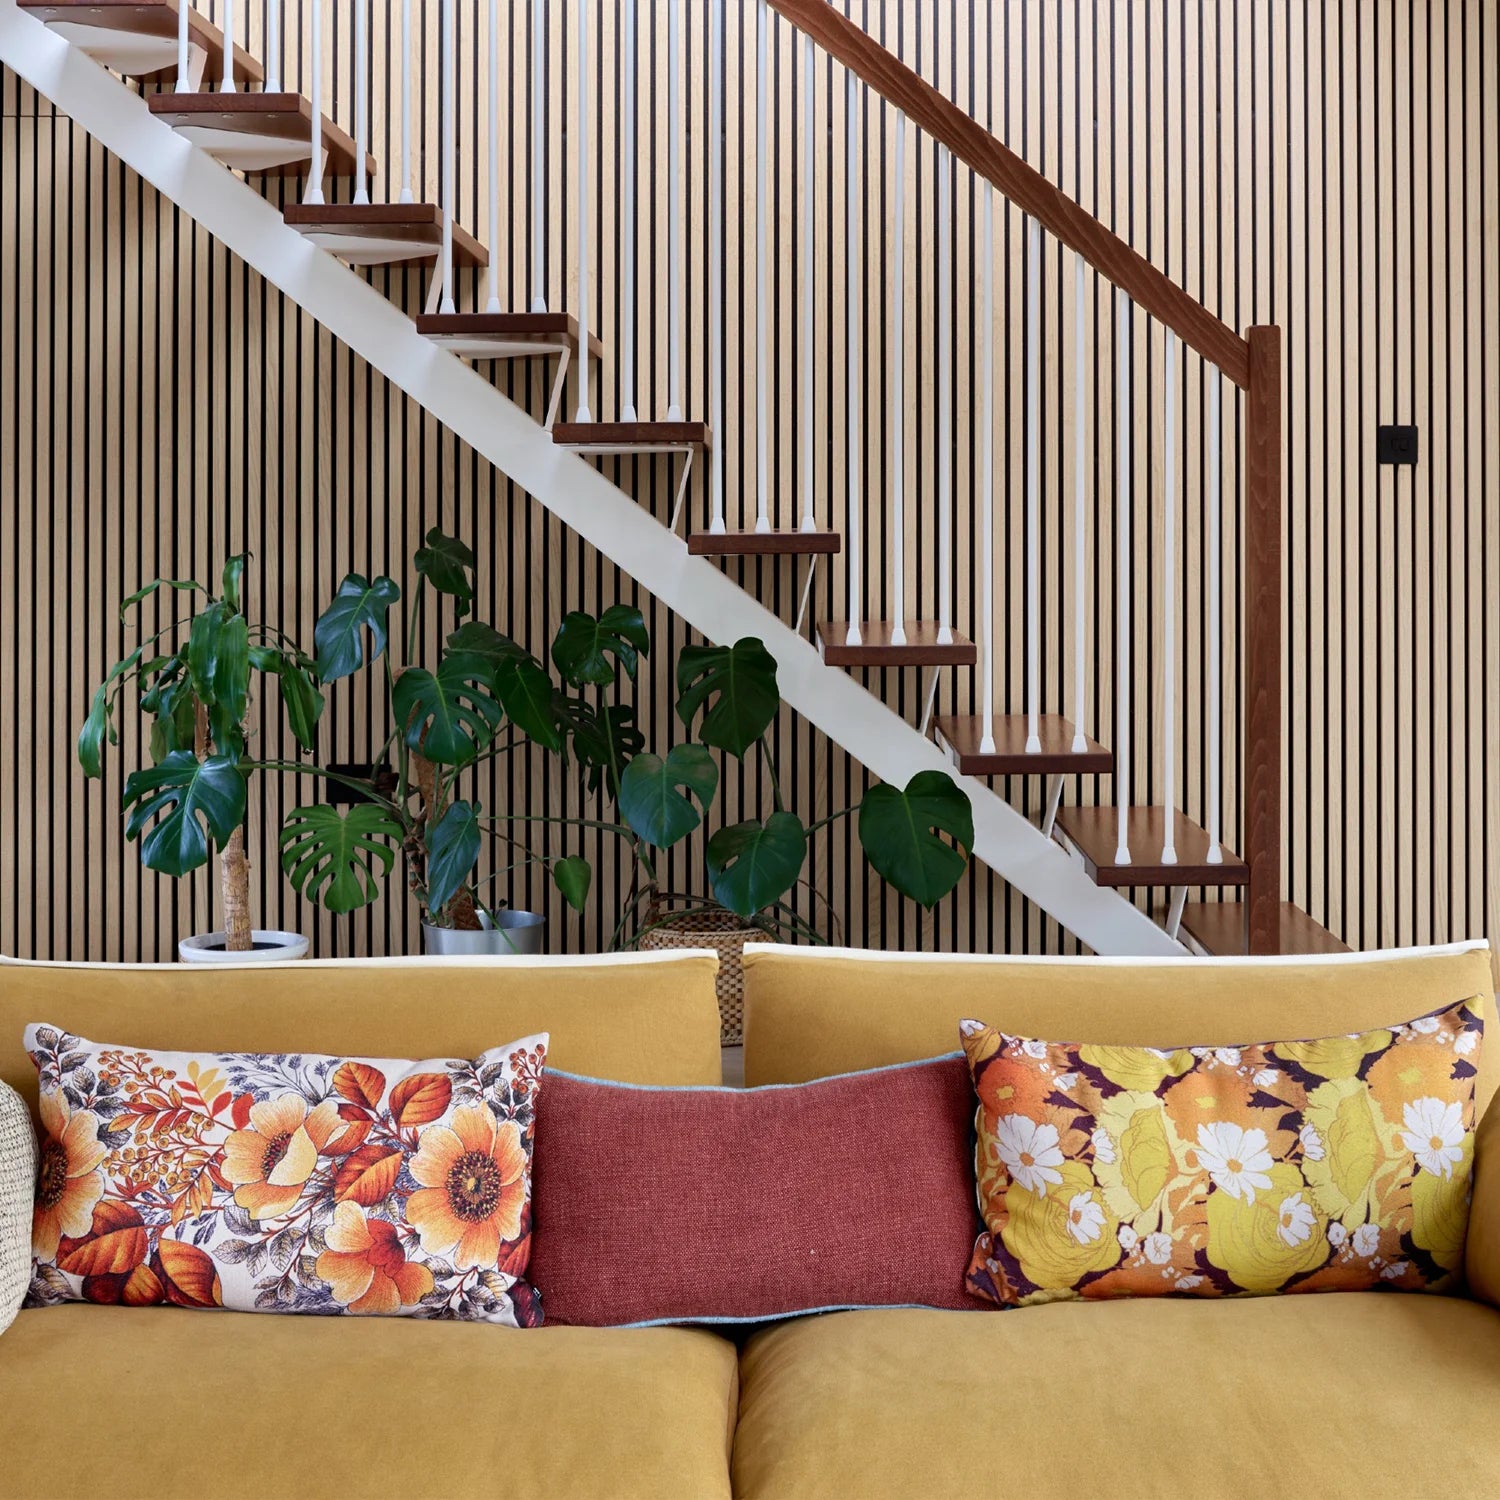
    Acoustic or decorative slat panels installed along the staircase wall, with the top edge of the panel run following the angle of the stairs below. The vertical slat lines create a strong graphic rhythm against the diagonal stair pitch — a combination that’s both dynamic and visually coherent. Best in a light oak or ash that keeps the stairwell feeling open.

    Board-and-Batten Full Height

    Full-height board-and-batten paneling from skirting to ceiling on the staircase wall is a bold, traditional approach that suits period properties and transitional homes. Paint in a deep, saturated colour for drama — dark green, navy, or charcoal — and hang a series of uniformly framed artworks or mirrors against the dark background.

    Wainscoting at Dado Height Following the Stairs

    Wainscoting panels that follow the stair pitch at a consistent height above each tread create the most traditional staircase treatment. The rail runs parallel to the handrail, and the panels sit below it. Practical as well as attractive — the lower wall of a staircase takes more accidental contact than almost any other surface in the home. Our wainscoting ideas guide covers the different panel styles and installation details.

    Geometric Panel Moulding

    Applied panel moulding — frames or rectangles of timber moulding adhered directly to the wall — creates architectural detail without the depth of full paneling. Painted the same colour as the wall for a subtle, tonal effect; painted a contrasting colour for a bold geometric statement. Achievable at modest cost and significantly easier to install around the challenging geometry of a staircase than full panel systems.

    Feature Wall at the Stair Landing

    If the full staircase wall feels too ambitious, treat just the landing wall — the surface visible when you reach the top of the stairs — with a feature panel installation. A full wall of acoustic slat panels at the landing creates a premium destination moment at the top of the stairs that reads from both floor levels.

    The Installation Challenge: Angled Cuts

    The defining technical challenge of staircase paneling is the angled cut required where panels meet the stair pitch line. Every panel that runs alongside the staircase will need a diagonal cut along one edge — either at the top, bottom, or both — to follow the slope of the stair stringer.

    Practical tips:

    • Make a cardboard template of the angled cut required before touching your actual panels. Test the template against the wall before cutting the real material.
    • Use a sliding compound mitre saw for angled cuts — a jigsaw works but produces rougher edges on veneer surfaces.
    • Work from the bottom up: Install the lowest panel first, establish the correct angle, then work upward maintaining consistency.
    • Allow extra material: Angled cuts waste more material than straight cuts. Order 15–20% more than your coverage calculation suggests.

    Access and Scaffolding

    The upper sections of a staircase wall are typically out of reach from the stairs themselves. Before starting, plan your access:

    • A scaffolding board spanning the stairs (supported on trestles at stair-tread level) provides a stable working platform at upper sections
    • Scaffold tower hire for properties with long stair flights
    • Never work from a ladder on a staircase — the risk of a fall is too high

    For general panel installation guidance that applies to the non-angled sections of a staircase wall, our step-by-step panel installation guide covers wall preparation, adhesive application, and finishing in detail. And for broader staircase design inspiration, our accent wall ideas guide covers the range of treatments that work well in high-visibility, high-traffic spaces.

    Shop Staircase Wall Panels

    Browse the full wood wall panel collection at The Panel Hub to find the right panel profile and species for your staircase. The SoundPanel™ acoustic slat range is a popular choice for staircase feature walls — the vertical slat profile suits the dynamic geometry of a staircase particularly well. For further staircase and hallway panel inspiration, our interior slat wall ideas guide covers real-room applications. The acoustic panel buyer’s guide explains why a staircase — a hard-surfaced, reverberant space — benefits meaningfully from acoustic panel treatment.

  • Wall Panels for Home Theater: Acoustic Treatment That Also Looks Great

    Wall Panels for Home Theater: Acoustic Treatment That Also Looks Great

    Why Home Theater Acoustics Matter More Than You Think

    Most home theater discussions focus on screens and speakers. But the room itself — specifically its acoustic properties — has at least as much impact on what you hear as the speaker system. A premium sound system in an untreated room sounds worse than a mid-range system in a well-treated space. This isn’t marketing copy; it’s acoustics physics.

    Untreated home theater rooms suffer from:

    • Flutter echo: Rapid bouncing of sound between parallel reflective walls, creating a smearing effect on dialogue and music
    • Comb filtering: Interaction between direct and reflected sound that causes some frequencies to cancel and others to reinforce, producing uneven tonal response
    • Excessive reverberation: Sound sustaining too long after the source has stopped, muddying transients and reducing clarity
    • Bass buildup in corners: Low-frequency energy accumulates in room corners, creating boomy, uncontrolled bass response

    Acoustic wall panels address the first three directly. Bass traps in corners address the fourth. Together, they transform the room from a liability into an asset.

    What Panel Coverage Do You Need?

    If you’re still in the planning stage — layout, seating, screen placement — start with our small home theater room design guide before settling on panel quantities. Once the layout is set, use the coverage guidelines below.

    For a dedicated home theater, the general guideline is:

    • Minimum treatment: First reflection points (the wall positions where sound from each speaker first reflects before reaching your seat) — typically one point on each side wall and one on the ceiling.
    • Standard treatment: 40–50% of all wall surfaces, plus ceiling panels at first reflection points.
    • Full treatment: 60–70% of all wall surfaces, rear wall absorption, ceiling cloud, and corner bass traps.

    For most home theaters that double as media rooms (rather than dedicated black-box cinemas), 40–50% coverage on two or three walls delivers excellent results without making the room feel over-treated or visually oppressive.

    Best Panel Positions in a Home Theater

    1. Front wall (behind the screen): If your screen doesn’t fill the entire front wall, panel the exposed wall area on either side and above. This absorbs early reflections from the front speakers and reduces the impression of sound coming from the wall rather than the speakers.
    2. Side walls at first reflection points: Sit in the primary viewing seat and have someone walk along each side wall holding a mirror flat against the surface. Where you can see the speakers reflected in the mirror, that’s the first reflection point — your highest-priority acoustic treatment location.
    3. Rear wall: Absorb the sound from surround and Atmos speakers that reflects back toward the primary listening position. Full-width rear wall panel treatment creates the cleanest surround imaging.
    4. Ceiling cloud: A panel or group of panels on the ceiling above the primary seating position reduces ceiling reflections that arrive slightly after the direct speaker sound, causing time-domain smearing.

    Acoustic Slat Panels vs Fabric Acoustic Panels for Home Theater

    • Acoustic slat wood panels: NRC 0.65–0.85, premium aesthetics, real wood character. Best for media rooms that double as living spaces or need to look good in daytime use. Slightly less acoustic coverage per dollar than fabric panels.
    • Fabric acoustic panels: NRC 0.80–0.95+ depending on thickness. Maximum acoustic performance per dollar. Best for dedicated black-box home theaters where aesthetics are secondary to performance.

    For most home media rooms, acoustic slat panels offer the best balance — they perform well acoustically while creating a space that’s visually comfortable for extended watching.

    Don’t Forget Bass Traps

    Acoustic wall panels absorb mid-to-high frequencies effectively. They do not absorb low bass (below ~100Hz). For controlled bass response, add corner bass traps — typically thick blocks of broadband absorber placed in room corners, particularly front corners. This is less important in smaller rooms but increasingly critical as room size increases and bass resonances become more pronounced.

    For the full picture on acoustic panel performance, how NRC ratings work, and how much panel coverage you need, our complete acoustic wall panel buyers’ guide has everything in one place. And for the specific acoustic treatment approach for home cinema spaces, the home theater acoustic treatment guide goes deeper on speaker placement and room calibration.

    How to Treat a Home Theater Room: A Step-by-Step Approach

    Rather than treating acoustic treatment as a single purchase, approach it as a layered plan. Each step targets a specific acoustic problem, and each step compounds the previous one.

    Step 1: Front wall

    Panel the exposed wall area on either side of the screen, and above it if the screen doesn’t reach the ceiling. This absorbs early reflections from your front speakers before they reach the listening position, tightening dialogue focus and stereo imaging significantly.

    Step 2: Side wall first reflection points

    Sit in the primary viewing seat. Have someone walk along each side wall holding a mirror flat against the surface. Where you can see the speaker reflected, that’s your first reflection point — your highest acoustic treatment priority after the front wall. Two panels at these positions, one per side, produce the largest measurable improvement per dollar spent on the entire treatment plan.

    Step 3: Rear wall

    The rear wall handles surround sound reflections. Full-width panel coverage on the rear wall — or a distributed arrangement covering at least 50% of its area — produces the cleanest surround imaging and reduces the delayed reflections that smear Atmos height effects.

    Step 4: Ceiling cloud

    A ceiling cloud — a floating panel or group of panels positioned above the primary seating area — addresses the last significant reflection source in most treated rooms. For most media rooms, a single 4×8 ft panel cloud makes a clearly audible improvement in dialogue clarity.

    Step 5: Corner bass traps

    Bass traps in room corners — particularly the two front corners — address low-frequency buildup that acoustic wall panels cannot absorb. This is the step most home theater owners skip, and it’s why many treated rooms still sound boomy on bass-heavy content. In smaller rooms it’s less critical; in rooms larger than 200 sq ft, corner treatment becomes increasingly important.

    Choosing the Right Panel Finish for a Home Theater

    The aesthetic of your home theater acoustic treatment matters more than most guides acknowledge. A room you enjoy being in — visually as well as sonically — is one you’ll actually invest in and maintain over time.

    • Dedicated dark cinemas: Dark-finish acoustic slat panels in walnut, ebony-stained oak, or charcoal absorb ambient light and prevent screen glare. They create a cinema atmosphere that makes the viewing experience feel intentional and immersive before the film even starts.
    • Media rooms that double as living spaces: Choose a species and finish that functions in daylight. Natural oak or ash panels integrate with daytime natural light and work with living room furniture, so the room doesn’t need to be darkened to look good. These spaces benefit from panels that are neutral enough to suit both film nights and afternoon use.
    • Modern high-contrast media rooms: White-oiled ash or lightly finished pale oak acoustic panels create a clean, contemporary aesthetic. Pair with dark upholstery and concealed equipment for a striking result that photographs well and feels genuinely designed.

    One technical note on finish and acoustics: fully sealed or high-gloss surfaces reflect slightly more mid-range sound than natural oil or matte lacquer finishes. For critical-listening applications, specify natural oil or matte lacquer over semi-gloss. The difference is modest, but measurable in dedicated cinema rooms.

    Shop Home Theater Acoustic Panels

    The SoundPanel™ acoustic slat range at The Panel Hub is purpose-built for cinema room acoustic treatment — combining high NRC absorption with a visual quality that suits a dedicated theater space. Browse the full wall panel collection for every option, explore our interior slat wall ideas guide for theater and media room inspiration, and read the complete acoustic panel buyer’s guide for NRC rating guidance before specifying your panel coverage.

  • Wall Panels for Rental Apartments: Making a Small Space Feel Like Home

    Wall Panels for Rental Apartments: Making a Small Space Feel Like Home

    The Apartment Renter’s Specific Challenges

    Rental apartment paneling presents different constraints than general renter paneling. Apartments are typically smaller than houses, which means every design decision has a larger proportional impact — both for good and ill. They’re also more likely to have open-plan layouts, lower ceilings, and strict management rules about alterations than standalone rental houses.

    This guide is specifically about apartments — the space constraints, the management company considerations, and the design approaches that work best at a smaller scale. For the broader principles of damage-free renter installation, our wall panels for renters guide covers the full range of installation methods.

    The Open-Plan Apartment Problem

    Many apartments combine kitchen, dining, and living in a single open-plan space. Without walls to define zones, these rooms can feel directionless and acoustically chaotic. A wood panel feature wall in the living zone serves two functions simultaneously: it defines the space visually — telling you where “the living room” is even without physical walls — and it provides acoustic treatment that makes the whole open-plan area feel less echoey and more comfortable.

    This is one of the most impactful single upgrades available in an apartment: one panel wall, one afternoon, transformative result.

    Scale: Getting It Right in a Small Space

    The instinct in small apartments is to go small with feature walls — partial height, narrow panels, restrained treatments. Often this is wrong. A half-hearted accent treatment on one wall in a small room looks tentative and can actually make the space feel more cluttered, not less. Counter-intuitively, floor-to-ceiling panel treatments often work better in smaller apartments because they:

    • Draw the eye upward, creating the impression of height
    • Create clean, uninterrupted vertical lines that expand the perceived size of the room
    • Look deliberate rather than accidental

    Acoustic slat panels are particularly good here: the fine vertical lines and open profile are visually lighter than solid panel systems, making them less imposing in smaller rooms.

    Apartment-Specific Panel Choices

    Peel-and-Stick Wood Veneer Panels

    Some brands now offer genuine wood veneer panels with pressure-sensitive adhesive backing specifically designed for renter-friendly installation. Quality varies — always test on a small area first and verify the removal characteristics before committing to a full wall.

    Lightweight Fabric Acoustic Panels

    Lightweight framed fabric panels can be mounted with Command strips rated for the panel weight. High acoustic performance (NRC 0.80+), fully removable, available in colours that suit apartment aesthetics. Best for home office or bedroom acoustic treatment where the visual character of wood isn’t the primary brief.

    Freestanding Slat Panel Screens

    Floor-standing panel screens that lean against the wall or use a tension system require no wall contact at all. Limited coverage area but zero deposit risk and completely portable when you move.

    Managing Expectations with Management Companies

    Many apartment management companies are more flexible than tenants assume — particularly for high-quality, long-term improvements. The key is communication before installation:

    • Put the request in writing and describe the installation method specifically
    • Offer a photographic record of the wall condition before and after
    • For longer tenancies (2+ years), some landlords will agree to a proper installation as a semi-permanent improvement that adds value to their property

    A professionally installed acoustic wood slat panel wall is genuinely an upgrade to the property — most landlords recognise this when it’s presented clearly.

    The Acoustic Argument for Apartment Panels

    Apartment living is acoustically challenging: hard floors, shared walls, and open-plan layouts all create environments where sound accumulates. Acoustic wall panels reduce this meaningfully. For apartment dwellers working from home, the improvement in call quality and concentration environment is often the most persuasive argument for getting panels up — deposit risk or not.

    For the acoustic panel specifics, see our guide to acoustic wall panel performance and our acoustic panels for home office guide, which covers exactly the scenarios most apartment renters are dealing with.

    Find Panels Suited to Apartment Living

    Browse the full wood wall panel collection at The Panel Hub — including lightweight options suited to adhesive installation in rental properties. The SoundPanel™ acoustic slat range is the most popular choice for apartment installations, particularly for open-plan living spaces where both visual and acoustic improvement are priorities. Our interior slat wall ideas guide shows 50+ apartment-applicable panel looks. The acoustic panel buyer’s guide explains the acoustic improvement achievable with a single feature wall — often the most persuasive argument for getting panels up in a rental space.

    The Rental Apartment Panel Checklist: Before You Install

    Before installing any panel system in a rental apartment, work through this checklist to avoid losing your deposit and ensure the installation performs as intended.

    First, read your tenancy agreement. Most agreements prohibit permanent fixings but are silent on reversible adhesive systems. If the agreement is ambiguous, get written permission from your landlord or agent before proceeding. A brief email confirming that adhesive-mounted panels are acceptable gives you a record to refer to.

    Second, test the wall surface. Adhesive panel systems perform best on fully painted, non-powdery plasterboard or plaster. Run a piece of tape across the intended installation area and pull it away sharply. If paint pulls off with it, the surface bond is insufficient for adhesive panels and you will need to find a mechanical fixing solution or accept the risk of adhesion failure.

    Third, measure for acclimatisation. Real wood panels need 24–48 hours in the room they will be installed in. This is especially important in apartments, which can have very different humidity levels from a typical house, particularly if the apartment is in a high-rise or has limited air circulation.

    Fourth, document before and after. Photographs of the wall before installation and after removal give you evidence that no damage was done — essential if there is any dispute about the deposit at the end of tenancy.

    Renter Panel FAQs

    Can I take wall panels with me when I move?
    Yes — most adhesive-mounted panel systems are designed to be removed and reinstalled. The panels themselves are reusable; you will need new adhesive for the second installation. Some slat panel systems use a rail-mounted approach that makes removal and reinstallation even simpler.

    Will adhesive wall panels damage the wall when removed?
    Properly installed and correctly removed, most modern panel adhesives leave no damage on well-painted plasterboard. The key is removal technique: score any edges, apply warmth (a hairdryer works well) to soften the adhesive, and pull slowly and evenly rather than yanking. The most damage occurs when panels are installed on poorly bonded paint or on surfaces that weren’t designed to carry the adhesive load.

    What is the best panel system for renters?
    Adhesive-backed slat panel kits and peel-and-mount mosaic panel systems are both widely available in formats designed for renter installation. Rail-mounted systems (where a horizontal batten supports panels that slide or clip in) are particularly good for renters because they use minimal fixings and allow the panels to be removed as a unit without touching the wall surface.

    How much do renter-friendly wall panels cost?
    Peel-and-stick options start from around £150–£250 for a standard feature wall. Mid-range adhesive slat panel kits for a full wall run £300–£600. Premium renter-specific systems with reversible fixing rail technology typically cost £500–£900 for a 3 m x 2.4 m wall, including the fixing system.

  • Wall Panels for Renters: How to Upgrade Your Space Without Losing Your Deposit

    Wall Panels for Renters: How to Upgrade Your Space Without Losing Your Deposit

    The Renter’s Dilemma

    Rental properties are almost universally beige. Landlords default to neutral paint and plain walls because they’re easy to maintain and universally inoffensive — but they’re also uninspiring to live in. The challenge for renters is that most meaningful wall upgrades involve nails, adhesive, or alterations that can void a tenancy agreement or cost you your deposit.

    The good news: there are genuinely renter-friendly ways to install wall panels that don’t damage walls, can be fully removed, and leave the wall in the same condition you found it.

    Know Your Tenancy Agreement First

    Before installing anything, read your tenancy agreement carefully. Most agreements prohibit “making alterations” to the property, which can include adhesive fixings. However, many landlords are flexible when approached honestly — especially if the upgrade looks better than what was there before.

    Options to consider:

    • Ask your landlord: Many will agree to removable panel installations, especially in long-term tenancies.
    • Offer to return the room to its original state: If you can demonstrate you’ll remove the panels cleanly at the end of the tenancy, most landlords won’t object.
    • Check for a “small nail” or “picture hanging” clause: Many agreements allow small fixings, which may be relevant for mechanically-fixed panel systems.

    Renter-Friendly Panel Installation Methods

    1. Command Strips for Lightweight Panels

    Heavy-duty Command adhesive strips can support lightweight panels without damaging paint or plaster. Best for smaller, lighter panels (fabric panels, thin acoustic tiles) rather than heavy engineered wood systems. They leave no residue when removed correctly.

    Weight limit: Typically 4–16 lbs per strip depending on the product. Not suitable for full-size engineered wood panels.

    2. Hook-and-Loop (Velcro) Systems

    Industrial-strength hook-and-loop strips can hold surprisingly heavy panels and are fully removable. The adhesive backing should be applied to the panel itself, not the wall — use a wooden batten glued to the wall with a removable adhesive, then attach the hook-and-loop to that.

    3. Removable Adhesive Mounting Tape

    Products like Tesa Powerstrips or equivalent heavy-duty removable adhesive tapes are designed to hold significant weight and release cleanly. Pair with lightweight panel systems and follow manufacturer weight limits.

    4. Freestanding Panel Systems

    Some panel systems are designed as freestanding room dividers or floor-to-ceiling tension systems that require no wall fixing at all. These are fully portable and genuinely zero-damage.

    5. Negotiate a Mechanical Fixing

    Screw-fixed batten systems leave small holes (easily filled with polyfilla at end of tenancy) but provide a fully secure, even installation for heavier panels. Some landlords will accept this, especially if you agree to fill and repaint the wall before leaving.

    Best Panel Types for Renters

    • Acoustic fabric panels: Lightweight, renter-friendly, and available in a range of colours and sizes. Easy to hang with removable fixings.
    • Peel-and-stick wood veneer panels: Some manufacturers offer genuine wood veneer panels with pressure-sensitive adhesive that can be removed without wall damage. Quality varies significantly — always test on a small area first.
    • Magnetic or hook-mounted slat panels: Systems designed for easy removal and repositioning.

    What to Avoid as a Renter

    • Solvent-based adhesives: These permanently bond panels to walls and will damage plaster on removal.
    • Heavy construction adhesive without landlord permission: Even “removable” panels bonded with strong construction adhesive will often pull paint and plaster.
    • Drilling multiple fixing holes without agreement: Even small holes multiply quickly across a feature wall.

    A Note on Value

    If you’re planning a long tenancy (3+ years), the conversation with your landlord is almost always worth having. A properly installed wood panel feature wall improves the property’s value and appeal — many landlords will agree to it as a semi-permanent upgrade rather than something you’re expected to remove. In this case, a properly adhered quality panel installation is better for everyone than a provisional renter workaround.

    Final Thoughts

    Renters can absolutely upgrade their walls with panels — but the installation method needs to match the tenancy constraints. For most rental situations, the most honest approach is a direct conversation with your landlord, an agreement in writing, and a quality installation you’d both be happy to leave in place. The deposit risk is almost always lower than renters assume when the upgrade is done well.

    Find the Right Panels for Your Rental

    Browse the full wood wall panel collection at The Panel Hub — including lightweight options suited to damage-free installation methods. For design inspiration on what’s achievable in a rental space, our interior slat wall ideas guide shows 50+ looks across room types and styles. If improving acoustic comfort is part of your motivation — making a rental feel quieter and less echoey — the acoustic panel buyer’s guide explains what different panel types actually deliver.

  • Wall Panels to Cover Bad Walls: What Works and What Doesn’t

    Wall Panels to Cover Bad Walls: What Works and What Doesn’t

    What “Bad Wall” Problems Panels Can Cover

    Wall panels are genuinely useful for covering cosmetic and surface-level wall problems — and they do it more permanently and attractively than filler and paint alone. The problems they handle well:

    • Uneven plaster: Old plaster that has settled, cracked, or been repaired multiple times often has a surface that’s impossible to paint flat. Wall paneling cover this completely, regardless of the surface condition behind them.
    • Old tile adhesive residue: The cement and adhesive left after tile removal is one of the hardest surfaces to flatten for painting. Panels over battens bypass this entirely.
    • Multiple paint layers and texture variation: A wall that’s been painted dozens of times with different products often has surface irregularities and texture inconsistencies that show through fresh paint. Panels cover all of this.
    • Ugly or outdated surface finishes: Woodchip wallpaper, textured Artex, dated tile patterns — panels are frequently used specifically to cover finishes that are too difficult or costly to remove.
    • Minor structural cracking: Non-structural hairline and settlement cracks (not expanding, not through the full wall thickness) can be covered by panels without addressing the cracks directly, provided the movement has stopped.

    What Panels Cannot Cover (or Shouldn’t)

    • Active damp or water ingress: Panels installed over a wall with active moisture will trap the moisture behind the panel. The result is mould growth, panel delamination, and structural damage to the wall over time. Damp must be remediated before any wood wall panel installation.
    • Structural movement: If cracks are actively expanding — widening seasonally, appearing in new locations — there is a structural issue that needs professional assessment before any cosmetic treatment.
    • Severe unevenness (over 20mm): Very severe wall deviation requires either substantial preparation work or a batten framework that brings the depth out from the wall significantly — adding to room size reduction. At extreme deviation, direct panel installation isn’t possible.

    The Right Approach for Wall-Covering Installations

    For Moderate Unevenness (5–15mm)

    A timber batten framework fixed directly to the wall, levelled using packing shims, provides a flat, level surface for panel installation regardless of what the wall behind is doing. The void between batten and wall also provides an air gap that helps ventilate any residual moisture in the wall — better than a direct-adhesion installation that seals the wall surface completely. Our guide to installing panels on uneven walls covers the batten method in detail.

    For Covering Wallpaper or Artex

    The question is whether the underlying surface is strong enough to bond to. Artex over sound plaster: sand back the highest points, prime well, and direct adhesion over a batten framework works. Old wallpaper: always remove it first — wallpaper bonded to a wall is only as permanent as the original wallpaper adhesive, and panels on top of lifting wallpaper will fail when the paper fails. Our wallpaper removal guide covers the process before panel installation.

    Choosing the Right Panel for Coverage

    For “covering bad walls,” favour panels with a solid face (fluted, reeded, or large-format smooth panels) over open-gap slat panels. Slat panels with visible gaps can reveal the wall behind through the gaps if the gap is wide enough — which undermines the whole purpose of covering the wall in the first place. Solid-face panels cover completely and unconditionally.

    For guidance on the full range of panel types and which suits which application, our complete wood wall panel guide covers every system with clear guidance on where each works best.

  • Wall Panels with LED Lighting: How to Integrate Lights for a Premium Look

    Wall Panels with LED Lighting: How to Integrate Lights for a Premium Look

    Why Lighting Transforms Wall Panels

    Wall panels in daylight look good. Wall panels with integrated or directed LED lighting look extraordinary. The combination of warm wood grain and carefully placed light creates depth, drama, and a layered quality that no other interior element achieves as efficiently. It’s also one of the most searched-for interior looks of recent years — the walnut slat panel wall glowing against a dark room has become a signature of premium residential design.

    Method 1: Recessed LED Strip at the Base of the Panel (Floating Effect)

    The most popular technique: an LED strip light fitted into a recessed channel at the base of the panel installation, pointing downward toward the floor. The panel itself appears to float away from the wall, with a warm glow emanating from underneath. The effect is dramatic in low-light conditions and subtle in full daylight.

    How to achieve it: Install the panel with a 20–30mm gap at the base (no contact with skirting board) using a batten system. Fix an LED strip to the wall or floor within this gap, directed toward the floor. Warm white (2700K) is the correct temperature — cool white destroys the effect.

    Method 2: LED Strip Along the Top Edge (Ceiling Wash)

    An LED strip at the top of the panel wall, directed upward toward the ceiling, creates an indirect ceiling wash that floods the room with soft ambient light. This technique works particularly well in rooms where the ceiling is used as the primary light source — bedrooms, living rooms, cinema rooms.

    Best combined with: A dark ceiling in the same room dramatically increases the visual impact of a ceiling wash — the contrast between the lit ceiling and the dark surfaces below creates a depth that daylight cannot replicate.

    Method 3: In-Slot LED (Within the Slat Gaps)

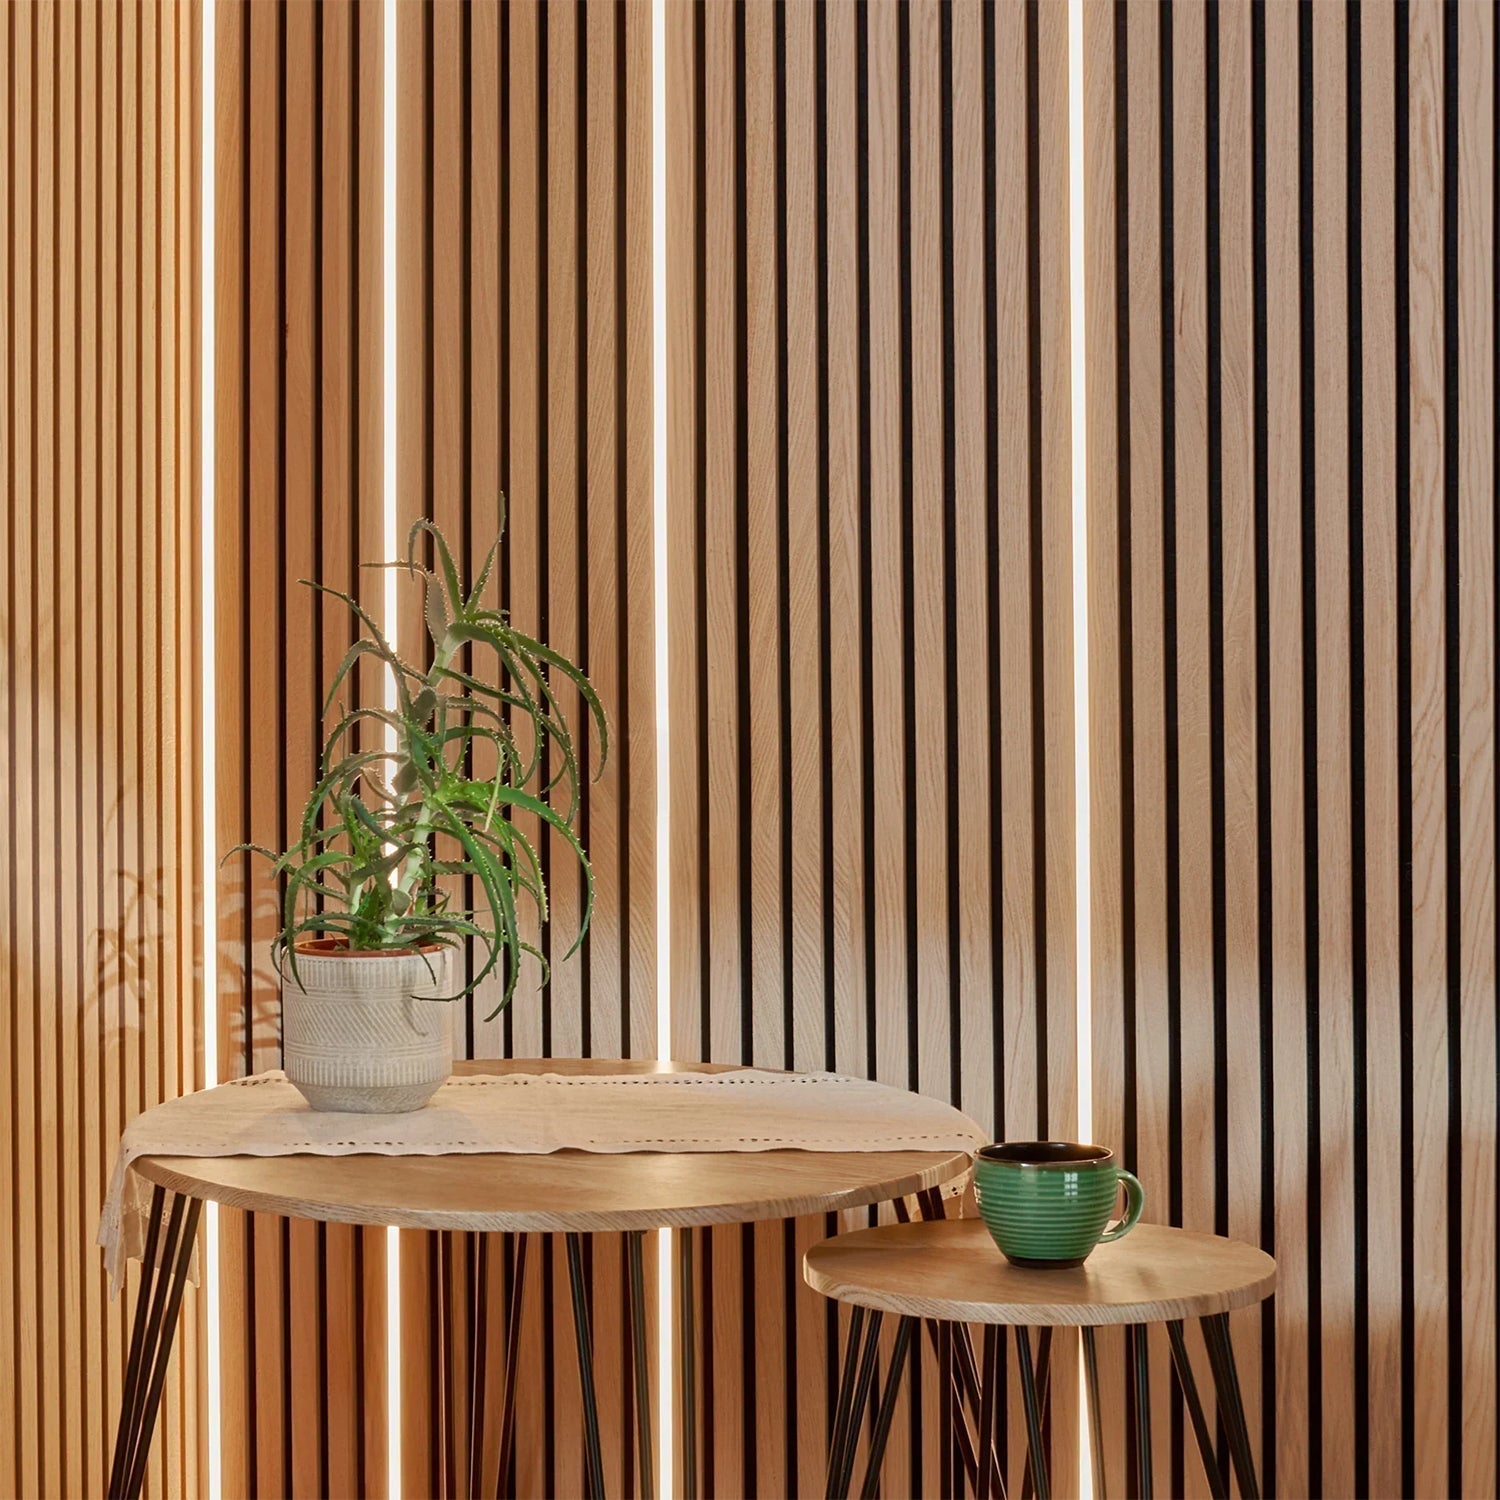
    For acoustic slat panels, ultra-slim LED strips (COB LED strips as narrow as 8mm) can be fitted within the gaps between slats, directed outward. This creates a panel that appears to emit light through its own structure — a highly distinctive effect that photographs exceptionally well.

    Technical requirements: The slat gap must be wide enough to accommodate the strip and its heat dissipation (typically a gap of at least 12mm). The strip should not touch the acoustic felt backing, which is flammable. Low-heat LED strips only — no halogen or incandescent alternatives.

    Method 4: Spotlights Directed at the Panel (Wall Grazing)

    Ceiling-mounted spotlights angled to graze the panel surface — hitting at a shallow angle rather than straight on — create shadow play within the slat gaps and panel texture. This technique reveals the three-dimensional quality of slat panels — and solid wood geometric relief panels — in a way that ambient room lighting cannot. The 3D Geometric Pattern panel is particularly responsive to wall-grazing light: the solid wood relief elements cast defined shadow lines that shift visibly as the light angle changes through the day. The shadows in the gaps deepen; the tops of the slats catch light; the overall effect suggests depth and craftsmanship.

    Positioning: Spotlights should be positioned 300–600mm from the wall surface to achieve a grazing angle. Too close and the effect is patchy; too far and the grazing angle is lost.

    LED Temperature: Getting It Right

    The colour temperature of your LED strip is as important as the method:

    • 2700K (warm white): The correct choice for wood wall panels. Enhances the amber and honey tones of oak, walnut, and ash. Creates an inviting, residential quality.
    •  3000K (soft white): Acceptable with darker species. Slightly cooler than 2700K but still warm enough to complement natural wood.
    • 4000K+ (cool white): Incorrect for almost all wood panel applications. Makes warm-toned wood look yellow and cheap; destroys the warmth that is the primary visual appeal of natural wood panels.

    For the broader context of planning a panel installation — where lighting infrastructure needs to be considered before panels go up — our step-by-step panel installation guide covers the sequencing. And for design inspiration on how panels with lighting translate in specific rooms, our bedroom panel guide and home theater panel guide show the technique in context.

  • Walnut vs Oak Acoustic Slat Panels: Which Species Is Right for Your Room?

    Walnut vs Oak Acoustic Slat Panels: Which Species Is Right for Your Room?

    The Most Common Decision in Wood Wall Panels

    Walnut and oak are the two dominant species choices for acoustic wood slat panels. They’re both premium options with real wood veneer; both are available in full acoustic slat panel systems; both look outstanding on a wall. The choice between them isn’t about quality — it’s about which suits your specific room, existing colour palette, and aesthetic preference.

    Here’s everything you need to make the right call.

    Walnut: The Rich Choice

    Colour range: Deep chocolate brown to warm golden brown, often with subtle purple or grey undertones depending on cut and origin. American black walnut is darker; European walnut slightly warmer.
    Grain character: Straight to slightly wavy with occasional figuring. Consistent enough to look intentional, varied enough to look natural.
    Visual weight: High. Walnut commands attention. In a room, a walnut panel wall is a bold design statement that other elements must work with.
    Ageing: Walnut lightens slightly over time as UV exposure reduces the initial dark intensity. Often considered an improvement — the aged tone is warmer and more complex.

    Walnut suits:

    • Rooms with neutral or warm-toned furniture (cream, beige, warm grey, natural linen)
    • Contemporary and Japandi interiors where contrast and material richness are deliberate choices
    • Bedrooms where deep, enveloping warmth is the brief
    • Home offices where the panel wall needs to convey authority and quality on camera
    • Darker or lower-light rooms where the wood tone adds warmth without making the space feel heavy

    Oak: The Versatile Choice

    Colour range: Light honey to warm amber. More variable than walnut across individual boards, but generally lighter and warmer in tone.
    Grain character: Pronounced open grain with distinctive ray fleck (particularly in quarter-sawn cuts). More visually active than walnut at close range.
    Visual weight: Lower than walnut. Oak adds warmth without visual heaviness — it reads as a background material that enhances rather than dominates.
    Ageing: Oak darkens slightly with age and UV exposure, deepening from pale honey toward warm amber. Most people find this an improvement.

    Oak suits:

    • Almost any interior style — the universal applicability of oak is its greatest strength
    • Rooms with white, light grey, or natural-toned furniture and flooring
    • Scandinavian and Japandi interiors where lightness and natural material are the brief
    • Living rooms where you don’t want the panel wall to dominate the overall scheme
    • First-time panel buyers unsure of their long-term aesthetic direction — oak is the “safe” choice that rarely looks wrong

    How to Decide

    Three questions that resolve most decisions:

    1. What colour is your floor? Light floors (blonde wood, white tile, light carpet) suit oak; dark floors (dark timber, charcoal stone) suit either but contrast better with oak rather than creating a uniformly dark lower half of the room.
    2. What’s your furniture? White or light grey furniture suits oak; natural or warm-toned furniture suits either; dark furniture suits walnut for a rich tonal range or oak for contrast.
    3. Do you want the panel wall to make a statement or set a mood? Statement → walnut. Mood/atmosphere → either works, but oak is more recessive.

    Order Samples

    Screen colour rendering is unreliable for wood. A walnut panel can appear almost black on one monitor and warm brown on another. A sample in your actual room, under your actual lighting, at different times of day, is the only reliable way to make this decision confidently.

    The SoundPanel™ acoustic slat range is available in both walnut and oak — sample ordering lets you see both in your space before committing. Visit The Panel Hub to explore the full species and finish range.

    How Room Lighting Affects Walnut and Oak Panels

    The most common source of regret in wood panel selection is ordering without testing in the room’s actual lighting conditions. Natural wood veneer responds to light in ways that digital photography doesn’t fully capture.

    American Walnut in different lighting: In warm, low-temperature artificial light (2700K–3000K — typical incandescent or warm LED), walnut reads as deep chocolate-brown with rich grain variation. Under cooler light (4000K+ — typical office or north-facing natural light), the same panel reads with more grey undertones and the grain pattern becomes more prominent. South-facing rooms with strong natural light reveal the full warmth of the veneer. Walnut that looks striking in a west-facing room with evening light may look quite different in a north-facing home office under cool overhead LEDs.

    Natural Oak in different lighting: Oak is more lighting-stable than walnut — it reads consistently across a wider range of colour temperatures. The characteristic pale, straight grain reads as clean and contemporary under both warm and cool light. In rooms with warm lighting, oak takes on a slightly amber tone. In cool or grey-toned spaces, it reads as crisp and minimalist. This stability makes oak a lower-risk choice for rooms with mixed or changing light conditions.

    The sample test protocol: Order a sample tile and place it on the target wall. Assess it at three different times: morning light (if applicable), afternoon, and evening with artificial lighting active. Photograph it with your phone against the existing wall colour. This 5-minute process eliminates the most common ordering mistake and is always worth the one-week delay.

    Combining species: Some installations use both walnut and oak across different walls in the same room — walnut on the feature wall for richness, oak on a secondary wall for lightness. This works when the room palette already contains both warm and cool tones. It requires careful planning; the transition line between species needs to fall at a natural visual break (a corner, a doorframe) rather than mid-wall.

    Frequently Asked Questions

    What’s the price difference between walnut and oak acoustic slat panels?
    American Walnut is typically priced 15–25% higher than Natural Oak due to the relative scarcity of the timber and the higher material cost in the veneer production process. Dark Oak (a stained oak product) is priced similarly to Natural Oak. The performance specification — NRC rating, panel dimensions, backing material — is identical across species.
    Which wood species is more durable for wall panels — walnut or oak?
    Both species have comparable performance as wall panel veneers. Neither will scratch or dent under normal use conditions because they’re not contact surfaces — they’re installed above the impact zone of most furniture and foot traffic. The backing material (AcuFelt) is the same for both. Durability is not a differentiating factor in the walnut vs oak decision.
    Does walnut or oak look better in a modern interior?
    Modern interiors typically suit both, but in different ways. Walnut aligns with warm contemporary and mid-century modern styles — it has visual weight and richness that suits design-forward spaces. Oak suits Scandinavian-influenced and minimalist interiors — it’s lighter, cleaner, and more neutral. Neither is objectively “more modern”; the choice depends on the room’s existing palette and intended mood.
    Can I mix walnut and oak panels in the same room?
    Yes, with planning. Mixed-species installations require the species transition to fall at a natural visual break — a corner, a structural column, a doorframe. Mid-wall transitions are rarely successful visually. A common approach is one species as a feature wall and the other on secondary walls, which creates visual hierarchy without looking mismatched.
    Are samples available before committing to a full order?
    Yes. TPH offers sample tiles in all available species and finishes. Sample ordering is strongly recommended before any full installation order — lighting conditions vary significantly between rooms and settings, and the sample is the most reliable way to confirm the choice before committing to full coverage.

    Shop Walnut and Oak Acoustic Slat Panels

    Compare both species side by side in the SoundPanel™ acoustic slat collection at The Panel Hub, and order samples before committing to a full order. Browse the complete wood wall panel range for every species and format available. Our interior slat wall ideas guide shows how each species reads in finished rooms across different lighting conditions and interior styles, and the acoustic panel buyer’s guide covers the performance specifications that apply equally to both species.