Tag: Geometric

  • Geometric Wall Panels for Kitchen: How to Add Pattern Without Overpowering the Room

    Geometric Wall Panels for Kitchen: How to Add Pattern Without Overpowering the Room

    The kitchen is one of the hardest rooms to introduce a bold wall treatment. Between the cabinetry, appliances, splashback, and countertops, there are already four or five competing visual elements before you’ve even thought about the walls. Add an undisciplined pattern and the room tips into chaos. Do it thoughtfully, and a geometric wood panel becomes the element that ties everything together.

    Here’s how to use geometric wall panels in a kitchen without overpowering the space.

    Where Geometric Panels Work in a Kitchen

    Not every kitchen wall is a candidate for bold geometric pattern. The most successful applications share a common characteristic: there’s a clear, bounded surface that benefits from a deliberate design decision rather than a default neutral finish.

    End walls and peninsulas

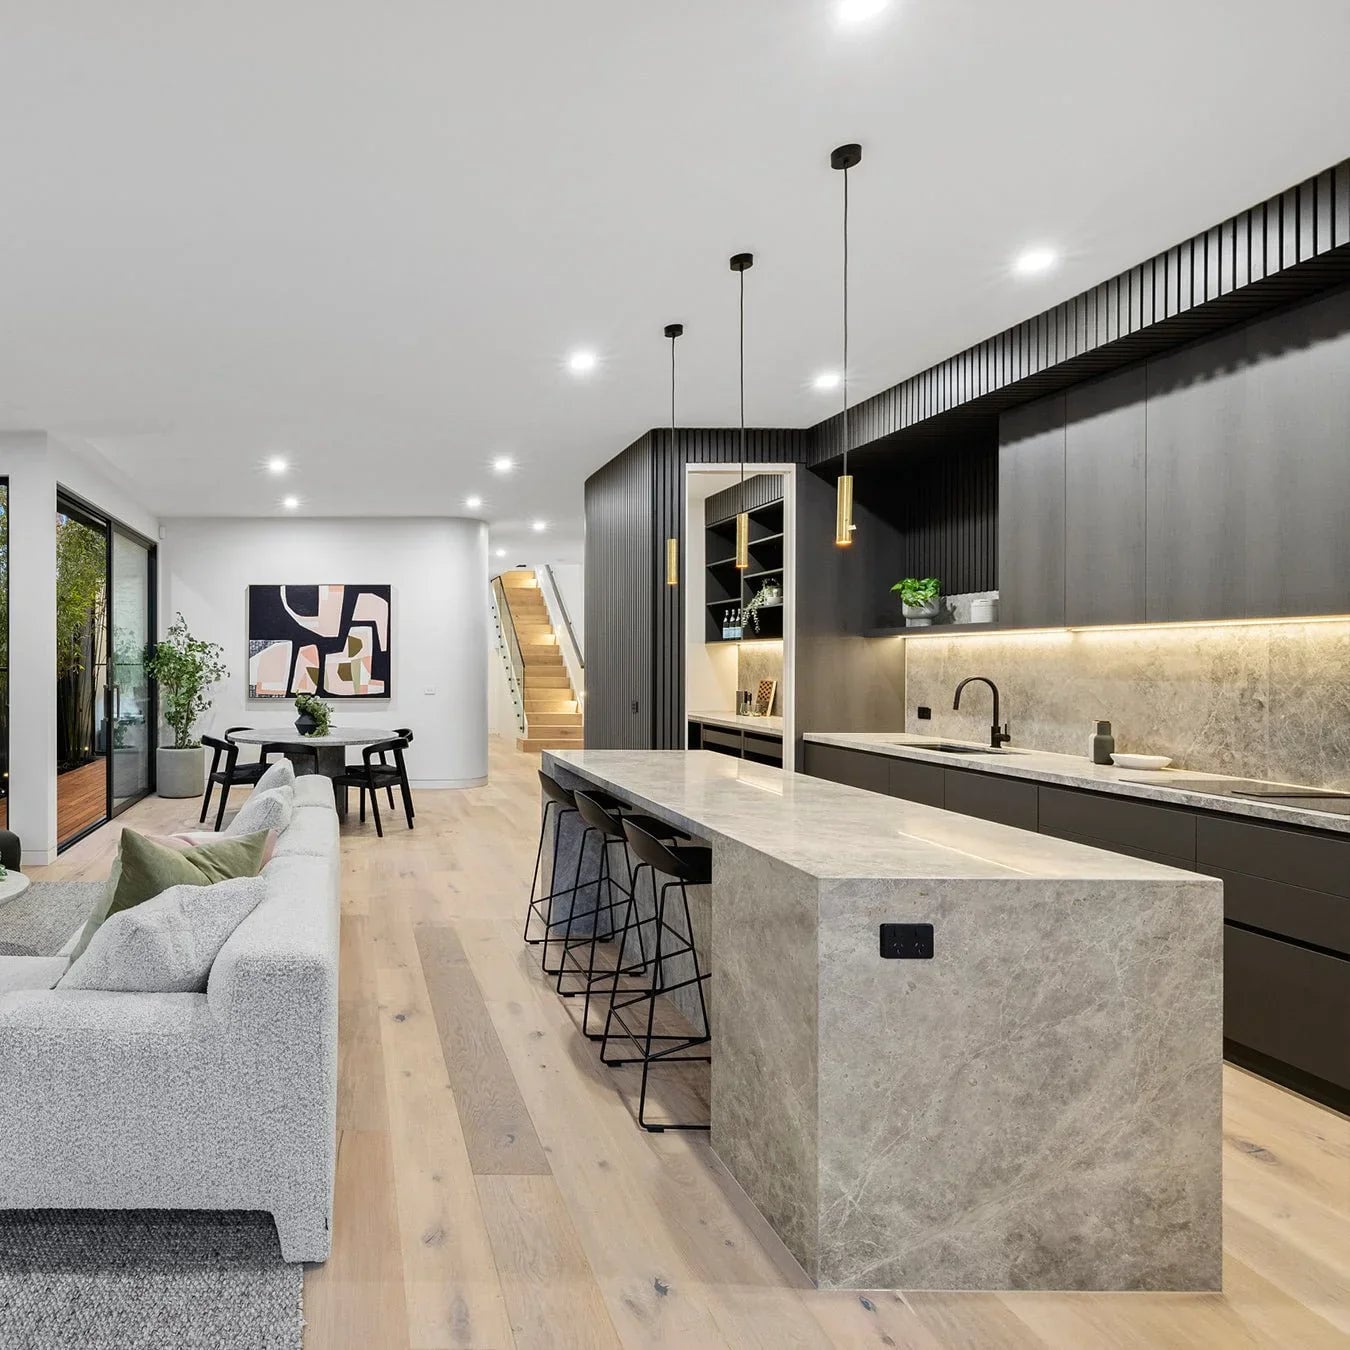
    The end wall of a galley kitchen, or the wall behind a peninsula or island, is often the most visible surface from the rest of the living space. It’s also typically the only wall not broken up by upper cabinets. This makes it the best candidate for a geometric panel feature — it’s big enough to make an impact and contained enough not to overwhelm.

    Below-counter panels

    Geometric wood panels applied to the wall section between the counter and the floor — below lower cabinets — create a contemporary alternative to standard kickboard finishes. A crossing lines or concentric pattern at this level adds a detail that most kitchens completely ignore.

    Breakfast nook or dining area within the kitchen

    If your kitchen opens into a dining area, the wall behind the dining table is often neutral by default. A geometric wood panel behind the dining table differentiates the eating zone from the cooking zone, gives the dining area its own identity, and avoids the visual monotony of matching everything to the kitchen cabinetry.

    Pattern Scale: Getting It Right for a Kitchen

    Kitchens have a lot of small visual elements — hardware, tile joints, cabinet doors. A geometric panel with a very fine repeat (small individual units) can visually merge with all this detail and get lost. A larger-scale pattern — where individual geometric units are clearly legible from across the room — reads more confidently.

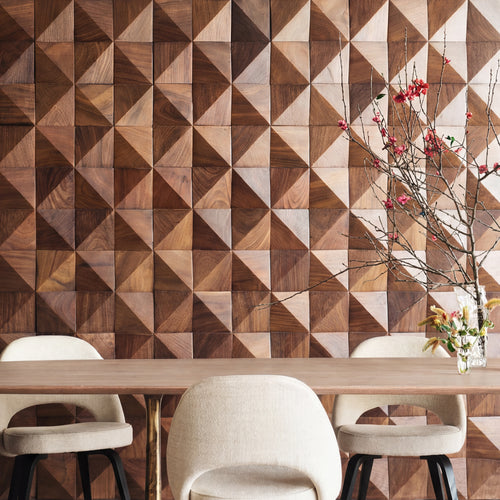
    The 3D Concentric Square Panel works well in kitchens because the pattern is bold enough to read clearly even when viewed through a doorway or from across an open-plan space. The Crossing Lines Panel is a cleaner, more architectural choice that doesn’t compete with cabinet hardware or tile patterns.

    Colour and Finish Considerations

    In kitchens where cabinetry is painted — particularly white, navy, or grey — solid walnut geometric panels add the warmth of natural timber that painted surfaces can’t provide. The contrast between a flat painted cabinet and a textured solid wood panel behind it is exactly the kind of material layering that elevates a kitchen from functional to designed.

    If your kitchen already has a lot of warm wood tones — oak cabinets, timber flooring — choose a geometric panel format with strong visual contrast rather than adding more of the same material. A panel in a darker walnut species, or a geometric pattern with deep shadow lines, will distinguish itself from background timber rather than blending into it.

    Moisture and Splashback Zones

    Solid wood wall panels should not be used as a direct splashback behind a sink or hob — zones where water and grease contact is regular and direct. However, anywhere that’s not in direct splashback range is fine with a basic protective oil or wax finish. Our GroovePanel® panels are supplied with a factory finish that provides everyday moisture resistance for normal kitchen environments.

    For genuinely wet zones, consider pairing geometric wood panels on the end wall or dining area wall with a waterproof surface (tile or a composite splashback) in the direct contact zones. The combination of different materials and textures across a kitchen is a mark of considered design, not inconsistency.

    Kitchen Panel Ideas at a Glance

    • Walnut triangle mosaic on the end wall of a white galley kitchen — the only warm element in an otherwise cool-toned space
    • Crossing lines panels behind a kitchen island as a graphic backdrop visible from the living room
    • Concentric square panels in the dining zone of an open-plan kitchen-diner, framing the table as its own space
    • Honey mosaic panels on the wall above a breakfast bench — small-scale, tactile, and warm

    For kitchen-specific panelling ideas with a different focus, see our guide to kitchen island fluted panel ideas. For the full geometric pattern range, browse the GroovePanel® collection. Order a sample to check timber tone against your cabinet colour before ordering.
  • Geometric Wall Panels for Bedroom: 8 Ideas That Create a Stunning Focal Point

    Geometric Wall Panels for Bedroom: 8 Ideas That Create a Stunning Focal Point

    A bedroom feature wall needs to do more than cover plasterboard. It needs to create a focal point, set the room’s tone, and make the space feel like it was designed rather than assembled. Geometric wood wall panels do all three — and unlike painted feature walls or wallpaper, they add physical texture that you can see shift under changing light.

    These eight ideas cover different pattern types, room sizes, and styling approaches. Whether you have a large master bedroom or a compact secondary room, there’s a geometric panel configuration that works.

    1. Full Headboard Wall in Walnut Triangle Mosaic

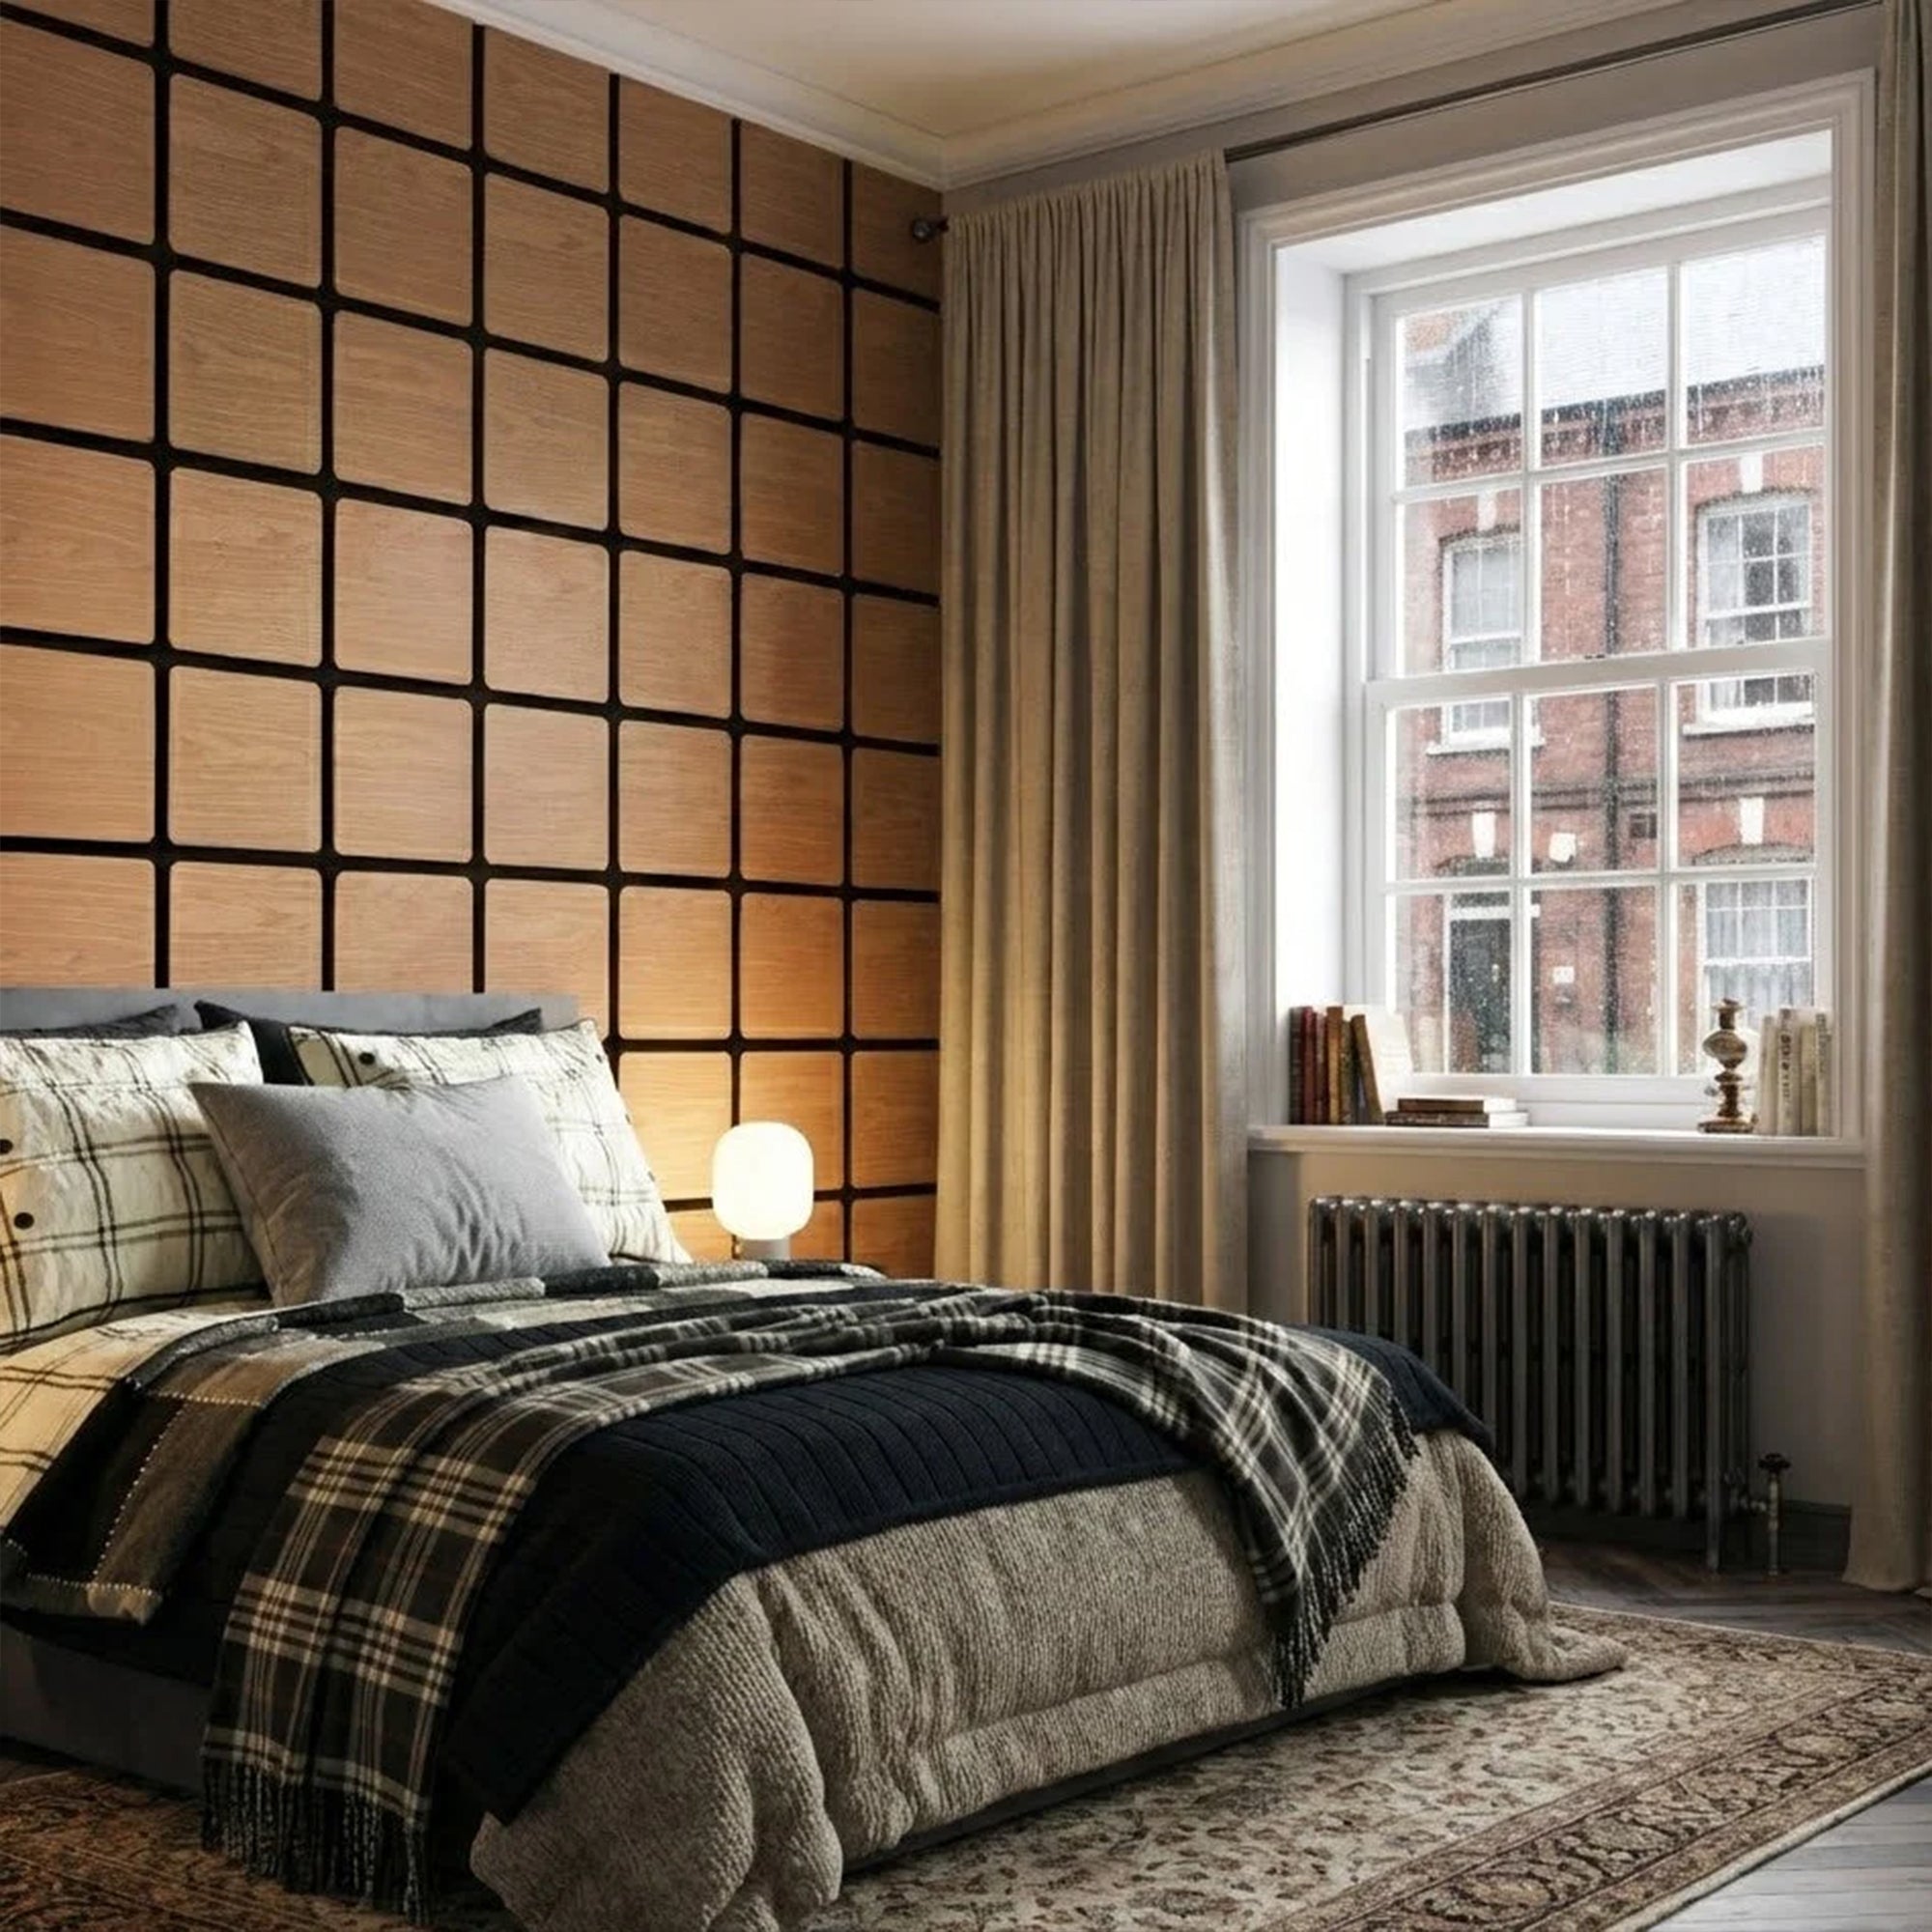
    The most impactful treatment: cover the entire wall behind the bed in Walnut Triangle Solid Wood Panels from skirting to ceiling. Keep the rest of the room in soft neutrals — off-white walls, linen bedding, pale oak furniture. The dark walnut triangle wall becomes the room’s centrepiece and the bed reads as framed within it.

    2. Concentric Square Panel as a Graphic Headboard Substitute

    If you want a focal point centred above the bed rather than a full wall treatment, the 3D Concentric Square Panel works like a piece of oversized wall art. Install a single large tile or a 3×3 grid of tiles centred behind the bed, with bare plastered or painted wall on either side. The concentric pattern draws the eye inward — it’s meditative in a bedroom context and doesn’t require anything else on that wall.

    3. Half-Wall Geometric Panel with Painted Top Half

    Apply geometric panels to the lower two-thirds of the headboard wall, finishing with a timber batten or flat painted reveal. Paint the upper section in a deep tone — charcoal, forest green, or dusty blue. This creates a sophisticated layered look without the commitment of a full floor-to-ceiling installation.

    4. Honey Mosaic Panels for a Warmer, More Organic Bedroom

    Not every bedroom calls for sharp angular geometry. The Honey Mosaic Solid Walnut Panel has a more irregular, flowing pattern than the triangle or concentric square formats. It reads as warm and crafted rather than architectural — better suited to bedrooms with earthy, textural interiors than to rooms going for a hard contemporary edge.

    5. Crossing Lines Panel Behind a Freestanding Wardrobe

    A geometric feature wall doesn’t have to be behind the bed. If your room layout places a wardrobe or dressing area on the most visible wall, consider panelling behind the furniture instead. The Crossing Lines Solid Wood Panel creates a graphic grid that shows above and between furniture pieces — making even a plain wardrobe feel considered.

    6. Geometric Panels in a Small Bedroom: Using Pattern to Add Depth

    In a small bedroom, the instinct is to keep walls plain. But a well-chosen geometric panel can actually make a compact room feel more considered and designed — which reads as intentional rather than cramped. The key is scale: use a smaller geometric tile with fine detail rather than a large-format panel that overwhelms the proportions.

    For more ideas on maximising small spaces, see our guide to modern bedroom wall panelling ideas.

    7. Mixing Geometric Wood Panels with Soft Furnishings

    Geometric panels work best when the rest of the room is quiet. If you’re installing a pattern wall, simplify your soft furnishings — avoid busy bed linen patterns, keep cushions in single solid tones. The panel is doing the heavy lifting visually; the room’s job is to let it.

    For complementary material pairings, consider: linen bedding in warm white or sand against walnut panels; concrete-effect furniture with lighter oak geometric panels; or velvet headboards in forest green against an unfinished natural timber mosaic wall.

    8. Feature Wall Behind a Daybed or Reading Nook

    Secondary seating areas within larger bedrooms — a daybed in a bay window, a reading chair in a corner alcove — create an opportunity for a contained geometric panel installation. Panel just the wall behind the daybed rather than the full headboard wall. This treats the nook as its own designed space within the room.

    Material and Safety for Bedroom Installations

    All panels in the GroovePanel® range are made from 100% solid FSC-certified timber and meet standard indoor air quality requirements. For rooms where air quality is a particular concern — including children’s rooms and nurseries — our article on wood accent walls for nurseries covers what to look for in panel materials and finishes.

    Getting Started

    Before committing to a full order, order a panel sample to see how the timber tone reads in your bedroom’s specific lighting. Bedrooms tend to have warmer artificial lighting than other rooms, which affects how walnut and oak tones appear in the evening. Then browse the full GroovePanel® geometric collection to choose your pattern.

  • Geometric vs Fluted vs Slat Wood Panels: A Complete Comparison

    Geometric vs Fluted vs Slat Wood Panels: A Complete Comparison

    The wood wall panel market has three dominant surface formats: geometric (mosaic or 3D relief), fluted (vertical parallel channels routed into a flat panel), and slat (individual strips of timber mounted on a backing). All three are available in solid wood and engineered alternatives. All three look good in the right context. Knowing the genuine differences between them — not just how they photograph but how they perform — is what allows you to make a confident decision.

    The Three Formats: A Quick Definition

    Geometric panels have a designed pattern geometry: triangles, squares, crossings, honeycomb shapes, concentric profiles. The pattern is formed by the arrangement of pieces (mosaic) or by routed relief (3D). Visual interest comes from the pattern and the shadows it creates. Examples: all products in the GroovePanel® Geometric wood wall panels.

    Fluted panels have parallel vertical channels routed into a solid board or MDF panel, creating a ribbed surface. The channels create shadow lines and texture while the overall panel remains flat in outline. Visual interest comes from the regularity of the ribbing and the shadow lines between channels.

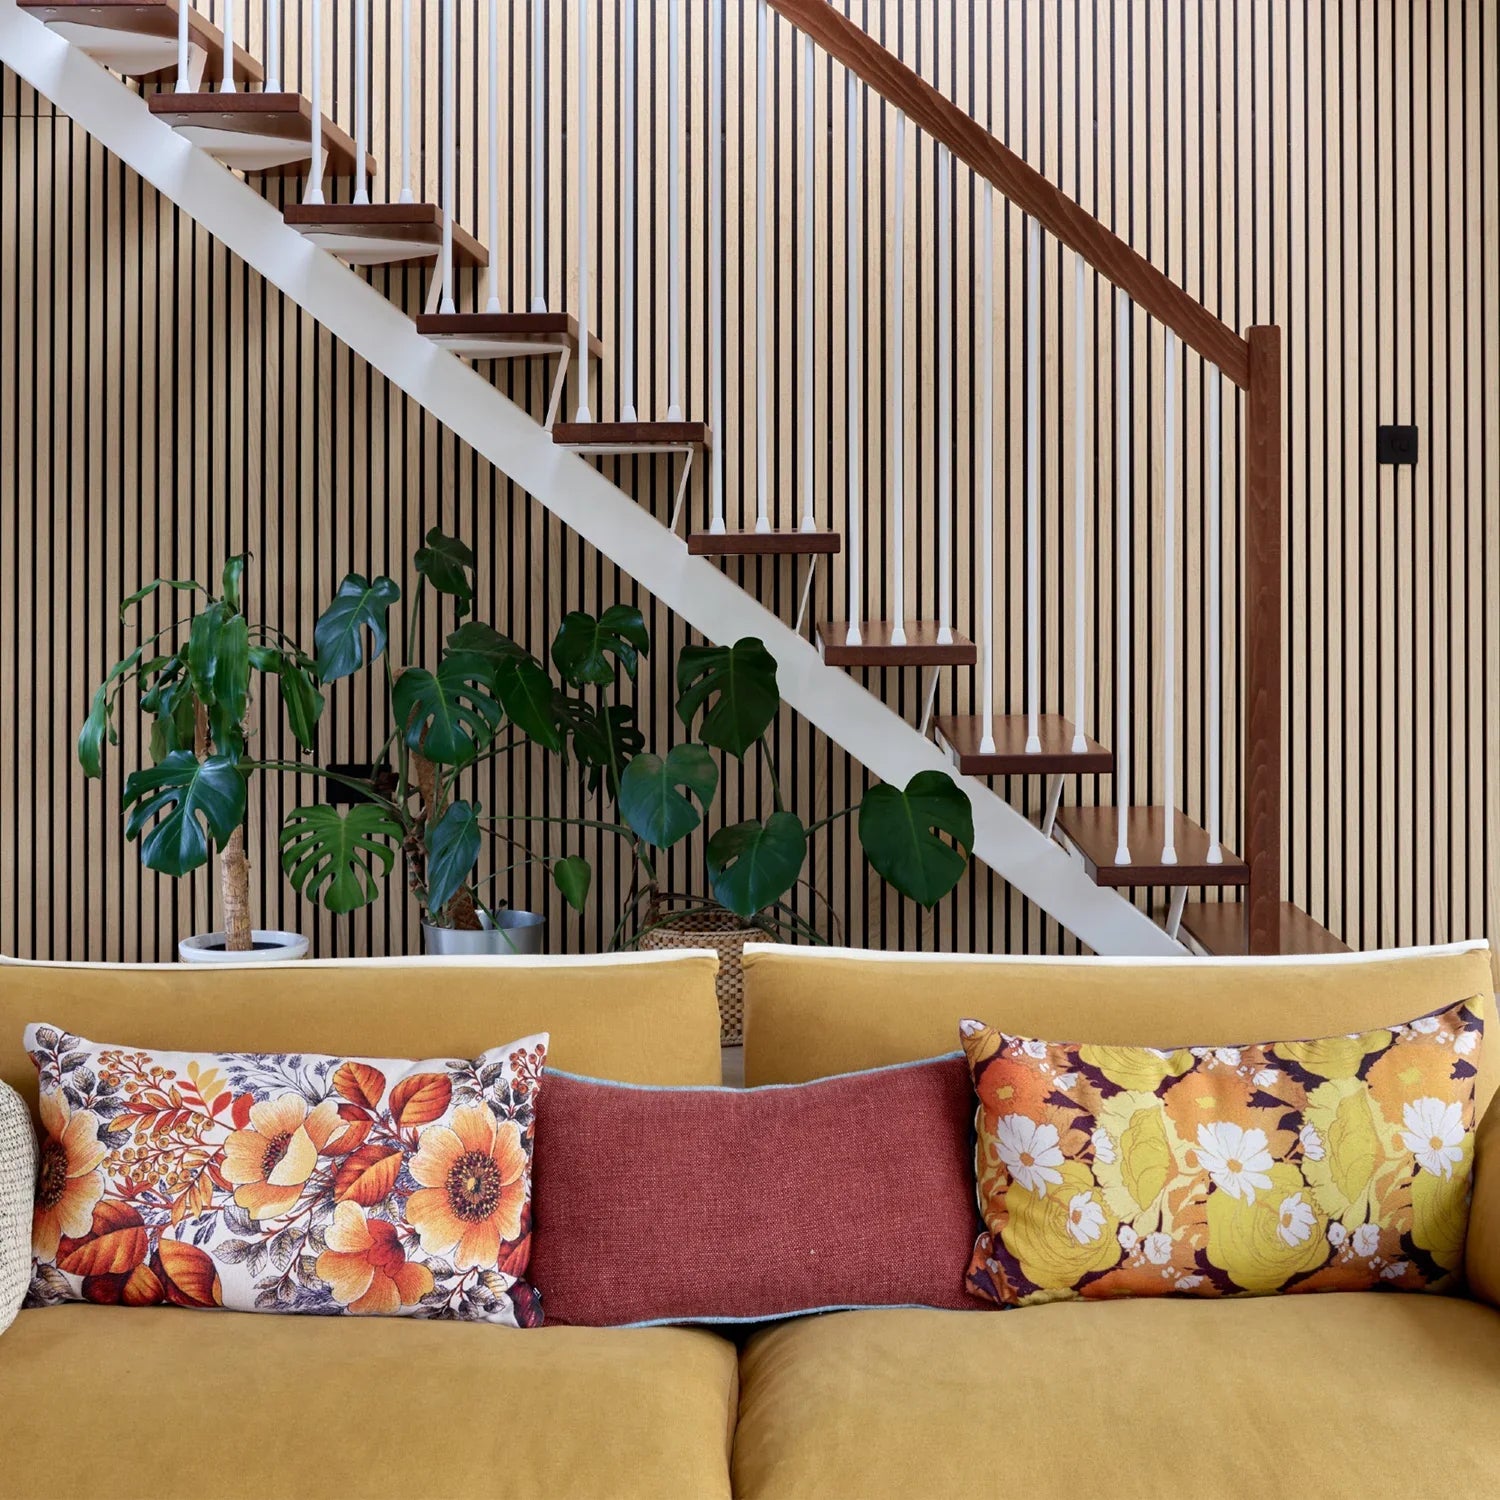
    Slat panels are individual strips of timber — typically 10–30mm wide — mounted at regular intervals on a backing board (usually felt or MDF). The gaps between slats reveal the backing. Acoustic slat panels use felt backing to absorb sound. Visual interest comes from the rhythm of the slats and the revealed depth between them. Examples: the SoundPanel® Acoustic panels.

    Visual Character: What Each Format Looks Like

    Geometric panels

    Bold, complex, graphic. Geometric panels create a surface that demands attention and provides sustained visual interest at close range. Different patterns convey different qualities: concentric squares feel precise and architectural; triangle mosaics feel dynamic and contemporary; honey mosaics feel organic and warm. In rooms with directional light, the shadow effects of 3D and mosaic formats create an installation that changes appearance through the day.

    Fluted panels

    Quieter and more linear than geometric. Fluted panels create vertical rhythm without the complexity of a multi-directional pattern. They read as refined and restrained — a texture that is present without being demanding. Better suited to rooms where other elements are already carrying visual interest. The fluted format also appears on kitchen island fronts, cabinet doors, and furniture — making it integrate well with a room that uses fluting as a broader design theme.

    Slat panels

    Light and airy. The gaps between slats create a sense of openness and depth — the wall appears to have layers rather than being a solid flat surface. Acoustic slat panels also perform a real acoustic function, which geometric and fluted panels don’t provide to the same degree. For rooms where sound quality matters (home offices, home theaters, living rooms in open-plan apartments), slat panels combine aesthetic and function. See our guide to acoustic wood slat wall panels for more detail.

    Acoustic Performance

    • Geometric panels: Minimal acoustic benefit. Solid wood surfaces scatter some sound but don’t significantly absorb it.
    • Fluted panels: Slightly better than flat panels due to surface area increase, but not materially significant.
    • Slat panels (with felt backing): Meaningful mid-frequency sound absorption. The felt backing absorbs sound energy passing through the slat gaps. This is a real and measurable benefit for room acoustics.

    Installation Complexity

    • Geometric panels: Variable. Mosaic tiles are installed piece by piece, which is slower but manageable for DIY. Large-format 3D panels are installed similarly to tiles.
    • Fluted panels: Typically the easiest — large flat panels that install like standard board panels.
    • Slat panels: Moderate — backing boards are large format, installation is relatively quick once the first board is levelled.

    Which to Choose?

    If you want… Choose
    Bold geometric pattern, visual drama, shadow effects Geometric (GroovePanel®)
    Quiet linear texture, refined and restrained Fluted
    Warm airy texture plus real acoustic benefit Slat (SoundPanel®)
    A combination — pattern wall plus acoustic treatment Geometric on feature wall, slat on return walls

    The Combination Approach

    Many rooms benefit from mixing formats. A geometric panel on the main feature wall provides the pattern and shadow drama; slat panels on the adjacent walls manage acoustics and add warmth without competing. This is a common specification in home cinemas, music rooms, and home offices where both aesthetics and acoustic performance are required.

    Browse geometric options at GroovePanel® Geometric Wood Wall Panels and acoustic slat options at SoundPanel® Acoustic Wood Wall Panels. For additional comparison detail, read our guides on fluted vs slat panels and 3D wall panels.

  • Geometric Feature Wall for Dining Room: Ideas, Patterns and Styling Tips

    Geometric Feature Wall for Dining Room: Ideas, Patterns and Styling Tips

    The dining room’s main wall — typically behind the table and chairs — is one of the most photographed surfaces in a home. It’s the backdrop for every dinner party, family gathering, and Sunday lunch. Getting it right matters not just for daily living but for how the whole room reads to anyone entering it.

    A geometric wood panel feature wall is one of the strongest choices for this surface. It adds warmth, texture, and a clear design intention without requiring art, wallpaper, or ongoing maintenance. Here’s how to plan and execute it.

    Why the Dining Room Works So Well for Geometric Panels

    Dining rooms typically have:

    • One clear wall that functions as a visual backdrop
    • Pendant or chandelier lighting that creates directional shadow across a textured wall
    • A natural gathering function where guests face the feature wall
    • Fewer competing visual elements than kitchens or living rooms

    These conditions are almost ideal for a geometric panel installation. The pendant light above the table naturally rakes across the wall, maximising the shadow and texture effect of a 3D or relief pattern. Guests seated at the table face the wall and have time to appreciate the detail. And unlike a living room, the dining room wall isn’t interrupted by sofas, TVs, or console tables that compete for attention.

    Pattern Options for the Dining Room

    3D Concentric Square — formal and architectural

    The 3D Concentric Square Panel creates a pattern that references both Art Deco geometry and contemporary architectural detail. In a dining room with a long table and formal seating, the precision of the concentric square pattern reads as intentional and considered — an appropriate backdrop for an occasion room.

    Walnut Triangle Mosaic — bold and contemporary

    A full wall of Walnut Triangle Panels is one of the bolder choices for a dining room, but in rooms where the aesthetic is contemporary and the brief is to impress, it delivers. The dark walnut tone deepens under pendant lighting, creating a rich, jewel-box quality.

    Crossing Lines — clean and graphic

    The Crossing Lines Panel is the most restrained option — a grid of intersecting lines that reads as architectural precision rather than organic warmth. It works in dining rooms where the existing material palette is already warm (timber floors, rattan chairs) and the wall needs to add structure without more of the same texture.

    Honey Mosaic — warm and tactile

    For dining rooms in warmer, more organic interior styles — terracotta tiles, linen curtains, ceramic dinnerware — the Honey Mosaic Panel adds tactile richness without sharp geometry. It’s the most approachable pattern in the GroovePanel® range.

    How High to Take the Panels

    Three main options for a dining room feature wall:

    1. Floor to ceiling: Maximum impact. Makes the wall feel like a room-defining architectural element rather than decor. Works best with high ceilings (2.7m+).
    2. Dado height to ceiling: Apply panels above a picture rail or dado height (typically around 900–1100mm from floor), with a different treatment below. Creates a layered effect.
    3. Behind-chair height: Panel only the section of wall visible above the chairs — roughly from 750mm to 2000mm. Frames the seating area specifically.

    Lighting the Geometric Feature Wall

    In a dining room, the pendant light above the table will create some ambient light on the wall — but it may not be angled enough to create meaningful shadow on a textured panel. Consider adding:

    • A wall sconce on each side of the feature wall
    • Picture lights mounted at the top edge of the panel installation, angled downward
    • LED strip lighting recessed in a channel above the panel

    For full guidance on integrating lighting with panel installations, see wall panels with LED lighting.

    Styling the Dining Room Around a Geometric Feature Wall

    Let the geometric panel wall anchor the room and keep everything else secondary. Recommendations:

    • Table: choose a simple form — no heavily carved legs or decorative detail competing with the wall
    • Chairs: upholstered in a single solid tone rather than a pattern
    • Pendant: a form with strong presence but no surface decoration — raw concrete, simple brass, or ceramic
    • Table accessories: natural materials (linen runners, ceramic bowls, glass candleholders) that reinforce the organic warmth of the timber wall

    For more dining room wall ideas across different material types, read our guide to dining room wood panel wall ideas.

    Order and Plan

    Browse the full geometric pattern range at GroovePanel® Geometric Wood Wall Panels. For a step-by-step guide to planning your layout, read our how to create a geometric feature wall article. Order a sample before committing to check timber tone under your dining room’s specific lighting.

  • Diamond Pattern Wall Panels: Design Ideas, Styling Tips, and Where to Use Them

    Diamond Pattern Wall Panels: Design Ideas, Styling Tips, and Where to Use Them

    The diamond — two triangles joined at the base — is one of the oldest geometric motifs in decorative design, and one of the most versatile. In wall panels, diamond patterns create a sense of upward movement and visual expansion that few other shapes match. Whether rendered in solid wood, stone, or tile, a diamond-patterned wall is difficult to ignore.

    This guide covers how to use diamond pattern wall panels, which rooms they suit, and how to choose the right scale and material for your project.

    What Makes the Diamond Pattern Work

    The diamond has two visual properties that make it particularly effective on walls. First, its vertical axis creates upward movement — a diamond-patterned wall tends to make a room feel taller. Second, the diagonal lines of a diamond grid resist the horizontal and vertical grain of furniture and architecture, creating visual tension that keeps the eye engaged.

    In wood panels specifically, the diamond shape exposes two different grain orientations within each unit (if each half of the diamond is cut from a different piece), creating subtle tonal variation across the surface.

    Diamond Patterns in Wood Mosaic Panels

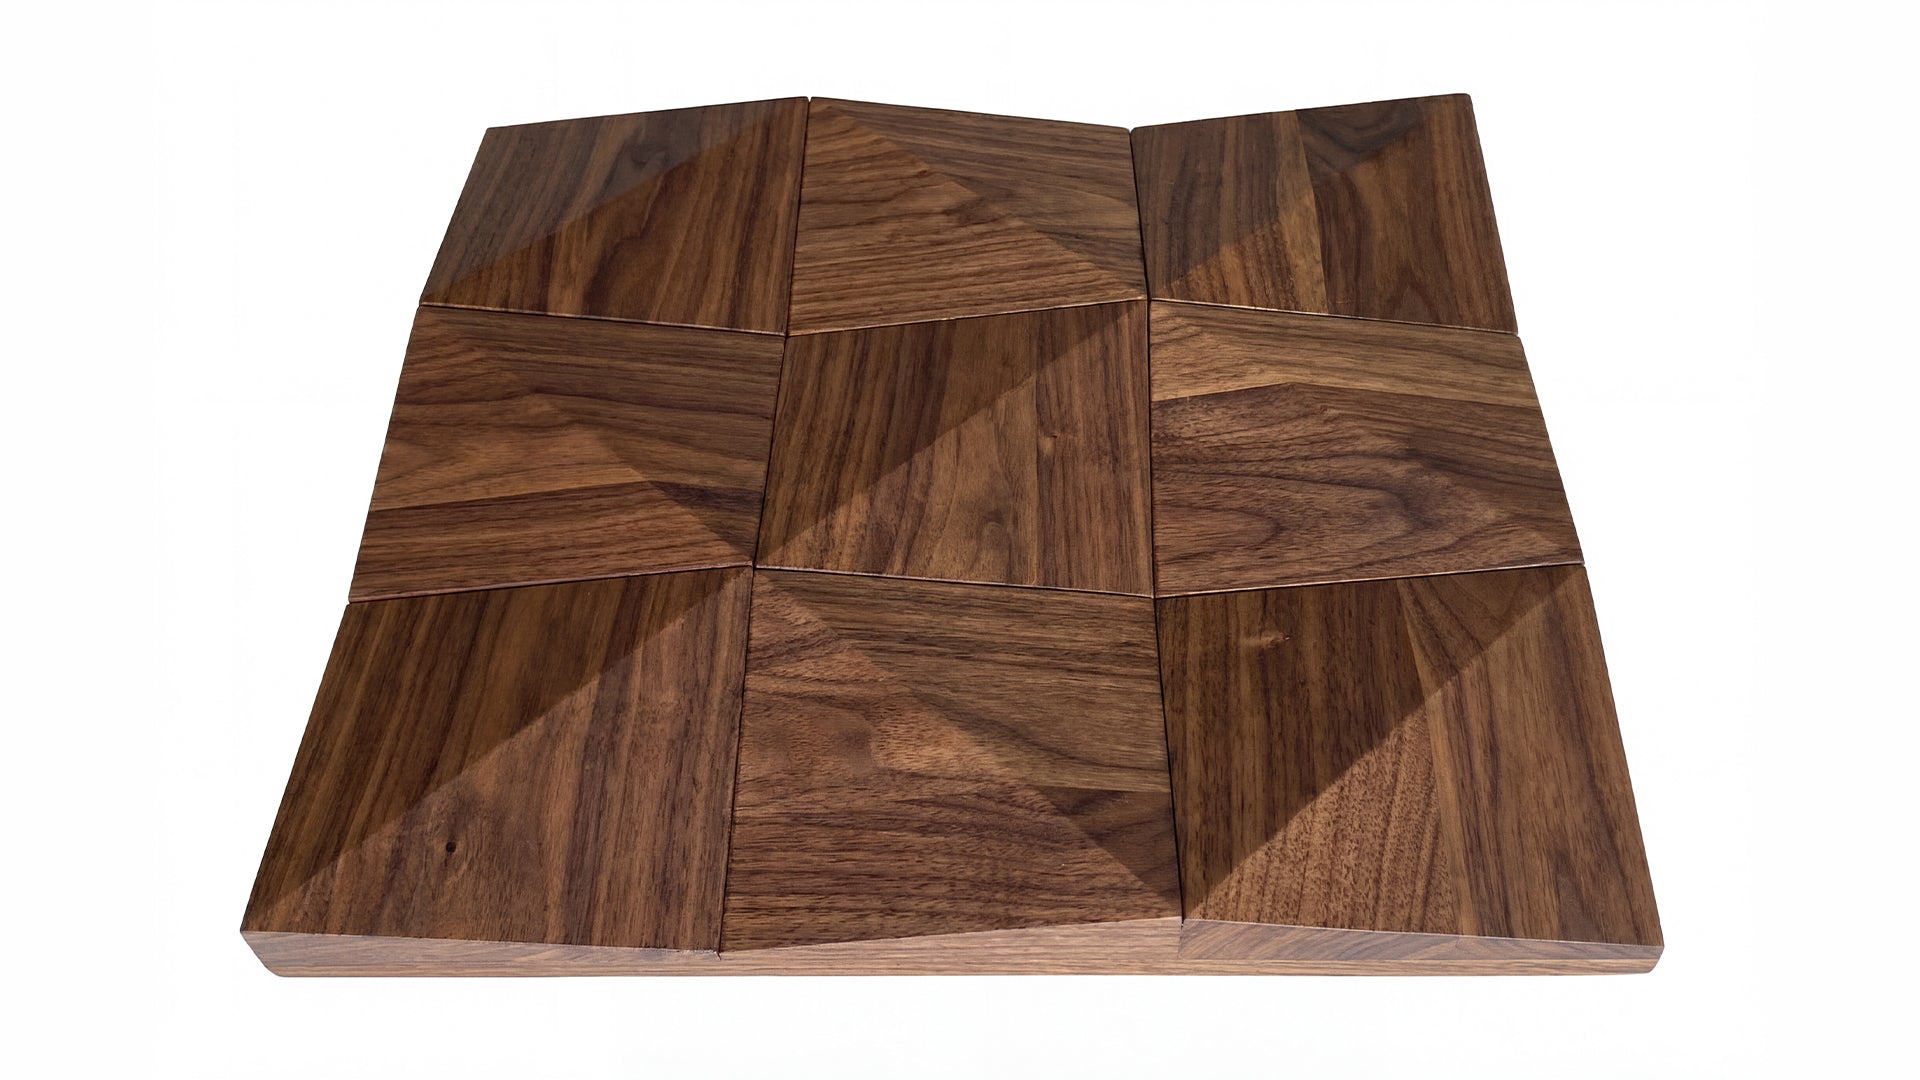
    The most direct way to achieve a diamond wall pattern in solid wood is through mosaic tile panels where paired triangles form diamond units. Our Walnut Triangle Solid Wood Panels can be installed to create a full diamond grid — the triangles are arranged in mirrored pairs, and the opposing grain directions create the distinctive two-tone effect within each diamond.

    This is a more sophisticated outcome than a printed or stamped diamond pattern because the effect comes from real timber grain, not a manufactured simulation. Every diamond looks slightly different because the wood is real.

    Scale: Small Diamond vs Large Diamond Patterns

    Scale matters significantly with diamond patterns:

    • Small-scale diamonds (where individual units are 50–100mm across): Create an all-over texture effect rather than a bold geometric statement. Better for smaller rooms or rooms with a lot of other visual elements.
    • Large-scale diamonds (150–300mm+ individual units): Make a bold, graphic statement. Better for large walls with clear sightlines — living rooms, dining rooms, hotel lobbies.

    In residential interiors, a medium scale — where you can clearly count individual diamonds from the other side of the room but the pattern doesn’t fragment at close range — tends to work best.

    Room-by-Room Diamond Panel Ideas

    Living room

    A diamond-patterned wood wall on the main feature wall (typically behind the sofa or fireplace) creates the kind of visual anchor that makes a living room feel complete. The upward movement of the diamond pattern draws the eye toward the ceiling, which emphasises ceiling height.

    Bedroom

    Behind a bed, a diamond pattern in dark walnut creates a dramatic, jewel-box quality — particularly effective in bedrooms with rich, layered textiles. Read our full guide to geometric wall panels for bedrooms for styling ideas.

    Hallway

    Diamond panels on a hallway wall make a strong first impression. The vertical movement of the diamond pattern is particularly useful in hallways where you want to suggest height in what is often a low-ceilinged space.

    Dining room

    A diamond pattern behind a dining table creates a backdrop that adds formality and occasion to the room. Pair with pendant lighting that highlights the texture of the wood surface.

    Mixing Diamond Patterns with Other Design Elements

    Diamond-patterned walls pair well with:

    • Plain, unfussy furniture: The diamond pattern is doing significant visual work — furniture should be clean-lined and undecorated
    • Metallic accents: Brass, bronze, or copper pick up the warmth in walnut timber tones
    • Layered textiles: Deep-pile rugs and velvet cushions create a contrast of hard geometry against soft texture

    Geometric Panel Formats Beyond Diamonds

    If you’re drawn to the geometric vocabulary but want to explore other shapes, the GroovePanel® collection covers several distinct pattern formats: concentric squares, honey mosaic, crossing lines, and standard 3D geometric panels. Our guide to geometric wood wall panel patterns and styles compares these formats in detail.

    Installation and Ordering

    Diamond mosaic panels are installed using adhesive onto a flat, prepared wall surface. The key to a clean diamond grid is establishing true horizontal and vertical reference lines before placing any tiles. Starting from the centre of the wall and working outward ensures symmetrical margins at the edges.

    Order a sample to see the timber tone in your lighting before committing. Then explore the full range at GroovePanel® Geometric Wood Wall Panels.

  • Art Deco Wall Panels: How Geometric Patterns Bring This Iconic Style Home

    Art Deco Wall Panels: How Geometric Patterns Bring This Iconic Style Home

    Art Deco is one of the most consistently popular interior styles of the past century, and one that genuinely suits the capabilities of modern wall panelling. The style’s signature vocabulary — bold geometry, rich materials, symmetry, and dramatic contrast — is directly embodied in a well-chosen geometric wood panel. Here’s how to channel Art Deco in a contemporary home without it feeling like a period piece.

    The Art Deco Visual Language

    Art Deco emerged in the 1920s as a reaction against the organic curves of Art Nouveau. Its defining characteristics are:

    • Strong, geometric forms: chevrons, fans, sunbursts, concentric circles and squares, stepped profiles
    • Symmetry: compositions that can be divided along a central axis
    • Rich materials: lacquered surfaces, exotic timbers, brass and gold metalwork, marble
    • High contrast: dark and light materials used in close proximity
    • Vertical emphasis: proportions that feel tall and elongated

    A geometric wood wall panel hits many of these notes simultaneously — especially when the pattern is symmetrical, the timber is a rich species like walnut, and the panel is installed in a way that emphasises vertical proportion.

    The Best GroovePanel® Formats for Art Deco Interiors

    3D Concentric Square — the most directly Art Deco pattern

    The 3D Concentric Square Panel is the closest thing in the GroovePanel® range to a classic Art Deco motif. The nested squares reference the stepped architectural profiles of Chrysler Building detailing, Aztec pyramid patterns, and the sunburst motifs common in 1920s design. Installed on a chimney breast or dining room feature wall in dark walnut, it reads as explicitly Art Deco without requiring any other period detail in the room.

    Diamond mosaic from triangle panels

    A wall of Walnut Triangle Panels arranged to create diamond rows is another strong Art Deco reference. Diamond patterns appear throughout the period in tile work, textile design, and decorative metalwork. In solid walnut with a dark oil finish, the result is a surface that looks expensive and deliberately considered.

    Crossing lines as a geometric grid

    The architectural precision of the Crossing Lines Panel suits Art Deco’s love of graphic, mechanical geometry. Used as a full-height wall panel in a bathroom or hallway, with brass fittings and marble accents, it creates a 1920s luxury hotel atmosphere without any overtly period decoration.

    Material Pairings for an Art Deco Scheme

    The materials you pair with geometric wood panels determine how strongly Art Deco the room reads:

    • Brass and gold metalwork: handles, taps, light fittings, and mirror frames in brass reinforce the Art Deco palette alongside walnut timber
    • Black and white marble or stone: the high-contrast material pairing is central to Art Deco luxury — a walnut panel wall with black marble flooring is a classic combination
    • Lacquered or high-gloss surfaces: a lacquered console table or glossy cabinet against a timber panel wall creates the reflective contrast characteristic of the period
    • Deep jewel tones: emerald green, midnight blue, and burgundy upholstery work with dark walnut panel walls in a way that lighter colours don’t

    Contemporary Art Deco: How to Avoid Looking Like a Costume

    The risk with any strong historical style is that it tips from evocative to theatrical. An Art Deco-inspired room should feel like a 21st-century space that references the period rather than recreating it. Guidelines:

    • Use one strong geometric panel wall as the period reference; keep remaining walls plain
    • Mix Art Deco geometric patterns with contemporary, minimal furniture rather than period reproduction pieces
    • Keep the palette focused — walnut, brass, white, and one jewel tone is more sophisticated than a full period colour scheme
    • Let the panel be the ornament; avoid adding further period decorative accessories that can feel busy

    Art Deco in Specific Rooms

    Art Deco reads particularly well in rooms with a formal or occasion purpose — dining rooms, master bedrooms, bathrooms, and home bars. For inspiration on how geometric patterns work in these contexts, see our guides to geometric feature walls for dining rooms and geometric wall panels for bedrooms.

    Get Started

    Browse the GroovePanel® Geometric Wood Wall Panels range for solid walnut and multi-species options. Order a sample to see how the timber tone reads in your specific room. For broader geometric pattern options and styling context, read our guide to geometric wood wall panel patterns and styles.

  • 3D Wood Wall Panels for Staircase: How to Design a Statement Vertical Feature

    3D Wood Wall Panels for Staircase: How to Design a Statement Vertical Feature

    The staircase wall is one of the most visible and least utilised surfaces in a home. It travels the full height between floors, typically in a high-traffic circulation route that everyone passes multiple times a day. Yet most staircase walls are painted white and treated as background — a missed opportunity in a space that is physically prominent and visually important.

    3D wood wall panels on a staircase wall are among the most dramatic applications of the format. Here’s how to plan and execute it.

    Why 3D Panels Work Especially Well on Staircase Walls

    American Golden Acoustic Slat Wood Wall Panels | SoundPanel®.

    Three characteristics of staircase spaces make them particularly suited to 3D geometric wood panels:

    Raking light from above

    Staircases often have a skylight, clerestory window, or upper-floor window at the top of the flight. This means natural light travels down and across the staircase wall at a raking angle — exactly the lighting condition that maximises the shadow definition on a 3D panel. The shadow lines on a concentric square or geometric relief panel change as you move up or down the stairs, making the installation dynamic rather than static.

    Height provides full-panel scale

    A staircase wall typically runs from ground floor to first floor level — 2.5 to 4 metres of continuous height. This scale allows a 3D panel installation to read at its intended proportion. Single-storey rooms often feel too confined for the full height potential of geometric panels; a staircase wall gives you the height to treat the panels as true architectural elements.

    It’s a viewing experience with movement

    You don’t stand stationary in front of a staircase wall — you move alongside it as you ascend or descend. This motion creates a parallax effect with 3D panels: the shadow lines and depth cues of the panel appear to shift as your viewpoint changes. It’s an experience you can’t replicate with flat panels or painted finishes.

    Pattern Options for Staircase Walls

    3D Geometric Pattern Panel — the most versatile

    The 3D Geometric Pattern Wooden Panel is the most broadly applicable choice for a staircase. Its relief geometry creates strong shadow definition across the full wall height without requiring the precise centring that concentric square patterns demand.

    3D Concentric Square — best on a landing or feature section

    The 3D Concentric Square Panel works best when you can view it from a fixed vantage point. On a staircase, this makes it ideal for the landing wall — the vertical surface at the top or bottom of the flight where you arrive and pause — rather than the sloped wall running alongside the stairs. The concentric pattern works as a focal point when viewed straight-on.

    Crossing Lines — for a cleaner, contemporary staircase

    The Crossing Lines Panel is the most architectural choice — a regular grid that creates a strong pattern without the directional movement of triangle mosaics or the dramatic depth of the concentric square. In a contemporary house with a floating staircase and minimal balustrade, crossing lines panels on the staircase wall continue the architectural language of the space.

    Planning a Staircase Panel Installation

    Decide on the full wall vs accent sections

    You can panel the entire staircase wall from floor to ceiling (most impactful), or create a banded installation — for example, panelling only the section between dado and ceiling, or creating a rectangular feature panel on the landing wall. Full-wall installations are more cohesive; partial installations can feel indecisive if not carefully bounded.

    Handle the raked ceiling junction

    On a sloped staircase wall, the top edge of the panel installation needs to follow either the slope of the staircase or a horizontal line. Following the horizontal ceiling is typically cleaner architecturally; following the slope requires additional cuts at the top edge of each panel row. Decide this in advance — it affects panel quantity calculations and cutting time.

    Cutting around balustrade posts

    If your staircase has a balustrade with fixed posts or newels, you’ll need to cut panels to fit around them. For solid wood mosaic tiles, this requires a jigsaw or oscillating multi-tool. For the 3D geometric format, it requires careful marking and routing to maintain the relief profile at cut edges.

    Quantity and Ordering

    Staircase walls are often trapezoidal or irregular in shape. Measure the total wall area in square metres and add at least 15% for cuts and waste — more if the wall is significantly irregular. Use our guide to how many wall panels you need for a systematic calculation method.

    For broader staircase design ideas including non-3D formats, read our guide to wall paneling ideas for staircase.

    Browse the 3D Range

    All 3D geometric formats are in the GroovePanel® Geometric Wood Wall Panels collection. Order a sample to hold against your staircase wall and check how the shadow effect reads in your specific lighting before ordering. For general 3D panel guidance, see our pillar guide to 3D wall panels.