Tag: Interior Design

  • Office Fit-Out Wall Panels: A Specification Guide for Commercial Interiors

    Office Fit-Out Wall Panels: A Specification Guide for Commercial Interiors

    The office fit-out market has changed dramatically since 2020. The shift to hybrid working, the need to make office environments attractive enough to draw employees in voluntarily, and the influence of hospitality-led design on workplace aesthetics have combined to raise the specification quality of office interiors significantly.

    Wall panels are a beneficiary of this shift. Where painted plasterboard was the default wall finish in most Cat B office fit-outs a decade ago, designers are now specifying wall panels across reception areas, meeting rooms, collaboration zones, and even open-plan floor plates as a way of creating environments that feel designed rather than functional.

    Cat A vs Cat B: Where Panels Fit in the Office Fit-Out Sequence

    In commercial leasing, Cat A fit-out refers to the base level of finish provided by the landlord — typically raised floors, suspended ceilings, mechanical and electrical services, and white-box walls. Cat B is the tenant’s fit-out — the transformation of the white box into a working office that reflects the occupier’s brand, culture, and ways of working.

    Wall panels are almost always a Cat B specification. They’re installed by the tenant’s fit-out contractor into the completed Cat A shell, which means the substrate (typically plasterboard) is known, level, and ready to receive adhesive.

    Acoustic Performance: The Critical Specification Requirement

    Acoustic comfort is consistently the most cited workplace dissatisfaction factor in post-occupancy surveys of open-plan offices. Unwanted speech from nearby colleagues, poor speech intelligibility in meeting rooms, and high ambient noise levels on open-plan floors all directly affect productivity and wellbeing.

    Acoustic slat panels from the SoundPanel™ range contribute measurably to reducing reverberation time on office floor plates. For meeting rooms and phone pods, acoustic panels on wall surfaces are an important part of creating a space where speech is clear and private conversations stay private.

    Reception and Brand Environment

    The reception area is where company culture and brand values are expressed physically. A reception with a feature wall in GroovePanel® solid wood or RockSurface® stone effect panels communicates quality and investment in the workplace environment. For clients and visitors, the quality of the reception finish is a direct signal about the organisation they’re visiting.

    Installation During a Live Fit-Out Programme

    Office fit-outs typically run to tight programmes. Panel installation is usually one of the final trades on programme, installed after partitioning, MEP second fix, and floor finishes are complete. This means panels need to be on-site and ready to install at the right moment in the programme — not held up by long lead times or supply issues.

    Confirm stock availability and delivery lead times with The Panel Hub at the point of specification, not at the point of order. For large-volume office fit-outs, it’s advisable to place a confirmed order ahead of the installation window to secure stock.

    Office Wall Panel Specification from The Panel Hub

    The Panel Hub supplies SoundPanel™ acoustic panels, GroovePanel® solid wood panels, and RockSurface® stone effect panels for office fit-out projects. Contact the trade team to discuss your project requirements, programme dates, and technical specifications.
  • MDF Wall Panels vs Solid Wood: Which Is Worth the Investment?

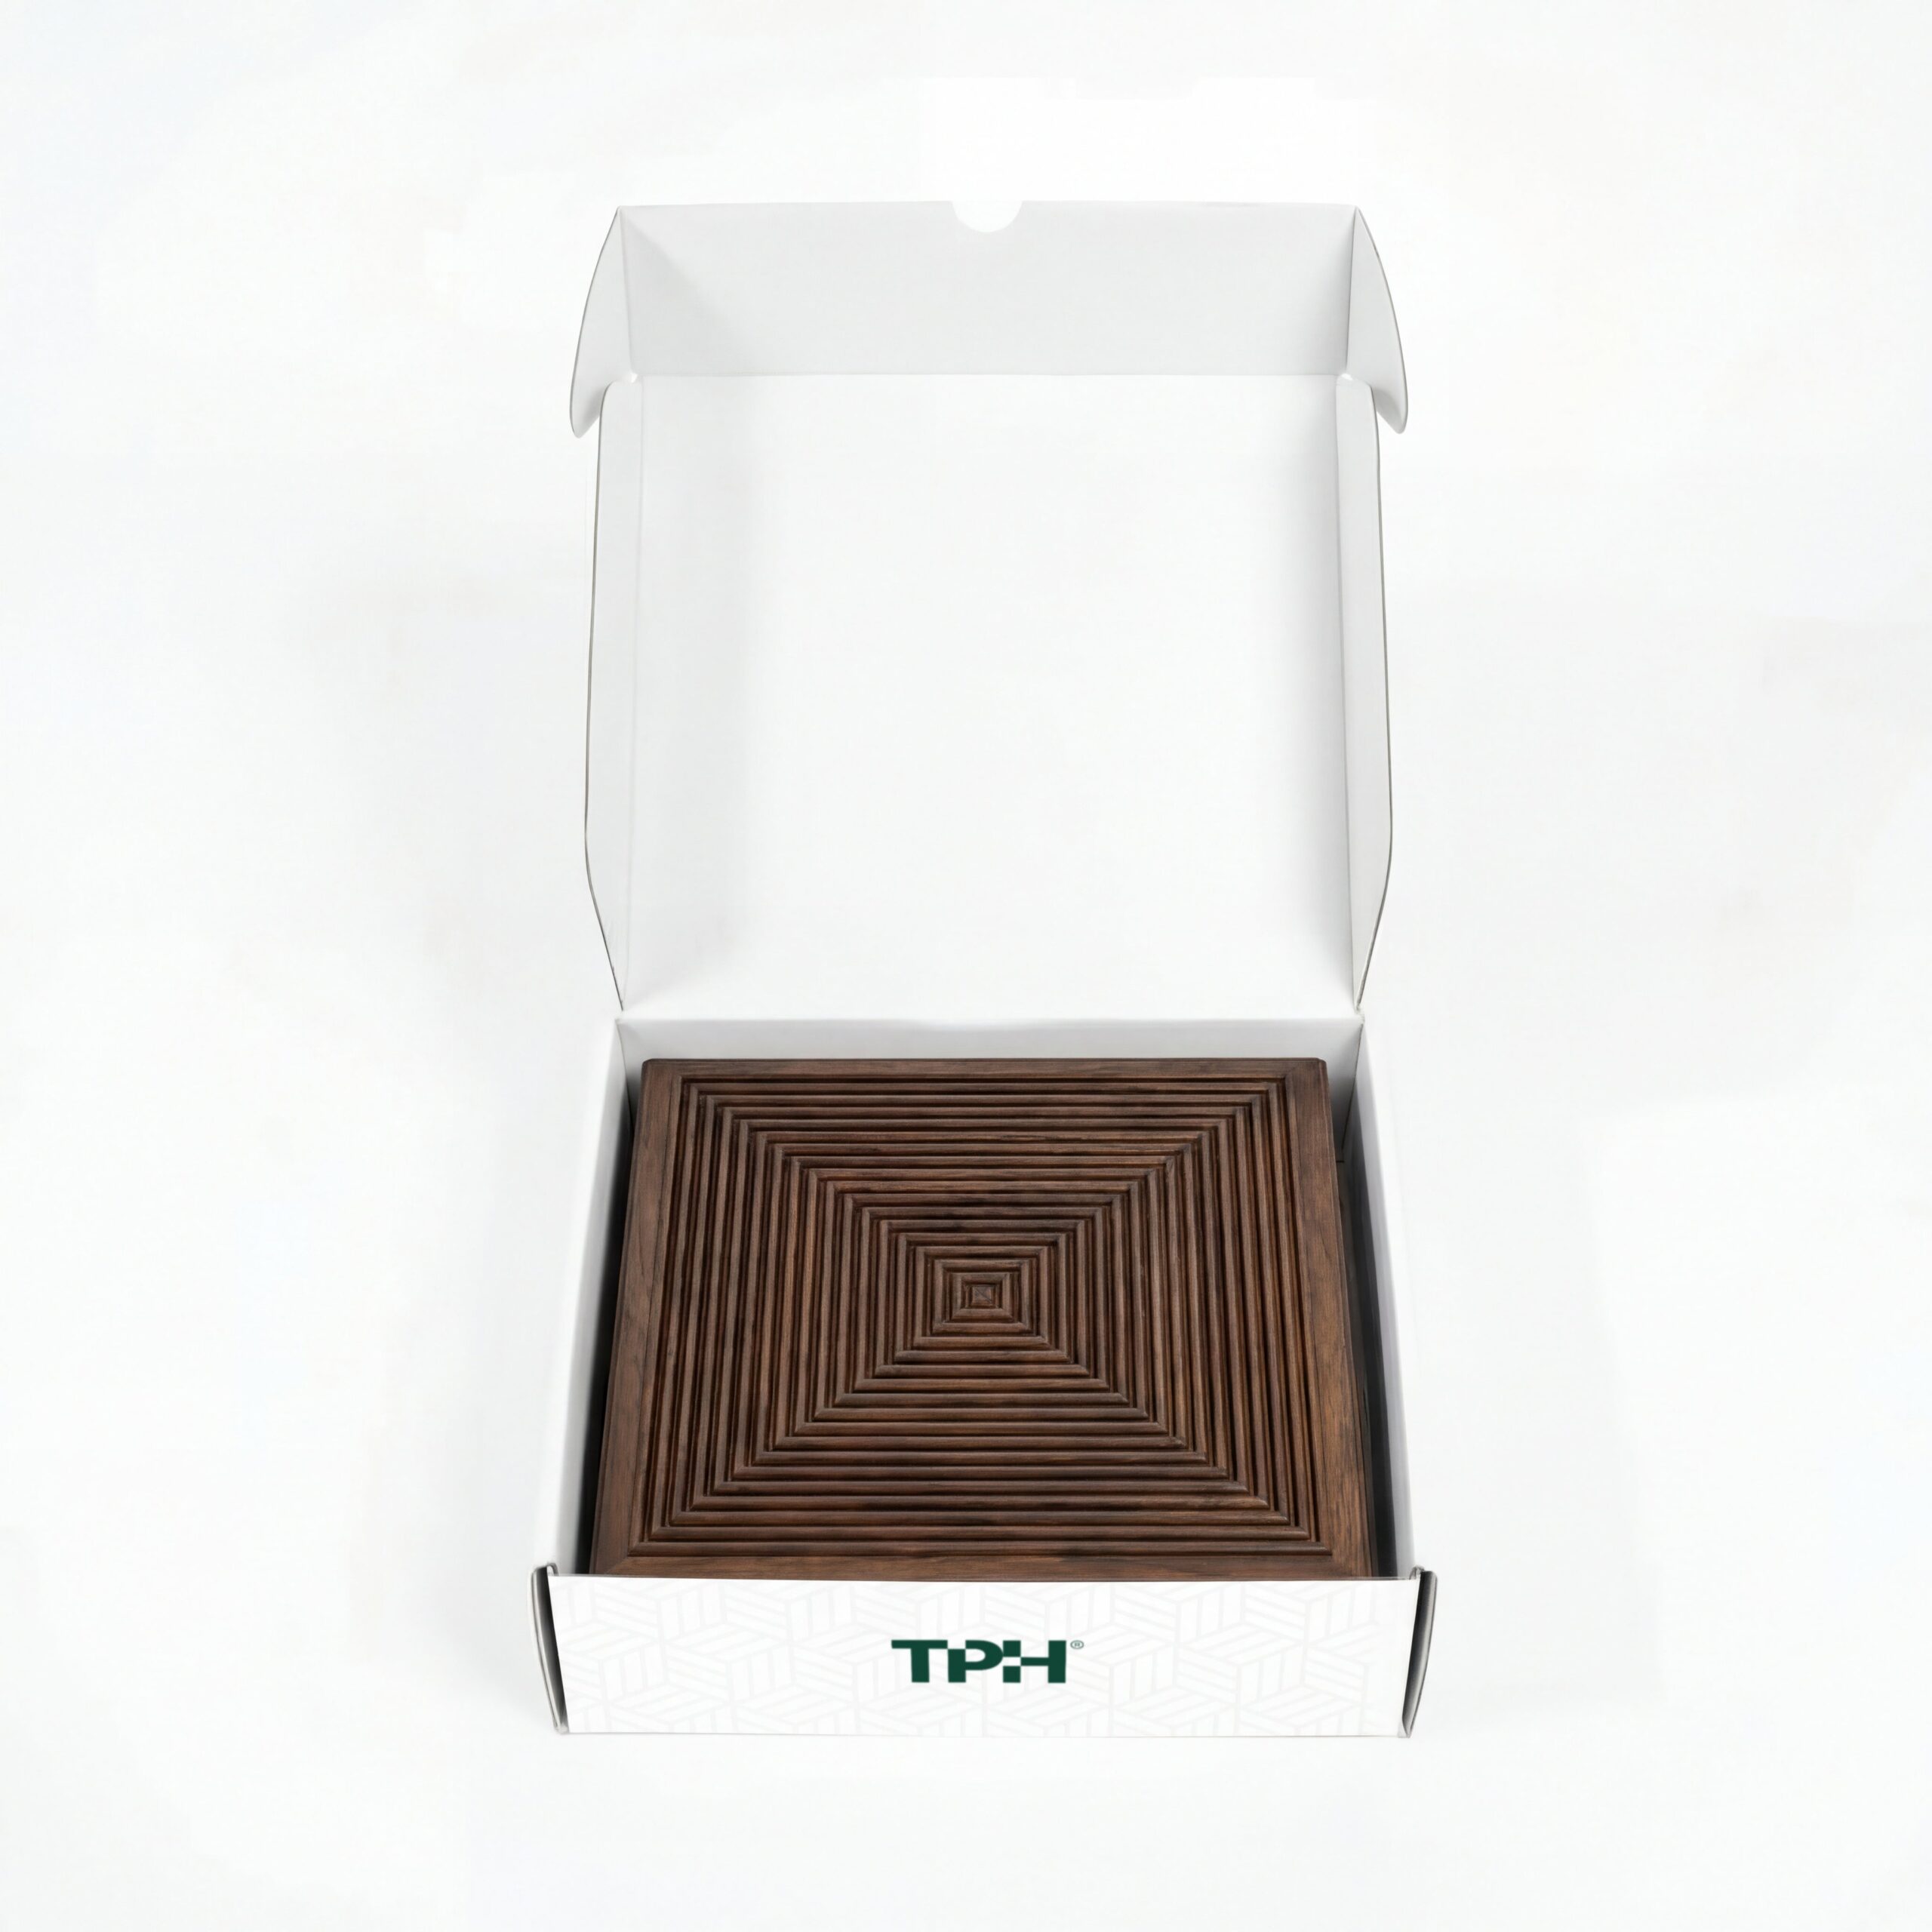
    MDF Wall Panels vs Solid Wood: Which Is Worth the Investment?

    MDF (Medium Density Fibreboard) and solid wood are the two primary substrate options for wood wall panels. Both can deliver excellent results. Both have genuine weaknesses. The choice between them matters — not just for budget, but for durability, appearance, environmental impact, and long-term performance in your specific application.

    What Is MDF and What Is Solid Wood?

    MDF Wall Panels

    MDF is an engineered wood product made from wood fibres, resin, and wax compressed under high pressure and heat. It’s dimensionally stable — it doesn’t expand, contract, or warp the way solid timber does — and has a smooth, consistent surface that takes paint, veneer, and surface finishes well. Most painted or foil-wrapped wall panels use MDF cores.

    Solid Wood Panels

    Solid wood panels use real timber — often oak, pine, walnut, or other hardwoods — as the primary material. The GroovePanel® and SoundPanel™ ranges from The Panel Hub use solid wood construction. Real wood brings visible grain, natural colour variation, and authentic warmth that engineered materials cannot replicate.

    Appearance and Finish

    Solid wood has the advantage for visible grain and natural authenticity. The grain, knots, colour shifts, and texture of real timber create a surface that looks and feels genuinely organic. In slat and fluted profiles, the grain of real wood creates visual depth that printed or foil-wrapped MDF cannot match.

    MDF has the advantage for painted finishes. Its smooth, consistent surface provides a flawless base for paint — no grain telegraphing through the finish. For painted panel applications, MDF is often the better material choice.

    Durability

    Solid wood is more durable in general use. It’s harder to dent, holds fixings well, and can be sanded and refinished if damaged. Solid wood panels, with appropriate maintenance, can last decades.

    MDF is less impact-resistant and has a critical weakness: moisture. MDF swells and disintegrates when exposed to sustained moisture. For bathroom or kitchen applications, only moisture-resistant (MR) MDF cores should be specified, and even then direct water exposure should be avoided.

    Cost

    MDF panels are generally less expensive than solid wood panels of equivalent dimensions. For painted applications where the material character isn’t visible in the final finish, MDF offers good value. For applications where the natural wood surface is part of the design — stained, oiled, or natural finishes — solid wood delivers an appearance that MDF cannot replicate.

    Environmental Considerations

    Solid wood from certified sustainable sources (FSC or PEFC) is renewable and stores carbon. MDF uses wood waste fibres but the resin binders are synthetic and typically non-recyclable. Look for certification claims when evaluating any wood panel product.

    Which Should You Choose?

    • Choose solid wood if natural grain and material character are important, if long-term durability is a priority, or if the application is in a dry environment where solid wood’s properties are best preserved.
    • Choose MDF if you’re painting the panels, if cost is the primary constraint, or if the application is in a dry interior environment where MDF’s moisture weakness is not a factor.

    For solid wood wall panels that deliver genuine material quality, explore the GroovePanel® and SoundPanel™ collections at The Panel Hub.

  • How to Order Wall Panel Samples: A Specifier’s Checklist

    How to Order Wall Panel Samples: A Specifier’s Checklist

    Specifying wall panels without physical samples is one of the most common and costly mistakes in interior design and fit-out projects. Digital images, product photography, and online swatches cannot replicate the way a panel performs in your specific space — under your lighting conditions, against your floor and furniture, and at the scale it will actually appear on the wall.

    This checklist is for designers, architects, and specifiers who want to make confident panel decisions based on real material evidence rather than screen approximations.

    Why Samples Are Non-Negotiable

    Three things about wall panels cannot be reliably assessed from digital images:

    • Colour temperature: Wood panel finishes shift significantly under different light sources. A warm oak that looks golden under the photography studio’s warm lights can look grey and flat in a north-facing room. A stone effect panel that looks grey online may have warm beige undertones in your actual lighting conditions.
    • Surface texture and depth: The three-dimensional quality of fluted, slat, and stone-effect panels — the way light plays across the relief — cannot be conveyed in a photograph. The depth and character of the texture only becomes apparent when you hold the sample at different angles under your lighting conditions.
    • Scale and proportion: Individual slat widths, groove depths, and stone face sizes read very differently at the scale of a sample versus the scale of a full wall. A profile that looks fine in a hand-held sample can look very different when you visualise it at 2.4 metres high across a wall.

    What to Request When Ordering Samples

    When requesting samples from The Panel Hub, provide enough information for the team to send the most useful selection:

    • The room type (bedroom, living room, commercial reception, etc.)
    • The wall dimensions and the approximate area of panel coverage planned
    • The existing or planned floor finish and its colour/tone
    • The primary light source (natural light direction, artificial light colour temperature)
    • Any existing materials the panel needs to coordinate with (furniture finishes, flooring, other wall materials)
    • Whether aesthetic, acoustic, or stone-effect products are the primary interest

    How to Assess Samples Properly

    Assess in the Actual Space

    Take samples to the space where the panels will be installed, not your office or studio. Hold the sample against the wall and assess it at the time of day when the room is typically used. A bedroom panel should be assessed in morning and evening light; an office panel should be assessed under the planned artificial lighting.

    Assess Against Other Materials

    Hold the sample next to your flooring, furniture swatches, and other material samples. The panel needs to work with the surrounding palette, not just look good in isolation.

    Assess at Scale

    Order the largest sample available for any product you’re seriously considering. A full panel or a large section gives you a much more accurate sense of how the slat spacing, grain character, and colour variation will read at wall scale.

    From Sample to Specification: The Next Steps

    Once you’ve identified the right panel from samples, the specification process involves:

    • Confirming the product reference, finish, and dimensions
    • Calculating the area to be covered and applying a 10–15% wastage allowance
    • Confirming lead time, stock availability, and delivery requirements
    • Obtaining any required technical documentation — fire test certificates, acoustic performance data, installation data sheets

    The full wall panel range and stone effect panels from The Panel Hub are available for sampling. Contact the team to request the samples you need for your current projects.

  • How to Clean and Maintain Faux Stone Wall Panels

    How to Clean and Maintain Faux Stone Wall Panels

    One of the underappreciated advantages of faux stone wall panels over real stone is maintenance. Natural stone — particularly porous varieties like limestone and sandstone — requires regular sealing, careful cleaning product selection, and ongoing attention to prevent staining and biological growth. Faux stone panels are significantly more forgiving.

    That said, “low maintenance” doesn’t mean “no maintenance.” This guide covers what routine care looks like, how to handle staining, and what to avoid to keep faux stone panels looking their best over the long term.

    Routine Cleaning

    • Dust regularly: Use a soft brush, vacuum with a brush attachment, or a dry microfibre cloth. The textured surface of stone panels accumulates dust more readily than flat walls.
    • Wipe down periodically: A lightly damp cloth with warm water handles most marks and general cleaning. Wipe in the direction of the panel texture rather than against it.
    • Mild detergent for marks: A small amount of washing-up liquid in warm water handles most household marks. Apply with a soft cloth, work gently, and rinse with clean water.

    Dealing with Stains

    Grease and Kitchen Splatter

    In kitchen applications, a degreasing spray applied to a soft cloth — rather than directly to the panel — works effectively. Avoid spraying cleaning products directly into deep-relief textured surfaces as residue can accumulate in recesses.

    Mould and Mildew

    In bathrooms or humid environments, surface mould can develop in panel recesses if ventilation is poor. A solution of 1 part white vinegar to 3 parts water, applied with a soft brush and left for 10 minutes before rinsing, handles most surface mould. For persistent mould, a specialist bathroom cleaner suitable for the panel material may be required.

    Scuffs and Impact Marks

    The three-dimensional surface of stone-effect panels is naturally resistant to scuffing because impact is spread across the relief. Minor scuffs can often be concealed using a stone touch-up pen or paint matched to the panel colour.

    What to Avoid

    • Abrasive cleaners or pads: Scouring pads and abrasive cleaning powders scratch the panel surface and damage the finish permanently.
    • Solvent-based cleaners: Acetone, bleach at high concentrations, and solvent-based cleaners can strip the surface finish. Test any unfamiliar product on an inconspicuous area first.
    • High-pressure washing: For exterior panels, high-pressure washing can force water behind panels or damage adhesive bonds. Use a standard garden hose and soft brush instead.
    • Steam cleaning: High-temperature steam can affect adhesive bonds and panel finishes.

    Long-Term Care Schedule

    • Weekly: Dust or wipe with a dry cloth in high-use areas such as kitchens and bathrooms
    • Monthly: Damp wipe with mild detergent solution
    • Annually: Inspect for any loose panels; re-seal if recommended by the manufacturer

    For product-specific maintenance guidance, contact The Panel Hub directly. The team can advise on the best approach for your specific RockSurface® panels.

  • 3D Stone Effect Wall Panels: How Depth and Shadow Transform a Surface

    3D Stone Effect Wall Panels: How Depth and Shadow Transform a Surface

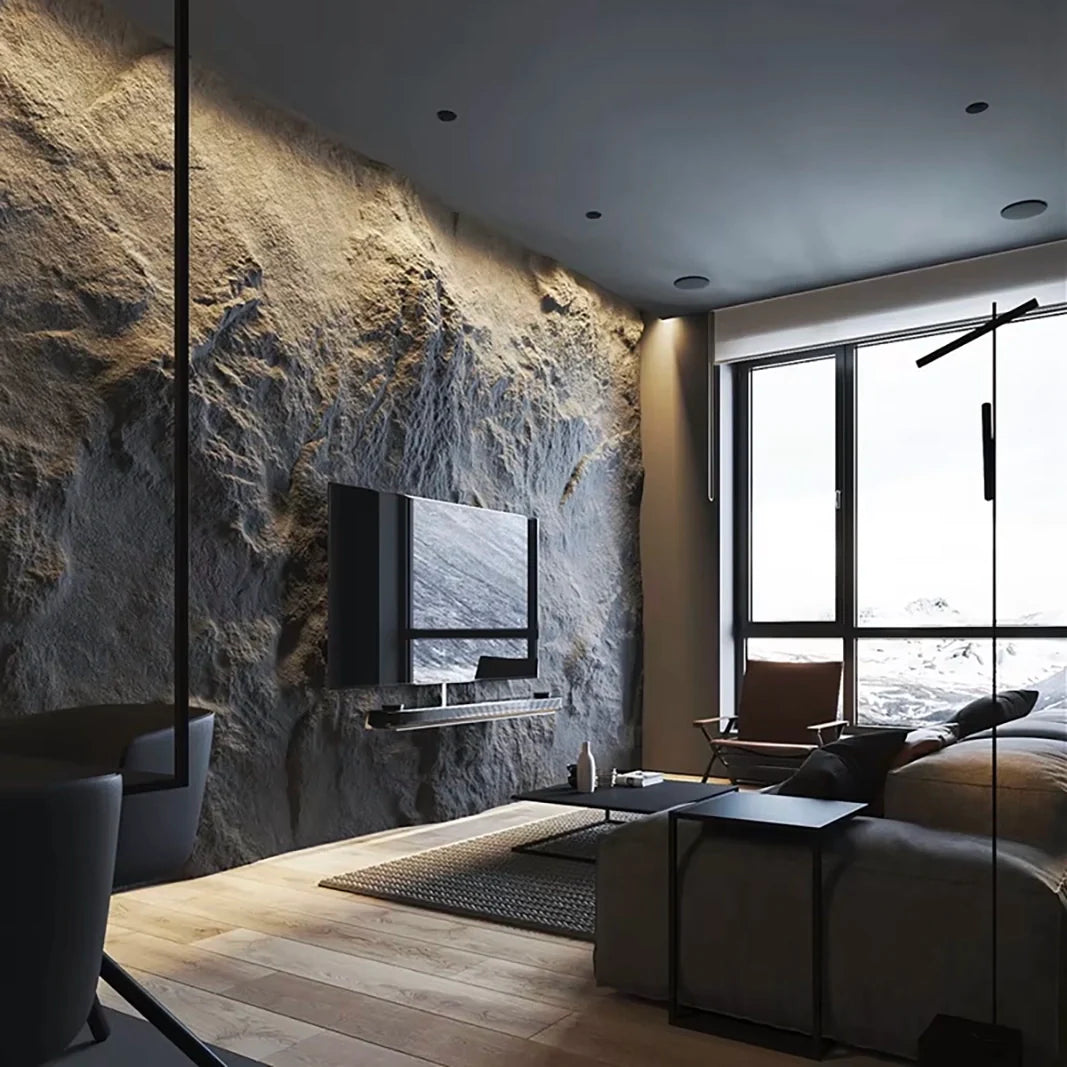
    A flat stone surface is attractive. A three-dimensional stone surface is arresting. The difference is what happens when light strikes the wall — on a flat panel, light reflects uniformly. On a 3D stone effect panel, light catches the raised surfaces, falls into the recesses, and creates an ever-shifting pattern of highlight and shadow that changes as the light source moves.

    This is why 3D stone effect wall panels have become a feature in high-end residential and commercial interiors. The surface actively engages with the room’s lighting conditions, producing a result that cannot be achieved by any flat material, however realistic its finish.

    The Science Behind the Effect

    3D stone panels use moulded relief — raised and recessed elements across the surface — to create depth. The depth of this relief varies: shallow relief creates a subtle undulation that reads as texture from a distance, while deep relief creates pronounced shadow lines and a sculptural quality visible from across the room.

    The most effective 3D stone panels derive their surface geometry from casts of actual stone samples. The natural irregularity of real stone — no two faces exactly the same, no perfectly straight edges — translates into a finished panel that reads as genuinely organic rather than manufactured.

    Lighting 3D Stone Panels for Maximum Effect

    Grazing Light

    Light positioned to graze across the surface — wall-mounted luminaires, directional spots at a low angle — catches the leading edges of the relief and throws the recesses into deep shadow. This is the most dramatic lighting approach for 3D stone and works particularly well in dining rooms, bars, and bedrooms.

    Warm vs Cool Light

    Warm white light (2700–3000K) brings out warm undertones in natural stone finishes and creates an intimate effect. Cool white light (4000K+) emphasises the sculptural quality of the relief and creates a crisper, more contemporary result. Choose based on the atmosphere you’re creating.

    Avoiding Flat Overhead Lighting

    Ceiling-mounted downlights directly above a 3D stone panel are the least effective lighting choice — they illuminate from above without creating the lateral shadows that reveal the relief. Supplement downlights with wall-mounted fittings to bring out the texture.

    Where 3D Stone Effect Panels Work Best

    Living Rooms and Dining Rooms

    The changing light conditions across a day mean a 3D stone feature wall looks different at every time of day. The surface is engaging without being distracting — it rewards close attention without demanding it.

    Fireplace Surrounds

    The dancing light from an open fire is particularly effective against a 3D stone surface. The irregular reflection creates a warm, organic effect that flat surfaces cannot replicate.

    Commercial Spaces: Bars, Hotels, Restaurants

    3D stone panels are extensively used in hospitality design. The textured surface provides acoustic benefit — broken surfaces scatter sound rather than reflecting it flatly — and creates atmosphere that flat walls cannot match. The controlled, directional lighting typical of hospitality environments brings out 3D stone at its best.

    3D Stone Effect Panels from The Panel Hub

    The Panel Hub stocks the RockSurface® 3D stone effect panel collection in multiple tones and relief depths. Request a sample to assess how the relief performs in your specific lighting conditions before placing your order.

  • Acoustic Wall Panel Specification: What Architects and Designers Need to Know

    Acoustic Wall Panel Specification: What Architects and Designers Need to Know

    For some buyers, checking on acoustic wall panel specification is an important step before buying. Acoustic wall panels are increasingly specified across residential, commercial, and hospitality projects — not just in recording studios and auditoria. The growing awareness that open-plan living, hard flooring, and glass surfaces create acoustically uncomfortable spaces has driven demand for attractive acoustic treatment that integrates with interior design rather than compromising it.

    For architects and designers specifying acoustic wall panels, understanding the performance metrics, their limitations, and how to integrate them into a specification is essential for delivering projects that meet acoustic targets as well as aesthetic ones.

    Understanding Sound Absorption Metrics

    NRC (Noise Reduction Coefficient)

    NRC is the most commonly cited acoustic performance metric for wall panels. It expresses the average sound absorption of a material across the frequency range 250Hz–2000Hz on a scale of 0 (perfect reflection) to 1.0 (perfect absorption). An acoustic panel with an NRC of 0.65, for example, absorbs 65% of incident sound energy across that frequency range.

    αw (Weighted Sound Absorption Coefficient)

    The European equivalent metric, αw, is calculated differently and expressed as a single number (0 to 1.0) with an application class suffix (A, B, C, D, E, or F) that indicates the shape of the absorption curve. For most commercial acoustic specifications in UK projects, both NRC and αw values are relevant — verify which standard your project’s acoustic consultant is using.

    Where Acoustic Panels Make the Most Impact

    Open-Plan Offices and Co-Working Spaces

    Reverberation times in open-plan offices directly affect speech intelligibility and cognitive performance. Research consistently shows that reducing reverberation in open-plan workspaces improves concentration, reduces perceived noise levels, and lowers stress. Acoustic wall panels on the perimeter walls of open-plan floors contribute significantly to reducing reverberation time (RT60).

    Hospitality: Restaurants, Bars, and Hotel Lobbies

    The “restaurant noise problem” — an open-plan dining environment with hard surfaces creating a loud, fatiguing experience — is a well-documented design challenge. Acoustic treatment on wall surfaces reduces the background noise level and improves the dining experience. The SoundPanel™ range provides an acoustic solution that’s also a premium visual feature.

    Residential Open-Plan Living

    The open-plan kitchen-dining-living room is acoustically one of the worst domestic environments. Hard flooring, hard kitchen surfaces, and the absence of soft furnishings in circulation zones create reflective rooms where conversation is tiring and television is too loud. A single acoustic panel feature wall can measurably improve the acoustic comfort of an open-plan residential space.

    How Much Coverage Is Needed?

    Acoustic panels don’t need to cover every wall surface to be effective. As a rule of thumb, covering 20–30% of the total wall and ceiling surface area with acoustic-rated material (NRC 0.5 or above) typically achieves a meaningful reduction in reverberation time in a typical room. Your acoustic consultant can calculate the specific coverage required to meet a target RT60 for any given space.

    Integrating Acoustic Panels into the Specification

    Acoustic slat panels from the SoundPanel™ range are designed to be specified as primary wall surface materials, not as add-on acoustic treatment. They install the same way as standard wall panels — adhesive to a prepared substrate, no specialist acoustic contractor required — and provide acoustic performance alongside the visual quality expected of a premium wall finish.

    Request acoustic test data, including NRC or αw values and the test standard used, or bulk order wood wall panels from The Panel Hub!

  • FF&E Wall Panels: How to Specify Finishes for Project Schedules

    FF&E Wall Panels: How to Specify Finishes for Project Schedules

    In the language of commercial interior design and project management, FF&E — Furniture, Fixtures and Equipment — covers the moveable and semi-permanent elements specified separately from the base building. Wall panels occupy a grey area in many project specifications: they’re not furniture, they’re not structural, and depending on the project scope, they may be classified as either FF&E or a finishes item within the base build.

    Getting this classification right, and specifying wall panels correctly within a project schedule, affects procurement timelines, installation sequencing, and the allocation of responsibility between the main contractor and the FF&E contractor.

    FF&E vs Base Build: Where Do Wall Panels Sit?

    In most commercial and hospitality projects, the distinction is straightforward:

    • Base build wall finishes (plaster, paint, standard tiling) are specified in the architect’s package and installed by the main contractor during the construction phase.
    • FF&E wall panels (decorative wall panels, acoustic panels, feature wall panels) are typically specified in the interior designer’s package and installed during the fit-out phase, after the base build is complete.

    The practical implication is that FF&E wall panels are installed after the main construction trades have finished — into a completed space, without the structural access and wet trade flexibility of the construction phase. This makes the installation method, substrate condition, and lead time particularly important considerations.

    Lead Times: Planning Your Panel Specification

    For commercial projects with fixed programme dates, lead time is a critical factor in material selection. The Panel Hub maintains stock of the most popular products in the GroovePanel®, SoundPanel™, and RockSurface® ranges for shorter lead times. For large-volume orders or non-standard finishes, confirm availability and lead time before locking the specification into the programme.

    Writing the Panel Specification

    A complete wall panel specification for an FF&E schedule should include:

    • Product name, reference, and finish description
    • Panel dimensions and coverage per panel
    • Total area to be covered (m²) with wastage allowance
    • Substrate specification (what the panel is to be fixed to)
    • Installation method (adhesive type, mechanical fixing if required)
    • Fire classification required and confirmation of product certification
    • Acoustic performance requirement (if applicable)
    • Maintenance and cleaning requirements for handover documentation

    Batch Consistency for Multi-Room and Multi-Property Projects

    For hospitality projects specifying the same panel across multiple rooms or multiple properties, batch consistency is a critical quality control issue. Natural wood products vary between production batches — colour, grain character, and finish tone can shift subtly between orders. For projects requiring consistent appearance across multiple units, confirm with the supplier whether panels can be ordered in a single batch, and what the maximum batch size is for the specified product.

    Working with The Panel Hub on FF&E Projects

    The Panel Hub works with interior designers, FF&E consultants, and hospitality procurement teams on commercial projects. Contact the trade team to discuss project volumes, lead times, and technical requirements before your specification is finalised.

  • Faux Stone vs Real Stone Cladding: Cost, Weight and Installation Compared

    Faux Stone vs Real Stone Cladding: Cost, Weight and Installation Compared

    The case for faux stone cladding has never been stronger. Advances in moulding technology, surface finishing, and composite materials mean that the gap between high-quality faux stone panels and natural stone cladding has narrowed considerably. In most residential and many commercial applications, the practical arguments now favour faux stone decisively. This guide covers how faux stone compares to real stone.

    Weight: The Most Consequential Difference

    Natural stone cladding is heavy. Depending on the stone type, it weighs 50–100kg per square metre. This has significant structural implications:

    • Most standard residential wall construction cannot support natural stone cladding without reinforcement
    • Structural assessment and often a structural engineer’s sign-off is required before installation
    • Installation requires specialist fixings, mechanical anchors, and in many cases a structural ledger at floor level to bear the load

    High-quality faux stone panels weigh 8–15kg per square metre. They can be fixed to standard plasterboard, masonry, or even existing tiled surfaces using adhesive alone — no structural assessment required for most applications.

    Cost: A Clear Advantage for Faux Stone

    The material cost difference between faux stone and real stone varies by stone type, but for comparable quality finishes, faux stone panels typically cost 30–50% of the material cost of real stone. Add the installation cost difference — faux stone requires no structural preparation, specialist fixings, or a stonemason — and the total installed cost of faux stone is typically 20–40% of equivalent natural stone.

    For a typical 10m² feature wall, the saving can be £2,000–£5,000 compared to a real stone installation.

    Installation: Accessible vs Specialist

    Real stone installation is a specialist trade requiring a stonemason, specialist tools, structural preparation, and typically several days of work for a room-scale installation.

    Faux stone panel installation is accessible to any competent DIYer or general contractor. The basic process — prepare the substrate, apply adhesive, fix panels, finish edges — can be completed in a day for most room-scale applications.

    Appearance: How Close Is Close Enough?

    At a distance of more than 1–2 metres, high-quality faux stone panels are visually indistinguishable from real stone to most observers. The colour variation, surface texture, and three-dimensional relief of premium panels replicate the natural variation of real stone convincingly.

    At very close range — an arm’s length — a careful observer can distinguish faux from real. For most interior applications this is irrelevant. Nobody inspects a feature wall at arm’s length.

    Durability and Maintenance

    Real stone has an exceptional lifespan — centuries in well-maintained buildings. However, many natural stones are porous and require regular sealing and careful maintenance to prevent staining and biological growth.

    Quality faux stone panels have a projected lifespan of 15–25 years in interior applications and are significantly less demanding in maintenance — wipeable with standard household cleaners, no specialist sealants required.

    When Real Stone Is Still the Right Choice

    There are applications where real stone remains the best specification: heritage properties where material authenticity is required, exterior applications demanding multi-decade lifespan, and prestige projects where the weight, feel, and genuine provenance of natural stone are part of the brief.

    For most residential and commercial applications, however, the weight, cost, and installation advantages of faux stone panels make them the practical choice. Browse the RockSurface® collection at The Panel Hub and request samples to assess the finish in your own space.

  • Faux Stone Panels vs Wallpaper: Which Is the Better Alternative to Real Stone?

    Faux Stone Panels vs Wallpaper: Which Is the Better Alternative to Real Stone?

    When the goal is replicating the look of stone without using real stone, two options compete for the same customer: faux stone wall panels and stone-effect wallpaper. Both are widely available, both claim to deliver the aesthetic of natural stone, and both cost significantly less than a real stone installation. But they’re not interchangeable — they perform differently in almost every practical category.

    Appearance: Which Looks More Like Real Stone?

    High-quality faux stone panels, particularly textured 3D relief panels, have a significant realism advantage. The physical depth of the panel surface — raised edges, shadow lines, and irregular planes — creates a dimensional effect that printed wallpaper cannot replicate. At close range, stone wallpaper is clearly flat. At close range, a quality stone effect panel is genuinely convincing.

    Stone wallpaper has improved considerably and high-end options now incorporate embossing for some texture. But the depth of embossing in even the best wallpaper is measured in fractions of a millimetre. The relief in a quality stone panel is measured in centimetres — a fundamentally different visual proposition.

    Durability: Which Lasts Longer?

    Stone effect wall panels have a clear durability advantage. A quality panel is resistant to knocks, moisture, and everyday wear. It won’t peel, bubble, tear, or fade with UV exposure. In high-traffic areas — hallways, kitchens, commercial environments — panels will outlast wallpaper by years.

    Wallpaper is vulnerable to moisture, particularly at seams and edges. It tears, scuffs, and requires replacement if damaged. In rooms with high humidity, stone wallpaper is a short-term solution.

    Installation: Which Is Easier?

    Wallpaper installation is a well-understood skill — straightforward for experienced decorators. Large panels of stone wallpaper are more challenging to hang than standard wallpaper due to size and weight, but the basic technique is unchanged.

    Stone effect panels require substrate preparation — the surface must be flat, dry, and sound — but the installation is clean and permanent. Once fixed, panels don’t require finishing, painting, or sealing. Total time investment for similar areas is comparable.

    Cost: Which Is More Affordable?

    Stone effect wallpaper generally has a lower initial material cost. However, wallpaper needs to be replaced — sometimes within a few years in demanding environments — while panels are a once-and-done investment. Over a ten-year period in a typical residential application, the total cost of ownership often favours panels.

    For commercial environments where walls take heavy use, the durability advantage of panels makes them the more cost-effective choice from the outset.

    Maintenance: Which Is Lower Maintenance?

    Stone effect panels win on maintenance. They can be wiped clean, are resistant to most household cleaning products, and don’t require re-pasting or replacing when marked. Wallpaper marks, tears, and peels — and when a single section is damaged, the entire wall often needs replacement to maintain a consistent appearance.

    The Verdict: When to Choose Each

    • Choose faux stone panels if you want a finish that’s genuinely three-dimensional, durable, and low-maintenance — particularly in high-traffic areas, wet environments, or commercial spaces.
    • Choose stone wallpaper if budget is the primary constraint, the application is in a low-traffic area, or you want flexibility to change the look in a few years without structural commitment.

    Browse The Panel Hub’s full RockSurface® stone effect panel collection and request samples to compare the finish in person before making your decision.

  • Faux Stone Panel Cost Guide 2026: What to Budget

    Faux Stone Panel Cost Guide 2026: What to Budget

    Cost is one of the most common reasons buyers choose faux stone panels over real stone cladding. But “how much do faux stone panels cost?” is a question with several layers — material cost, installation cost, and total cost of ownership over the life of the installation all tell different stories.

    This guide breaks down what to budget for faux stone wall panels in 2026, from materials through to installation, and compares the total cost against real stone alternatives.

    Panel Material Costs

    Faux stone panel prices vary based on quality, relief depth, material composition, and brand. As a general guide for the UK market in 2026:

    • Entry-level stone-effect panels: £15–£30 per m²
    • Mid-range quality stone-effect panels: £30–£60 per m²
    • Premium 3D relief panels: £60–£120 per m²

    The most significant quality differentiators are the depth and realism of the relief texture, the range of colour variation across the surface, and the substrate material. Higher-quality panels use more detailed moulds derived from actual stone samples.

    Installation Costs

    • DIY installation: Cost of adhesive and tools only — typically £50–£100 for a standard room feature wall
    • Professional installation: £20–£40 per m² for labour, depending on complexity and location

    The total installed cost for a typical 6m² feature wall using mid-range panels is in the range of £400–£600 for DIY, or £600–£900 professionally installed.

    Hidden Costs to Account For

    • Wastage: Order 10–15% more panels than your calculated area for cuts, breakages, and future repairs
    • Adhesive: Quality adhesive appropriate for the substrate — budget £20–£40 for a feature wall
    • Substrate preparation: Filling, priming, or levelling the wall surface before installation
    • Finishing materials: Corner pieces, sealant, caulk for perimeter joints

    Faux Stone vs Real Stone: Total Cost Comparison

    For a comparable 6m² interior feature wall:

    • Faux stone panels (mid-range, professionally installed): £600–£900
    • Natural stone cladding (basic, professionally installed): £1,500–£3,000+, depending on stone type and structural requirements

    The saving from faux stone panels is typically 50–80% of the equivalent real stone installation cost. For large-scale applications, the saving becomes very significant.

    Getting the Best Value

    • Order samples before committing — the finish must work in your specific lighting conditions
    • Order panels in a single batch where possible — matching additional panels from later production runs can be difficult
    • Don’t compromise on adhesive quality — long-term installation performance depends on the bond between panel and substrate

    Browse the RockSurface® panel collection at The Panel Hub and request samples to assess the finish before ordering.