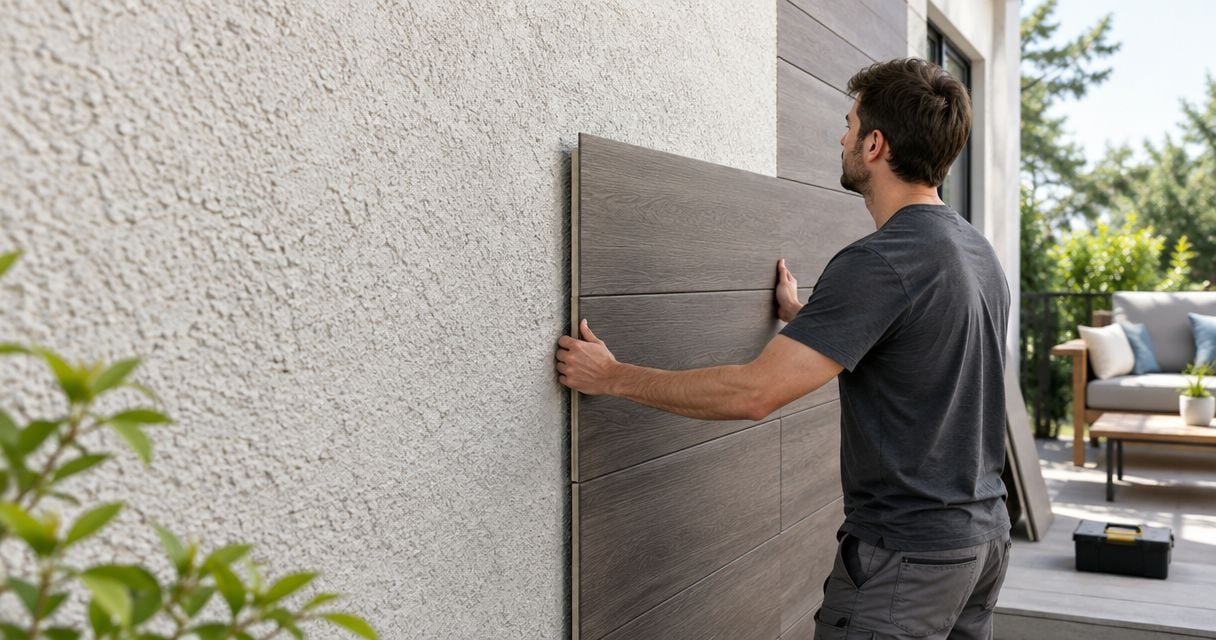
Yes, wall panels can be installed over textured stucco walls when the stucco is dry, sound, and paired with a panel-approved fixing method. Shallow texture sometimes allows direct attachment, while deep texture or an uneven wall generally needs a flat backing or securely anchored battens. The extra preparation—not the decorative panel—is what determines whether the finished wall stays straight and secure.
- Can wall panels be installed over textured stucco walls? Yes, after checking wall condition, flatness, and fixing compatibility.
- The Panel Hub acoustic wall panels suit homeowners seeking decorative sound absorption; stucco still needs a suitable mounting surface.
- Direct adhesive needs approved surface contact; deep texture often calls for a flat backing or anchored battens.
- Repair moisture problems and loose stucco before covering the wall with wood slat panels.
Can wall panels be installed over textured stucco walls?
Yes—but a textured finish is not automatically a suitable mounting surface. A secure installation depends on the condition of the stucco, the structure behind it, and the attachment instructions for your chosen panel.
Start by distinguishing texture from unevenness. Texture consists of small surface peaks and hollows; an uneven wall bows, leans, or changes plane across a wider area. The preparation differs, as explained in the guide to installing wall panels over uneven or bowed walls.
For a 2026 interior renovation, use this sequence before ordering materials:
- Identify whether the wall is cement-based stucco, textured plaster, or a textured coating over drywall.
- Check for dampness, loose material, cracks, and peeling paint.
- Check flatness with a straightedge and test the proposed panel position.
- Confirm the panel maker's approved substrate and fixing method.
- Prepare a flat, secure mounting surface where direct attachment is unsuitable.
This guidance covers interior wall paneling. Exterior stucco requires a separate assessment of weather protection, drainage, and exterior-rated cladding.
Why this matters
A panel can hide a rough wall without correcting the weakness underneath it. If adhesive bonds to loose paint or crumbling stucco, that surface layer remains the weak point holding the installation up.
Deep texture also reduces contact between a flat panel back and the wall. Pressing harder does not flatten hardened stucco; it can leave the panel rocking on high spots or force visible joints out of alignment.
Choose the mounting method before choosing the finish. That decision affects wall thickness, outlet positions, trim details, and whether you need help preparing the substrate.
Direct attachment: best for sound, shallow texture
Direct attachment keeps the new wall surface close to its original position. It is the simplest-looking option, but it works only when the panel manufacturer and fixing system permit the existing substrate.
| Mounting approach | Best for | Main advantage | Main limitation |
|---|---|---|---|
| Direct adhesive | Sound, sufficiently flat surfaces approved for bonding | Avoids a separate framing layer | Texture, paint, and weak surface material can compromise contact |
| Mechanical fixing | Panels designed for screws or other approved fasteners | Transfers support to suitable structure or rated anchors | Requires knowledge of the wall construction and fixing locations |
| Battens or backing | Deep texture or walls needing a new mounting plane | Creates a controlled surface for panel attachment | Adds thickness and changes trim and outlet details |
Do not assume that an adhesive described as suitable for wood also bonds safely to your painted stucco. The relevant combination includes the panel backing, adhesive, coating, and wall surface.
Ask for installation instructions that address the actual substrate. A generic adhesive recommendation is not confirmation that it will bridge deep texture or hold a heavy decorative panel.
Battens or backing: best for deep texture
Battens are strips secured to the supporting wall that create a mounting plane in front of the rough finish. A suitable sheet backing creates a continuous surface instead. Either approach needs a fixing design matched to the wall and panel system.
The benefit is control: you can establish a flat face without making every hollow in the stucco disappear. The trade-off is extra wall thickness, which becomes especially noticeable beside door casings, baseboards, and electrical fittings.
Do not anchor battens only into a fragile decorative layer. Determine whether the support behind the stucco is masonry, timber framing, or another construction, then select the appropriate fastening system.
For your 2026 project plan, treat this as wall preparation rather than a cosmetic shortcut. If you cannot identify the supporting construction or safely establish fixing points, have an installer assess it before drilling.
Why the installation method varies
The same panel can require different preparation on different walls. These factors determine the approach:
- Surface strength: Powdering stucco, loose paint, and detached material cannot provide dependable support for an adhesive bond.
- Texture depth: Pronounced ridges reduce contact with flat-backed panels and complicate alignment.
- Overall flatness: A bowed wall needs correction across its surface, not just treatment of individual high spots.
- Supporting construction: Masonry and framed walls require different fasteners and installation techniques.
- Moisture condition: An active leak or damp substrate must be addressed before decorative covering begins.
- Panel instructions: Backing material, permitted fasteners, and required support determine how a panel attaches.
A textured wall that looks solid from across the room can still have a weak painted surface. Inspect the actual attachment area rather than relying on appearance alone.
How do you prepare textured stucco for wall panels?
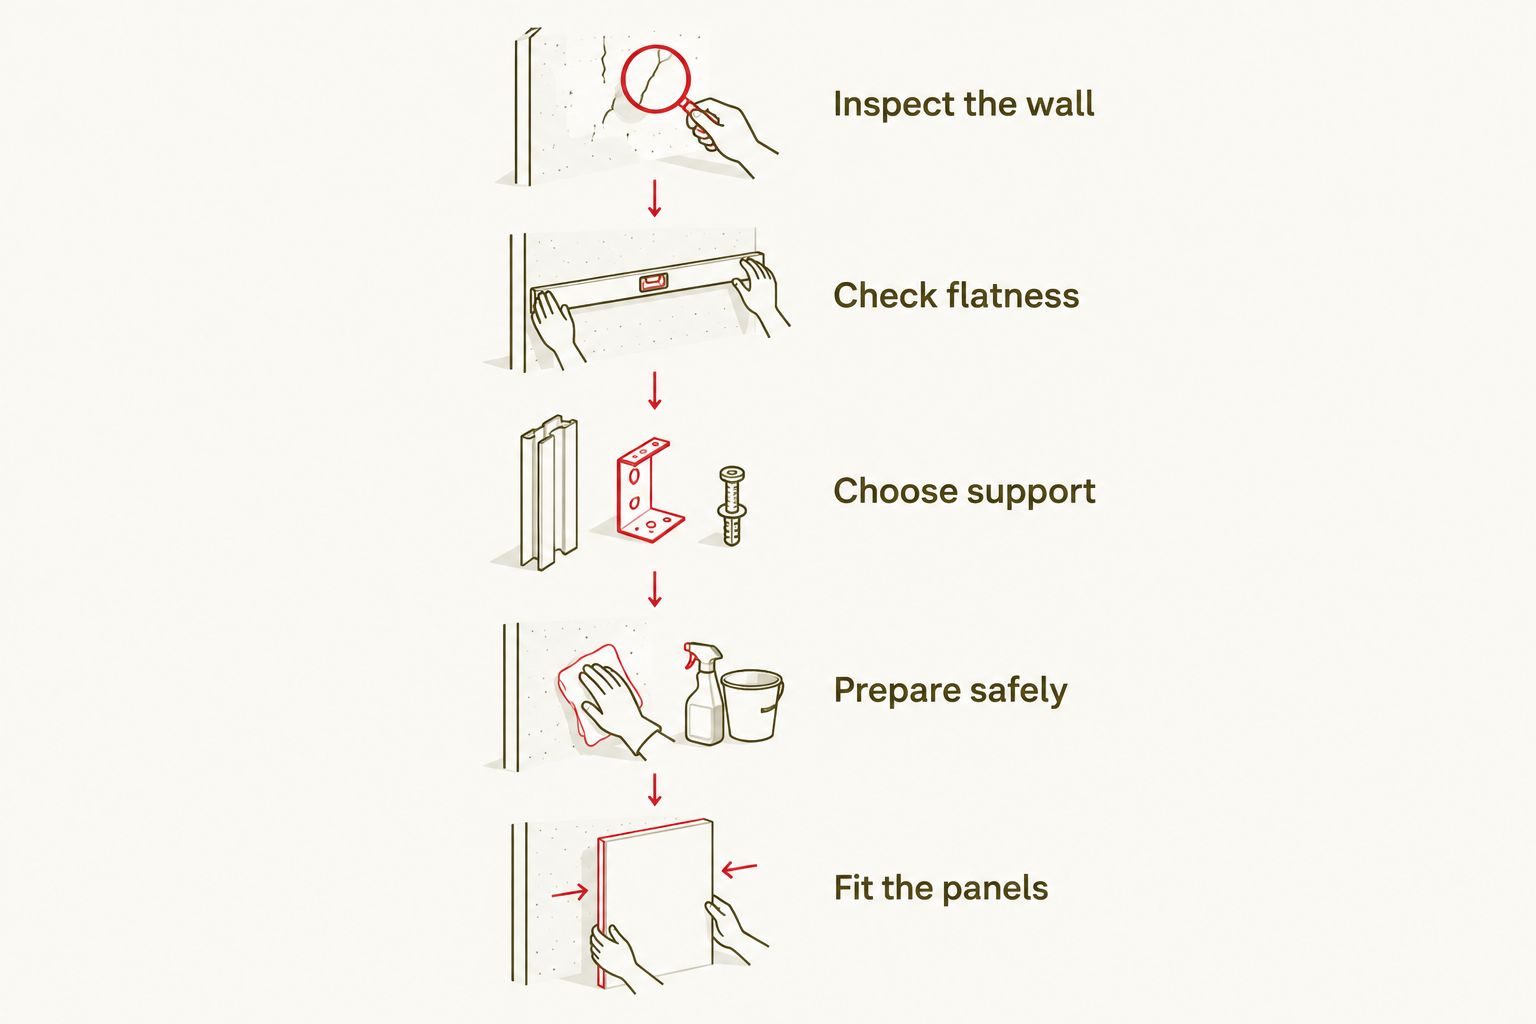
Prepare the wall in stages so you do not commit to a mounting method before understanding the substrate. Keep your 2026 installation checklist focused on these tasks.
Inspect the wall
Look for staining, recurring cracks, loose edges, and areas where the finish separates from the underlying wall. Identify what needs repair before covering it.
Do not use decorative paneling to conceal unresolved dampness. A new surface makes the problem harder to see; it does not remove the source.
Check flatness
Hold a straightedge across the proposed installation area in several directions. Look for rocking, broad gaps, and high points that prevent a panel from sitting consistently.
Dry-position a panel or suitable flat reference board without forcing it against the wall. This helps reveal whether the problem is fine texture or a wider change in the wall plane.
Choose support
Select direct attachment only after confirming substrate compatibility. Otherwise, plan an approved backing or batten arrangement that gives the panels the support they require.
Work out the final wall position before drilling. Include the panel thickness and any backing so you can resolve edges, corners, and fittings together.
Prepare safely
Clean and repair the wall using methods appropriate to its material and coating. Follow the preparation product's instructions for drying and readiness before covering it.
Do not sand, grind, or drill an unidentified older finish without considering hazardous materials. Arrange an appropriate assessment where asbestos or lead is a concern, and control dust during permitted work.
Fit the panels
Follow the panel manufacturer's layout, acclimation, cutting, fastening, and movement-gap instructions. Start from a checked reference line rather than assuming the floor or ceiling is level.
Check alignment as you work. Correcting a small error early is easier than discovering that every joint has drifted at the far end of the wall.
What changes around outlets, trim, and corners?
Adding battens or backing moves the finished face of the wall outward. Existing outlet boxes, baseboards, window trim, and door casings remain where they were unless you make a separate plan for them.
Resolve these junctions before installing the first panel. Decide how the panel edge will finish beside existing trim and whether the result leaves an awkward recess or an exposed backing edge.
Electrical boxes must remain accessible and appropriately positioned for the finished wall assembly. Have a qualified electrician assess extensions or other changes; do not hide wiring connections behind decorative paneling.
At inside corners, check both walls rather than assuming a square intersection. A neat starting edge cannot compensate for a layout that ignores an out-of-square corner at the other end.
Is this a realistic DIY project?
Installing panels over sound, suitably prepared stucco is a different task from repairing a failing wall. Your DIY scope should match the work you can inspect, measure, and fasten safely.
The practical challenge in DIY wood slat panel installation is often establishing a straight starting line and consistent support before attaching the decorative surface. Over stucco, surface preparation adds another decision: whether the existing wall can support the approved fixing method at all.
A sensible division of work is to handle layout and straightforward panel fitting yourself while assigning uncertain substrate repairs, structural fixing decisions, and electrical alterations to qualified trades.
For a 2026 weekend project, inspect the wall before setting the installation date. Product fitting time and total renovation time are not the same when repairs or a new backing surface are involved.
Which panel finish suits the prepared wall?
Once the mounting surface is suitable, choose the finish according to the room's purpose. Do not select a panel because you expect its decorative face to compensate for poor support behind it.
| Panel | Best for | Reason to choose it | Limitation to plan around |
|---|---|---|---|
| Acoustic Slat Wood Wall Panels | SoundPanel™ | Homeowners seeking a slatted finish and sound absorption | Combines a decorative wood appearance with an acoustic-panel format | An acoustic finish does not establish compatibility with untreated stucco |
| 3D Geometric Pattern Wooden Panels | GroovePanel® | Homeowners prioritizing a geometric feature wall | Uses real solid wood for a dimensional decorative surface | The geometric face does not level the wall behind it |
The Panel Hub acoustic wall panels are best for homeowners seeking decorative sound absorption rather than structural wall repair. Choose the geometric option when the visual pattern is your main priority, not as a substitute for acoustic treatment.
The Panel Hub describes its acoustic offering with an NRC 0.85 rating and a 5-year warranty. NRC describes sound absorption, not proof that a panel blocks sound transmission or attaches safely to a particular substrate.
The Panel Hub also describes installation in under 2 hours. Do not apply that fitting claim to the whole stucco project: inspection, repairs, backing installation, and electrical work are separate tasks.
Do you have to remove the stucco first?
You do not automatically have to remove sound stucco before installing interior panels. An approved fixing arrangement can leave the existing finish in place while providing suitable support in front of it.
Remove or repair loose material rather than trapping it behind the new surface. If the finish is extensively detached, or the wall needs investigation, covering it first makes the underlying problem harder to address.
Can you cover damp stucco with wall panels?
No—resolve active moisture problems before covering stucco with decorative panels. Identify the source, complete the necessary repairs, and confirm the substrate is ready for the chosen system.
Do not assume that a moisture-resistant decorative face makes the concealed wall assembly suitable. Bathroom and shower installations also require a system appropriate to their exposure, not simply a panel attached over existing texture.
Are screws better than adhesive over stucco?
Screws are not automatically better than adhesive; the correct method depends on the panel instructions and supporting wall. A screw fixed only into weak finish material is not a substitute for a sound attachment point.
Likewise, additional adhesive does not correct an unsuitable bonding surface. Use the specified fixing arrangement instead of improvising a combination to compensate for uncertainty.
FAQ
Can I glue wood panels straight onto textured stucco?
Only when the panel and adhesive instructions approve the substrate and the surface provides suitable contact. Deep texture, loose paint, and crumbling stucco need preparation or a different mounting approach.
What’s the best way to cover heavily textured interior stucco?
A securely fixed backing or batten system is often the practical approach when heavy texture prevents flat panel contact. Match the support and fasteners to the wall construction and panel instructions.
Do I need to sand stucco smooth before adding panels?
No, sanding is not automatically necessary when an approved backing or mounting system provides the required surface. Assess unidentified older coatings for hazards before disturbing them.
Can peel-and-stick wall panels go over rough stucco?
Do not assume peel-and-stick panels will bond to rough stucco. Use them only when their instructions explicitly permit the surface condition and texture.
Will acoustic panels over stucco soundproof my room?
Acoustic panels are intended to absorb sound within a room, not automatically soundproof it. Sound transmission also depends on the wall assembly, openings, and other sound paths.
Can I keep my existing baseboards when covering stucco?
You can keep existing baseboards if the finished panel assembly meets them cleanly. Added backing or battens can move the panels beyond the trim face, so plan that junction before installation.
One last thing
Before committing to your 2026 wall upgrade, hold a sample or flat reference board at an outlet, a doorway, and the baseboard—not just at the center of the wall. These junctions reveal the consequences of added thickness that a front-facing room photo hides.
The best next move is a wall assessment, not an adhesive purchase. Once you know the substrate and required mounting plane, the decorative choice becomes much simpler.
Related guides
- Does peel-and-stick wall paneling work over textured walls?
- Installing wall panels around window and door casings
Leave a Reply