Category: Uncategorized

  • Geometric Wood Wall Panels: Design Guide

    Geometric Wood Wall Panels: Design Guide

    What Are Geometric Wood Wall Panels?

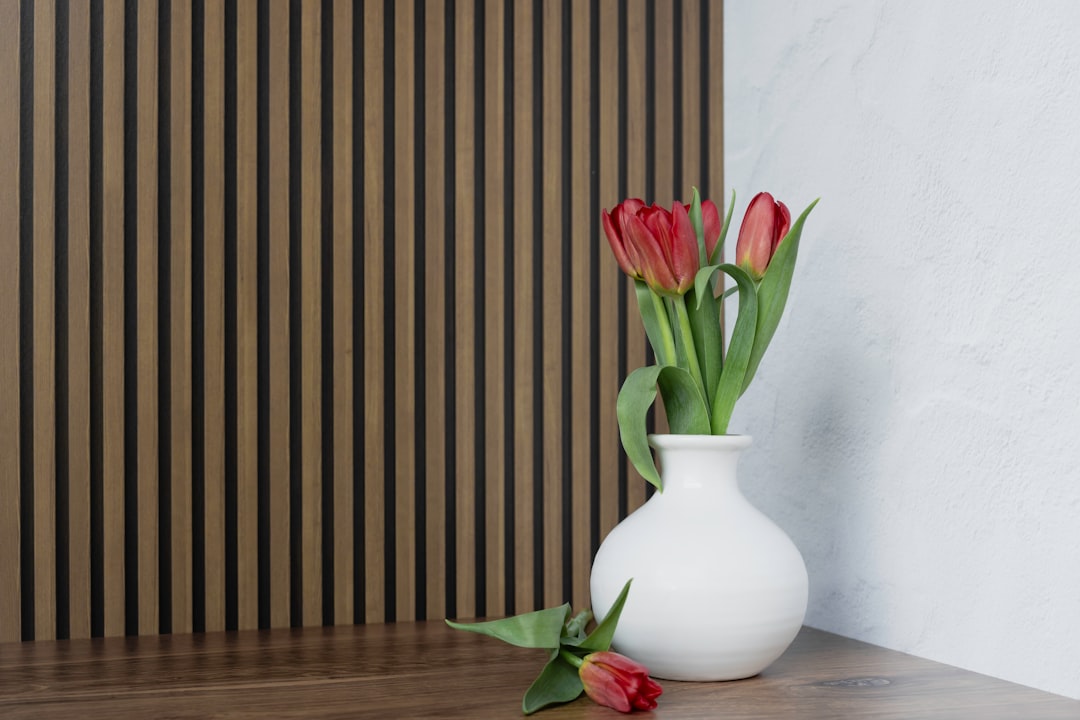
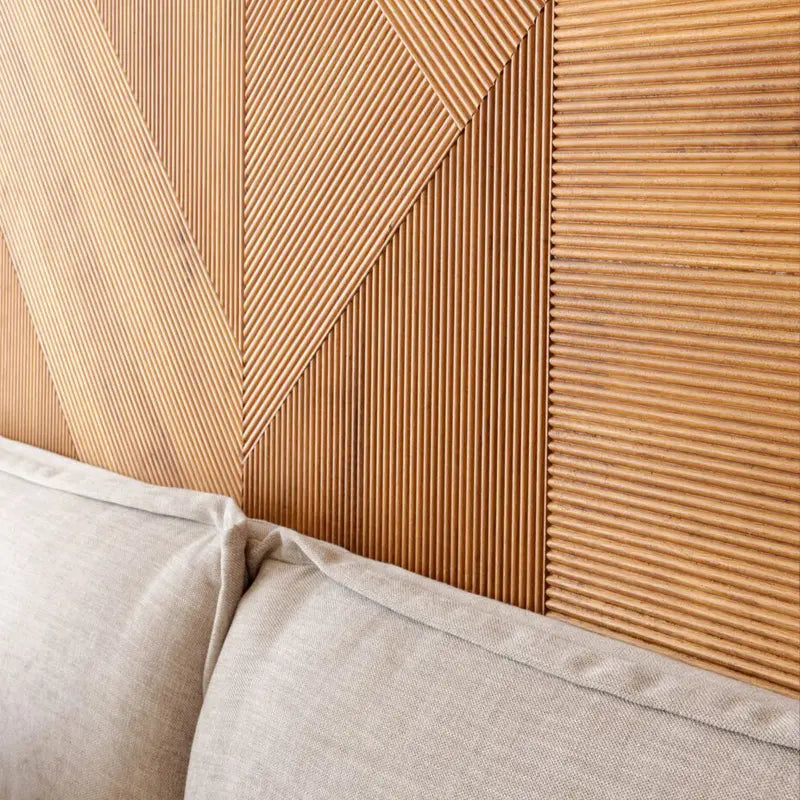
    Geometric wood wall panels are solid or engineered wood panels with precision-cut patterns — grid lines, concentric shapes, 3D relief, or interlocking angular forms — that create visual depth and rhythm on a flat wall surface. Unlike plain slat panels that rely on linear spacing for texture, geometric panels use the panel face itself as a design canvas, with grooves and relief work that cast shadows and shift in appearance as the light changes throughout the day.

    The result is a wall that does more than fill space. At The Panel Hub, our GroovePanel® geometric wood wall panels are crafted from 100% solid wood throughout — no MDF core, no veneer face — so the same natural grain runs across the face, the cut edge, and the back of every panel.

    The Main Types of Geometric Wood Panel Patterns

    Crossing Lines

    Crossing lines geometric wood wall panel in walnut

    Horizontal and vertical grooves intersect to create a grid or lattice pattern across the panel face. The depth and width of the grooves determine how bold or subtle the effect appears. Shallow, narrow cuts read as refined texture; deeper, wider cuts produce strong shadow lines that read as deliberate pattern even from across a room. Crossing lines patterns suit modern, minimalist, and Japandi-influenced interiors where geometric precision is part of the design language.

    Concentric Squares

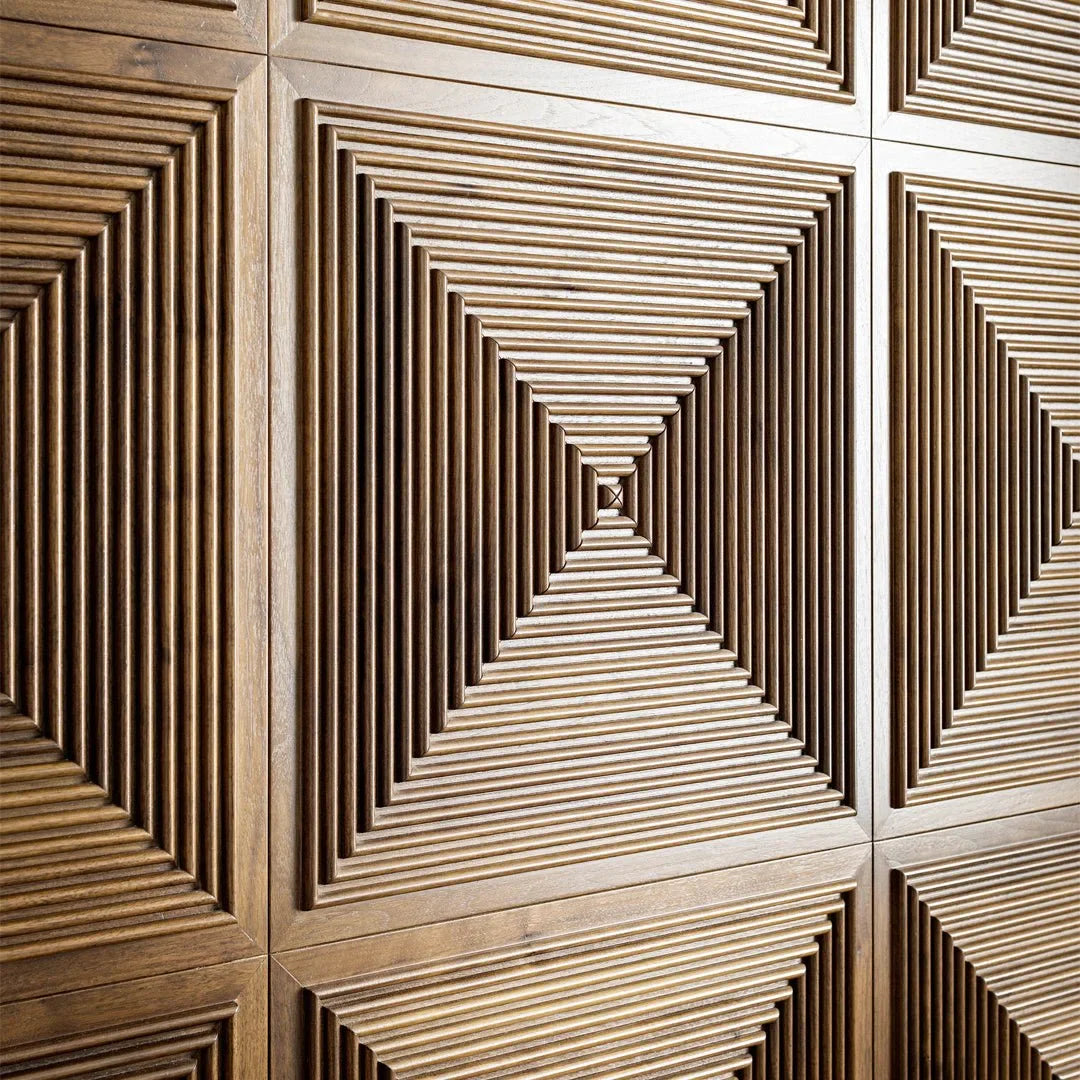
    Concentric square 3D geometric wood wall panel

    Grooves cut in a series of nested squares — each progressively smaller, one inside the last — create a radiating, architectural motif on the panel surface. Concentric square panels carry a mid-century modern sensibility but work equally well in contemporary spaces. Installed across multiple panels, the pattern can align panel-to-panel for a continuous repeating motif, or stagger deliberately for a more relaxed, broken-grid effect.

    3D Relief Panels

    3D relief geometric wood wall panel

    Relief panels use the panel thickness itself to create dimensional geometry — stepped profiles, angular facets, or raised elements that project from the wall surface. These panels respond dramatically to light: under directional downlights or raking wall-wash fixtures, the shadow cast by each relief element becomes part of the design. In flat or diffuse light, the same panel reads more quietly. 3D relief is the most dramatic of the geometric categories and works best as a singular feature wall rather than a room-wide application. The 3D Geometric Pattern Wooden Panel is the most versatile entry point — a solid wood relief panel that delivers strong shadow definition without requiring the precise centring of a concentric square format.

    Diamond and Diagonal Patterns

    Diamond and diagonal walnut triangle geometric wood wall panel

    Diagonal groove lines or diamond-shaped relief elements introduce dynamic movement — the eye follows the diagonal rather than settling, which makes a room feel more energetic and less static. Diamond patterns suit statement walls in hallways, behind beds, and in commercial or hospitality environments where high visual impact is the primary goal.

    Where to Use Geometric Wood Panels

    Living Room Feature Wall

    The most common application is a single wall behind a sofa or within an alcove. Geometric panels work well here because the room’s main seating faces the wall directly, so the pattern is viewed from a consistent distance and angle. Crossing lines or concentric square patterns suit rooms with existing geometric elements in furniture or textiles. 3D relief panels suit rooms with good directional lighting already in place — or planned.

    Behind the Bed

    Geometric panels behind a bed function as an architectural headboard — framing the sleeping space without requiring a separate furniture piece. For bedrooms, subtler geometric patterns (shallow crossing lines, fine grid work) suit a calm environment better than bold 3D relief. Our bedroom wood wall panel guide covers placement and pattern selection in detail.

    Home Office

    Geometric panels behind a desk make an immediate impression on video calls without requiring art, accessories, or additional styling. A single panelled wall in a home office reads as intentional and professional — a designed space rather than a spare room. Crossing lines and grid patterns work particularly well in office contexts because the angular precision of the geometry reinforces a sense of focus and order.

    Hallway and Entrance

    Narrow hallways benefit from geometric panelling because the pattern provides visual interest in a space where there is little room for furniture or art. Running geometric panels at dado height (halfway up the wall) is a classical approach updated with modern precision-cut geometry rather than traditional raised-and-fielded panels. Our hallway wood panelling guide explores this further.

    Commercial and Hospitality Spaces

    Hotel lobbies, restaurant feature walls, boutique retail environments, and office reception areas are natural homes for geometric wood panels. The combination of natural wood warmth and geometric precision positions a brand as high-quality and considered. GroovePanel® is FSC® and EPD certified — relevant for commercial projects requiring sustainability credentials for LEED or BREEAM compliance.

    How to Choose the Right Geometric Panel for Your Room

    Match the Pattern to the Room’s Existing Design Language

    Geometric panels look best when the pattern language connects to something already present in the room. A space with grid-patterned textiles, rectangular furniture silhouettes, and straight architectural lines will carry crossing lines or concentric square panels naturally. A room with curved furniture and organic forms can still use geometric panels, but the panel should be the single geometric anchor rather than competing with other angular elements.

    Consider Scale Relative to Room Size

    Larger groove patterns and deeper relief elements suit larger rooms and taller ceilings where the scale of the pattern can breathe. In smaller rooms, fine-scale geometric patterns — tighter grid spacing, shallower groove depths — are more appropriate. An oversized geometric pattern in a small room can feel aggressive rather than designed.

    Plan Your Lighting First

    3D relief panels require directional light to perform properly. Before specifying them, confirm whether the wall receives raking daylight from a nearby window, or whether you can add directional downlighters or wall-wash fixtures above the panel. Crossing lines and concentric patterns are less light-dependent — they create pattern and visual interest in any light condition.

    Why Solid Wood Holds Geometric Cuts Better Than MDF Veneer

    For geometric panels with precision-cut grooves, core material matters significantly. MDF core panels with wood veneer faces can struggle to hold crisp groove edges over time — the MDF compresses slightly at cut edges, and thin veneer on the face can separate at groove lines with seasonal movement. 100% solid wood holds a precision cut permanently. The grain runs through the groove edge identically to the face — there is no veneer edge to separate or delaminate. Our MDF vs solid wood wall panel comparison covers this in full.

    Installation

    GroovePanel® geometric panels install with standard construction adhesive and finishing nails — no specialist tools required. Panel-to-panel pattern alignment is the key technique: on geometric panels with repeating patterns, how the pattern meets at panel joints determines whether the installation reads as one continuous surface or a series of segments. Full installation instructions are in our step-by-step wood panel installation guide.

    Geometric Wood Wall Panel FAQs

    What are geometric wall panels?

    Geometric wall panels are decorative panels cut or assembled into repeating shapes such as triangles, diamonds, chevrons, or layered 3D relief. They are used on feature and accent walls to add texture, depth, and a designed look that flat paint or wallpaper cannot achieve.

    Are geometric wood panels real wood?

    It depends on the maker. Many are printed vinyl or a thin veneer over MDF. The Panel Hub’s GroovePanel geometric range is 100% solid wood throughout, so the grain and tone are authentic on every surface and the cut edges stay crisp over time.

    Where should I use a geometric feature wall?

    They work best on a single feature wall rather than a whole room. Popular spots are behind a bed, behind a living-room sofa or TV, in an entryway, or on a client-facing office or reception wall.

    Are geometric panels hard to install?

    No, but they take a little more care than plain panels because the pattern needs to line up at each seam. Get the first panel level and aligned, then work across the wall. Most panels fix with a panel adhesive, with screws added for heavier solid-wood options.

    Browse Geometric Wood Wall Panels

    The GroovePanel® collection at The Panel Hub includes Crossing Lines, Concentric Squares, and 3D relief panels — all 100% solid wood, FSC® certified, with a 5-year warranty and factory-direct pricing. Free US shipping, 60-day returns, and 24/7 support if you need help choosing. Order a sample before committing to a full wall.
  • Grooved Wall Panels: What They Are, Why Designers Love Them, and How to Use Them

    Grooved Wall Panels: What They Are, Why Designers Love Them, and How to Use Them

    What Are Grooved Wall Panels?

    What Are Grooved Wall Panels?
    Photo by Heather Newsom on Unsplash

    Grooved wall panels are wood wall panels with deliberate channels — grooves — machined or routed into the panel face. The grooves can run in a single direction (vertical or horizontal), intersect in a grid, radiate outward in a concentric pattern, or form more complex geometric configurations depending on the panel design.

    The groove itself is doing two things simultaneously: creating a physical shadow line that adds depth to the wall, and defining a geometric pattern that gives the wall visual rhythm and organisation. The result is a wall surface that is more than a flat backdrop — it has its own architectural character.

    At The Panel Hub, our GroovePanel® collection is built around this principle. Every panel in the range is 100% solid wood throughout — no MDF core, no veneer face — with precision-machined grooves that hold their geometry permanently. The same grain that appears on the panel face runs through the groove edge and the panel back, because there is no veneer edge to separate or degrade over time.

    How Grooves Create Depth and Shadow

    How Grooves Create Depth and Shadow
    Photo by Heather Newsom on Unsplash

    The visual appeal of a grooved wall panel is directly tied to how light interacts with the groove geometry. A groove cut into a panel face creates a recessed shadow line — a darker band that contrasts with the lit surfaces on either side. As the light source changes through the day, the shadow depth and position shift, which means a grooved wall panel looks different in morning light, afternoon light, and under artificial evening lighting. The panel is not static.

    The depth and width of the groove determines how strong this effect is:

    • Shallow, narrow grooves (3–6mm deep): Create subtle texture — refined background detail that rewards close inspection without dominating the room from a distance. Best suited to rooms where the wall should provide warmth and interest without competing with furniture or art.
    • Deep, wide grooves (10–20mm deep): Create strong, hard shadow lines visible from across the room. These grooves read as bold architectural pattern and suit rooms where the wall is intended to be the primary visual statement.

    Groove direction adds another dimension. Vertical grooves extend the visual height of a room — the eye follows the groove lines upward. Horizontal grooves extend visual width. Intersecting grooves in a grid create even, balanced texture with no directional emphasis.

    Why Interior Designers Specify Grooved Panels

    Why Interior Designers Specify Grooved Panels
    Photo by l ch on Unsplash

    Material Authenticity

    Grooved panels in solid wood are a genuine material — real grain, real texture, real warmth. Designers working at the premium end of the residential and commercial market specify them because they introduce natural material quality that painted surfaces, wallpaper, and even most laminate finishes cannot replicate. The tactile quality of a grooved solid wood panel — the way the groove edge feels under a fingertip, the way the grain changes tone at the cut edge — is something that has to be experienced to be fully understood.

    Precision and Control

    Grooved panels give designers precise control over the visual character of a wall. The groove spacing, depth, direction, and pattern are all specified and consistent across every panel — unlike hand-finished or painted surfaces where the result depends on the skill of the tradesperson on the day. CNC-machined grooves are repeatable and exact. The panel-to-panel alignment on an installed wall reflects that precision.

    Versatility Across Design Styles

    Grooved panels sit comfortably across a wide range of interior design languages:

    • Japandi and Scandinavian: Fine-scale vertical grooves in pale oak or natural ash sit perfectly within the clean, material-honest aesthetic of Nordic-influenced interiors
    • Contemporary and minimalist: Intersecting grid grooves in a mid-tone wood create architectural texture without ornament
    • Mid-century modern: Concentric square grooves reference the geometric forms of 1950s and 60s design with a contemporary material execution
    • Transitional: Horizontal grooves in a warm walnut tone add character to transitional interiors without reading as period-specific

    Acoustic Contribution

    In rooms where sound quality matters — home offices, media rooms, dining rooms with hard floor surfaces — grooved panels contribute a small but measurable acoustic benefit. The grooves break up the flat reflective surface of the wall, introducing surface irregularity that diffuses rather than reflects sound. For more significant acoustic treatment, dedicated acoustic slat panels with felt backing are the appropriate specification — our SoundPanel® collection is designed specifically for this purpose.

    Where to Use Grooved Wall Panels

    Feature Walls and Focal Points

    The most common application — a single grooved panel wall as the primary focal point of a room. Living room sofa walls, bedroom headboard walls, and home office backdrop walls are the most frequent choices. A single well-executed grooved panel feature wall transforms the quality of a room in a way that few other interventions can achieve for equivalent cost and effort.

    Full-Room Applications

    In smaller rooms — walk-in wardrobes, studies, powder rooms — wrapping all four walls in a fine-scale grooved panel creates a cohesive, immersive material environment. The groove pattern unifies the space and eliminates the need for any other wall treatment or decoration. This approach requires precise panel-to-panel planning to ensure the groove pattern reads continuously at internal corners.

    Alcoves and Recesses

    Grooved panels used to line alcoves, recesses, or the interior of shelving units create a premium material backdrop that elevates the objects displayed against it. Books, objects, and plants all look better against a grooved wood surface than against painted plaster.

    Commercial and Hospitality Spaces

    Hotel reception walls, restaurant feature walls, office boardrooms, and boutique retail environments regularly specify grooved wood panels because the material quality and geometric precision signals investment and attention to detail. GroovePanel® FSC® and EPD certification means these panels meet sustainability requirements for LEED, BREEAM, and other commercial green building frameworks.

    Choosing Between Groove Patterns

    The GroovePanel® collection includes three primary groove configurations:

    • Crossing Lines: Horizontal and vertical grooves intersect to create a grid. Even, balanced, works at any scale. See our Crossing Lines panel guide for specific design applications.
    • Concentric Squares: Nested squares machined into each panel face. Creates a radiating focal-point pattern. See our Concentric Squares guide for room-specific ideas.
    • 3D Relief: Stepped and faceted relief elements that create physical depth beyond a single groove plane. Requires directional lighting to perform at its best. The 3D Geometric Pattern panel is the most striking expression of this format in the GroovePanel® range.

    Our geometric wood panel guide covers the full range of patterns, their visual character, and which rooms suit each one.

    Browse the GroovePanel® Collection

    Explore the full GroovePanel® range at The Panel Hub — 100% solid wood, FSC® and EPD certified, with factory-direct pricing, free US shipping, a 5-year warranty, and 24/7 support. Order a sample to see the groove depth, grain quality, and shadow-play in your own space before committing to a full wall.
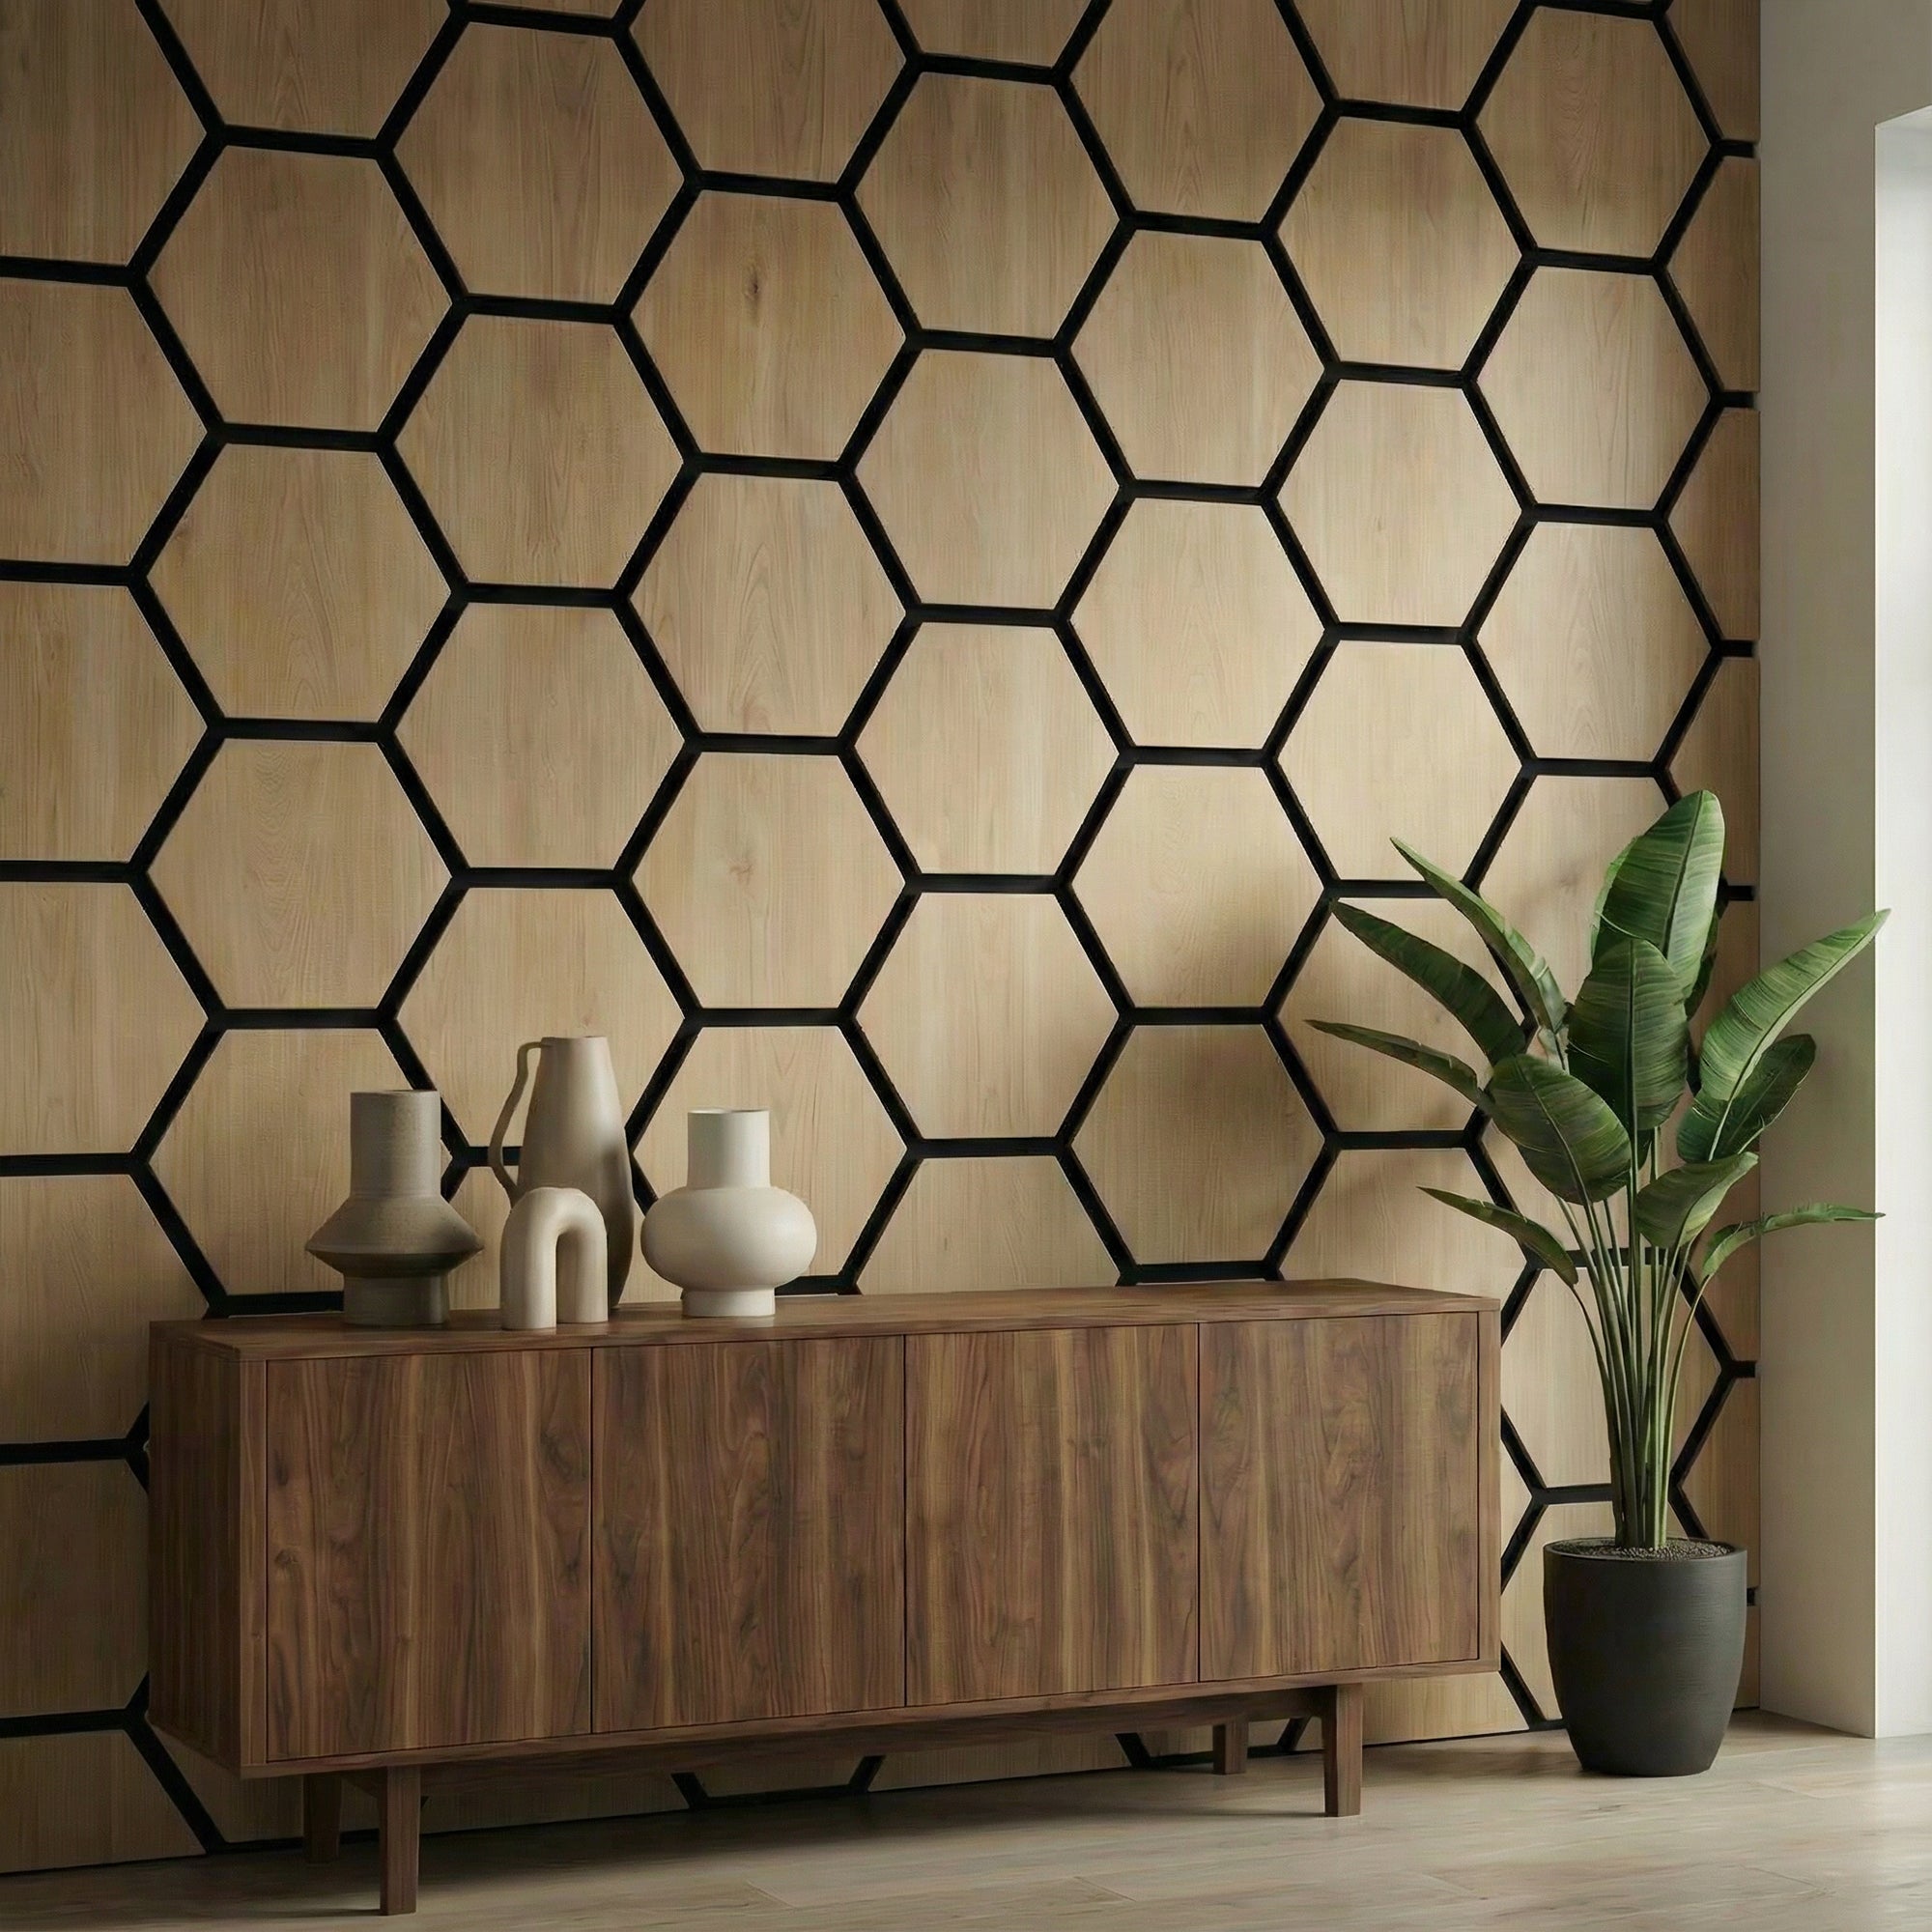
  • How to Create a Geometric Feature Wall: Planning, Patterns & Installation Guide

    How to Create a Geometric Feature Wall: Planning, Patterns & Installation Guide

    Why a Geometric Feature Wall Works

    Why a Geometric Feature Wall Works
    Photo by Hoang Dang Khoa on Unsplash

    A feature wall — a single wall treated differently from the others in a room — is one of the most powerful tools in interior design. It creates a focal point, defines the room’s visual hierarchy, and gives furniture a designed backdrop to sit in front of rather than floating in an undefined space.

    A geometric feature wall does this with particular effectiveness because geometric patterns create structure and precision — a sense that the wall has been designed rather than merely finished. The precision of a geometric pattern in solid wood, like the panels in the GroovePanel® collection, adds a layer of material quality that painted geometry and wallpaper patterns cannot match.

    This guide covers every decision in the process: choosing which wall to feature, selecting the right geometric pattern, planning the installation, and executing it correctly.

    Step 1: Choose the Right Wall

    Step 1: Choose the Right Wall
    Photo by Darren Ee on Unsplash

    Not every wall in a room works equally well as a feature wall. The right choice depends on architecture, furniture arrangement, and how the room is used.

    The Wall You Face Most

    The single most reliable rule: feature the wall you spend the most time facing. In a living room, this is usually the sofa wall (the wall the sofa is placed against) because the main seating faces it. In a bedroom, it is the headboard wall. In a dining room, it is the wall at the end of the table. This wall receives the most visual attention, so it benefits most from design investment.

    The Architectural Focal Point

    If a room has a natural architectural focal point — a chimney breast, an alcove, a bay — consider featuring that element. Panelling a chimney breast emphasises the fireplace as the room’s organisational centre. Panelling a deep alcove transforms a recessed void into a designed feature.

    Walls to Avoid

    Walls with many interruptions — multiple doors, windows, or radiators — are harder to feature successfully because the panel installation is fragmented by the interruptions. Walls with problematic structural issues (significant unevenness, recurring damp) should be addressed before panelling. Our uneven wall preparation guide covers remediation approaches.

    Step 2: Select the Geometric Pattern

    Step 2: Select the Geometric Pattern
    Photo by Declan Sun on Unsplash

    Crossing Lines (Grid Panels)

    Intersecting horizontal and vertical grooves create an even, all-over texture with no directional emphasis. Best for: rooms where you want textural warmth without a specific focal point pattern; Japandi and minimalist interiors; rooms where the furniture is the main visual event and the wall should be a composed backdrop. See our full Crossing Lines guide.

    Concentric Squares (Radiating Panels)

    Nested squares create a focal-point pattern that draws the eye to the panel centre and radiates outward. Best for: bedroom headboard walls, living room sofa walls, and anywhere a strong visual anchor is the goal. See our full Concentric Squares guide.

    3D Relief Panels

    Stepped and faceted profiles that project from the wall plane. Best for: rooms with strong directional lighting where the shadow-play of physical relief can be exploited. These panels require more considered lighting design than groove-only configurations.

    How to Decide

    Consider three questions: What is the room’s overall design style? What level of visual drama is appropriate? What is the lighting situation? A Japandi bedroom with soft diffuse light calls for fine crossing lines. A contemporary living room with directional downlights could carry 3D relief. A mid-century influenced dining room suits concentric squares. Our geometric panel pattern guide maps patterns to design styles and lighting conditions systematically.

    Step 3: Plan the Layout

    Full Height vs Partial Height

    Full floor-to-ceiling panelling creates maximum impact and reads as fully architectural. Partial panelling — from floor to dado height, or as a framed section within a larger wall — is more restrained and suits rooms where a full-height treatment might feel overwhelming. Both approaches are valid; the choice depends on ceiling height, room volume, and the desired level of drama.

    Full Width vs Panel-Width Section

    Panelling the full width of the wall creates a cohesive, room-defining treatment. A narrower section of panels — centred on the wall, or positioned behind a specific piece of furniture — creates a more focused statement. In a bedroom, a section of panels matching the width of the bed plus some margin creates a perfect headboard-wall effect without requiring the full wall width.

    Pattern Alignment

    On geometric panels with repeating patterns — particularly crossing lines and concentric squares — plan how the pattern will align at wall edges and between panels before installation. Decide in advance whether the pattern should be symmetrical (centred on the wall, with matching cut panels on each side) or whether to start from one edge and run to the other. Symmetrical layouts require careful calculation but read as more deliberate and designed.

    Step 4: Calculate Quantities

    Measure the height and width of the intended panel area. Multiply to get total square footage. Add 10–15% for cuts and waste — more for complex layouts with many obstacles. Use our panel quantity calculator guide to confirm your order before purchasing.

    Step 5: Prepare the Wall Surface

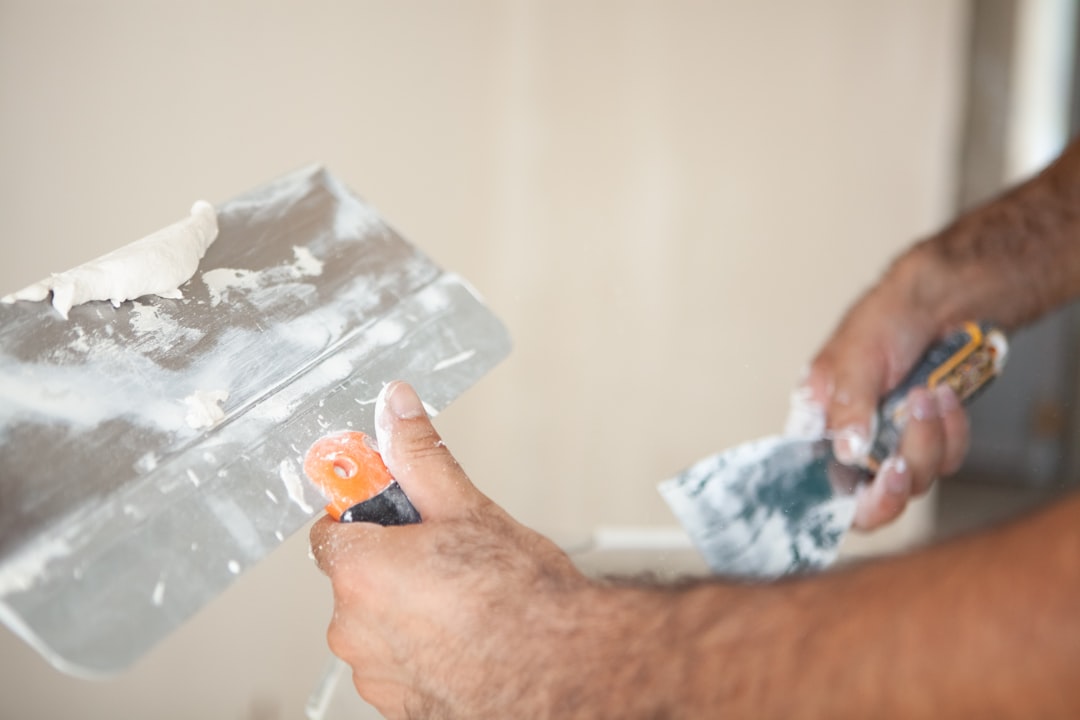
    The wall behind geometric panels must be flat. Surface irregularities that would be invisible behind paint are amplified under a geometric panel system — an uneven wall causes visible gaps at panel edges and prevents the grid pattern from appearing straight. Fill, sand, and skim as required. Allow all remediation work to dry fully before beginning the panel installation.

    Bring panels into the room 24 hours before installation for acclimatisation, particularly in rooms with heating systems that create humidity fluctuations.

    Step 6: Install the Panels

    For GroovePanel® geometric panels:

    1. Mark a precise horizontal reference line at your starting height using a spirit level
    2. Mark a vertical plumb line at your starting side edge — do not rely on the room corner being plumb
    3. Cut panels to size where needed using a fine-tooth saw (cut on the face side)
    4. Apply MS polymer adhesive in a serpentine bead pattern to the panel back, keeping 25mm from edges
    5. Press firmly to the wall, align to reference lines, and secure with finishing nails at panel edges while adhesive cures
    6. Check alignment every two panels and correct before the adhesive sets

    Full detailed instructions are in our step-by-step wood panel installation guide.

    Step 7: Light the Feature Wall

    The finished installation is only as good as the lighting that illuminates it. Plan at least one directional light source aimed at the panel wall — a recessed downlight 300–400mm from the wall face, a wall-wash fixture at ceiling level, or a floor uplight at the panel base. Without directional lighting, the groove depth and shadow-play that define geometric panels is significantly diminished.

    Start Your Geometric Feature Wall

    Browse the GroovePanel® geometric collection at The Panel Hub — including the 3D Geometric Pattern Wooden Panel, Crossing Lines, Concentric Squares, and mosaic formats, all in 100% solid wood. Order a sample to see the pattern, grain, and shadow-play in your own room before committing to a full installation.

  • How to Install Faux Stone Wall Panels: A Step-by-Step DIY Guide

    How to Install Faux Stone Wall Panels: A Step-by-Step DIY Guide

    What You Need Before You Start

    What You Need Before You Start
    Photo by Jesus Loves Austin on Unsplash

    Installing faux stone wall panels is a straightforward DIY project — most single-wall installations complete in a day. Before starting, gather the following:

    • Faux stone panels: RockSurface® panels in your chosen profile, plus 10–15% additional for cuts and offcuts
    • Construction adhesive: MS polymer or polyurethane adhesive — moisture-resistant, gap-filling, suitable for bonding composite panels to plaster, drywall, or masonry
    • Finishing nails or screws: 50–65mm nails for mechanical fixing during adhesive cure
    • Spirit level: 1200mm or longer for setting accurate horizontal and vertical reference lines
    • Pencil and tape measure
    • Handsaw or jigsaw: For cutting panels to size around obstacles, corners, and edges
    • Caulking gun: For applying construction adhesive
    • Colour-matched sealant: For finishing edges and joints
    • Damp cloth: For removing adhesive residue from panel faces before it cures

    Use our panel quantity calculator guide to confirm how many panels you need before ordering.

    Step 1: Prepare the Wall Surface

    Step 1: Prepare the Wall Surface
    Photo by Karl Callwood on Unsplash

    The wall behind the panels must be clean, dry, structurally sound, and reasonably flat. Address any issues before installation:

    • Remove loose paint, wallpaper, and any surface treatments that are not firmly bonded to the substrate
    • Fill cracks and holes with filler or patching compound and allow to cure fully
    • Sand down any high points or raised areas that would prevent panels from lying flat
    • On very uneven walls, apply a skim coat to bring the surface within tolerance. Our uneven wall guide covers this in detail

    A poorly prepared wall is the most common cause of panel installation problems. Time spent on wall preparation saves time and frustration during and after installation.

    Step 2: Acclimatise the Panels

    Step 2: Acclimatise the Panels
    Photo by Sasun Bughdaryan on Unsplash

    Bring your RockSurface® panels into the installation room 24 hours before starting work. Leave them lying flat or standing upright (not stacked face-to-face without air circulation) to allow the panels to adjust to the room’s temperature and humidity. This reduces the risk of dimensional changes after installation. In bathrooms or high-humidity rooms, allow 48 hours.

    Step 3: Plan Your Layout

    Before applying any adhesive, dry-lay the panels on the floor to plan the installation:

    • Decide whether to start from the centre of the wall (for symmetrical layouts) or from one corner (for continuous-run layouts)
    • Check that the top row and bottom row will not end up with very narrow cut strips — adjust your starting point if necessary to ensure cut rows are at least half a panel height
    • Mark the starting position on the wall with a pencil line and confirm it is level with a spirit level

    Step 4: Mark Reference Lines

    Use your spirit level to mark a precise horizontal reference line across the wall at your starting height. This is the most important step in the installation — if your first row of panels is not level, every subsequent row will be progressively more out of level. Take time to get this right.

    If starting from a corner, also mark a vertical plumb line from which to start the first panel. Use the spirit level to confirm the line is perfectly vertical, not relying on the room corner itself (which is often not plumb).

    Step 5: Cut Panels for Edges and Obstacles

    Measure and mark any wall panels that need to be cut to fit — at wall edges, around electrical outlets, at ceiling and floor junctions, or around fireplace openings. Cut faux stone panels with a handsaw, jigsaw, or circular saw with a fine-tooth wood-cutting blade. Always cut on the face side of the panel to minimise surface chipping on the visible surface.

    For electrical outlet cutouts, mark the position accurately on the panel back, drill a starter hole, and use a jigsaw for the internal cut.

    Step 6: Apply Adhesive and Fix the First Row

    Apply construction adhesive to the back of the first panel in a serpentine bead pattern — one continuous wavy bead from top to bottom of the panel, keeping the adhesive 25mm from all panel edges. Do not apply adhesive to the full face of the panel back — this prevents any trapped air from escaping and can cause the panel to bow.

    Press the panel firmly onto the wall, aligning the bottom edge with your reference line. Apply firm, even pressure across the full panel face for 30 seconds. Use finishing nails driven through the panel edge into the wall at 400mm centres for mechanical support while the adhesive cures.

    Step 7: Install Subsequent Rows

    Continue installing panels row by row, working upward from your reference line. Stagger the vertical joints between rows by at least half a panel width — this replicates the random joint pattern of real stone and prevents visible vertical lines running up the wall. Check level every two or three rows with your spirit level and correct any drift before it compounds.

    At internal corners, butt the panels directly into the corner. At external corners, either mitre the panels at 45° for a seamless corner, or use a corner moulding profile for a cleaner, faster solution.

    Step 8: Allow Adhesive to Cure

    Most MS polymer and polyurethane construction adhesives achieve handling strength within 4–6 hours and full bond strength within 24–48 hours. Do not apply force to the panels or attempt to remove the mechanical fixing nails until the adhesive has reached full cure. In cold or humid conditions, cure times may be longer — check the adhesive manufacturer’s datasheet.

    Step 9: Finish Edges and Joints

    Once the adhesive has cured fully, finish the panel installation:

    • Fill any gaps at ceiling, floor, and wall edge junctions with colour-matched sealant
    • In bathrooms or humid areas, apply sealant to all panel-to-panel joints and panel edges
    • Set finishing nails below the panel surface and fill nail holes with colour-matched filler
    • Remove any adhesive residue from panel faces with a damp cloth (if the adhesive has not yet fully cured) or a careful scrape with a plastic scraper (if cured)

    Step 10: Final Check and Touch-Up

    Stand back and review the completed installation from normal viewing distances. Check for any wall panels that are not fully bonded (a hollow sound when tapped lightly), any gaps that need additional sealant, and any surface residue requiring cleaning. Address any issues before considering the installation complete.

    Common Mistakes to Avoid

    • Starting without a level reference line — the single most common cause of a visibly crooked installation
    • Not staggering joints — creates an obviously artificial vertical grid pattern on the finished wall
    • Applying too much adhesive — causes squeeze-out on the panel face and makes alignment adjustments difficult
    • Installing without acclimatisation — increases risk of panel movement and joint opening after installation
    • Skipping edge sealing in humid rooms — leads to moisture ingress behind panels over time

    Browse RockSurface® Faux Stone Panels

    Ready to get started? Explore the RockSurface® faux stone collection at The Panel Hub — Highland Rock, Ridge Rock, and Stone Rock profiles, all lightweight and DIY-compatible. Order a sample first to confirm your choice, then complete your order with free US delivery, a 5-year warranty, and 24/7 support throughout your installation.

  • Outdoor Stone Wall Panels: What to Use for Exterior Walls, Gardens & Patios

    Outdoor Stone Wall Panels: What to Use for Exterior Walls, Gardens & Patios

    Can You Use Stone Wall Panels Outdoors?

    Can You Use Stone Wall Panels Outdoors?
    Photo by Wolfgang Weiser on Unsplash

    Yes — but not all stone wall panel products are rated for exterior use. Interior faux stone panels made from standard polyurethane foam are not designed for the UV exposure, temperature cycling, and moisture that exterior applications involve. Using an interior-rated product outdoors will result in colour fade, surface degradation, and panel delamination over time.

    This guide covers which panel types genuinely work in exterior applications, where to use them, how to specify correctly, and what to expect from outdoor stone panel installations.

    The Challenges of Exterior Stone Panel Applications

    The Challenges of Exterior Stone Panel Applications
    Photo by Vasanth Kedige on Unsplash

    UV Exposure

    Ultraviolet light degrades most synthetic materials over time — fading colour, breaking down polymer chains, and causing surface chalking or cracking. Standard interior faux stone panels are not UV-stabilised. For exterior applications, specify panels with UV-stable pigments and UV-resistant surface treatments, or use real stone materials that are inherently UV-stable.

    Temperature Cycling

    Exterior walls experience significant daily and seasonal temperature fluctuations — from below freezing in winter to 40°C+ in direct summer sun in many US climates. Panel materials and adhesives must accommodate thermal expansion and contraction without cracking, delaminating, or creating visible joint movement. This requirement eliminates most interior panel adhesives and many interior panel materials.

    Moisture and Freeze-Thaw

    Exterior walls are exposed to rain, snow, and frost. Moisture that penetrates behind panels and freezes can cause significant damage — panels detach, substrates crack, and moisture damage propagates into the building fabric. Correct exterior installation requires appropriate substrate waterproofing, moisture-resistant adhesives, and sealed joints at all panel edges.

    Panel Types for Exterior Applications

    Panel Types for Exterior Applications
    Photo by Balázs Gábor on Unsplash

    Natural Stone Veneer (Best for Exterior)

    Natural thin stone veneer is the most durable exterior stone wall material. Real stone is inherently UV-stable, frost-resistant (for appropriate stone species), and weather-proof when correctly installed. The installation requirements for exterior natural stone veneer — metal lath, scratch coat mortar, professional setting — are demanding, but the result is a permanent exterior cladding with a design life measured in decades.

    For exterior garden walls, boundary walls, and feature wall sections on home exteriors, natural stone veneer is the specification benchmark. Cost is higher than manufactured alternatives, but the durability and authentic appearance justify the investment for prominent exterior applications.

    Manufactured Stone Veneer for Exterior

    Manufactured stone veneer (MSV) — concrete-based units cast in stone moulds — is specifically designed and tested for exterior use. Major MSV manufacturers produce products certified to ASTM C1670 (the US standard for adhered manufactured stone masonry veneer units), confirming suitability for exterior applications. MSV for exterior use requires correct substrate preparation (waterproof barrier, metal lath, scratch coat) and professional installation.

    Exterior-Rated Faux Stone Panels

    Some faux stone panel manufacturers produce exterior-rated versions of their products — using UV-stabilised materials, weather-resistant surface treatments, and specified exterior adhesives. When considering faux stone panels for outdoor use, confirm explicitly with the manufacturer that the product is rated for exterior exposure in your climate zone. Request the product’s UV stability rating, frost resistance rating, and recommended adhesive system for outdoor use.

    For RockSurface® panels specifically: the primary collection is designed and rated for interior use. Contact The Panel Hub directly to discuss exterior applications and confirm current product ratings for your specific climate and exposure conditions.

    Exterior Applications Where Stone Panels Work Well

    Garden Feature Walls

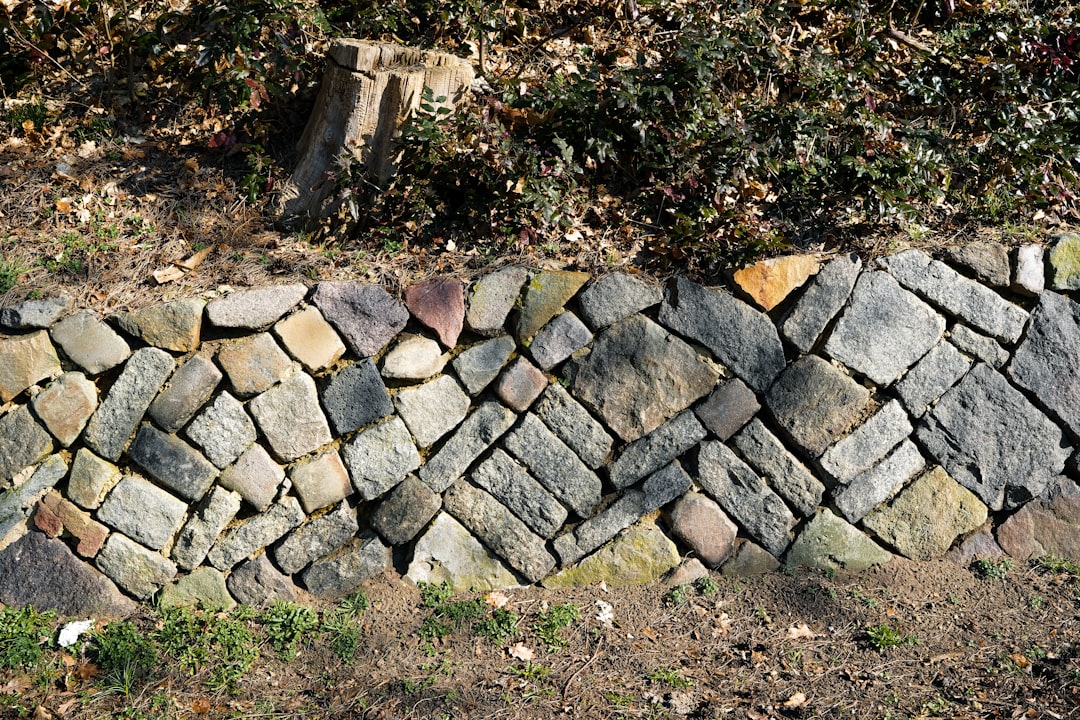
    Freestanding garden feature walls — separating zones, framing garden rooms, or creating backdrop walls for water features and planting — are excellent applications for exterior stone panel cladding. A stone-clad garden wall creates a permanent, designed landscape feature that weathers well and requires minimal maintenance. Natural stone veneer or exterior-rated MSV is the appropriate specification here.

    Patio and Outdoor Living Space Walls

    The boundary walls of a patio or outdoor living area, or the exterior wall of the house facing the patio, are natural candidates for stone panel cladding. Stone on the patio-facing wall visually extends the interior character of the home into the outdoor space and creates a premium material backdrop for outdoor furniture and planting. This application is typically sheltered from direct weather more than a fully exposed exterior wall.

    Exterior House Feature Walls

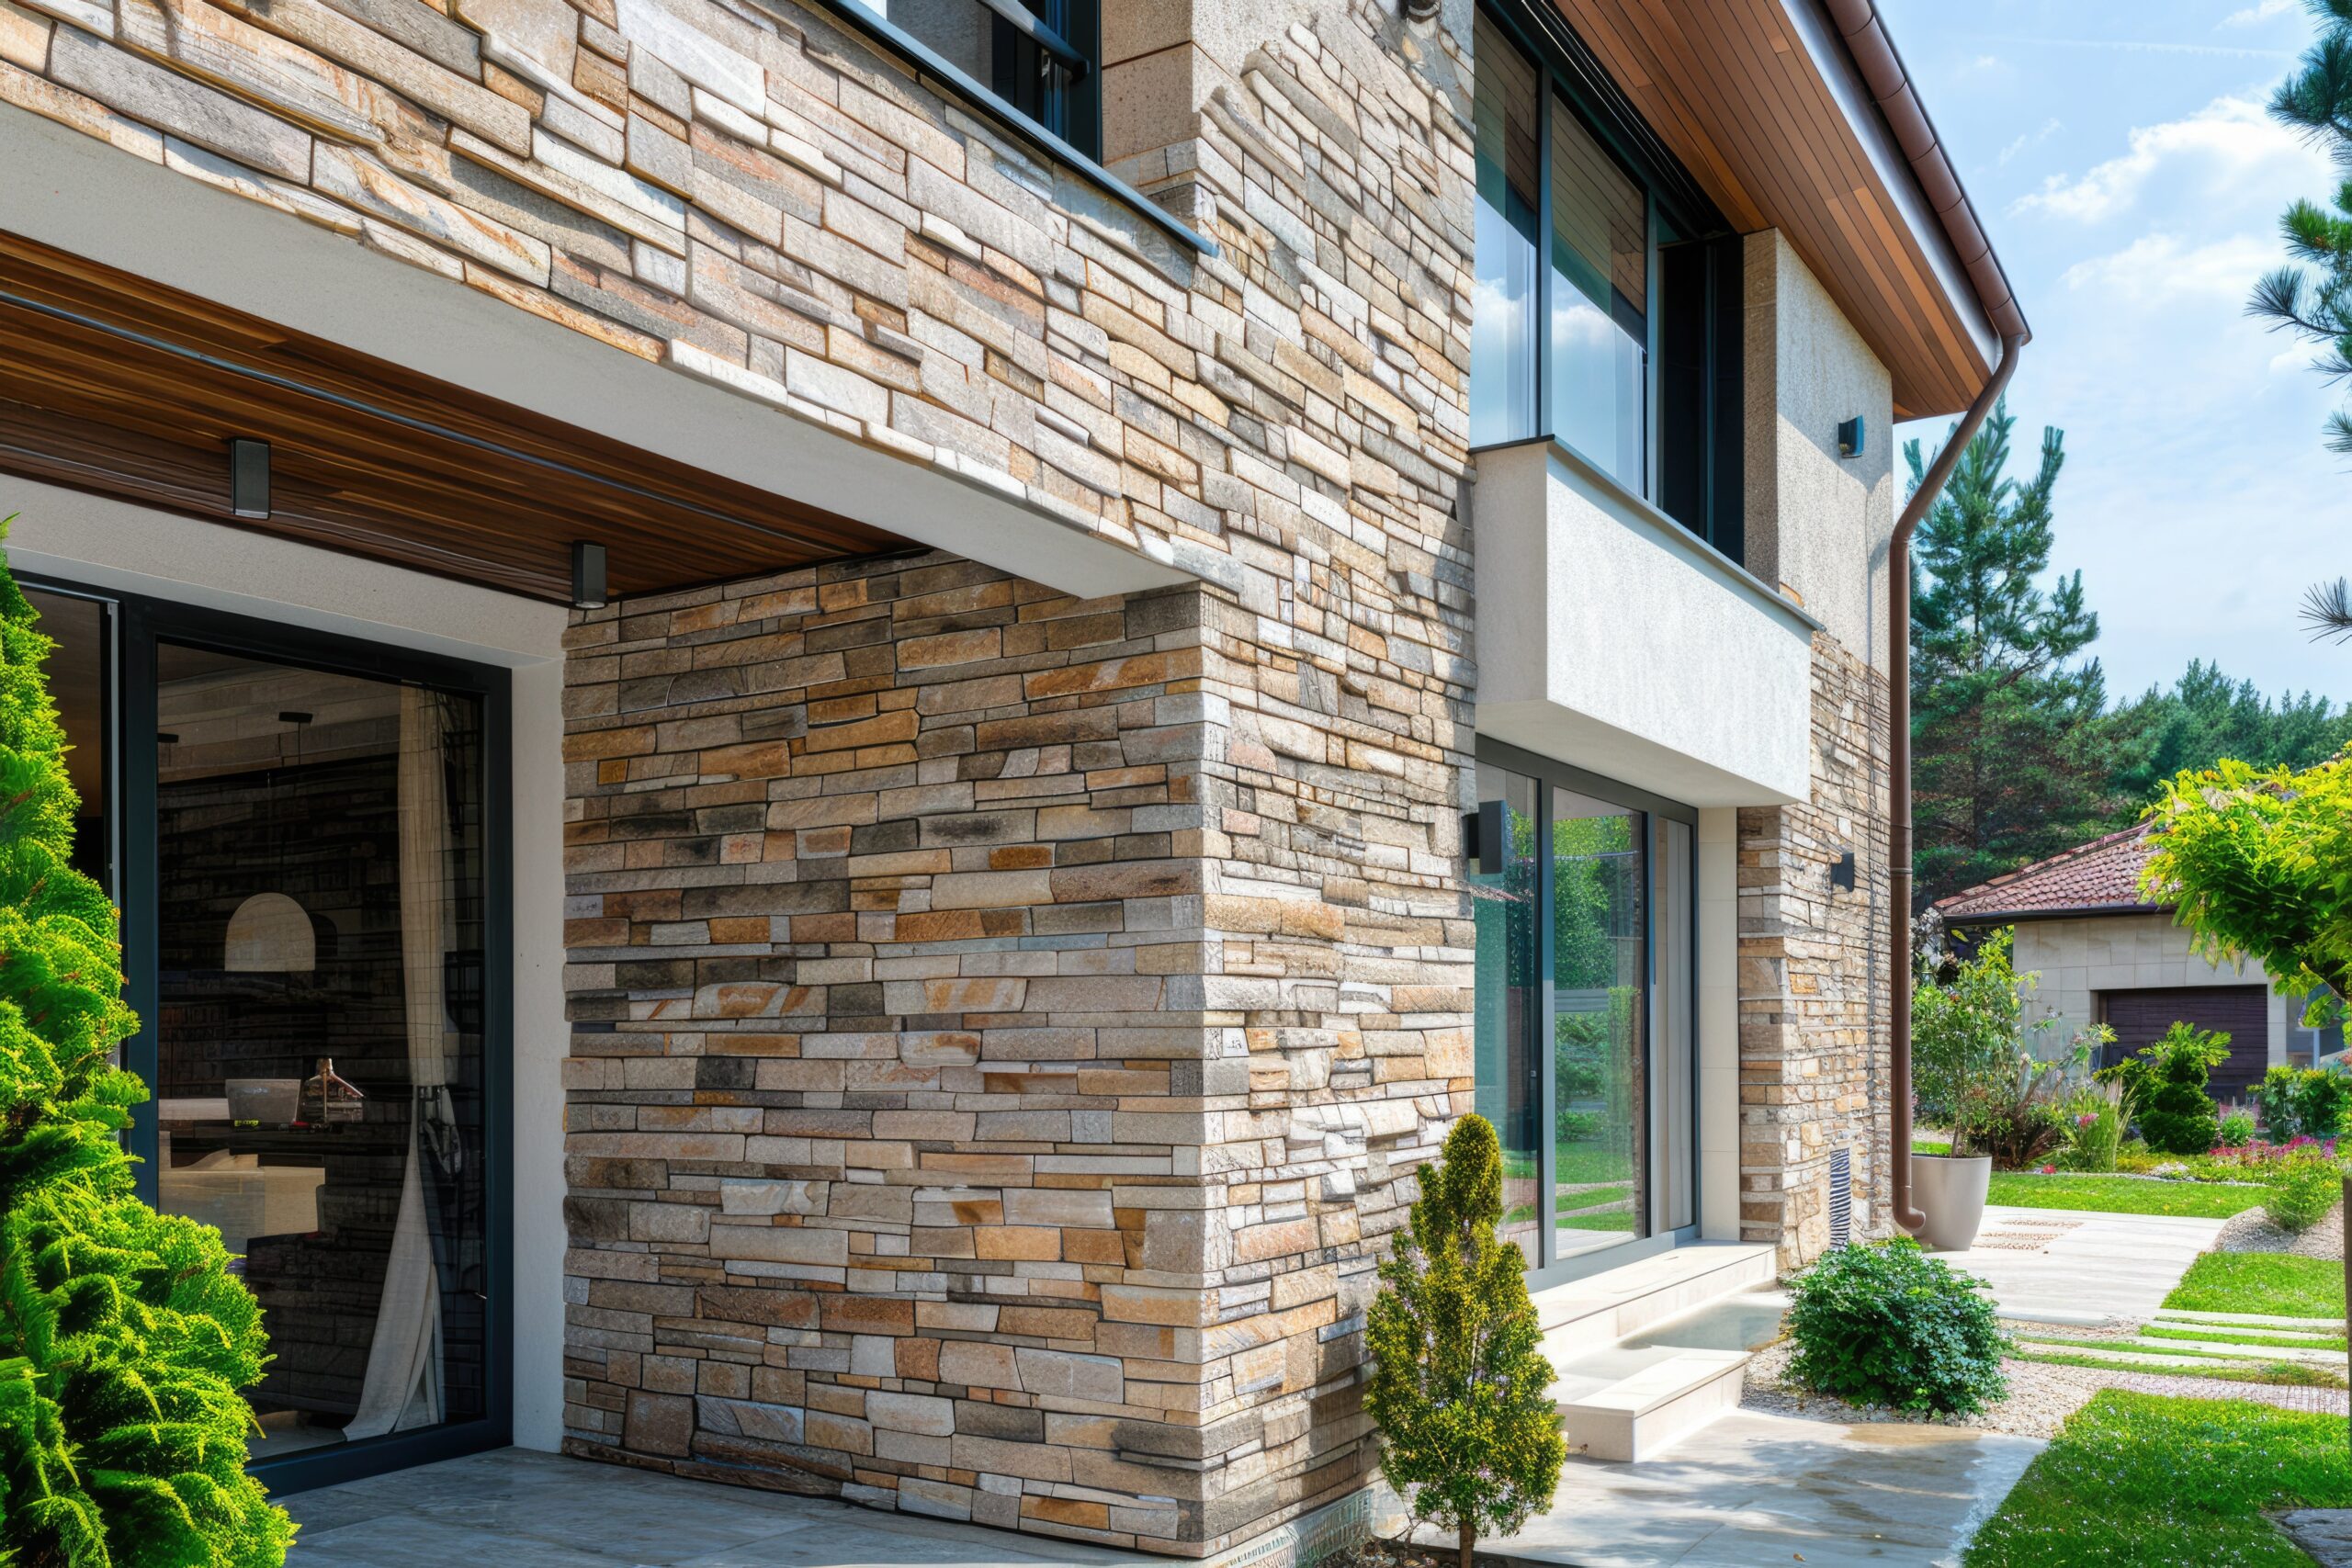
    A stone panel section on an exterior house wall — flanking the front door, beneath a window grouping, or framing a garage entrance — creates an exterior character that painted render and brick alone cannot achieve. These applications are fully exposed to weather and require natural stone veneer or exterior-rated manufactured stone veneer for long-term performance.

    BBQ and Outdoor Kitchen Surrounds

    Stone cladding around an outdoor kitchen counter, BBQ surround, or pizza oven creates a premium material finish that suits the scale and character of an outdoor cooking area. These installations are partially sheltered (typically under a pergola or roof structure) which reduces full weather exposure. Confirm heat proximity to any panel material before installing around live cooking surfaces — maintain appropriate clearance from direct heat sources.

    Pool and Water Feature Surrounds

    Stone cladding around pool surrounds, water feature walls, and garden ponds is a classic application. The material association of stone and water is instinctive and visually compelling. Applications directly adjacent to water require fully waterproof adhesives and sealed joints — water ingress behind panels in a pool surround context is very difficult to remediate once it occurs.

    Installation Requirements for Exterior Stone Panels

    Substrate Preparation

    Exterior stone panel substrates must be waterproofed before installation. Apply a waterproof membrane or tanking coat to masonry substrates. For timber-frame construction, install a weather-resistant barrier (housewrap) before the panel substrate. Concrete block and brick are the most straightforward substrates for exterior stone panels — render-coated surfaces require the render to be fully cured and firmly bonded before panelling.

    Adhesive Selection

    Use only exterior-rated construction adhesives for outdoor stone panel applications. MS polymer adhesives with UV stability and frost resistance are appropriate. Polyurethane adhesives offer high initial bond strength but can be brittle in very low temperatures. Always check the adhesive manufacturer’s temperature range rating against your climate’s expected extremes.

    Expansion Joints

    Exterior panel installations require expansion joints — gaps between panel sections that accommodate thermal movement — at maximum 3m centres both horizontally and vertically. Fill expansion joints with a flexible exterior sealant rather than rigid grout or adhesive.

    The Interior vs Exterior Decision

    If your primary goal is a stone wall surface visible from inside the home — even if it is on an exterior wall — interior-rated faux stone panels viewed through glass are appropriate. If the panel surface itself is exposed to weather, specify accordingly and accept the higher cost and installation complexity of exterior-rated products. The cost of specifying incorrectly — premature panel failure, moisture ingress, and remediation — significantly exceeds the cost of the correct specification from the start.

    Browse RockSurface® Stone Wall Panels

    The RockSurface® collection is designed and rated for interior and sheltered applications. For exterior and fully exposed applications, contact The Panel Hub’s team directly to discuss product suitability for your specific project conditions. Order a sample to evaluate texture and quality, and explore our stone accent wall ideas guide for inspiration across indoor and outdoor contexts.

  • Rock Wall Panels for Bedroom: Ideas, Placement & What to Avoid

    Rock Wall Panels for Bedroom: Ideas, Placement & What to Avoid

    Can You Use Rock Wall Panels in a Bedroom?

    Can You Use Rock Wall Panels in a Bedroom?
    Photo by e24 on Unsplash

    Yes — and when done well, a rock or stone panel wall in a bedroom is one of the most striking and character-defining design choices available. The challenge is that bedrooms are intimate spaces with specific visual and atmospheric requirements that differ from living rooms and commercial environments. Stone panels that would look commanding in a living room can feel cold, heavy, or aggressive in a bedroom if applied without care.

    This guide covers the approaches that work, the profiles that suit bedroom use, and the mistakes most commonly made when specifying stone panels in sleeping spaces.

    Why Rock Panels Work in a Bedroom

    The bedroom is the most personal room in the home — the space where the design of the environment directly influences mood, relaxation, and sleep quality. Natural material surfaces — stone, wood, linen, organic textures — contribute to a sense of warmth and groundedness that synthetic and industrial materials undermine. Rock wall panels in a bedroom introduce the weight and permanence of natural stone into what is often the most important room in terms of daily wellbeing.

    Products like the RockSurface® faux stone collection — with their genuine dimensional depth and organic texture variation — create the material presence of real stone without the weight, cost, or installation complexity. In a bedroom context, this matters: the installation can be completed without the disruption of structural work or specialist trades.

    The Best Placement: The Headboard Wall

    The Best Placement: The Headboard Wall
    Photo by Christian Ventura on Unsplash

    The wall directly behind the bed is the ideal location for a bedroom rock panel treatment. This placement works for several reasons:

    • It is viewed from the room’s natural orientation: From the doorway, the bed is the first thing you see, and the headboard wall behind it is the room’s primary visual backdrop.
    • It frames the bed architecturally: A stone panel wall behind the bed functions as a designed element that gives the sleeping position gravitas and structure — an architectural headboard at room scale.
    • It is not the surface you sleep facing: Lying in bed, you typically face the wall opposite — not the headboard wall. This means the stone texture is a backdrop rather than a surface you stare at for extended periods, which avoids the potential visual agitation of a busy texture directly in your line of sight at rest.

    Profile Selection for Bedrooms

    Not all stone profiles suit a bedroom environment equally:

    Ridge Rock — Best for Bedrooms

    The Ridge Rock profile’s horizontal layered texture has a composed, ordered quality that suits the bedroom environment well. The horizontal direction of the stone layers echoes the horizontal orientation of the bed and sleeping body, creating a subtle visual harmony. The profile reads as strong but calm — it adds character without visual agitation.

    Highland Rock — Use with Restraint

    The irregular, organic field stone texture of the Highland Rock profile is more visually complex and random. In a bedroom, this reads as rustic and natural — appropriate in a cabin-style, farmhouse, or organic-modern bedroom. In a more refined or contemporary bedroom, the irregularity of the surface can feel disordered. If using Highland Rock in a bedroom, keep the stone treatment contained to the headboard wall only and ensure surrounding surfaces are calm and simple.

    Stone Rock — For Formal Bedrooms

    The ashlar-style Stone Rock profile with its consistent face dimensions and clean joints suits formal, high-end, and hotel-inspired bedrooms. It reads as refined and architectural — appropriate for master bedrooms where a luxury aesthetic is the goal.

    Scale and Coverage: How Much Stone Is Right?

    For most bedrooms, panelling the headboard wall only — from floor to ceiling or from the bed height upward — is the most controlled and successful approach. This contains the stone treatment to a single surface where it provides maximum impact (framing the bed) without overwhelming the room’s other walls. Pair the stone headboard wall with simple, plain-painted side walls and ceiling to let the stone be the room’s singular material statement.

    Headboard Wall + Bed Alcove

    If the bed sits in an alcove — a recessed section with flanking walls — extending the stone treatment across all three surfaces of the alcove (back wall and both side walls) creates an immersive, hotel-suite quality environment. The enclosure of the alcove contains the stone and prevents it from dominating the full room.

    Avoid: Stone on Multiple Walls

    Applying stone panels to two or more walls in a bedroom typically creates an environment that feels cold, cave-like, and oppressive rather than warm and characterful. The bedroom requires balance — one wall of stone impact, three walls of calm. Breaking this balance by extending stone panels to the ceiling, side walls, or the wall you face from bed reliably produces a result that feels designed for effect rather than for human comfort.

    Colour and Tone: Warm, Not Cool

    Stone wall panels span a significant colour range — from cool grey and blue-grey tones to warm sandy, ochre, and brown tones. In a bedroom, warm stone tones are almost universally more successful than cool ones. Cool grey stone in a bedroom can read as cold and clinical — the opposite of the warmth and comfort the room should convey. Warm sandstone, warm brown field stone, and honey-toned ashlar profiles create the material warmth that makes a bedroom stone wall feel enveloping rather than austere.

    Consider the room’s existing colour palette. Stone panels with warm undertones pair naturally with natural linen, warm white paint, timber furniture, and organic textiles. Stone with cool undertones works in rooms with a deliberate cool, contemporary palette — but requires more careful surrounding material choices to avoid feeling cold.

    Lighting the Bedroom Stone Wall

    Stone panel walls in bedrooms benefit from warm, low-level lighting that emphasises the texture and depth of the surface without creating harsh shadows that might disturb sleep. Consider:

    • Bedside table lamps: The warm, low, directional light of table lamps rakes across the stone surface at bed height, creating beautiful shadow depth in the stone texture.
    • Wall-mounted reading lights: Swing-arm or fixed reading lights positioned at either side of the headboard cast angled light across the stone surface that reveals the panel’s relief depth.
    • Avoid harsh overhead downlights aimed directly at the stone wall — recessed spots directly above a stone headboard wall create flat-on illumination that removes the shadow-play and flattens the texture the panel is designed to create.

    Pairing Rock Panels with Other Bedroom Materials

    The stone headboard wall works best when the surrounding materials are chosen to complement rather than compete:

    • Natural wood: Timber bed frames, wooden floors, and wood side tables pair naturally with stone — the two organic materials reinforce each other’s warmth. Consider pairing a RockSurface® stone wall with GroovePanel® geometric wood panels on the opposite wall for a material-rich, balanced bedroom environment.
    • Soft textiles: Linen bedding, wool throws, and fabric-upholstered headboards all contrast well against stone’s hard texture.
    • Warm paint colours: Warm whites, off-whites, and warm greiges on surrounding walls complement stone panel walls without competing for attention.

    Browse RockSurface® Panels for Bedrooms

    The RockSurface® collection includes stone panel profiles suitable for bedroom feature walls — lightweight, DIY-compatible, and designed to deliver the visual character of real stone in a domestic scale application. 5-year warranty, free US delivery, 60-day returns, and 24/7 support. Order a sample to see how the texture and tone look in your bedroom space before committing to a full wall.
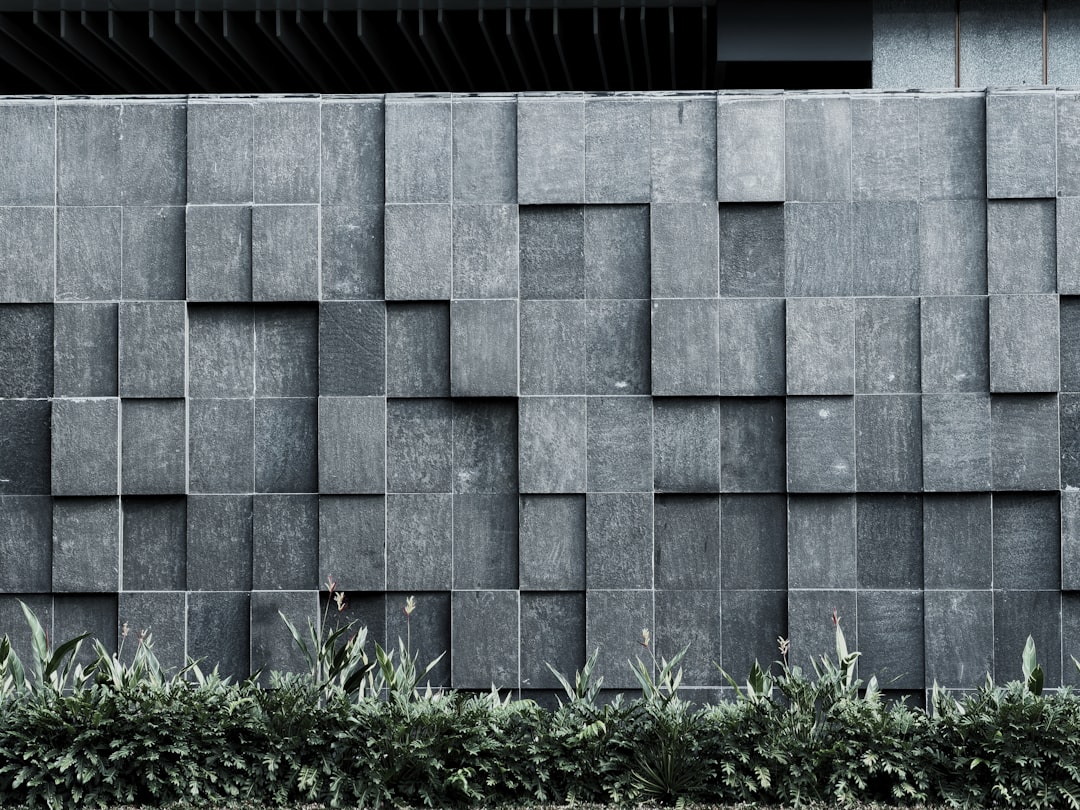
  • Shiplap vs Wood Wall Panels: What’s the Difference and Which Is Right for Your Home?

    Shiplap vs Wood Wall Panels: What’s the Difference and Which Is Right for Your Home?

    Shiplap vs Wood Wall Panels: The Short Answer

    Shiplap is a specific plank profile — individual boards with a rabbet cut on each edge that allows planks to overlap slightly and lie flush. Wood wall panels are a broader category: pre-engineered panel systems, typically sold in larger format sheets or modular tiles, that can include slat panels, geometric panels, acoustic panels, and more. The two products serve different design intentions and perform differently on a wall.

    What Is Shiplap?

    Shiplap originated as an exterior cladding material. The overlapping rabbet joint between boards creates a weather-resistant profile that sheds water. Used on interior walls, shiplap produces a characteristic horizontal-line aesthetic — evenly spaced parallel planks running across the wall surface.

    The modern interior shiplap trend owes much to the farmhouse and coastal interior styles popularised in the 2010s. White-painted pine shiplap became a design signature of a particular aesthetic. That association is now so strong that shiplap has become somewhat style-specific — it signals a rustic, casual, or coastal character that may or may not be what you want.

    Shiplap Characteristics

    • Profile: Individual planks, typically 100–150mm wide, with overlapping rabbet joints
    • Material: Usually pine or MDF, sometimes cedar for exterior use
    • Finish: Most often painted white; natural wood stain is less common
    • Aesthetic: Horizontal, linear, rustic, farmhouse, coastal
    • Installation: Board by board, nailed to studs; time-consuming on large walls
    • Gap consistency: Requires care to maintain even spacing and level lines across the wall

    What Are Modern Wood Wall Panels?

    Modern wood wall panel systems — like the GroovePanel® collection at The Panel Hub — are engineered as complete wall systems rather than individual boards. Panels are manufactured to precise dimensions, with pre-engineered edges that butt together cleanly and patterns that align panel-to-panel without careful on-site measurement and adjustment.

    The category is wide: geometric panels, acoustic slat panels, fluted panels, reeded panels, mosaic wood panels — each with its own visual character and performance characteristics. Unlike shiplap, which is strongly associated with a single aesthetic, wood wall panels span multiple design languages from contemporary minimalist to mid-century modern to Japandi.

    Wood Wall Panel Characteristics

    • Format: Panel sheets or tiles, typically 600mm–1200mm wide, installed in fewer pieces than individual plank systems
    • Material: Solid wood, real wood veneer on engineered core, or MDF — depending on the manufacturer
    • Finish: Natural wood tones (oak, walnut, pine), stained finishes, or paintable surfaces
    • Aesthetic: Spans contemporary, minimalist, Japandi, mid-century, traditional — depending on panel type
    • Installation: Adhesive and nails; larger format means fewer joints and faster installation
    • Pattern alignment: Engineered panel-to-panel alignment built into the product design

    Key Differences Side by Side

    Aesthetic Flexibility

    Shiplap is style-specific. Its horizontal plank profile reads as farmhouse, coastal, or rustic regardless of how it is finished. If that is the aesthetic you want, shiplap delivers it efficiently. If you want a contemporary, Japandi, minimalist, or architectural result, shiplap works against you — its associations are too strong.

    Modern wood wall panels are style-flexible. A geometric GroovePanel® with deep-cut crossing lines reads as contemporary and architectural. A fine oak slat panel reads as Japandi or Scandinavian. The panel format itself does not carry a single strong style association the way shiplap does.

    Installation Speed and Precision

    Individual shiplap planks require precise levelling of each course, particularly on longer walls where small angle errors compound over multiple boards. On a full 4m wall, keeping twenty individual planks level, spaced evenly, and terminated cleanly at corners and obstacles is a skilled job that takes time. Modern panel systems install faster because each panel covers more area and alignment is built into the panel design. Our installation guide walks through the full process.

    Material Quality

    Most shiplap available at building merchants and home improvement stores is pine or MDF — functional materials but not premium ones. At the premium end, shiplap in cedar, oak, or hardwood species is available but less common and significantly more expensive. Modern wood wall panels span a wider quality range from affordable MDF-core options through to 100% solid hardwood panels like GroovePanel® — all solid wood throughout, FSC® certified, and built for longevity. See our MDF vs solid wood comparison for detail on what the difference means in practice.

    Acoustic Performance

    Flat shiplap boards with tight joints provide no meaningful acoustic benefit. Modern acoustic wood panel systems — slat panels with felt backing, for example — do provide measurable sound absorption. If reducing echo or improving room acoustics is part of your goal, wood wall panels are the appropriate category; shiplap is not.

    Which Is Right for Your Home?

    Choose shiplap if:

    • You specifically want a farmhouse, coastal, or rustic interior aesthetic
    • You are happy with the standard painted-plank look
    • Budget is a priority and you are comfortable with the installation labour involved

    Choose modern wood wall panels if:

    • You want a contemporary, Japandi, minimalist, or architectural result
    • You want design flexibility — geometric patterns, acoustic performance, natural wood grain
    • You want a premium material (solid wood, real veneer, FSC certified)
    • You want faster, cleaner installation with engineered panel-to-panel alignment

    Where Each Approach Works Best: Room-by-Room

    The decision between shiplap and modern wood wall panels is partly about aesthetics and partly about the specific spatial context. Here’s how the two approaches tend to play out by room type.

    Hallways and entryways: Both treatments work well in hallways. Shiplap’s horizontal lines can make a narrow hallway feel slightly wider (horizontal lines optically expand a space). Vertical slat or fluted panels draw the eye upward, making a low ceiling feel taller. The choice depends on whether width or height is the more constraining dimension.

    Living rooms: Modern wood wall panels are the dominant choice for living room feature walls — the acoustic benefit in slat panel versions is particularly relevant for rooms where television and conversation compete. Shiplap in a living room reads as country-house or coastal in character, which suits some aesthetics but limits others.

    Bedrooms: Both approaches work as headboard wall treatments. Modern panels — particularly slat panels in warm timber tones — are the more common current choice for bedrooms. Shiplap in a bedroom reads as relaxed and informal, which suits a countryside or cottage aesthetic well.

    Home offices: Modern acoustic slat panels are practically significant in home offices: they address the reverberation that makes video calls uncomfortable. Shiplap provides no acoustic benefit. For a home office that also appears on screen regularly, modern panels offer both the aesthetic and the functional improvement.

    Kitchens and bathrooms: Shiplap in moisture-prone environments requires careful species selection and finishing — untreated pine shiplap will fail in high-humidity conditions. Modern composite-core panels rated for damp environments are more predictably moisture-resistant. In both rooms, the panel specification must match the environmental conditions.

    FAQs: Shiplap vs Wood Wall Panels

    Is shiplap the same as tongue-and-groove cladding?
    No. Shiplap boards have a rabbet (stepped overlap) cut into the top and bottom edges so adjacent boards overlap without a gap. Tongue-and-groove boards have a tongue on one edge and a groove on the other, creating an interlocking join. Both create a similar horizontal board look, but the join detail and shadow line are different. Tongue-and-groove creates a flat, flush surface; shiplap creates a visible shadow line at each board overlap.

    Can modern wood wall panels look like shiplap?
    Yes. Some modern wall panel products include a horizontal channel or groove profile that replicates the shadow line of shiplap boards in a single panel format. These products install more quickly than individual shiplap boards while achieving a similar visual result. The difference from genuine shiplap is visible on close inspection but not from normal room distances.

    What timber is shiplap typically made from?
    Traditionally, shiplap uses pine, cedar, or spruce — softwoods that are relatively easy to mill, paint, and maintain. For interior applications, MDF shiplap is available in primed and paint-ready formats. For exterior shiplap cladding, durable species like cedar, larch, or Siberian spruce are standard choices. Hardwood shiplap is less common due to cost and milling difficulty.

    How long does shiplap last compared to modern wall panels?
    Both can last 20+ years in appropriate conditions. Shiplap’s longevity depends on regular painting or staining (exterior shiplap every 5–7 years; interior every 7–10 years). Modern wood wall panels with factory-applied hard-wax oil or lacquer finishes require less frequent maintenance. In exterior applications, both require ongoing maintenance; modern composite panels are generally lower-maintenance than natural timber shiplap.

    Browse Wood Wall Panel Collections

    Explore the full range at The Panel Hub: the GroovePanel® geometric collection for contemporary and architectural interiors, the SoundPanel® acoustic slat collection for rooms where sound quality matters, and the full wood wall panel range for every style and budget. Order a sample to compare materials in your own space before deciding.

  • Stacked Stone Wall Panels: What They Are and Why Faux Is the Smarter Choice

    Stacked Stone Wall Panels: What They Are and Why Faux Is the Smarter Choice

    What Are Stacked Stone Wall Panels?

    What Are Stacked Stone Wall Panels?
    Photo by Michele Wales on Unsplash

    Stacked stone is a masonry technique where natural stone pieces — typically flat, thin slabs — are laid in horizontal layers without mortar, or with minimal mortar between courses. The result is a wall surface with a distinctive horizontal-layered texture where each stone piece is visible individually, creating depth, shadow, and natural variation across the surface.

    Stacked stone wall panels replicate this aesthetic in a manufactured format: panels moulded or textured to reproduce the layered, dimensional profile of real stacked stone. The panels are produced as modular units — typically 600mm x 150mm or similar — that interlock or align on the wall to create the appearance of a continuous stacked stone surface.

    Real Stacked Stone vs Stacked Stone Panels: A Practical Comparison

    Real Stacked Stone vs Stacked Stone Panels: A Practical Comparison
    Photo by Alex Tyson on Unsplash

    Real Stacked Stone

    Authentic stacked stone walls use natural stone — bluestone, slate, limestone, quartzite, and similar flat-splitting sedimentary and metamorphic stones are common choices. The appeal is obvious: each piece of stone is genuinely unique, the colour and texture variation is completely natural, and the finished surface has a physical depth and weight that manufactured products cannot fully replicate.

    The practical challenges are significant:

    • Weight: Real stone walls weigh 40–80kg per square metre. Most standard internal wall constructions cannot support this load without structural reinforcement.
    • Skill: Laying stacked stone correctly — maintaining courses, managing joints, handling irregular pieces — requires masonry experience.
    • Cost: Stone material, structural assessment, and skilled installation combine to make real stacked stone one of the most expensive interior wall treatments available.
    • Permanence: Once installed, a real stone wall is essentially impossible to remove without damaging the structural fabric of the building.

    Stacked Stone Wall Panels (Faux Stone)

    Faux stacked stone panels — like our RockSurface® collection — address all of these challenges directly:

    • Weight: Faux stone panels weigh a fraction of real stone — typically 3–8kg per square metre. No structural assessment required.
    • Skill: Installation uses standard construction adhesive and finishing nails. No masonry skill required; most homeowners complete a full wall installation in a day.
    • Cost: Significantly lower than real stone, particularly when labour is factored in. The material and installation costs combined are typically 20–30% of an equivalent real stone treatment.
    • Reversibility: Panels can be removed if required, though adhesive-fixed panels will leave residue on the substrate.

    What faux stone panels cannot fully replicate is the absolute uniqueness and material authenticity of real stone — a close inspection will reveal manufacturing patterns in lower-quality products. Premium faux stone panels like RockSurface® use deep-relief moulding and textured finishes that are genuinely difficult to distinguish from the real thing at normal viewing distances.

    Where to Use Stacked Stone Wall Panels

    Where to Use Stacked Stone Wall Panels
    Photo by 高 长华 on Unsplash

    Living Room Fireplace and Feature Walls

    The most natural application — the layered horizontal texture of stacked stone creates warmth and character in a living room context. The fireplace wall is the classic stacked stone feature, but full-length living room walls are equally effective. See our stone accent wall ideas guide for placement inspiration.

    Kitchen and Dining Room Walls

    Stacked stone panels behind a kitchen island, along a dining room wall, or as a kitchen splashback (with appropriate sealing) add a material warmth and character that painted walls cannot achieve. The horizontal layering of the stone texture creates a composed, architectural backdrop for food and dining experiences.

    Exterior-Influenced Indoor Spaces

    Garden rooms, conservatories, open-plan spaces that connect to the outside, and basement conversions all benefit from the outdoor-material vocabulary that stacked stone brings. The material bridges the inside/outside divide in a way that painted walls or standard wood treatments do not.

    Commercial Environments

    Restaurants, bars, boutique hotels, and retail environments frequently use stacked stone wall panels to create a premium material environment. The association of stone with quality, permanence, and craftsmanship is powerful in commercial contexts. RockSurface® panels carry a 5-year warranty and are suitable for commercial specification.

    What to Look for When Buying Stacked Stone Panels

    Relief Depth

    The depth of the panel’s surface relief determines how much shadow is cast and how authentic the stacked stone effect appears. Look for panels with at least 20–30mm of surface relief — shallow panels read as flat pattern rather than genuine stone texture at close range.

    Colour Variation

    Natural stacked stone has significant colour and tone variation between individual pieces. Premium faux stone panels replicate this variation through varied toning and finish on individual “stones” within the panel. Wall panels with flat, uniform colour look noticeably artificial even at a distance.

    Panel-to-Panel Pattern Repetition

    Lower-quality faux stone panels have a visible repeat pattern — the same stone arrangement repeats every panel or every two panels, creating a visible, artificial regularity. Good faux stone panels randomise the stone arrangement sufficiently that no obvious repeat is visible across a full wall installation.

    Installation System

    Look for panels with an interlocking or staggered-joint installation system that hides panel joints within the stone pattern. Panels with a visible square grid of joints on the installed wall do not replicate the random joint pattern of real stacked stone.

    How to Style Stacked Stone Panels: Five Applications That Work

    Stacked stone has a specific visual vocabulary — horizontal ledgestone layers create a strong directional line that reads differently to random-coursed stone or smooth cladding. Here are five applications where it works particularly well.

    1. Fireplace surround floor-to-ceiling: The classic stacked stone application. Running ledgestone panels from hearth to ceiling on a chimney breast creates a dramatic focal point in a living room. The horizontal layering directs attention upward, which suits taller fireplace surrounds. Keep the adjacent walls plain to let the stone breathe.

    2. Kitchen island base: Stacked stone panels on the base of a kitchen island add weight and permanence to what can otherwise be a floating element in a room. The texture contrasts effectively with smooth countertop surfaces, polished handles, and flat cabinet doors. Works best with island bases over 900mm long where there’s enough surface area for the pattern to register.

    3. Garden or entertainment bar: Stacked stone is one of the most popular treatments for outdoor kitchen bars, pizza oven bases, and garden entertainment areas. The profile suits the outdoor scale well and works with exterior-rated faux stone panels in UV-stable finishes.

    4. Retail or commercial reception: In commercial settings — hotel lobbies, wine bar frontages, boutique retail interiors — stacked stone panels on a reception desk front or entrance wall communicate permanence and quality. The material reads as substantial without the cost and structural implications of real stone.

    5. Partial wall treatment (dado): A horizontal band of stacked stone at dado height (900–1,100mm) on a dining room or hallway wall gives a room a period-influenced character without committing to a full feature wall. Paired with a contrasting paint colour above, this treatment is distinctive and architecturally deliberate.

    FAQs: Stacked Stone Wall Panels

    What is the difference between stacked stone panels and ledgestone panels?
    The terms are often used interchangeably. Both refer to panels designed to replicate the appearance of horizontally layered stone — individual courses of thin stone pieces stacked in roughly uniform rows. “Ledgestone” typically refers to the specific profile where pieces have a consistent thickness and horizontal alignment, while “stacked stone” can refer to more varied profiles including mixed-length pieces.

    Do stacked stone panels have visible seams between panels?
    Quality stacked stone panels are designed with staggered joints and randomised edge profiles so that adjacent panels interlock without creating a visible vertical seam line. When selecting panels, check that the product has a random or staggered edge format. Butt-jointed panels with straight edges will create visible grid lines across the finished surface.

    Can stacked stone panels be used on curved walls?
    Rigid stacked stone panels cannot curve. On curved surfaces, the panels would need to be cut into narrower strips and installed with gaps that accommodate the curve. For gently curved surfaces (radius over 3m), this is feasible. For tight curves, individual stone tile products are a better fit than large-format panels.

    How thick are stacked stone wall panels?
    Faux stacked stone panels typically have a relief depth of 20–50mm from the back of the panel to the face of the most projecting stone piece. The overall panel thickness including the backing board is typically 25–55mm. This dimensional depth is what creates the three-dimensional shadow-line effect characteristic of real stacked stone.

    Browse RockSurface® Stacked Stone Panels

    The RockSurface® collection at The Panel Hub includes deep-relief faux stone panels with genuine stone-like texture, colour variation, and randomised pattern — designed to read as authentic at normal viewing distances. All panels come with a 5-year warranty, free US delivery, and 60-day returns. Order a sample to evaluate the depth, texture, and colour in your own space.

  • Stone Accent Wall Ideas: 10 Ways to Add Natural Texture to Any Room

    Stone Accent Wall Ideas: 10 Ways to Add Natural Texture to Any Room

    Why a Stone Accent Wall Works in Almost Any Room

    Why a Stone Accent Wall Works in Almost Any Room
    Photo by Clay Banks on Unsplash

    Stone has a permanence and warmth that few other materials match. In architecture and interior design, exposed stone walls signal quality, character, and a connection to natural materials that is difficult to achieve any other way. The challenge has always been practical: real stone is heavy, expensive, requires skilled installation, and is permanent once in place.

    Modern faux stone wall panels solve these problems. Products like our RockSurface® faux stone panels are designed to replicate the texture, depth, and visual character of natural stone — at a fraction of the weight, cost, and installation complexity. The result is a stone accent wall that looks authentic and lasts, without the structural requirements or budget of the real thing.

    Here are ten ways to use a stone accent wall effectively.

    1. Living Room Fireplace Wall

    1. Living Room Fireplace Wall
    Photo by Dhiemas Afif Febriyan on Unsplash

    The fireplace wall is the natural home for a stone accent treatment. Stone and fire are visually connected at a fundamental level — one reinforces the other. Faux stone panels applied to the chimney breast and the recessed alcoves on either side create a complete fireplace surround that reads as architectural and considered. The RockSurface® Highland Rock panel’s irregular surface texture is particularly effective here — it replicates the character of real field stone without the weight or the mortar work.

    2. Behind the Television

    2. Behind the Television
    Photo by Marija Zaric on Unsplash

    A panel wall of faux stone behind a mounted television frames the screen in a way that no painted surface can. The texture and depth of the stone panels make the TV wall a genuine design feature rather than a functional necessity. Use a panel with a consistent horizontal texture — like the Ridge Rock profile — for a wall that reads as composed and deliberate even with the television as the focal point.

    3. Dining Room Statement Wall

    The wall at the end of a dining table or behind a sideboard is an underused opportunity. Stone panels on a dining room accent wall create a backdrop that elevates the quality of every meal — the natural texture and depth of the stone surface makes the room feel designed at an architectural level. Warm-toned stone profiles suit both contemporary and traditional dining rooms.

    4. Bedroom Headboard Wall

    A stone panel wall behind the bed is an unexpected choice that works beautifully — particularly in contemporary or industrial-influenced bedrooms. The texture of the stone creates a tactile, organic backdrop that contrasts well with the softness of bedding and fabric. Keep the stone accent wall restrained (behind the bed only) and the remaining walls simple to let the stone surface speak without overwhelming the room.

    5. Entrance Hall and Foyer

    The entrance hall is the first room visitors experience and the last they see on departure. A stone accent wall in an entrance — even a single partial wall or a section flanking the front door — sets a material quality expectation for the rest of the home. Stone panels in a hallway also benefit from the directional light common in entrance spaces, which emphasises the texture and depth of the panel surface.

    6. Home Bar or Cellar Wall

    Stone panels behind a home bar counter or wine storage area create an immediate sense of permanence and quality. The association of stone with cellars and traditional wine storage makes this a natural pairing — the aesthetic logic is intuitive. A dark, rough-textured stone profile is particularly effective in this context.

    7. Bathroom Feature Wall

    A stone accent wall in a bathroom — particularly behind a freestanding bath or a vanity unit — adds a spa-like quality to the space. RockSurface® faux stone panels are built to withstand the humidity levels of a bathroom interior. The key consideration is avoiding direct water contact in wet zones (shower enclosures and bath surrounds); in those areas, fully waterproof panels are required. Our stone wall panels for bathroom guide covers material selection and placement in detail.

    8. Kitchen Splashback and Feature Wall

    Stone panels as a kitchen splashback or behind open shelving create a material contrast that lifts the kitchen above a standard fitted-room look. The panel surface adds visual depth behind shelf displays and creates a considered backdrop for worktop items and accessories. Seal the panel surface appropriately for kitchen use — splashback areas require a panel surface that can be wiped clean.

    9. Garden Room or Conservatory Wall

    Indoor-outdoor spaces — garden rooms, conservatories, orangeries — are natural homes for stone accent walls because the stone material bridges the interior and exterior environments. A stone panel wall visible from the garden reinforces the connection between the indoor and outdoor space. Check RockSurface® panel specifications for suitability in spaces with significant temperature and humidity variation.

    10. Commercial and Hospitality Spaces

    Hotel lobbies, restaurant walls, boutique retail environments, and office reception areas benefit enormously from stone accent walls. The material quality and permanence of stone signals investment and attention to detail. Faux stone panels deliver this visual quality at the scale required for commercial spaces — and the DIY-compatible installation means stone features can be added to commercial spaces without extensive contractor involvement. RockSurface® panels come with a 5-year warranty and 24/7 support, making them appropriate for commercial specification.

    Choosing the Right Stone Profile for Your Accent Wall

    Not all stone textures suit all spaces:

    • Irregular field stone (like Highland Rock) suits rustic, farmhouse, and eclectic interiors — the randomness of the surface texture reads as natural and organic
    • Layered ridge stone (like Ridge Rock) suits contemporary and industrial interiors — the horizontal layering creates a composed, architectural rhythm
    • Smooth ashlar stone suits formal and traditional interiors — the clean faces and consistent joints read as refined rather than rustic

    Browse RockSurface® Faux Stone Panels

    Explore the full RockSurface® faux stone panels collection at The Panel Hub — including Highland Rock, Ridge Rock, and Stone Rock profiles. Each panel is lightweight, DIY-compatible, and backed by a 5-year warranty, 60-day returns, and 24/7 support. Order a sample to see how the texture and depth look in your own space before committing to a full wall.
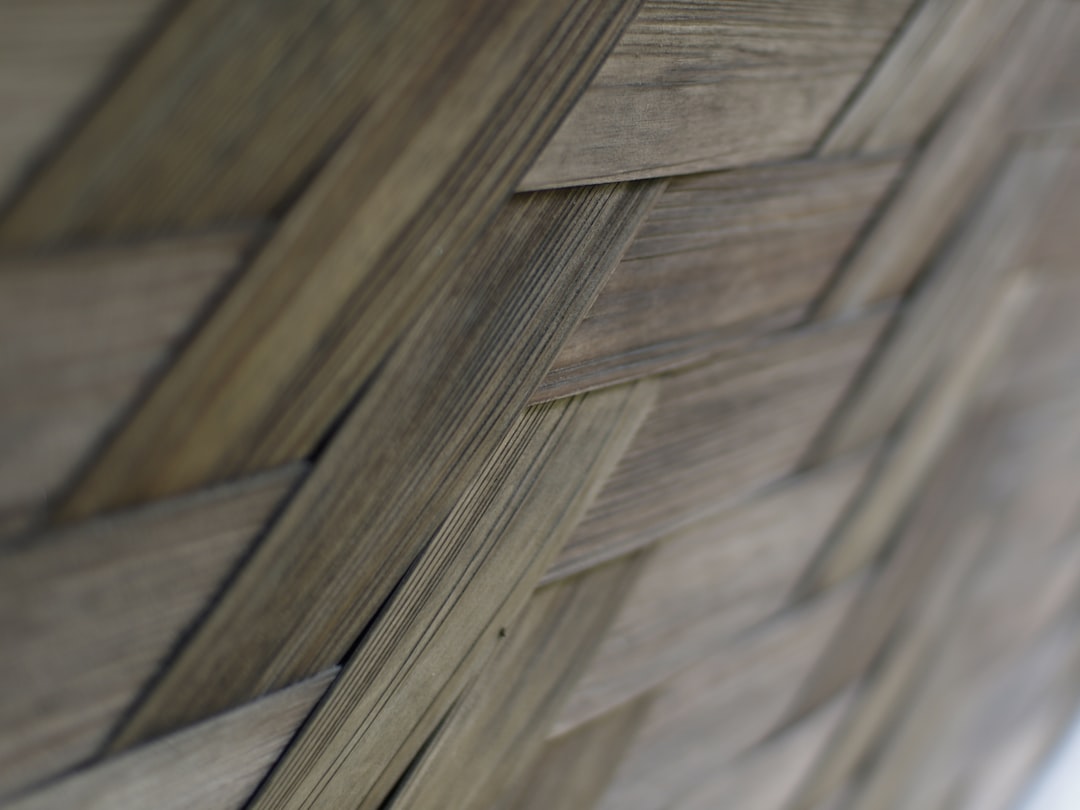
  • Stone Veneer Panels vs Faux Stone Panels: What’s the Real Difference?

    Stone Veneer Panels vs Faux Stone Panels: What’s the Real Difference?

    The Confusion Between Stone Veneer and Faux Stone

    The Confusion Between Stone Veneer and Faux Stone
    Photo by engin akyurt on Unsplash

    The terms “stone veneer” and “faux stone” are used interchangeably in much of the market — which creates genuine confusion when buying. They describe different products with different material compositions, different installation requirements, and different performance characteristics. Understanding the distinction matters before you commit to a purchase.

    What Is Stone Veneer?

    What Is Stone Veneer?
    Photo by Erik Mclean on Unsplash

    Stone veneer is real stone — natural rock quarried, cut, and processed into thin slabs typically 10–30mm thick. It has the same mineral composition, colour variation, and physical properties as full-thickness stone, but at a fraction of the weight of traditional masonry. Stone veneer products include:

    • Natural thin stone veneer: Real quarried stone cut to consistent thin slabs. Each piece is unique — no two sections of a natural stone veneer installation are identical.
    • Manufactured stone veneer (MSV): A concrete-based product cast in moulds taken from real stone. Uses real aggregate, Portland cement, and iron oxide pigments to replicate the appearance of natural stone. Sometimes marketed as “stone veneer” despite being a manufactured product.

    Stone veneer — particularly natural thin stone veneer — still weighs significantly more than faux stone panels. Natural thin stone veneer weighs 15–30kg per square metre. Manufactured stone veneer weighs 25–45kg per square metre. Both require a structurally appropriate substrate, and natural stone veneer often requires professional installation for larger applications.

    What Are Faux Stone Panels?

    What Are Faux Stone Panels?
    Photo by Damien Dufour on Unsplash

    Faux stone panels are manufactured products — typically polyurethane (PU) foam, high-density polyethylene (HDPE), or composite materials — moulded to replicate the surface texture, profile, and colour of real stone. They contain no stone content. Their visual appearance comes entirely from the mould (taken from real stone surfaces) and the applied finish.

    Products like the RockSurface® collection at The Panel Hub are faux stone panels. They are designed specifically to replicate the dimensional texture and visual depth of natural stone in a lightweight, DIY-compatible format.

    Side-by-Side Comparison

    Weight

    Natural stone veneer: 15–30kg/m². Requires structural assessment for most standard internal wall constructions.
    Manufactured stone veneer: 25–45kg/m². Requires structural assessment; typically needs a metal lath substrate for adhesion.
    Faux stone panels: 3–8kg/m². No structural assessment required; compatible with standard plasterboard and masonry walls.

    Installation

    Natural stone veneer: Skilled installation required. Individual pieces are set in mortar or adhesive, grouted, and finished. Specialist trades experience is strongly recommended for wall-scale installations.
    Manufactured stone veneer: Requires metal lath fixings, scratch coat mortar, and individual unit placement. Professional installation recommended.
    Faux stone panels: DIY-compatible. Construction adhesive and finishing nails. Most homeowners complete a full wall in a day. Full instructions in our faux stone installation guide.

    Cost

    Natural stone veneer: Material cost $25–$80/sq ft depending on stone species. Professional installation adds $15–$40/sq ft labour. Total installed cost: $40–$120/sq ft.
    Manufactured stone veneer: Material cost $8–$25/sq ft. Installation $10–$20/sq ft. Total installed cost: $18–$45/sq ft.
    Faux stone panels: Material cost significantly lower. DIY installation eliminates labour cost entirely. Total cost is typically 15–25% of an equivalent natural stone veneer installation.

    Appearance

    Natural stone veneer: Genuine stone — unmatched authenticity at close range. Each piece is unique. Colour variation is entirely natural. The visual quality under close inspection is impossible to replicate with manufactured products.
    Manufactured stone veneer: Very close to natural stone in appearance. Slight regularity in colour and texture is detectable on careful inspection at close range. At normal viewing distances, difficult to distinguish from natural stone.
    Faux stone panels: Premium products like RockSurface® are designed to be indistinguishable from real stone at normal viewing distances (1.5m+). At very close range, the manufacturing substrate is detectable to a trained eye. For most residential and commercial applications, the visual difference is immaterial.

    Durability

    Natural stone veneer: Permanent. Appropriately installed natural stone veneer lasts the life of the building. Resistant to impact, heat, and UV. Can be cleaned with any stone-appropriate cleaning product.
    Manufactured stone veneer: Very durable. Concrete-based construction resists impact and environmental exposure well. Pigments may fade over decades with UV exposure in exterior applications.
    Faux stone panels: Appropriate for interior applications; less suitable for high-UV exterior environments without specific UV-stable finishes. Impact resistance is lower than real stone. Interior lifespan is very long with correct installation and care.

    Repairability

    Natural stone veneer: Individual damaged pieces can be replaced if matching stone is available.
    Manufactured stone veneer: Individual units can be replaced; colour matching may vary with production batches.
    Faux stone panels: Damaged sections can be replaced panel by panel — easier than individual piece replacement in stone veneer systems.

    Which Should You Choose?

    Choose Natural Stone Veneer If:

    • Absolute material authenticity is a priority — you want the genuine article
    • The installation will receive close scrutiny (e.g., a luxury residential project where clients will touch and examine the surface)
    • Budget accommodates material and professional installation costs
    • The application is exterior or in a high-heat environment

    Choose Faux Stone Panels If:

    • The application is interior, viewed primarily from normal room distances (1.5m+)
    • DIY installation is preferred or budget is a consideration
    • The structural capacity of the wall does not support the weight of real stone veneer
    • You want the visual character of stone without permanent commitment — faux panels can be removed if required
    • Speed of installation matters — a full wall of faux stone panels installs in one day

    Colour, Texture, and Profile: Choosing the Right Look

    Beyond the material and cost comparison, the choice between stone veneer and faux stone panels often comes down to the aesthetic options available in each category and how they suit the specific room and application.

    Stone veneer profiles: Real stone veneer is shaped and cut from actual quarried stone, so the available profiles depend on what can be achieved with that material — typically flat-face, ledgestone, and river rock cuts. The colour palette is entirely natural and varies by quarry batch, which means exact colour-matching between batches is impossible. This can cause visual inconsistency if you order multiple times for the same project.

    Faux stone panel profiles: Polyurethane panels are cast from moulds taken from real stone originals, so they can replicate any stone profile in a consistently reproducible format. This means exact colour and texture matching across all panels in a single project, and the ability to reorder identical panels years later. The three main RockSurface® profiles — Highland Rock, Ridge Rock, and Stone Rock — each replicate a distinct stone character suitable for different applications.

    Scale and room proportion: Faux stone panels come in standard sizes that can cover large wall areas quickly and with predictable spacing. Real stone veneer pieces vary in individual size, which requires more careful planning for large areas. In a small room, the larger-format relief of some faux stone profiles can be proportionally challenging — compare profile samples against actual wall dimensions before committing.

    Colour consistency in rooms with natural light: Natural stone veneer changes colour character significantly under different light conditions — this is part of its appeal and is completely authentic. Faux stone panels have a fixed colour formulation that reads consistently under most light conditions. Neither is inherently better; they suit different design intentions.

    FAQs: Stone Veneer vs Faux Stone Panels

    Can stone veneer and faux stone panels be used together?
    Combining real stone veneer with faux stone panels in the same space is rarely advisable — the material quality difference becomes apparent on close inspection. In separate rooms of the same property, or in areas viewed from very different distances, the combination can work. Generally, it’s cleaner to choose one material per application.

    Is stone veneer heavier than faux stone panels?
    Yes, significantly. Real stone veneer weighs 30–50 kg/m² depending on the profile and stone type. High-density polyurethane faux stone panels weigh 2–4 kg/m². The weight difference affects installation method (structural fixing requirements for real stone vs. adhesive-only for faux stone) and whether the existing wall structure can support the cladding without reinforcement.

    How do I tell the difference between stone veneer and faux stone panels at a showroom?
    Touch the surface and tap it lightly. Real stone veneer is cold to the touch (thermal mass), completely rigid, and sounds solid when tapped. Faux stone panels feel slightly warmer, flex very slightly under pressure in thin sections, and sound slightly hollow when tapped. At visual distance, quality faux stone is difficult to distinguish from real stone veneer.

    Does faux stone panel installation require any special skills?
    No specialist skills are required for standard wall installations. Construction adhesive application, basic measuring and cutting with a handsaw or jigsaw, and level checking with a spirit level are the required skills — all accessible to competent DIYers. Real stone veneer installation requires more experience, particularly for cutting stone and managing grout lines.

    Browse RockSurface® Faux Stone Panels

    The RockSurface® collection at The Panel Hub includes Highland Rock, Ridge Rock, and Stone Rock profiles — premium faux stone panels designed to deliver the visual character of real stone at a fraction of the weight, cost, and installation complexity. Order a sample to evaluate the texture and depth in your own space.