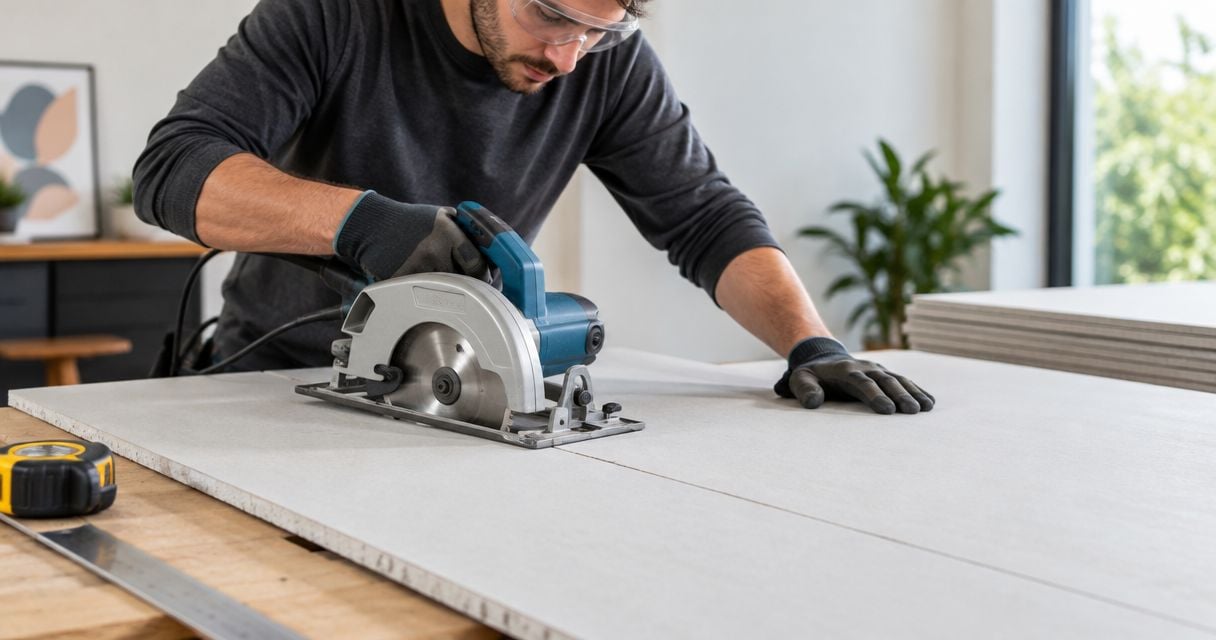
Yes, many wood, MDF, and wood-veneer wall panels can be cut with a standard circular saw when you use a blade approved for the material and support the panel securely. The main caveat is panel construction: backing, raised details, plastic layers, and concealed fasteners can require a different cutting method, so check the panel instructions before cutting.
- Can wall panels be cut with a circular saw? Yes, when the blade matches the panel material.
- The Panel Hub acoustic wall panels suit homeowners seeking decorative paneling with sound absorption.
- Support both sides of the cut, test an offcut, and follow the panel and saw instructions.
- A circular saw handles straight cuts; enclosed openings and curves need a different approach.
Why this matters
A panel can fit perfectly and still look unfinished if its cut edge is chipped. Your blade, face orientation, and support setup determine whether that edge looks clean beside a ceiling, doorway, or trim piece.
For a 2026 DIY project, identify the panel's core before choosing a blade. A wood-looking surface does not establish what is underneath; this guide to engineered wood veneer versus solid wood paneling explains the material distinction.
Choose the cutting method for the complete panel, not just its decorative face.
Can wall panels be cut with a circular saw?
Yes. A standard handheld circular saw is suitable for many straight cuts through wood-based wall panels, provided its cutting capacity, blade, and operating instructions match the job. It is not a universal cutter for every decorative panel.
Use this material check before setting up your saw. These are cutting considerations, not confirmation that every product in a category accepts the same blade.
| Panel construction | Best for | Circular saw suitability | Main limitation |
|---|---|---|---|
| Solid wood | Decorative wood walls | Generally suitable with a wood-cutting blade matched to the cut | Grain can splinter at the edge |
| MDF or wood-veneer composite | Flat decorative surfaces | Generally suitable with an appropriate fine-finish blade | Dust and fragile surface edges need attention |
| Acoustic slats on backing | Decorative sound-absorbing walls | Suitable only when the instructions permit cutting the assembled panel | Slats and backing need secure support |
| PVC | Decorative plastic wall finishes | Use only when the panel and blade instructions permit it | Heat, vibration, and an unsuitable blade can damage the edge |
| Mineral, cementitious, or unknown composite | Product-specific applications | Do not assume a wood-cutting setup is suitable | Blade requirements and dust hazards differ |
A circular saw's advantage is a straight cutting path across a large panel. Its drawback is limited control over tight curves, small loose pieces, and enclosed openings. Use it for the cuts it handles well rather than forcing it into every part of the installation.
How do you cut wall panels with a circular saw?
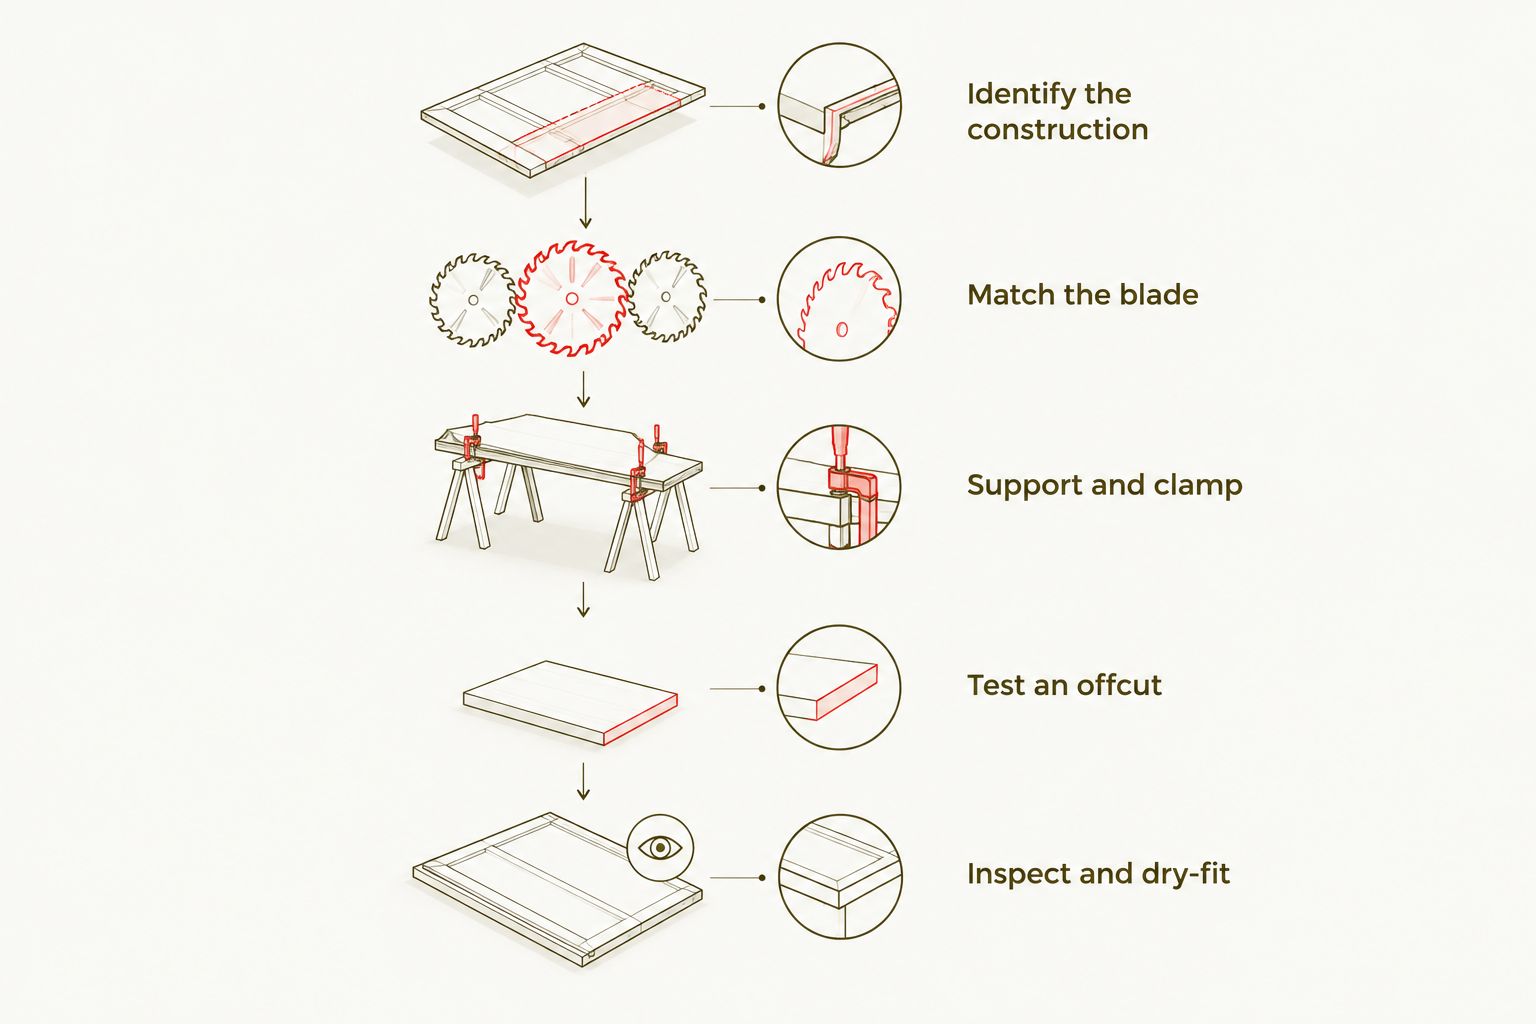
Use this sequence for a straight cut in a panel whose instructions permit circular-saw cutting. Complete the setup with the saw unplugged or its battery removed.
1. Identify the construction
Check the face, core, backing, and any attached components. Look for staples, screws, metal strips, or other hardware along the proposed cut line; do not cut through concealed hardware with a wood blade.
Read the panel's installation instructions and relevant safety information. If you cannot establish the material or an approved cutting method, stop before making a test cut.
2. Match the blade
Select a blade labeled for the material and compatible with the saw's diameter, arbor, and speed requirements. For decorative wood-based surfaces, use a blade intended for clean finishing rather than assuming a coarse framing blade will leave an acceptable edge.
There is no universal tooth count for wall paneling. Blade diameter, tooth geometry, material, and cut direction all matter, so follow the blade manufacturer's stated uses.
3. Mark the finished edge
Measure from the panel edge that will remain in the installation. Mark the finished dimension, then identify the waste side so the blade's kerf—the material removed by the cut—does not shorten the piece you need.
For a square cut, check the line at 90 degrees to the reference edge. A pattern can create a misleading visual reference, so measure from a reliable physical edge rather than following a decorative groove automatically.
4. Support and clamp
Place the panel on a stable cutting setup that supports the retained piece and the waste without closing the kerf around the blade. A suitable sacrificial support can help, provided the blade path remains clear of the bench and hardware.
Clamp a straightedge or compatible guide using the saw's actual base-to-blade offset. Check that clamps will not obstruct the saw, guard, motor housing, or your stance along the cut.
5. Set depth and bevel
Set blade depth according to the saw manual and panel thickness. Excessive exposed blade is unnecessary; insufficient depth leaves the panel partly attached.
For a square edge, check the saw's 0-degree bevel setting. A 45-degree miter is a different setup and only suits a joint designed for that angle; it is not the default for trimming a panel to height.
6. Test an offcut
Make a trial cut in matching waste material before cutting the visible piece. Inspect the decorative face, backing, and cut edge for chips, tearing, scorching, or separation.
On a conventional handheld circular saw, cutting with the finished face down generally reduces visible breakout because of tooth direction. Confirm that orientation with your saw and test piece, especially when the panel has a delicate or raised surface.
7. Make the cut
Wear eye and hearing protection, and use dust extraction and respiratory protection appropriate to the material and its safety information. Keep hands clear of the blade path and follow the saw manual's grip and stance instructions.
Allow the blade to reach operating speed before entering the panel. Advance steadily without forcing the saw, and stop if the panel shifts, the blade binds, or the cut starts to burn.
8. Inspect and dry-fit
Release the trigger and wait for the blade to stop before setting the saw down or handling the waste. Disconnect power before making adjustments or clearing trapped material.
Check the cut edge and dry-fit the panel before applying adhesive or fasteners. Remove loose fibers using a finishing method suitable for the panel, then confirm that any trim or edge treatment fits as intended.
What changes for acoustic slat wall panels?
Acoustic slat panels need support across their separate components, not just beneath the backing. A crosscut passes through multiple slats, while a lengthwise cut can fall within a backing gap or through a slat; those are different cutting tasks.
Keep the slats restrained without crushing their surfaces, and check whether the instructions call for securing them before trimming. Do not assume the backing alone will prevent movement as the blade reaches the final slat.
For homeowners planning an acoustic feature wall in 2026, The Panel Hub offers Acoustic Slat Wood Wall Panels | SoundPanel™. Their decorative and acoustic purpose makes them relevant to this project, but that does not establish a universal blade choice or permission to cut through every component.
Check the selected panel's cutting instructions before using the assembled panel as your test piece.
Why does cut quality vary?
A clean result depends on the interaction between the panel and the cutting setup. When an edge looks rough, check these factors before changing tools:
- Surface construction: Thin veneer and brittle decorative coatings can chip differently from solid wood.
- Blade condition: Dull, damaged, or contaminated teeth interfere with a clean cut. Disconnect power before inspection.
- Panel support: Movement allows slats, sheet edges, or backing to tear as the cut finishes.
- Feed pressure: Forcing the saw or lingering in the cut can damage the edge. Follow the blade instructions and watch the test cut.
- Cut direction: Cutting across grain or across separate slats presents different resistance from a lengthwise cut.
- Guide alignment: A guide that forces the saw sideways can cause binding rather than improve accuracy.
Do not treat masking tape as a cure for a poor setup. Tape can help with marking on some finishes, but it can also lift delicate coatings; test it on waste first.
Can I cut wall panels without chipping the face?
You can reduce chipping, but no setup guarantees a chip-free edge on every panel. Use a material-matched finishing blade, support the panel, and test face orientation on an offcut.
If the test still chips, inspect the blade and change one setup variable at a time. Do not try to solve the problem simply by pushing harder or cutting the finished panel repeatedly.
For visible edges, decide on the finish before installation. A cut that disappears beneath compatible trim has different appearance requirements from an exposed edge beside a doorway.
Should I use a circular saw or a jigsaw for wall panels?
Use a circular saw for long straight cuts and a jigsaw for suitable curves or enclosed cutouts. Both tools still need a blade approved for the panel material.
A circular saw's round blade can overcut beyond a corner, so it is not the default tool for a neat rectangular opening. Plan electrical and plumbing openings before installation, and never cut blindly into an installed wall.
For your 2026 tool plan, choose around the actual cuts rather than buying a tool for every possibility. A straight panel trim and a small service opening are separate jobs.
FAQ
Can I use a normal wood blade to cut wall panels?
A normal wood blade is suitable only when its stated uses match the panel construction and saw. A coarse framing blade is not the default choice for a delicate decorative face; use a compatible finishing blade when appropriate.
Which side of the wall panel should face down when cutting?
The finished face generally faces down with a conventional handheld circular saw to reduce visible breakout. Verify the saw’s tooth direction and test matching waste material before cutting the finished piece.
Can I cut PVC wall panels with a circular saw?
You can cut PVC wall panels with a circular saw only when the panel and blade instructions permit that method. Use the specified setup and stop if the test cut shows melting, cracking, or excessive vibration.
What blade tooth count is best for wall paneling?
There is no single best tooth count for every wall panel. Choose by the blade manufacturer’s material and finish guidance, along with the diameter and speed requirements of your saw.
Can I cut acoustic wall panels from The Panel Hub?
Check the instructions for the specific The Panel Hub acoustic wall panels before cutting. Confirm the approved tool, blade, and method for supporting or securing the slats and backing.
Can I cut wall panels after they are attached to the wall?
Do not make blind cuts through installed wall panels. Concealed wiring, plumbing, fasteners, and wall materials require assessment before cutting; removing and trimming the panel separately avoids guessing what lies behind it.
Do I need a special circular saw for a 2026 paneling project?
You do not automatically need a special circular saw for a 2026 paneling project. An existing saw is suitable when its capacity, blade compatibility, and instructions match the panel and the planned cut.
One last thing
Before your final cut, check where the pattern ends—not just where the tape measure lands. A dimensionally correct panel can still leave an awkward partial slat or an unbalanced geometric edge.
For a 2026 installation, dry-lay neighboring panels and mark the visible boundaries together. Plan the finished wall first; cut the individual pieces second.
Related guides
- Installing wall panels around window and door casings
- Filling nail holes in wood wall paneling
- Installing wall panels over uneven or bowed walls
Leave a Reply