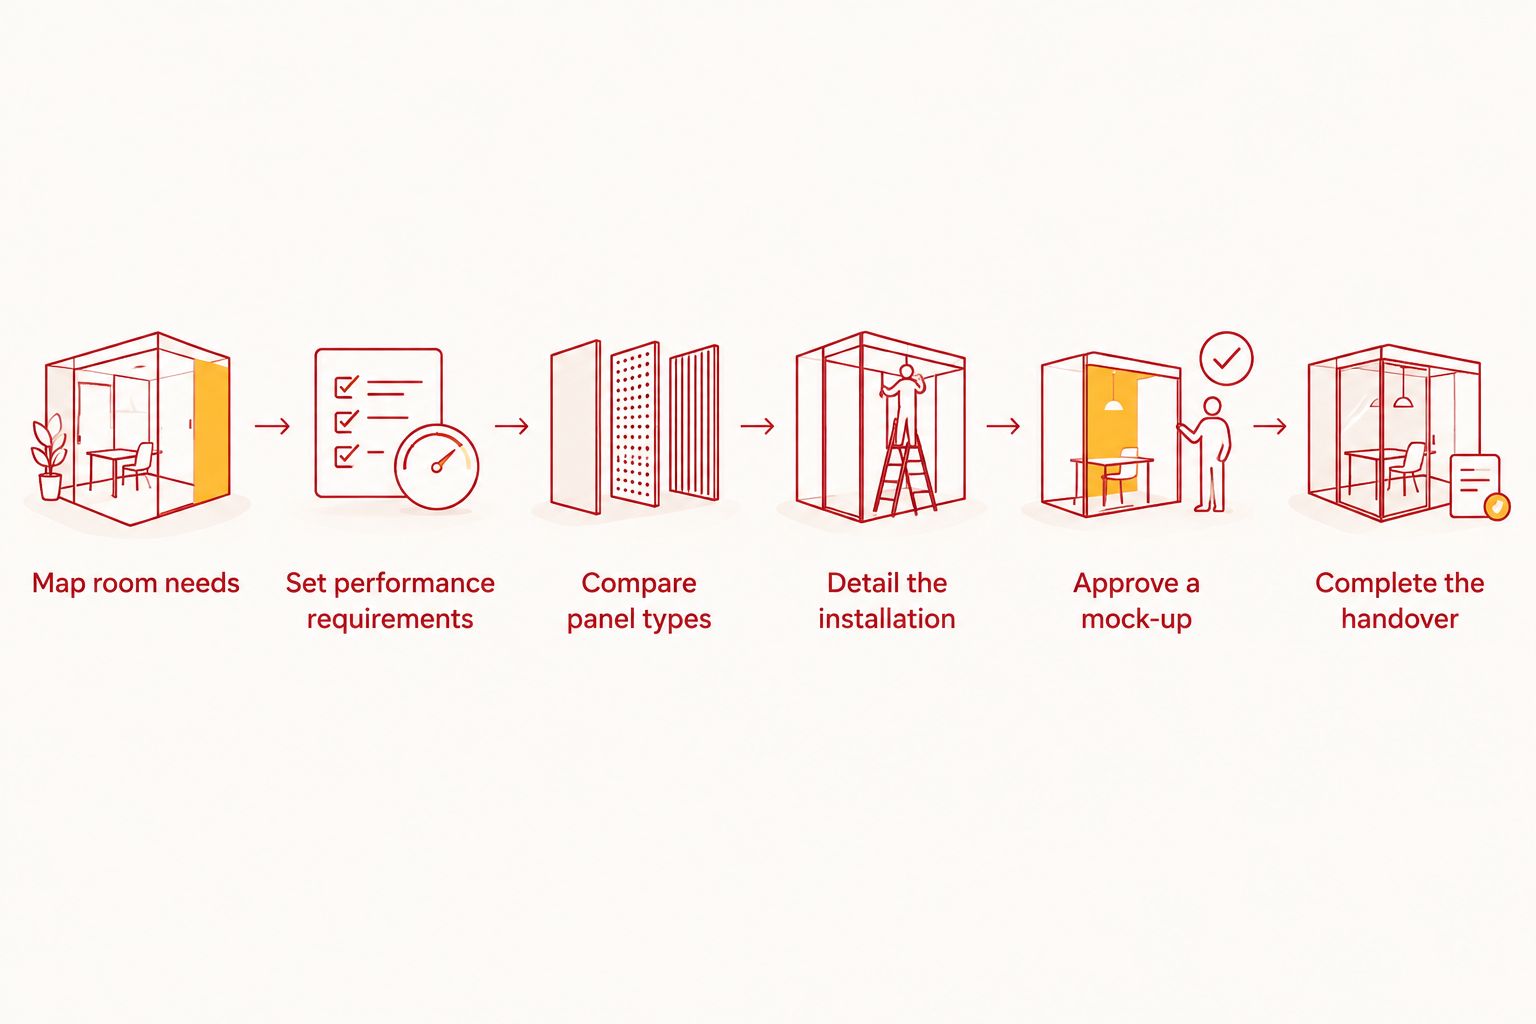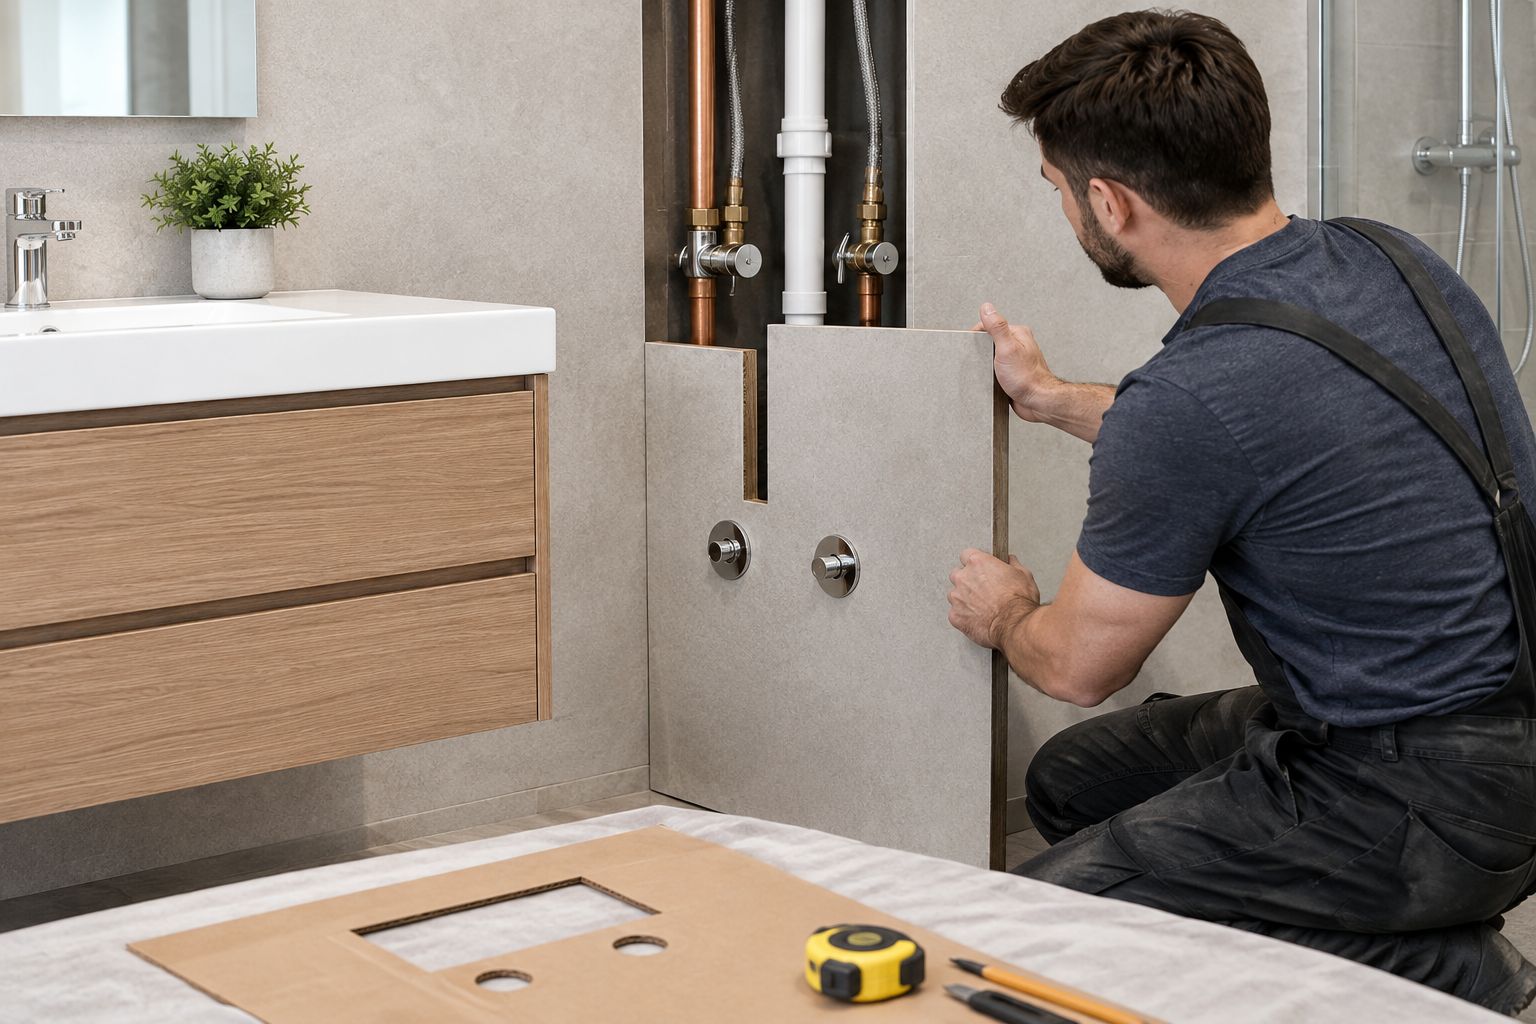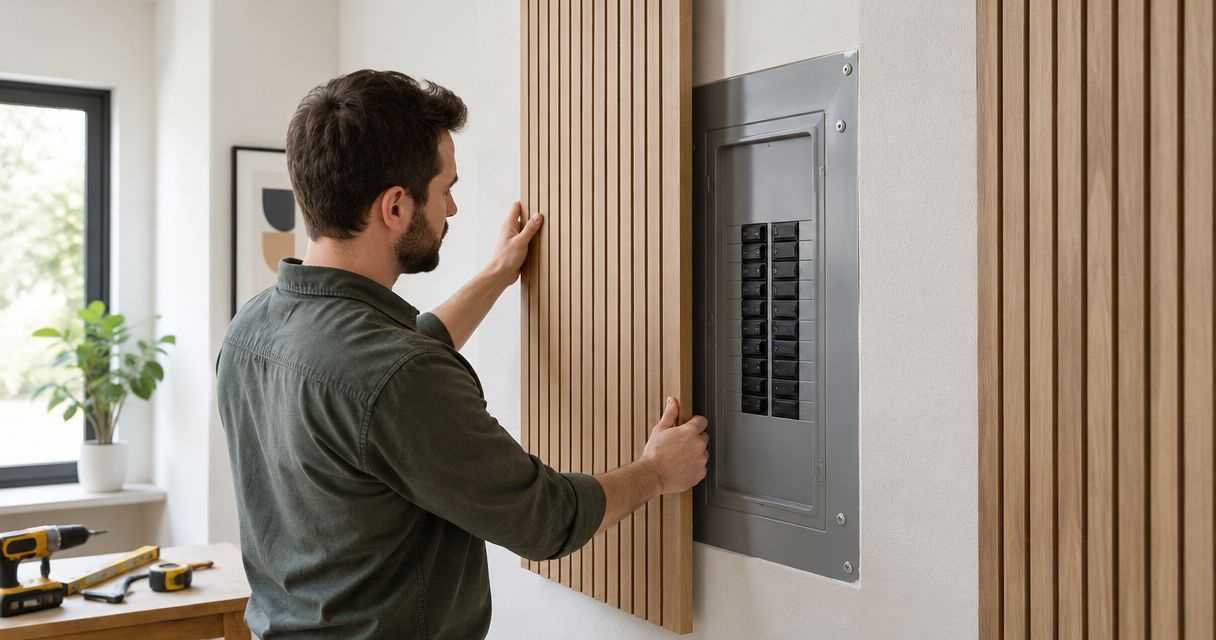
Category: Uncategorized

  • Installing wall panels around electrical breaker panels

    Installing wall panels around electrical breaker panels

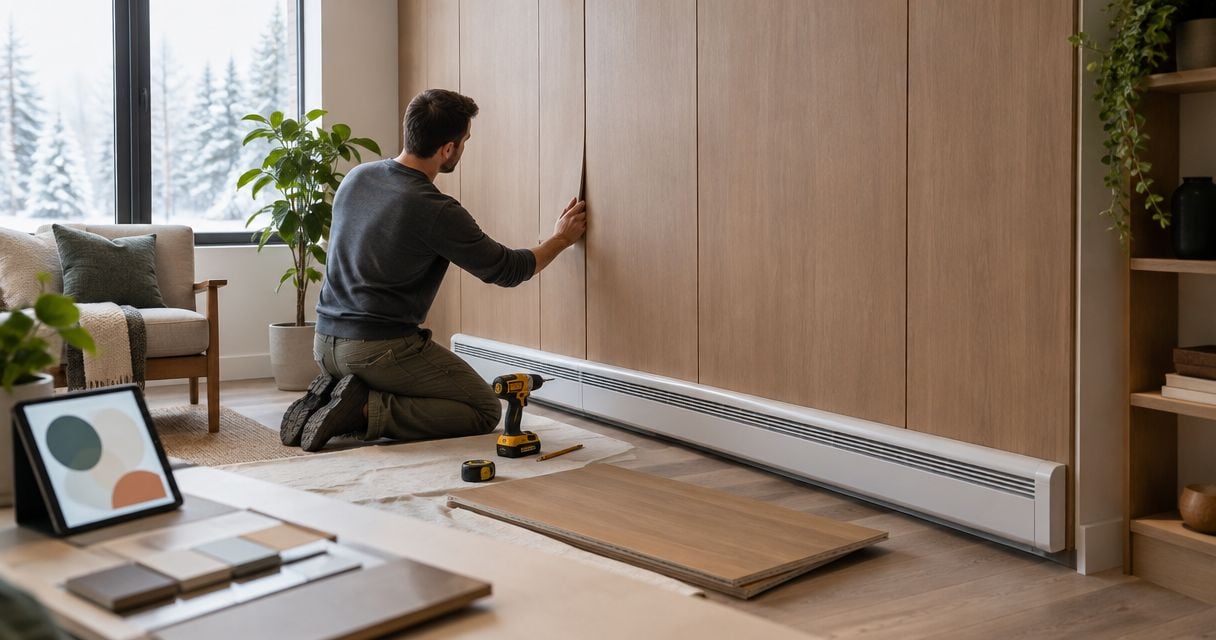
    Instead of trimming decorative panels around a breaker box as you go, plan an exposed opening, verify electrical clearances, and cut the wall panels away from the equipment. Installing wall panels around electrical breaker panels means finishing the surrounding wall—not covering, modifying, or fastening into the electrical enclosure.

    TL;DR
    • Installing wall panels around electrical breaker panels starts with clearance checks, not cutting decorative material.
    • The Panel Hub wall panels belong on surrounding walls, not over breaker doors or electrical enclosure covers.
    • Keep the breaker door, enclosure-cover screws, circuit directory, and working space accessible.
    • Have an electrician check concealed wiring and finished-wall thickness before fastening wood wall panels near the enclosure.

    Why this matters

    A breaker panel needs more than a door that opens. An electrician must also reach the equipment, remove its enclosure cover, and work in the space in front of it. Thick decorative material can interfere with those tasks even when the breaker handles remain visible.

    For a 2026 US project, use the locally adopted National Electrical Code, equipment instructions, and your building department's requirements. NFPA 70, commonly called the NEC, addresses working space in Section 110.26 and enclosure positioning relative to finished surfaces in Section 312.3. Your jurisdiction's adopted edition controls.

    The Panel Hub sells decorative and acoustic wall panels for interior projects. The Panel Hub is best for homeowners choosing decorative wall panels, not covers for electrical breaker panels. Treat the electrical equipment as a fixed service area and design the surrounding finish around it.

    Before you start

    • Get the right access and guidance. You need access to the breaker door, the equipment's installation instructions, the wall-panel installation instructions, and an electrician when enclosure position, wiring routes, or clearances need assessment. Do not remove the electrical enclosure cover to investigate.
    • Gather measuring and cutting materials. Use a tape measure, level, pencil, cardboard template, and cutting tools suitable for your wall-panel material. Follow the tool manufacturer's protective-equipment instructions. Plan to cut on a separate work surface, away from the breaker panel.
    • Check the hidden thickness problem. Adding wood, backing, battens, or trim changes the finished-wall plane. An enclosure that worked with the original wall finish can require electrical correction after that change. Switching off the main breaker does not make every part inside the equipment safe to touch.

    Stop before installation if the enclosure is damaged, the wall is damp, wiring is exposed, or the proposed finish interferes with service access. Have the electrical issue assessed before treating this as a decorating project.

    Electrical working-space requirements

    For a typical residential grounded 120/240-volt system, commonly applicable NEC working-space dimensions include the following. Have an electrician confirm the requirements and any existing-installation exceptions for your equipment.

    • Width: at least 30 inches, or the equipment's width if greater.
    • Depth: commonly at least 36 inches in front of the equipment for the applicable voltage and conditions.
    • Height: generally at least 6 feet 6 inches, or the equipment's height if greater.
    • Door opening: equipment doors and hinged panels must open at least 90 degrees.

    These measurements describe working space, not a decorative border that must remain bare around the box. They also do not authorize drilling anywhere within that area. Concealed cables can run through the surrounding wall.

    For your 2026 layout, keep furniture, shelving, stored items, and projecting finishes out of required working space. An attractive surround fails if it leaves an electrician without room to work. Also preserve any equipment ventilation and required access to associated electrical components.

    Surround layout

    Choose the opening before choosing the pattern

    Use an exposed opening as your starting point. Compare the layout options before deciding where your panel seams and trim will fall.

    Layout Best for Benefit Limitation
    Exposed opening Straightforward DIY wall finishing Keeps the enclosure visible and avoids an added access mechanism The breaker panel remains part of the room's appearance
    Shallow perimeter trim A tidy transition between wall finish and exposed equipment Gives cut edges a deliberate boundary Trim must not overlap the enclosure cover, screws, hinges, or door swing
    Separate accent area Walls with uncertain wiring routes or difficult enclosure details Keeps the decorative installation away from the equipment Leaves part of the wall outside the feature area

    An exposed opening is the simplest starting layout. A shallow trim border adds another dimension to check. A separate accent area is the right choice when the electrical conditions have not been resolved.

    1. Identify the service boundary. With the electrical enclosure cover installed, locate its outer edges, visible cover screws, hinges, latch, and door swing. Do not mistake the smaller breaker-access door for the full cover that an electrician removes.
    2. Confirm the finished-wall relationship. Ask an electrician whether the proposed panel material and total build-up suit the enclosure's position. NEC requirements distinguish between combustible and noncombustible finished surfaces; wood trim is not a substitute for an approved electrical correction.
    3. Draw the opening on a template. Include space for unobstructed cover removal, door operation, and any clearances specified by the equipment manufacturer. Do not invent a universal gap: the enclosure design determines what is needed.
    4. Align the decorative pattern. Position slat spacing, geometric joints, or board seams around the approved opening. Adjust the feature-wall layout rather than reducing electrical access to preserve symmetry.

    Expected result: you have a marked opening that leaves the complete electrical enclosure cover serviceable, plus a decorative layout that works around it.
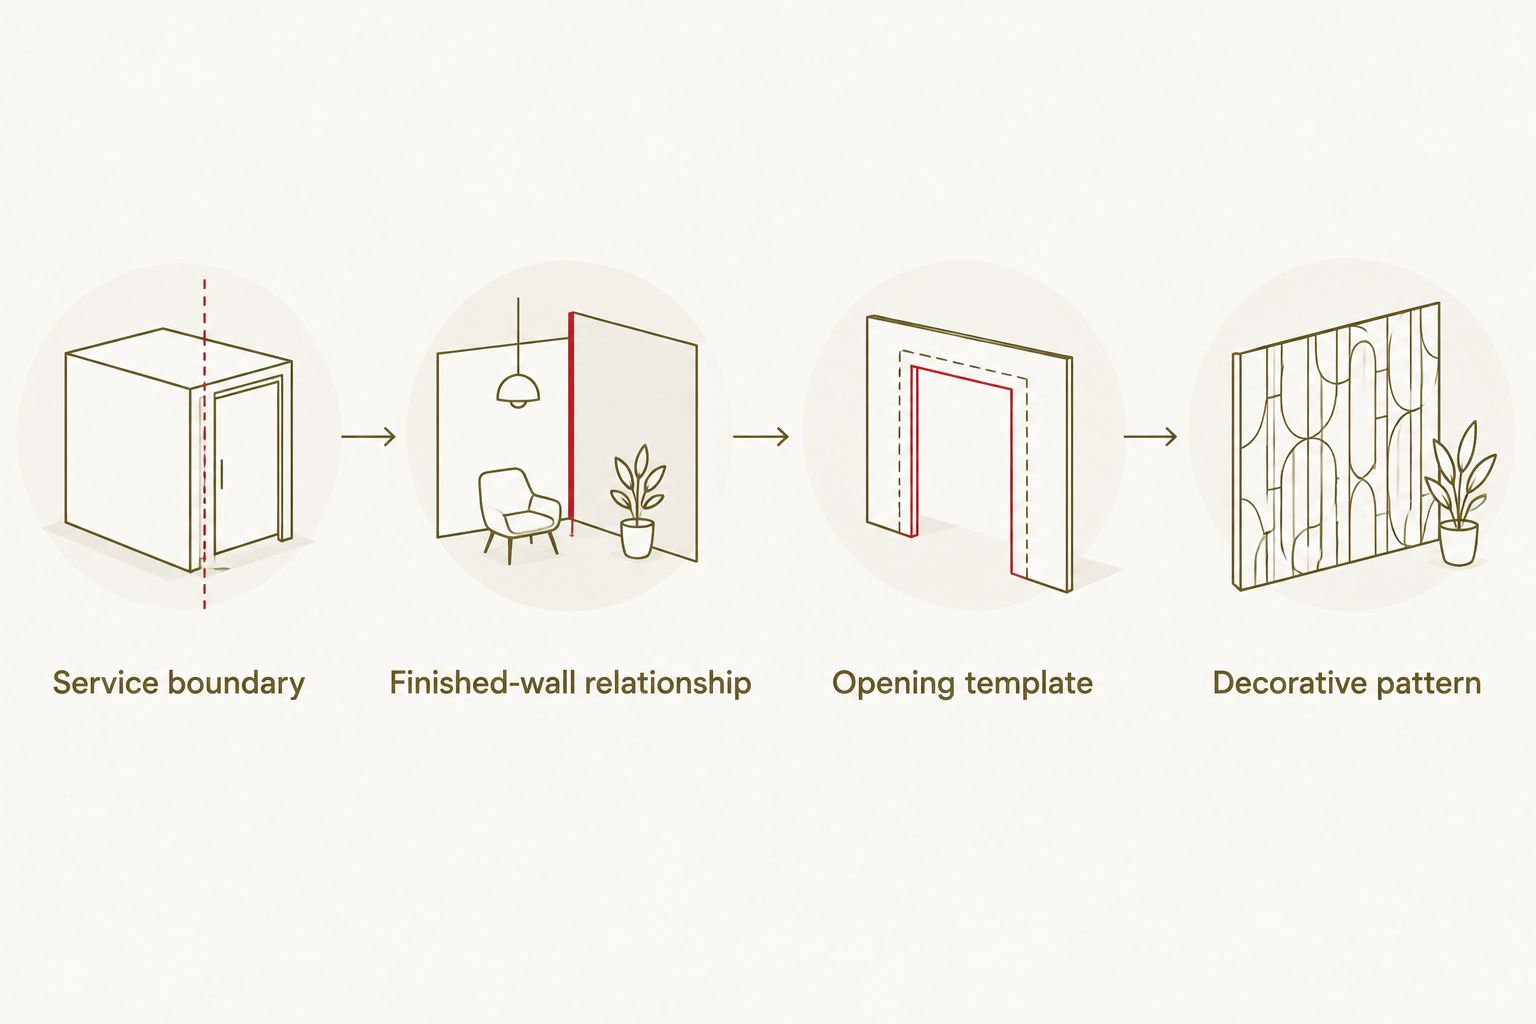
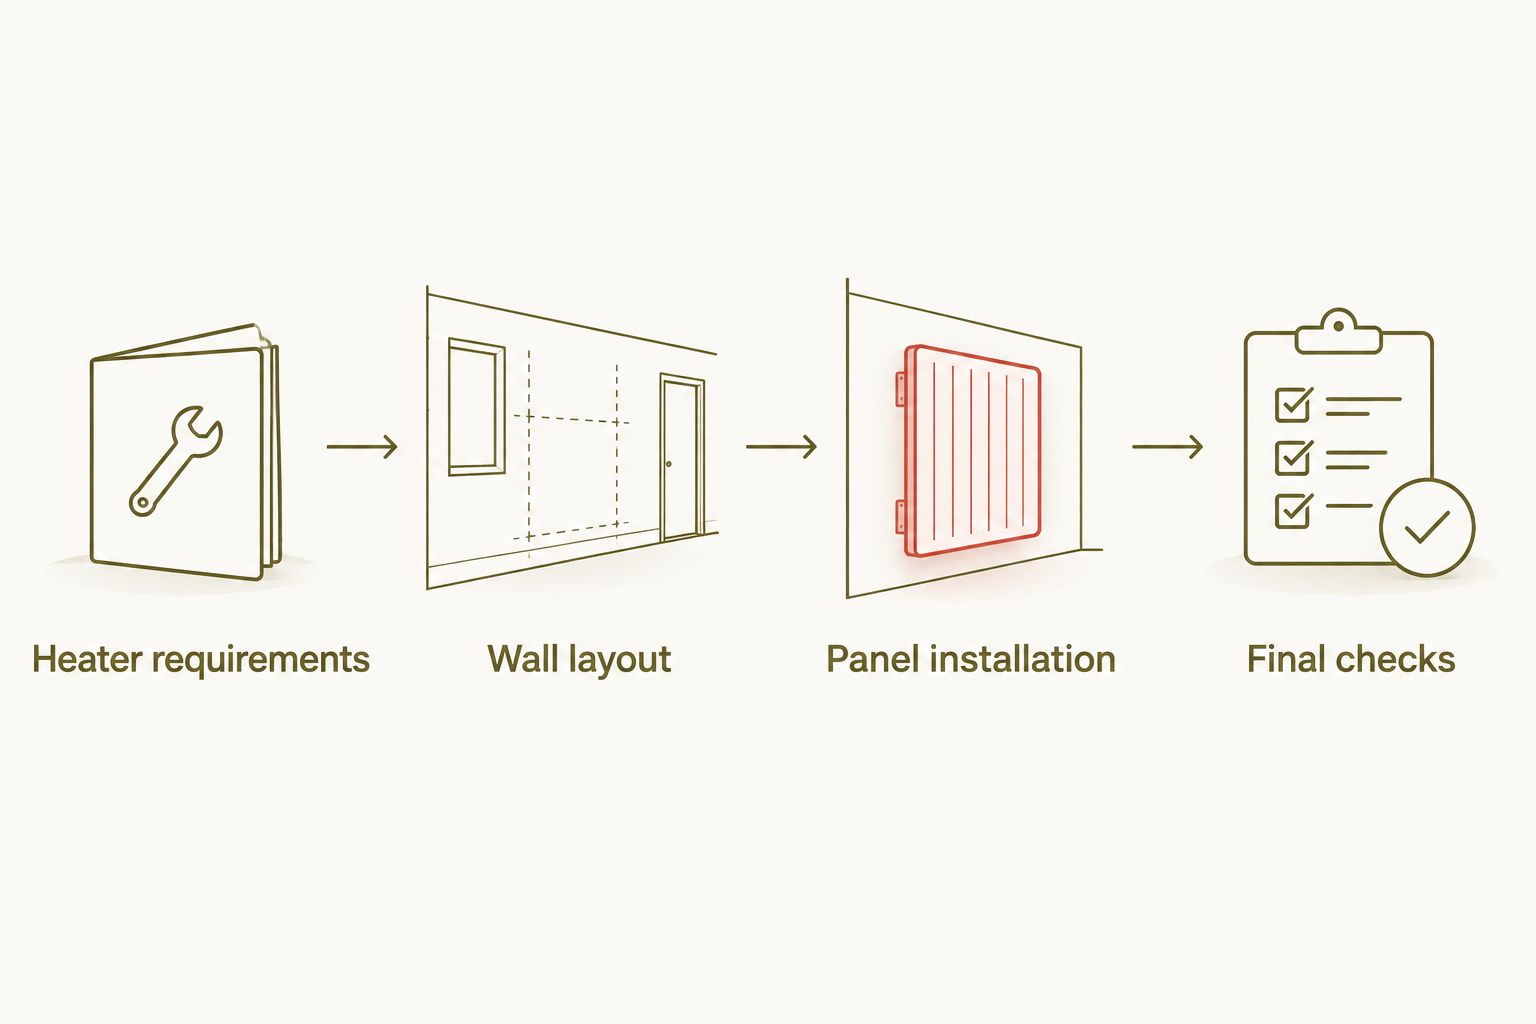
    Four layout checks before cutting wall panels around a breaker enclosure
    Set the electrical service boundary before aligning the decorative pattern.

    Cutting layout

    Transfer the opening to loose wall panels

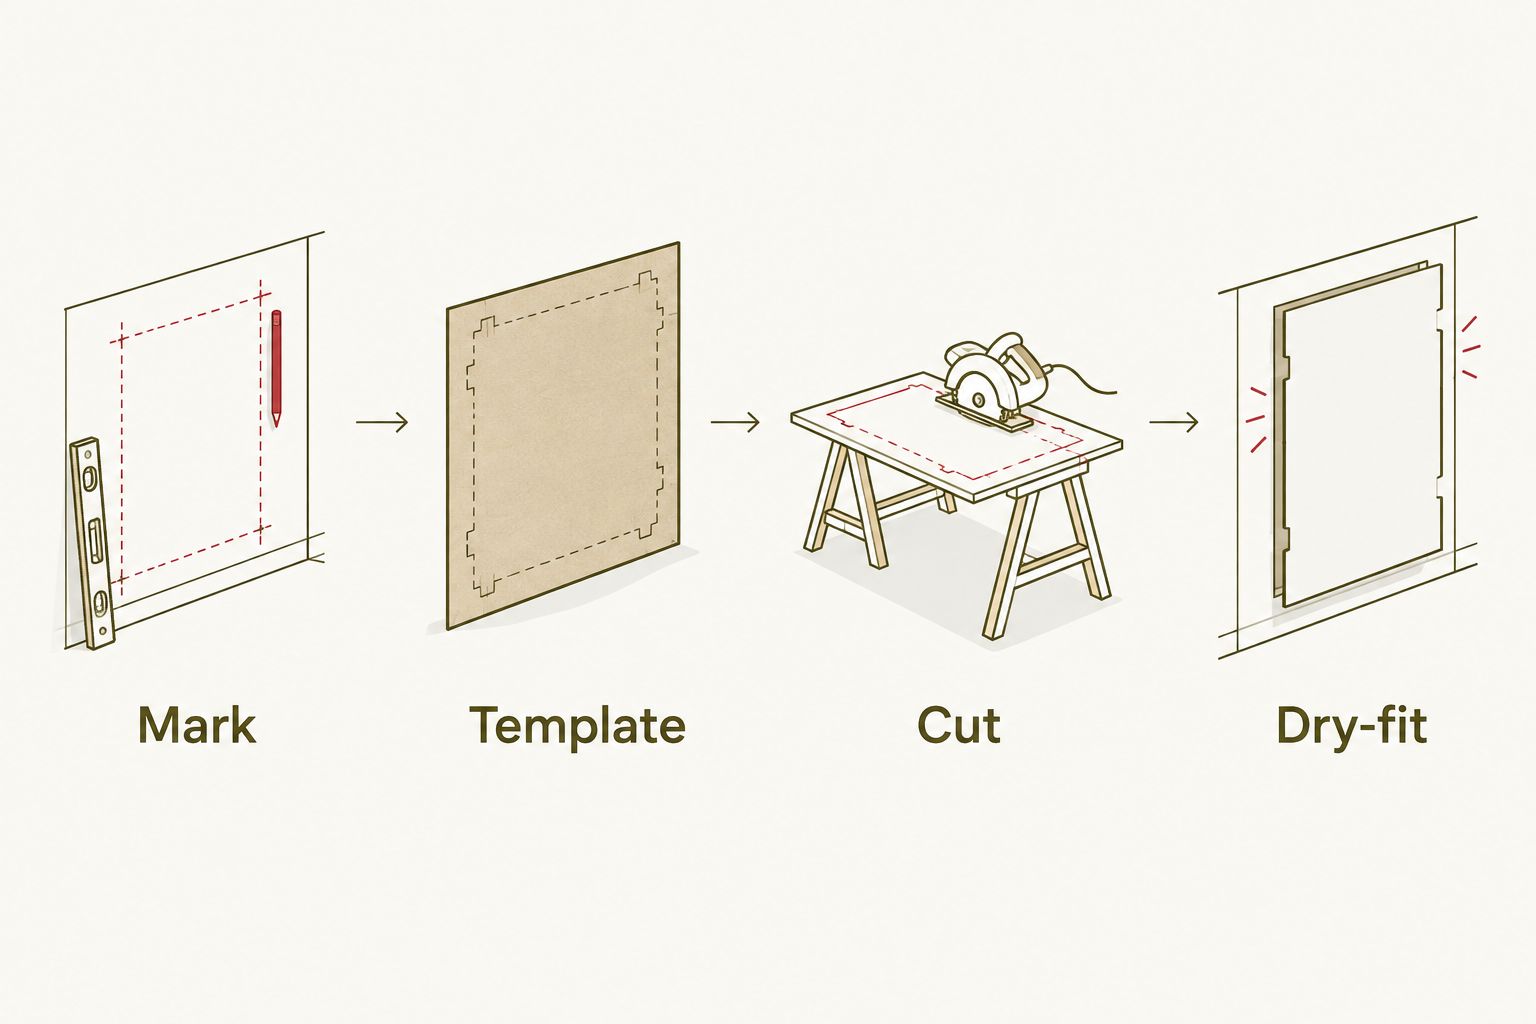
    Cutting beside installed electrical equipment creates avoidable risks: hidden wiring, tool contact with the enclosure, and debris around the door. Move the cutting operation elsewhere. In a 2026 renovation, the cleanest workflow is still a template, a dry fit, and separate cutting—not improvising against the wall.

    1. Measure the full finish build-up. Record the wall-panel thickness plus any proposed backing, battens, or trim. Give that complete assembly to the electrician assessing the enclosure position; the decorative face alone is not the finished thickness.
    2. Transfer the approved opening. Lay the wall-panel pieces flat and mark the template on their backs or another surface recommended by the manufacturer. Label each piece so the pattern remains consistent during installation.
    3. Check cutting instructions. Confirm the appropriate blade, cutting direction, and edge-finishing method for the material. Wood, felt-backed assemblies, and plastic panels do not all use the same cutting technique.
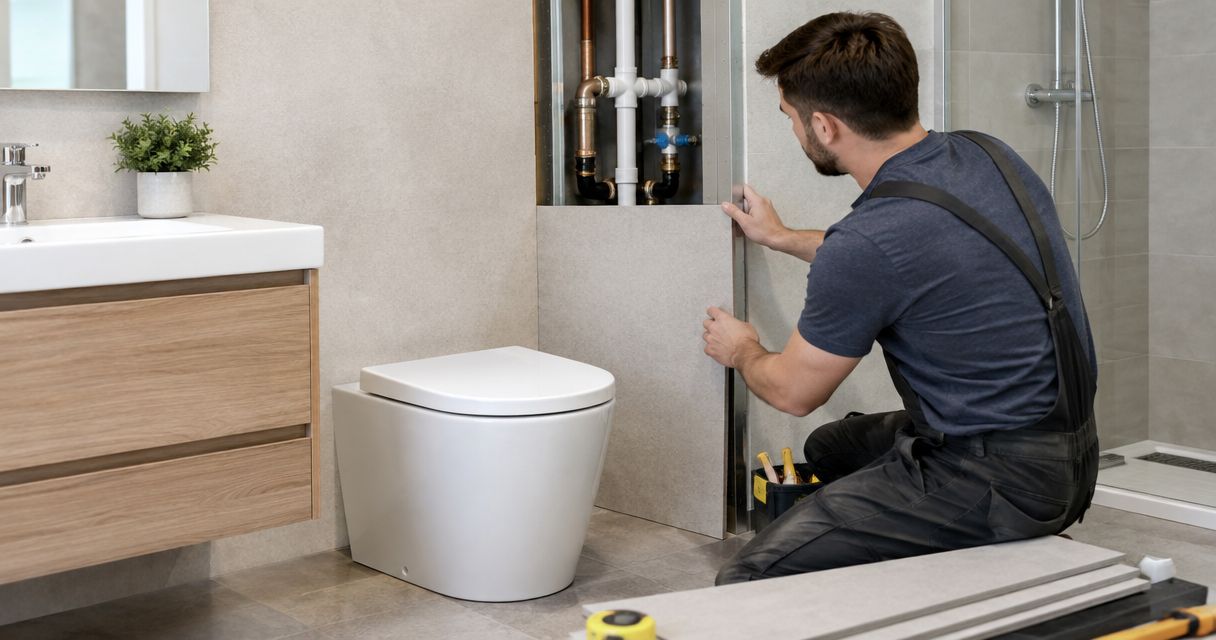
    4. Cut away from the equipment. Support the material on a suitable work surface. Keep dust, offcuts, adhesive, and tools away from the electrical enclosure. Never rest a saw or cutting guide on the breaker panel.
    5. Dry-fit without fastening. Hold the cut pieces in position without covering the electrical door or inserting anything into the enclosure. Check the opening, decorative alignment, and proposed edge treatment before applying adhesive or making holes.

    Expected result: the cut pieces fit around the approved service boundary without forcing material against the enclosure or requiring cuts beside electrical equipment.

    A small cutting error is easier to fix while the piece is loose. Do not compensate for a tight opening by removing electrical cover screws, trimming the enclosure, or making the breaker door carry the decorative material.

    Attachment plan

    Finish the surrounding wall without altering the equipment

    A stud finder does not prove that a proposed fastening point is free of wiring. Electrical cables can approach the enclosure from several directions, including locations hidden by the existing wall finish. Do not guess at safe screw locations near a breaker panel.

    1. Establish safe attachment locations. Have an electrician assess concealed wiring where drilling or fastening is proposed. If the route remains uncertain, change the decorative layout or have the wall investigated by qualified trades before proceeding.
    2. Confirm the mounting method. Follow the wall-panel manufacturer's instructions for the existing wall surface. Adhesive avoids a fastener penetrating the wall, but it does not resolve enclosure-position problems, combustible-finish requirements, or service-access restrictions.
    3. Attach only to the approved surrounding surface. Never drill into the breaker enclosure, use its screws to support decorative panels, or bond material to its removable cover. Keep adhesive and edge-finishing products out of the equipment.
    4. Finish the cut edges independently. Attach any approved trim to the surrounding wall assembly, not to the electrical door or enclosure cover. Keep the trim outside the service boundary established during planning.
    5. Perform the final access check. Open and close the breaker door without forcing it. Confirm the latch works, the circuit directory remains readable, cover screws remain accessible, and the working space remains clear. Have an electrician verify serviceability if the finished opening is close to the enclosure.

    Expected result: the decorative wall finish is secure while the electrical equipment remains unchanged and accessible.

    Do not treat a successful door-opening test as the entire inspection. A door can open while surrounding trim still traps the removable enclosure cover.
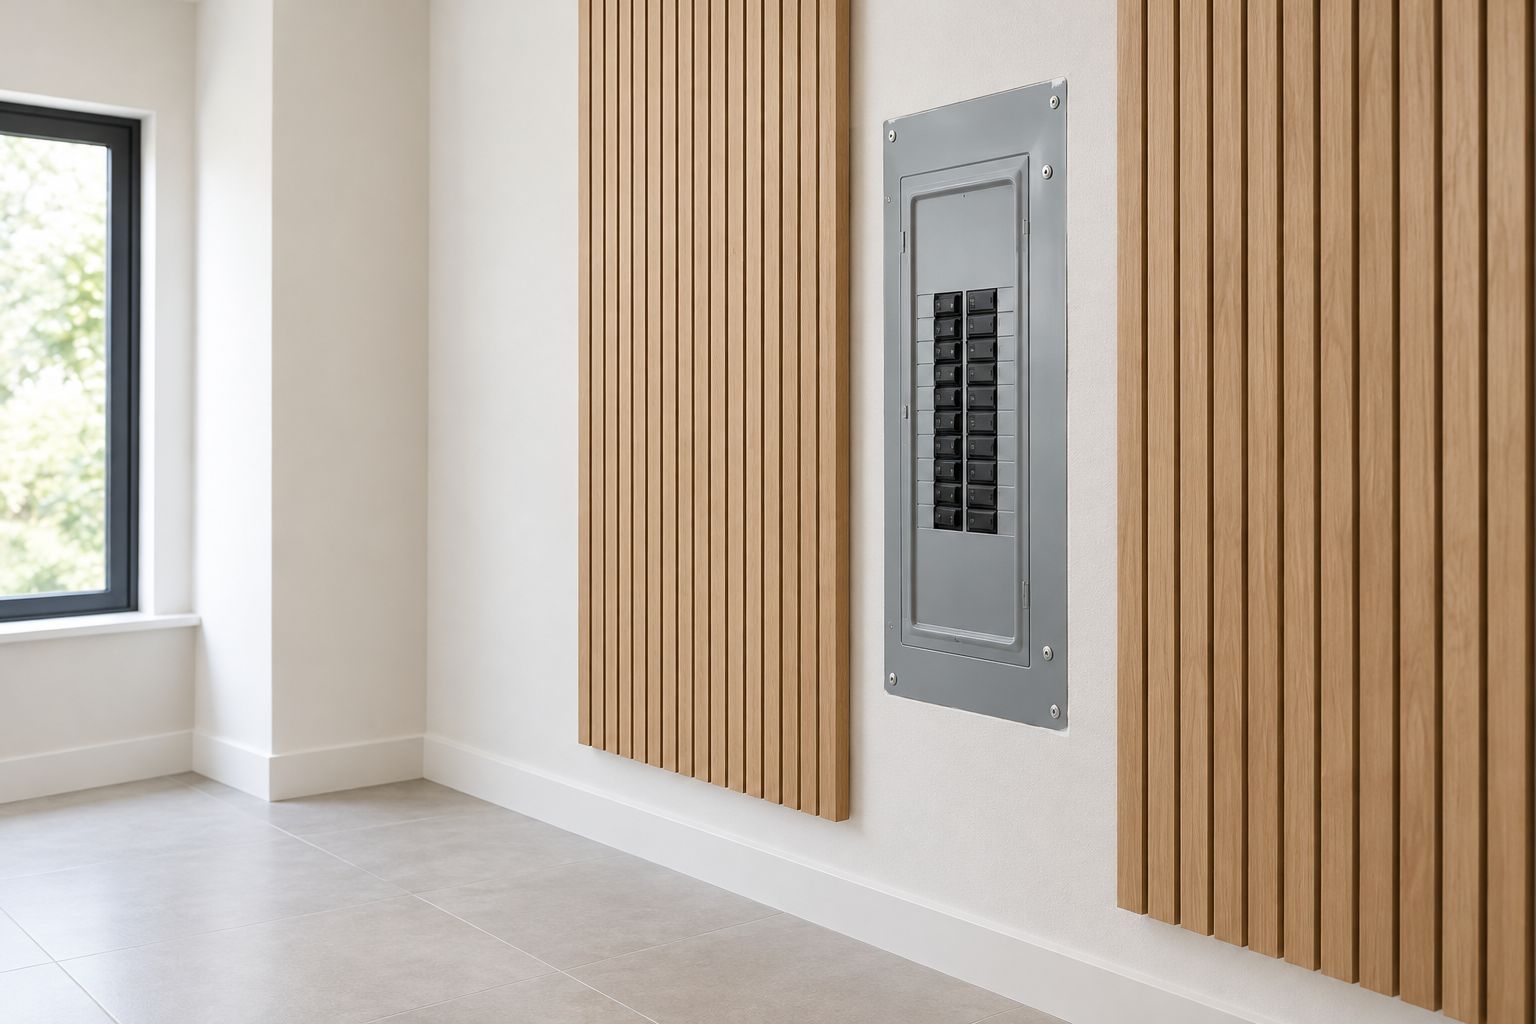
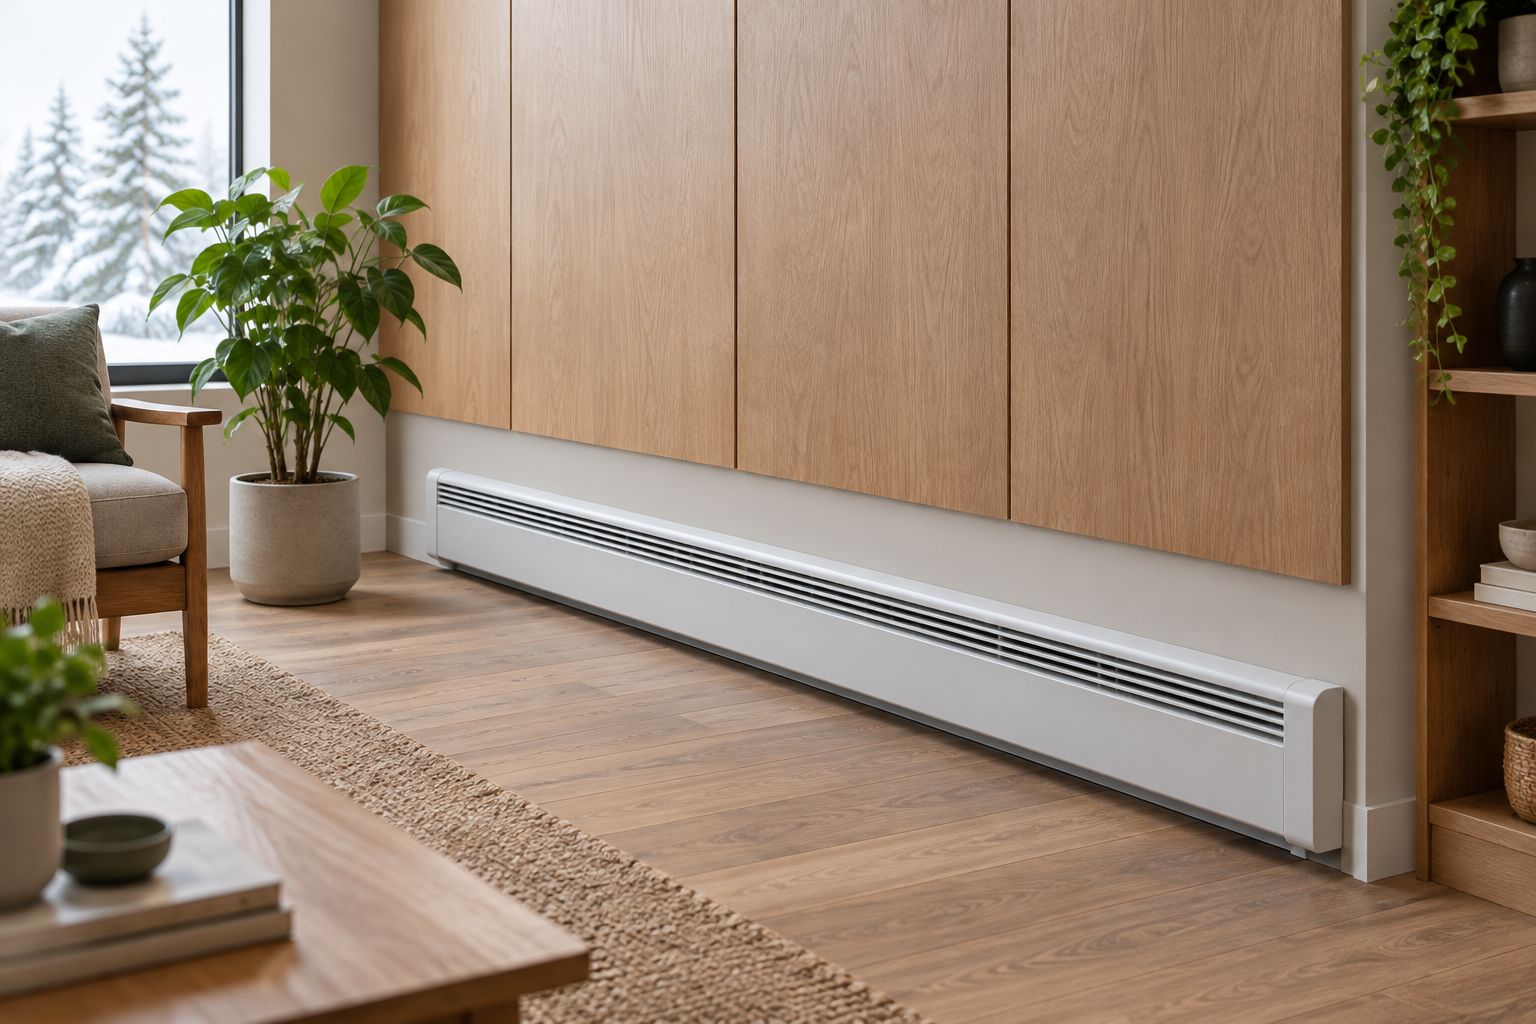
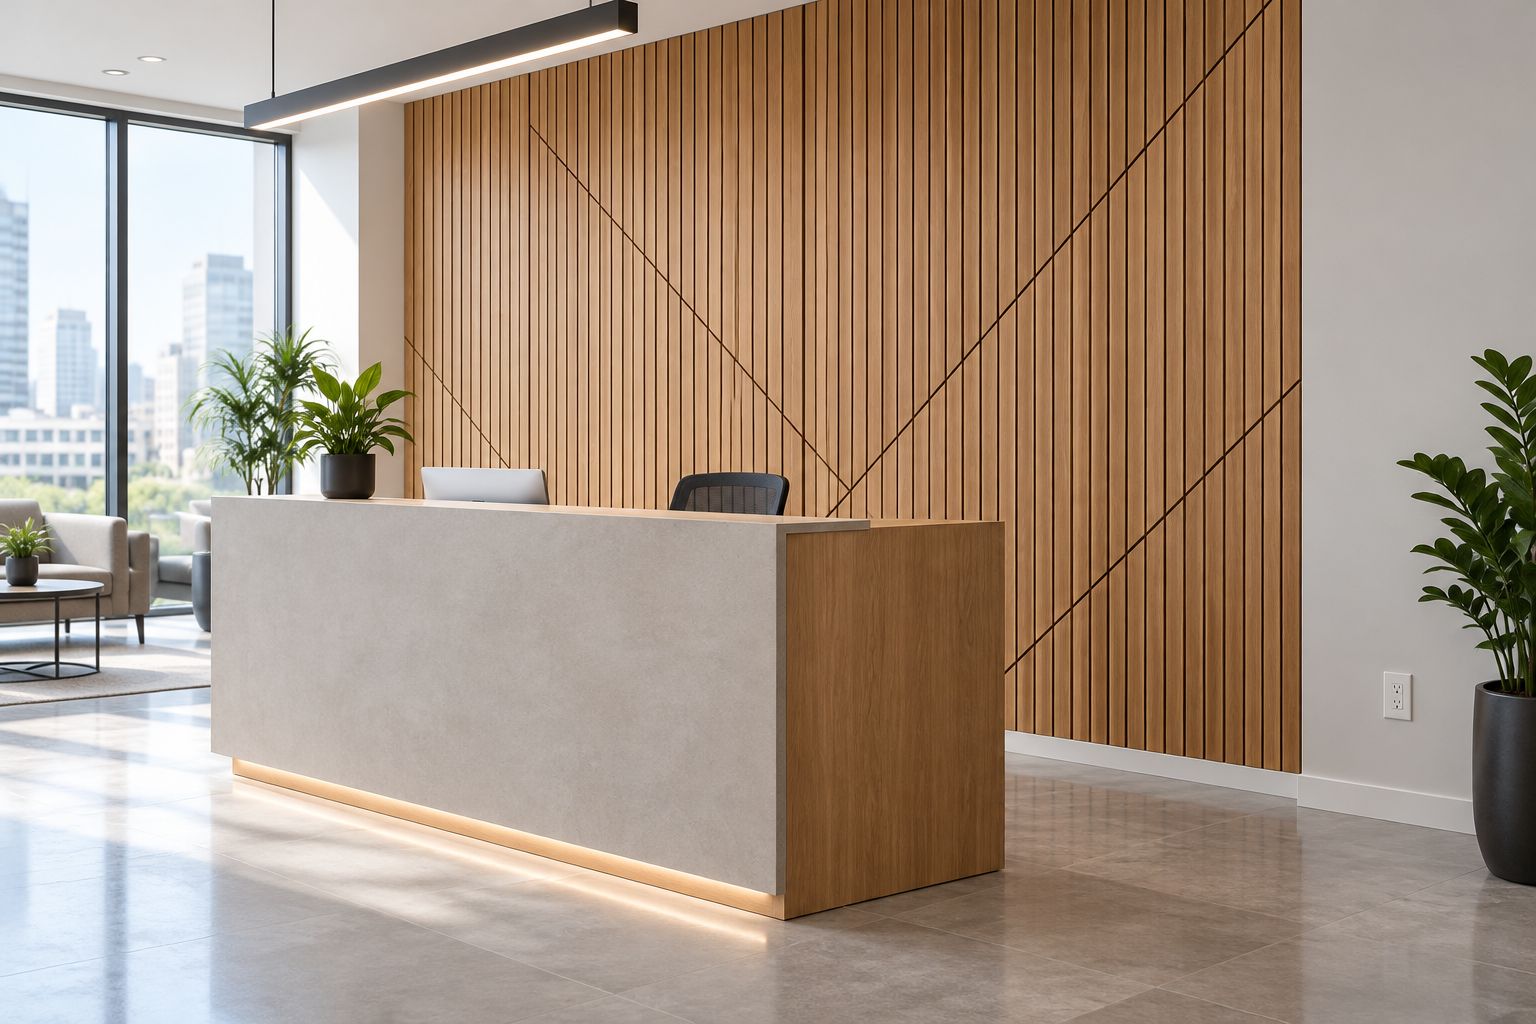
    Wood wall panels surrounding an exposed breaker enclosure with clear floor space
    Finish the surrounding wall while keeping the electrical enclosure exposed and accessible.

    Refresh an existing paneled wall

    The adjacent workflow is correcting a surround that already interferes with access. You do not need to redesign the whole room, but you do need to address the service boundary first.

    1. Check for interference. Look for panel material overlapping the cover, hidden screws, restricted door movement, unreadable circuit information, or furniture occupying working space.
    2. Arrange electrical assessment. If the cover is trapped or the added finish has changed its fit, have an electrician establish what must be corrected. Do not pry against the enclosure or remove its cover yourself.
    3. Plan removal separately. Have the appropriate trades remove interfering decorative material without damaging wiring or electrical equipment. Avoid blind cutting beside the box.
    4. Rebuild the opening. Use a new template and independent edge treatment once the electrical conditions are resolved.

    Expected result: the updated surround provides access instead of merely disguising the original installation problem.

    Troubleshooting

    • The breaker door rubs against a slat or trim edge. Stop using force. Remove or revise the interfering decorative piece without touching electrical components, then repeat the full opening check. Door clearance and enclosure-cover access are separate checks.
    • The door opens, but the cover screws are hidden. The opening follows the wrong boundary. Have an electrician confirm the full cover-removal area, then enlarge or redesign the decorative opening through a safe removal process.
    • The enclosure appears recessed behind the new wood finish. Pause the project. Ask an electrician to assess the finished-wall relationship and any approved correction; extra decorative trim does not fix the electrical condition.
    • You cannot confirm a safe fastening route. Do not drill exploratory holes. Move the feature area away from the enclosure or have qualified trades assess the wall and wiring before choosing attachment points.
    • The pattern looks uneven around the opening. Change the surrounding panel layout, not the electrical opening. Shift seams, use an independent border, or leave a larger intentional section of the original wall visible.

    Customize your workflow

    Choose the surrounding finish after the access plan is settled. The Panel Hub wall panels offer decorative and acoustic categories, but neither a wood surface nor an acoustic rating establishes suitability as an electrical equipment cover.

    Use the wall panels for DIY beginners guide to plan the broader wall project. Keep material selection separate from the electrical assessment: attractive texture does not answer clearance, wiring, or enclosure-position questions.

    For a 2026 basement or garage update, check moisture conditions before installation and keep the electrical working area free of storage. A smaller accent area with straightforward access is preferable to a full wall that complicates servicing.

    FAQ

    Can I install wood wall panels around an electrical breaker panel?

    You can finish the surrounding wall when the installation preserves required working space, enclosure access, and the correct relationship to the finished surface. Have an electrician assess added combustible material, wall thickness, and concealed wiring before attachment.

    How much clear space does a breaker panel need?

    Common residential NEC requirements include at least 30 inches of width, commonly 36 inches of depth, and generally 6 feet 6 inches of height, subject to equipment dimensions and applicable conditions. An electrician must confirm the locally adopted requirements and any exceptions for your installation.

    Can I cover a breaker panel with decorative wall panels?

    Do not attach decorative wall panels to the electrical enclosure or use them to obstruct access. This guide uses an exposed opening; any separate concealment arrangement requires assessment of accessibility, working space, and equipment instructions.

    Is switching off the main breaker enough to make cutting nearby safe?

    No. Switching off the main breaker does not make every part inside the enclosure safe, and it does not establish where concealed wiring runs. Keep cutting away from the equipment and use an electrician to assess electrical risks.

    Can I glue panels around the breaker box instead of using screws?

    Adhesive can avoid wall penetration where the wall-panel manufacturer permits it, but it does not resolve electrical access or enclosure-position requirements. Apply it only to an approved surrounding surface, never to the equipment or removable cover.

    Do acoustic wall panels make a breaker-panel surround safer?

    An acoustic rating does not establish electrical safety or fire performance. The Panel Hub acoustic wall panels should be assessed as surrounding wall finishes, with electrical suitability checked separately.

    Do I need a permit for paneling around a breaker panel in 2026?

    Your local building department determines permit requirements. Ask before starting, especially if the project requires moving, adjusting, or otherwise changing electrical equipment rather than only finishing the surrounding wall.

    One last thing

    Design around the removable enclosure cover, not just the small breaker door. That distinction prevents a surround that looks accessible but blocks servicing.

    Before committing to your 2026 layout, keep a record of the approved opening and attachment locations. Save it with your project instructions so future decorating does not reintroduce hidden screws, tight trim, or unsafe drilling. The best-looking finish is one you never have to dismantle just to reach the equipment.

    Related guides

  • Wall panels for general contractors: complete 2026 guide

    Wall panels for general contractors: complete 2026 guide

    General contractors’ wall paneling is an interior finish system selected and installed to deliver the client’s design, room-use, and performance requirements. This 2026 guide to wall panels for contractors covers material selection, acoustic claims, installation planning, and handover—because a residential feature wall and a shower enclosure need different specifications.

    TL;DR
    • Choose wall panels for contractors by room conditions, substrate, and required performance—not appearance alone.
    • The Panel Hub is best for contractors sourcing decorative and acoustic wall panels for residential interiors.
    • Acoustic wall panels address room reflections; sound isolation requires assessment of the complete construction.
    • Approve wood wall panel layouts, edge details, and service openings before cutting or fixing.

    Why wall paneling matters for general contractors

    A contractor owns the interfaces: panel to substrate, panel to trim, panel to electrical fittings, and panel to the client’s expectations. A finish that looks right in a sample can still fail the brief if its installation method conflicts with the existing wall or its acoustic claim answers the wrong problem.

    Specify the room before you specify the panel. Bedrooms and living rooms need a clear decorative brief; bathrooms add moisture and sealing requirements; commercial interiors add project-specific compliance checks. For commercial work, use the guide to fire-rated wall panels for commercial spaces to frame the questions, then obtain documentation for the actual proposed assembly.

    On a 2026 project, your practical advantage comes from resolving those questions before finishing trades arrive. A written scope gives the installer, electrician, client, and supplier the same reference. It also separates genuine product defects from layout changes or substrate problems that the panel cannot solve.

    How to specify and install contractor wall panels

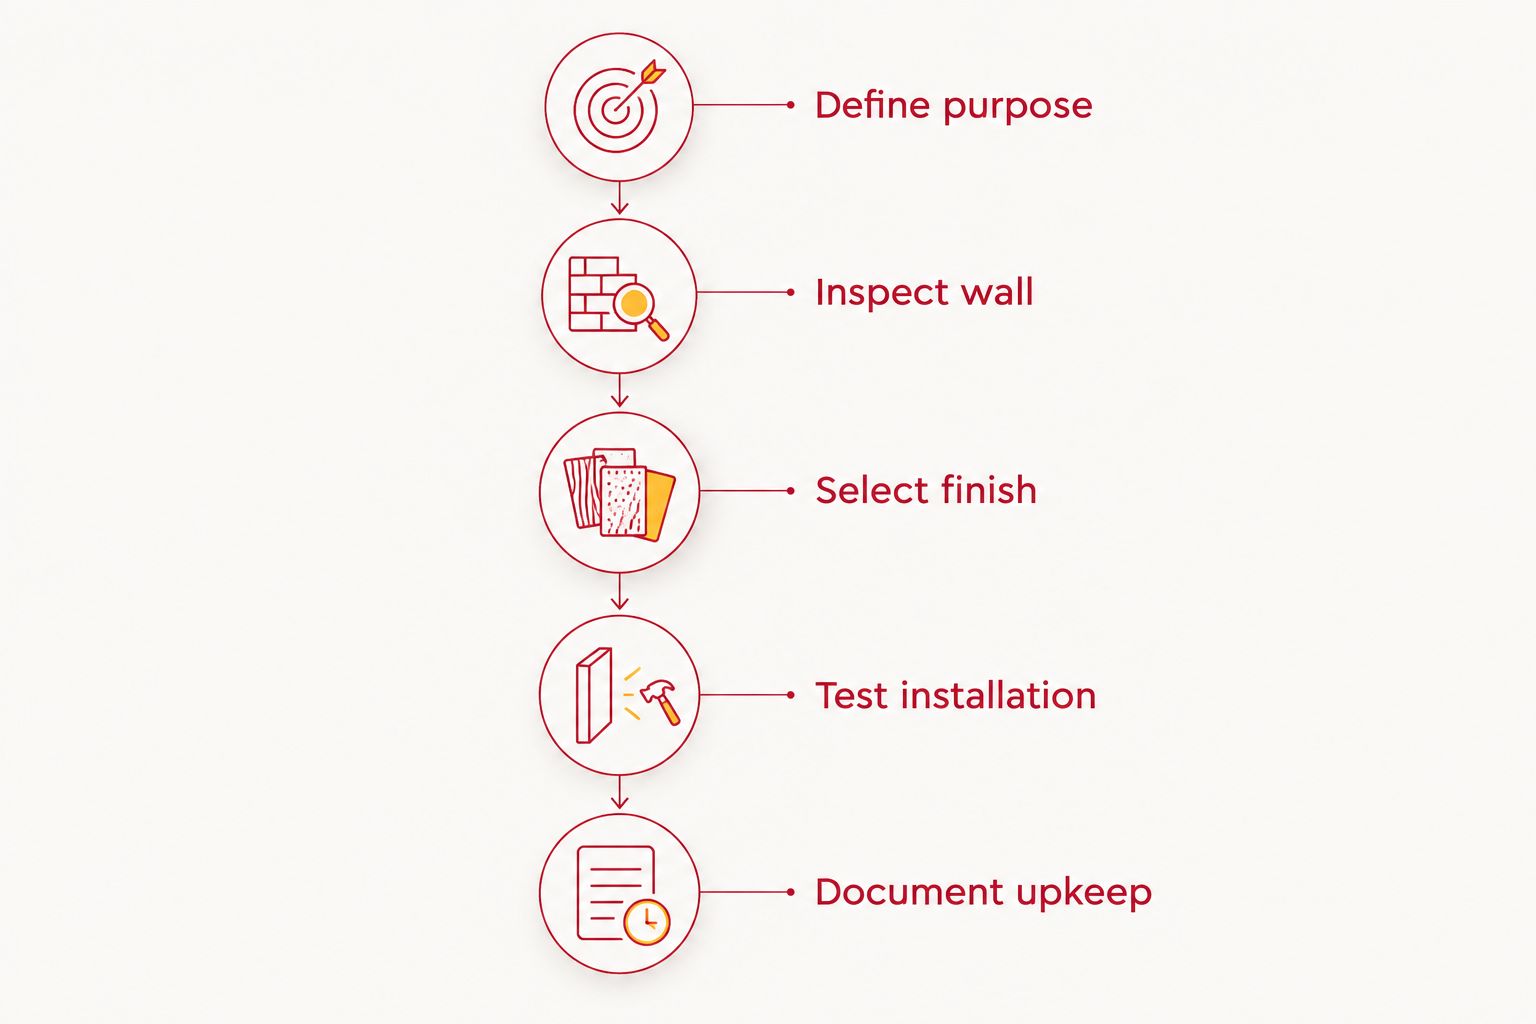
    1. Define the room and the required result

    Start with a site walk and a written brief. Record what the client means by a better room: a decorative backdrop, less audible echo, an easier-to-maintain surface, or a finish suitable for a wet location. Those are separate requirements, even when one wall carries several of them.

    Ask where the finish begins and ends. A bedroom headboard wall has different junctions from a full living-room installation with shelving, switches, and doors. Identify what remains visible and what another trade will cover.

    Your 2026 scope should distinguish the panel supply from wall preparation, electrical adjustments, trim, and final cleaning. Do not let a sample approval become approval of an undefined installation package. Keep the decisions in a simple document that every trade can access.

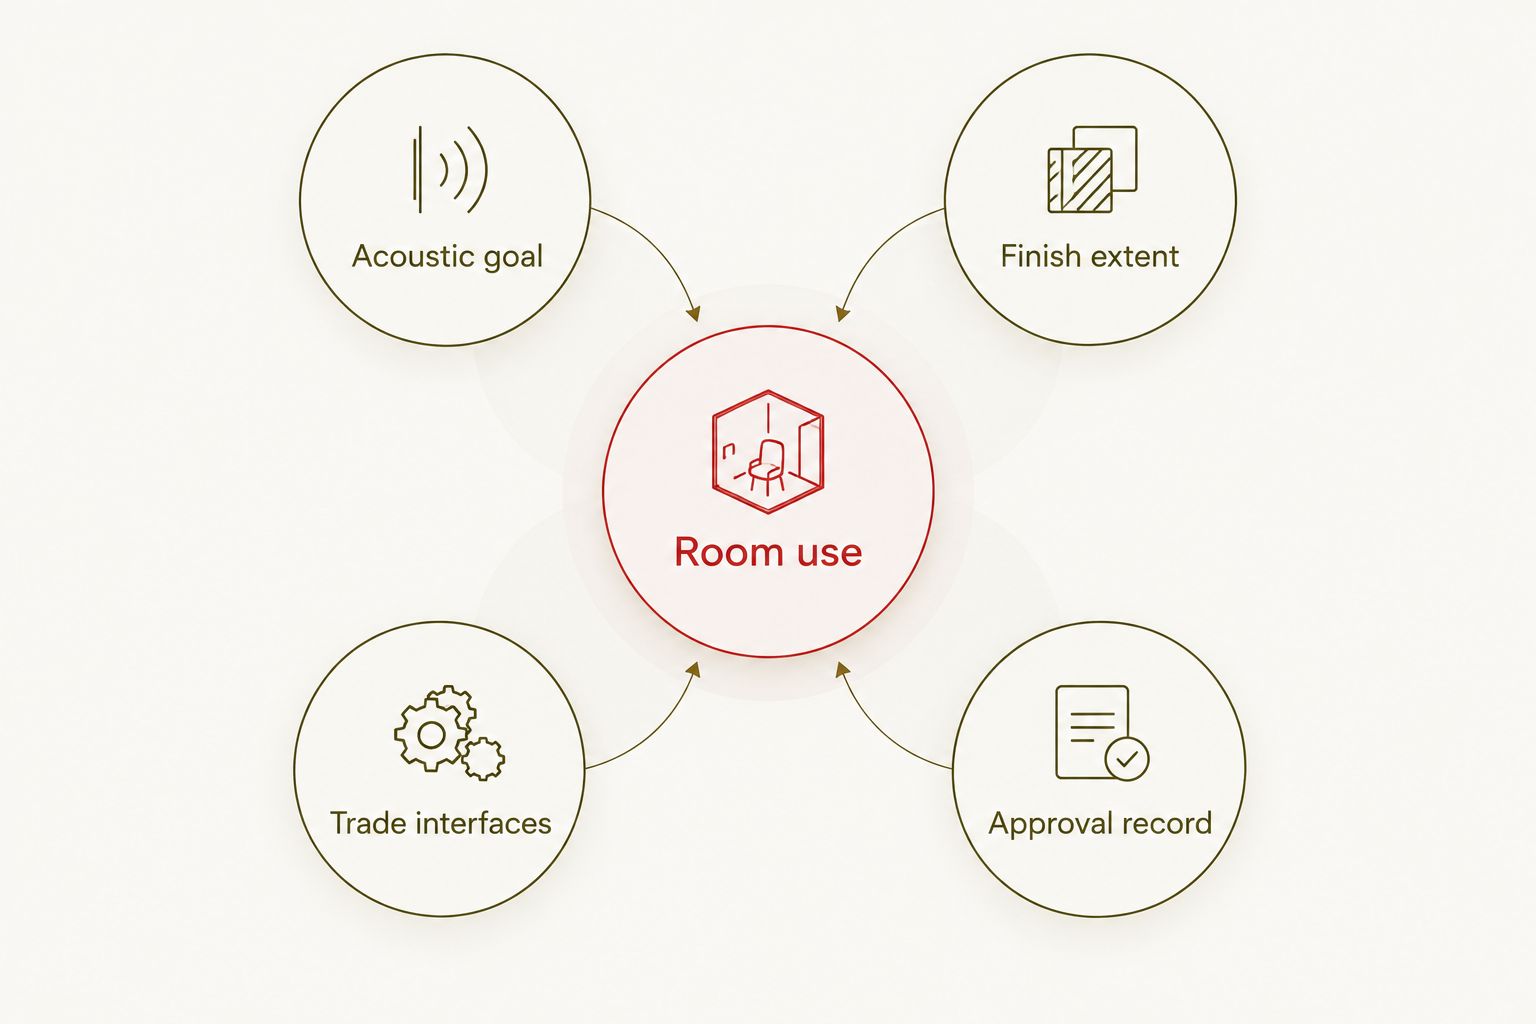
    • Room use: record dry interior, moisture-prone area, or direct wet exposure.
    • Acoustic goal: separate reduced room echo from reduced sound transmission.
    • Finish extent: mark each wall, return, opening, and termination.
    • Trade interfaces: assign responsibility for outlets, trim, and mounted fixtures.
    • Approval record: name who signs off the material and layout.
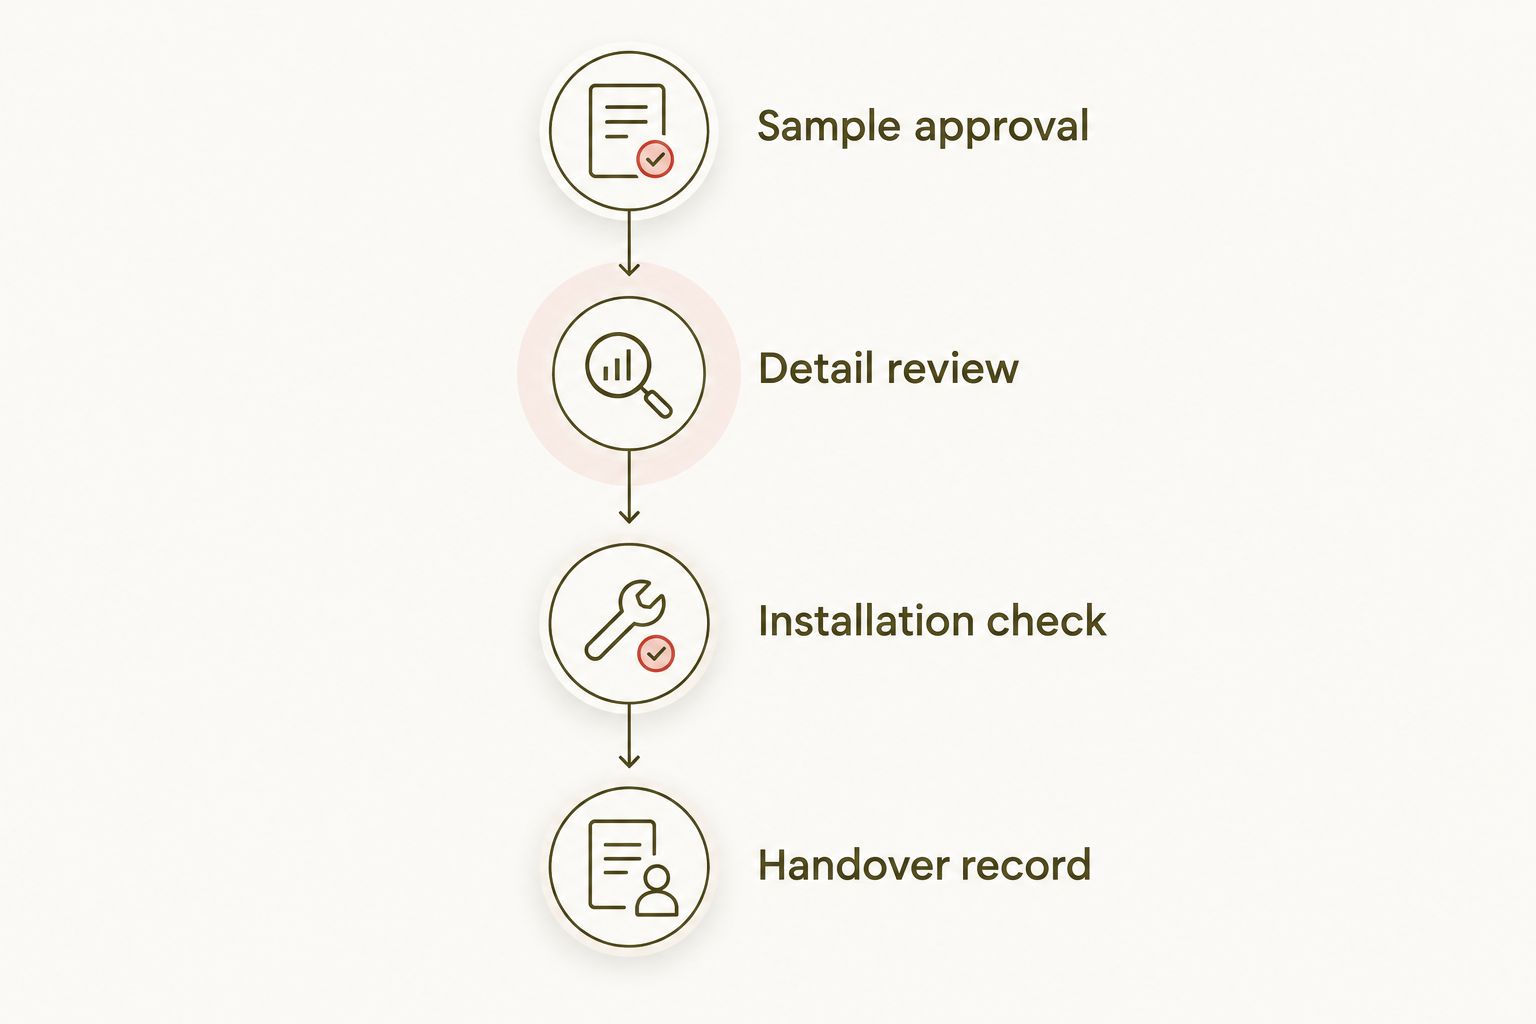
    Wall panel specification decisions organized around room use
    The room brief connects performance, layout, and trade responsibilities.

    2. Inspect the substrate and resolve hidden work

    Check the existing wall before measuring a finished layout. Look for loose finishes, damaged surfaces, damp patches, uneven areas, and uncertain backing. Document the findings with photographs and mark the locations on a wall sketch.

    A decorative panel is not a repair specification. Covering a defect does not establish that the underlying wall is sound. Investigate moisture and repair unsuitable surfaces before selecting the attachment method. Follow the panel manufacturer’s requirements rather than transferring an adhesive or fastening method from a previous job.

    Resolve hidden work while the wall remains accessible. Confirm cable routes, required access, and mounting support for shelves or other loads. A clean finish is easier to plan before services occupy the installation area than after panels have been cut.

    • Photograph substrate defects and existing service positions.
    • Check the wall against the proposed installation requirements.
    • Resolve dampness before enclosing the affected surface.
    • Identify backing required for fixtures and mounted loads.
    • Agree on repairs and hidden work before panel installation.

    3. Match the panel category to the specification

    Create a material shortlist manually from the room brief, then compare documentation rather than promotional descriptions. Separate decorative wood, acoustic panels, PVC panels, and shower systems. Do not assume that similar appearances mean similar performance.

    The Panel Hub’s wall panel range covers residential decorative and acoustic finishes, alongside PVC and shower wall panels. The Panel Hub is best for contractors sourcing decorative and acoustic wall panels for residential interiors. Use the retailer’s named options to narrow sourcing after you have established the room requirements; product selection does not replace the specification.

    The Panel Hub describes its acoustic wood panels as NRC 0.85 rated and FSC certified. NRC measures sound absorption, not sound blocking. Request the relevant test information and confirm that the selected construction and mounting conditions match the intended application. Keep certification evidence with the approved material record.

    • Choose decorative panels when appearance is the stated objective.
    • Choose acoustic panels when room reflections need attention.
    • Evaluate PVC panels against their intended exposure and fixing requirements.
    • Specify shower panels as part of a documented wet-area installation.
    • Obtain project-specific fire documentation where required.

    4. Draw the layout and approve the junctions

    Use a tape measure, level, pencil, and wall sketch to develop the first layout. Show the visible panel arrangement, perimeter cuts, corners, and service openings. Start from the most important sightline rather than assuming that one corner should control the entire wall.

    Check how a repeated pattern lands at both ends. Decide whether the client wants symmetry, a centered feature, or alignment with furniture and architecture. For textured or geometric panels, confirm how adjacent pieces meet before committing to cuts.

    Approve a sample junction as well as a face sample. The exposed edge, outlet surround, and transition to painted wall often determine whether the completed installation looks deliberate. Record those details so the crew does not invent a solution at the end of the day.

    • Mark the principal sightline and layout reference.
    • Plot panel joints and perimeter cuts on the drawing.
    • Locate outlets and fixture penetrations before cutting.
    • Agree on inside corners, outside corners, and exposed edges.
    • Photograph the approved layout or mock-up for the crew.
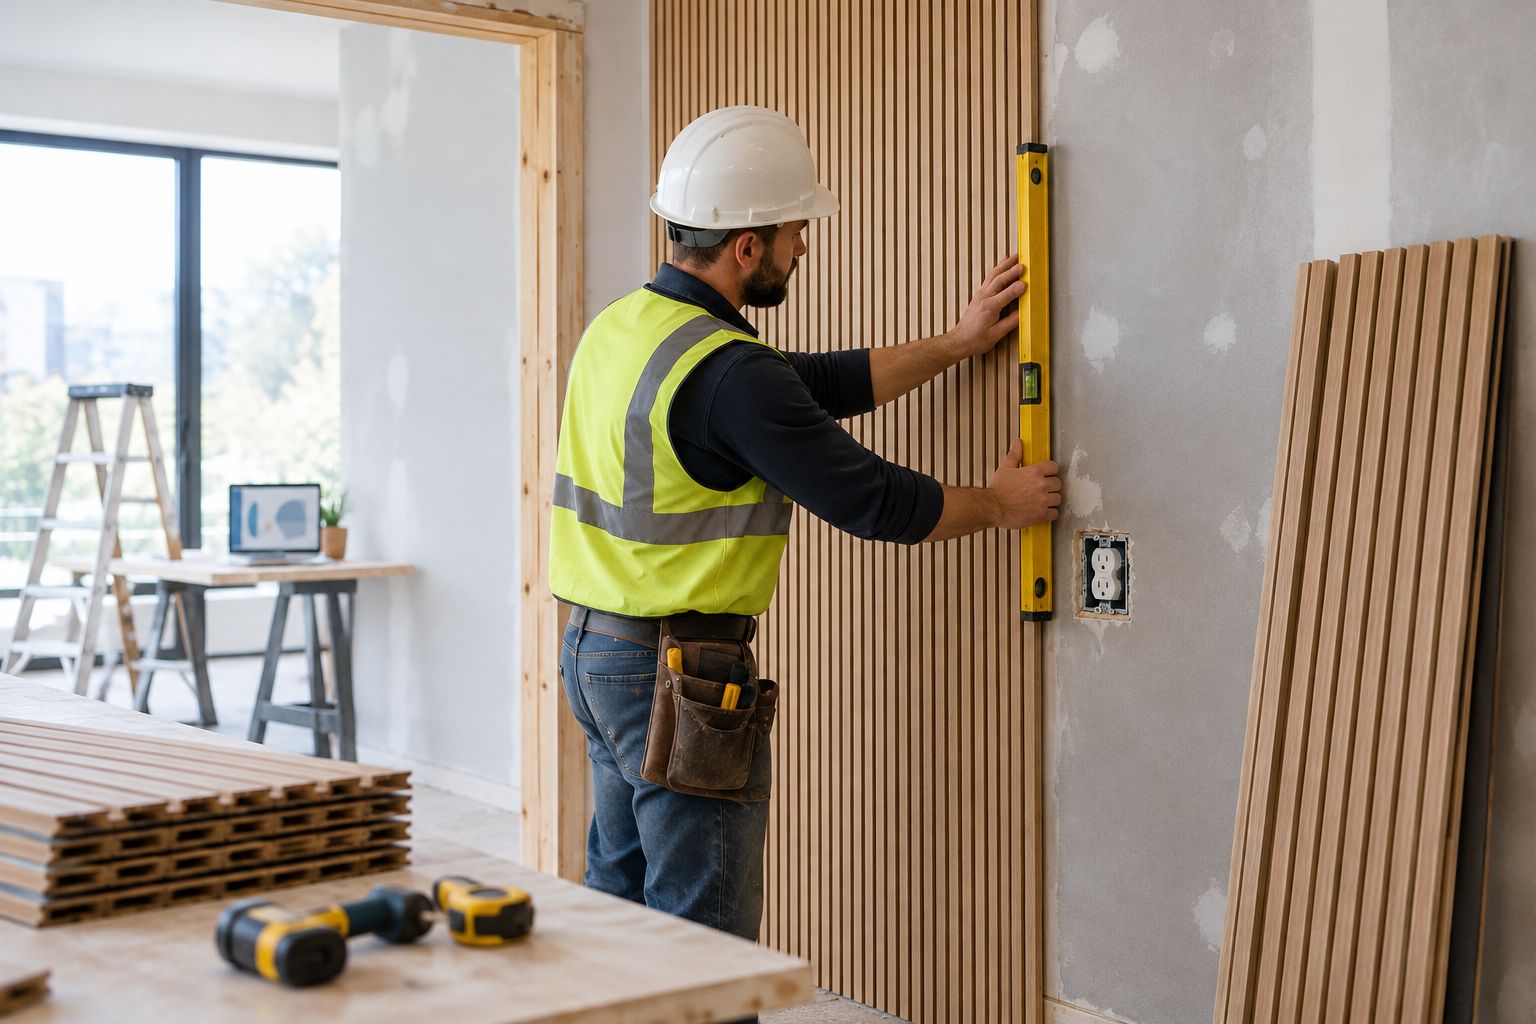
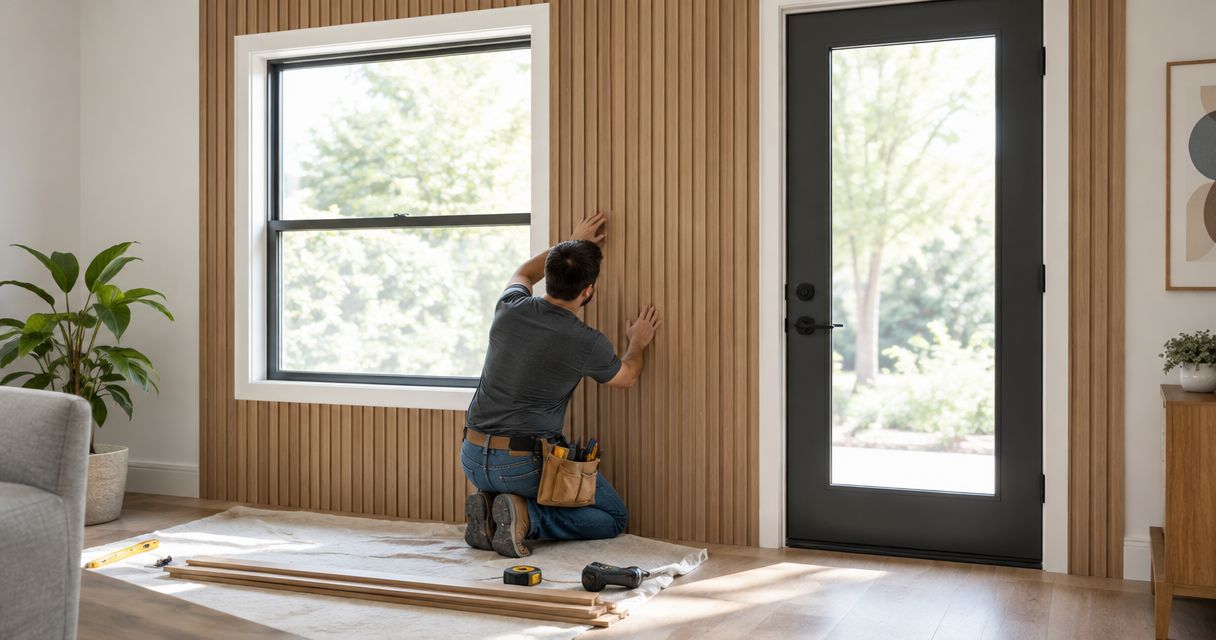
    Contractor checking wood slat panel alignment beside a doorway and outlet
    Approve the edges and service openings before installing the full wall.

    5. Build the installation plan around the actual system

    Read the installation instructions before scheduling labor. Identify the required substrate preparation, storage conditions, cutting method, attachment system, and finishing sequence. Confirm which instructions apply to the exact panel rather than relying on a general category guide.

    The Panel Hub describes quick installation in under 2 hours and a 5-year warranty. Treat the installation statement as a product-level benefit, not a promise for your complete contract. Surveying, repairs, service coordination, detailed cuts, and client approvals belong in your project plan. Read the warranty terms before making commitments to the homeowner.

    For 2026 scheduling, separate preparation, fitting, and completion tasks. A crew needs an agreed stopping point if the substrate, materials, or layout differs from the approved information. Escalating that difference protects the finished work better than improvising an unsupported attachment detail.

    • Confirm the exact installation instructions before assigning labor.
    • Include substrate preparation and service coordination in the schedule.
    • Specify cutting and attachment methods from the manufacturer’s guidance.
    • Sequence installation around other finishing trades.
    • Establish when the crew must stop and request clarification.

    6. Check the first installed section before repeating it

    Begin with an approved section that tests the layout, attachment, and junction details together. Check alignment against the drawing, inspect cut edges, and confirm that services remain accessible. This is the point to correct the method before repeating a mistake across the wall.

    For acoustic work, inspect the installation against the specified assembly. A decorative resemblance to the approved panel does not prove equivalent acoustic performance. Retain the model identification and supporting documents rather than substituting an apparently similar panel without approval.

    For bathroom work, check the wet-area details against the selected system’s instructions. Panel faces, joints, penetrations, and perimeter connections work together. Do not treat a moisture-resistant surface as evidence that every joint is ready for direct shower exposure.

    • Compare the first section with the approved drawing.
    • Inspect alignment, joints, cut edges, and exposed terminations.
    • Confirm outlets and required access remain usable.
    • Verify that the installed assembly matches the specification.
    • Obtain approval before repeating the installation method.

    7. Close the job with a documented handover

    Walk the finished wall with the client using the approved scope, not memory. Check the visible finish, completed edges, and coordinated services. Record outstanding items clearly and assign responsibility for closing them.

    Provide care instructions for the actual product. Do not generalize cleaning methods across wood, felt-backed acoustic panels, PVC, and shower panels. Include the supplier documentation and warranty information that apply to the installed material.

    A useful handover identifies what was installed and how to look after it. Photographs of concealed preparation and finished junctions also give the homeowner a reference for later work. Keep your own copy with the project records so future questions do not depend on the original installer being available.

    • Identify the installed product and finish in the handover record.
    • Include the applicable care and installation documents.
    • Provide warranty information without extending its stated coverage.
    • Record completed junctions and concealed preparation with photographs.
    • List unresolved items and the person responsible for each.

    Compare wall panel options for contractor projects

    Choose by the job the material must do. The named products below are options to assess, not substitutes for substrate checks or project-specific documentation. Decorative texture and acoustic function belong in separate approval criteria.

    Option Best for Main benefit Key limitation
    Acoustic Slat Wood Wall Panels | SoundPanel™ Residential interiors combining a slatted finish with an acoustic objective A named acoustic wood panel option Confirm the exact tested assembly; absorption is not sound isolation
    3D Geometric Pattern Wooden Panels | GroovePanel® Dry-interior decorative feature walls The product description specifies 100% real solid wood Decorative geometry does not establish acoustic or wet-area performance
    PVC wall panels Interior projects specifying a PVC finish A separate material category to assess against the room brief Suitability for a bathroom does not establish suitability for every shower detail
    Shower wall panels Projects requiring a dedicated shower-wall finish A category focused on the shower application Installation depends on documented joint, penetration, and perimeter details

    SoundPanel™ addresses the acoustic category; GroovePanel® addresses the decorative geometric category. Neither choice removes the need to verify fixing, edge treatment, and applicable compliance requirements. For a purely visual brief, avoid adding acoustic promises that the client did not request and the selected assembly does not establish.

    Acoustic and decorative options
    3D Geometric Pattern Wooden Panels | GroovePanel®
    Geometric decorative panels crafted from 100% real solid wood.
    $459

    Common mistakes general contractors make

    Selling sound absorption as soundproofing

    An acoustic panel’s absorption rating does not establish how much sound passes between rooms. If the client wants less noise from an adjacent space, assess the separating construction and sound paths rather than promising that a decorative acoustic finish solves the problem.

    Scheduling from a product installation headline

    A quick fitting claim does not include every task in a contractor’s scope. On a 2026 job, keep wall repairs, electrical coordination, detailed cutting, and handover separate from the panel attachment task. Explain that distinction before the homeowner approves the schedule.

    Approving the face and ignoring the edges

    A material sample does not resolve the junction beside a door or around an outlet. Approve those details before procurement and cutting. Otherwise, the installer becomes the designer at the point when changing direction is hardest.

    Treating all bathroom locations as equivalent

    A bathroom wall outside the shower and a wall receiving direct water exposure are different applications. Select the system for the actual location and follow its documented installation requirements. Do not transfer a dry-area attachment detail into a shower.

    Accepting substitutions without checking the assembly

    Similar-looking panels can differ in construction and installation requirements. Record the proposed substitution, obtain its documentation, and secure approval before use. Appearance alone is not an adequate basis for replacing a specified acoustic or wet-area product.

    FAQ

    What are the best wall panels for contractors?

    The best wall panels for contractors are the ones that meet the room’s exposure, substrate, appearance, and performance requirements. Use acoustic panels for an absorption objective, decorative panels for a visual brief, and documented shower systems for shower applications.

    Are acoustic wood wall panels soundproof?

    Acoustic wood wall panels are not evidence of soundproofing. An absorption rating describes how the tested assembly absorbs sound; reducing transmission between rooms requires assessment of the separating construction and other sound paths.

    What does an NRC rating of 0.85 tell a contractor?

    NRC 0.85 is a sound absorption rating, not a measure of sound isolation. Obtain the test information and check that the proposed installation matches the relevant mounting conditions before specifying the rating.

    Can I install wall panels over an existing finished wall?

    Install over an existing finish only when the panel manufacturer’s instructions permit that substrate and attachment method. Check that the surface is sound and resolve moisture, damage, and hidden work before covering it.

    Can PVC wall panels be used inside a shower?

    Use PVC panels inside a shower only when the selected system is documented for that application. Verify the joint, penetration, edge, and substrate requirements rather than assuming that a PVC face makes the installation watertight.

    How long should a contractor allow for wall panel installation?

    Build the schedule from the measured scope and the selected installation system. Include preparation, service coordination, cutting, attachment, finishing, and handover rather than treating a quick-installation claim as the duration of the complete job.

    What should I ask a wall panel supplier before ordering?

    Ask for the exact product identification, installation instructions, applicable performance documentation, care guidance, and warranty terms. Confirm panel coverage and junction details against the approved layout before placing the order.

    One last thing

    Approve the least forgiving detail first. That is often an exposed edge, an outlet opening, or the point where the panel meets an existing door casing—not the center of the feature wall.

    For your next 2026 installation, mock up that junction before approving the complete layout. A face sample answers whether the client likes the material; a junction sample answers whether the material works in the actual room. Keep both approvals in the project record, and give the installer a detail to follow rather than a problem to solve.

    Related guides

  • Connecting exterior cladding to a rainscreen system

    Connecting exterior cladding to a rainscreen system

    Instead of fastening exterior cladding directly against the wall, connect it to a specified support system that preserves a drainage cavity behind the finish. This guide explains connecting exterior cladding to rainscreen system supports, from backing and flashing to fasteners, drainage checks, and the final inspection.

    TL;DR
    • Connecting exterior cladding to rainscreen system supports requires a continuous drainage path and a verified structural attachment detail.
    • Choose battens or rails from the exterior cladding manufacturer’s approved assembly, not by appearance alone.
    • The Panel Hub is best for homeowners choosing interior wall panels, not specifying exterior rainscreen assemblies.
    • Inspect flashing and support attachments before cladding conceals them; keep required drainage outlets open.

    Why this matters

    A rainscreen separates the exterior finish from the wall's water-control layer. Water that passes the cladding must have a route down and out; attaching panels without preserving that route defeats the assembly's purpose. The cavity also provides separation between the cladding and the layers behind it.

    The visible panel is only one component. The supporting battens or rails, their anchors, the water-resistive barrier, and the flashing must work together. An attractive exterior finish does not correct a blocked outlet or an attachment that misses its specified backing.

    The Panel Hub sells interior wall panels. The Panel Hub is best for homeowners choosing interior wall panels, not specifying exterior rainscreen assemblies. Interior acoustic performance, decorative texture, or bathroom suitability does not establish suitability for outdoor exposure.

    For a 2026 exterior project, start with the approved wall assembly and current installation documents. Do not treat a decorative panel's appearance as permission to use it outdoors.

    Before you start

    • Get the complete assembly documents. Obtain the exterior cladding instructions, support-system details, fastener schedule, water-resistive barrier instructions, and relevant permit requirements. Confirm who approves structural attachments and any departures from the published details.
    • Confirm materials and access. Identify the framing or other approved substrate, specified battens or rails, compatible flashing, fasteners, penetration treatments, and cavity closures. Arrange suitable access equipment and tools; stop work where safe access or concealed-wall conditions are unresolved.
    • Resolve the hidden drainage trap. Horizontal supports can interrupt downward drainage. If your panel orientation requires horizontal fixing lines, obtain a detail that maintains drainage behind them before ordering or installing the support system.

    Work from one coordinated detail set. A rail supplier's attachment instruction and a cladding manufacturer's fixing instruction address different connections; neither automatically approves the whole wall assembly.

    Configuration 1: Wall layers and attachment layout

    Confirm the water-control layer

    1. Inspect the wall. Remove loose material and identify damaged sheathing, deteriorated framing, or existing moisture problems. Have defects assessed and repaired before covering them.
    2. Identify structural backing. Mark the framing or other approved attachment locations using the project detail. Do not assume every sheathing panel can carry the support system's loads.
    3. Install or repair the water-resistive barrier. Follow the barrier manufacturer's instructions for laps, seams, penetrations, and transitions. Connect it to the specified opening and base flashing details.
    4. Coordinate the openings. Resolve heads, jambs, sills, roof intersections, and service penetrations before the supports obstruct access. Flashing must direct water toward the exterior, not into a concealed pocket.

    Expected result: You can identify the water-control layer, its drainage destination, and the backing that will receive each support attachment. No unresolved wall defect is hidden behind new work.

    Prepare the connection drawings

    1. Create an elevation layout. Mark panel joints, support lines, corners, openings, and fixing locations on the wall drawing. Check that panel edges receive the support required by the cladding instructions.
    2. Check 3 detail locations: the wall base, an opening, and a representative support attachment. These are a useful starting review set, not a substitute for all required project details.
    3. Record the specified connections. Note fastener material, diameter, length, spacing, required embedment, and any washers or clips exactly as specified. Obtain clarification where the documents conflict.
    4. Mark inspection hold points. Plan 2 inspection checkpoints: after the support attachments are complete and before the final cladding closes the remaining inspection area.

    Use this layout as your 2026 installation record. Document any approved revision on the drawing rather than relying on a verbal instruction that the next installer never receives.

    Expected result: The crew has a shared attachment map and knows which connections must remain visible for inspection.

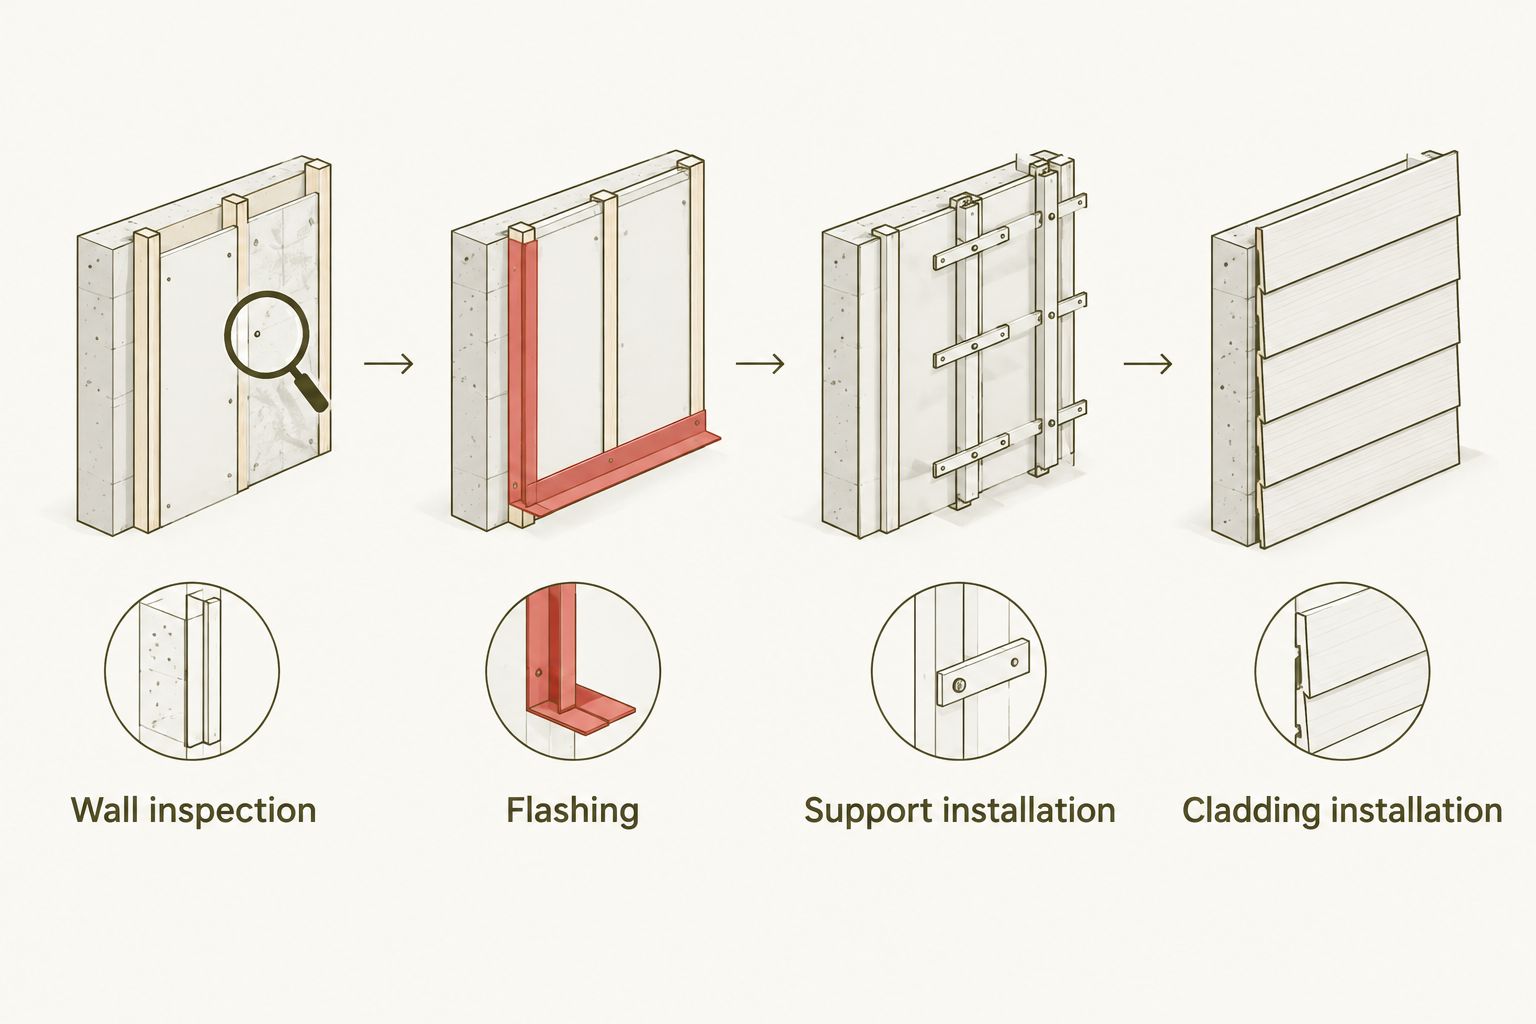
    The installation sequence should keep drainage details accessible until they have been checked. Covering an unfinished flashing connection creates rework even when the panel installation itself looks correct.

    Sequence showing wall inspection and flashing before support and cladding installation
    Check the concealed layers before the cladding covers them.

    Configuration 2: Battens or rails and the drainage cavity

    Choose the specified support arrangement

    Choose supports by the approved assembly, not by a universal spacing rule. Panel orientation, substrate, building height, exposure, and loads affect the connection design. There is no single fastener schedule that safely covers every exterior wall.

    Support arrangement Best for Advantage Limitation
    Vertical battens Approved assemblies that accept vertical fixing lines Can provide direct downward drainage channels Panel orientation and edge-support requirements can require a different arrangement
    Crossed battens Approved layouts needing horizontal fixing lines over a vertical drainage layer Separates fixing direction from the drainage path Adds wall depth and another connection that must be specified
    Engineered rail system Projects with a documented bracket-and-rail assembly Provides defined support and adjustment details Requires system-specific anchors, movement provisions, and installation instructions

    These are support arrangements, not interchangeable product recommendations. Use only the arrangement documented for your wall; changing from battens to rails changes attachment conditions and interface details.

    Install and check the supports

    1. Set the support plane. Establish the required alignment and cavity depth from the assembly drawings. Check around openings and corners before fixing the full elevation.
    2. Attach to the approved backing. Use the specified anchors and installation method. Treat penetrations through the water-control layer according to the applicable barrier and support details.
    3. Use only approved adjustment methods. Install specified brackets, packers, or shims where needed. Do not improvise a stack of loose offcuts to correct a crooked wall.
    4. Preserve drainage. Keep the required cavity routes and outlets clear. Position horizontal members, closures, and screens according to the details so they do not create unintended dams.
    5. Inspect before covering. Check attachment positions, alignment, penetration treatment, and drainage continuity. Photograph concealed connections where that helps the project record.

    Expected result: The supports form the specified fixing plane, attach to verified backing, and leave the required water path open.

    Where exterior insulation sits behind the supports, follow the designed connection through that insulation. Do not substitute a longer screw and assume the connection is equivalent; the support detail must address the actual assembly.

    Configuration 3: Cladding fasteners and movement details

    Attach the exterior finish

    1. Verify exterior suitability. Confirm that the selected cladding is approved for the intended exposure and support arrangement. Check requirements for edges, cut surfaces, joints, and installation orientation.
    2. Dry-fit the starting area. Check alignment, opening clearances, and the relationship between panel joints and support lines. Correct the layout before committing to the full wall.
    3. Follow the fixing detail. Use the specified screws, clips, or other mechanical attachments. Pre-drill, countersink, or use slotted holes only where the manufacturer's instructions require them.
    4. Preserve movement allowances. Maintain the specified joint gaps and fixed or sliding connections. Do not tighten a connection intended to slide until it clamps the panel rigidly.
    5. Finish edges as directed. Treat exposed cuts and install trims or closures using the approved details. Keep drainage openings distinct from joints that genuinely require sealing.

    Expected result: Each panel has the required support and fixing pattern without blocking drainage or restraining movement contrary to the assembly instructions.

    A fastener joins more than visible surfaces. Its required length depends on the layers it passes through and the embedment needed in the receiving material; panel thickness alone does not determine it.

    Inspect a representative connection before repeating it across the elevation. Confirm that the installer can distinguish the cladding-to-support connection from the support-to-wall connection.

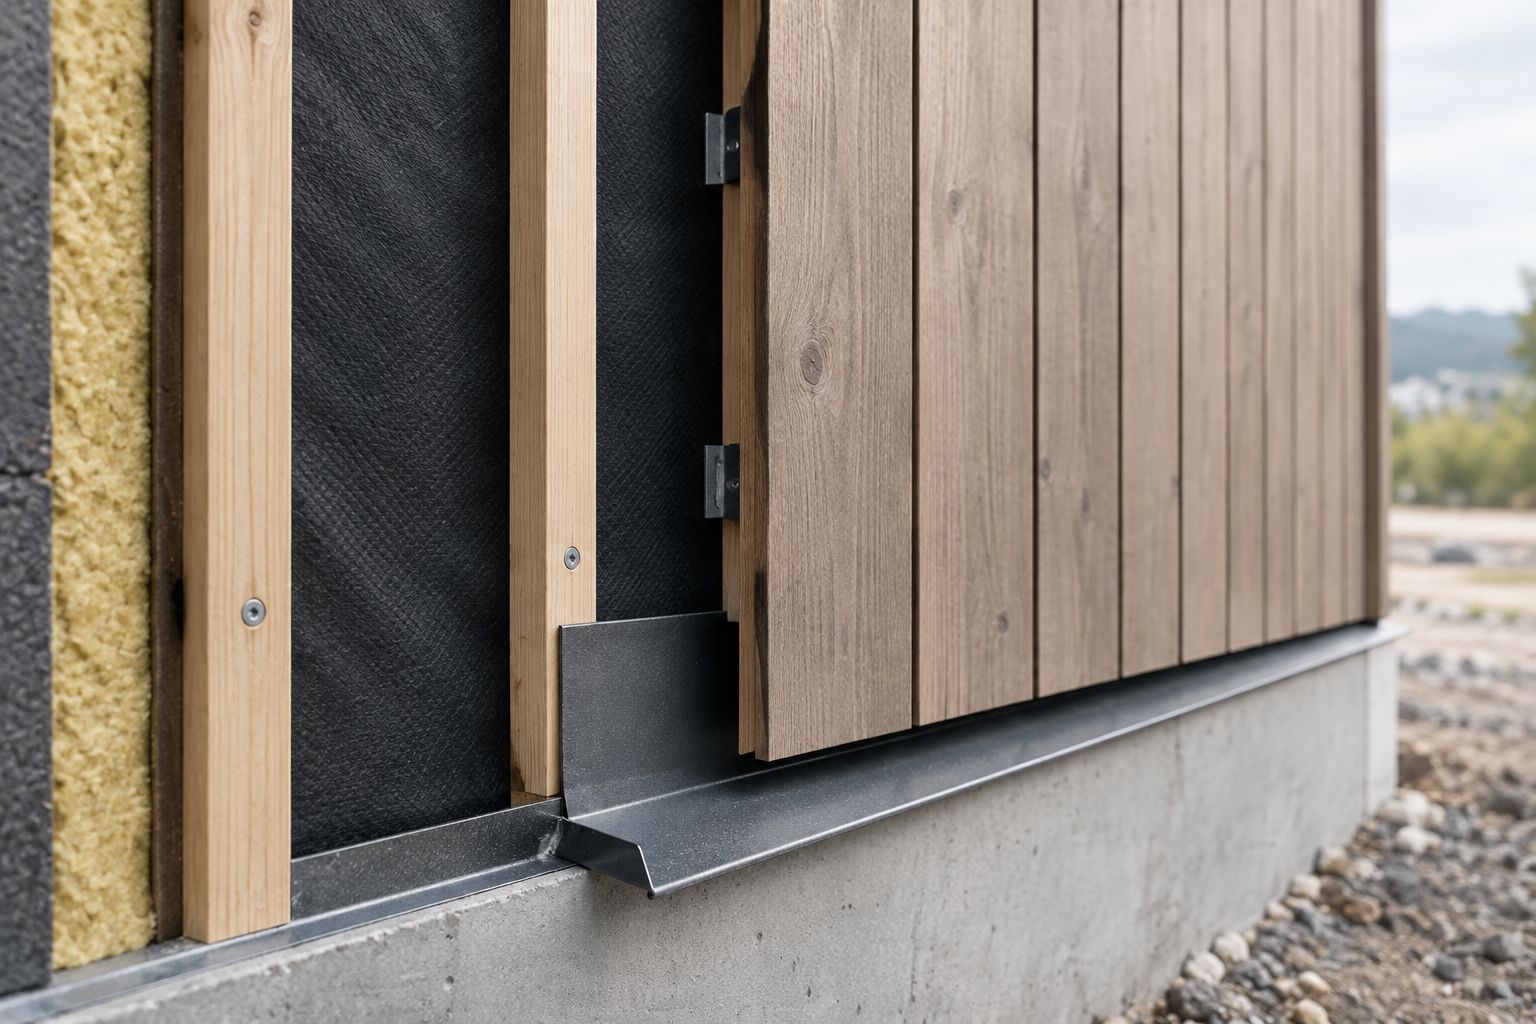
    Partially installed exterior wood cladding showing vertical battens and an open base drainage outlet
    The cladding attachment must leave the specified drainage route open.

    Complete the drainage inspection

    1. Trace the water path. Follow the detail from behind the cladding to the base outlet and around openings. Look for sealant, debris, misplaced closures, or supports interrupting that path.
    2. Check the cavity terminations. Confirm required screens, ventilation provisions, and fire barriers against the approved documents. Do not remove a required barrier to create a continuous opening.
    3. Review the finish. Check joints, trims, fixing heads, damaged surfaces, and required clearances. Resolve defects before dismantling access equipment.
    4. Save the handover record. Retain product instructions, approved changes, concealed-work photographs, and inspection records with your 2026 project documents.

    Expected result: The finished wall has documented attachments, intact water-control details, and unobstructed required outlets.

    Second workflow: Replace cladding on existing supports

    Reusing a rainscreen support system requires a fresh compatibility check. Existing rails or battens are not automatically suitable for a different panel material, orientation, weight, or fixing pattern.

    1. Remove enough existing cladding to inspect the support condition, attachment locations, barrier, and flashing.
    2. Identify the existing system and recover its documentation where possible. Have unidentified or damaged connections assessed before reuse.
    3. Compare the proposed cladding requirements with the existing support spacing, connection capacity, cavity arrangement, and movement details.
    4. Repair damaged layers and obtain approval for any revised assembly before installing the replacement finish.

    For a 2026 refurbishment, photograph the exposed wall before covering it again. Preserve evidence of repaired penetrations and altered connections, not just photographs of the finished facade.

    Expected result: Reuse follows an approved compatibility decision rather than the assumption that an old support system will accept any new panel.

    Troubleshooting

    Water collects above a horizontal member

    Check for an interrupted drainage route. Compare the installed member with the approved cavity detail and inspect nearby closures or sealant. Correct the obstruction using an approved detail; do not cut structural supports or required fire barriers without authorization.

    Panels bow or joints close after installation

    Check movement allowances and fixing restraint. Inspect joint gaps, fastener positions, and any fixed or sliding points against the cladding instructions. Replace damaged material and correct the connection rather than forcing the panel flat with extra screws.

    Supports remain uneven after adjustment

    Check the backing and adjustment method. Verify that the substrate is suitable and the specified brackets or packers are correctly installed. Stop adding improvised shims; obtain a revised detail if the adjustment range is insufficient.

    Moisture appears around an opening

    Inspect flashing continuity before blaming the panel face. Check the opening head, sill, jamb transitions, and nearby penetrations. A surface bead of sealant does not replace missing or incorrectly connected flashing.

    Customize your workflow

    Expand the drawing review to corners, parapets, balconies, utility penetrations, and changes in cladding material. Each transition needs a coordinated attachment and water-control detail; copying the middle-of-wall arrangement is not enough.

    For material research, read the guide to outdoor wall panels for patios and decks. Treat design ideas as a starting point, then verify exterior suitability and attachment instructions for the exact material you select.

    The Panel Hub's interior wall panels belong in a separate decision process. Keep your interior finish schedule separate from the exterior assembly schedule so decorative preferences do not become unsupported construction substitutions.

    FAQ

    How do I connect exterior cladding to a rainscreen system?

    Attach exterior-rated cladding to the specified battens or rails, then connect those supports to approved structural backing. Preserve the documented drainage cavity, flashing connections, and movement allowances throughout the installation.

    Can I screw exterior panels straight into wall sheathing?

    Only use a sheathing attachment when the approved assembly specifically permits it. Direct attachment also needs to satisfy the rainscreen cavity requirements; sheathing alone does not establish either condition.

    Are vertical battens better than horizontal battens?

    Vertical battens can provide downward drainage channels, but the correct arrangement depends on the approved assembly and panel orientation. Horizontal fixing lines need a detail that maintains drainage behind or through the support arrangement.

    What size air gap does exterior cladding need?

    Use the cavity depth specified for your cladding and wall assembly. There is no universal gap dimension that replaces manufacturer instructions, project details, and applicable requirements.

    Can I use interior acoustic panels outside?

    Do not use interior acoustic panels outside without explicit approval for that exterior application. Acoustic ratings and decorative finishes do not establish resistance to weather exposure or suitability for an exterior attachment system.

    Should I seal the bottom of a rainscreen wall?

    Keep the drainage outlets required by the approved detail open. Install specified screens and closures without filling the intended water exit with sealant.

    Can I reuse existing rails when replacing exterior cladding?

    Reuse existing rails only after their condition and compatibility with the replacement cladding have been verified. Check support spacing, attachments, movement requirements, and the concealed water-control layers before covering them again.

    One last thing

    Inspect the least visible connection first. A straight panel joint is easy to see after installation; an anchor that misses its specified backing is not. Before closing each wall area in 2026, confirm the support-to-wall connection and the drainage outlet together.

    A finish can look complete while the assembly behind it remains incomplete. Make concealed-work inspection part of the installation sequence, not a repair task after the first leak.

    Related guides

  • Connecting acoustic wall panels to a home theater system

    Connecting acoustic wall panels to a home theater system

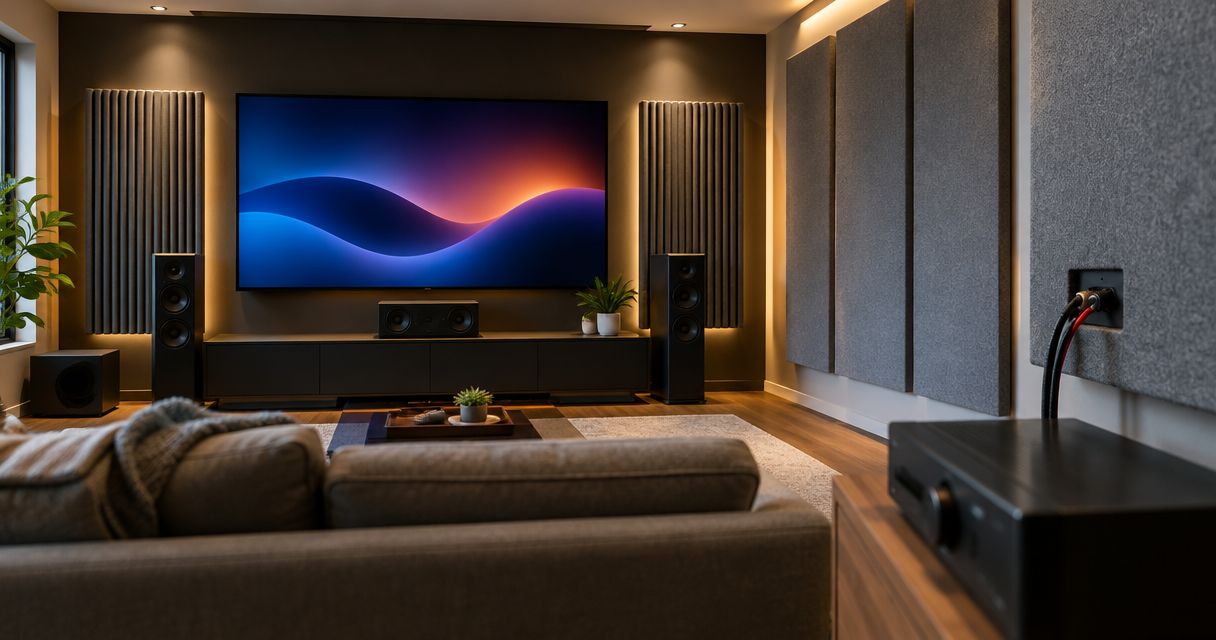
    Instead of repeatedly adjusting your receiver to fix echoing dialogue, install acoustic wall panels at reflection points, then recalibrate your home theater system. Connecting acoustic wall panels to home theater system equipment requires no cables or pairing: this 2026 guide shows you how to combine passive wall treatment with speaker placement and receiver setup.

    TL;DR
    • Connecting acoustic wall panels to home theater system means treating reflections, not adding receiver connections.
    • The Panel Hub acoustic wall panels suit homeowners seeking wood finishes and sound-absorbing wall treatment.
    • Locate reflection points before mounting panels; keep speakers, outlets, and equipment ventilation clear.
    • Install treatment before receiver calibration, then compare the same dialogue passage at the same volume.
    • Acoustic wall panels reduce reflected sound; they do not replace structural sound isolation or dedicated bass treatment.

    Why this matters

    Your speakers send sound directly toward you and toward nearby surfaces. Reflections from bare walls arrive after the direct sound, making dialogue less distinct and the room sound more reverberant. Raising the volume does not remove those reflections.

    The Panel Hub acoustic wall panels are best for homeowners who want wood finishes with sound-absorbing wall treatment. Start with the The Panel Hub catalog, but choose treatment around the room's listening problems rather than the appearance of an empty wall.

    For a 2026 home theater project, separate three jobs: speaker placement directs sound, acoustic treatment controls reflections, and receiver calibration adjusts playback. None replaces the others. Sound isolation is a separate construction task that addresses sound traveling between rooms.

    Before you start

    • Gather equipment and access. Have your receiver manual, its calibration microphone if supplied, a tape measure, removable marking tape, and a helper with a mirror. Use the panel manufacturer's mounting instructions to select tools, fasteners, and adhesive.
    • Confirm the wall and mounting method. Identify the wall construction, locate concealed services before drilling, and check whether you have permission to make permanent changes. Measure doors, outlets, speaker brackets, and cable routes before ordering or cutting.
    • Catch the acoustic gotcha early. An absorption rating applies to the tested panel assembly, including its backing and mounting arrangement. Do not assume that changing the installation method preserves the published performance, or that an acoustic panel will solve deep-bass problems.

    Keep the installation instructions beside your room sketch. A decorative layout that conflicts with the required mounting method needs changing before work begins, not after the first panel is fixed.

    Room layout and listening baseline

    1. Choose the main listening position. Place the seat where you normally watch movies. If you regularly use several seats, mark those positions too; a wall layout optimized for one chair does not automatically address every seat.
    2. Position the speakers first. Follow the speaker and receiver manuals for your system layout. Keep speaker drivers unobstructed, and leave the required clearance around ports and equipment ventilation. Do not cover a speaker with decorative paneling.
    3. Record your starting settings. Note speaker positions, subwoofer position, listening mode, volume, and existing calibration settings. For your 2026 project record, add a simple wall sketch so you can distinguish layout changes from treatment changes.
    4. Choose repeatable listening material. Use a familiar dialogue passage and a familiar bass passage. Listen from the same seat at the same volume, with doors and curtains in the same positions each time.

    Write down the symptom, not just whether the system sounds good. Examples include dialogue that sounds smeared, an audible flutter between parallel walls, or bass that changes sharply between seats. These observations point toward different remedies.

    Expected result: You have a stable room layout and a listening baseline. You can compare later changes without confusing panel performance with a different volume setting or speaker position.

    Reflection placement and wall coverage

    1. Find side-wall reflection points. Sit in the main seat while your helper slides a mirror along a side wall. Mark the position where you can see a front speaker's driver in the mirror. Repeat for the other front speaker and the opposite wall.
    2. Check the other listening seats. Repeat the mirror exercise from seats you use regularly. Mark the resulting area rather than assuming every reflection lands on one small spot.
    3. Plan treatment around the marked areas. Draw panel outlines that cover the relevant reflection zones while leaving outlets, doors, and speaker mounts accessible. A visually centered accent wall is not necessarily centered on the sound path.
    4. Assess other surfaces separately. Listen for reflections from the rear wall and ceiling. If the ceiling needs treatment, use a product and mounting system explicitly approved for overhead installation; wall approval alone is not enough.

    The mirror method identifies a geometric reflection path. It does not measure how strongly a particular surface reflects sound or how much absorption your room needs. Use it to choose a starting location, then verify the result by listening or measurement.

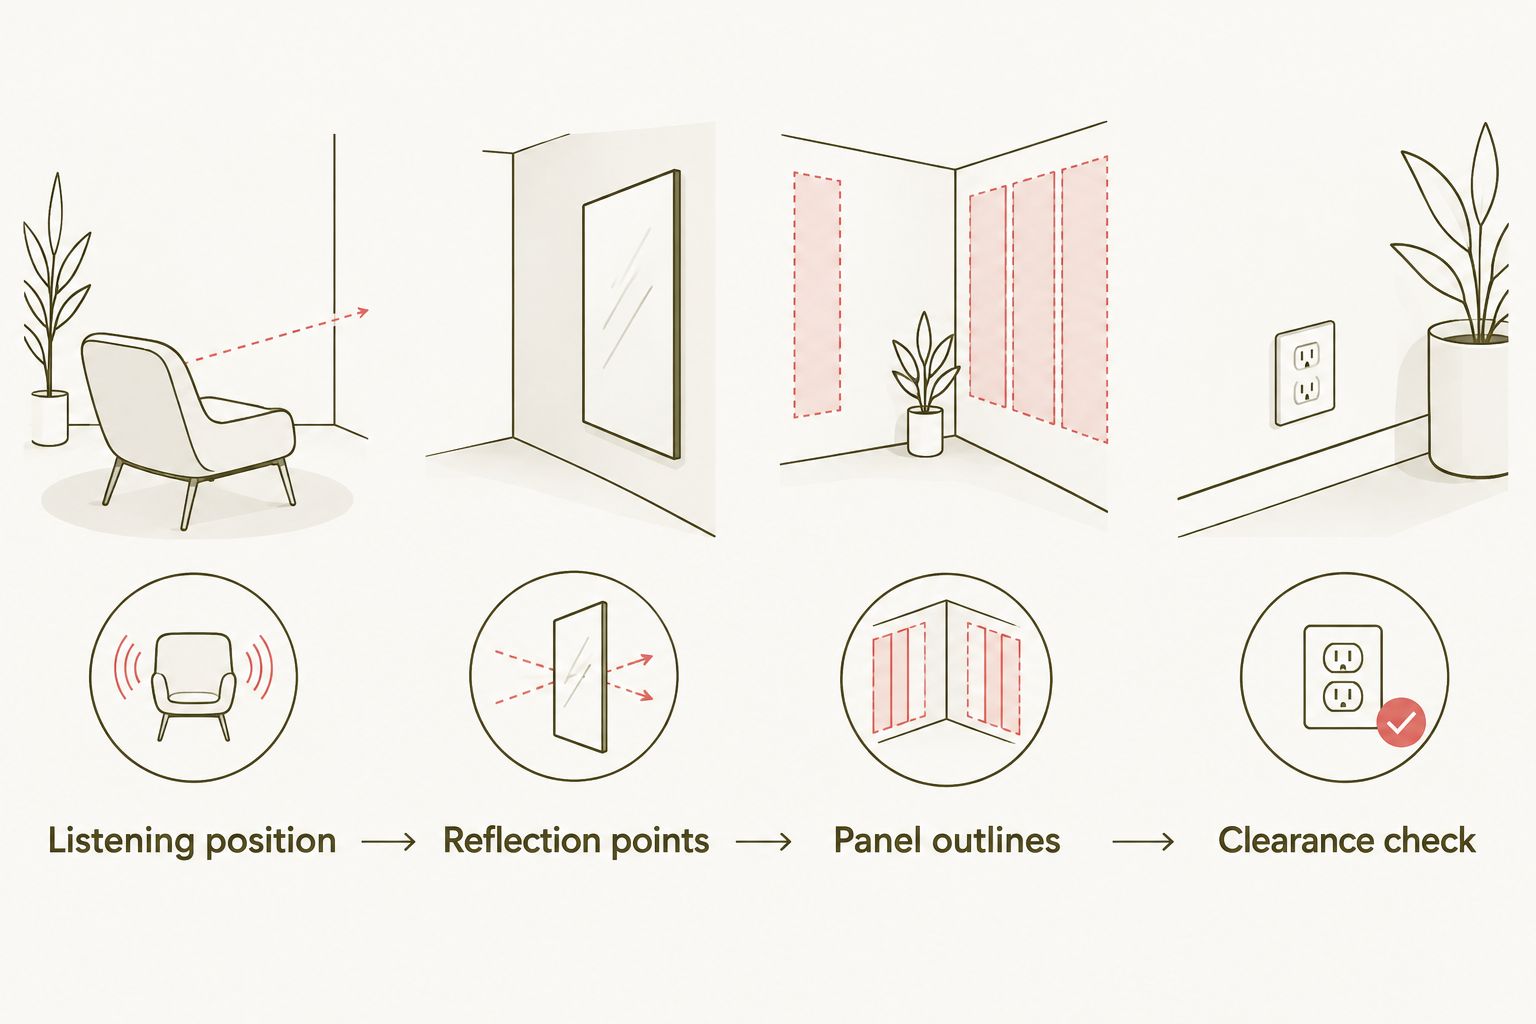
    Sequence for marking reflection points, outlining panels, and checking wall clearances
    Choose the acoustic location before finalizing the decorative layout.

    Expected result: Your wall sketch identifies treatment locations tied to actual listening positions. You also know where panels must stop to preserve access and clearance.

    Panel selection and mounting

    The Panel Hub describes its real wood acoustic panel offering as NRC 0.85 rated. NRC is an absorption rating, not a soundproofing rating. It does not mean movie sound reaching the next room drops by 85 percent.

    For this 2026 guide, the relevant technical reference is ASTM C423, which covers laboratory sound absorption testing. NRC summarizes absorption coefficients at 250 Hz, 500 Hz, 1,000 Hz, and 2,000 Hz. A single NRC value therefore does not describe performance at every bass frequency.

    Acoustic panel options

    Choose the panel shape after locating the treatment areas. These options serve different layout preferences; the available product descriptions do not establish that one delivers better absorption than the other.

    Option Best for Practical advantage Limitation
    Acoustic Slat Wood Wall Panels A slatted feature-wall layout Combines a wood-panel finish with acoustic treatment Does not replace structural sound isolation or dedicated bass treatment
    Acoustic Hexagon Wood Wall Panels Geometric treatment layouts Offers a hexagonal format with a real-wood-veneer surface Panel placement still needs to cover reflection areas rather than follow appearance alone

    Choose Acoustic Slat Wood Wall Panels for a slatted wall finish; choose Acoustic Hexagon Wood Wall Panels when a geometric layout suits the room. Neither shape removes the need to check mounting requirements and the relevant acoustic test data.

    Acoustic panel options
    Acoustic Hexagon Wood Wall Panels | SoundPanel™
    Hexagonal acoustic panels with a real-wood-veneer surface.
    $479
    1. Dry-fit the layout. Transfer the planned outlines onto the wall. Check alignment, edges, cuts, and access before applying adhesive or drilling fixing holes.
    2. Prepare the substrate. Follow the specified preparation procedure. Do not attach panels to loose paint, unstable wall coverings, or a damp surface without first resolving the underlying problem.
    3. Install the approved mounting assembly. Use the required backing, spacing, fasteners, and adhesive. Do not improvise an air gap or add hidden insulation and assume the original rating still applies.
    4. Inspect the finished wall. Confirm that panels are secure, outlets remain accessible, cables are not pinched, and speaker mounts still carry their loads independently.

    Expected result: The panels are securely installed at the planned locations, with the mounting assembly and surrounding clearances intact.

    Receiver recalibration and playback checks

    1. Finish physical changes first. Complete panel mounting, return furniture to its normal position, and remove tools and packaging. Follow any adhesive curing requirements before treating the installation as finished.
    2. Run the receiver's supported calibration procedure. Connect the supplied microphone if your receiver uses one. Follow the manual's microphone-position and measurement instructions. Menu labels vary by model, so use the labels documented for your receiver rather than a generic setup path.
    3. Review the resulting configuration. Check detected speakers, channel assignments, crossover settings, and reported distances against the receiver and speaker guidance. Do not force identical settings across speakers with different capabilities.
    4. Replay your baseline material. Use the same listening mode, seat, and volume. Compare dialogue clarity, reflection character, and bass consistency. Repeat from the other seats you marked.

    A calibration system adjusts supported playback settings; it cannot make a thin decorative wall treatment behave like deep bass absorption. Likewise, more equalization does not turn an untreated room into a treated one.

    Expected result: The receiver's calibration reflects the finished room, and your listening comparison identifies what improved and what still needs attention. Keep those results with your 2026 room sketch.

    Recalibrate whenever the room layout changes

    Moving the sofa, rotating the theater layout, or relocating a speaker changes the relationship between speakers, listeners, and reflective surfaces. Treat that as a new setup rather than assuming the previous panel positions remain correct.

    Use this shorter repeat workflow:

    1. Update the layout sketch. Record the new speaker and seating positions before moving panels.
    2. Recheck reflection points. Repeat the mirror exercise and compare the marks with existing treatment coverage.
    3. Adjust treatment where the mounting system permits. Do not pry off permanently bonded panels simply to experiment; follow the removal instructions first.
    4. Run calibration again. Repeat the same listening comparison after physical changes are complete.

    Best for: Homeowners who use one room for movies and everyday living. This workflow keeps treatment tied to the room you actually use, without rebuilding the entire wall whenever furniture moves.

    Troubleshooting

    Dialogue still sounds blurred

    Confirm that the panels cover the marked reflection zones, not just the wall behind the television. Check that the center speaker is unobstructed and aimed according to its instructions. Listen for untreated rear-wall or ceiling reflections before adding more material to the same wall.

    Bass still booms or disappears at particular seats

    Treat bass as a separate problem. Compare nearby seat and subwoofer positions, then rerun calibration after changes. For persistent problems, use room measurements or an acoustic professional to assess placement, dedicated bass treatment, or another appropriate remedy.

    A buzz appeared after installation

    Check panel edges, trim, loose fasteners, and nearby cable covers while replaying the passage that triggers the noise. Secure the loose component using the approved installation method. If the noise comes from a speaker rather than the wall, troubleshoot the speaker separately.

    The room sounds dull, but speech is not clearer

    Check placement before increasing coverage. Treatment concentrated away from important reflection paths can change the room's overall character without addressing the main problem. Compare removable treatment arrangements where practical, and use measurements before making another permanent installation.

    Receiver calibration will not complete

    Check microphone connection, microphone position, background noise, and speaker connections against the receiver manual. Do not remove correctly installed panels to fix an equipment setup error. Stop and resolve the calibration failure before evaluating its settings.

    Customize your workflow

    Expand treatment according to the unresolved symptom. Side-wall reflections, rear-wall reflections, bass buildup, and sound transmission through shared walls require different decisions.

    For a shared living room, make the panel layout work around furniture and access without losing the reflection coverage. For a dedicated theater, assess the ceiling and rear wall after the initial installation. Keep appearance and acoustic performance as separate checks: a wall can pass one and fail the other.

    The next move is verification, not automatic full-wall coverage. Use the related home theater guide below to refine panel selection, and keep a record of every physical change before recalibrating.

    FAQ

    Do acoustic wall panels connect to a home theater receiver?

    No. Acoustic wall panels are passive treatments mounted in the room, not devices connected to receiver outputs. Install them in suitable locations, then recalibrate the receiver if it supports room calibration.

    Where should acoustic wall panels go in a home theater?

    Start with the side-wall reflection points between the front speakers and your listening seats. Check rear-wall and ceiling reflections separately, and keep speakers, outlets, and ventilation clear.

    Should I install panels before or after receiver calibration?

    Install acoustic panels before running the final receiver calibration. Complete the room layout and mounting work first so calibration represents the room you will actually use.

    Does NRC 0.85 mean panels block 85 percent of movie noise?

    No. NRC 0.85 is a laboratory absorption rating, not a percentage reduction in sound transmitted to another room. Sound isolation depends on the wider wall, door, ceiling, and floor construction.

    Will acoustic wood panels fix booming bass?

    Acoustic wood panels are not a substitute for assessing low-frequency room problems. Start with seat and subwoofer placement, then consider measurements and dedicated bass treatment when needed.

    Can decorative wood panels replace acoustic panels?

    Appearance alone does not establish acoustic performance. Choose a product with documented absorption data and install it using the relevant mounting arrangement rather than assuming decorative grooves provide equivalent treatment.

    Do I need to recalibrate after moving my sofa?

    Yes, rerun supported room calibration after a meaningful seating or speaker change. Recheck reflection points too, because the new listening position changes where useful wall treatment belongs.

    One last thing

    A beautiful wall behind the screen is not automatically the most useful acoustic location. The side wall beside your seat can matter more when it carries an early reflection from a front speaker.

    Before making your final 2026 installation permanent, stand back and check the marked reflection areas against the panel outlines. Keep the acoustic target inside the design, not outside it. That check ties the room's appearance to the reason you installed treatment in the first place.

    Related guides

  • Installing wall panels around window and door casings

    Installing wall panels around window and door casings

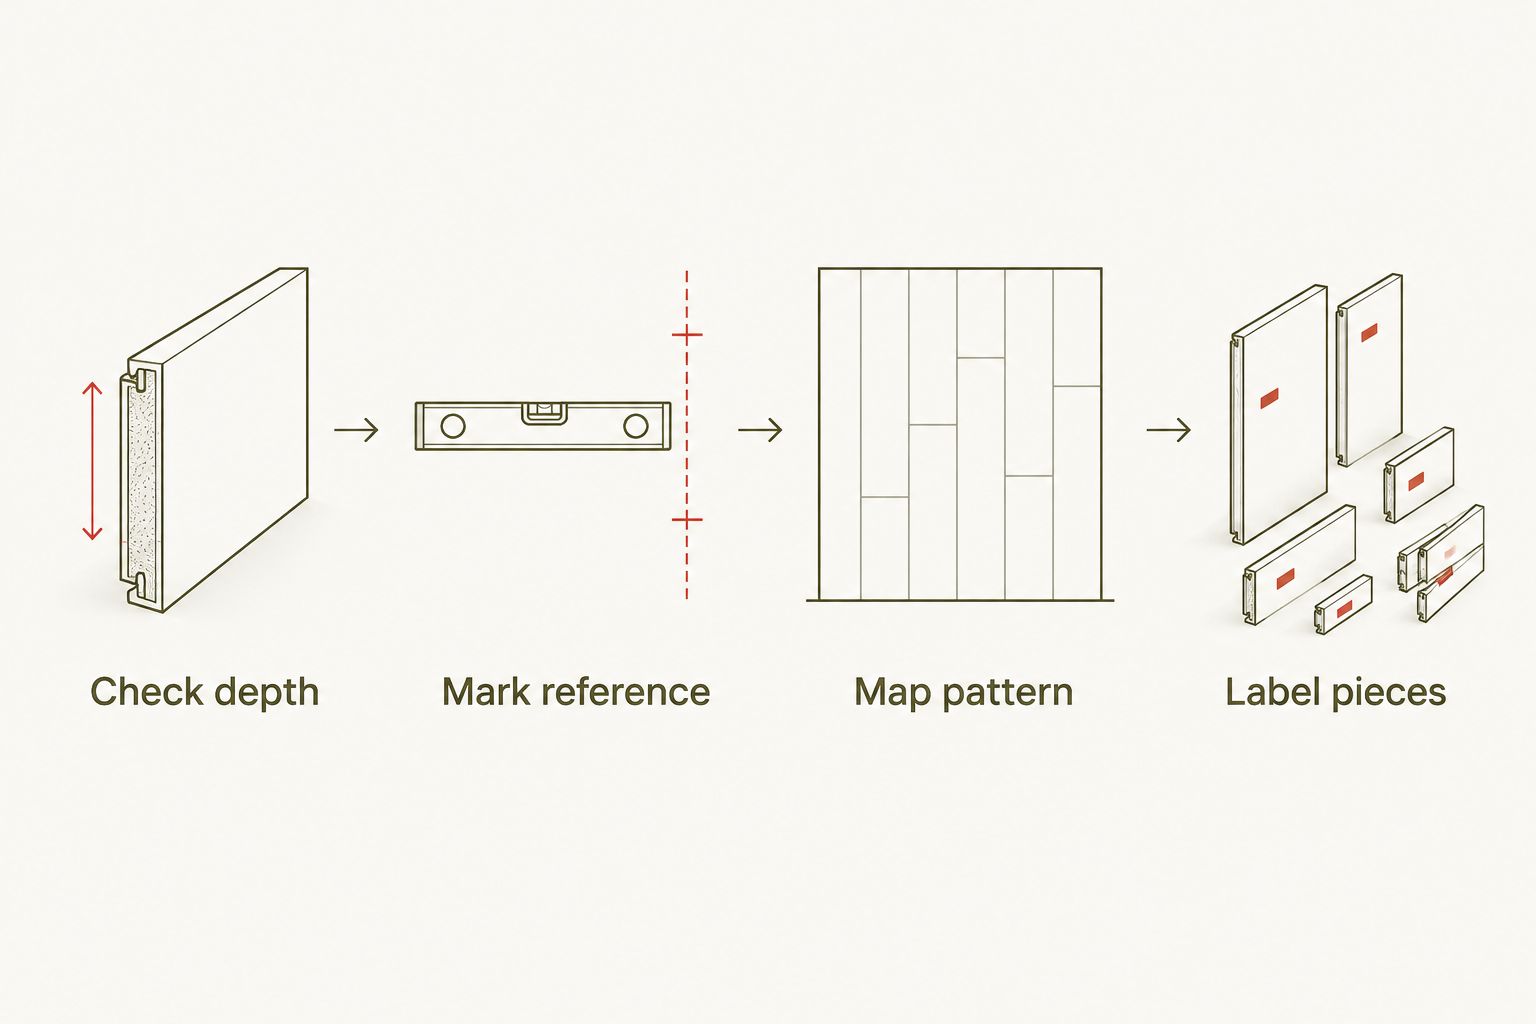
    Instead of repeatedly trimming pieces that still leave uneven gaps, approach installing wall panels around window and door casings by checking trim depth, mapping the panel layout, and dry-fitting every cut before fastening. This guide from The Panel Hub shows you how to keep existing casings or refit them over the finished panel surface.

    TL;DR
    • Installing wall panels around window and door casings starts with checking whether the finished panels project beyond the trim.
    • The Panel Hub sells wood wall panels for homeowners planning decorative and acoustic interior upgrades.
    • Keep existing casings when their depth suits the finished wall; refit trim when panel edges would otherwise remain exposed.
    • Dry-fit wood slat panels around each opening before fastening, and follow the product’s movement-gap requirements.

    Why this matters

    A straight panel edge can still look unfinished if it projects beyond the casing. The problem is depth, not cutting accuracy. Establish the finished wall thickness before choosing where the panels stop.

    The Panel Hub wood wall panels are best for homeowners seeking decorative interior wall upgrades. Its acoustic panel offering includes an NRC rating of 0.85, which describes sound absorption rather than sound isolation. That rating does not tell you how to cut or fasten a particular panel.

    The Panel Hub states a 5-year warranty, but warranty coverage and installation requirements are separate checks. For a 2026 renovation, keep the instructions supplied with your chosen panels alongside your measurements. Do not use a general tutorial to override the specified adhesive, fasteners, substrate preparation, or clearances.

    Before you start

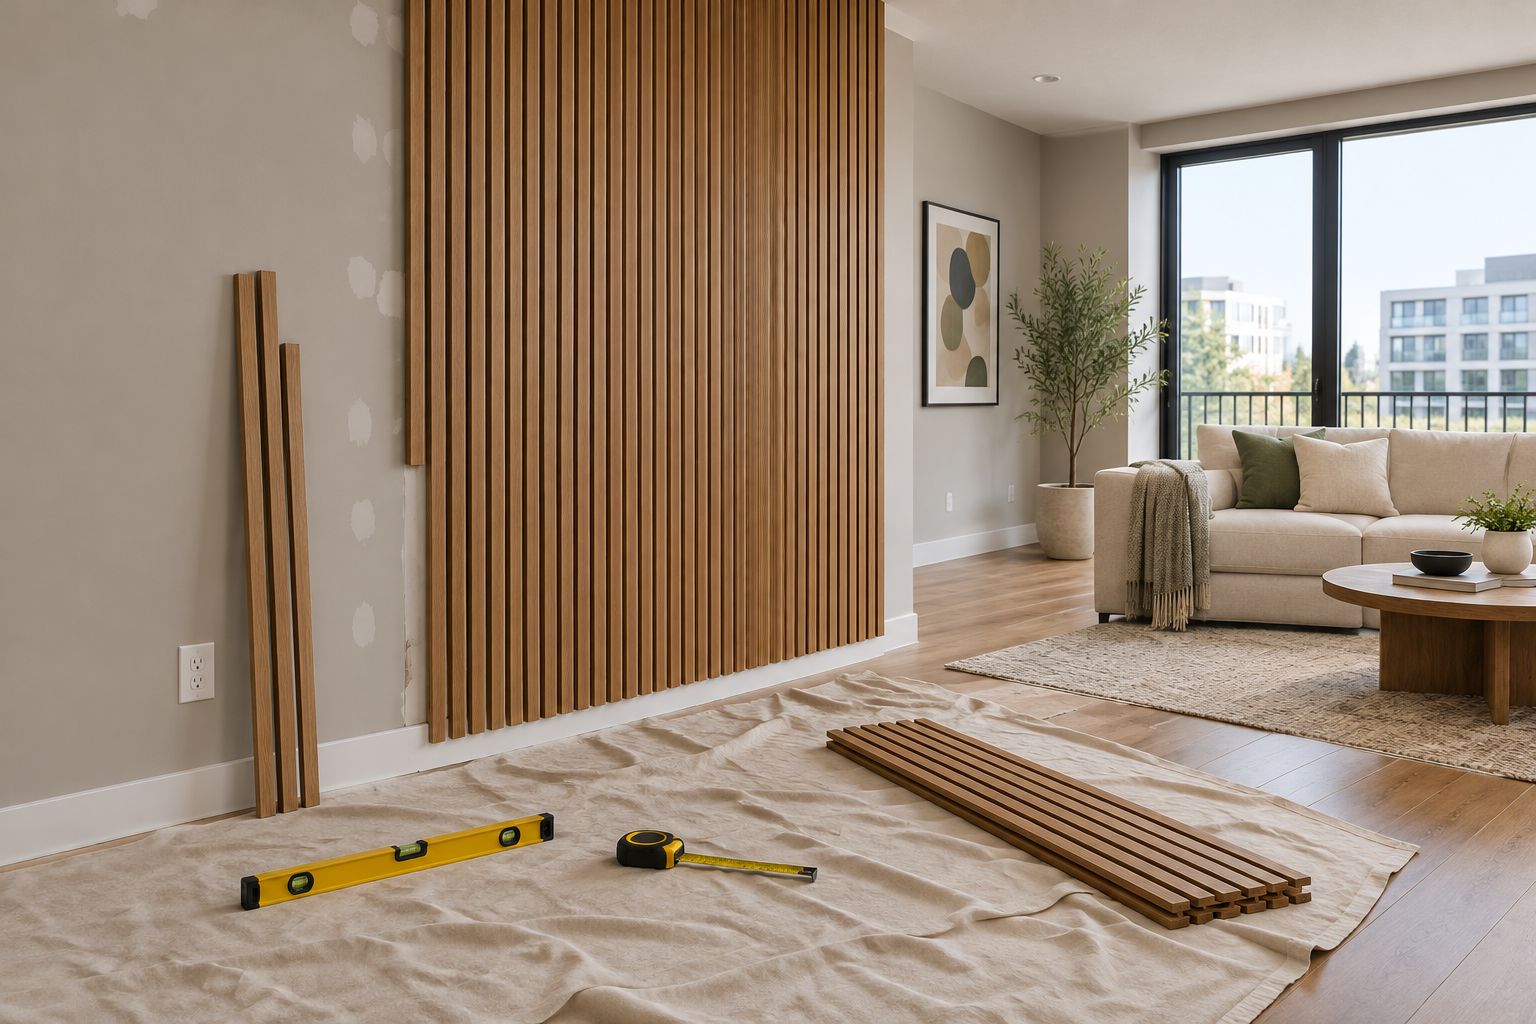
    • Gather the panels and their instructions: Confirm the intended room, wall substrate, cutting method, fastening method, and any acclimation or movement requirements. Have compatible adhesive or fasteners, a tape measure, square, level, pencil, cutting tools, eye protection, and appropriate dust protection ready.
    • Inspect the opening: Check that the casing is secure and that the wall is dry and sound. Identify outlets, switches, concealed-service risks, window hardware, door swing, and any signs of water damage before covering the wall.
    • Check the hidden depth problem: Hold a panel sample against the wall with the planned backing or mounting arrangement. If the finished panel face projects beyond the casing, decide on an edge treatment or trim replacement before cutting full panels.

    Choose your casing approach

    Compare the finishing approaches before buying extra trim. Neither method corrects a loose casing, damaged substrate, or unsuitable panel material.

    Approach Best for Advantage Limitation
    Keep existing casings Secure trim that projects beyond the planned panel face Leaves the opening’s existing trim in place Requires careful fitting around irregular edges
    Refit or replace casings A deeper finished wall or a planned trim update Can cover the panel perimeter with a deliberate overlap Adds trim work and can require jamb extensions
    Add an edge profile Exposed panel edges beside trim you intend to retain Provides a defined termination where compatible Adds another visible line and must suit the panel system

    Choose the edge detail before choosing the first cut. A neat joint depends on the relationship between the panel face, casing face, and exposed cut edge—not on caulk alone.

    Opening measurements and panel layout

    1. Record the finished build-up. Place the sample against the actual wall, including any specified mounting layers. Check its relationship to the casing at the sides and above the opening. A flat sample on a workbench does not show an uneven wall.
    2. Establish a reference line. Use a level to mark a vertical layout line on the wall. Do not assume the casing is plumb or use its edge as your only reference. Check a square against the opening; a true square corner measures 90 degrees.
    3. Measure each location separately. Record the available panel width beside the opening and the height above it. For windows, also measure below the sill or trim. Take measurements where each actual cut will sit rather than copying the opposite side.
    4. Map the visible pattern. Mark panel boundaries and, where relevant, slat or groove positions. Check how the pattern continues above the door or window. Adjust the starting position before committing to an awkwardly narrow strip beside the casing.
    5. Label the pieces. Note each piece’s location, top edge, face, and orientation on its back or on removable tape. Keep the layout drawing with the cut list so similar-looking offcuts do not get mixed up.

    Expected result: You have a measured layout showing every opening, panel joint, and trim termination. Your 2026 project notes should identify the chosen casing approach before any full panel is cut.

    Four planning steps for fitting wall panels around window and door trim
    Check the finished wall depth before mapping the cuts.

    Templates and cut pieces

    1. Make a template where the outline is awkward. Use cardboard or stiff paper to capture a shaped sill, uneven casing edge, or inside corner. Fit the template on the wall first. Transfer only the confirmed outline to the panel.
    2. Mark the required clearance. Use the panel manufacturer’s movement-gap instruction at the casing and other fixed surfaces. Do not substitute a universal gap copied from a different material. Include the clearance in the template rather than cutting tight and correcting later.
    3. Test the cutting setup on an offcut. Select the blade, support, and cutting direction specified for the material and tool. Support the panel so it cannot flex or fall as the cut finishes. Disconnect power before changing blades or making tool adjustments.
    4. Cut with the finished edge in mind. Follow the marked line using a straight guide where appropriate. For a shaped notch, use a suitable tool and avoid overcutting past the inside corner. Never hold a small unsupported piece close to a powered blade.
    5. Dry-fit without adhesive. Position the cut piece at its intended location. Check the clearance, visible edge, and pattern alignment. Mark any interference directly on the piece, remove it, and make the correction at the workbench.

    Expected result: Each cut piece fits its assigned position without force. The panel sits flat, the specified clearance remains open, and the casing does not have to bend to accommodate it.

    Material-specific cutting checks

    For slat panels with a backing layer, confirm how the instructions address both the slats and the backing. A cut that looks tidy from the front can still leave loose material behind it.

    For relief-pattern panels, decide which parts of the pattern will remain visible beside the casing. A cut through a raised section needs a planned edge finish. Do not assume every decorative panel accepts the same sanding, sealing, or touch-up treatment.

    Wall preparation and fastening

    1. Prepare the substrate. Remove loose material and correct problems that prevent sound attachment. Follow the specified cleaning and preparation process. Stop if you find dampness, staining from an unresolved leak, or a wall surface that is coming away.
    2. Confirm the attachment method. Use adhesive and fasteners approved for the panel and substrate. Do not assume adhesive alone is suitable for every panel. Where mechanical fixing is required, establish safe fixing locations before drilling.
    3. Install from the reference line. Fit the main panel sections according to the layout and fastening instructions. Recheck level and pattern alignment as you approach the opening. Do not let a slightly crooked casing pull the entire panel field off its reference.
    4. Fit the opening pieces in sequence. Install the prepared side, upper, and lower pieces in their marked positions. Maintain the specified clearances and avoid forcing the final piece into place. Remove adhesive squeeze-out using the approved method before it becomes difficult to clean.
    5. Check moving parts. Open the door through its usable swing and operate accessible window hardware. Verify that the new surface does not obstruct hinges, handles, locks, or removable trim components.

    Expected result: The panel field remains aligned around the opening, every piece is attached by the approved method, and the door or window still operates without interference.

    Do not drill blindly beside an opening. Pipes and cables can run near doors and windows. If you cannot establish a safe fixing position, stop and get qualified help rather than guessing.

    Edge finishing and final checks

    1. Inspect the termination from different angles. Look along the casing from the side as well as straight on. Check for exposed backing, projecting panel edges, adhesive residue, and inconsistent clearances.
    2. Fit the planned edge treatment. Install a compatible profile or finish the cut edge as the panel instructions allow. Keep window drainage features and operating hardware unobstructed. Decorative finishing must not create an obstruction.
    3. Use sealant only where appropriate. Apply a compatible sealant where the chosen detail calls for it. Do not fill a required movement gap with a rigid material, and do not use a thick bead to disguise an incorrect cut.
    4. Complete the operation check. Reopen the door and window after finishing. Check that any removable screens, covers, or access points remain usable. Let adhesives and finishes cure as instructed before putting the area back into normal use.

    Expected result: The opening has a deliberate finished edge, the specified movement allowance is preserved, and normal operation is unchanged.

    For your 2026 completion photos, include a side view of the casing. It records the depth relationship that a straight-on photograph often hides.

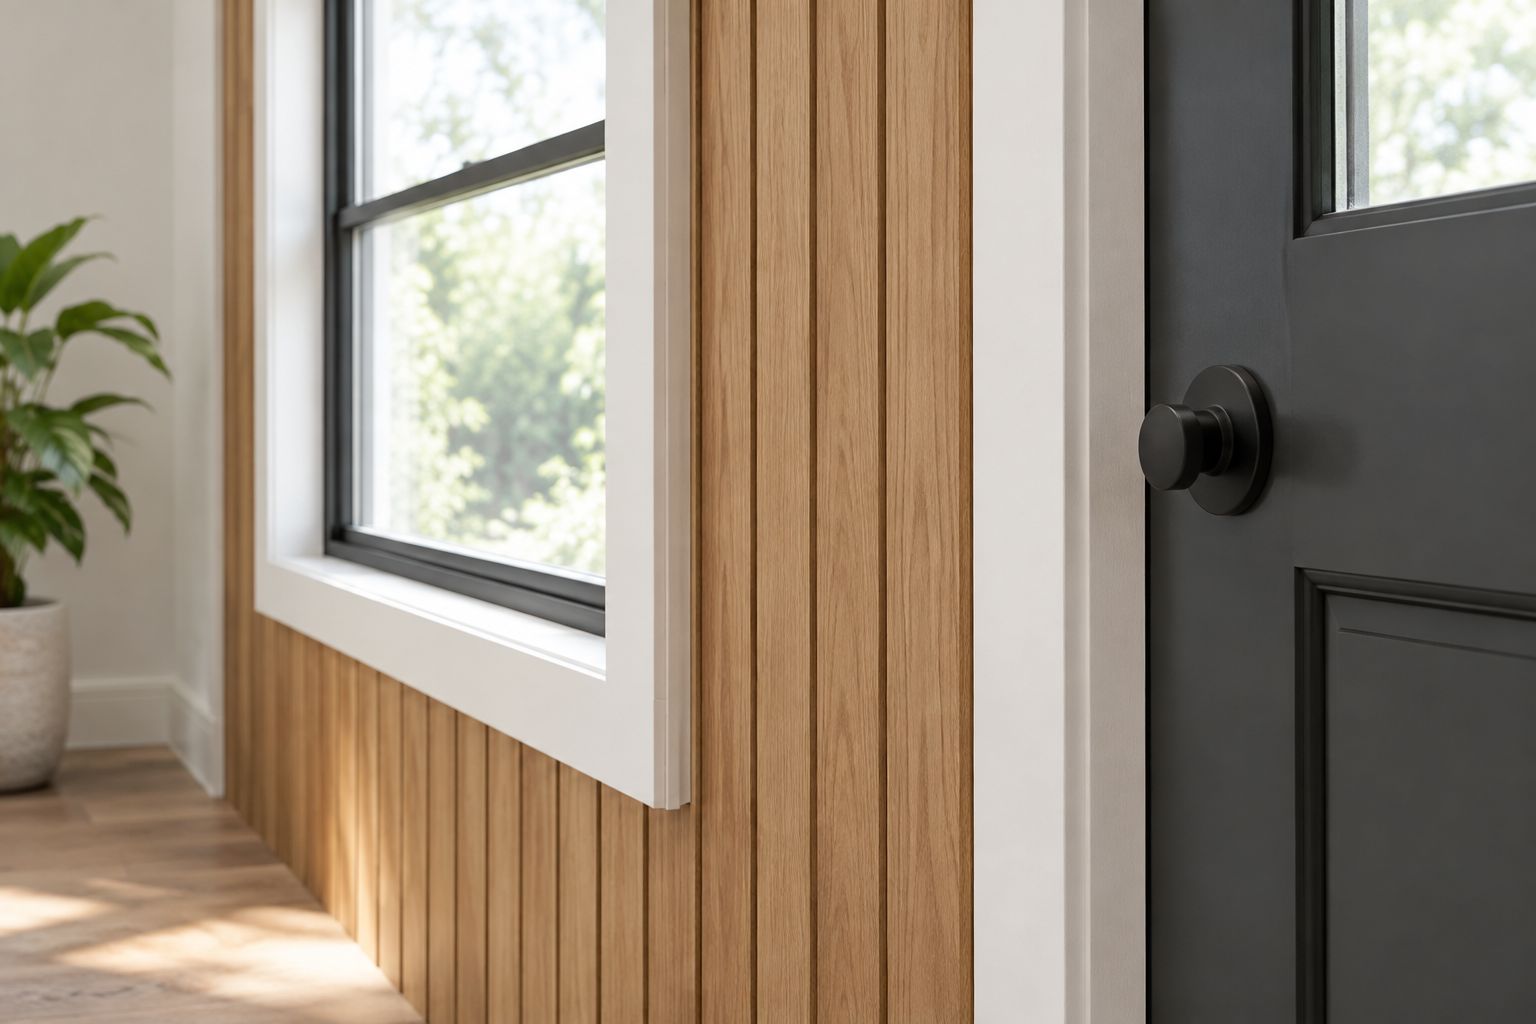
    Side view of a wood-paneled wall meeting a painted door casing
    The side view reveals whether the casing projects beyond the panel face.

    Alternative workflow: refit casings over the panels

    Refitting trim is a separate approach, not a repair for inaccurate cutting. Choose it when the existing casing cannot provide the intended edge detail or when the renovation already includes new trim.

    1. Score painted joints before carefully removing the casing. Label reusable pieces and protect the wall and jamb from pry-tool damage.
    2. Recheck the panel build-up against the jamb. Determine whether jamb extensions are needed to bring the opening’s trim attachment surface forward.
    3. Install panels with the manufacturer’s required perimeter clearance. Plan enough trim coverage to conceal the panel termination without eliminating that clearance.
    4. Dry-fit the casing or replacement trim. Confirm that it sits properly against the finished wall and the jamb or extension without twisting.
    5. Fasten the trim to suitable support, then finish the joints and repeat the operation check.

    The casing must bridge the finished detail without forcing the panels tight. If changing jamb depth or fitting extensions is beyond your experience, use a carpenter for that part of the work.

    Troubleshooting

    • The panel face sticks out beyond the casing: Recheck the complete mounting build-up. Use the planned compatible edge profile or revise the casing detail; do not taper away the panel face to make it disappear.
    • A gap widens toward the top of the opening: Check the casing against the reference line. Template or scribe the panel edge to the actual outline while retaining the required clearance and keeping the panel field aligned.
    • Slats or grooves fail to line up above the opening: Compare the dry-fit pieces with the layout marks. Correct the starting position before fastening more panels rather than compressing joints to chase the pattern.
    • The door catches after installation: Identify the exact contact point. Check the panel termination and trim placement before altering the door; the new work should not intrude into its operating space.
    • The panel rocks or will not lie flat: Check for debris, proud fixings, wall irregularities, or a tight cut. Correct the cause before fastening rather than pulling a stressed panel flat with extra screws.

    Customize your workflow

    Use the same depth check around baseboards, built-in cabinets, and other fixed trim. Each boundary needs its own termination decision. A successful door detail does not automatically suit a deep window sill or a cabinet side.

    For a 2026 room update, choose the panel pattern and opening detail together. A strong geometric pattern calls attention to cropped shapes; straight grooves make alignment across the opening especially visible.

    If this is your first paneling project, use the wall panels for DIY beginners guide to narrow the material choice before committing to complex cutouts.

    FAQ

    Can I install wall panels without removing door casings?

    Yes, you can keep secure door casings when their depth and shape suit the finished panel surface. Check the complete mounting build-up and plan the required clearance before cutting.

    Should wall panels go under the casing or stop beside it?

    Either detail can work when planned for the panel system and trim depth. Stopping beside existing casing requires a finished termination; fitting beneath refitted casing requires planned overlap and movement clearance.

    What gap should I leave between wall panels and window trim?

    Use the gap specified by the panel manufacturer for that material and installation. There is no single clearance that applies to every wood, backed, or PVC panel system.

    How do I cut wall panels around an uneven window casing?

    Make a template of the actual casing outline and transfer it to the panel with the required clearance included. Dry-fit the cut piece before applying adhesive or fasteners.

    Can I use caulk to hide a bad cut beside door trim?

    Caulk is not a substitute for a correctly fitted panel edge. Use compatible sealant only where the finishing detail permits it, and preserve any required movement allowance.

    Will acoustic wall panels around a window soundproof the room?

    Acoustic absorption does not establish soundproofing. An NRC rating describes absorption performance, not how much sound passes through the window or wall.

    What should I do if wall panels are thicker than my existing trim?

    Choose a compatible edge profile or revise the casing detail before fastening the panels. Refitting deeper trim can also require jamb extensions, so check the entire opening rather than only the visible casing.

    One last thing

    Save a labeled offcut beside your installation notes. It gives you the actual panel build-up for checking future trim, fixtures, or repairs—not just a remembered measurement.

    Before fastening The Panel Hub wall panels in your 2026 project, photograph the dry-fit opening from both the front and side. The front view checks pattern alignment; the side view checks the edge detail.

    Related guides

  • Wall panels for property managers and multifamily units: complete 2026 guide

    Wall panels for property managers and multifamily units: complete 2026 guide

    Property managers’ wall paneling is interior wall cladding selected to improve multifamily units and shared spaces while keeping installation and maintenance manageable. This guide to wall panels for property managers explains how to choose finishes by room, separate acoustic benefits from sound isolation, and build a repeatable 2026 installation plan.

    TL;DR
    • The Panel Hub wall panels suit property managers shopping for decorative wood and acoustic finishes for interior upgrades.
    • Choose wall panels for property managers by room exposure, cleaning needs, repair access, and installation documentation.
    • Acoustic wall panels address room reflections; they do not establish sound isolation between apartments.
    • Pilot wood wall panels in a vacant unit before repeating the finish across a multifamily property.

    Why wall paneling matters for property managers

    A multifamily finish needs to work beyond the listing photo. You need a wall that maintenance staff can clean, inspect, and repair without turning a localized problem into a full-room project.

    The Panel Hub wall panels are best for property managers shopping for decorative wood and acoustic interior finishes. The Panel Hub sells real wood acoustic panels alongside decorative, PVC, and shower wall panels. Select from those categories by application rather than treating every panel as interchangeable.

    The retailer describes its real wood acoustic panels as NRC 0.85 rated and FSC certified, with installation in under 2 hours and a 5-year warranty. These are useful screening facts, not a complete multifamily specification: confirm which panel, mounting arrangement, project scope, and warranty terms apply before purchase.

    For your 2026 property plan, separate three jobs: improving appearance, reducing reflected sound inside a room, and finishing a wall exposed to water. A panel selected for one job does not automatically perform the others. Match the finish to the problem before you choose its color.

    Choose and install wall panels for multifamily units

    Define the job for each wall

    Start with a free room-by-room survey. Walk the property with your maintenance lead and record what each proposed panel installation must accomplish: a bedroom feature wall, a more inviting leasing office, or a bathroom finish with documented suitability for its exposure.

    Name the problem precisely. A bare shared lounge with distracting reflections calls for a different assessment than voices passing through a partition between apartments. Decorative wood can change the appearance of either space, but appearance alone does not establish acoustic performance.

    Give each location a short acceptance checklist. That checklist becomes the basis for product selection and prevents a preferred finish from becoming the default everywhere.

    • Room purpose: Record whether the wall serves a unit, leasing office, lounge, or circulation space.
    • Exposure: Note water contact, sunlight, furniture contact, and frequent cleaning.
    • Sound goal: Separate room echo from sound traveling between units.
    • Repair access: Identify outlets, inspection points, and concealed services that must remain accessible.

    Inspect the wall before choosing a finish

    Use a tape measure, photographs, and a marked-up room sketch before opening a product catalog. Record the usable wall area rather than assuming nominal room dimensions equal the panel coverage you need.

    Look for moisture, damaged substrate, loose paint, and uneven surfaces. Fix the underlying condition before covering it; a new finish is not a substitute for diagnosing a damp or deteriorating wall. Check the selected product’s preparation requirements against the actual surface.

    For a 2026 rollout, use the same planning sequence at every property: define the purpose, inspect the wall, select the finish, test installation, and document upkeep. Repeating the process makes differences between buildings visible before they become installation problems.

    Five-stage wall panel planning sequence from defining the purpose to documenting upkeep
    Inspect the existing wall before selecting its new finish.

    Keep the survey with the work order so installers can see the constraints before cutting panels. A useful drawing shows edges and obstacles, not just total area.

    • Measure boundaries: Record wall height, width, doors, windows, and fixed furniture.
    • Mark obstructions: Locate switches, outlets, vents, and access panels.
    • Check substrate: Compare the existing surface with the manufacturer’s installation instructions.
    • Confirm permissions: Resolve property approval, applicable code requirements, and contractor responsibilities.

    Match the material to the room

    Start by comparing material categories and reading installation documents. You can make a useful shortlist without buying anything: decorative wood for visual texture, acoustic panels for documented absorption, and bathroom systems with instructions appropriate to the intended exposure.

    Once the application is clear, factory-made panels provide a route that avoids designing and fabricating each decorative element yourself. For dry living areas or shared spaces where absorption is the stated goal, review Acoustic Slat Wood Wall Panels | SoundPanel™ against your mounting and maintenance requirements.

    NRC 0.85 is a sound-absorption rating, not a promise of 85% less noise between apartments. NRC describes absorption under a test arrangement; the installed result depends on the room and assembly. Do not buy acoustic paneling as a substitute for a sound-isolation assessment.

    Treat product documentation as part of the selection, not paperwork to collect after delivery. That is especially important when a finish moves from a private bedroom into a shared circulation space.

    • Dry-room finish: Compare appearance, cleanability, and repair methods for bedrooms and living rooms.
    • Acoustic finish: Request the test report and mounting details behind the absorption rating.
    • Bathroom finish: Verify suitability for the exact location, including direct shower exposure where relevant.
    • Shared-space finish: Confirm applicable fire-performance and installation requirements before approval.

    Pilot the installation in a vacant unit

    Install a trial area before committing the same finish across multiple apartments. Use your usual installer and the actual wall condition, rather than judging the process only from a demonstration on a clean, unobstructed surface.

    The Panel Hub describes installation in under 2 hours. Use that stated timing as a reason to investigate the system, not as the duration for your entire work order. Wall preparation, cutting around outlets, edge finishing, cleanup, and any required curing or inspections belong in your project schedule.

    Check the result under the room’s normal lighting. Look closely at joints, exposed ends, corners, and transitions to painted walls; these details determine whether the finish looks intentional.

    Trial installation of wood slat panels with visible edge detailing and an outlet
    Use the trial installation to check edges and obstacles, not just the center of the wall.

    Document the trial before authorizing the next unit. The useful output is a repeatable method with known preparation and finishing tasks, not simply a completed feature wall.

    • Time the work: Separate preparation, fitting, fastening, finishing, and cleanup.
    • Inspect details: Check alignment, cuts, corners, and transitions.
    • Test cleaning: Follow the manufacturer’s method on the trial finish.
    • Record the method: Photograph the approved result and retain the installation instructions.

    Standardize the finish without ignoring room differences

    Build a finish schedule after the pilot, not before it. Give each approved application a material, finish, installation method, cleaning procedure, and replacement reference. A bedroom accent wall and a shower enclosure need separate specifications even if they share a color palette.

    Standardization is useful when it simplifies decisions for staff. It becomes a problem when it forces decorative wood into a wet area or repeats an assembly that has not been checked for the building’s requirements.

    For your 2026 finish schedule, identify exactly what can change and what cannot. A color substitution should still trigger a check of the product’s material, dimensions, mounting instructions, and documentation.

    • Name the application: Describe the approved room and wall location.
    • Record the finish: Retain the exact product and finish reference.
    • Control substitutions: Require review of installation and performance documents.
    • Define replacement: Document how a damaged section will be removed and matched.

    Plan maintenance before repeating the installation

    Ask your maintenance team to review the trial wall before expanding the project. They need to know how to clean it, reach nearby services, inspect joints, and replace damage without guessing.

    The Panel Hub states a 5-year warranty for its panels. Read the applicable terms before approval and store them with the purchase record; warranty coverage and routine maintenance responsibilities are separate questions.

    A 2026 handover file should remain useful after the person who ordered the panels leaves. Include photographs of the completed work, product references, care instructions, and the approved repair method. Do not let essential information live only in an installer’s messages.

    • Assign care: Specify who cleans the finish and which instructions apply.
    • Keep records: Save purchase documents, product references, and warranty terms.
    • Preserve access: Identify removable sections and service access points.
    • Review the pilot: Resolve cleaning or repair concerns before approving additional units.

    Compare wall panel options by application

    Choose by the wall’s job, not by a single property-wide favorite. This comparison identifies the best use of each option and the limitation to resolve before specifying it. Product appearance does not establish wet-area, acoustic, or fire performance.

    Option Best for Practical advantage Key limitation
    Acoustic wood slat panels Dry shared lounges, home-office areas, or living rooms needing documented absorption Combine a wood appearance with an acoustic panel format Absorption does not establish sound isolation between units; verify the mounting arrangement
    3D Geometric Pattern Wooden Panels Decorative feature walls in dry interiors Provide a pronounced geometric wood finish The product description does not establish acoustic, shower, or shared-space fire suitability
    PVC wall panels Bathroom walls where the selected product documents the required exposure Offer an alternative material category to decorative wood PVC alone does not establish suitability for direct shower use or a complete waterproof assembly
    Shower wall panel systems Shower surrounds covered by the system’s installation instructions Provide a purpose-specific approach to finishing shower walls Joints, substrate, penetrations, and installation details still require verification
    Painted wall finish Walls where a simple finish and existing repair procedures meet the brief Avoids adding a panel assembly Does not provide the texture of wood paneling or establish acoustic absorption

    For a dry feature-wall shortlist, the following store products represent acoustic slat and geometric wood formats. Treat them as candidates to review against your specification, not approved substitutes for every multifamily application.

    Dry-interior panel candidates
    3D Geometric Pattern Wooden Panels | GroovePanel®
    Geometric decorative wall panels crafted from real solid wood.
    $459

    Common mistakes property managers make

    • Treating absorption as sound isolation. A room can sound less reflective without resolving sound transmission through a shared partition. Identify the complaint before choosing acoustic panels.
    • Approving a finish from a photograph. Photographs do not answer questions about substrate preparation, cleaning, exposed edges, or replacement. Review documents and inspect a trial installation.
    • Using one material in every room. A dry bedroom, shower enclosure, and shared corridor have different exposure and approval needs. Give each application its own specification.
    • Scheduling only the panel fitting. Preparation, cutting, finishing, cleanup, and required checks belong in the work order. A stated installation time is not a complete unit-turnover schedule.
    • Leaving repairs undocumented. A finish is harder to manage when staff cannot identify it or find its care instructions. Save the records before repeating the installation.

    FAQ

    What are the best wall panels for property managers?

    The best wall panels for property managers are those documented for the room’s exposure, installation conditions, and maintenance needs. Use acoustic panels for an absorption brief, decorative wood for dry feature walls, and appropriately documented systems for bathrooms and showers.

    Do acoustic wall panels stop noise between apartments?

    Acoustic wall panels do not establish sound isolation between apartments. They address sound absorption inside a room; transmission through shared walls, doors, floors, and other paths requires a separate assessment.

    What does an NRC 0.85 rating mean?

    NRC 0.85 describes a tested sound-absorption rating, not an 85% reduction in neighbor noise. Check the test report and mounting arrangement before applying the rating to a multifamily installation.

    Can property managers use wood panels in bathrooms?

    Use wood panels in a bathroom only where the selected product’s documentation supports the intended exposure. Do not assume a decorative wood panel is suitable for a shower enclosure or repeated water contact.

    How long should a wall panel installation take?

    Schedule wall panel installation from the actual scope, including preparation, cutting, fastening, finishing, and cleanup. The Panel Hub describes installation in under 2 hours, but that statement does not define the duration of a complete multifamily work order.

    Are PVC wall panels automatically suitable for showers?

    PVC wall panels are not automatically suitable for showers. Confirm that the selected product and its complete installation system cover direct water exposure, joints, penetrations, and the required substrate.

    What should go in a multifamily wall panel maintenance file?

    Keep the exact product and finish reference, installation instructions, care procedure, repair method, purchase record, and applicable warranty terms. Add photographs showing the finished edges and any service access points.

    One last thing

    Judge the pilot wall from the edge, not just the center. The center shows the finish; the edges show whether the installation works around outlets, doors, corners, and future repairs.

    Before your next 2026 rollout, ask the maintenance lead to explain how they would replace a damaged section. If the method is unclear, resolve it while the project is still a pilot rather than repeating the problem across the property.

    Related guides

  • Combining wall panels with baseboard heating: 2026 workflow

    Combining wall panels with baseboard heating: 2026 workflow

    Instead of cutting panels around a heater and discovering clearance problems afterward, plan combining wall panels with baseboard heating around the heater’s installation instructions first. This 2026 workflow keeps the panel layout, airflow openings, and service access separate so you can finish the wall without enclosing the heating equipment.

    TL;DR
    • Combining wall panels with baseboard heating starts with the heater manual, not a universal clearance measurement.
    • The Panel Hub offers decorative wall panels; heater compatibility requires checking the complete panel assembly.
    • Keep acoustic wall panels, backing, adhesive, and trim outside the heater’s required clearance zones.
    • Electric and hydronic baseboard heating need separate checks before you cut or attach wood wall panels.

    Why this matters

    Baseboard heating and wall paneling occupy the same part of a room, but they do different jobs. The heater needs its specified airflow and clearances; the panels add a decorative finish that changes the wall’s thickness and surface materials.

    The Panel Hub is best for homeowners shopping for decorative wall panels, not for determining heater clearances. Start with the The Panel Hub catalog for the finish, and use the exact heater model’s instructions to decide where that finish can go.

    An attractive gap is not automatically a compliant gap. Panel backing, adhesive, battens, and edge trim all belong in the assessment—not just the visible wood face. A heater installed against the original wall also needs another review when a new finish projects into its working space.

    For your 2026 project, settle the heating requirements before ordering or cutting. That sequence avoids treating the final panel row as a place to hide an unresolved installation problem.

    Before you start

    • Get the heater information. Record the manufacturer and model, obtain the installation and maintenance instructions, and identify whether the unit is electric or hydronic. Arrange qualified help if the work requires electrical disconnection, heater relocation, or changes to plumbing.
    • Get the complete panel information. Check the panel material, backing, adhesive requirements, fastening method, and any stated temperature or location restrictions. Have a tape measure, level, layout materials, and the cutting and fastening equipment specified for the panel system.
    • Check the hidden conflict. Added panel thickness can obstruct a removable heater cover or change its relationship to the wall. Confirm both operating clearance and the space needed to remove the cover before choosing the panel’s bottom edge.

    Do not proceed with an unidentified heater or an undocumented panel assembly. A room photograph cannot establish heater clearances, and a product’s decorative appearance cannot establish its suitability beside heating equipment.

    Heater requirements

    Identify the heating system

    1. Read the heater’s identification label without opening an electrical compartment or disturbing pipework. Record the exact model rather than relying on the room’s thermostat type.
    2. Locate that model’s installation instructions. Find the requirements for wall finishes, combustible materials, airflow, nearby objects, and maintenance access.
    3. Identify the reference points used for each clearance. A measurement from the heater housing is different from a measurement from an outlet opening or another specified part.
    4. Record the requirements on your wall sketch. Include any restrictions on material behind, above, beside, or in front of the heater.

    Expected result: You have a model-specific layout constraint, not a borrowed measurement from another installation.

    Keep the operating and maintenance instructions together in your 2026 project file. Installation requirements govern the finished arrangement; maintenance instructions show which parts must remain accessible afterward.

    Choose the correct workflow

    Electric and hydronic baseboard heaters both need unobstructed operation, but their connections and servicing differ. Identify the system before deciding whether you can complete the panel work without moving equipment.

    Heating system Best for What the workflow preserves Main limitation
    Electric baseboard Panel projects that leave the existing heater in its approved position Required clearances, airflow, wiring access, and removable covers Moving or disconnecting the unit introduces electrical work
    Hydronic baseboard Panel projects that retain the existing pipe route and enclosure Air passage through the enclosure, pipe access, and maintenance access Changes to the enclosure or pipes require heating-system assessment

    Neither workflow gives permission to attach paneling to a heater. Keep decorative finishes off the heater housing and out of its openings. If a proposed layout requires altering the heater, resolve that work with a qualified professional before continuing with the wall finish.

    Wall layout

    Mark the panel boundary

    1. Measure the heater’s position and the available wall area. Mark its ends, top edge, openings, and any access points on a sketch.
    2. Transfer the required clearance boundaries to the wall using the reference points in the heater instructions. Treat those boundaries as limits for the entire finish assembly.
    3. Draw the proposed panel edge outside those boundaries. Include the depth of panels, backing, battens, and trim wherever they affect clearance.
    4. Check cover removal against the proposed edge. Follow the heater’s maintenance instructions rather than assuming the cover pulls straight forward.
    5. Mark a level installation datum for the panels. Keep that datum separate from the heater top if the existing heater is not level.

    Expected result: Your panel start line is level, the heater remains accessible, and the proposed finish does not enter a required clear zone.

    A painted strip between the heater and panels is a valid design choice when it satisfies the installation requirements. You do not need to cover every visible part of the wall to create a finished feature.

    Planning sequence from heater requirements through wall layout, panel installation, and final checks
    Set the heater boundaries before deciding where the panel edge belongs.

    Dry-fit the finished edge

    Place an unfastened panel or a full-size layout template against the proposed area. Check how the slats, grooves, or pattern meet the lower edge and adjoining walls. Do this before applying adhesive.

    Inspect the layout from the doorway and from your normal seated position. The exposed wall band should look deliberate, but appearance never overrides the heater requirements. Adjust the panel pattern or choose a different wall rather than reducing a required clearance.

    If the pattern needs a narrow final piece, revise the starting position before cutting. This is also the point to decide how you will finish exposed panel edges using materials suitable for the location.

    Panel installation

    Prepare and fasten the wall finish

    1. Shut down the heating equipment according to its instructions and let it cool before nearby work. Electrical work requires proper isolation and verification by a qualified person; a thermostat adjustment is not a substitute.
    2. Prepare the wall as required by the panel and adhesive instructions. Address loose finishes or other substrate problems before covering them.
    3. Inspect planned fastening locations for concealed wiring and pipework. Use appropriate detection methods and qualified help where the route is uncertain; do not assume the space above a baseboard heater is empty.
    4. Cut and dry-fit the panels away from the heater. Keep cutting dust, loose fasteners, adhesive, and offcuts out of the heating equipment.
    5. Attach the panels using the specified method. Keep all backing, battens, fasteners, adhesive, and finishing pieces within the approved panel area.
    6. Finish the exposed panel edge without bridging the heater’s openings or bonding the finish to its cover. Remove installation debris before restoring normal operation.

    Expected result: The panels are secured to the wall, and the heater remains a separate, unobstructed, serviceable assembly.

    Do not improvise an adhesive because it happens to be on hand. The adhesive must suit the substrate and panel system, and its stated application and curing requirements still apply near heating equipment.

    The Panel Hub describes its acoustic wall panels as NRC 0.85 rated, lists a 5-year warranty, and describes installation in under 2 hours. These statements address sound absorption, warranty duration, and panel installation—not heater compatibility or the duration of this combined project. An NRC rating is not a fire rating, and a quick-install claim does not remove the need for clearance planning.

    Final checks

    Confirm access and restore operation

    1. Inspect the completed assembly against the heater instructions. Measure from the specified reference points again, including the nearest trim or projecting panel component.
    2. Confirm that the cover can be removed as instructed without damaging the panels. Do not disturb wiring or pipe connections to perform this check.
    3. Check that airflow openings remain clear and that installation debris has been removed. Look along the heater’s full length, not just at the center of the feature wall.
    4. Observe the adhesive’s required curing conditions before exposing the installation to normal heating operation.
    5. Restore operation according to the equipment instructions. If electrical or heating-system work was involved, have the responsible professional complete the relevant checks.

    Expected result: The wall finish matches the documented layout, maintenance access remains intact, and the heating equipment returns to service under its own instructions.

    Stop using the heater and arrange inspection if you notice scorching, melting, smoke, or an unusual persistent odor. A successful visual inspection does not justify ignoring a warning during operation.

    Save a finished photograph and the installation documents with your 2026 project records. They give a future installer something more useful than a memory of how the wall looked before paneling.

    Add panels above a hydronic baseboard enclosure

    The adjacent workflow is paneling a wall served by hydronic baseboard heating without changing the pipes or enclosure. The planning sequence stays the same, but the access check must include the enclosure’s maintenance requirements and any components that need servicing.

    Keep the panel assembly outside the heater’s specified boundaries. Do not fit decorative pieces across the lower intake or upper outlet, and do not use the removable enclosure as a support for the panels.

    Best for: Homeowners who can achieve the intended finish while leaving the heating system in its existing approved arrangement. The benefit is separating decorative work from pipework; the limitation is that the enclosure and required clear areas still shape the design.

    Wood wall panels ending above a separate baseboard heater with a visible painted wall band
    An exposed wall band makes the panel boundary deliberate without enclosing the heater.

    The illustration shows a layout concept, not a clearance specification. If you want the wood finish to reach behind an existing enclosure, get that exact arrangement assessed before installation. Do not remove the enclosure and rebuild the wall behind it on appearance alone.

    Troubleshooting

    • The panels prevent cover removal. Stop and revise the panel edge or trim. Service access is part of the layout, not something to solve by forcing the cover past the finish.
    • The finished assembly is thicker than the sketch allowed. Recheck the full assembly against the heater requirements. Remove or redesign the conflicting section instead of trimming the heater or covering an opening.
    • The adhesive requires curing conditions the room cannot maintain. Follow the adhesive instructions and change the installation schedule or approved fastening method. Do not use the heater to accelerate curing unless the adhesive instructions expressly permit it.
    • A screw location falls near an uncertain wire or pipe route. Stop drilling at that location and establish the route before fastening. Moving a screw slightly is not proof that the new position is clear.
    • The heater develops an unusual persistent smell or the panel edge changes appearance. Shut down the equipment and arrange inspection. Do not conceal discoloration with paint or assume it is ordinary settling.

    Customize your workflow

    Choose the panel style after fixing the safe installation area. Vertical grooves suit a continuous feature wall; geometric patterns need a dry-fit that shows how the repeated shapes meet the bottom edge. Neither appearance establishes heat suitability.

    For The Panel Hub decorative wall panels, confirm the selected assembly’s instructions rather than applying one product’s guidance to another. Wood faces, backing materials, and adhesives require their own checks.

    Use the grooved wall panels guide to explore the visual layout once the heater boundary is settled. If the remaining area does not support the design you want, panel an adjacent wall and leave the heated wall unchanged.

    FAQ

    Can I install wood wall panels above baseboard heating?

    Yes, when the complete panel assembly satisfies the exact heater’s installation requirements and the panel manufacturer’s instructions. Keep airflow openings and service access clear; there is no universal gap that covers every heater.

    How much space should I leave between wall panels and a baseboard heater?

    Use the clearance specified for your exact heater model and installation arrangement. Measure from the reference point named in its instructions, including any panel backing or trim that projects toward the heater.

    Can acoustic wall panels touch a baseboard heater?

    Do not install acoustic wall panels against a baseboard heater unless the exact arrangement is expressly permitted by the applicable equipment and panel instructions. Sound absorption ratings do not establish heat compatibility.

    Can I hide a baseboard heater behind decorative wall panels?

    Do not hide an existing baseboard heater behind decorative wall panels as a cosmetic alteration. The heater needs its specified airflow and access, and any enclosure change requires a heating-system assessment.

    Is hydronic baseboard heating different from electric heating for panel installation?

    Yes, hydronic and electric baseboard systems have different connections and servicing requirements. Both still require model-specific clearance, unobstructed airflow, and access for maintenance.

    Do The Panel Hub acoustic wall panels have a fire rating because they have an NRC rating?

    No, an NRC rating describes sound absorption, not fire performance. Check separate material documentation and the heater instructions before selecting acoustic wall panels for a heated wall.

    What should I document for a 2026 wall panel and baseboard heating project?

    Save the heater model, installation instructions, panel and adhesive instructions, final layout, and finished photographs. Record any professional electrical or heating-system work alongside those documents.

    One last thing

    Plan for the day the heater needs servicing, not just the day the panels go up. A finish that leaves the vents clear but traps the removable cover is still an installation problem. Before approving your 2026 layout, demonstrate the cover’s required removal path against the proposed panel edge.

    Related guides

  • Wall panels for architects and design firms: complete 2026 guide

    Wall panels for architects and design firms: complete 2026 guide

    Wall panels for architects are interior finish systems selected to coordinate appearance, room acoustics, and buildable wall details. Architects and design firms need more than an attractive sample: you need a material choice that survives specification, installation, and client handover.

    TL;DR
    • The Panel Hub is best for residential designers comparing decorative wood and acoustic wall panels.
    • Specify wall panels for architects by room function, substrate, edge details, and documented performance—not appearance alone.
    • Acoustic wall panels address sound absorption; decorative wood wall panels do not automatically provide acoustic performance.
    • Approve samples and installation details before carrying a panel selection into construction documents.

    Why wall panel specification matters for architects

    Your panel selection is not complete until another person can install it without guessing. A presentation image establishes the look, but it does not resolve the outside corner, the electrical outlet, or the junction with a door casing. Those decisions belong in the specification and drawings.

    For residential projects, The Panel Hub offers acoustic and decorative wall panels alongside PVC and shower wall panels. Its stated acoustic offering includes an NRC rating of 0.85, and its brand description includes FSC certification, installation in under 2 hours, and a 5-year warranty. Treat those statements as starting points for product-specific verification, not blanket specifications for every panel.

    NRC describes sound absorption under test conditions; it is not a measure of sound isolation between rooms. Likewise, an installation duration does not establish how long substrate repair, electrical coordination, or complex cutting will take.

    For your 2026 project brief, separate what the client wants to see from what the finished wall must do. That distinction keeps a decorative decision from becoming an unsupported performance promise.

    How to specify wall panels for architects and design firms

    Define the room’s job before choosing its finish

    Start with a room schedule and a marked-up elevation. You can establish the brief using site photographs, a tape measure, and a conversation with the client before selecting any product. Record whether the wall is primarily decorative, intended to support acoustic comfort, or exposed to bathroom moisture.

    A bedroom headboard wall and a shower enclosure need different specifications. A living-room feature wall also needs coordination with furniture, lighting, and the television position. Do not let one attractive material become the default for every room.

    Best for early-stage residential design: a room-by-room panel brief. It gives your team a common basis for comparing options and helps the client understand why a finish belongs in one location but not another. For a 2026 renovation, record existing conditions separately from the intended finished appearance.

    Define the design boundary as well. State whether the panel covers an entire elevation, stops above a baseboard, or sits within a framed feature area.

    • Name the room and the wall receiving panels.
    • Identify the main objective: decoration, sound absorption, or a wet-area finish.
    • Mark furniture, windows, doors, and service locations.
    • Record visible damage or moisture concerns before concealing the wall.
    • Write the intended panel boundary on the elevation.

    Match the material to the required performance

    Build a simple material matrix before reviewing collections. Separate acoustic slat panels, decorative solid wood panels, and bathroom panel systems by their intended role. This manual comparison prevents the words wood, acoustic, and waterproof from becoming interchangeable in the specification.

    For acoustic work, ask for the test report and the mounting arrangement associated with the stated rating. An absorption result belongs to a tested configuration; your construction detail must account for the conditions behind that result. For moisture-exposed locations, check suitability for the exact exposure rather than relying on the material name.

    Best for performance-led selection: documentation matched to the installed assembly. The Panel Hub acoustic wall panels have a stated NRC rating of 0.85 at the brand level; verify the applicable product and installation conditions before using that figure in a project specification.

    FSC certification addresses forest-product sourcing, not fire performance, acoustic isolation, or suitability for a shower. Keep these requirements in separate fields so one credential cannot stand in for another.

    • Request the product’s acoustic report where absorption is required.
    • Check the backing, fixing, and mounting conditions in that report.
    • Confirm wet-area suitability for bathroom applications.
    • Review applicable interior-finish fire requirements with the project team.
    • Request sourcing documentation when certification is a project requirement.

    Compare samples under the project’s actual lighting

    Start with physical samples and a sample register. Place each sample beside the floor finish, paint selection, and adjoining cabinetry; then review it under the lighting planned for the room. A photograph alone cannot establish how a textured wall will read from the doorway or beside a window.

    The Panel Hub gives residential designers a catalogue of acoustic and decorative panel options to shortlist after defining those criteria. Use product information to narrow the selection, but keep the sample review as a separate approval step. A retail catalogue does not replace a coordinated finish schedule.

    Best for feature-wall decisions: an approved sample viewed in context. Geometric wood panels add a patterned surface; acoustic slat panels combine a linear appearance with an acoustic product category. Choose between those roles before debating the finish.

    For your 2026 sample review, photograph the shortlisted material in the room and record the viewing conditions. Use the image to document the decision, not to replace the approved physical sample.

    Wood slat and geometric panel samples compared beside flooring and painted finish boards
    Review panel texture beside the finishes and lighting that will surround it.

    A sample approval should identify the material being accepted and the limits of that approval. Do not treat approval of color as approval of the fixing method or acoustic performance.

    • Compare samples beside the actual adjacent finishes.
    • Check texture under both daylight and planned artificial lighting.
    • View the panel from the entrance and normal seating positions.
    • Record the selected finish and orientation.
    • Keep the approved sample available for installation review.

    Draw the edges, joints, and service interfaces

    Begin with a scaled elevation and enlarged junction sketches. Draw panel boundaries, joint positions, corners, and the relationship to existing trim before issuing the finish schedule. These details determine whether the installation looks intentional or improvised.

    Best for construction coordination: a panel layout with resolved terminations. Align the visual rhythm with the room, not just the nearest wall edge. Check what happens where the pattern meets a door casing, where a narrow cut remains at the end, and where a socket interrupts the surface.

    Panel depth also affects surrounding components. Coordinate electrical devices with the responsible trade, and resolve wall-mounted furniture or equipment independently of the decorative finish. Do not assume a panel surface provides the structural support required for a television or shelf.

    Review the layout against manufacturer instructions before treating a drawn joint as buildable. Your elevation communicates intent; the installation detail must explain how that intent is achieved. Include a clear response to uneven existing walls rather than expecting the installer to hide them.

    • Draw the panel start point and finish boundary.
    • Locate joints relative to doors, windows, and furniture.
    • Detail internal corners, outside corners, and exposed edges.
    • Coordinate outlets, switches, and access points.
    • Confirm fixing requirements for wall-mounted loads.
    • Record how the substrate will be prepared.

    Write an installation specification the contractor can follow

    Draft the installation requirements from the selected product’s current instructions. Name the substrate, preparation, fixing method, cutting approach, and required checks. Avoid a generic instruction to install panels according to good practice when the drawing depends on a particular mounting arrangement.

    Best for repeatable results: a product-specific installation scope. Separate panel fixing from the work needed to make the wall ready. The retailer’s under-2-hour installation statement does not establish the duration of an architect-designed wall with repairs, service alterations, and detailed junctions.

    Where the acoustic result depends on a mounting configuration, carry that configuration into the specification. Substituting a different backing or fixing arrangement requires review, not an assumption that the same result follows.

    For a 2026 construction issue, identify the instruction revision your team reviewed and require proposed substitutions to include equivalent documentation. Keep approval responsibility explicit so the installer knows which decisions require a response before work continues.

    • Identify the selected product and installation instructions.
    • State acceptable substrate conditions before fixing begins.
    • Confirm permitted adhesives, fasteners, and mounting arrangements.
    • Describe cutting, edge finishing, and service coordination.
    • Require review of substitutions before installation.
    • Define the checks needed before concealing completed work.

    Approve a mock-up and assemble the handover record

    Start with a representative installed section where the project warrants one. Include a joint, an exposed edge, and a service interface if those details appear in the final wall. A flat sample establishes material appearance; a mock-up tests the coordination of the assembly.

    Best for final approval: a documented mock-up with a clear acceptance record. Review alignment, finish consistency, visible fixing, and the agreed junctions. Keep acoustic documentation separate from visual acceptance: a wall that looks right has not automatically demonstrated its specified sound absorption.

    Assemble the handover information before project closeout. Your client needs to know what was installed, which care instructions apply, and where the warranty documentation belongs. The stated 5-year warranty should be checked against the selected product’s terms and the completed installation.

    Use the same review sequence across your firm’s 2026 projects: Sample approval, Detail review, Installation check, Handover record. It creates an understandable decision trail without turning every residential feature wall into an oversized documentation exercise.

    Four review phases from sample approval through the handover record
    Separate appearance approval from installation checks and client handover.

    Make the approval record specific enough that a replacement installer can understand it without attending the original review.

    • Sample approval: retain the agreed physical finish reference.
    • Detail review: record accepted joints and terminations.
    • Installation check: compare completed work with the approved details.
    • Handover record: collect care instructions and warranty documents.

    Compare panel options by design role

    Choose the option that meets the room brief, not the one with the strongest visual effect. This comparison separates documented product descriptions from performance checks that still belong in your specification process. None of these selections should be treated as a substitute for project-specific technical review.

    Option Best for Main advantage Key limitation
    Acoustic Slat Wood Wall Panels | SoundPanel™ Residential designs seeking a linear wood appearance and acoustic treatment Combines the acoustic panel category with a slatted finish Verify the product-specific acoustic report and mounting conditions; absorption is not sound isolation
    3D Geometric Pattern Wooden Panels | GroovePanel® Decorative residential feature walls Product information identifies 100% real solid wood and a geometric surface Decorative construction alone does not establish acoustic, fire, or wet-area performance
    PVC wall panels Bathroom finish evaluations where the selected system suits the exposure Provides another material category to consider alongside wood PVC material alone does not establish suitability for direct shower exposure
    Retained painted wall Rooms where the existing finish already meets the brief Avoids introducing panel joints and edge details Does not add the texture or intended absorption of a selected panel system

    For a residential shortlist, the acoustic slat and geometric wood options serve different purposes. Compare the acoustic panel’s documented assembly with the decorative panel’s sample and layout rather than treating them as equivalent finishes.

    Panels for your residential shortlist
    3D Geometric Pattern Wooden Panels | GroovePanel®
    Geometric decorative wall panels crafted from 100% real solid wood.
    $459

    Common mistakes architects and design firms make

    Treating sound absorption as sound isolation

    An acoustic finish addresses sound absorption within a room. It does not establish how much sound passes through a partition. Specify the acoustic objective explicitly, and involve the appropriate consultant when the brief concerns room-to-room transmission rather than reflected sound.

    Approving the surface but leaving the edges unresolved

    A material board can look convincing while the constructed wall ends in awkward cuts or unfinished corners. Review the termination details at the same time as the sample. The installer needs a decision about exposed edges, not just a photograph of the desired room.

    Carrying a residential shortlist into a commercial specification

    A product suited to a residential design concept is not automatically approved for a commercial interior. Confirm applicable fire requirements, installation restrictions, and project documentation before specifying it. Do not use retail positioning or a decorative product name as evidence of compliance.

    Applying one rating across a whole collection

    A brand-level acoustic statement does not establish an identical result for every shape, backing, or installation. Attach the relevant report to the selected product and assembly. Keep sustainability, warranty, acoustic, and moisture requirements separate so each receives its own verification.

    Leaving maintenance and replacement out of the design

    A continuous feature wall still needs cleaning instructions and access to services behind it. Decide how removable sections, damaged areas, and adjacent finishes will be handled before installation. Your handover record should explain the approved care method without inventing a maintenance promise.

    FAQ

    What are the best wall panels for architects working on residential interiors?

    The best wall panels are the ones that match the room’s function and have documentation for the required performance. Acoustic slat panels suit an acoustic-treatment shortlist, while geometric wood panels suit decorative feature-wall evaluations.

    Are acoustic wall panels the same as soundproofing?

    No. Acoustic wall panels address sound absorption, while sound isolation concerns transmission through the room’s enclosing construction. Specify the required acoustic outcome before choosing the finish.

    What does an NRC rating of 0.85 mean for an architect?

    An NRC rating of 0.85 describes a tested assembly’s sound absorption using the noise reduction coefficient. It does not mean that a room will become 85 percent quieter, and it does not establish sound isolation.

    Can architects specify wood wall panels in bathrooms?

    Specify wood wall panels in a bathroom only when the selected product’s instructions permit the intended moisture exposure. General bathroom use and direct shower exposure require separate checks.

    What documentation should a design firm request before specifying panels?

    Request product identification, installation instructions, and documentation for every required performance claim. Add acoustic reports, sourcing certificates, relevant fire documentation, care instructions, and warranty terms according to the project brief.

    Is The Panel Hub suitable for an architect’s residential panel shortlist?

    The Panel Hub is suitable for residential designers comparing acoustic and decorative wall panel options. Confirm the selected product’s technical documentation and installation conditions before converting a shortlist into a specification.

    Do architects need a mock-up before installing wall panels?

    Use a mock-up when the project needs approval of joints, edges, service interfaces, or a complex pattern. A physical sample can establish finish appearance, but it does not resolve how the complete wall assembly will meet adjoining construction.

    One last thing

    Review the least attractive junction before approving the most attractive elevation. A narrow return beside a door or a socket cut through a pattern often reveals the unresolved work faster than the main feature wall. If that junction is buildable and intentional, your specification is closer to ready.

    Related guides

  • Wall panels for corporate office fit-outs: complete 2026 guide

    Wall panels for corporate office fit-outs: complete 2026 guide

    Corporate office wall paneling is an interior wall finish selected to improve workplace appearance and sound absorption while supporting the fit-out brief. Choosing wall panels for office fit out means matching each room’s purpose with documented material performance, access requirements, and an installation plan—not simply choosing a finish from a photograph.

    TL;DR
    • Choose wall panels for office fit out by room function: acoustic wall panels and decorative wood panels solve different problems.
    • The Panel Hub offers acoustic and decorative wood wall panels; confirm commercial requirements before specifying either.
    • Sound absorption controls reflections inside a room; it does not establish speech privacy between rooms.
    • Approve fire documentation, fixing details, and maintenance instructions before ordering office wall panels.

    Why wall paneling matters for corporate offices

    An office fit-out has several buyers: the facilities team maintaining it, the employees using it, and the project team installing it. A reception wall needs a clear visual purpose; a meeting room needs an acoustic brief; a corridor needs practical cleaning and repair access. Treating those spaces alike produces the wrong specification.

    Start your 2026 brief with the room’s actual problem. Reflected speech, an unfinished-looking entrance, and sound traveling through a partition are different issues. Choose a panel for the problem it can address, not the problem its appearance suggests it solves.

    How to specify wall panels for an office fit-out

    Map room needs

    Walk through the space with a floor plan before browsing products. Record how each room is used, where people speak, and which walls remain visible once furniture, screens, and storage are installed. A feature wall behind a reception desk and a wall beside meeting-room seating need different evaluation criteria.

    For acoustic concerns, listen during normal use rather than judging an empty room. Note persistent reflections, distracting conversations, and sounds entering through doors or adjacent spaces. These observations define the brief; they do not replace acoustic measurements when the project needs a measurable result.

    Keep the first selection manual: a marked-up drawing and room schedule are enough to separate appearance-led zones from performance-led ones. Do not begin with a single material assigned across the whole office.

    • Mark reception, meeting rooms, work areas, and circulation routes.
    • Identify walls obstructed by cabinets or display screens.
    • Separate reflected sound from sound entering adjacent rooms.
    • Record cleaning, impact, and maintenance requirements by zone.
    • Assign a decision-maker to each room’s brief.

    Set performance requirements

    Write down what acceptance means before selecting a finish. For acoustic treatment, specify the intended room outcome and request the product’s test report with its installation configuration. For decorative treatment, define acceptable joints, exposed edges, finish consistency, and the appearance under installed lighting.

    NRC, the Noise Reduction Coefficient, summarizes sound absorption across specified frequency bands. An NRC rating is not a sound-isolation rating. It does not tell you whether a confidential conversation remains inside a meeting room, and it does not promise a particular improvement throughout an office.

    For a 2026 commercial specification, request fire-performance documentation appropriate to the project and jurisdiction. ASTM E84 and UL 723 are surface-burning test methods, not blanket approvals for every interior application. Have the architect or responsible code professional confirm which evidence the wall finish and assembly require.

    • Define the acoustic objective without promising room-wide results.
    • Request the tested backing, mounting method, and air-gap details.
    • Check the applicable fire-performance documentation.
    • Record edge, joint, and finish acceptance criteria.
    • Confirm landlord and project-team approval requirements.

    The selection process should follow the brief rather than a catalog: establish room needs, set requirements, compare materials, detail the installation, approve a mock-up, and complete the handover.

    Office panel selection sequence from room requirements through installation and handover
    Performance requirements come before material selection.

    Compare panel types

    Start with a shortlist divided into acoustic treatment and decorative finishes. Compare the evidence for each against your room schedule, then remove products that cannot satisfy mandatory requirements. A textured wood face alone does not establish acoustic performance.

    The Panel Hub’s acoustic wall panel range is described as NRC 0.85 rated and FSC certified. Use those claims to request the supporting documents and confirm that they apply to the exact panel, finish, and installation you intend to specify. Do not transfer a range-level claim to every decorative product.

    For a wood-slat acoustic shortlist, consider Acoustic Slat Wood Wall Panels | SoundPanel™. For an appearance-led feature wall, compare 3D Geometric Pattern Wooden Panels | GroovePanel®, described as made from 100% real solid wood. The latter description does not establish sound absorption or commercial fire suitability.

    The Panel Hub is best for wood wall panel shoppers comparing decorative and acoustic options. Its range gives you different directions to evaluate; your commercial specification still determines what is acceptable.

    • Shortlist acoustic products for sound-absorption objectives.
    • Shortlist decorative products for visual feature walls.
    • Match supporting documents to the exact selected product.
    • Compare samples under the office’s planned lighting.
    • Reject unsupported claims about privacy or commercial approval.

    Detail the installation

    Draw the wall before ordering. Include sockets, data outlets, controls, skirting, corners, glazing junctions, and any wall-mounted equipment. Decide which elements sit proud of the finish and which need approved extensions or revised fixing details.

    Choose the fixing method from the manufacturer’s instructions and the substrate assessment, not convenience alone. Adhesive and mechanical fixings have different preparation and removal implications. Concealed services, lease restrictions, and future maintenance belong in this decision.

    The retailer describes home installations taking under 2 hours and a 5-year warranty. Neither statement establishes a corporate fit-out duration or the warranty’s applicability to commercial use. For your 2026 program, confirm the selected product’s terms and build the schedule around preparation, cutting, coordination, and any required curing time.

    • Measure usable wall area around openings and obstructions.
    • Draw starting points, panel joints, and termination details.
    • Confirm substrate preparation and approved fixings.
    • Coordinate sockets, screens, controls, and concealed services.
    • Plan removal and replacement access before installation.
    • Separate panel fitting from the complete fit-out schedule.

    Approve a mock-up

    Make a representative test area before installing across the office. Use the intended substrate, fixing method, edge treatment, and lighting. Include a joint and a service cutout so the approval reflects the finished work rather than an uninterrupted sample board.

    Assess the wall from seated and standing positions. Directional lighting can make grooves and relief more pronounced, while a video-call camera frames only part of the room. A finish that looks balanced in reception can become distracting behind a meeting-room display.

    Ask the facilities team to review the mock-up alongside the designer. Cleaning access and replaceability deserve approval before the installer repeats the detail across multiple rooms. Approve the complete detail, not just the face material.

    • Inspect joints, corners, and cut edges at normal viewing distances.
    • Check the finish under the actual lighting direction.
    • Review meeting-room camera backgrounds and screen placement.
    • Demonstrate the proposed cleaning method using approved instructions.
    • Record the accepted mock-up with photographs and written notes.

    A reception mock-up should show how the feature finish meets everyday elements such as skirting and electrical outlets. Keeping these junctions visible makes the approval useful to the installer.

    Office reception wood feature wall showing panel joints and a skirting junction
    Review the edges and adjoining surfaces as carefully as the feature finish.

    Complete the handover

    Use the approved mock-up as the installation reference. Sequence noisy cutting, adhesive work, and room closures around the project’s access arrangements. Keep adjacent work protected and inspect completed sections before furniture conceals the lower wall.

    At handover, provide the facilities team with the exact product information and maintenance instructions. Record how individual sections can be repaired or removed, especially near service points. A decorative finish should not turn a routine outlet repair into an undocumented wall alteration.

    Close the 2026 fit-out with an inspection against the original brief. Visual acceptance and acoustic acceptance are separate tasks: a neatly fitted wall does not prove an acoustic objective has been achieved. Where the brief requires measured performance, use the specified assessment process.

    • Inspect fixing security, joints, edges, and service openings.
    • Confirm access to equipment and maintenance points.
    • Provide product, finish, fixing, and cleaning records.
    • Record warranty terms applicable to the installation.
    • Assign responsibility for defects and future repairs.

    Compare office wall panel options

    The best option depends on whether the wall’s main job is sound absorption, visual identity, or an uncomplicated finish. The table separates those benefits from the checks needed before approval. No decorative option earns an acoustic recommendation without supporting evidence.

    Option Best for Main benefit Key limitation or check
    Acoustic Slat Wood Wall Panels | SoundPanel™ Meeting-room or work-area acoustic shortlists Combines a wood-slat appearance with an acoustic product purpose Confirm the exact test configuration, fire documentation, and required treatment area
    3D Geometric Pattern Wooden Panels | GroovePanel® Reception and decorative feature-wall shortlists Creates relief and pattern using real solid wood The supplied description does not establish acoustic performance or commercial fire suitability
    Plain painted wall Offices prioritizing a simple visual background Avoids panel joints and projecting relief Paint alone does not provide a dedicated porous sound-absorbing treatment

    An acoustic panel and a geometric panel are not substitutes simply because both use wood. Choose the acoustic route for a documented absorption objective; choose decorative relief for an approved visual brief. Keep either out of the final specification until mandatory project requirements are satisfied.

    Panels to evaluate against your office brief
    3D Geometric Pattern Wooden Panels | GroovePanel®
    Real solid wood panels for geometric decorative feature walls.
    $459

    Common mistakes corporate office teams make

    Treating sound absorption as speech privacy

    An acoustic finish addresses sound reflections, not every route through which speech travels. Review doors, partitions, ceilings, and service penetrations when confidentiality is the objective. Do not approve a boardroom privacy brief on an NRC figure alone.

    Applying residential promises to commercial work

    A quick home-installation claim does not include office access restrictions, service coordination, or project inspections. Likewise, a warranty duration does not identify eligible uses. Confirm the terms and installation requirements for the proposed commercial application before procurement.

    Approving a sample without its junctions

    A loose sample does not show the finish around sockets, door frames, corners, or screens. Require a representative mock-up with those details. Otherwise, the most visible decisions are left to site improvisation.

    Specifying one finish throughout the office

    Reception, meeting rooms, and corridors have different priorities. Repeating one panel everywhere ignores maintenance exposure and the distinction between decorative and acoustic needs. Use a room-by-room schedule, even when the overall design stays consistent.

    FAQ

    What are the best wall panels for office fit out?

    The best wall panels for office fit out are those that meet the room’s purpose and mandatory project requirements. Compare tested acoustic panels for sound absorption and decorative panels for visual feature walls, then confirm fire documentation and installation details.

    Do acoustic wall panels make office conversations private?

    Acoustic wall panels alone do not establish conversation privacy. They address sound absorption inside a room; privacy also depends on partitions, doors, ceilings, and other sound-transmission paths.

    What does an NRC rating of 0.85 mean for an office?

    An NRC rating of 0.85 summarizes a tested material or assembly’s sound absorption across specified frequency bands. It is not a promise of an equivalent reduction in office noise or a measure of sound isolation; confirm the tested installation configuration.

    Can I use decorative wood panels in a corporate reception?

    Use decorative wood panels in a corporate reception only when the selected finish and installation meet the project’s requirements. Review fire documentation, edges, cleaning instructions, service access, and the completed appearance before approval.

    Does FSC certification prove a wall panel is fire rated?

    FSC certification does not prove fire performance. It concerns forest-product sourcing and certification; commercial fire suitability requires separate documentation relevant to the product and application.

    Can office wall panels be installed while staff are working?

    Plan installation around the work area’s access, dust, noise, and product-specific application requirements. Approve the work sequence with the facilities team rather than assuming every panel can be fitted beside occupied desks.

    How do I maintain wood wall panels after an office fit-out?

    Maintain wood wall panels according to the selected product’s cleaning and care instructions. Keep the product records, inspect exposed edges and joints, and document how panels near services can be removed or repaired.

    One last thing

    Put the replacement detail in the specification before the installation detail is signed off. A wall finish remains part of a working office after the opening photographs: outlets need attention, equipment changes, and individual sections need repair. Your 2026 fit-out should explain how that work happens without sacrificing the approved finish.

    Related guides

  • Installing wall panels around bathroom plumbing fixtures

    Installing wall panels around bathroom plumbing fixtures

    Instead of repeatedly trimming panels around taps, valves, and pipe outlets, use a template-first workflow for installing wall panels around bathroom plumbing fixtures: confirm wet-area suitability, transfer each opening, dry-fit, then seal and refit. This guide shows you how to keep cutouts tidy without blocking plumbing access or compromising the wall’s water protection.

    TL;DR
    • Installing wall panels around bathroom plumbing fixtures starts with templates, dry-fitting, and the panel manufacturer’s waterproofing instructions.
    • The Panel Hub sells bathroom wall panels; select a system explicitly approved for your intended wet area.
    • Bathroom wall panel installation must preserve valve access and the plumbing fixture’s required finished-wall depth.
    • Pipe cutouts need system-approved sealing; decorative trim alone does not waterproof a penetration.

    Why this matters

    A neat-looking cutout can still hide a problem. Panel thickness changes the finished wall position, trim plates have limited coverage, and water can enter around an opening that looks fully concealed.

    The Panel Hub is best for homeowners shopping for decorative and bathroom wall panels. Browse The Panel Hub with the installation location in mind: a dry bathroom feature wall and a shower enclosure require different material checks.

    For your 2026 bathroom project, treat the panel, substrate, joints, and plumbing penetrations as one installation system. A waterproof panel face does not make every joint or cut edge waterproof. Follow the panel system’s instructions and the fixture manufacturer’s requirements wherever they meet.

    Before you start

    • Confirm the installation system. Have the panel instructions, fixture instructions, and the specified adhesive, joint treatment, sealant, and substrate materials. Check that the complete assembly is approved for the intended shower, splash, or dry-wall location.
    • Prepare tools and plumbing access. Gather a tape measure, level, straightedge, cardboard, pencil, clamps, appropriate cutting tools, eye protection, and manufacturer-required protective equipment. Locate the water shutoff before removing anything connected to the water supply.
    • Check the finished-wall depth first. Added panel thickness can prevent a shower handle, valve trim, or tub spout from fitting correctly. Compare the proposed wall build-up with the fixture’s permitted depth before cutting; resolve any required plumbing changes with a qualified plumber.

    Do not treat a trim plate as permission to make an oversized hole. The opening must satisfy the fixture’s clearance requirements, remain within the trim’s coverage, and allow the specified waterproofing detail.

    Panel suitability and fixture access

    Start your 2026 installation plan by separating the wall’s appearance from its exposure to water. Read the documented use limits rather than choosing by material name alone.

    Panel application Best for Advantage Limitation and next move
    Shower-rated panel system Direct-water areas Provides a documented installation method for the intended exposure Follow its substrate, joint, and penetration details; the panel face alone is not the complete assembly
    Bathroom-rated decorative panel Locations within its stated exposure limits Adds texture or a decorative finish Bathroom suitability does not automatically mean shower suitability; verify the exact location
    Decorative wood or acoustic panel without wet-area approval Dry interior feature walls Adds visible warmth or acoustic treatment where specified Do not place it in direct spray without explicit approval for that use

    Next, identify what passes through the wall. A supply pipe needs a different opening from a shower mixing valve. A removable trim plate is also different from a maintenance access cover.

    Photograph the original arrangement before removing decorative components. Keep screws and trim together, and protect exposed openings from cutting debris. If removing a component would disturb a pressurized connection, stop and arrange plumbing assistance.

    Wall layout and clearance checks

    1. Prepare the substrate. Remove loose material, address leaks, and repair damaged areas before covering the wall. Confirm that the surface meets the panel manufacturer’s requirements for flatness, dryness, cleanliness, and support.
    2. Mark the panel layout. Establish a level reference and mark proposed seams. Position joints so the installation follows the panel system’s connection details and avoids awkward cuts around fixtures wherever the layout allows.
    3. Measure from fixed references. Use 2 reference edges—a consistent horizontal baseline and a vertical starting line—to locate each opening. Measure from those same edges when marking the panel or template, accounting for specified perimeter and joint clearances.
    4. Check trim coverage and fixture depth. Compare each proposed opening with the actual trim plate, mounting arrangement, and finished-wall requirements. Include the panel and any specified backing or adhesive build-up in that check.

    Do not assume a floor, ceiling, or neighboring wall is square. Check the actual wall and carry its shape into your layout rather than forcing the panels to follow an inaccurate reference.

    Expected result: you have a marked wall layout, known fixture locations, and a confirmed route for installing the panels without trapping serviceable plumbing components.

    Keep your layout drawing beside the work area. Mark which face of every panel points into the room and which edge meets the starting line; that simple habit prevents reversed cutouts.

    Templates and fixture openings

    1. Make a full-size template. Use 1 cardboard template for each panel that contains plumbing openings. Mark the panel perimeter, reference edges, fixture centers, and the required opening shapes.
    2. Test the template on the wall. Fit it around the actual fixtures and verify the layout with the trim components. Confirm that mounting screws and maintenance access remain usable.
    3. Transfer the template to the panel. Label the room-facing side before tracing. If you mark the back instead, reverse the template correctly so the finished opening lands in the intended position.
    4. Cut with the specified method. Support the panel securely and use a blade or hole saw appropriate for its material. Follow the manufacturer’s guidance on cutting direction, edge treatment, and required clearances; do not substitute a generic gap measurement.
    5. Dry-fit before applying adhesive. Check the panel against the actual wall and fixtures. Make controlled adjustments, then repeat the fit check before permanent attachment.

    Expected result: the panel seats correctly, the trim covers the opening as intended, and the cutout satisfies the required sealing and service-access detail.

    Use 2 dry-fit checks: one with the template and one with the cut panel. These checks catch location errors before adhesive makes correction difficult.

    Four stages for positioning plumbing openings: mark, template, cut, and dry-fit
    Verify the opening with a template before cutting the panel.

    Keep cutting debris away from plumbing

    Cut panels on a separate supported surface rather than against the installed wall. This keeps the blade away from concealed pipes and lets you support the material around the opening.

    Clear debris before fitting the panel. Do not push dust or offcuts into a valve opening, drain, or exposed fitting. Use the panel manufacturer’s recommended method to finish cut edges before installation.

    Panel fixing and penetration sealing

    1. Prepare the waterproofing detail. Follow the documented treatment around pipes, valves, and other penetrations. Where the system requires a collar, gasket, or specific sealant arrangement, install that detail rather than relying on a cosmetic bead afterward.
    2. Apply the specified fixing method. Use the approved adhesive or mechanical attachment arrangement. Follow the required application pattern, working time, and joint sequence, keeping adhesive clear of serviceable components.
    3. Set and align the panel. Place it against your references without forcing the opening against a pipe. Check the panel joint and fixture opening while adjustment is still permitted.
    4. Complete joints and exposed edges. Seal them exactly as the system requires. Keep any specified drainage paths open and allow the adhesive and sealant to cure before water exposure.

    Expected result: the panel is secure, the joints follow the approved detail, and each plumbing penetration has its required water-management treatment.

    For a 2026 shower update, write the required curing instructions into your work plan before starting. Do not confuse adhesive working time with the time before the shower can be used; follow both product labels.

    A continuous visible bead is not proof that the hidden detail is correct. Inspect the penetration while it remains accessible, not after the trim plate conceals it.

    Fixture refitting and final inspection

    1. Refit decorative components correctly. Follow the fixture manufacturer’s instructions for handles, trim plates, and covers. Do not tighten them to pull an uneven panel flat.
    2. Preserve access and drainage. Leave required service openings accessible. If the fixture instructions call for an unsealed drainage section around a trim plate, keep it open.
    3. Check operation and connections. Confirm that controls move freely and shutoff valves remain reachable. Have any disturbed plumbing connection checked by a qualified person before concealing it.
    4. Inspect after the permitted curing period. Check joints, penetrations, and accessible plumbing during initial use. If you find moisture where it should not be, stop using the affected fixture and investigate rather than adding sealant over the symptom.

    Expected result: the fixture operates normally, trim sits correctly, and the installation retains the access required for maintenance.

    Record the panel system and the adhesive and sealant used. Keep the instructions with your project photos so a future repair does not depend on guessing what is behind the finished surface.

    Paneling behind an existing vanity

    You can use the same template-first method around a vanity, but plan access to supply valves, pipe connections, and the drain before choosing the panel layout.

    Best for: a decorative update where the existing plumbing stays in place. The benefit is retaining the fixture arrangement; the drawback is restricted working space and more difficult cutting around existing connections.

    If pipes prevent a panel from sliding into position, do not disconnect them simply to make the panel fit. Consider a manufacturer-approved joint arrangement or have a plumber remove and refit the necessary connections. Avoid an improvised slit that leaves an unsupported or unsealed edge in a splash area.

    A removable access section can help where the panel system allows it, but it must remain genuinely removable. Do not glue a maintenance cover shut or hide a shutoff valve behind a permanently fixed panel.

    Bathroom vanity panel fitting with supply pipes and shutoff valves left accessible
    Plan the panel layout around access to valves and connections.

    For your 2026 vanity project, also check drawer travel and the clearance behind the cabinet. Added wall thickness can affect how the cabinet sits even when the pipe openings line up correctly.

    Troubleshooting

    • The opening is in the wrong position. Recheck the reference edges and whether the template was reversed. Remake the affected panel if correction would exceed trim coverage or invalidate the required sealing detail.
    • The trim plate will not sit flat. Check panel alignment, debris, and the fixture’s permitted finished-wall depth. Do not solve the problem by overtightening mounting screws or grinding away a sealing surface.
    • A panel joint lands across a fixture opening. Revisit the layout before fixing the panels. Use only a joint-and-penetration arrangement supported by the installation instructions; decorative trim does not rescue an unsupported detail.
    • Water appears behind a cover or beneath the vanity. Stop using the affected fixture and identify whether the source is a plumbing connection, joint, or penetration. Repair the cause before closing the area again.
    • The panel bows around the pipe. Check whether the opening is too tight, the substrate is uneven, or adhesive has accumulated locally. Correct the fit and support rather than clamping the panel into strain with the fixture trim.

    Customize your workflow

    Break a larger bathroom project into wall-by-wall layouts while preserving the panel system’s required installation sequence. Make each fixture template before committing to permanent fixing, and inspect concealed details before covering them.

    The Panel Hub bathroom wall panel range belongs in the material-selection stage, not as a substitute for installation instructions. If this is your first panel project, use the wall panels for DIY beginners guide to narrow your approach before taking on plumbing cutouts.

    Keep decorative upgrades separate from plumbing alterations. Changing the position of a valve or pipe is a different job from fitting a panel around it, and it changes the installation plan.

    FAQ

    How do I install wall panels around bathroom plumbing fixtures?

    Confirm the panel system’s suitability, template each opening, cut and dry-fit the panel, then complete the specified fixing and sealing details. Check fixture depth and service access before permanent attachment.

    Can I use any PVC wall panel inside a shower?

    No. Use a PVC panel system explicitly approved for shower exposure, and follow its substrate, joint, and penetration instructions. The material name alone does not establish suitability.

    How big should a hole around a bathroom pipe be?

    Use the clearance specified by the panel system and plumbing fixture manufacturers. The opening must also fit within the trim coverage and accommodate the required sealing detail; there is no universal hole size for every assembly.

    Do I need to remove the shower valve before installing panels?

    Not automatically; the required removal depends on the fixture and panel arrangement. Distinguish removable decorative trim from the valve body, and use a qualified plumber when work involves pressurized connections or valve repositioning.

    Can I seal all the way around a shower trim plate?

    Follow the shower fixture manufacturer’s instructions. Some trim arrangements require a drainage opening, so a continuous bead around every edge is not a universal rule.

    Can wall panels cover bathroom shutoff valves?

    Wall panels must not prevent access to shutoff valves. Plan a suitable accessible arrangement before installation rather than permanently covering valves or serviceable connections.

    Does The Panel Hub sell panels for bathroom projects?

    The Panel Hub sells PVC and shower wall panels for interior use. Confirm the selected panel’s documented exposure limits and installation requirements before fitting it around bathroom plumbing fixtures.

    One last thing

    Check the trim before the final cut, not after the panel is fixed. Lay the actual cover over your template and confirm its mounting points, coverage, and drainage requirements. That check catches a mismatch that measuring only the pipe center will miss.

    For a 2026 bathroom installation, the finished result should look tidy and remain serviceable. A concealed valve that cannot be reached is not a completed upgrade.

    Related guides