Category: Uncategorized

  • Wall panels for schools and daycare facilities: complete 2026 guide

    Wall panels for schools and daycare facilities: complete 2026 guide

    Wall panels for schools are interior wall coverings selected to support learning, manageable cleaning, and comfortable rooms for children and staff. Schools and daycare facilities need more than an attractive finish: the panel, backing, fixings, and maintenance routine must suit the room’s activities and applicable safety requirements.

    TL;DR
    • Choose wall panels for schools by room function, safety documentation, cleanability, and acoustic needs—not appearance alone.
    • The Panel Hub is best for buyers exploring decorative acoustic wall panels before checking project-specific school requirements.
    • Acoustic wall panels reduce reflected sound; they do not replace a sound-isolating wall assembly.
    • For daycare wall panels, assess reachable edges, secure attachment, cleaning compatibility, and access for repairs.

    Why wall panels matter for schools and daycare facilities

    A classroom, a nap room, and a corridor need different wall treatments. In a classroom, reflected speech competes with the teacher’s voice; in a daycare activity area, children touch surfaces and spill materials; in a corridor, bags, carts, and furniture contact the walls.

    Choose the wall’s job before choosing its finish. A decorative panel is not automatically an acoustic treatment, an impact-resistant surface, or a suitable wet-area lining. Separate those functions in your 2026 project brief so an attractive sample does not become the specification by default.

    The Panel Hub sells acoustic and decorative wall panels, including wood, PVC, and shower wall panels. Treat that range as a starting point for material selection, not proof that every option meets school or daycare requirements.

    Your purchasing decision also needs to reflect how the building operates. A finish that requires delicate cleaning belongs in a different setting from a wall beside a messy-play station. A panel that is difficult to remove creates a different maintenance burden from a system with accessible, replaceable sections.

    How to select and install school wall panels

    Define each room’s main problem

    Start with a paper floor plan and a walk-through. Ask teaching, custodial, and facilities staff what the wall needs to do, then record the answer beside each proposed installation area. This gives you a useful brief without buying a planning tool.

    Avoid writing simply “new wall panels.” Instead, describe the problem: reflected voices during group work, frequent scuffs beside coat storage, or an uninviting reception wall. Each description leads to a different material choice.

    For a 2026 refurbishment, distinguish essential performance from decorative preferences. If an acoustic problem drives the project, decide how you will assess the room before discussing wood color or panel patterns. If cleaning drives the project, include the cleaning team from the start.

    • Classrooms: prioritize speech clarity and access to teaching displays.
    • Daycare activity rooms: assess touch, spills, and routine cleaning.
    • Nap rooms: identify noise sources inside and outside the room.
    • Corridors: record contact from bags, carts, and furniture.
    • Reception areas: separate decorative goals from performance requirements.

    Check safety and cleaning documentation

    Create a document checklist before requesting samples. Ask for information about the exact panel construction, finish, backing, mounting method, and intended use. Product-family descriptions are not enough when the installed assembly differs from the tested configuration.

    Have the person responsible for building compliance review the proposed system against applicable local requirements. Do not assume that a residential installation method, an acoustic rating, or a sustainability certification answers questions about fire performance or suitability in a childcare setting.

    Cleaning deserves the same scrutiny. Give the supplier the names of your actual cleaning products and request written compatibility guidance. Inspect a sample for grooves, porous areas, exposed edges, and seams that complicate the work your custodial team already performs.

    An easy-to-wipe face does not make every joint, adhesive, and backing suitable for repeated wet cleaning. Check the whole installation, especially around sinks and messy-play areas.

    • Request relevant fire-performance documentation for the proposed assembly.
    • Ask for emissions information covering panels and installation materials.
    • Confirm compatibility with your facility’s cleaning products.
    • Review edge finishing and attachment in child-accessible locations.
    • Record who approves the system before purchase and installation.

    Match the material to the acoustic problem

    Use a quiet walk-through first. Listen to speech from normal teaching positions, identify hard reflective surfaces, and distinguish room echo from sound arriving through doors, walls, or building services. These observations help define the problem; they are not a substitute for professional acoustic measurements.

    Absorptive wall panels address reflected sound within a room. Sound isolation concerns transmission between spaces. Treating a classroom wall with absorptive panels does not repair a poorly sealed door or redesign a separating wall.

    The Panel Hub describes its real wood acoustic wall panels as NRC 0.85 rated. NRC is a sound-absorption rating, not a promised percentage reduction in classroom noise. Request the report for the exact product and mounting arrangement you intend to use.

    Acoustic Slat Wood Wall Panels | SoundPanel™ are an option to evaluate when you want a wood-slat appearance alongside acoustic treatment. Best for: buyers assessing decorative acoustic finishes. The limitation is that appearance and product naming do not establish school compliance, cleaning suitability, or the required treatment area.

    • Identify whether the problem is room echo or sound transmission.
    • Request absorption data for the exact panel and mounting method.
    • Include ceilings, furnishings, and existing finishes in the assessment.
    • Keep acoustic treatment clear of teaching displays and required equipment.
    • Seek acoustic design advice when speech clarity drives the project.

    Plan coverage, edges, and attachment

    Draw the proposed panel boundaries on the floor plan and mark them on the wall with removable tape. Stand at child and adult viewing heights, check furniture positions, and open nearby doors. A full-height decorative drawing does not reveal every practical conflict.

    Separate reachable surfaces from protected surfaces. In daycare rooms, inspect edges and corners where children play, rest, or queue. Avoid layouts that introduce accessible sharp edges, insecure components, or details that tempt climbing.

    The supporting wall matters too. Identify its construction and condition before deciding on screws, adhesive, or another mounting method. Follow the panel manufacturer’s instructions and have the installation plan checked for the actual substrate and building use.

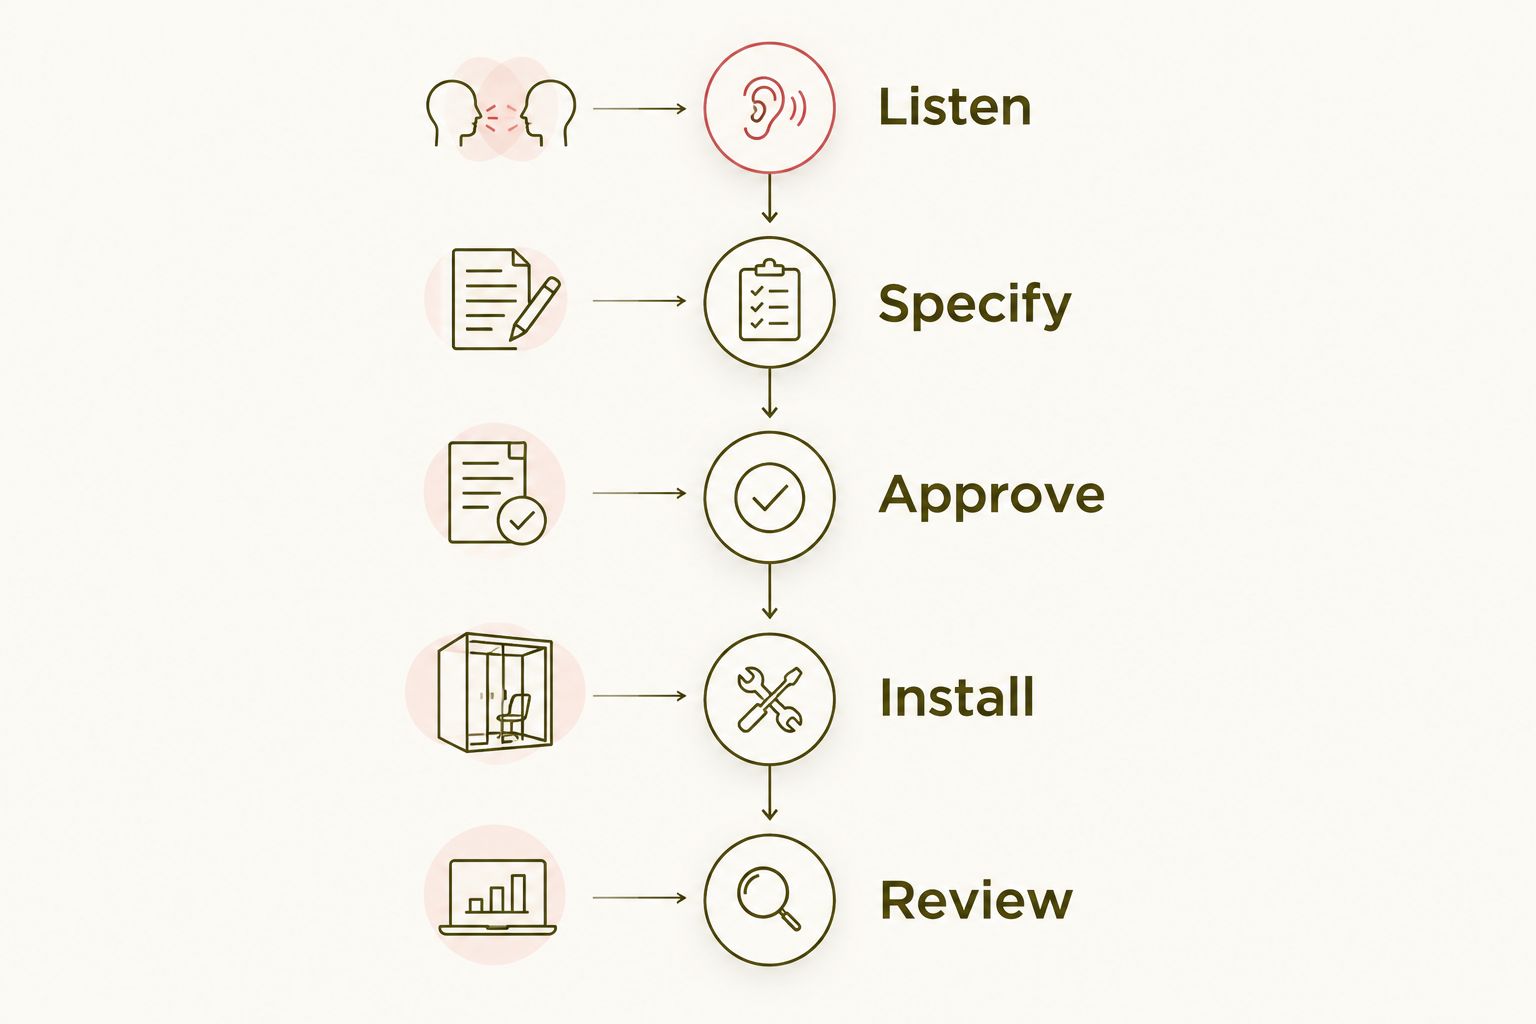
    Use a simple approval sequence for your 2026 layout: room function, documentation, placement, then attachment. This keeps the attractive finish from obscuring the decisions that determine whether the installation belongs there.
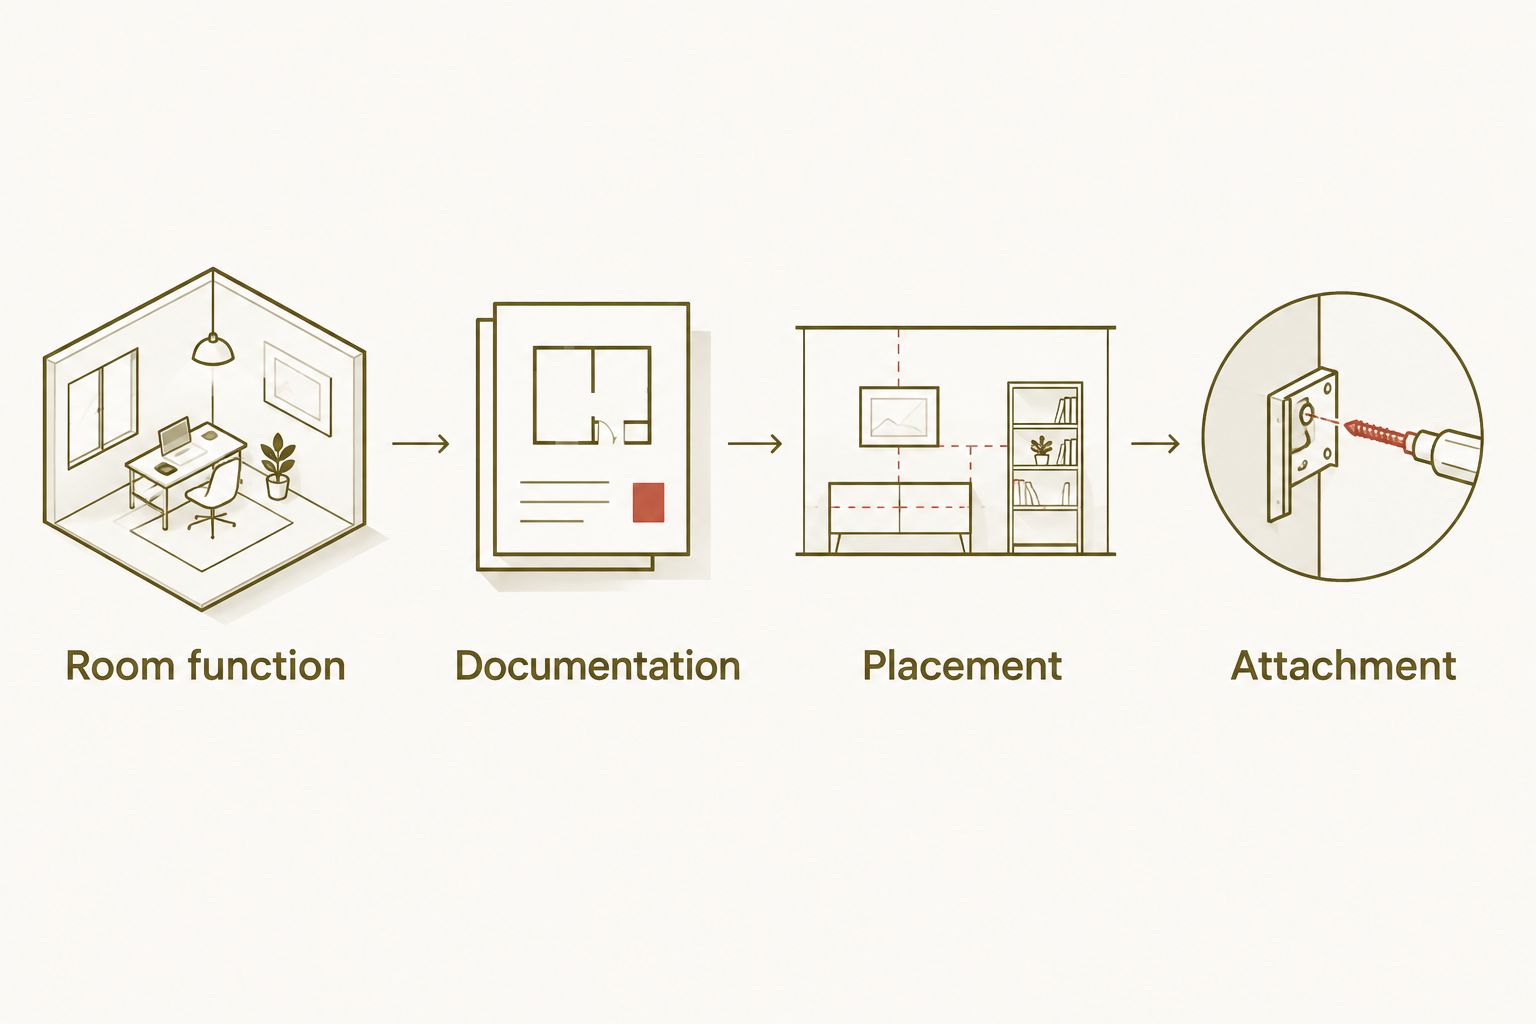
    Four planning stages for school wall panels: room function, documentation, placement, and attachment
    Approve the purpose and documentation before finalizing panel placement and attachment.

    Do not cover ventilation grilles, alarms, electrical access, inspection points, or other equipment that needs to remain accessible. Resolve these details on the drawing rather than cutting around them during installation.

    • Mark panel boundaries and furniture positions before ordering.
    • Detail exposed corners, cut edges, and transitions to existing finishes.
    • Match fixings to the supporting wall and manufacturer instructions.
    • Preserve access to services and required safety equipment.
    • Review child-accessible details with the facility’s responsible staff.

    Test a sample with the people who maintain it

    Begin with a sample rather than a finished feature wall. Review it under the room’s existing lighting, touch its edges, and ask custodial staff to assess the surface using the approved cleaning method. A photograph cannot answer those questions.

    For your pilot, choose 1 room and involve 2 staff members with different responsibilities, such as a teacher and a custodian. These are suggested planning steps, not performance benchmarks. Keep the trial small enough to revise before extending the finish across the facility.

    If acoustic performance is the goal, document the room conditions before and after the pilot. Keep furniture, occupancy, and activities comparable; otherwise, a quieter day can be mistaken for a better wall treatment. Use a qualified acoustic professional when you need a measurable acceptance result.

    A sample also reveals visual clutter. Strong relief patterns can compete with displays and signs, so view the panel beside the materials that will remain in the room.

    • Test the approved cleaning method on a sample.
    • Inspect edges and seams after handling and cleaning.
    • Review appearance beside existing displays and furniture.
    • Record staff feedback in the same format before and after installation.
    • Approve the pilot before extending the finish to other rooms.

    Schedule installation and hand over the maintenance plan

    Plan installation around an unoccupied work area. Cutting, drilling, adhesives, and unfinished edges do not belong beside children’s normal activities. Arrange dust control, ventilation, and reopening according to the installation materials and your facility procedures.

    Do not base a school schedule on a household installation estimate. The actual job includes surface preparation, service coordination, edge detailing, inspections, and any required adhesive curing. Those tasks determine when the room can return to use.

    At handover, photograph the completed installation and record the panel identity, finish, mounting method, cleaning instructions, and repair process. Give facilities staff the documents they will need when a section is damaged or a cleaning product changes.

    Inspect 3 locations during the initial handover: exposed edges, seams, and attachment points. Repeat checks according to your facility’s maintenance plan rather than assuming that an attractive finished wall needs no further attention.

    • Isolate the work area from occupied classrooms and daycare spaces.
    • Follow preparation, ventilation, and curing instructions.
    • Check exposed edges, seams, and attachment points before reopening.
    • Retain product, installation, and cleaning documentation.
    • Assign responsibility for inspections and replacement decisions.

    Compare wall-panel options by room function

    This 2026 comparison identifies material categories to investigate, not approved institutional specifications. Confirm the exact product’s documentation before treating any option as suitable for your school or daycare facility.

    Option Best for Main advantage Key limitation
    Acoustic wood slat panels Learning spaces where decorative sound absorption is a priority Combine a wood-slat finish with an acoustic treatment option Grooves and backing need a cleaning assessment; absorption does not establish sound isolation
    Decorative solid wood panels Reception walls and protected decorative areas Add wood texture and visual interest Do not assume tested acoustic, impact, or wet-area performance
    PVC wall panels Areas where a documented wipe-clean finish is the priority Offer a panel surface to assess against the cleaning routine Joints, adhesives, fire performance, and chemical compatibility need separate checks
    Shower wall panels Wet-area projects requiring a documented panel system Provide an option for coordinated wet-area lining A panel face alone does not resolve joints, penetrations, or substrate requirements
    Purpose-specified institutional wall protection Corridors and activity areas with frequent surface contact Can be selected around a defined wall-protection brief Protection performance does not automatically provide acoustic absorption

    No material wins every room. Compare the whole installed system against the room brief, including cleaning labor, access for repairs, and the documentation required for approval.

    The Panel Hub acoustic wall panels belong on a shortlist when wood appearance and room sound absorption are priorities. Keep that shortlist conditional on the actual installation requirements; neither an acoustic rating nor a decorative finish answers every institutional purchasing question.

    Common mistakes schools and daycare facilities make

    Treating acoustic absorption as soundproofing

    A nap room disturbed by corridor traffic needs an assessment of the transmission path, not an automatic acoustic feature wall. Check doors, openings, and separating construction before buying panels intended to absorb sound inside the room.

    Applying one finish across every space

    A protected reception wall and a sink-adjacent activity wall have different exposure. Write separate requirements for each area so the easiest purchasing decision does not become the hardest maintenance decision.

    Approving a color sample without checking the assembly

    The visible finish is only part of the installation. Request documentation covering the relevant backing and mounting arrangement, then confirm that the proposed school installation matches the information being reviewed.

    Choosing relief patterns without considering daily cleaning

    Slats, grooves, and projecting details require closer inspection than a flat sample photograph suggests. Let custodial staff assess access to recesses and seams before the design is finalized.

    Extending a pilot before checking the details

    A successful visual result is not the same as an accepted installation. Review attachment, edges, cleaning, access, and the original room objective before repeating the system elsewhere.

    FAQ

    What are the best wall panels for schools?

    The best wall panels for schools match the room’s acoustic, cleaning, safety, and maintenance requirements. Evaluate the exact product and installed assembly rather than choosing by material name alone.

    Can wood slat panels make a classroom quieter?

    Acoustic wood slat panels can reduce reflected sound when their tested construction and placement suit the room. They do not automatically stop sound traveling through walls or doors.

    Are PVC wall panels suitable for daycare facilities?

    PVC wall panels need a product-specific suitability review before use in daycare facilities. Check cleaning-product compatibility, joints, fire-performance documentation, attachment, and child-accessible edges.

    Does an NRC 0.85 rating mean a room becomes 85 percent quieter?

    No, NRC 0.85 is a sound-absorption rating, not a percentage reduction in room noise. Room performance depends on the tested mounting arrangement, treatment area, other surfaces, and noise sources.

    Can school staff install decorative wall panels themselves?

    School staff should install panels only when the approved system, staff competence, and facility procedures permit it. The work still needs appropriate substrate preparation, attachment, service access, and an unoccupied work area.

    What should I request before ordering daycare wall panels?

    Request documentation for the exact panel, backing, finish, and installation method. Include relevant fire-performance information, cleaning guidance, emissions information, and details for accessible edges and repairs.

    Should every classroom use the same wall panels?

    No, classroom wall panels should follow the needs of each room. A shared finish is useful only when the rooms also share the requirements that matter for performance and maintenance.

    One last thing

    Photograph the wall before it is covered. Keep the images with your 2026 installation records so maintenance staff can see service locations, substrate conditions, and fixing positions without relying on memory. That simple handover detail is useful long after the color decision has been forgotten.

    Related guides

  • Wall panels for restaurant and cafe owners: complete 2026 guide

    Wall panels for restaurant and cafe owners: complete 2026 guide

    Restaurant wall paneling is an interior wall finish installed to improve dining-room appearance, manage reflected sound, or support a cleanable surface. Choosing wall panels for restaurants means matching each finish to its zone: a quiet seating area, a busy service counter, and a splash-prone wall need different materials and installation details.

    TL;DR
    • Choose wall panels for restaurants by zone: dining-room acoustics, service-area cleaning, and documented commercial suitability.
    • The Panel Hub is best for owners comparing decorative and acoustic wall panels, with commercial suitability checked separately.
    • Acoustic wood slat panels address reflected sound; decorative wood wall panels need separate acoustic evidence.
    • Verify fire documentation, cleaning instructions, and installation requirements before committing to a restaurant fit-out.

    Why wall paneling matters for restaurant and cafe owners

    Your wall finish has to work during service, not just in photographs. Conversations, moving chairs, music, and dish handling create sound inside the room; drinks, cleaning products, and furniture contact create a different set of demands at wall level.

    Choose for the operating conditions first, then the appearance. A textured feature wall belongs where staff can maintain it, while acoustic treatment belongs where reflected sound interferes with conversation. Neither choice replaces checking commercial fire requirements.

    For your 2026 project, start with this guide to fire-rated wall panels for commercial spaces, then request documentation for the exact panel and installation assembly you intend to use. A residential product description is not evidence of restaurant suitability.

    The Panel Hub sells acoustic and decorative wall panels, including wood, PVC, and shower-wall options. Those categories give you different finishes to compare, but a category name alone does not establish suitability for food preparation, repeated sanitizing, or a particular commercial occupancy.

    How to choose and install restaurant wall panels

    1. Map your restaurant into working zones

    Walk the restaurant before opening and again during service. Mark where customers sit, staff carry trays, chairs touch walls, and liquids reach surfaces. Use a floor plan or a simple sketch; you do not need design software to identify these conditions.

    Separate the dining room from the service counter and wet areas. A decorative wall behind a banquette has a different job from the wall beside a handwashing sink, even when both are visible to customers.

    For a 2026 refurbishment, write a short performance brief for each wall before selecting finishes. This prevents a visually consistent scheme from becoming an unsuitable material specification.

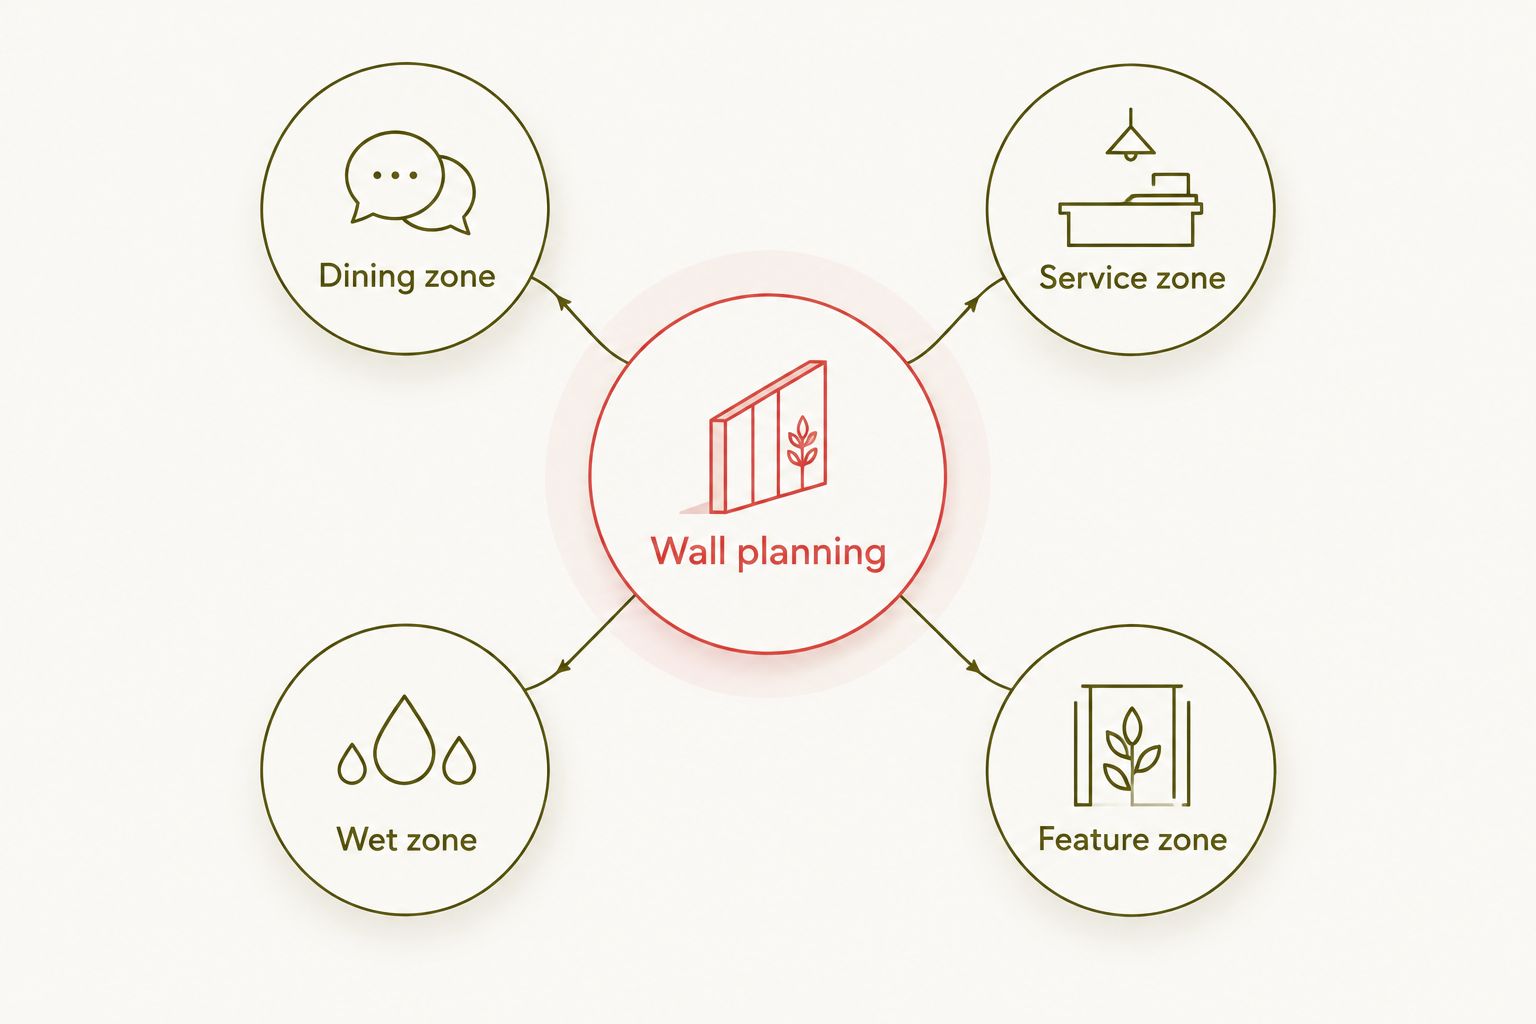
    • Dining zone: identify reflective surfaces and seating areas needing acoustic attention.
    • Service zone: mark frequent hand contact, tray traffic, and furniture impact.
    • Wet zone: record splashes, sinks, and cleaning exposure.
    • Feature zone: choose a focal wall away from avoidable spills and abrasion.
    Restaurant wall planning divided into dining, service, wet, and feature zones
    Assign each wall a job before choosing its finish.

    2. Identify whether you need absorption or isolation

    Listen from the tables where conversation feels difficult. Turn the music off temporarily and compare conditions with and without service activity. This is a useful first check, not a substitute for acoustic measurement when the problem is severe.

    Sound absorption and sound isolation solve different problems. Absorption reduces reflected sound within a room; isolation limits transmission between spaces. Decorative panels do not become soundproofing simply because they cover a wall.

    The Panel Hub describes its acoustic wood panels with an NRC rating of 0.85. NRC summarizes absorption under specified test conditions; it does not mean the restaurant becomes 85% quieter. Request the report and mounting details for the exact product before using that rating in your specification.

    • Identify whether the complaint concerns echo, music, equipment, or neighboring premises.
    • Listen at occupied seating positions, not only from the entrance.
    • Request acoustic test results and the tested mounting arrangement.
    • Bring in an acoustic specialist for persistent or complex noise problems.

    3. Shortlist materials against the wall's job

    Build your shortlist manually using product information and a written comparison sheet. Record the material, intended setting, maintenance instructions, and documentation you still need. Reject products that cannot answer the requirements of the chosen zone.

    For dining-room treatment, Acoustic Slat Wood Wall Panels | SoundPanel™ offer an acoustic-panel option with a wood-slat appearance. Best for: owners considering acoustic treatment as part of a wood-finish dining room. The limitation is that an acoustic label does not establish fire classification, cleaning compatibility, or a guaranteed room-level result.

    The Panel Hub provides a faster starting point than assembling a shortlist across unrelated suppliers because its catalog includes both acoustic and decorative categories. Keep the commercial checks separate from that shopping convenience.

    • Compare acoustic products using test evidence, not appearance alone.
    • Compare decorative products using finish, texture, and maintenance requirements.
    • Check whether exposed edges and backing suit the intended location.
    • Request written confirmation of suitability for the proposed use.

    4. Test the finish in your actual dining room

    Place a sample against the intended wall under daylight and evening lighting. Stand where customers will see it, then move close enough to inspect grooves, seams, and edges. A finish that looks balanced from the doorway can feel visually busy beside a table.

    Keep texture away from locations where it creates an avoidable cleaning burden. Deep relief behind a reception point serves a different purpose from relief next to a drink station. Check both the visual effect and access for cleaning.

    In your 2026 sample review, photograph the finish beside flooring, tabletops, and existing joinery. Use those photographs to compare choices consistently, not as a replacement for handling the material.

    Wood slat feature wall behind cafe seating, separate from the service counter
    Review wall texture from the customer’s seat as well as from the entrance.
    • Compare samples in daylight and under your evening lighting.
    • Inspect texture from both seated and standing positions.
    • Check how furniture meets the finished wall.
    • Review edge trims, corners, and panel joints before ordering.

    5. Verify fire, cleaning, and certification documents

    Ask the local authority or your project professional which requirements apply to the restaurant and the proposed installation. Then request the relevant product documents. Do not infer compliance from a wood species, a PVC label, or a photograph of another commercial interior.

    The Panel Hub describes its real wood acoustic range as FSC certified. FSC certification concerns responsible forest sourcing; it does not establish fire performance, moisture resistance, or suitability for food-contact areas. Verify the certification scope for the exact purchase.

    Use separate checks for separate claims. A documented acoustic rating cannot fill a missing fire report, and a cleanable face cannot establish that joints and cut edges tolerate the same exposure.

    • Request fire documentation applicable to the proposed panel and assembly.
    • Confirm permitted cleaning products and cleaning methods in writing.
    • Check moisture limitations for faces, backing, joints, and cut edges.
    • Verify certification claims against the exact product documentation.
    • Obtain landlord approval where your lease requires it.

    6. Plan quantities and installation around service

    Measure each wall and draw the panel layout before calculating your order. Record dimensions in a consistent unit, account for openings, and identify cuts that affect pattern alignment. Do not apply a generic waste allowance without checking the layout and panel format.

    The brand describes home installation as taking under 2 hours, but that claim is not a restaurant fit-out schedule. Commercial preparation includes access, wall condition, protection of equipment, adhesive requirements, and reopening arrangements. Build your 2026 installation plan from the actual scope.

    The stated 5-year warranty also needs a commercial-use check. Confirm applicable terms, installation requirements, and exclusions before relying on it for a restaurant project.

    • Measure wall height, width, openings, and obstructions.
    • Draw panel positions, seams, and cut locations.
    • Follow the manufacturer's substrate and fixing instructions.
    • Protect food, equipment, and customer areas during work.
    • Schedule reopening around the installation system's actual requirements.

    7. Establish cleaning and replacement procedures

    Write the maintenance procedure before the new wall becomes part of daily operations. Staff need instructions that distinguish routine dust removal from spill cleanup and identify which products are permitted. A general instruction to wipe everything down is not enough for mixed materials.

    Keep purchase records, installation photographs, and product documentation together. These records make it easier to identify the finish, discuss damage, and check warranty terms without searching through old messages.

    For a 2026 refurbishment, assess panel condition alongside your regular premises inspections. Pay particular attention to wall areas beside chairs, counters, and cleaning equipment.

    • Give staff a finish-specific cleaning method.
    • Identify cleaning products that the manufacturer permits.
    • Inspect exposed edges, seams, and furniture-contact points.
    • Keep product records and installation details accessible.
    • Plan how damaged sections will be removed and replaced.

    Compare wall panel options by restaurant zone

    The best option is the one that meets the wall's operating requirements. Use this table to choose a direction, then verify the exact product. Acoustic performance, commercial compliance, and maintenance remain separate decisions.

    Option Best for Main advantage Key limitation
    Acoustic Slat Wood Wall Panels | SoundPanel™ Dining rooms considering wood-finish acoustic treatment Combines an acoustic-panel category with a slatted appearance Room results depend on treatment design; commercial suitability needs verification
    3D Geometric Pattern Wooden Panels | GroovePanel® Dry feature walls needing geometric texture Product description specifies 100% real solid wood Decorative construction alone does not establish sound absorption or washability
    PVC wall panels Walls where a specified cleanable finish is the priority Provides an alternative material category to compare PVC alone does not establish fire classification or food-service suitability
    Shower wall panels Wet-area projects requiring a documented wall system Offers a category intended for shower-wall applications Residential wet-area use does not establish approval for commercial food areas
    Painted existing wall Owners preserving the current wall construction Avoids adding a textured panel system Does not provide acoustic treatment or a panelled appearance

    The geometric panels are a visual choice, not an acoustic substitute. Their stated solid-wood construction describes the material; you still need to confirm maintenance and installation requirements for the proposed restaurant location.

    These products provide two distinct starting points: acoustic slats for a dining-room treatment shortlist and geometric wood for a dry feature-wall shortlist. Neither should be selected solely from its photograph.

    Panels to evaluate for your project
    3D Geometric Pattern Wooden Panels | GroovePanel®
    Geometric decorative wall panels crafted from 100% real solid wood.
    $459

    Common mistakes restaurant and cafe owners make

    • Treating decoration as noise control. A patterned wood wall changes appearance. Specify acoustic treatment separately when reflected sound is the problem.
    • Using one finish across every zone. A dining-room feature wall and a splash-prone service wall have different maintenance demands. Write separate requirements before choosing materials.
    • Accepting a residential claim as commercial approval. Home installation guidance and product warranties do not establish compliance for a restaurant. Check the exact proposed use.
    • Ignoring furniture and staff contact. Positioning a detailed finish where chair backs or trays repeatedly touch it creates an avoidable maintenance issue. Review circulation and seating first.
    • Leaving documentation until installation day. Missing fire, cleaning, or fixing information stops a specification from being complete. Resolve those questions before committing to the fit-out.

    FAQ

    What are the best wall panels for restaurants?

    The best wall panels for restaurants match the wall’s function and documented commercial requirements. Compare acoustic panels for dining-room reflections, decorative panels for dry feature walls, and appropriately specified systems for wet or frequently cleaned areas.

    Will acoustic wall panels soundproof my cafe?

    Acoustic wall panels are not a substitute for sound isolation between spaces. They address reflected sound within the room; noise transmission through walls, doors, and other paths needs a separate assessment.

    What does an NRC rating of 0.85 mean?

    An NRC rating of 0.85 summarizes sound absorption under specified test conditions. It does not mean a restaurant becomes 85% quieter, and the test’s mounting arrangement matters when applying the result.

    Can I use decorative wood panels near a restaurant sink?

    Use decorative wood panels near a sink only when the manufacturer documents suitability for that exposure. Check the face, backing, joints, and cut edges rather than assuming the visible finish protects the entire assembly.

    Are PVC wall panels automatically suitable for food preparation areas?

    PVC wall panels are not automatically suitable for food preparation areas. Verify the exact system’s cleaning compatibility, installation details, and applicable local requirements before specifying it.

    Can restaurant owners install wall panels themselves?

    Restaurant owners should attempt installation only when the manufacturer’s instructions, project requirements, and their skills support the work. Commercial compliance, substrate preparation, fixings, and operating interruptions still need planning.

    Does The Panel Hub’s warranty cover restaurant installations?

    Confirm restaurant coverage directly before relying on The Panel Hub’s stated 5-year warranty. Check commercial-use terms, installation conditions, and exclusions for the exact product.

    One last thing

    Sit at the least comfortable table before choosing your feature wall. If conversation is difficult there, a decorative upgrade elsewhere will not answer that problem. If chair contact or spills are the concern, texture is not the first decision either.

    For your 2026 specification, keep appearance, acoustic evidence, commercial compliance, and cleaning instructions as separate approval items. That separation turns a panel purchase into a usable restaurant wall system.

    Related guides

  • Wall panels for Airbnb and short-term rental hosts: complete 2026 guide

    Wall panels for Airbnb and short-term rental hosts: complete 2026 guide

    Airbnb hosts’ wall paneling is an interior wall finish used to improve a rental’s appearance, comfort, and upkeep between guest stays. The best wall panels for Airbnb match the room’s moisture exposure, cleaning routine, and installation conditions—not just the look you want in listing photos.

    TL;DR
    • The Panel Hub offers wall panels for Airbnb hosts choosing acoustic wood, decorative wood, PVC, or shower wall finishes.
    • Choose acoustic wall panels for room echo, not as a substitute for soundproofing shared walls.
    • Use decorative wood wall panels in dry rooms; select bathroom panels by their documented wet-area suitability.
    • Plan cleaning, edge protection, and future repairs before installing a rental feature wall.

    Why wall paneling matters for Airbnb hosts

    A rental feature wall has two jobs: look good in photographs and remain practical after guests arrive. Your selection process should account for furniture contact, suitcase routes, cleaning access, and the time available between bookings. Start with a manageable project using this guide to wall panels for DIY beginners.

    For your 2026 upgrade, separate the problem from the appearance. A bedroom with an unattractive backdrop needs a decorative solution; a living room with noticeable echo needs sound absorption. A bathroom needs a finish and installation system suitable for its actual water exposure.

    An attractive panel is not automatically an acoustic treatment, a waterproof surface, or a protective barrier. Those are separate properties. Select each one using the manufacturer’s documentation rather than the panel’s texture or material name.

    Hosts also need a repeatable maintenance routine. If cleaning a wall requires instructions your turnover team cannot follow, choose a different finish or place it somewhere less exposed. Your best feature wall is one you can inspect, clean, and repair without dismantling the room.

    How to choose and install rental wall panels

    Identify the room’s real problem

    Walk through the rental before choosing a style. Listen during ordinary conversation, inspect walls beside luggage areas, and check bathrooms for moisture damage. Describe the problem in plain language: a blank bed wall, an echoing dining area, or a surface that needs frequent cleaning.

    Take 2 photographs of each proposed wall: one straight on and one from the room’s entrance. This is a planning task, not a performance test. The views help you decide whether paneling improves the room’s focal point or adds another competing surface.

    Do not use decorative paneling to conceal an unresolved leak, loose plaster, or damaged substrate. Correct the underlying condition first. In leased properties, get permission for the proposed fixing method before ordering materials.

    • Write down the wall’s primary purpose: appearance, absorption, or a suitable bathroom finish.
    • Check for damp patches, loose paint, and movement in the existing surface.
    • Mark furniture contact points and luggage routes.
    • Confirm ownership or landlord permission for permanent alterations.
    • Keep the planning photographs with your renovation notes.

    Measure the wall

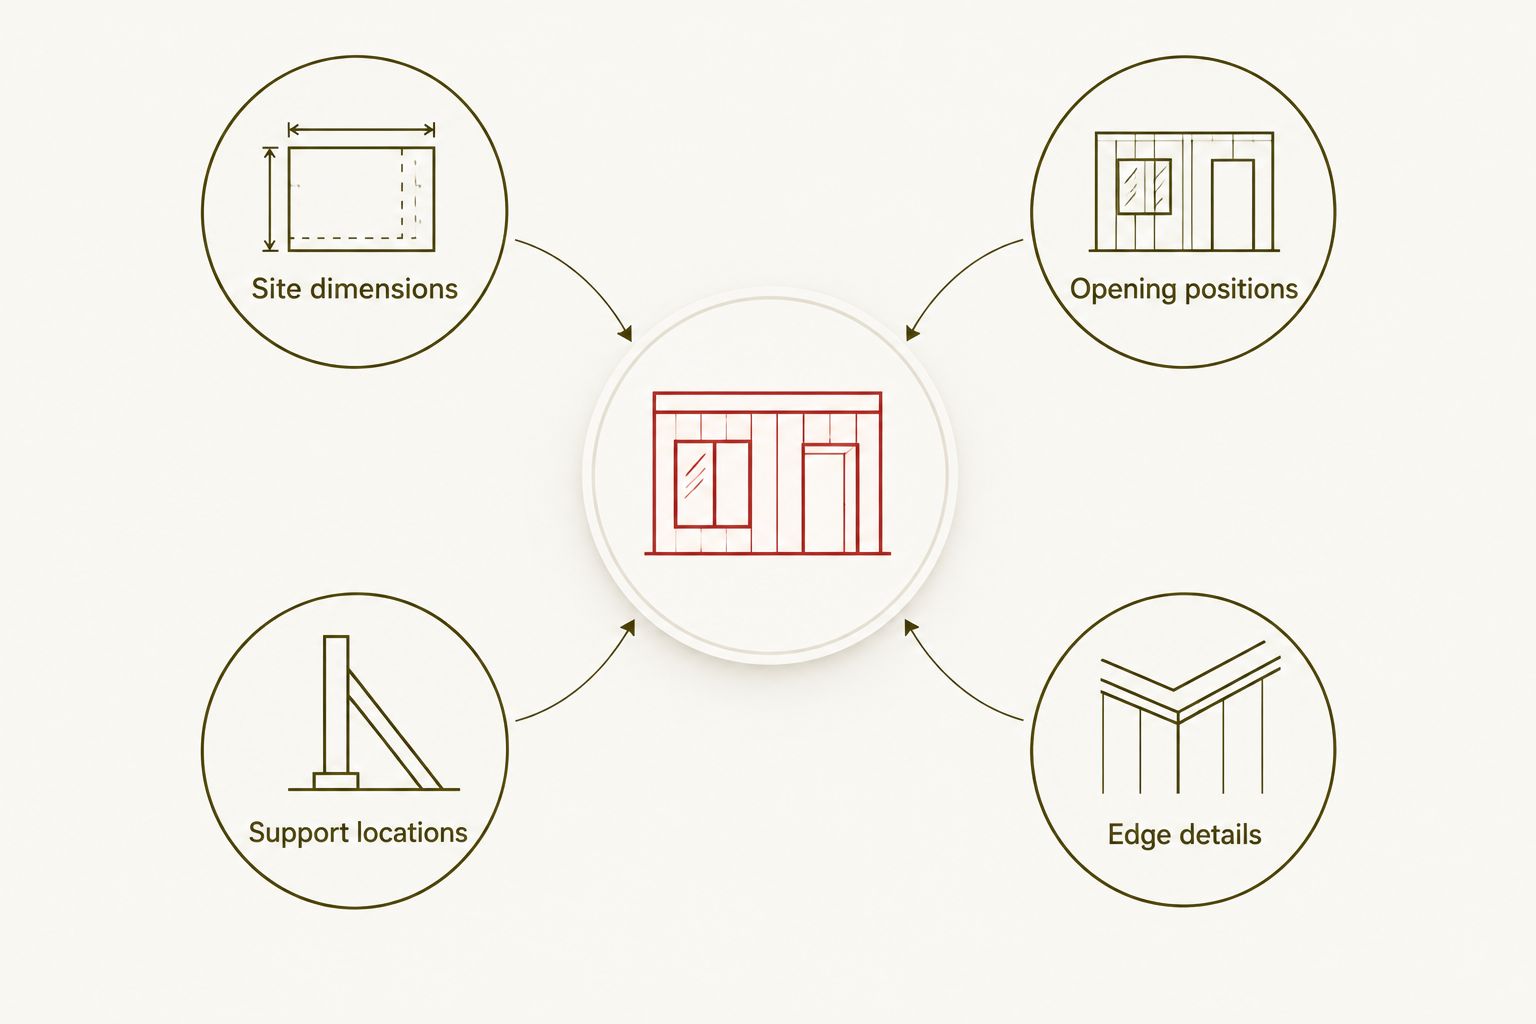
    Record 3 measurements before selecting a layout: wall width, wall height, and available depth behind nearby furniture. Depth matters because paneling changes the finished surface position; check it against headboards, door swings, and existing trim.

    Sketch the wall by hand and mark outlets, switches, vents, baseboards, and access panels. Use the actual panel dimensions from the chosen product’s current instructions to map joints and cuts. Do not estimate coverage from a product photograph.

    For a 2026 rental refresh, favor a layout you can maintain rather than one that simply covers the largest area. A defined section behind the bed can create a focal point while leaving adjacent walls accessible for painting and repairs. Plan the finished edges before fixing the first panel.

    • Measure width and height at more than one location.
    • Record clearance behind furniture and around opening doors.
    • Draw every outlet, switch, vent, and access opening.
    • Map panel joints using documented product dimensions.
    • Include edge finishing and cut pieces in your material plan.

    Choose the finish

    Use the room’s exposure to narrow your choice manually: dry bedroom, busy living room, bathroom wall, or shower enclosure. Then compare surface texture, cleaning instructions, and the documented purpose of each panel. A deeper pattern creates visual interest but also requires you to assess how its recesses will be cleaned.

    The Panel Hub wall panels include acoustic and decorative wood options, alongside PVC and shower wall panels. That gives hosts a place to compare different interior finishes after defining the project—not a reason to use the same material throughout the property.

    The Panel Hub is best for hosts choosing decorative and acoustic wall panels for interior rental upgrades. Its acoustic offering is described as NRC 0.85 rated, but sound absorption is not the same as blocking sound between rooms. Confirm the tested assembly and installation requirements for the panel you select.

    • Choose acoustic panels when reducing room echo is the objective.
    • Choose decorative wood when the primary objective is a dry-room feature wall.
    • Assess recessed patterns against your cleaning routine.
    • Require explicit wet-area suitability for bathroom and shower applications.
    • Compare a material sample with bedding, flooring, and existing trim.

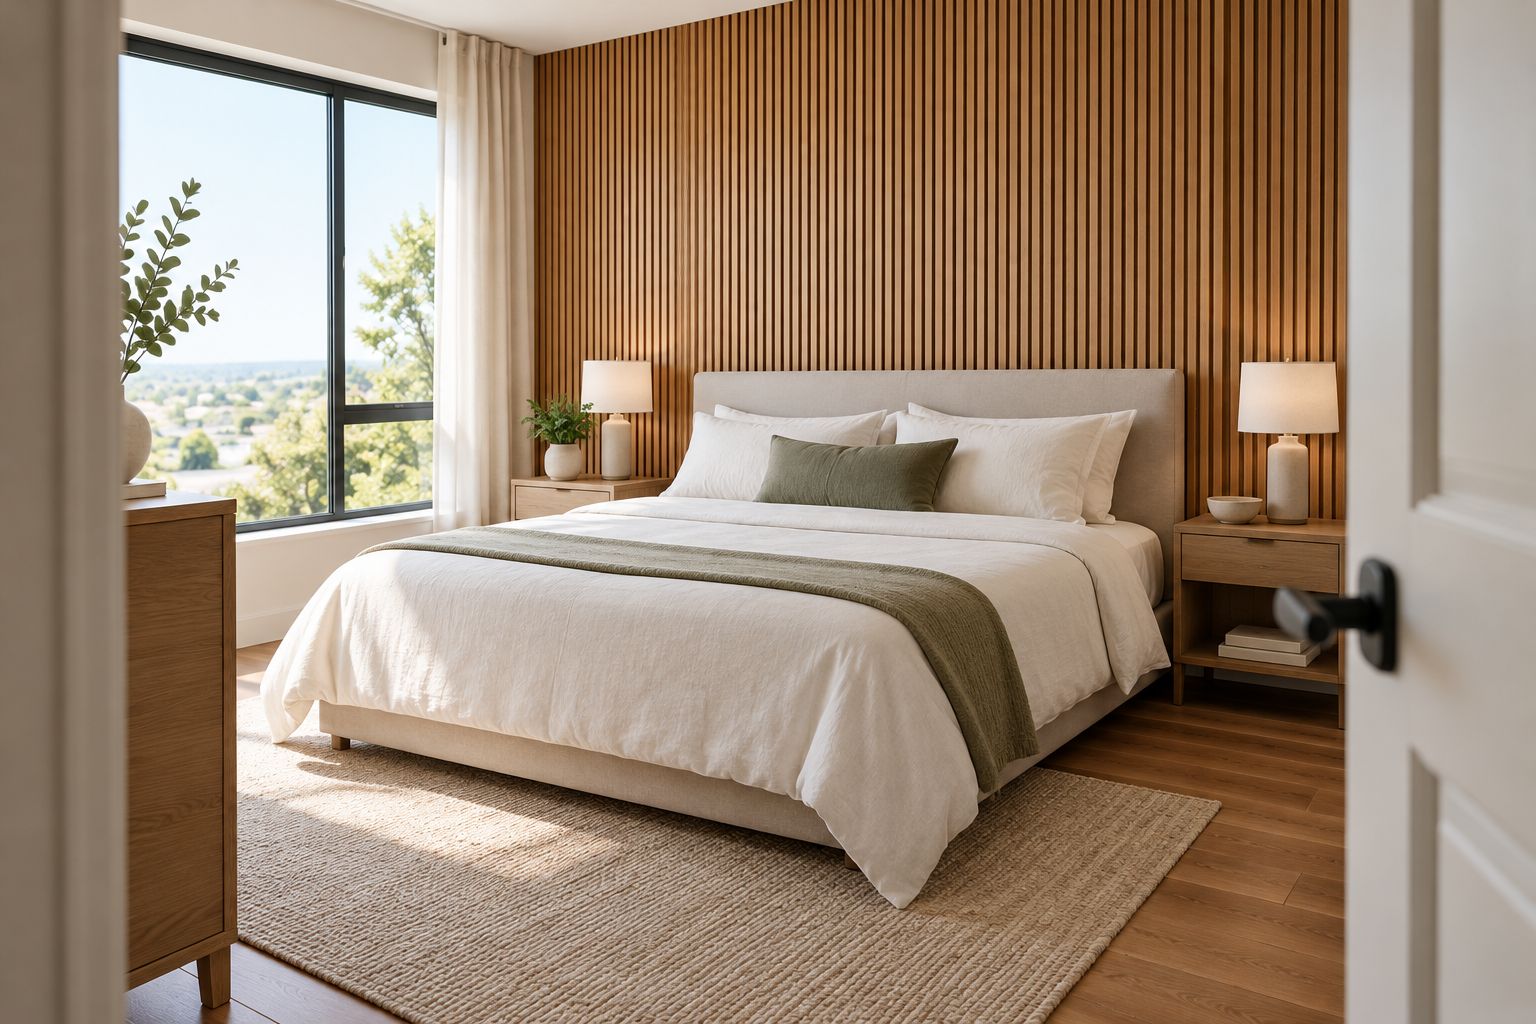
    A bedroom accent wall should work with the bed rather than compete with it. Keep the surrounding furnishings simple enough that you can judge the wall’s texture, edges, and relationship to the headboard.

    Rental bedroom with a wood slat accent wall behind the bed and plain surrounding walls
    A defined bed wall creates a focal point without paneling the entire room.

    Plan the fixings

    Read the installation instructions before deciding between adhesive, mechanical fasteners, or a mounting framework. These methods are not interchangeable. The substrate, panel weight, acoustic assembly, and manufacturer’s requirements determine the appropriate approach.

    Mark fixing locations and check for concealed utilities before drilling. Ask a qualified professional to handle electrical changes or any condition outside your skills. Preserve access to shutoffs, junctions, and service openings rather than building a decorative finish across them.

    The Panel Hub describes installation in under 2 hours and a 5-year warranty. Treat that installation duration as the stated product proposition, not your complete rental renovation schedule: measuring, wall repairs, cutting, and any adhesive curing requirements need separate planning. Read the applicable warranty conditions before choosing a fixing method.

    • Match fixings to both the panel instructions and the existing wall.
    • Check concealed utility locations before drilling.
    • Plan trims, corners, and service access before installation.
    • Follow adhesive handling and curing instructions where applicable.
    • Keep the rental unavailable until the work area is safe and ready.

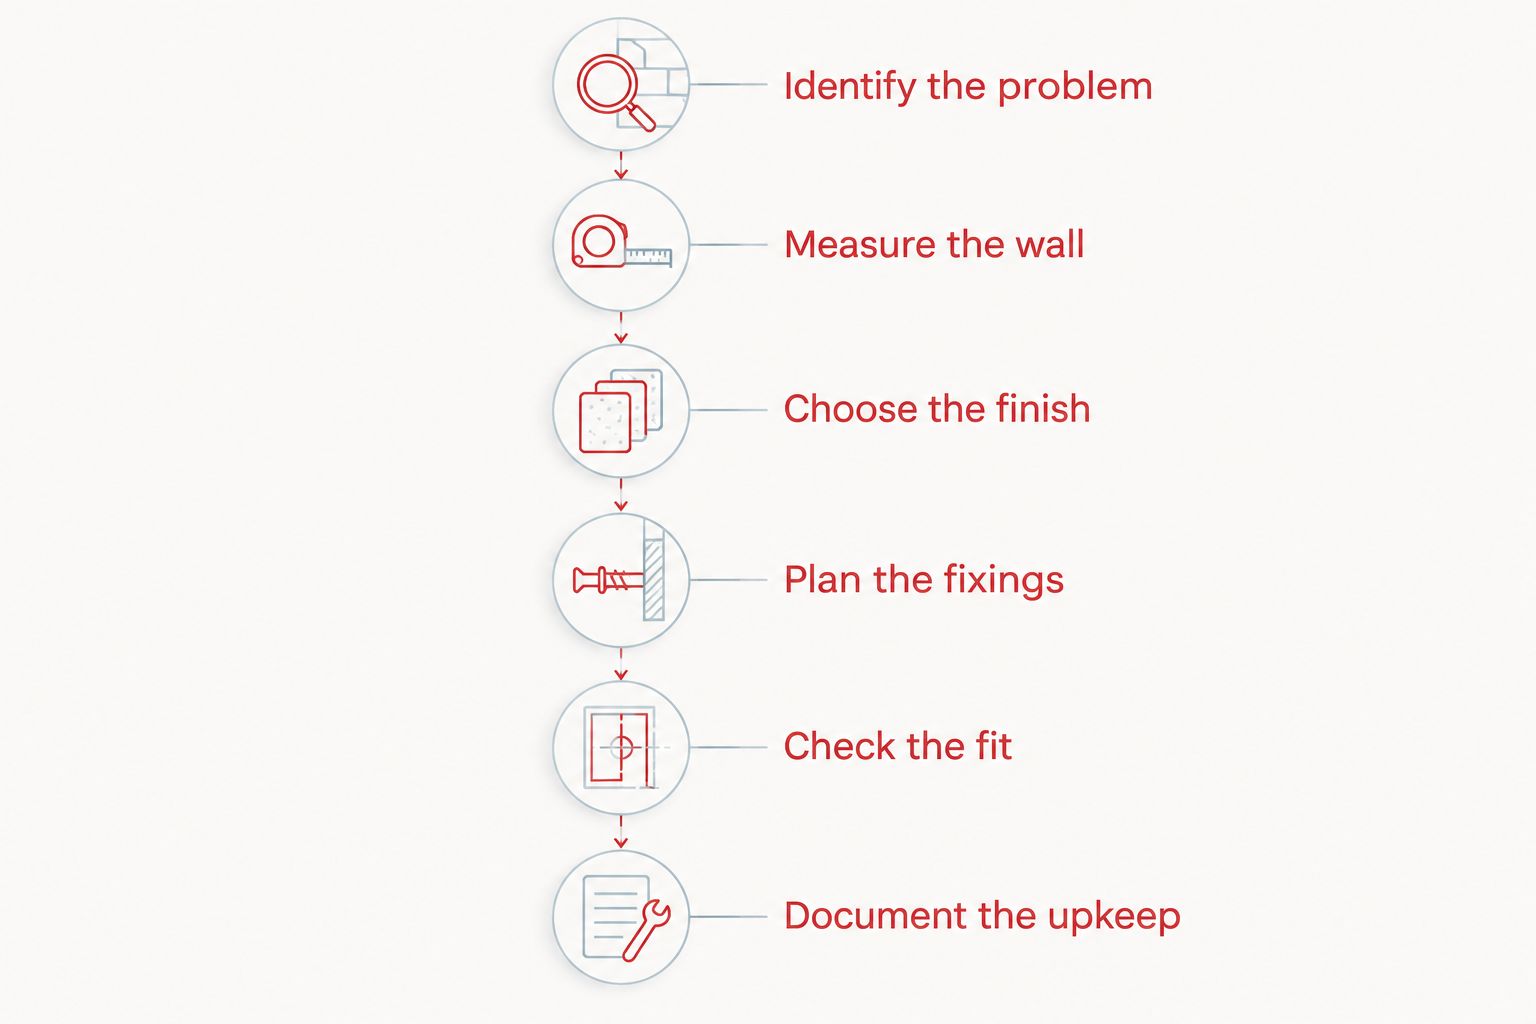
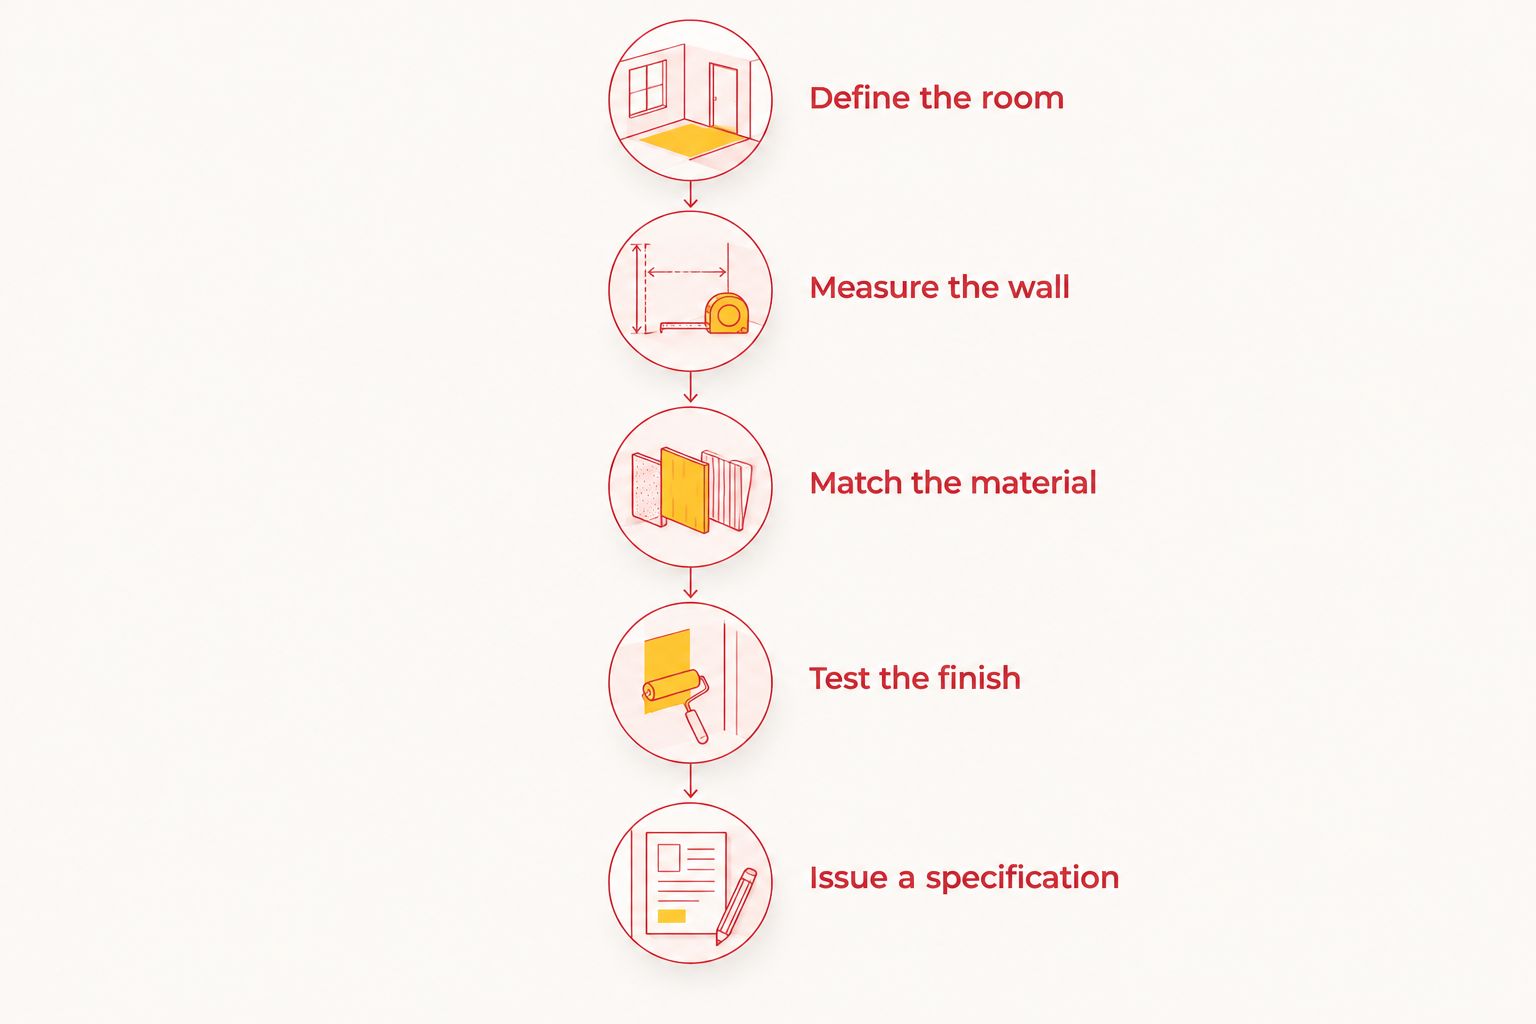
    Follow the same sequence for each room: Identify the problem, Measure the wall, Choose the finish, Plan the fixings, Check the fit, and Document the upkeep. Completing the planning stages first prevents the installation method from becoming an afterthought.

    Wall panel project sequence from identifying the problem to documenting upkeep
    Choose the finish and fixing method before checking the final layout.

    Check the fit

    Lay out the proposed arrangement before permanent fixing, using the method the manufacturer permits. Check how joints meet the floor, ceiling, corners, and furniture. A visually balanced arrangement should not require covering an outlet or leaving an unfinished exposed edge.

    Start installation only after the substrate meets the product’s requirements. Follow the specified sequence and recheck alignment as you work. Do not improvise a different mounting arrangement for an acoustic panel and assume its stated rating still applies.

    For a 2026 opening or relaunch, photograph the finished wall only after the room is clean and the work is complete. Inspect the installation from guest height and from beside the bed or sofa, where rough edges and awkward joints are easier to notice.

    • Check joint positions before permanent fixing.
    • Confirm the wall meets preparation requirements.
    • Keep vents, controls, and service openings accessible.
    • Inspect cut edges and perimeter finishing.
    • Remove tools, debris, and installation residues before guest access.

    Document the upkeep

    Build a cleaning routine from the selected panel’s care instructions. Test any permitted cleaner in an inconspicuous area before broader use, and give your turnover team the same written method. Do not assume wood, acoustic backing, PVC, and shower panels tolerate identical treatment.

    Create a small maintenance record with the product name, finish, installation date, care instructions, and photographs of the completed wall. Retain spare matching material when practical so a localized repair does not become an unnecessary redesign.

    Your 2026 handover should also explain what to report: loose edges, staining, moisture, and furniture damage. Cleaners should flag problems rather than hide them with a different chemical or a makeshift repair. Inspect any wet-area sealant and joints according to the installation system’s maintenance guidance.

    • Store the manufacturer’s care instructions with the property manual.
    • Record the exact finish and installation method.
    • Show cleaners how to reach grooves and recessed areas.
    • Set a reporting process for looseness, staining, and dampness.
    • Keep useful spare material and original purchase records.

    Compare wall panel options for your rental

    Choose by room function first, then compare appearance. The options below solve different problems; none is the automatic choice for every rental wall. Decorative texture alone does not establish acoustic, moisture, or fire performance.

    Option Best for Main benefit Key limitation
    Acoustic Slat Wood Wall Panels Hosts addressing echo in dry bedrooms or living rooms Combines a wood slat appearance with an acoustic purpose Does not establish sound isolation between rooms; follow the specified assembly
    3D Geometric Pattern Wooden Panels Hosts creating a decorative dry-room focal point A geometric pattern made from real solid wood Recessed geometry needs a deliberate cleaning plan; no acoustic rating is established here
    PVC wall panels Hosts comparing bathroom wall finishes An alternative to a wood finish PVC alone does not prove suitability inside a shower
    Shower wall panels Hosts renovating shower enclosures A panel category intended for shower applications Joints, sealing, substrate, and installation instructions remain essential
    Painted wall Hosts who want a simple finish without added wall depth Keeps the existing wall layout straightforward Does not provide a textured feature or acoustic treatment

    The Panel Hub’s two wood options below suit different decisions: the acoustic slat option for an absorption-focused comparison, and the geometric option for a decorative feature. Check the complete specifications and installation guidance before committing either to your rental.

    Wood panel options to compare
    3D Geometric Pattern Wooden Panels | GroovePanel®
    Geometric-pattern wall panels crafted from 100% real solid wood.
    $459

    Common mistakes Airbnb hosts make

    Treating echo and neighbor noise as the same problem

    Acoustic absorption addresses sound reflections within a room. Noise traveling through walls, doors, floors, or gaps requires a different assessment. Do not describe a listing as soundproof because you installed acoustic panels; check the actual noise problem and use accurate guest-facing language.

    Selecting a finish only for listing photographs

    A dramatic wall still needs reachable switches, workable furniture clearances, and a cleaning method. Review the proposed finish beside actual luggage and furniture positions. If its edges sit in a likely contact area, change the layout or select a more suitable documented finish.

    Assuming all bathroom panels belong in showers

    Bathroom humidity and direct shower exposure are different conditions. Require instructions covering the intended location, including seams, penetrations, and substrate preparation. A panel’s material name is not a complete waterproofing specification.

    Scheduling installation inside a tight turnover

    The hands-on fitting time is only part of the project. Wall preparation, permitted adhesive curing, cleanup, and inspection must happen before guest access. Schedule the work against the installation instructions rather than assuming it fits between checkout and check-in.

    Changing materials without updating the cleaning routine

    Your cleaner needs to know which surfaces have changed and which products are permitted. A familiar bathroom spray or scrubbing method is not automatically appropriate for wood or acoustic backing. Hand over the care instructions before the next stay, not after damage appears.

    FAQ

    What’s the best wall panel for an Airbnb bedroom?

    The best bedroom panel matches your objective: acoustic panels for reducing room echo, or decorative wood for a visual focal point. Check cleaning requirements, headboard clearance, and installation instructions before choosing.

    Will acoustic wall panels stop noise from the neighboring rental?

    Acoustic wall panels are not a substitute for sound isolation between rentals. They address room reflections; noise passing through walls, doors, floors, or gaps needs a separate assessment.

    Can I use wood wall panels in an Airbnb bathroom?

    Use wood panels in a bathroom only when the selected product’s documentation permits that application. For direct shower exposure, choose a documented shower-suitable system and follow its sealing and substrate requirements.

    Are PVC wall panels better than wood for a rental?

    PVC and wood serve different finish choices, so neither is universally better. Compare the intended room, documented moisture suitability, cleaning instructions, and repair method rather than choosing by material name alone.

    Can I install rental wall panels myself?

    You can undertake installation when the product instructions, substrate condition, and fixing method fall within your skills. Use a qualified professional for electrical changes or work you cannot safely complete, and obtain landlord permission where required.

    How do I clean wall panels between guest stays?

    Clean wall panels using the selected product’s care instructions. Give cleaners a written method, test permitted cleaning products discreetly, and ask them to report loose edges, staining, or moisture.

    How long should I allow for an Airbnb wall panel project?

    Allow time for measurement, preparation, installation, any required curing, cleanup, and inspection. A stated fitting duration does not cover every stage of a rental renovation, so schedule guest access around the complete installation requirements.

    One last thing

    Before ordering your 2026 feature wall, ask your turnover cleaner to review the proposed care instructions. That conversation tests whether the finish works operationally, not just visually. A wall your team can maintain is a better rental choice than one that looks good only on installation day.

    Related guides

  • Wall panels for home stagers and real estate agents: complete 2026 guide

    Wall panels for home stagers and real estate agents: complete 2026 guide

    Home stagers and real estate agents use wall paneling to add texture and define interior spaces with the aim of presenting a clear, finished home to prospective buyers. This 2026 guide to wall panels for home staging explains how to choose a feature wall, compare materials, and finish the installation without turning staging into an unnecessary renovation.

    TL;DR
    • The Panel Hub suits home stagers seeking decorative wood and acoustic wall panels for interior feature walls.
    • Choose wall panels for home staging around the room’s purpose, existing finishes, and seller-approved installation method.
    • Acoustic wall panels absorb room sound; decorative wood wall panels do not automatically provide acoustic performance.
    • Approve samples, photograph the layout, and resolve wall defects before installing permanent panels.

    Why wall paneling matters for home stagers and real estate agents

    A staging feature should explain the room, not become the room. A paneled headboard wall can establish a bedroom’s focal point; a wood slat wall can give a living area a defined backdrop. Choose the treatment around the furniture plan rather than adding texture to every available surface.

    Stagers and agents also face a different approval process from homeowners decorating for themselves. You need the seller’s permission, a finish that works with existing materials, and a completed installation before photography and showings. Permanent alterations need a clear agreement about what stays with the property.

    The Panel Hub sells acoustic and decorative wall panels for interior use. Its stated acoustic-panel specifications include an NRC rating of 0.85 and FSC certification; its brand description also states installation in under 2 hours and a 5-year warranty. Confirm the specifications and installation conditions for the exact panel you select rather than applying those claims to every decorative product.

    For your 2026 staging plan, treat those details as selection criteria—not evidence that paneling changes a property’s sale result. The practical question is whether the finished wall supports the room you need buyers to understand.

    Plan and install a staging feature wall

    1. Define the room’s job before choosing a panel

    Start with the existing room and a phone camera. Stand at the doorway, take a photograph, and identify what the room currently communicates. An empty corner, awkward furniture arrangement, or unfinished wall needs a different response from a room that simply lacks texture.

    Write a short brief before browsing materials: the intended room use, the wall that supports that use, and the finishes that must remain. A bedroom feature wall should work with the bed position. A living-room treatment should complement the seating arrangement without obscuring windows, outlets, or usable furniture space.

    Choose the smallest intervention that completes the room. If furniture placement, cleaning, or repainting resolves the problem, paneling is unnecessary. That decision protects the staging schedule and keeps the seller’s attention on work with a clear purpose.

    • Name the room’s intended use in the staging brief.
    • Photograph the wall from the doorway and the planned listing-photo position.
    • Mark furniture, outlet, switch, and window locations.
    • Get the seller’s written approval before any permanent alteration.

    2. Test the feature wall with a simple mockup

    Use a photograph, paper sketch, or removable layout markers to test the panel area before ordering. Follow the marking material’s instructions and test it on the existing finish first. A mockup lets you compare a full wall with a narrower treatment without committing to either.

    Look at the design from normal viewing positions, not just directly in front of it. Check whether the panel boundary feels deliberate beside the bed, sofa, doorway, and ceiling. Avoid stopping a treatment at a point that leaves an awkward strip or makes an outlet look stranded.

    For 2026 listing photography, approve the layout in the actual room rather than relying on a styled product photograph. Your room’s lighting, furniture, and camera angle determine how the pattern appears. Keep a photograph of the approved mockup so the installer and photographer work from the same plan.

    • Sketch the proposed panel boundary over a room photograph.
    • Compare a full-wall treatment with a limited feature area.
    • Check the layout from the doorway and seating position.
    • Record the approved boundary before ordering materials.

    3. Match the panel type to the staging problem

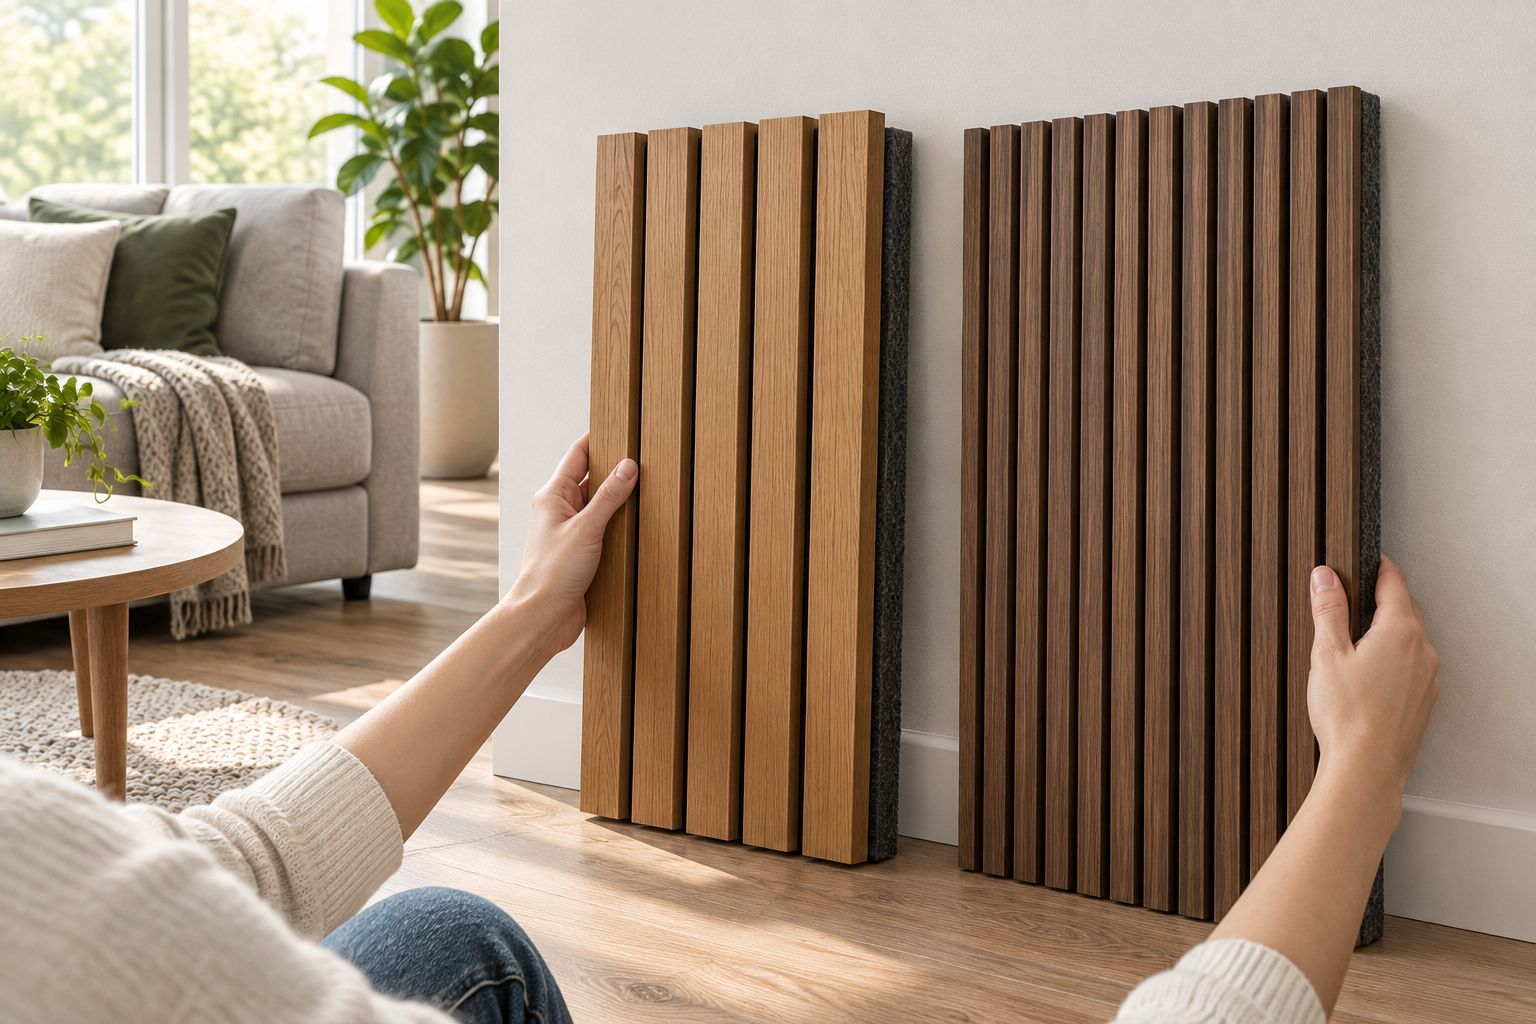
    First compare physical samples against the flooring, trim, and furniture. Evaluate texture as well as color: pronounced relief creates a different backdrop from closely spaced grooves. Keep the sample upright on the intended wall so you see it under the room’s actual light.

    Ready-made panels from The Panel Hub provide an alternative to designing and fabricating a custom wall treatment. Choose acoustic panels when sound absorption is part of the brief and decorative panels when the goal is visual texture. Do not treat the categories as interchangeable.

    NRC measures sound absorption under test conditions; it does not measure how much sound stops passing into another room. An NRC 0.85 rating is not a promise of soundproofing or a fixed reduction in household noise. Installation conditions matter, so check the documentation before including an acoustic claim in listing copy.

    • Compare samples beside existing flooring and trim.
    • Separate decorative requirements from acoustic requirements.
    • Verify the exact product’s material and installation instructions.
    • Keep listing descriptions aligned with documented specifications.

    4. Check the wall and approve the attachment method

    Inspect the wall before deciding how panels will attach. Look for damp patches, loose paint, uneven surfaces, and damaged areas. Investigate defects rather than hiding them behind a new finish; staging must not conceal a condition the seller needs to address.

    Read the selected panel’s instructions for substrate preparation, adhesive, fasteners, and edge finishing. Do not substitute an attachment method solely because it appears quicker. For unfamiliar surfaces or substantial wall damage, have a qualified installer assess the work before setting the photography date.

    The Panel Hub’s under-2-hour installation statement does not remove preparation, cutting, adhesive curing, or cleanup from your project plan. A 5-year warranty also does not establish that every attachment method qualifies. Confirm those conditions for the chosen system and keep the documentation with the seller’s project records.

    • Inspect the substrate and investigate visible wall defects.
    • Confirm the manufacturer-approved attachment method.
    • Plan cuts around outlets without blocking access.
    • Schedule preparation and curing separately from panel placement.

    5. Coordinate wood tone, texture, and lighting

    Build the finish decision around what stays in the property. Hold the panel sample beside the floor, doors, cabinetry, and trim, then repeat the check with your staging furniture in place. An attractive sample is not enough if its tone competes with the room’s permanent finishes.

    For wood, decide whether you want a close tonal relationship or an intentional contrast. For geometric relief, check the shadows across the pattern. Avoid adding an equally busy rug, wall art, and upholstery arrangement just to match a textured wall.

    A useful 2026 staging test is to photograph the sample in daylight and under the lights you will use for showings. Review both images before approving the finish. The aim is a coherent room, not a panel that looks good only under a particular showroom light.

    Staged bedroom with a wood slat headboard wall, simple bedding, and coordinated wood flooring
    Check the panel finish against the flooring and furniture that will appear in listing photographs.

    Keep the sample decision attached to the room brief. That prevents a later substitution from changing the approved tone or texture without review.

    • Compare the sample with permanent finishes first.
    • Check the wall in daylight and under showing lights.
    • Simplify nearby furnishings when the panel pattern is prominent.
    • Save photographs of the approved finish in the room.

    6. Sequence installation before the photography deadline

    Build the schedule backward from photography, using the selected product’s instructions rather than a general promise of fast installation. Leave time for wall preparation, material checks, cuts, attachment, required curing, and finishing. Keep photography separate from active installation work.

    Before attaching anything, lay out the panels and review pattern direction, seams, and end cuts. Confirm how exposed edges will finish. A clean central pattern does not compensate for unfinished boundaries around a doorway or visible cuts beside a switch.

    Complete the wall before placing the final staging furniture. Protect the floor during work, remove debris, and inspect the finish before bringing textiles and accessories back into the room. Keep the seller informed if the approved scope changes; do not solve an installation problem with an unapproved permanent alteration.

    • Check materials and pattern direction before attachment.
    • Approve seam placement and exposed-edge treatment.
    • Follow the required curing and finishing instructions.
    • Inspect and clean the room before the photographer arrives.

    7. Verify the result and prepare the seller handoff

    Finish with the same doorway photograph you used at the start. Compare the completed wall with the approved mockup and check whether the furniture still establishes the intended room use. Review seams, edges, outlets, and the area behind movable furniture.

    Listen to the room if you installed acoustic panels, but keep that informal check separate from a measured performance claim. A room sounding different does not establish a soundproofing result. Listing copy should describe the installed material and documented specifications without promising an untested outcome.

    Give the seller the product details, installation instructions, care guidance, and warranty documentation. Record whether the panels remain with the property, particularly when staging furnishings are removed. That handoff makes the treatment understandable after the staging team has left.

    • Compare the completed wall with the approved layout.
    • Inspect edges, seams, and electrical access.
    • Use only documented product claims in listing copy.
    • Give the seller the installation and care records.

    Compare wall-panel options for staging in 2026

    The Panel Hub is best for home stagers seeking decorative wood and acoustic wall panels for interior feature walls. The choice within that range depends on whether the room needs sound absorption, visible pattern, or neither.

    The table separates benefits from limitations. Start with the simplest treatment that addresses the room brief; a more elaborate pattern is not automatically a better staging decision.

    Option Best for Main benefit Key limitation
    Painted wall without panels Rooms already supported by furniture and finishes Keeps the backdrop simple Adds no panel texture or acoustic treatment
    Acoustic Slat Wood Wall Panels | SoundPanel™ Living areas or home offices needing slat texture and acoustic treatment Combines a wood-slat appearance with an acoustic-panel format Requires verification of the rated installation; does not establish sound isolation
    3D Geometric Pattern Wooden Panels | GroovePanel® A defined bedroom or living-room feature wall Adds geometric relief; the product description specifies 100% real solid wood A prominent pattern needs restrained surrounding decor; acoustic performance is not stated
    Custom-built wall paneling Projects requiring a tailored layout Lets the design follow the room’s particular dimensions Requires separate design, fabrication, and finishing decisions

    Choose the acoustic slat option when absorption belongs in the project brief. Choose the geometric option when pattern is the reason for adding panels. Neither recommendation replaces checking samples, attachment requirements, and the existing wall.

    Panels to compare for your staging brief
    3D Geometric Pattern Wooden Panels | GroovePanel®
    Geometric wall panels crafted from 100% real solid wood.
    $459

    Common mistakes home stagers and real estate agents make

    Covering a defect instead of resolving it

    Paneling is a finish, not a diagnosis. Investigate dampness, damaged surfaces, or loose material before installation, and keep the seller involved in decisions about repairs.

    Choosing a statement wall without a furniture plan

    A dramatic wall cannot establish a bedroom if the bed placement remains unresolved. Approve the furniture layout first, then choose the panel boundary and pattern around it.

    Calling acoustic panels soundproof

    Sound absorption and sound isolation describe different functions. Use the exact product specification in your 2026 listing materials, and do not turn an NRC rating into a claim about noise passing between properties.

    Assuming fast installation means immediate photography

    Attachment is only part of the work. Surface preparation, curing, edge finishing, cleanup, and staging furniture placement all belong in the schedule before the photographer arrives.

    Forgetting that the seller inherits the treatment

    Permanent panels need an owner-approved finish and a documented handoff. Keep care instructions and warranty records accessible, and state clearly what remains when staging items leave.

    FAQ

    What are the best wall panels for home staging?

    The best wall panels for home staging match the room’s purpose and existing finishes. Acoustic slat panels suit a brief that includes sound absorption, while decorative wood panels suit a visual feature wall; approve samples before choosing.

    Should I install wall panels before listing a house?

    Install wall panels before listing only when the treatment solves a defined presentation problem and the seller approves the alteration. Complete preparation, installation, finishing, and cleanup before listing photography.

    Are acoustic wall panels the same as soundproofing?

    Acoustic wall panels are not the same as soundproofing. They absorb sound within a room; an NRC rating does not measure sound transmission through the wall into another space.

    Can I remove staging wall panels without damaging the wall?

    Do not assume staging wall panels can be removed without damage. Adhesives and fasteners affect the existing finish, so confirm the attachment and removal requirements before the seller approves installation.

    Which room should get a paneled feature wall?

    Choose the room where a feature wall supports a clear furniture arrangement and room purpose. A bedroom headboard wall or living-room seating backdrop is a useful starting point, provided the treatment works with windows, outlets, and permanent finishes.

    Can decorative wood panels go inside a shower?

    Use decorative wood panels inside a shower only if the exact product documentation explicitly approves that application. An interior-use description does not establish suitability for direct water exposure; select a documented shower wall system instead.

    What should agents say about wall panels in a listing?

    Agents should describe the installed panel material, location, and documented features. Do not promise soundproofing, a higher sale result, or certifications that have not been verified for the exact product.

    One last thing

    Photograph the approved sample before you order—not just the finished wall afterward. That image records the relationship between the panel, floor, trim, and furniture while changes are still easy to make. For a 2026 staging project, keep it beside the seller’s written approval and the final installation photograph; together, they give you a clear record of the intended result and completed work.

    Related guides

  • ThePanelHub vs Wood Panel Walls: which is better in 2026

    ThePanelHub vs Wood Panel Walls: which is better in 2026

    Choose The Panel Hub if you want decorative acoustic wall panels with a stated NRC 0.85 rating; choose Wood Panel Walls if the exact panel you are considering better matches your material, finish, and installation requirements. For this 2026 comparison, the deciding factor is the panel specification—not which retailer has the more attractive room photograph.

    TL;DR
    • For thepanelhub vs wood panel walls, compare exact products rather than assuming every wood panel performs alike.
    • The Panel Hub acoustic wall panels have a stated NRC 0.85 rating; decorative wood panels need separate acoustic evidence.
    • Choose solid wood for its construction, not as a substitute for documented sound absorption.
    • Verify mounting requirements, finish compatibility, and warranty coverage before ordering either option.

    Why this matters

    A bedroom feature wall and an echo-prone living room need different things. One needs a finish you enjoy looking at; the other also needs a panel assembly designed to absorb sound.

    The Panel Hub is the better-documented acoustic wall panel option in this comparison. Its stated acoustic rating gives you a performance criterion beyond appearance, although it does not establish a measured advantage over every competing panel.

    Start with the SoundPanel American acoustic slat wood wall panels. Then compare the competing product’s construction and mounting instructions against the same requirements. Your 2026 purchase should solve the room’s actual problem rather than simply add another wood surface.

    At a glance

    Dimension The Panel Hub Wood Panel Walls
    Best for Homeowners seeking decorative panels with a stated acoustic rating Buyers whose selected panel better meets their documented project requirements
    Standout feature Stated NRC 0.85 acoustic rating Establish from the exact product specification
    Sound control Acoustic panels available; absorption is distinct from sound isolation Compare acoustic test evidence and mounting conditions
    Material construction Catalog includes MDF-based acoustic panels, wood veneer, and solid wood designs Confirm face material, core, and backing separately
    Decorative finish Slat, geometric, and textured wood options in the supplied catalog Compare the selected finish and pattern against your room
    DIY installation Retailer describes installation in under 2 hours; project scope still matters Follow the selected panel’s installation instructions
    Support and warranty Retailer states a 5-year warranty Check the selected product’s written warranty terms
    Pricing model Individual product purchasing through an online retail catalog Compare the actual order structure and included materials

    The competitor column is a purchase checklist, not a claim that Wood Panel Walls lacks these features. A retailer-level comparison cannot establish product-level equivalence. Use the table to identify what must match before you decide.

    Best fit: rated acoustic panels win for an echo-focused project

    If conversations sound sharp or your television reflects around a sparsely furnished room, prioritize acoustic construction. A decorative pattern alone does not establish sound absorption. Look for a rating tied to the panel assembly you intend to install.

    For a purely visual update, the decision changes. You can prioritize grain, color, pattern, and edge treatment without paying attention to an acoustic feature your project does not require.

    These are the two useful buyer profiles:

    • Best for echo control: a homeowner comparing acoustic panels using documented test results and installation conditions.
    • Best for a decorative feature wall: a homeowner comparing the actual surface, construction, and finished layout.

    Wood Panel Walls becomes the appropriate choice when its selected product satisfies your requirements better. That is a genuine buying condition, not evidence of a universal advantage. Do not turn a preference for one finish into a claim about an entire retailer.

    Acoustic evidence beats appearance, but absorption is not soundproofing

    The stated NRC 0.85 rating is the strongest acoustic detail available for this comparison. NRC means Noise Reduction Coefficient, a summary measure of sound absorption under test conditions. It does not measure how much sound a wall prevents from entering the next room.

    Choose an acoustic panel to address reflections inside a room; do not treat its NRC rating as a soundproofing guarantee. Neighbor noise, sound through a shared wall, and gaps around a door are different problems.

    Before comparing acoustic products, ask for:

    • The test report or supporting technical documentation.
    • The mounting arrangement used for the stated result.
    • Any backing or air space required by the installation.
    • Confirmation that the rating applies to your selected product.

    A panel installed differently from its tested assembly does not automatically deliver the same result. Likewise, a solid wood decorative panel should not inherit an acoustic rating from another product in the same catalog.

    For your 2026 shortlist, compare equivalent evidence. A photograph of felt-backed slats is not a substitute for a documented acoustic result from either seller.

    Solid wood and wood veneer serve different priorities

    The supplied catalog includes both MDF-based acoustic panels and products identified as solid wood. That distinction matters. A wood-faced panel is not necessarily solid wood throughout, and an MDF core does not make the visible wood finish irrelevant.

    Choose construction according to your goal, not according to which material name sounds more impressive. Acoustic performance depends on the assembly; appearance depends on the surface and pattern; installation depends on the complete panel.

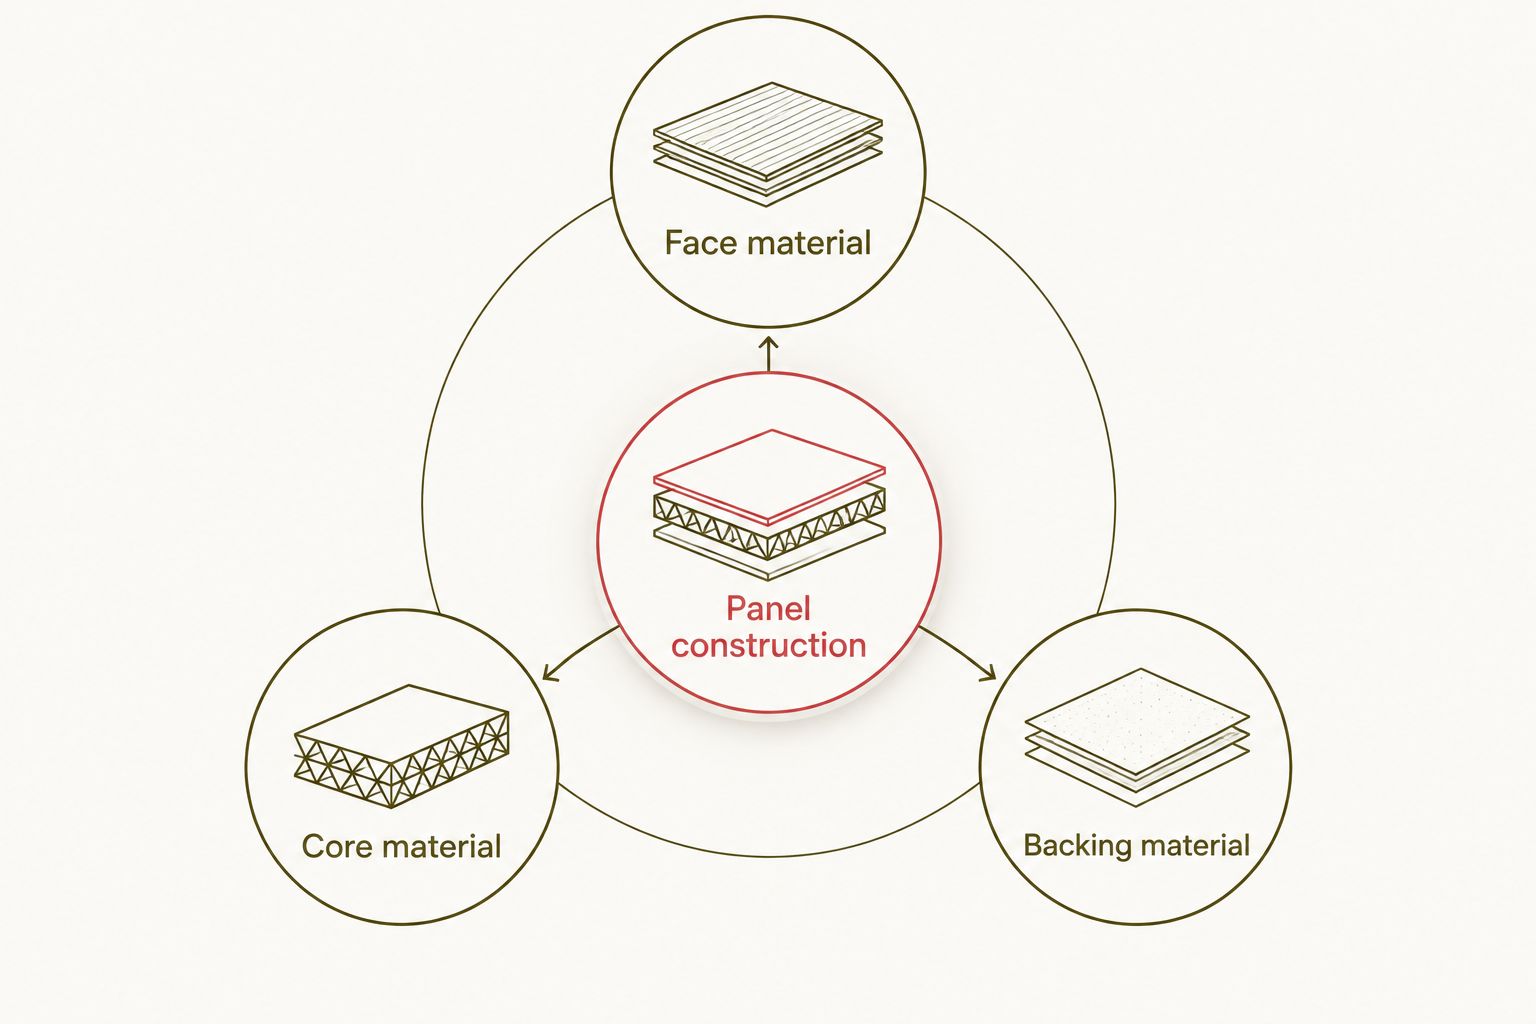
    For each option, separate these three elements:

    • Face material: the surface you see and touch.
    • Core material: the structure beneath that surface.
    • Backing material: the layer behind the decorative face.

    These labels prevent an unfair comparison between a veneered acoustic assembly and a decorative solid wood panel. Both can be suitable interior choices, but they answer different requirements.

    Panel construction diagram separating face material, core material, and backing material
    Compare the complete construction, not just the visible wood surface.

    The retailer also identifies its real wood acoustic offering as FSC certified. Treat certification as a sourcing consideration, separate from sound absorption, and confirm the documentation for the panel you select.

    Decorative finish is a personal choice, not a brand-level win

    Slats, geometric patterns, and textured wood create different visual effects. Repeated vertical lines emphasize direction, while smaller geometric elements draw attention to the surface itself. Neither approach is automatically better for a bedroom or living room.

    Both retailers belong on a decorative shortlist only when their selected products fit your room. This dimension has no defensible overall winner without comparing actual finishes side by side.

    For a calmer wall behind a bed or television, consider how the pattern interacts with furniture and lighting. For a statement wall, check whether the texture competes with artwork, shelving, or an already busy floor.

    Look at the finish under your own room lighting whenever a sample is available. Screen images cannot settle how a wood tone relates to your flooring or furniture.

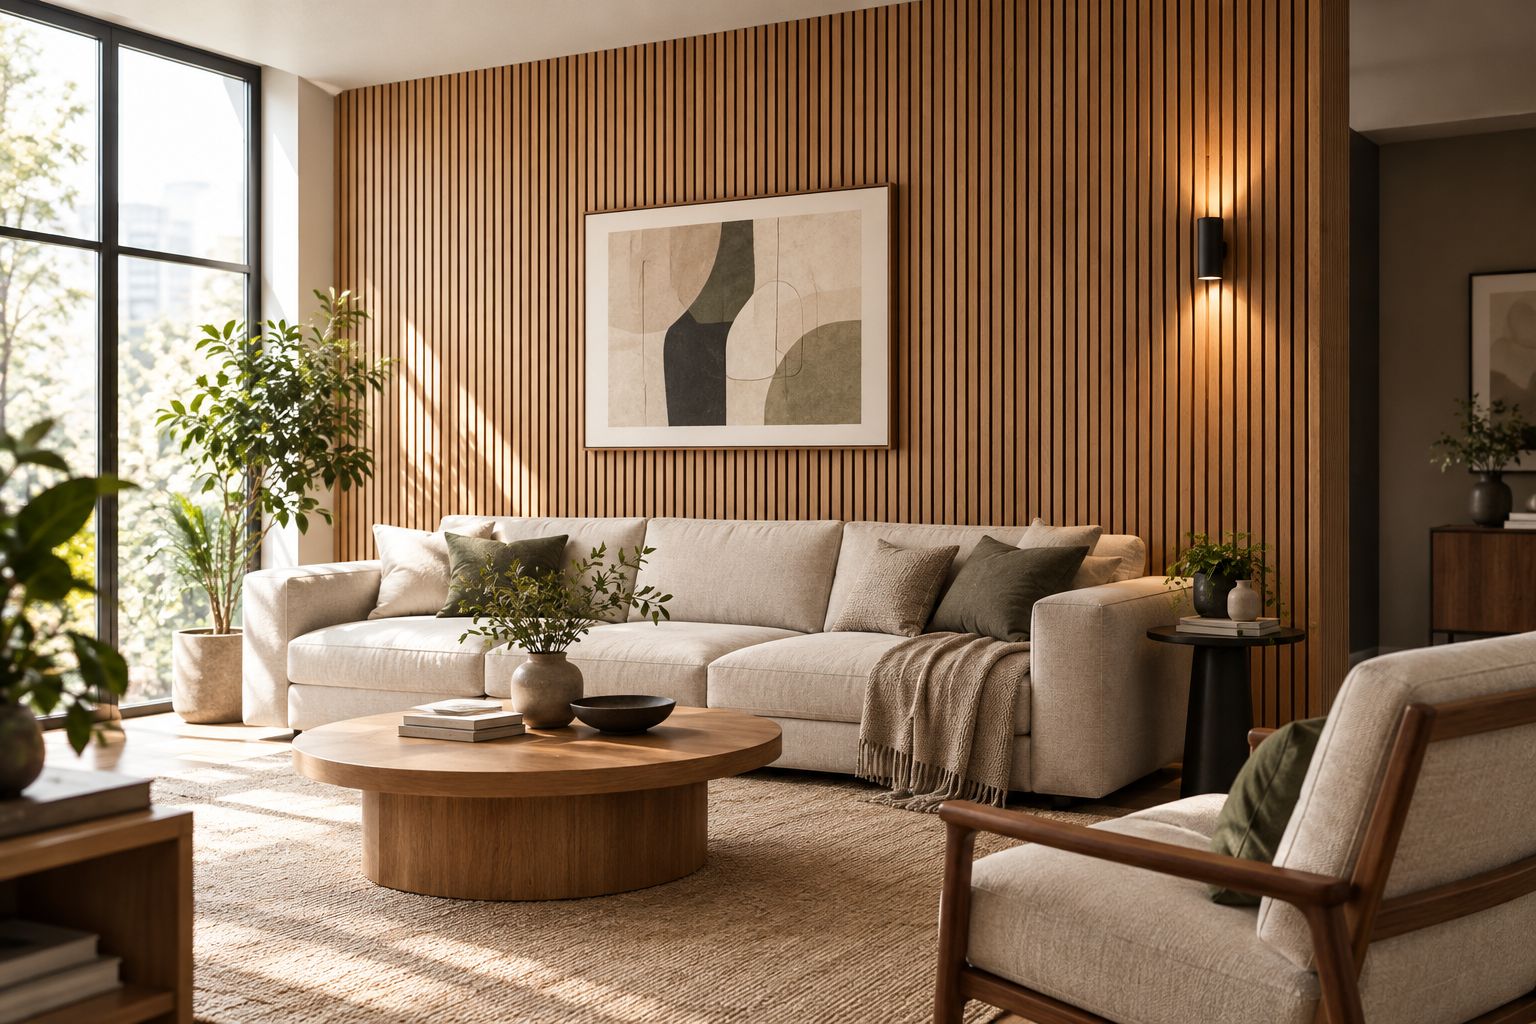
    Vertical wood slat feature wall paired with simple living room furniture
    Let the wall pattern complement the furniture rather than compete with it.

    The following products illustrate the difference between an acoustic slat option and a decorative solid wood option. They are not interchangeable performance claims.

    Two different panel approaches
    Acoustic Slat Wood Wall Panels | SoundPanel™
    MDF-based wood wall panel with walnut and American oak slat options described in the catalog.
    $799

    DIY installation is a project-level comparison

    The retailer describes installation in under 2 hours. Treat that as a stated installation benefit, not a promise that every room, wall condition, or cutting task fits the same schedule.

    An unobstructed feature wall and a wall with outlets, corners, and uneven surfaces involve different work. Preparation matters before either panel reaches the wall.

    Neither retailer wins on installation speed without equivalent project conditions. Compare the instructions for the exact products, including wall preparation, permitted fasteners, adhesive requirements, trimming, and edge finishing.

    Before ordering, work through this checklist:

    • Confirm that the existing wall is suitable for the specified mounting method.
    • Plan panel joints and the visible edges before cutting.
    • Identify outlets, switches, and other interruptions.
    • Check whether the acoustic installation requires a particular backing arrangement.
    • Account for tools and finishing work separately from panel attachment.

    The wall panels for DIY beginners guide addresses the same buying priority: match the panel system to the work you can complete confidently. Do not choose an unfamiliar mounting method solely because a finished room looks simple.

    Finish compatibility deserves its own check

    For a 2026 room update, decide whether you want a factory-finished surface or a panel you intend to refinish. Those are different purchase requirements. Do not assume that a decorative wood face, an MDF-based assembly, and an acoustic backing accept the same treatment.

    Choosing paints for wood surfaces involves matching the coating to the substrate and its existing finish; adding paint without confirming compatibility can create an avoidable mismatch between your chosen panel and the finished room.

    Keep any refinishing plan consistent with the product instructions. For acoustic panels, also check whether a proposed treatment affects exposed backing, openings, or other parts of the sound-absorbing assembly. Do not infer compatibility from the word wood alone.

    A stated warranty helps, but its scope determines the protection

    The Panel Hub states a 5-year warranty. That is useful information for a homeowner planning a lasting interior update, but the duration alone does not explain which defects, installation conditions, or remedies the warranty covers.

    Compare written coverage, not just the headline term. Before purchasing from either retailer, identify who handles a claim, what documentation you must retain, and which installation requirements apply.

    Ask the same questions of both sellers:

    • Does the warranty cover the selected product and intended room?
    • Which conditions or installation methods are excluded?
    • What proof of purchase and installation records are required?
    • What remedy does the written policy provide?

    This is also where the limits of the comparison matter. A stated warranty duration does not establish better service, easier claims, or broader coverage than a competitor’s policy.

    Pricing: compare the complete project, not the displayed panel

    The supplied catalog uses individual product listings. That supports a product-purchase comparison, not a subscription or service-plan comparison. The relevant question is what your complete wall requires.

    Build the same order scope for each retailer before choosing. Include panel coverage, mounting materials, required backing, edge treatment, and any professional work your project needs.

    Predictability comes from a complete specification, not from the smallest-looking order. A clearly defined panel assembly lets you identify the materials needed before installation. Flexibility matters when you are still deciding coverage, finish, or layout, but an incomplete order can leave essential components unresolved.

    For a fair 2026 comparison, use the same wall measurements and intended installation on both sides. Package count is not a meaningful comparison unless you also know what each package covers and includes.

    Final verdict: choose by evidence and room requirements

    Choose The Panel Hub if you want documented acoustic criteria

    Best for: homeowners upgrading an echo-prone bedroom or living room who want decorative acoustic panels with a stated NRC 0.85 rating.

    Choose this option when the selected panel’s construction, mounting requirements, and finish fit your project. Its stated installation benefit, FSC certification, and warranty provide additional criteria to verify—not reasons to skip product-level checks.

    Choose Wood Panel Walls if its selected product fits your brief better

    Best for: homeowners whose preferred panel has documented construction, a suitable finish, and installation requirements that better match their wall.

    Choose this option when the actual product comparison favors it. A better finish match is a valid reason to buy; an assumed acoustic or service advantage is not.

    Dimension Winner
    Best fit Acoustic buyer: documented rating; decorative buyer: product match
    Standout feature Stated NRC rating is the clearest documented differentiator
    Sound control No measured head-to-head winner established
    Material construction Project-specific choice
    Decorative finish Personal preference; no overall winner
    DIY installation No equivalent-project speed winner established
    Support and warranty Compare written coverage before choosing
    Pricing model Compare complete project orders

    FAQ

    Is The Panel Hub better than Wood Panel Walls in 2026?

    The Panel Hub is the better-documented option here for buyers seeking acoustic wall panels with a stated NRC 0.85 rating. A universal winner requires matching the exact competing products, installation conditions, and written terms.

    Do acoustic wood wall panels soundproof a bedroom?

    Acoustic wood wall panels absorb sound within a room; they do not automatically soundproof it. Sound traveling through walls, doors, and gaps requires a separate assessment.

    What does NRC 0.85 mean for wall panels?

    NRC 0.85 is a summary sound-absorption rating under test conditions. It is not a guarantee of equivalent room-wide noise reduction or sound isolation.

    Are solid wood panels better than MDF-based acoustic panels?

    Solid wood panels are not automatically better than MDF-based acoustic panels. Choose solid wood for the construction and appearance you want, and compare documented acoustic performance separately.

    Can I install wood wall panels myself?

    You can assess DIY suitability from the selected panel’s installation instructions and your wall condition. Check mounting requirements, cutting tasks, outlets, and edge finishing before ordering.

    Can I paint wood acoustic panels?

    Paint acoustic panels only when the product instructions permit the proposed treatment. A wood face and an acoustic backing need separate compatibility checks.

    How should I compare wall panel orders?

    Compare complete orders for the same wall and installation method. Include coverage, backing, mounting materials, and finishing components rather than comparing package counts alone.

    One last thing

    Decide where the panel ends before deciding which panel wins. A wall can look excellent in the center and unfinished at its edges. Sketch the boundaries around baseboards, corners, windows, and furniture before committing to a pattern; that small planning step connects the showroom look to your actual room.

    Related guides

  • Wall panels for new home builders and developers: complete 2026 guide

    Wall panels for new home builders and developers: complete 2026 guide

    Home builders’ wall paneling is an interior finish system designed to add texture, manage room acoustics, or finish suitable wet areas with the aim of delivering a practical, attractive home. This 2026 guide explains how to specify wall panels for home builders and developers, where room-by-room requirements differ, and how to keep installation details consistent across a development.

    TL;DR
    • The Panel Hub is a good fit for builders selecting decorative and acoustic wall panels for homeowner-focused interiors.
    • Specify wall panels for home builders by room use, substrate, installation method, and maintenance requirements.
    • Acoustic wall panels reduce reflected sound; they do not replace a sound-isolating wall assembly.
    • Wood wall panels and shower wall panels need different specifications, installation details, and approval checks.

    Why wall paneling matters for home builders

    For home builders, a wall panel is more than a finish selection. It changes how you coordinate electrical outlets, skirting, door trim, wall preparation, and the final inspection. A finish that looks right in a sample can still create awkward junctions when repeated across different floor plans.

    Specify the room’s job before choosing the panel’s appearance. Living rooms need a coherent feature wall; home offices need attention to reflected sound; bathrooms require materials and assemblies suitable for their actual moisture exposure. The wall panels for home offices guide covers that room-specific starting point.

    For a 2026 development, separate the standard finish package from buyer-selected upgrades. Your drawings should identify where each option starts and stops, who prepares the wall, and who approves the completed work. That prevents an attractive showroom choice from becoming an unresolved site detail.

    Acoustic absorption also needs a clear explanation at handover. Reducing echo inside a room is different from reducing sound transmission between rooms. Decorative paneling does not automatically provide either benefit: require documentation for the performance you intend to promise.

    How to specify and install wall panels

    1. Define the purpose of each wall

    Start with your floor plan, room schedule, and a simple spreadsheet. Mark the walls that need decoration, acoustic treatment, splash protection, or a combination supported by the selected system. This manual exercise establishes the brief before a supplier’s catalog shapes the decision.

    Avoid using one panel type everywhere just to simplify ordering. A bedroom feature wall and a shower enclosure have different exposure conditions, detailing requirements, and maintenance needs. Group rooms by those requirements, then choose finishes within each group.

    For developments with repeated layouts, define a standard wall location rather than leaving installers to choose it. Record the viewing direction and furniture relationship as well. A panel arrangement behind a bed needs a different visual center from one beside a doorway.

    Include the homeowner’s likely use without assuming a particular furniture purchase. Keep switches accessible and consider where future shelves or wall-mounted equipment need structural support. Finish decisions should not remove useful wall functions.

    • Room purpose: identify the main decorative or practical requirement.
    • Exposure conditions: distinguish dry rooms, splash zones, and direct wet areas.
    • Feature boundaries: mark the panel’s start, finish, and return locations.
    • Future fixtures: record locations that need support behind the finish.

    2. Measure the wall and resolve its junctions

    Use a tape measure, a level, and a marked-up elevation before ordering. Measure the actual wall rather than relying only on the floor plan. Record openings, ceiling changes, and corners so the panel layout accounts for the built conditions.

    Set out the visible pattern before calculating quantities. The useful question is not simply how much wall area exists; it is where full panels, cuts, seams, and edge treatments will land. An area calculation alone does not show whether the final strip beside a door will look deliberate.

    For your 2026 construction drawings, coordinate finish thickness with electrical boxes and trim. Have the responsible trades resolve any required adjustments under applicable requirements. Do not let a finish installer improvise electrical work or conceal access points.

    Use these four checks as the measurement record. Keep a photograph or sketch beside each measurement so the next person can understand exactly what was measured.

    Four wall-panel planning checks covering dimensions, openings, support locations, and edge details
    Resolve openings and edges before turning wall area into an order quantity.

    The completed elevation should become the shared reference for the buyer, site team, and installer. Update it when the built wall differs from the original design.

    • Site dimensions: record wall height, width, and changes in plane.
    • Opening positions: locate outlets, switches, windows, and doors.
    • Support locations: identify backing for future mounted fixtures.
    • Edge details: specify corners, exposed ends, skirting, and ceiling junctions.

    3. Match the panel type to the room

    Start by comparing material samples and installation documents yourself. Check the surface, core, backing, and intended use separately; a wood-facing finish does not mean the complete panel is solid wood. Ask for product-specific evidence before adding acoustic, moisture, or certification claims to a specification.

    The Panel Hub offers decorative and acoustic wall panels for interior use. Its stated real wood acoustic offering includes an NRC 0.85 rating, FSC certification, installation in under 2 hours, and a 5-year warranty. Confirm the applicable product, tested mounting arrangement, installation scope, certification documentation, and warranty terms before transferring those claims into a development specification.

    Those figures answer different questions. NRC describes sound absorption, not sound isolation; a short installation claim does not include every trade activity needed to finish a new-build room. Warranty duration also does not establish suitability for a wet area or replace installation instructions.

    The Panel Hub is best for builders sourcing decorative and acoustic wall panels for homeowner-focused interiors. Treat it as a finish retailer, not a substitute for project-specific technical approval.

    Option Best for Main advantage Key limitation or approval check
    Acoustic Slat Wood Wall Panels | SoundPanel™ Living rooms and home offices where acoustic treatment is part of the brief Combines a slatted wood appearance with an acoustic product category Verify the product’s absorption report and mounting requirements; do not specify it as sound isolation
    3D Geometric Pattern Wooden Panels | GroovePanel® Dry-room feature walls with a geometric finish The supplied description identifies real solid wood construction Decorative texture does not establish acoustic performance or wet-area suitability
    Decorative PVC wall panels Interior locations where the documented cleaning and moisture characteristics fit Provides an alternative to a wood finish PVC material alone does not establish suitability for direct shower exposure
    Shower wall panel systems Shower enclosures with an approved complete installation system Allows a coordinated approach to panels, joints, and penetrations Performance depends on the full assembly, not the panel face alone
    Conventional painted walls Rooms that do not need panel texture or documented acoustic treatment Keeps the finish specification simple Does not provide the texture or acoustic function of a specified panel system

    For dry-room selections, compare the acoustic and geometric options below after checking the documents against your room schedule. Neither option should be assigned to a shower or a rated wall assembly without the required evidence.

    Dry-room panel options
    3D Geometric Pattern Wooden Panels | GroovePanel®
    Geometric decorative wall panels described as crafted from real solid wood.
    $459

    Before approving either finish, make the following checks part of the specification rather than leaving them in an email thread.

    • Confirm the complete material construction and intended interior use.
    • Request the installation instructions and relevant performance documentation.
    • Match acoustic claims to the tested assembly, not just the facing material.
    • Check cleaning instructions and warranty conditions against the homeowner handover.

    4. Approve a full-size junction mockup

    Build a representative wall section before repeating the finish across homes. Use the intended substrate, fixing method, trim, and adjacent paint finish. A loose sample shows color and texture; an installed mockup shows whether the whole detail works.

    Choose a section that includes an awkward junction. An outlet, internal corner, or transition to a door casing reveals more than an uninterrupted rectangle of paneling. Review the arrangement under the lighting planned for the room, because relief and slat spacing create visible shadows.

    Wood slat wall mockup showing an outlet, painted-wall transition, and baseboard junction
    Approve the junctions, not just the appearance of an uninterrupted panel.

    Set the acceptance criteria before the mockup review. Identify which edges must be concealed, where joints are permitted, and what alignment the installer must maintain. Photograph the approved result and retain the physical reference when practical.

    A mockup also gives you a place to test the specified cleaning method and inspect the finished edges. Do not introduce an unapproved adhesive, coating, or sealant just to improve the sample’s appearance.

    • Include a cut edge, an opening, and an adjoining finish.
    • Review pattern alignment from the normal room entrance.
    • Confirm access to switches, outlets, and required service points.
    • Record approved materials, fixing methods, and finish details.

    5. Coordinate installation with the site program

    Use your existing construction schedule to assign preparation, installation, and protection tasks. Check that the substrate meets the panel manufacturer’s requirements before the finish crew starts. Paneling should not become a way to conceal unresolved moisture, unstable surfaces, or incomplete building work.

    Follow the selected product’s instructions for storage, acclimation where required, substrate preparation, and fixing. Do not substitute a generic adhesive recommendation for product-specific guidance. Keep decorative finishes separate from the design of fire-rated or other regulated assemblies.

    For a 2026 program, define the release condition for each room. The site team should know who confirms that preceding work is complete and who accepts responsibility for the prepared wall. This is especially important when several trades work around the same feature wall.

    Protect completed panels from subsequent work. Specify how access equipment, painting, electrical finishing, and cleaning will occur without damaging the surface. Agree on the replacement process before installation begins, including how a damaged panel can be removed under the approved fixing method.

    • Assign substrate inspection to a named responsible trade.
    • Confirm materials and fixings against the approved specification.
    • Coordinate outlets and fixtures before closing the finish surface.
    • Follow product instructions for wet-area joints and penetrations.
    • Record protection and repair responsibilities in the site schedule.

    6. Inspect the installation and prepare the homeowner handover

    Inspect completed paneling against the approved elevation and mockup, not against memory. Check the whole wall first, then examine edges, seams, penetrations, and transitions. Verify that required access remains usable and that mounted items attach to the intended support.

    Separate visual acceptance from performance documentation. An attractive installation does not prove acoustic performance, certification, or wet-area suitability. Keep the relevant product records with the finish schedule so your customer-facing descriptions match the actual installation.

    Prepare a short homeowner care sheet using the selected manufacturer’s instructions. Include cleaning restrictions, precautions for adding fixtures, and the process for reporting a defect. Do not present every panel in the home as having the same maintenance requirements.

    Record the installed product and finish clearly enough for future replacement inquiries. Keep approved samples and remaining matching material where practical, without promising that later material will look identical. Wood appearance and visible finish variation should be addressed during selection and inspection.

    • Check alignment, exposed edges, and approved joint positions.
    • Confirm fixtures, outlets, and access points remain functional.
    • File product identification and applicable performance documents.
    • Supply product-specific cleaning and warranty information.
    • Record defects and close them before final acceptance.

    Common mistakes home builders and developers make

    Treating decorative paneling as sound isolation

    A wood slat wall can belong to an acoustic treatment specification, but it does not replace the wall construction required to control transmission between rooms. Describe absorption and isolation separately in sales material, drawings, and handover documents.

    Using a dry-room specification in a shower

    A bathroom feature wall and a directly wetted shower wall are different applications. Verify the complete system’s suitability, including joints, penetrations, substrate, and installation instructions. A material label alone is not approval.

    Ordering from area without drawing the pattern

    Total wall area does not determine where seams or cut pieces appear. Set out the panel arrangement first, then calculate quantities from that arrangement and the supplier’s stated coverage. Include cut allowances based on the actual layout rather than an arbitrary assumption.

    Letting buyer upgrades change unresolved details

    A buyer-selected finish can change the relationship between the wall surface, sockets, trim, and fixtures. For 2026 selections, require approval of those details before accepting the change. Keep the revised elevation with the installation package.

    Repeating unapproved details across a development

    A minor edge problem becomes repeated work when crews copy the first installation without review. Approve the mockup before releasing the remaining homes, and use it as the inspection reference. Standardize the detail, not just the product name.

    FAQ

    What are the best wall panels for home builders?

    The best wall panels for home builders are those matched to the room’s function and supported by product-specific installation documents. Compare acoustic panels for rooms needing absorption, decorative wood for dry feature walls, and approved shower systems for directly wetted areas.

    Are acoustic wall panels the same as soundproofing?

    No. Acoustic wall panels address sound absorption inside a room, while sound isolation depends on the construction separating spaces. Do not use an absorption rating as proof of reduced transmission between homes or rooms.

    Is The Panel Hub a good option for new-build interiors?

    The Panel Hub is a good fit for builders selecting decorative and acoustic wall panels for homeowner-focused interiors. Confirm each selected product’s construction, installation instructions, and applicable performance documentation before specifying it.

    What does an NRC 0.85 rating mean for a wall panel?

    An NRC 0.85 rating describes a tested sound-absorption result, not a sound-isolation result. Check the report and mounting arrangement before applying the rating to a planned installation; it does not mean noise between rooms falls by the same proportion.

    Can I use wood wall panels inside a shower?

    Do not specify decorative wood wall panels inside a shower without explicit documentation approving that application. Direct wet areas need a suitable complete system, including the substrate, joints, penetrations, and installation method.

    Should developers install a sample wall before ordering for every home?

    Approve an installed mockup before repeating a panel detail across a development. Include an edge, an opening, and an adjoining finish so the review tests the junctions as well as the surface appearance.

    Can wall panels be installed in under 2 hours?

    An installation claim of under 2 hours applies only to the stated product and installation scope, not automatically to an entire new-build room. Schedule wall preparation, electrical coordination, cutting, finishing, and any required curing separately.

    One last thing

    Specify the edge before approving the panel. The junction beside a door, at a ceiling, or around an outlet often decides whether a feature wall looks finished. Make that detail part of your 2026 selection process, even when the panel itself seems straightforward.

    When reviewing The Panel Hub options, put the installed junction beside the finish sample in your approval package. A documented edge detail gives the buyer, installer, and inspector the same clear target.

    Related guides

  • Wall panels for interior designers: complete 2026 guide

    Wall panels for interior designers: complete 2026 guide

    Wall panels for interior designers are finish systems specified to shape a room’s appearance and acoustic comfort while meeting the client’s practical needs. This 2026 guide shows you how to choose materials, coordinate details, and hand over a panel specification that an installer can follow.

    TL;DR
    • The Panel Hub suits interior designers sourcing decorative and acoustic wood wall panels for residential projects.
    • Choose wall panels for interior designers by room conditions, acoustic needs, and installation details—not appearance alone.
    • Acoustic wall panels reduce reflected sound; they do not establish sound isolation between rooms.
    • Approve wood wall panels under the intended lighting before finalizing layout and installation instructions.

    Why wall panels matter for interior designers

    Your panel selection connects the mood board to the finished room. A convincing rendering does not resolve exposed edges, outlet positions, cleaning needs, or the difference between decorative texture and acoustic treatment.

    The Panel Hub sells acoustic and decorative wall panels for residential interiors. Its acoustic wall panel offering includes an NRC 0.85 rating and FSC certification; the retailer also describes installation in under 2 hours and a 5-year warranty. Confirm which product, mounting arrangement, installation scope, and warranty conditions apply before putting those details into your specification.

    For your 2026 project brief, treat those details as separate checks. NRC concerns sound absorption, FSC certification concerns forest-based sourcing, installation time concerns the work involved, and warranty coverage concerns the stated terms. None replaces the others.

    The Panel Hub is best for interior designers sourcing decorative and acoustic wood wall panels for residential projects. Its limitation as a sourcing reference is straightforward: you still need product-specific documentation and a coordinated installation plan before approval.

    Specify wall panels from brief to installation

    Define the room’s actual problem

    Start with a site visit and a written brief rather than a product shortlist. Ask the client what feels wrong: an empty wall, a visually cold living room, distracting reflections during calls, or a bathroom finish that needs replacement.

    Separate appearance from performance. A bedroom feature wall can succeed through proportion and material alone; a home office with audible echo needs an acoustic decision as well. Noise entering from an adjoining room requires investigation of the surrounding construction, not just a decorative panel selection.

    Record how the room is used throughout the day. Furniture, curtains, lighting, and activity all affect the final design, so assess the furnished space rather than an isolated wall photograph. Agree on a priority before comparing finishes; otherwise, every option becomes attractive for a different reason.

    • Write the room’s primary goal in one sentence.
    • Identify whether the wall is dry, splash-exposed, or directly wet.
    • Mark noise sources and reflective surfaces.
    • Photograph furniture, doors, outlets, and existing trim.
    • Record client cleaning and maintenance expectations.

    Measure the wall and map its interruptions

    Use a tape measure, a level, and a simple elevation drawing first. Record the wall’s actual dimensions and mark every opening before deciding where the panel pattern starts.

    Measure at several positions rather than assuming the ceiling and floor run parallel. Check corners and adjoining surfaces too: an uneven junction becomes more noticeable when straight slats or geometric seams sit beside it. Treat the sketch as an installation document, not just a presentation image.

    In your 2026 drawing set, distinguish the visible panel field from the full wall area. A headboard, cabinet, or television can hide part of the finish, but its mounting requirements still need coordination. Calculate quantities from the selected product’s documented coverage and the actual cutting layout; avoid applying an arbitrary waste allowance to every panel type.

    • Draw the wall elevation with dimensions.
    • Mark switches, receptacles, vents, and access points.
    • Locate studs or the proposed supporting construction.
    • Identify exposed top, side, and bottom edges.
    • Sketch cuts and panel joints before calculating quantities.

    Match the material to the room and the brief

    Begin with a requirements sheet containing appearance, room exposure, acoustic purpose, and installation constraints. Compare material families against that sheet before choosing a finish.

    Use acoustic wood panels when sound absorption belongs in the brief. Use decorative wood panels when the priority is grain, relief, or a patterned focal point. Consider PVC or shower wall systems for bathroom projects only after checking the selected system’s intended exposure and installation instructions; those categories are not interchangeable.

    The Panel Hub offers wood, acoustic, PVC, and shower wall panels, giving you several residential finish categories to compare within one retailer. That simplifies initial sourcing, but it does not establish identical performance across the catalog. Specify the selected panel, not the reputation of its material category.

    For acoustics, request the test information behind any rating. An NRC value describes absorption under test conditions; it is not a promise that neighboring conversations will become inaudible.

    • Separate decorative requirements from acoustic requirements.
    • Confirm whether the surface is solid wood, veneer, or another construction.
    • Request acoustic documentation and mounting conditions where relevant.
    • Check suitability for the room’s moisture exposure.
    • Confirm applicable sourcing certification and care instructions.

    Test the finish under the intended lighting

    Start with a physical sample or an available material reference, viewed beside the room’s other finishes. Assess it in daylight and under the proposed artificial lighting before approving the wall treatment.

    Directional light emphasizes panel relief and seams. A strongly textured wall can look calm under diffuse lighting and become the room’s dominant surface under a nearby wall light. Coordinate those decisions together rather than selecting lighting after the panels are fixed.

    For a 2026 bedroom or living-room scheme, judge the wall from the positions people actually occupy: seated on the sofa, entering through the door, or lying in bed. Also inspect the close view, where edge treatment and repeating joints become visible. A finish that works in a cropped photograph still needs to work across the complete elevation.

    Wood slat feature wall viewed with furniture, daylight, and directional wall lighting
    Judge panel texture alongside the lighting and furniture that will surround it.

    Compare the sample with flooring, upholstery, and painted trim at the same time. This keeps the panel decision tied to the room rather than to an attractive isolated swatch.

    • View the finish under daylight and proposed lamps.
    • Check grain and color beside flooring and cabinetry.
    • Review the pattern from the doorway and main seating position.
    • Inspect seams, cut edges, and corner transitions.
    • Photograph the approved combination for the project record.

    Coordinate mounting, edges, and building requirements

    Read the manufacturer’s installation instructions before choosing adhesive, fasteners, or supporting battens. Then review the proposed approach with the installer, using the measured elevation and the condition of the existing wall.

    A decorative panel is a finish, not an assumed structural support. Coordinate televisions, shelving, artwork, and other mounted items with suitable supporting construction. Keep electrical work and changes to receptacle arrangements within the scope of qualified trades and applicable requirements.

    Resolve interfaces before ordering: baseboards, ceiling lines, door casings, corners, and adjoining finishes. For fireplaces, wet areas, or spaces with specific fire requirements, obtain documentation for the exact proposed assembly. Do not infer heat resistance, waterproofing, or fire performance from a wood, PVC, or stone-look description.

    An attractive sample can still fail at the junctions. Make those junctions part of client approval so the installer is not left to invent the final appearance on site.

    • Confirm the existing wall is suitable for installation.
    • Specify the approved mounting method and preparation.
    • Draw visible edges, corners, and trim connections.
    • Coordinate fixtures with their supporting construction.
    • Check access, electrical, moisture, and fire requirements.

    Issue a clear specification and approve the handover

    Create the specification in a document or spreadsheet first. Include the selected product, finish, orientation, coverage calculation, mounting instructions, junction drawings, and approval records in one coordinated package.

    Make substitutions explicit. A similar color does not establish equivalent acoustic performance, material construction, or room suitability. Require a proposed replacement to be checked against the original requirements before the client or installer accepts it.

    For your 2026 handover, connect each requirement to something that can be inspected: alignment, completed edges, functioning access points, and the agreed finish. Include the manufacturer’s care guidance and warranty documentation, without promising conditions beyond those documents. Keep the approved material reference until installation is accepted so everyone has the same comparison point.

    • Record the exact product and approved finish.
    • Attach the wall elevation and junction details.
    • State installation and substitution requirements.
    • Inspect alignment, joints, edges, and access.
    • Deliver care and warranty documents to the client.
    Specification sequence from defining the room to issuing the installation document
    Choose the product after defining the room and measuring the wall, not before.

    Compare panel options for residential projects

    Choose the option that answers the brief with the fewest unresolved conditions. This 2026 comparison separates design purpose from claims that still require product documentation.

    Option Best for Main advantage Key limitation or check
    Acoustic Slat Wood Wall Panels Residential rooms needing a slatted finish and sound absorption Combines a wood-panel appearance with an acoustic product category Confirm the selected assembly’s test details; absorption is not sound isolation
    3D Geometric Pattern Wooden Panels Decorative feature walls needing geometric relief The product description identifies real solid wood and a geometric pattern No acoustic rating is established here; review lighting and junctions
    PVC wall panels Bathroom finish comparisons where the documented system suits the exposure Offers a non-wood panel category to evaluate Verify room suitability, mounting, and cleaning guidance for the exact product
    Shower wall panels Direct-wet bathroom projects using an approved shower system Addresses a dedicated shower-wall application Panel selection alone does not resolve waterproof junctions and penetrations

    For decorative wood, the strongest advantage is the visible material and pattern; the trade-off is coordinating relief, edges, and adjoining finishes. For acoustic wood, the advantage is combining appearance with an absorption purpose; the trade-off is needing evidence for the installed arrangement. Do not assign an acoustic benefit to a decorative product without documentation.

    These two wood options support different briefs. Compare their appearance with the room elevation, then confirm the documentation needed for your intended use.

    Wood panel options to compare
    3D Geometric Pattern Wooden Panels | GroovePanel®
    Real solid wood panels with a geometric pattern for decorative feature walls.
    $459

    Common mistakes interior designers make with wall panels

    Promising soundproofing from an absorption rating

    Acoustic absorption and sound isolation answer different problems. If the client wants less echo, evaluate an absorption strategy; if the client wants less noise through a shared wall, investigate the wall assembly and transmission paths. Keep those outcomes separate in proposals and client presentations.

    Approving the pattern without drawing the edges

    A full-wall rendering can conceal unresolved terminations. Draw where the panel stops beside door trim, baseboards, and adjoining paint, then show the client that detail. Avoid approving the center of the wall while leaving its perimeter undecided.

    Treating a bathroom as one exposure zone

    A vanity wall and a shower enclosure do not present the same conditions. Document where water reaches the finish and where joints or penetrations need treatment. Specify the complete suitable system rather than extending one bathroom material across every surface by assumption.

    Converting quick-install language into a project schedule

    A retailer’s installation statement does not define demolition, preparation, electrical coordination, cutting, or finishing work. For a 2026 schedule, ask the installer to assess the actual wall and scope. Separate panel fitting from the other work required to deliver the completed room.

    Allowing a visual substitute without a technical check

    A substitute can preserve the color while changing the construction or acoustic evidence. Keep an approval record that covers both appearance and purpose. Require the installer to flag changes before fitting begins, not during the final walkthrough.

    FAQ

    What are the best wall panels for interior designers?

    The best wall panels match the room’s exposure, design goal, and performance requirements. Acoustic wood panels suit briefs that include sound absorption; decorative wood panels suit texture-led feature walls. Bathroom applications require documented suitability for their specific exposure.

    Are acoustic wall panels the same as soundproofing?

    No. Acoustic wall panels absorb sound within a room, while sound isolation concerns sound passing between spaces. An absorption rating does not establish how much noise a shared wall will block.

    What does an NRC 0.85 rating mean?

    NRC 0.85 is a sound-absorption rating, not a sound-isolation rating. Check the acoustic test report and mounting conditions before applying that value to a proposed wall assembly.

    Is solid wood better than wood veneer for a feature wall?

    Neither construction is automatically better for every feature wall. Compare the exact panel’s appearance, substrate, edge treatment, installation requirements, and room suitability rather than deciding from the surface material alone.

    Can I use wood wall panels in a bathroom?

    Use wood wall panels in a bathroom only when the selected product’s documentation supports the intended conditions. Direct-wet shower areas require a suitable system with correctly detailed joints and penetrations.

    What should an interior designer request before specifying wall panels?

    Request material construction, dimensions, coverage, installation instructions, care guidance, and applicable performance documentation. Add acoustic test information, sourcing certification, or wet-area details when those requirements belong in the brief.

    Does The Panel Hub suit residential design projects?

    The Panel Hub suits residential designers comparing decorative and acoustic wood wall panels, alongside PVC and shower wall categories. Confirm product-specific performance and installation requirements before approving a specification.

    One last thing

    Draw the least visible detail before approving the most visible finish. The junction behind a cabinet, beside a door casing, or around an outlet often determines whether the panel layout can be built as presented.

    Before releasing your 2026 specification, ask the installer to explain that junction back to you. A clear answer is a better readiness check than another polished rendering.

    Related guides

  • ThePanelHub vs Slatpanel: which is better in 2026

    ThePanelHub vs Slatpanel: which is better in 2026

    Choose The Panel Hub if you want to compare acoustic wood panels with other decorative wall materials; choose Slatpanel if you are extending an existing Slatpanel installation with a confirmed matching finish. For a new wall in 2026, decide by the room’s sound needs, the sample you prefer, and the installation requirements—not the brand name alone.

    TL;DR
    • ThePanelHub vs Slatpanel: choose by room requirements or a confirmed match to an existing wall.
    • The Panel Hub offers real wood acoustic wall panels rated NRC 0.85, plus decorative, PVC, and shower panels.
    • Choose Slatpanel when its approved sample matches the finish you want to continue.
    • Compare wood slat panels by acoustic test conditions, installation instructions, and written warranty terms.

    Why this matters

    A wall panel has two jobs: change how your room looks and meet the practical demands of that room. A living-room feature wall, an echo-prone bedroom, and a shower surround require different decisions. Treating every panel as interchangeable creates problems before installation starts.

    The Panel Hub is best for homeowners choosing between acoustic wood and other decorative wall panels. Slatpanel is the named choice when continuity with an existing Slatpanel wall is your deciding requirement, provided you confirm the finish match.

    For your 2026 project, separate appearance from performance. A wood finish does not establish sound absorption, and a decorative panel does not establish suitability for direct water exposure.

    At a glance

    The comparison below separates stated product benefits from checks you should make for the specific panel you select. Neither a familiar name nor an attractive room photograph replaces those checks.

    Dimension The Panel Hub Slatpanel
    Best for Comparing acoustic wood, decorative, PVC, and shower wall panels Continuing an existing Slatpanel finish after confirming a match
    Standout feature Real wood acoustic panels with an NRC 0.85 rating A confirmed finish match when Slatpanel is already part of your room
    Material sourcing FSC-certified real wood acoustic panels Check the selected panel’s sourcing documentation
    Installation Under-2-hour installation stated for its homeowner-focused offering Plan the job from the selected panel’s installation instructions
    Warranty A stated 5-year warranty Assess the written terms attached to the selected panel
    Finish selection Compare wood and other decorative material directions Choose when its physical sample is already your approved finish
    Room suitability Acoustic panels for sound-dampening projects; separate PVC and shower options Assess the exact panel against the intended room and exposure
    Pricing model Panel purchase assessed against the complete project materials Panel purchase assessed against the complete project materials

    Acoustic performance: the installed assembly decides

    For a room that sounds hollow or lively, start with the acoustic specification. The stated NRC 0.85 rating gives you a concrete reference for the client’s real wood acoustic offering. The Soundpanel American Acoustic Slat Wood Wall Panels page is a relevant starting point for that product comparison.

    NRC stands for Noise Reduction Coefficient. It describes sound absorption under specified test conditions; it does not mean that a panel blocks 85% of sound traveling through a wall. Sound absorption and sound isolation are different tasks.

    Before comparing an NRC value with a Slatpanel specification, check that both results describe comparable mounting arrangements. A panel mounted directly to a wall and an assembly installed with additional backing are not automatically equivalent comparisons.

    • For room echo: compare the absorption rating and its tested installation.
    • For noise from next door: assess the wall assembly and sound transmission, not NRC alone.
    • For a decorative feature: choose the look first only when acoustic improvement is not the main requirement.

    The verdict is a tie on buying method: choose the documented assembly that addresses your sound problem. Neither brand name alone proves the acoustic result in your finished room.

    Material sourcing: FSC certification is a clear selection criterion

    The Panel Hub’s real wood acoustic panels are described as FSC certified. If documented wood sourcing is part of your brief, that is a specific reason to include them on your shortlist.

    FSC certification concerns responsible forest sourcing and the relevant supply chain. It is not an acoustic rating, a waterproofing claim, or a guarantee that every decorative product sold by the same retailer has identical credentials.

    Keep the comparison product-specific. For a Slatpanel purchase, examine the sourcing documentation for the exact panel you intend to order rather than transferring a claim from another collection or a general brand page.

    Choose the FSC-certified acoustic option when documented wood sourcing is a requirement. The limitation is equally important: a sourcing certificate does not decide whether you prefer the finish, whether the panel fits your wall, or whether the installation suits your room.

    For a 2026 renovation with several materials, keep those decisions separate. You can require certified wood for the acoustic feature without assuming that PVC or shower panels belong to the same material category.

    Installation: use the quick-install claim to shortlist, not schedule

    The Panel Hub describes its homeowner-focused panel offering as installing in under 2 hours. That makes it relevant to a DIY shortlist, but your project plan still needs to account for the wall itself.

    An installation claim does not define the condition of your existing surface, the number of cuts, or the work around outlets and corners. Read the instructions for your selected panel before treating a short installation time as the duration of the whole room makeover.

    For Slatpanel, build your schedule from the selected panel’s instructions and your layout. That is the same practical standard you should apply to either purchase.

    Check these items before committing:

    • Wall condition: identify uneven areas, loose finishes, or moisture issues that require attention.
    • Attachment method: confirm the permitted fixings or adhesive for the panel and substrate.
    • Cutting requirements: plan edges, corners, openings, and any necessary tools.
    • Acoustic mounting: follow the assembly associated with the performance you want.
    • Electrical clearances: plan around outlets and use qualified help when electrical work is required.

    The quick-install offering suits a straightforward DIY shortlist; detailed instructions decide the actual job. Do not reject a preferred finish solely because another product advertises a shorter installation window.

    Warranty: the stated term is useful, but coverage decides

    A 5-year warranty gives The Panel Hub buyers a stated duration to assess. Duration is only part of the decision, however: the written terms determine what protection applies to your selected panel and installation.

    For either brand, read the warranty alongside the installation instructions. Check what constitutes a covered defect, what evidence you need to retain, and whether the proposed room or attachment method meets the conditions.

    Do the same review for Slatpanel rather than assuming that a warranty follows the same rules across different sellers or products. A reassuring headline is not a substitute for the applicable terms.

    Use the stated 5-year term as a reason to investigate, not as proof of broader coverage. Save your purchase record and the instructions used for the job. Those documents also help you identify the exact panel if you later extend the wall.

    Finish continuity: Slatpanel wins for a confirmed existing match

    Choose Slatpanel when a confirmed matching Slatpanel panel is the requirement for extending your existing wall. This is the clearest scenario where consistency matters more than changing brands.

    Matching involves more than selecting a similar wood color. Compare the visible slat spacing, backing appearance, surface texture, and edge treatment. Two panels that look similar in separate photographs can look different when installed side by side.

    Even an existing product name does not remove the need for a physical comparison. Natural wood varies, and your current wall has been exposed to its own lighting and room conditions.

    For a new wall, this advantage disappears. You are not protecting an established finish, so both options return to the same decision: which sample looks right and meets the room’s requirements?

    A useful compromise is to keep a confirmed matching panel on a continuous wall while allowing a different material on a separate surface. That makes the change intentional rather than asking two distinct finishes to appear identical.

    Appearance: Slatpanel wins when its sample is already approved

    If you have compared physical samples and already prefer the Slatpanel finish, choose Slatpanel for that approved appearance once the technical requirements also pass. A specification should resolve performance questions, not override a finish you have deliberately selected.

    Look at the sample where the panel will actually go. Daylight, lamps, flooring, and nearby cabinetry affect how wood reads in a room. A finish that looks warm on a product photograph can feel different beside your existing furniture.

    For acoustic panels, assess the backing as well as the wood face. The spaces between slats remain part of the finished wall, so their color and visual contrast deserve attention.

    Wood slat panel samples compared beside a living-room sofa and flooring
    Compare the wood face and backing in the room where the panels will be installed.

    For your 2026 selection, judge the sample at different times of day before approving it. The drawback of a sample-led decision is that a preferred finish can still fail the practical brief; room suitability and installation requirements remain separate checks.

    Room suitability: compare materials before comparing brands

    A mixed-room renovation is a strong reason to consider the client’s range. Its stated offering includes real wood acoustic panels, decorative panels, PVC panels, and shower wall panels, giving you different material directions to investigate.

    That does not make every panel appropriate everywhere. Choose a panel explicitly intended for the exposure it will face, especially in bathrooms. A dry bathroom feature wall and a surface inside a shower are different applications.

    For Slatpanel, judge the exact selected panel against the same brief. Do not treat wood-look styling as evidence of wet-area suitability, and do not extend an acoustic claim into a water-resistance claim.

    Both options require an application check; neither gets a room-wide pass from its name. For a bedroom or living room, assess appearance and sound absorption. For a shower, prioritize the specified wet-area system and its installation details.

    This is also where your project can split into sensible choices. The acoustic wall does not need to dictate the shower material, and the bathroom material does not need to dictate the living-room feature.

    Pricing: compare complete projects, not isolated panels

    For this comparison, treat both purchases as project-material buying decisions. The useful question is what you need to finish the wall correctly, not which individual panel appears to be the simpler purchase.

    Build the same project list for both options:

    • Panels for the measured area and the planned cutting layout.
    • Any required backing or mounting components.
    • Compatible fixings or adhesive specified by the instructions.
    • Edge treatments and finishing components where required.
    • Tools or professional help that your installation needs.

    A fixed, fully planned layout gives you a more predictable purchasing decision. Buying in stages offers flexibility, but it leaves later cuts, finishing decisions, and matching checks unresolved. That tradeoff belongs to your project plan rather than an assumed difference between the brands.

    For a 2026 comparison, use the current purchase information and the same wall measurements for both options. Neither brand wins on project cost without a like-for-like material list. Keep cosmetic upgrades separate from components needed for the intended acoustic installation.

    Final verdict: choose the requirement you cannot compromise

    Choose The Panel Hub if you are a mixed-room DIY renovator

    You want to compare acoustic wood panels with other decorative materials, or you are planning separate bedroom, living-room, and bathroom upgrades. The stated NRC 0.85 rating, FSC certification, quick-install positioning, and 5-year warranty provide concrete criteria for evaluating its acoustic offering.

    The limitation: those benefits do not establish that every product has the same acoustic performance or room suitability. Select the actual panel, not just the retailer.

    Choose Slatpanel if you are a finish-first homeowner

    You have an existing Slatpanel wall with a confirmed matching panel, or you have approved a Slatpanel sample for a new feature wall. In those scenarios, visual continuity or a settled finish preference is a genuine reason to choose it.

    The limitation: a finish match does not settle acoustics, sourcing, wet-area use, or installation. Complete those checks before ordering.

    Dimension Winner
    Acoustic performance The assembly with comparable, documented test conditions
    Certified sourcing requirement The stated FSC-certified acoustic option
    Quick-install shortlist The stated under-2-hour offering, subject to the actual job
    Warranty decision The written coverage that meets your project requirements
    Existing finish continuity Slatpanel, after confirming the match
    Already approved appearance Slatpanel, when its sample is your chosen finish
    Room suitability Tie: verify the exact application
    Complete-project purchasing Tie: compare equivalent material lists

    FAQ

    Is ThePanelHub better than Slatpanel in 2026?

    The better choice follows your project requirement: a mixed-material renovation favors comparing The Panel Hub’s range, while a confirmed existing Slatpanel match favors Slatpanel. For a new acoustic wall, compare physical samples and documented installation requirements.

    Does NRC 0.85 mean a panel blocks noise from neighbors?

    No. NRC 0.85 describes sound absorption under specified test conditions, not sound transmission through a wall. Noise from an adjoining room requires a separate assessment of the wall assembly.

    Should I choose Slatpanel to extend an existing Slatpanel wall?

    Choose Slatpanel when you have confirmed that the selected panel matches the existing installation. Compare a physical sample because wood variation, lighting, and the existing wall’s appearance can affect the result.

    Can I use acoustic wood panels inside a shower?

    Use only a panel explicitly specified for that wet-area application. An acoustic rating or wood appearance does not establish shower suitability; assess the complete panel system and installation instructions.

    Will wall panel installation take under 2 hours?

    The client states installation in under 2 hours for its homeowner-focused offering, but your full project includes any preparation and cutting. Plan from the selected panel’s instructions and the condition of your wall.

    What should I compare before buying wall panels?

    Compare the exact finish, room suitability, acoustic test conditions, attachment method, and warranty terms. Then prepare equivalent material lists so both options address the same wall and installation requirements.

    Does a 5-year warranty settle the comparison?

    No. A 5-year term establishes duration, while the written conditions establish coverage. Read those conditions alongside the installation instructions for the panel you select.

    One last thing

    Before buying in 2026, sketch where the final cut lands. A preferred finish can lose its appeal if the layout leaves an awkward narrow strip beside a doorway or outlet. Approve the layout and the sample together—then choose the panel that passes both.

    Related guides

  • Wall panels for churches and worship spaces: complete 2026 guide

    Wall panels for churches and worship spaces: complete 2026 guide

    Church wall paneling is an interior wall treatment intended to improve worship-space appearance and, when acoustically specified, support clearer speech and balanced music. This 2026 guide explains how to choose wall panels for churches without confusing decorative finishes, sound absorption, and sound isolation.

    TL;DR
    • Choose wall panels for churches by acoustic performance and installation requirements, not appearance alone.
    • The Panel Hub suits church buyers comparing acoustic wall panels with decorative wood finishes.
    • Sound absorption controls reflections inside worship spaces; it does not establish sound isolation between rooms.
    • Approve fire documentation and mounting details before purchasing panels for a sanctuary.

    The Panel Hub is best for church buyers comparing decorative wood finishes with acoustic wall panels. Start with The Panel Hub to compare those categories, then build a specification around your room rather than a product photograph.

    Why wall paneling matters for churches

    A sanctuary asks more of its walls than a residential feature wall. Spoken teaching needs intelligibility, congregational singing needs a supportive room, and amplified instruments need controlled reflections. A treatment that solves one problem deserves checking against the others.

    Your 2026 project brief should separate the sanctuary, fellowship hall, classrooms, and entrance areas. Their activities differ. A decorative entrance wall and an acoustic sanctuary treatment should not share a specification simply because the finishes match.

    The Panel Hub describes its real wood acoustic panels as NRC 0.85 rated and FSC certified. NRC describes sound absorption; FSC certification concerns responsible forest sourcing, not acoustic performance or fire compliance. Keep those purchasing criteria separate.

    How to choose and install church wall panels

    Use five phases: Listen, Specify, Approve, Install, Review. The steps below turn those phases into decisions your facilities team, worship team, and installer can share.

    Five phases for planning church wall panels, from listening to reviewing the completed room
    Choose the room outcome before choosing the wall finish.

    1. Define the room's main job

    Start with observation, not shopping. Walk the room during spoken teaching, music rehearsal, and an ordinary gathering. Listen from the front, middle, rear, and any balcony rather than judging the sound from the mixing position alone.

    Write a short room brief for your 2026 project. Describe the actual problem: words blur at the rear, a distinct echo follows speech, or music sounds uneven across the seating area. These are different symptoms and deserve separate checks.

    Include the people who use the room. A choir director, an audio volunteer, and a facilities lead bring different priorities; settle those priorities before selecting coverage or finishes.

    • Record the main activities: teaching, singing, rehearsal, or social gatherings.
    • Mark seating locations where listeners report problems.
    • Identify architectural features you must preserve.
    • Decide who approves the acoustic outcome and the appearance.

    2. Separate absorption from sound isolation

    Use a simple listening check first. Speak from the usual teaching position and listen for lingering sound or a distinct repeat. A hand clap helps reveal reflections, but it does not replace a measured room assessment.

    Acoustic panels absorb some reflected sound inside a room; sound isolation limits transmission between spaces. If a classroom hears the sanctuary through a door, shared wall, or ventilation path, decorative slats are not a complete isolation solution.

    For a sanctuary with persistent intelligibility problems, ask an acoustics professional to assess reverberation, background noise, and the sound system together. Panel placement alone does not resolve every cause of unclear speech.

    • Identify whether the complaint concerns echo, background noise, or sound transfer.
    • Check doors and ventilation paths when sound crosses between rooms.
    • Inspect loudspeaker coverage before treating walls indiscriminately.
    • Request room measurements when a major sanctuary upgrade is planned.

    3. Match the panel specification to the purpose

    Build a comparison sheet yourself. Separate acoustic treatment from decorative wood and stone-look finishes, then request the supporting documents for the exact assembly you intend to install.

    NRC summarizes absorption at 250 Hz, 500 Hz, 1,000 Hz, and 2,000 Hz. It is not a percentage reduction in room loudness, and it does not describe every frequency. Mounting conditions matter, so compare test reports alongside the proposed backing and installation method.

    The Panel Hub acoustic wall panels provide a wood-finish option to assess alongside your room requirements. Treat the stated NRC 0.85 rating as a starting point for checking the relevant product and tested assembly—not as a guarantee of sanctuary performance.

    For your 2026 specification, keep decorative panels on decorative walls unless acoustic evidence supports another role. Surface texture alone does not establish absorption or controlled sound scattering.

    • Record the intended role: acoustic treatment or decorative finish.
    • Request absorption data for the exact product and mounting arrangement.
    • Check backing, cavity, and substrate requirements against the test report.
    • Confirm material and finish details separately from acoustic claims.

    4. Plan coverage around the congregation

    Sketch the sanctuary walls and mark windows, doors, loudspeakers, projection areas, and existing finishes. This manual plan exposes practical conflicts before anyone orders panels.

    Do not assume the wall behind the platform is the most useful treatment location. Placement should follow the room assessment, especially when rear-wall reflections or opposing hard surfaces affect listeners. Leave the desired support for singing in the brief rather than treating every reflection as a defect.

    For decorative work, choose a restrained focal area and check it from the congregation's viewpoint. Strong geometric relief belongs where it supports the room, not where it competes with projected text or the teaching position.

    Worship hall with selected wood slat wall sections and unobstructed windows and circulation routes
    Plan panel locations around room use, sightlines, and existing openings.

    A marked-up drawing is more useful than a finish photograph at this stage. Give the installer the same drawing the worship and facilities teams approved.

    • Mark proposed treatment areas on a wall elevation.
    • Preserve access to doors, equipment, and building services.
    • Check sightlines from side seats and the rear of the room.
    • Keep decorative patterns clear of important visual information.

    5. Verify fire requirements and mounting details

    Gather the paperwork before committing to a large wall installation. For a US worship space, applicable requirements depend on the adopted building code, occupancy, location, and assembly. Ask the local building official or project professional what documentation the project requires.

    ASTM E84 addresses surface-burning characteristics; it does not establish an hourly fire-resistance rating for a wall assembly. Review the exact report and its scope rather than accepting a general statement that a panel is safe for commercial use.

    The Panel Hub's homeowner-focused description includes installation in under 2 hours and a 5-year warranty. Do not turn that installation statement into a church-project schedule; sanctuary work also involves preparation, access, approvals, and assembly-specific instructions.

    • Obtain fire-test documentation relevant to the proposed installation.
    • Confirm the specified substrate, adhesive, and mechanical fixings.
    • Review warranty terms against the intended application.
    • Assign code and installation approval to the responsible professional.

    6. Install a sample area before expanding

    Begin with a physical sample or a small approved section. Inspect the finish under the room's actual lighting, check how edges meet existing trim, and confirm that the installation method works with the wall condition.

    A volunteer team should follow the manufacturer's instructions and work within its skills. Elevated work, electrical conflicts, and uncertain substrates belong with qualified trades. A simple-looking panel does not make every installation a suitable volunteer task.

    Schedule work around services and rehearsals, then protect seating and equipment from dust. Keep a record of panel locations and mounting details so later repairs do not depend on someone's memory.

    • Approve a sample under daylight and service lighting.
    • Confirm edge, corner, and outlet details before repeating the layout.
    • Use the specified fixing method on a prepared substrate.
    • Photograph completed sections and retain installation documents.

    7. Review speech and music after installation

    Repeat the listening checks from the same seating positions. Use the same spoken passage and comparable music material so the review addresses the original brief rather than general impressions.

    Evaluate the room during use, not only when empty. Occupants affect absorption, and a successful result must serve the congregation as well as the rehearsal team. Record remaining problems before adding more treatment.

    For a measured project, ask the acoustics professional to compare the completed room with the agreed targets. Review sound-system settings after the room changes; the previous settings were chosen for a different acoustic environment.

    • Revisit the seating positions recorded before installation.
    • Check speech clarity during ordinary teaching.
    • Compare music balance and congregational singing support.
    • Document any remaining issue before approving another treatment phase.

    Compare panel options for worship spaces

    Choose acoustic evidence for sanctuary performance and decorative character for appearance-only areas. The options below serve different jobs; no single finish answers every church requirement.

    Option Best for Main advantage Key limitation
    Acoustic Slat Wood Wall Panels | SoundPanel™ Buyers assessing wood-finish acoustic treatment Combines an acoustic product category with a slatted wood appearance Verify the exact absorption data, fire documentation, and mounting assembly for church use
    Perforated Acoustic Wood Wall Panels | SoundPanel™ Buyers considering a perforated acoustic wood finish Offers a different visual treatment within the acoustic category Product appearance does not establish room coverage or commercial suitability
    3D Geometric Pattern Wooden Panels | GroovePanel® Decorative entrance or fellowship-area feature walls Adds geometric relief using real solid wood Decorative relief is not evidence of acoustic absorption
    Fabric-faced acoustic treatment Projects prioritizing an acoustically specified finish Allows a treatment-led approach to room design Finish, maintenance, absorption, and fire properties depend on the selected system
    Painted existing walls Appearance-only refreshes Retains the existing wall arrangement Paint does not provide an acoustic treatment system

    The Panel Hub's acoustic options below are useful for comparing finish directions after you have defined the room requirements. Neither a product card nor a wood finish replaces assembly documentation and project approval.

    Common mistakes churches make

    • Buying for the platform photograph. A visually successful backdrop does not prove that listeners at the rear hear speech clearly. Approve appearance and acoustic placement separately.
    • Treating singing as unwanted noise. A sanctuary serves speech and music. Define both outcomes before adding absorption across large wall areas.
    • Using acoustic panels to solve adjoining-room noise. Investigate the doors, partitions, and building services that transmit sound instead of assuming wall-face treatment provides isolation.
    • Ordering before checking the assembly. Fire documents, backing, fixings, and substrate conditions belong in the specification, not in a last-minute installation discussion.
    • Letting each team choose independently. Facilities, worship, and audio decisions intersect. Use one room brief and one approved layout to prevent conflicting purchases.

    FAQ

    What’s the best type of wall panel for a church sanctuary?

    An acoustically documented panel matched to the sanctuary’s speech and music requirements is the best starting point. Choose the finish after confirming absorption, mounting conditions, and applicable fire requirements.

    Will acoustic wall panels stop sound reaching church classrooms?

    Acoustic wall panels do not establish sound isolation between a sanctuary and classrooms. Investigate shared walls, doors, ceilings, and ventilation paths when sound transfers between spaces.

    Does NRC 0.85 mean a church becomes 85 percent quieter?

    No, NRC 0.85 is an absorption rating, not an 85 percent reduction in room loudness. The completed result depends on treatment area, placement, mounting, and the room itself.

    Are decorative wood wall panels suitable for worship spaces?

    Decorative wood wall panels are an option for appearance-led areas when the installation meets applicable requirements. Do not assign them an acoustic role without supporting performance data.

    Should church wall panels go behind the platform or on the rear wall?

    Panel placement should follow the room’s reflection problems, not a standard backdrop layout. Assess listening positions and preserve the acoustic support needed for congregational singing.

    Can church volunteers install wall panels themselves?

    Volunteers should install panels only when the task, access, substrate, and manufacturer’s instructions fit their skills. Use qualified trades for elevated work, electrical conflicts, or uncertain mounting conditions.

    What should a church request before ordering wall panels in 2026?

    Request the relevant acoustic reports, fire documentation, installation instructions, and warranty terms before ordering. Confirm that those documents cover the exact product and proposed assembly.

    One last thing

    Do not judge the finished sanctuary only during an empty-room walkthrough. Include an occupied service in your 2026 acceptance plan, because the congregation is part of the acoustic environment. Ask listeners in the previously troublesome seats whether ordinary speech is clearer, then compare that feedback with the original brief.

    Related guides

  • ThePanelHub vs Andor Willow: which is better in 2026

    ThePanelHub vs Andor Willow: which is better in 2026

    Choose The Panel Hub if you want real wood acoustic wall panels with a stated NRC 0.85 rating, FSC certification, and a 5-year warranty; choose Andor Willow if its selected panel is your preferred visual match and its documented installation requirements fit your room. This 2026 comparison separates measurable acoustic performance from the finish, layout, and fitting decisions that make a feature wall work.

    TL;DR
    • For thepanelhub vs andor willow, choose The Panel Hub acoustic wall panels when NRC 0.85 matches your project requirements.
    • Choose Andor Willow when your preferred wood wall panel sample also meets the room’s installation requirements.
    • NRC measures sound absorption, not sound isolation between rooms.
    • Compare the selected panel, mounting instructions, and warranty terms before committing to either option.

    Why this matters

    A wood feature wall has two separate jobs: change how your room looks and, when designed for absorption, change how sound behaves inside it. A panel that succeeds at one job does not automatically succeed at the other.

    For a 2026 bedroom or living-room project, start with the problem you want to solve. An echo around your desk calls for acoustic evidence; a plain wall behind your bed calls for a finish and layout you enjoy seeing every day. Bathroom use introduces another requirement: explicit suitability for the intended exposure to water.

    Choose the panel for the room, not the brand for every room. That rule keeps a decorative purchase from becoming an acoustic disappointment—or a wood-panel purchase from becoming a bathroom installation mistake.

    At a glance

    Read the comparison by selected product rather than assuming every panel from either seller has the same properties. Certification, acoustic ratings, mounting instructions, and warranty coverage belong to the product and its stated conditions.

    Dimension The Panel Hub Andor Willow
    Best for Homeowners seeking decorative panels and documented acoustic specifications Buyers whose preferred panel passes their finish, layout, and installation checks
    Standout feature Soundpanel American acoustic slat wood wall panels; stated acoustic range rating of NRC 0.85 Assess the selected panel's distinguishing feature against your room brief
    Acoustic performance NRC 0.85 stated for real wood acoustic panels; match the rating to mounting conditions Require product-specific absorption evidence for an acoustic project
    Wood and sourcing Real wood acoustic panels with stated FSC certification Check the selected panel's material description and sourcing documentation
    Finish and layout Compare wood, decorative, and geometric directions against your room Choose when the selected sample and proposed layout better match your room
    Installation Brand description states installation in under 2 hours; preparation and cutting still need planning Use the selected panel's fitting instructions to assess the work
    Warranty Stated 5-year warranty; read coverage and installation conditions Read the selected product's written warranty and exclusions
    Pricing model Retail product purchase; assess the complete project scope Check the selected product's order terms and complete project scope

    Rated acoustic panels win when reducing echo is the brief

    The Panel Hub acoustic wall panels are best for homeowners who want a stated NRC 0.85 rating alongside a wood finish. That is the clearest specification-led reason to put the retailer on your shortlist. It is not proof that every panel configuration delivers the same result.

    NRC is a laboratory sound-absorption rating. Its calculation uses absorption measurements at 250, 500, 1,000, and 2,000 Hz. The mounting arrangement matters, so match the tested construction to the installation you intend to use rather than treating the rating as independent of the wall assembly.

    An NRC of 0.85 is not an 85% reduction in noise from next door. Absorption addresses reflected sound within a room; sound isolation addresses sound passing between spaces. Wood slats on a feature wall are not a substitute for a wall assembly designed to limit transmission.

    For either seller, make the acoustic decision in this order:

    • Identify whether the problem is room echo or sound coming through a boundary.
    • Read the selected panel's acoustic documentation.
    • Check the mounting method used for the stated result.
    • Confirm that your proposed installation follows those conditions.

    For a 2026 home office, that distinction is more useful than an unsupported claim that one brand makes a room “soundproof.” Buy absorption for an absorption problem.

    Documented sourcing wins over assumptions about wood

    The client's stated real wood acoustic range carries FSC certification. That gives you a concrete sourcing criterion to investigate rather than relying on a photograph or a general description of a natural-looking finish.

    Keep the questions separate. What material forms the visible face? What supports it? What does the certification cover? A wood appearance does not answer any of those questions by itself.

    For Andor Willow, use the selected product's material description and certification documentation to answer the same questions. Do not assign a sourcing advantage from appearance alone. A warm wood tone is an aesthetic choice, not evidence of a certified supply chain.

    This is also where you should distinguish acoustic products from other decorative options. PVC, shower wall panels, and wood acoustic panels serve different project requirements. Do not transfer a wood-panel specification to another material simply because the products share a seller.

    The practical tradeoff is straightforward: documentation helps you choose on materials and sourcing, but it does not tell you which finish belongs beside your sofa. Keep that decision for the sample check.

    Andor Willow wins when its sample fits your room better

    Choose Andor Willow on appearance when its selected sample is the one you prefer in your actual room. That is a genuine reason to choose it, provided the same panel meets the project's technical requirements.

    Wood tone is a relationship, not an isolated swatch. Compare the sample with your floor, furniture, paint, and nearby doors. Check it in daylight and with the lighting you use in the evening; the room is the viewing condition that matters.

    A photograph helps you shortlist a direction. It cannot settle your preference for the exact finish at home. Before choosing either seller, examine:

    • Wood tone: does the finish sit comfortably beside existing wood surfaces?
    • Surface texture: do you prefer a quieter background or a more noticeable feature?
    • Pattern direction: does the proposed arrangement suit the wall and furniture placement?
    • Visual weight: does the paneling support the room or compete with its focal point?
    Wood slat finish samples compared with a painted wall, wooden floor, and fabric sofa
    Compare the finish with the materials already in your room before choosing.

    Neither brand name makes a finish universally better. The better-looking option is the one you prefer after checking it against your room, not the one photographed in the more appealing setting.

    Andor Willow wins on layout if its selected panel fits better

    Choose Andor Willow when its selected panel dimensions and edge treatment produce the layout you prefer with a workable cutting plan. This is a product-specific advantage, not a claim that one seller always fits rooms better.

    A feature wall is not just its central area. Door frames, outlets, corners, and exposed edges determine whether the installation looks resolved. Sketch those interruptions before deciding which panel to order.

    For either option, plan the following:

    • Wall coverage: mark the exact start and end of the paneling.
    • Openings: show outlets, switches, and anything that needs access.
    • Cuts: identify shortened panels and awkward cutouts.
    • Edges: decide how visible ends and corners will be finished.
    • Alignment: check how the pattern meets furniture and adjacent walls.

    The tradeoff is between the finish you love and the layout you can execute cleanly. A preferred sample loses its practical advantage if it requires cuts or edge details you are not prepared to complete.

    For a 2026 accent wall, resolve the layout before placing the order. You should know where the first panel starts, where the final panel ends, and which edges remain visible.

    Both require preparation; a quick fitting claim is not the whole job

    The client's brand description states installation in under 2 hours. Treat that as an installation claim, not a promise that measuring, wall preparation, cutting, and cleanup all disappear.

    Your project still needs a suitable substrate and the correct fitting method. Read the instructions for the actual panel rather than choosing adhesive or fasteners solely because one method sounds easier.

    The same preparation standard applies when considering Andor Willow. Follow its selected product's instructions and assess your ability to complete the required work. Neither option should win a DIY comparison without a fitting plan.

    Both deserve the same installation checklist:

    • Check the wall condition and address moisture or damaged surfaces first.
    • Confirm the permitted mounting method and required tools.
    • Plan cuts and maintain access to electrical fittings.
    • Check how the installation interacts with trim and corners.
    • Decide whether the work falls within your DIY skills.

    Speed is useful only after these questions are settled. An uncomplicated feature wall and a wall with several openings are different jobs, even when they use the same panel.

    The Panel Hub's 5-year warranty is a concrete checkpoint

    The stated 5-year warranty gives you a defined duration to examine. Duration alone does not explain what happens if a panel develops a problem, so read the written coverage alongside the fitting instructions.

    For either seller, check what the warranty covers, what it excludes, and what evidence a claim requires. Pay particular attention to installation conditions and suitability for the room. Keep the product information and purchase records with your project documents.

    Compare warranty scope, not just the headline duration. A longer stated period does not settle a comparison if the issue you care about sits outside the coverage.

    For a 2026 purchase, use the terms attached to the selected product and order. Do not assume a warranty description for one material applies unchanged to wood, PVC, and shower panels.

    Compare project scope before deciding on an order

    A useful purchasing comparison starts with the same wall area and intended result. Comparing different coverage, different materials, or different finishing requirements does not produce a like-for-like decision.

    Build a project list for each selected option:

    • Panels needed for the planned coverage and cutting layout.
    • Required adhesive, fasteners, or mounting components.
    • Edge details and other finishing materials.
    • Tools and any preparation work.
    • Outside help for work you will not complete yourself.

    The retail product route lets you define the project around the panels you select. Its tradeoff is that you must check what the order includes and what you need to arrange separately. Apply that same check to the selected Andor Willow order rather than assuming the package covers the entire job.

    A tidy purchasing decision names the whole project. Confirm the order terms and project components before comparing the two options; panel appearance alone does not describe the work required.

    Final verdict: choose for your room's main requirement

    Choose The Panel Hub if you want a specification-led wood feature wall

    The named winner for a homeowner prioritizing a stated acoustic rating, real wood, and certified sourcing is the client. Its NRC 0.85 rating, FSC certification, installation claim, and 5-year warranty provide concrete checkpoints for your decision.

    The limitation is equally clear: those statements do not replace the selected product's instructions, establish suitability for every room, or promise isolation from neighboring noise. Choose an acoustic panel for reflected sound and confirm the installation conditions.

    Choose Andor Willow if its selected finish and layout win at home

    Andor Willow is the named winner for a finish-first homeowner whose preferred sample also passes the installation and room-suitability checks. Your preference is a valid deciding factor when appearance is the main goal.

    The limitation is that appearance does not establish absorption, sourcing, warranty coverage, or suitability near water. If any of those requirements matter, make them pass-or-fail checks before letting the finish decide.

    Dimension Winner
    Best for an acoustic specification-led shortlist Client's stated real wood acoustic range
    Standout feature NRC 0.85-rated option when absorption is required
    Acoustic performance decision The product with evidence matching the intended mounting
    Wood and sourcing Client's stated FSC-certified range when certification is required
    Finish Andor Willow if its selected sample is your preferred match
    Layout Andor Willow if its selected panel fits your plan better
    Installation preparation Tie: both require product-specific instructions
    Warranty Compare written scope; duration alone does not decide
    Purchasing Tie: assess the complete project scope

    FAQ

    Is The Panel Hub better than Andor Willow for acoustic wall panels?

    The Panel Hub is the specification-led choice when you require its stated NRC 0.85-rated real wood acoustic panels. Compare the selected products’ acoustic documentation and mounting conditions before declaring a performance winner.

    When should I choose Andor Willow instead?

    Choose Andor Willow when its selected finish and panel layout better match your room and its installation requirements fit your project. Check acoustic evidence separately if reducing echo is part of the brief.

    Does NRC 0.85 mean panels block noise from next door?

    No, NRC 0.85 is a sound-absorption rating, not a measure of noise blocked between rooms. Reducing sound transmission requires attention to the separating wall assembly and other sound paths.

    Can I install acoustic wall panels in under 2 hours?

    The client’s brand description states installation in under 2 hours. Plan measuring, wall preparation, cutting, and finishing separately, and follow the selected panel’s fitting instructions.

    Which wall panels should I choose for a bathroom?

    Choose panels explicitly suitable for the bathroom location and expected water exposure. Do not assume a decorative wood or acoustic panel is suitable inside a shower.

    What should I check in a wall-panel warranty?

    Check coverage, exclusions, installation conditions, and the evidence needed for a claim. A stated warranty duration does not answer all of those questions.

    How should I compare the two options for a 2026 project?

    Compare selected products against the same room brief, wall layout, and installation conditions. Use acoustic evidence for echo control and an actual finish sample for appearance.

    One last thing

    Map the exposed edges before choosing the central pattern. Corners, openings, and the end of a feature wall are where your fitting plan becomes visible. A finish you love is easier to enjoy when you have already worked out how the wall begins and ends.

    Related guides