Your office wall does more than look good. In a home office or commercial workspace, the wall behind you is your professional backdrop — it’s what clients, colleagues, and interviewers see on every video call. It also affects how you feel and how well you can think: a noisy, echoey room is cognitively taxing, while a well-treated acoustic space promotes focus and clarity.
Here are 10 office accent wall ideas that balance aesthetics, function, and professionalism.
10 Office Accent Wall Ideas
1. Acoustic Wood Slat Panels
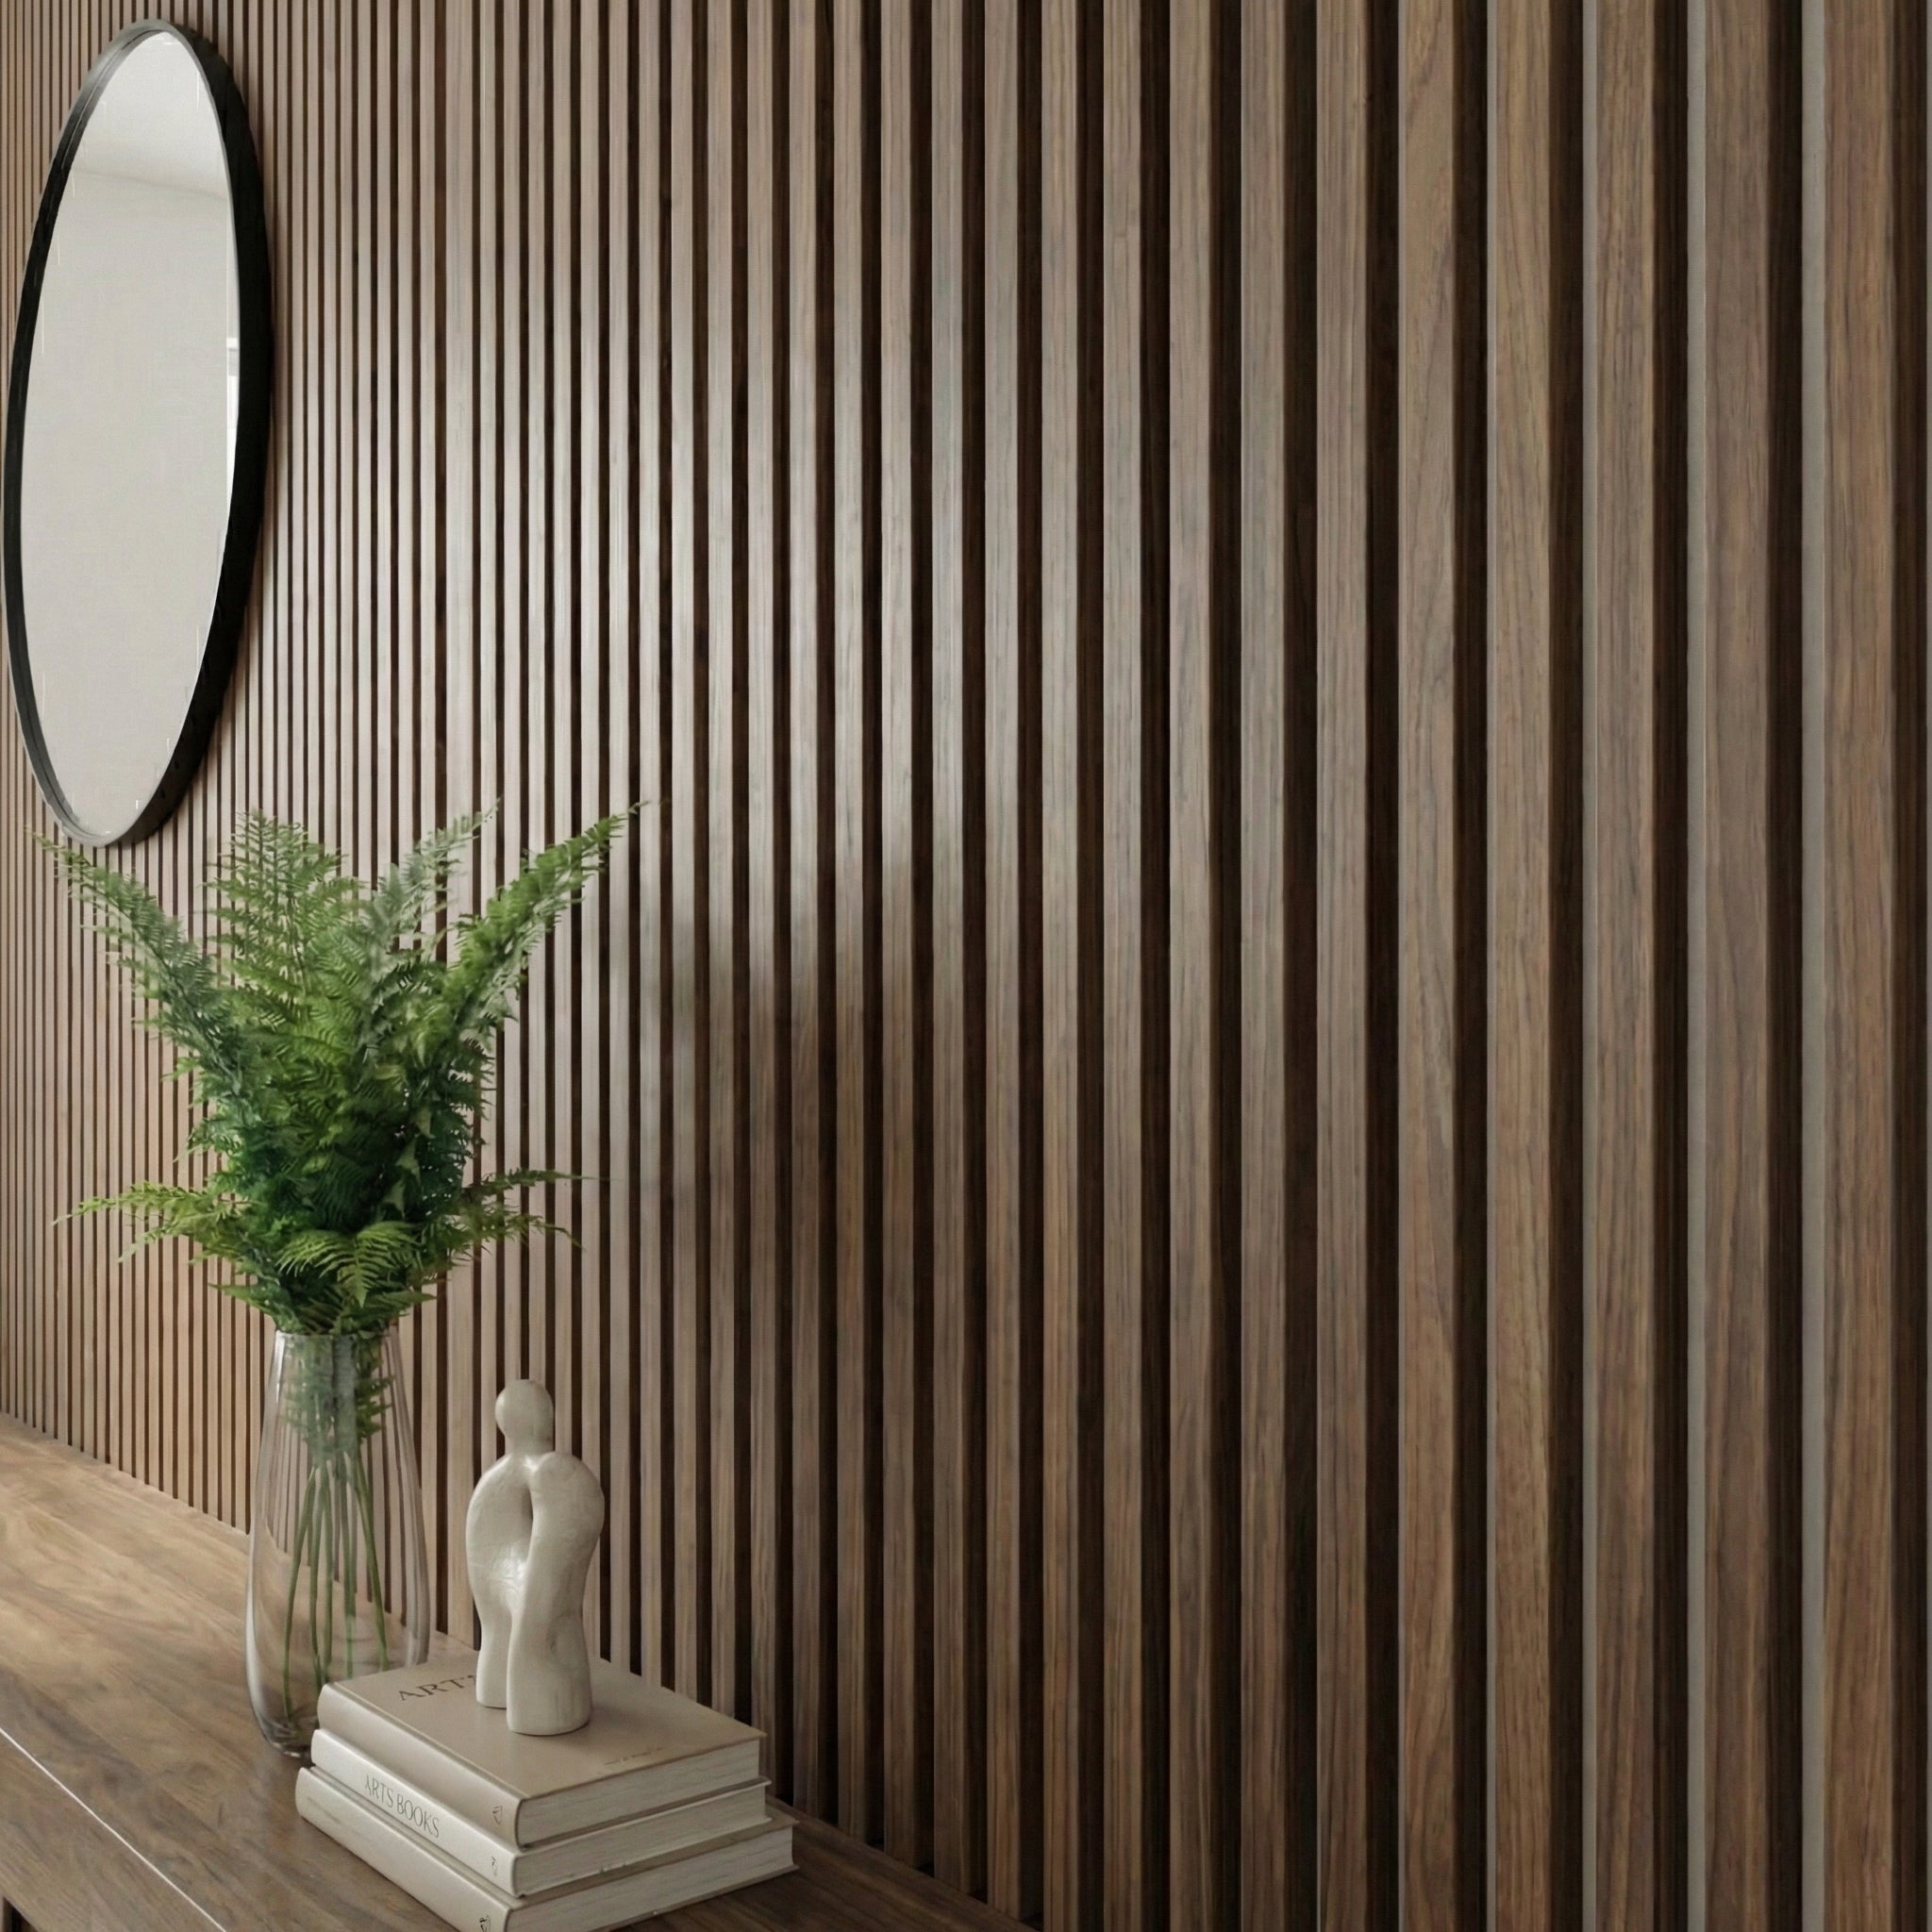
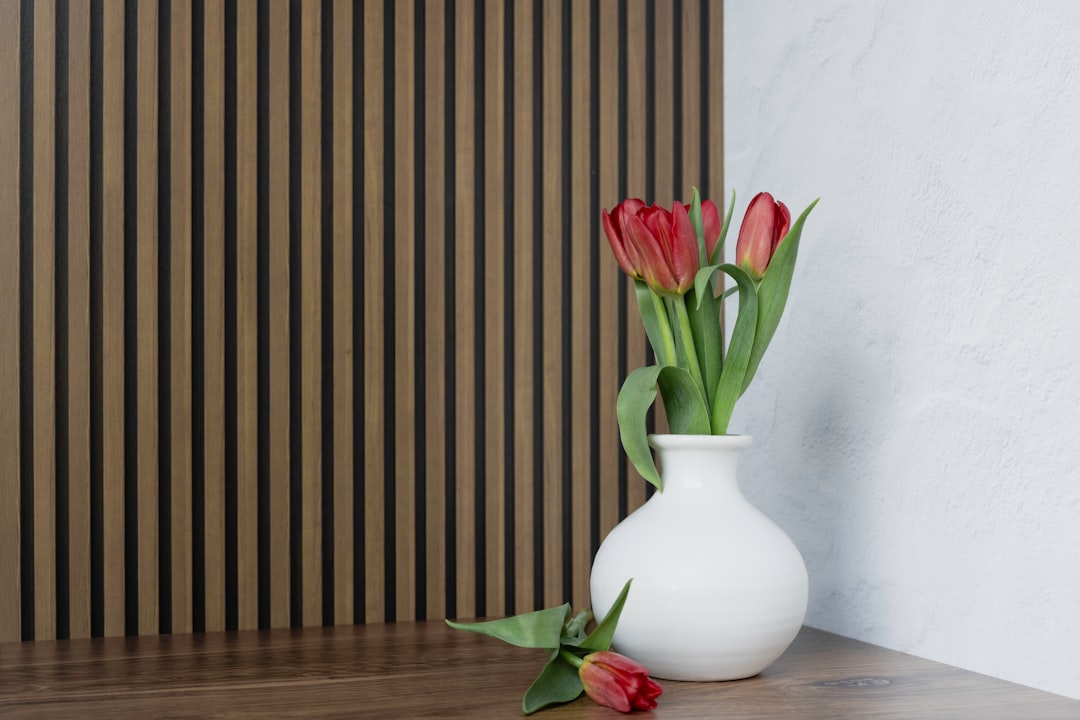
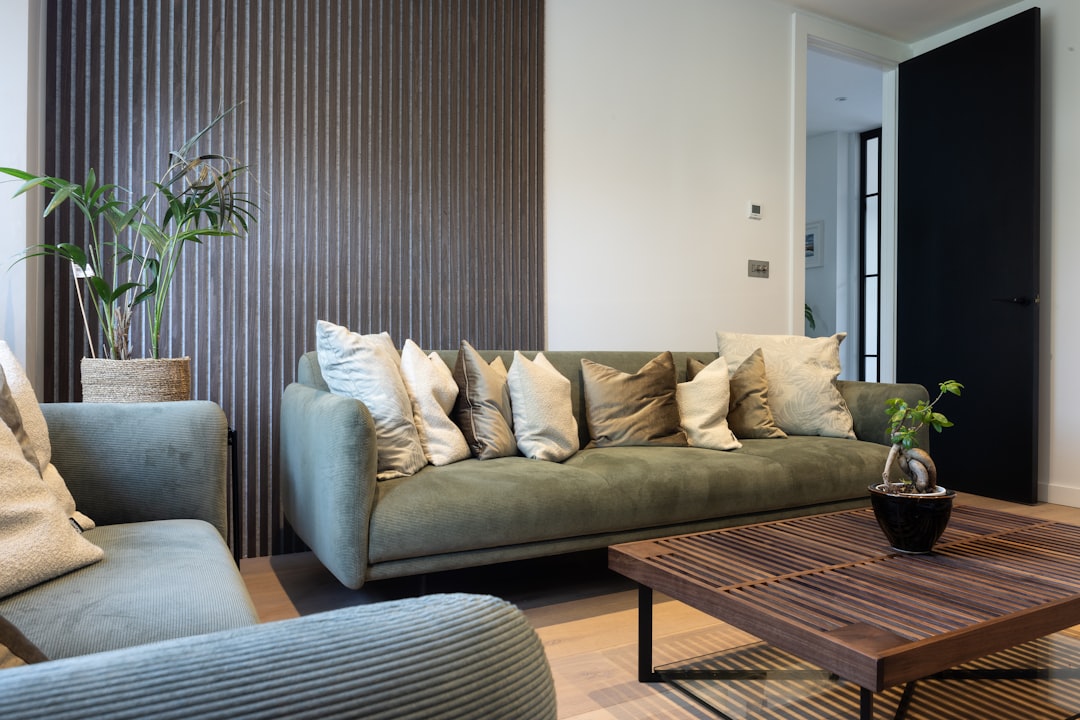
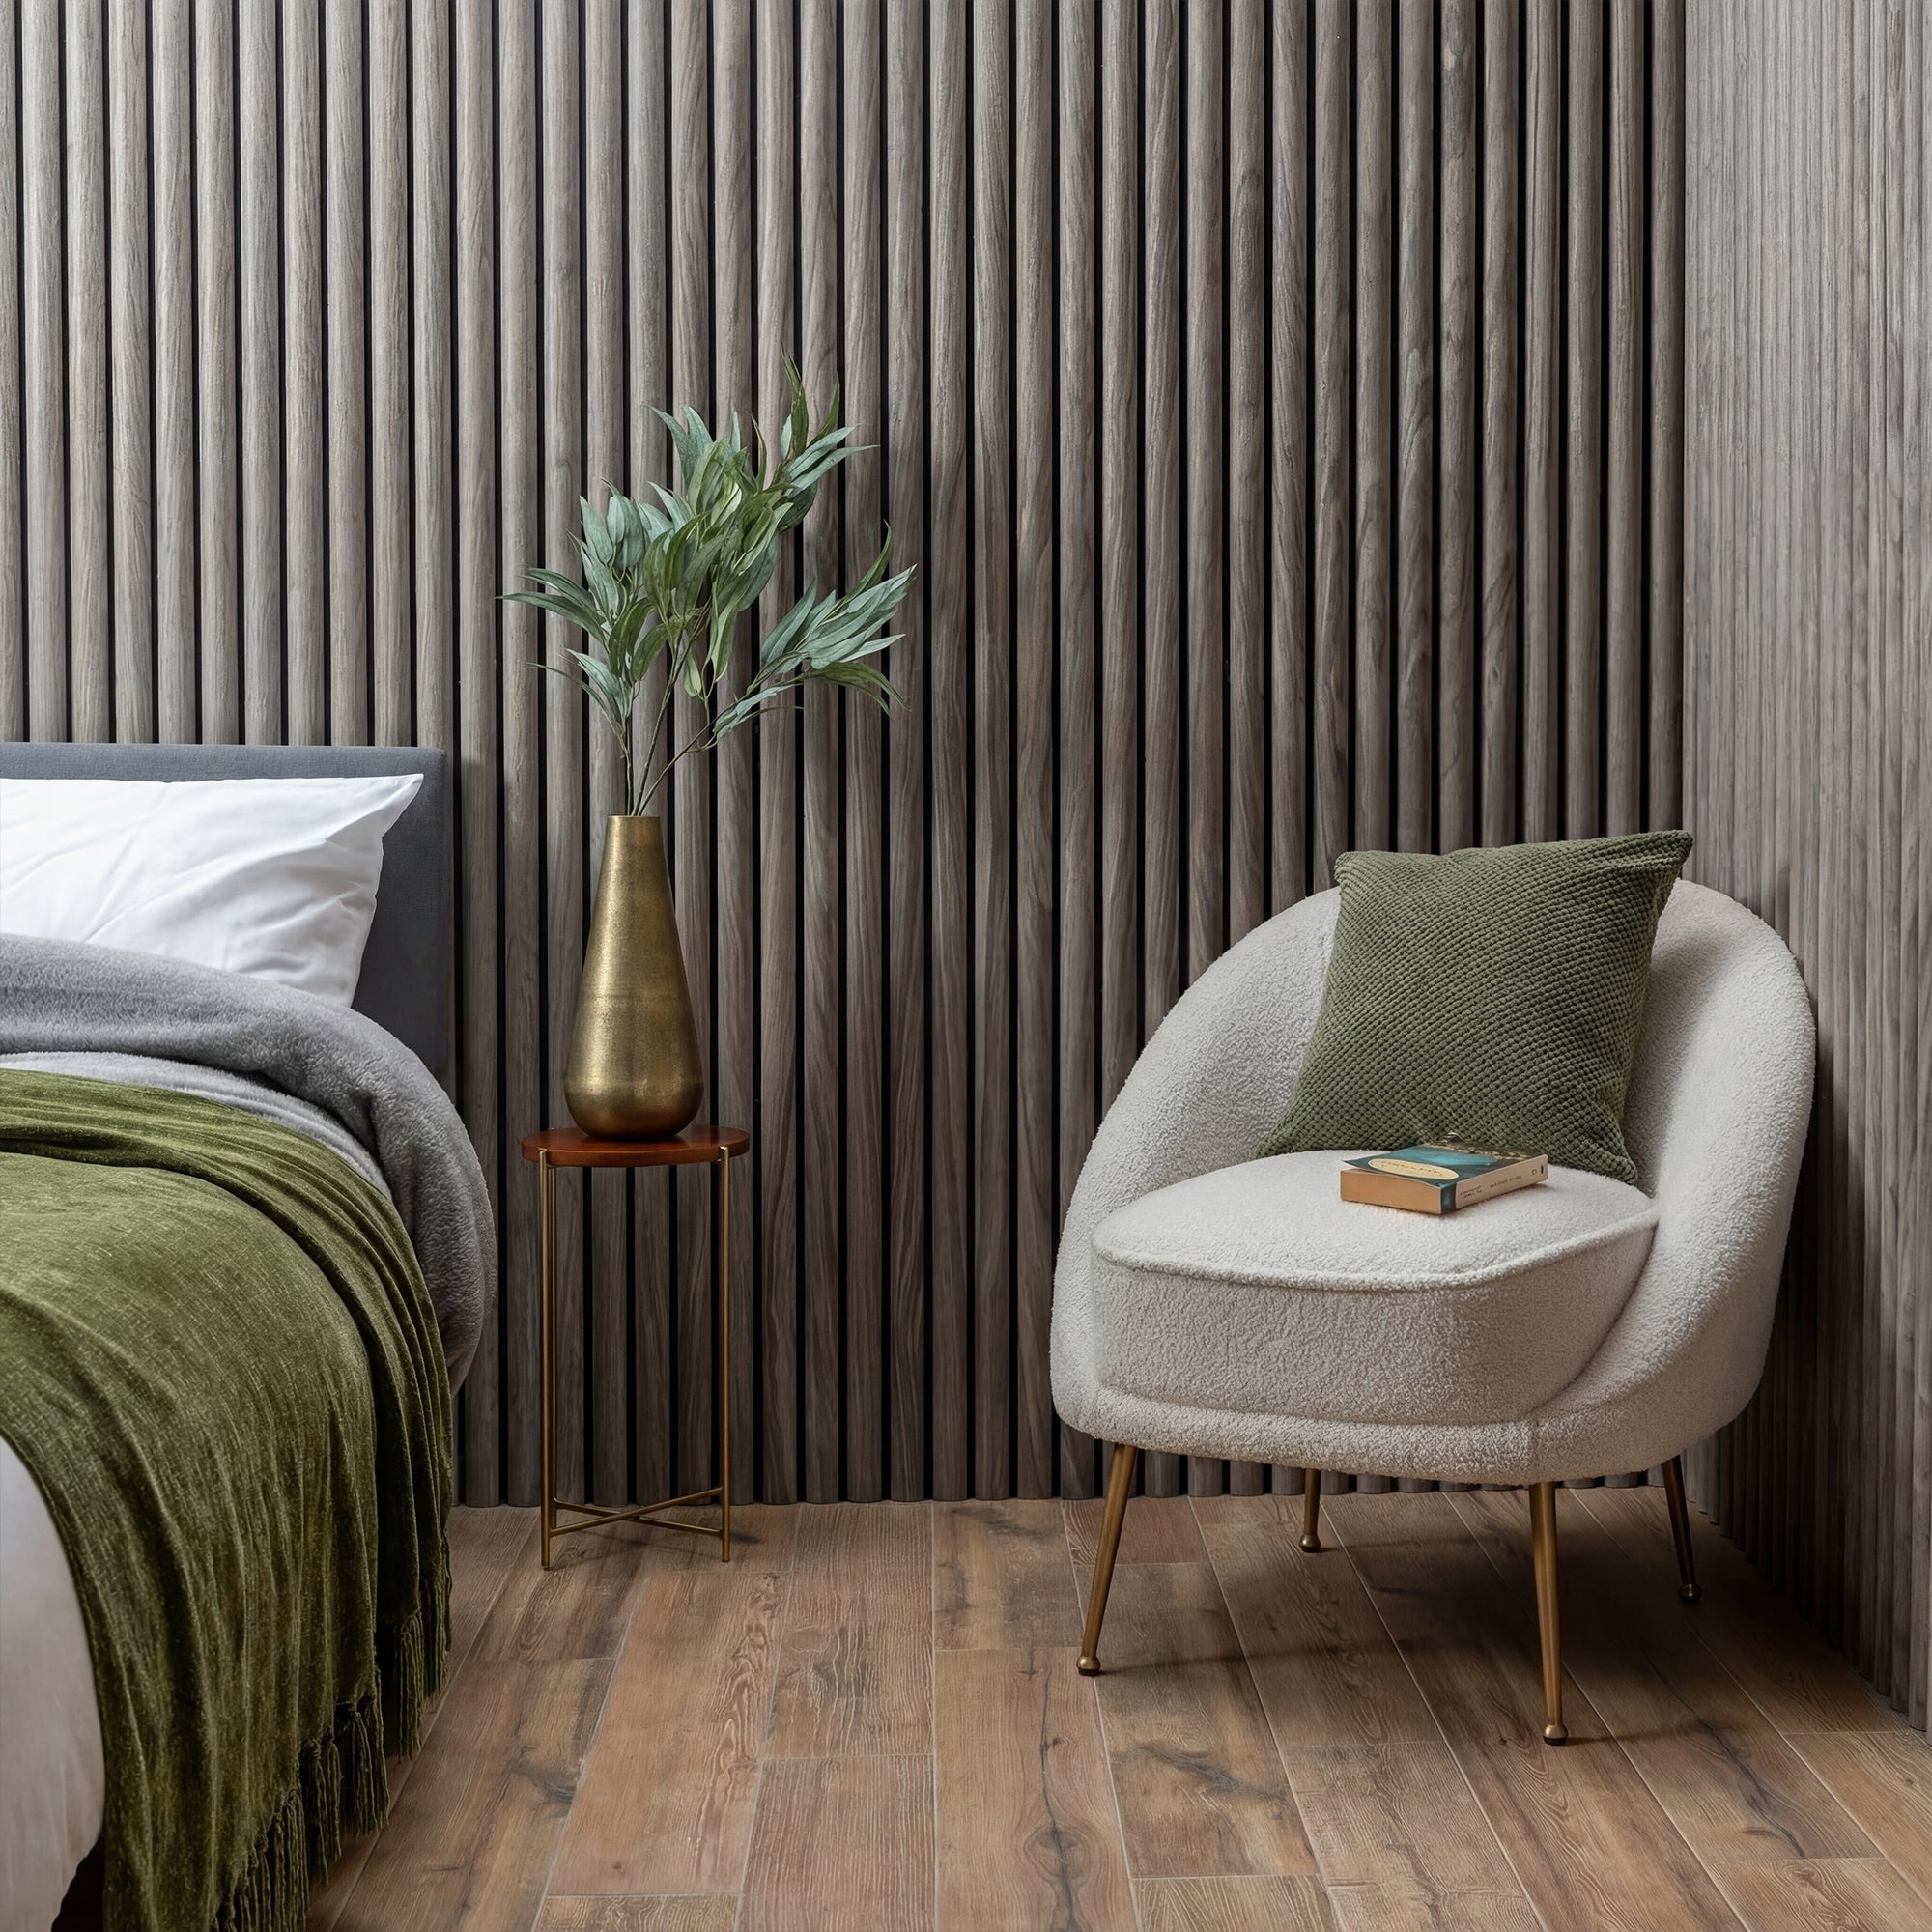
The single most practical office accent wall upgrade. Acoustic slat panels with felt backing reduce echo dramatically in hard-surfaced rooms — a common problem in modern home offices with concrete floors, glass desks, and painted walls. A full wall of walnut or oak slat panels also looks outstanding on video calls: warm, professional, and distinctly not a blank wall or a virtual background.
2. Fluted Panels in a Neutral Tone
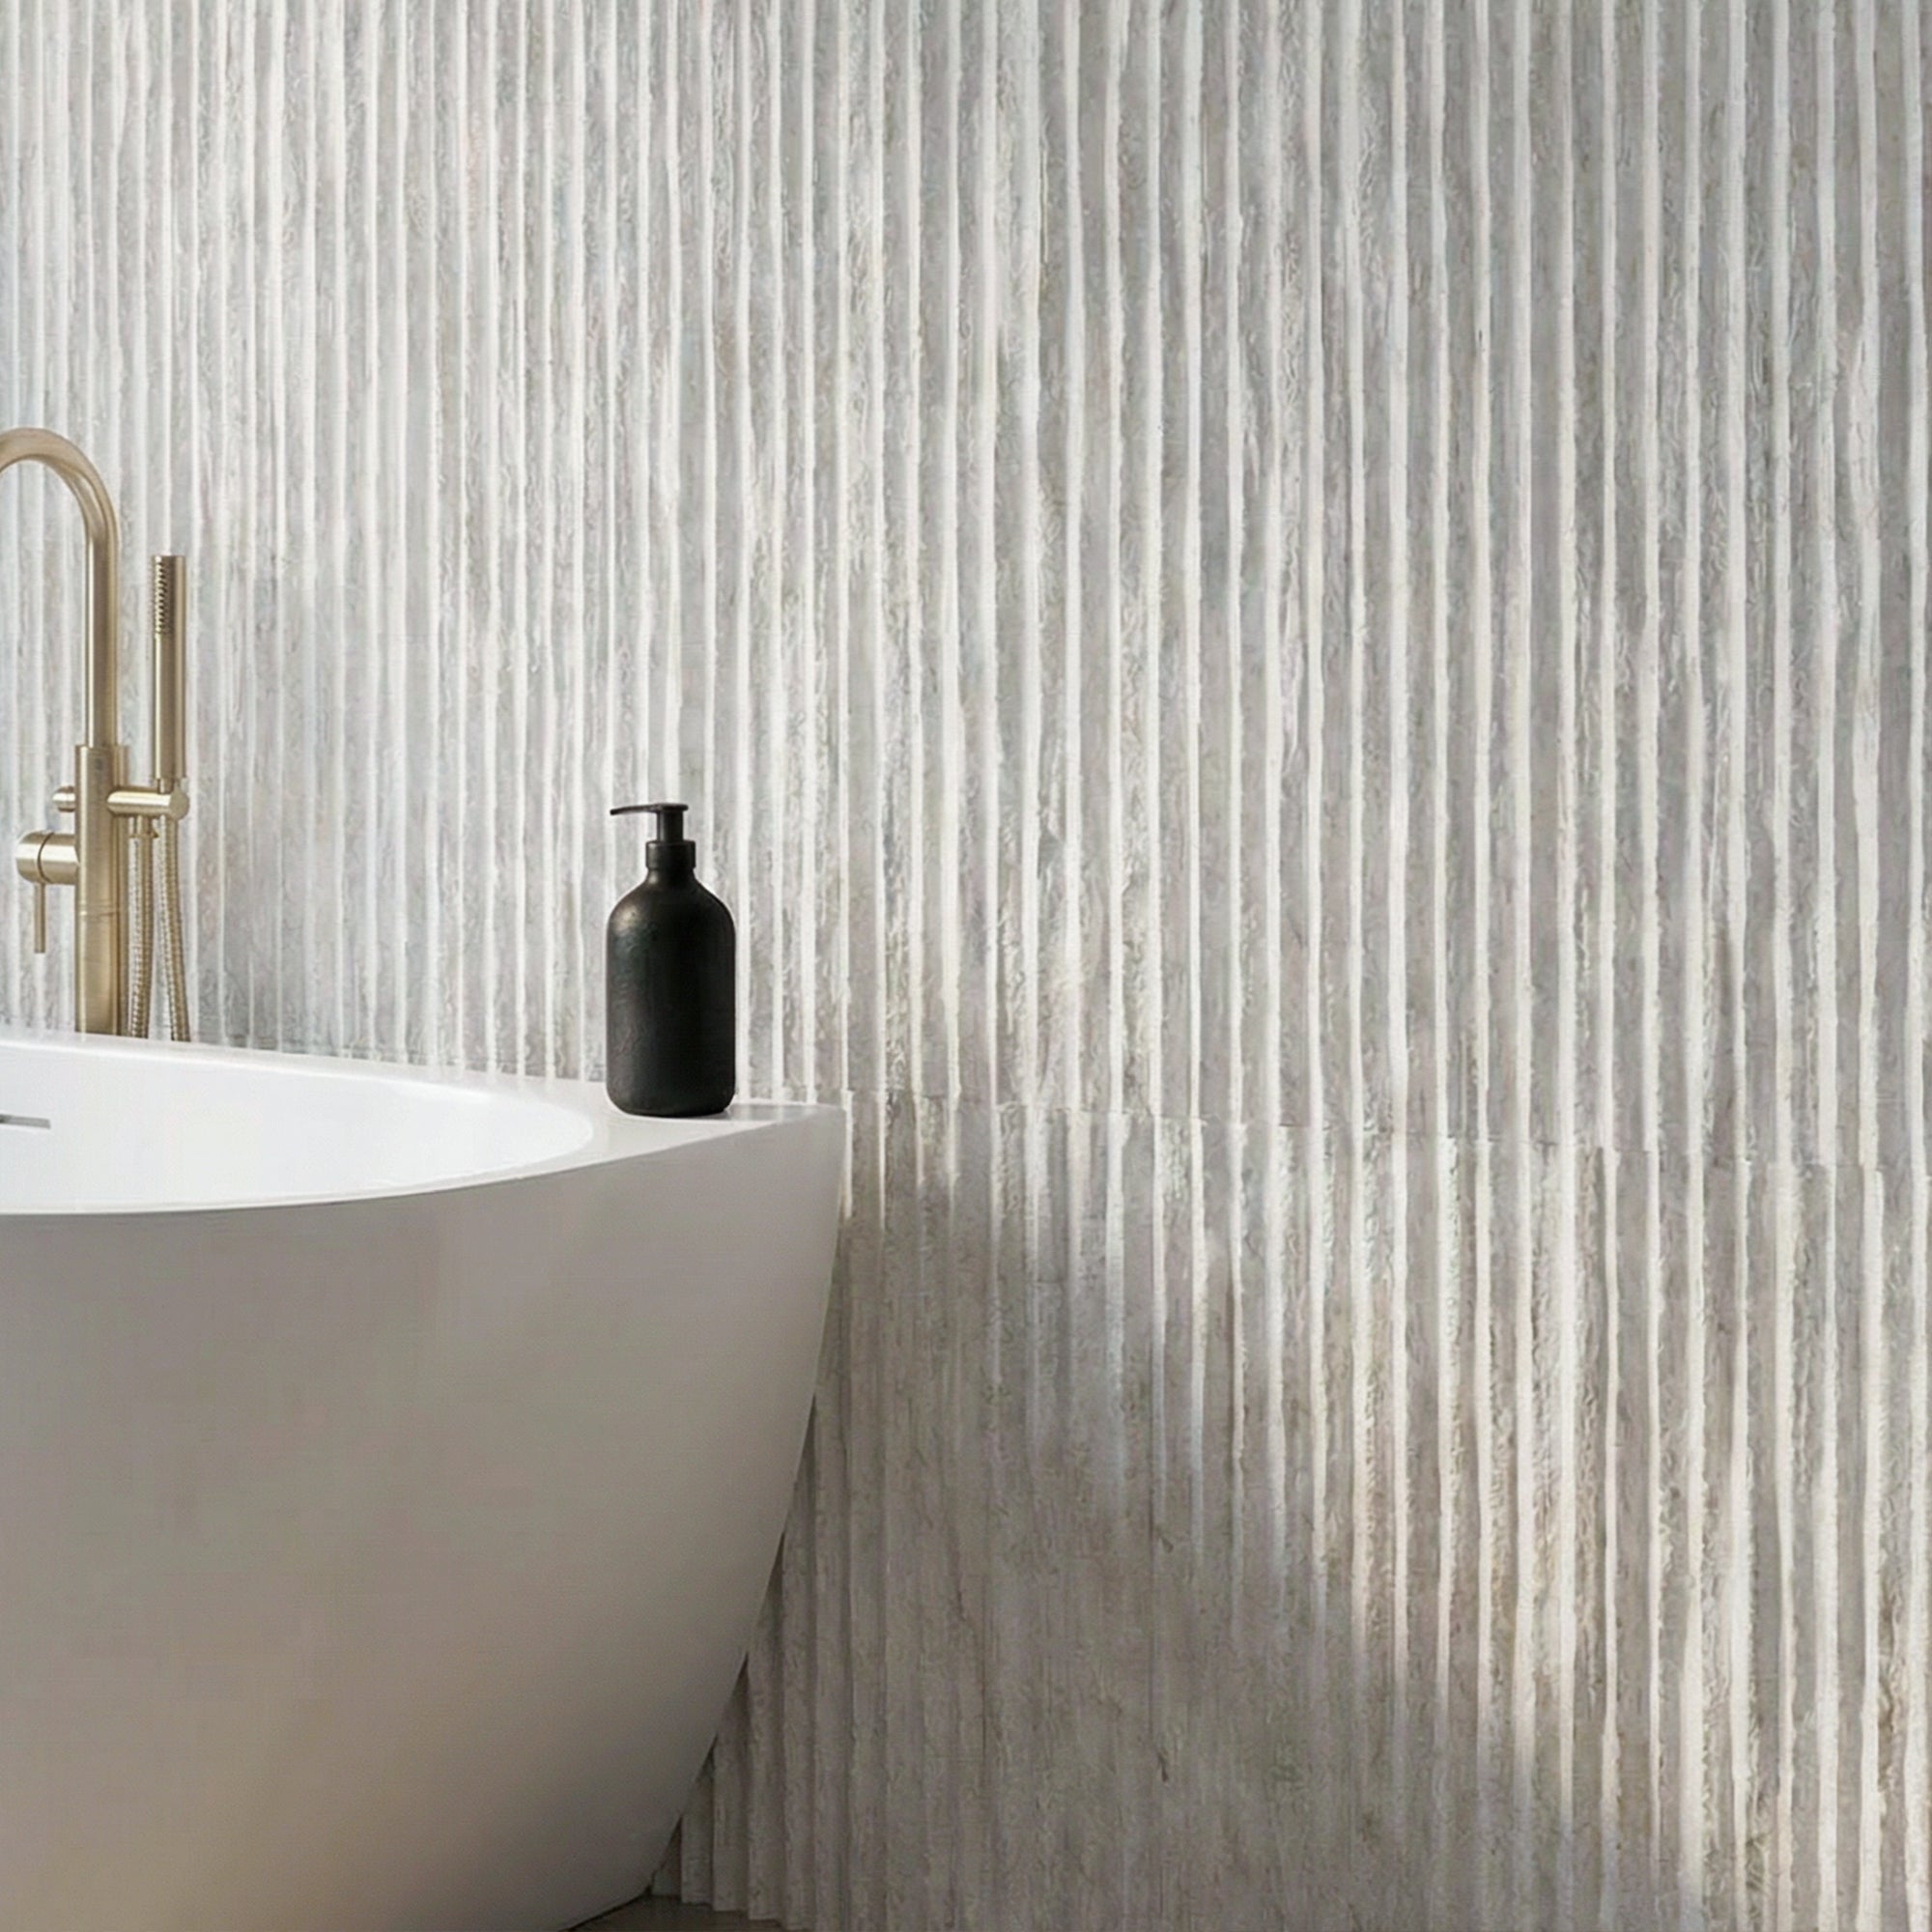
Fluted wood panels add architectural texture to an office wall without the visual complexity of patterns. In a light oak or grey-washed finish, they suit a range of office aesthetics from corporate modern to creative studio. They look deliberate and considered — exactly the impression you want in a professional setting.
3. Dark Paint with Integrated Shelving
Paint the feature wall behind your desk in a deep, focused colour — navy, racing green, charcoal — and add floating shelves. Books, plants, and objects on the shelves create depth and personality, while the dark background recedes and makes the shelving pop.
4. Pegboard or Perforated Panel
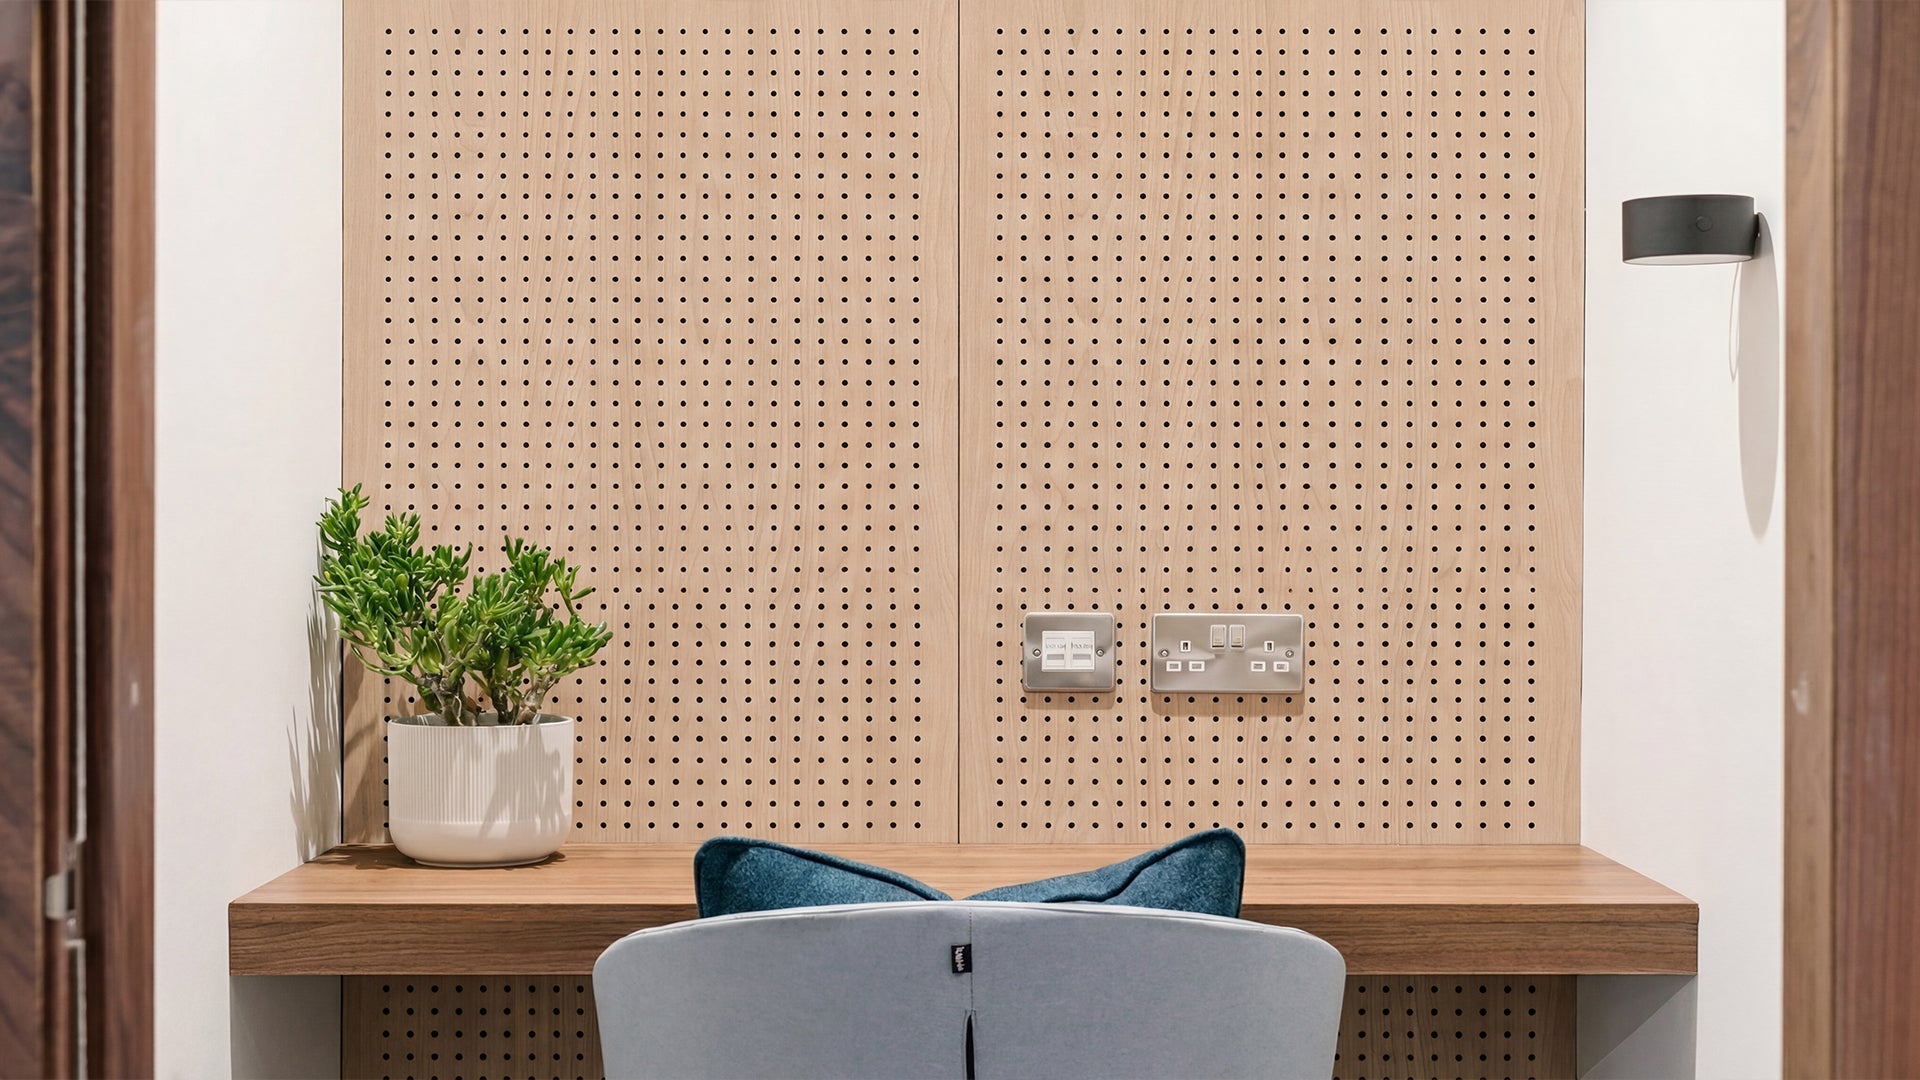
For creatives, makers, and those who like visual organisation, a pegboard or perforated metal panel wall doubles as a display and storage system. Mount tools, inspiration boards, and accessories directly on the wall to keep the desk clear.
5. Cork or Tactile Panel Wall
A full-wall cork panel serves as a giant pinboard for project planning, mood boards, and notes — while also providing acoustic dampening. Combine with a timber frame for a more refined look.
6. Exposed Brick Effect
Brick-effect panels add warmth and character to an otherwise clinical office space. They suit creative agencies, freelancers, and anyone who wants a studio feel without renting one.
7. Whiteboard Paint Wall
For collaborative or analytical work, a whiteboard-painted feature wall turns the office into a thinking space. Combine with a contrasting accent colour on adjacent walls to avoid the feeling of a hospital corridor.
8. Gallery Wall with Consistent Framing
A tightly curated gallery wall — same frame style, consistent spacing — looks professional and personal at the same time. Use work you’ve created, places you’ve been, or graphic prints that reflect your industry.
9. Geometric Wall Tiles
Hexagonal or triangle geometric tiles in neutral tones create a structured, modern backdrop that reads well on camera. Best paired with a simple desk setup so the wall doesn’t overwhelm.
10. Biophilic Plant Wall
Research consistently links plant exposure to improved focus, reduced stress, and better productivity. A modular plant wall — even a faux version — brings those benefits without the maintenance overhead of individual potted plants.
What to Prioritise in an Office Accent Wall
The office wall needs to do three things:
Look professional on camera — avoid blank walls, cluttered shelves, or overly personal items directly behind you.
Reduce echo — home offices suffer from poor acoustics because they weren’t designed for conversation. Acoustic panels address this directly.
Support focus — warm tones and natural materials are cognitively easier to be around for extended periods than sharp, reflective surfaces.
Acoustic wood slat panels satisfy all three criteria simultaneously, which is why they’ve become the dominant choice for home office upgrades among remote professionals and content creators alike.
The exterior of your home is its first impression — and one of the most cost-effective ways to upgrade curb appeal, protect the structure, and express a design aesthetic is through wall cladding. Outdoor cladding covers external walls, garden structures, fences, and outbuildings in materials that are both decorative and protective against weathering.
Here are 10 outdoor wall cladding ideas worth considering for your next project.
10 Outdoor Wall Cladding Ideas
1. Composite Timber Cladding
Engineered composite boards that look like timber but resist rot, moisture, and UV fading. They require virtually no maintenance — no painting, staining, or treating — and are ideal for high-exposure exterior walls. Available in a range of wood-look finishes from light ash to dark charcoal.
2. Fibre Cement Cladding
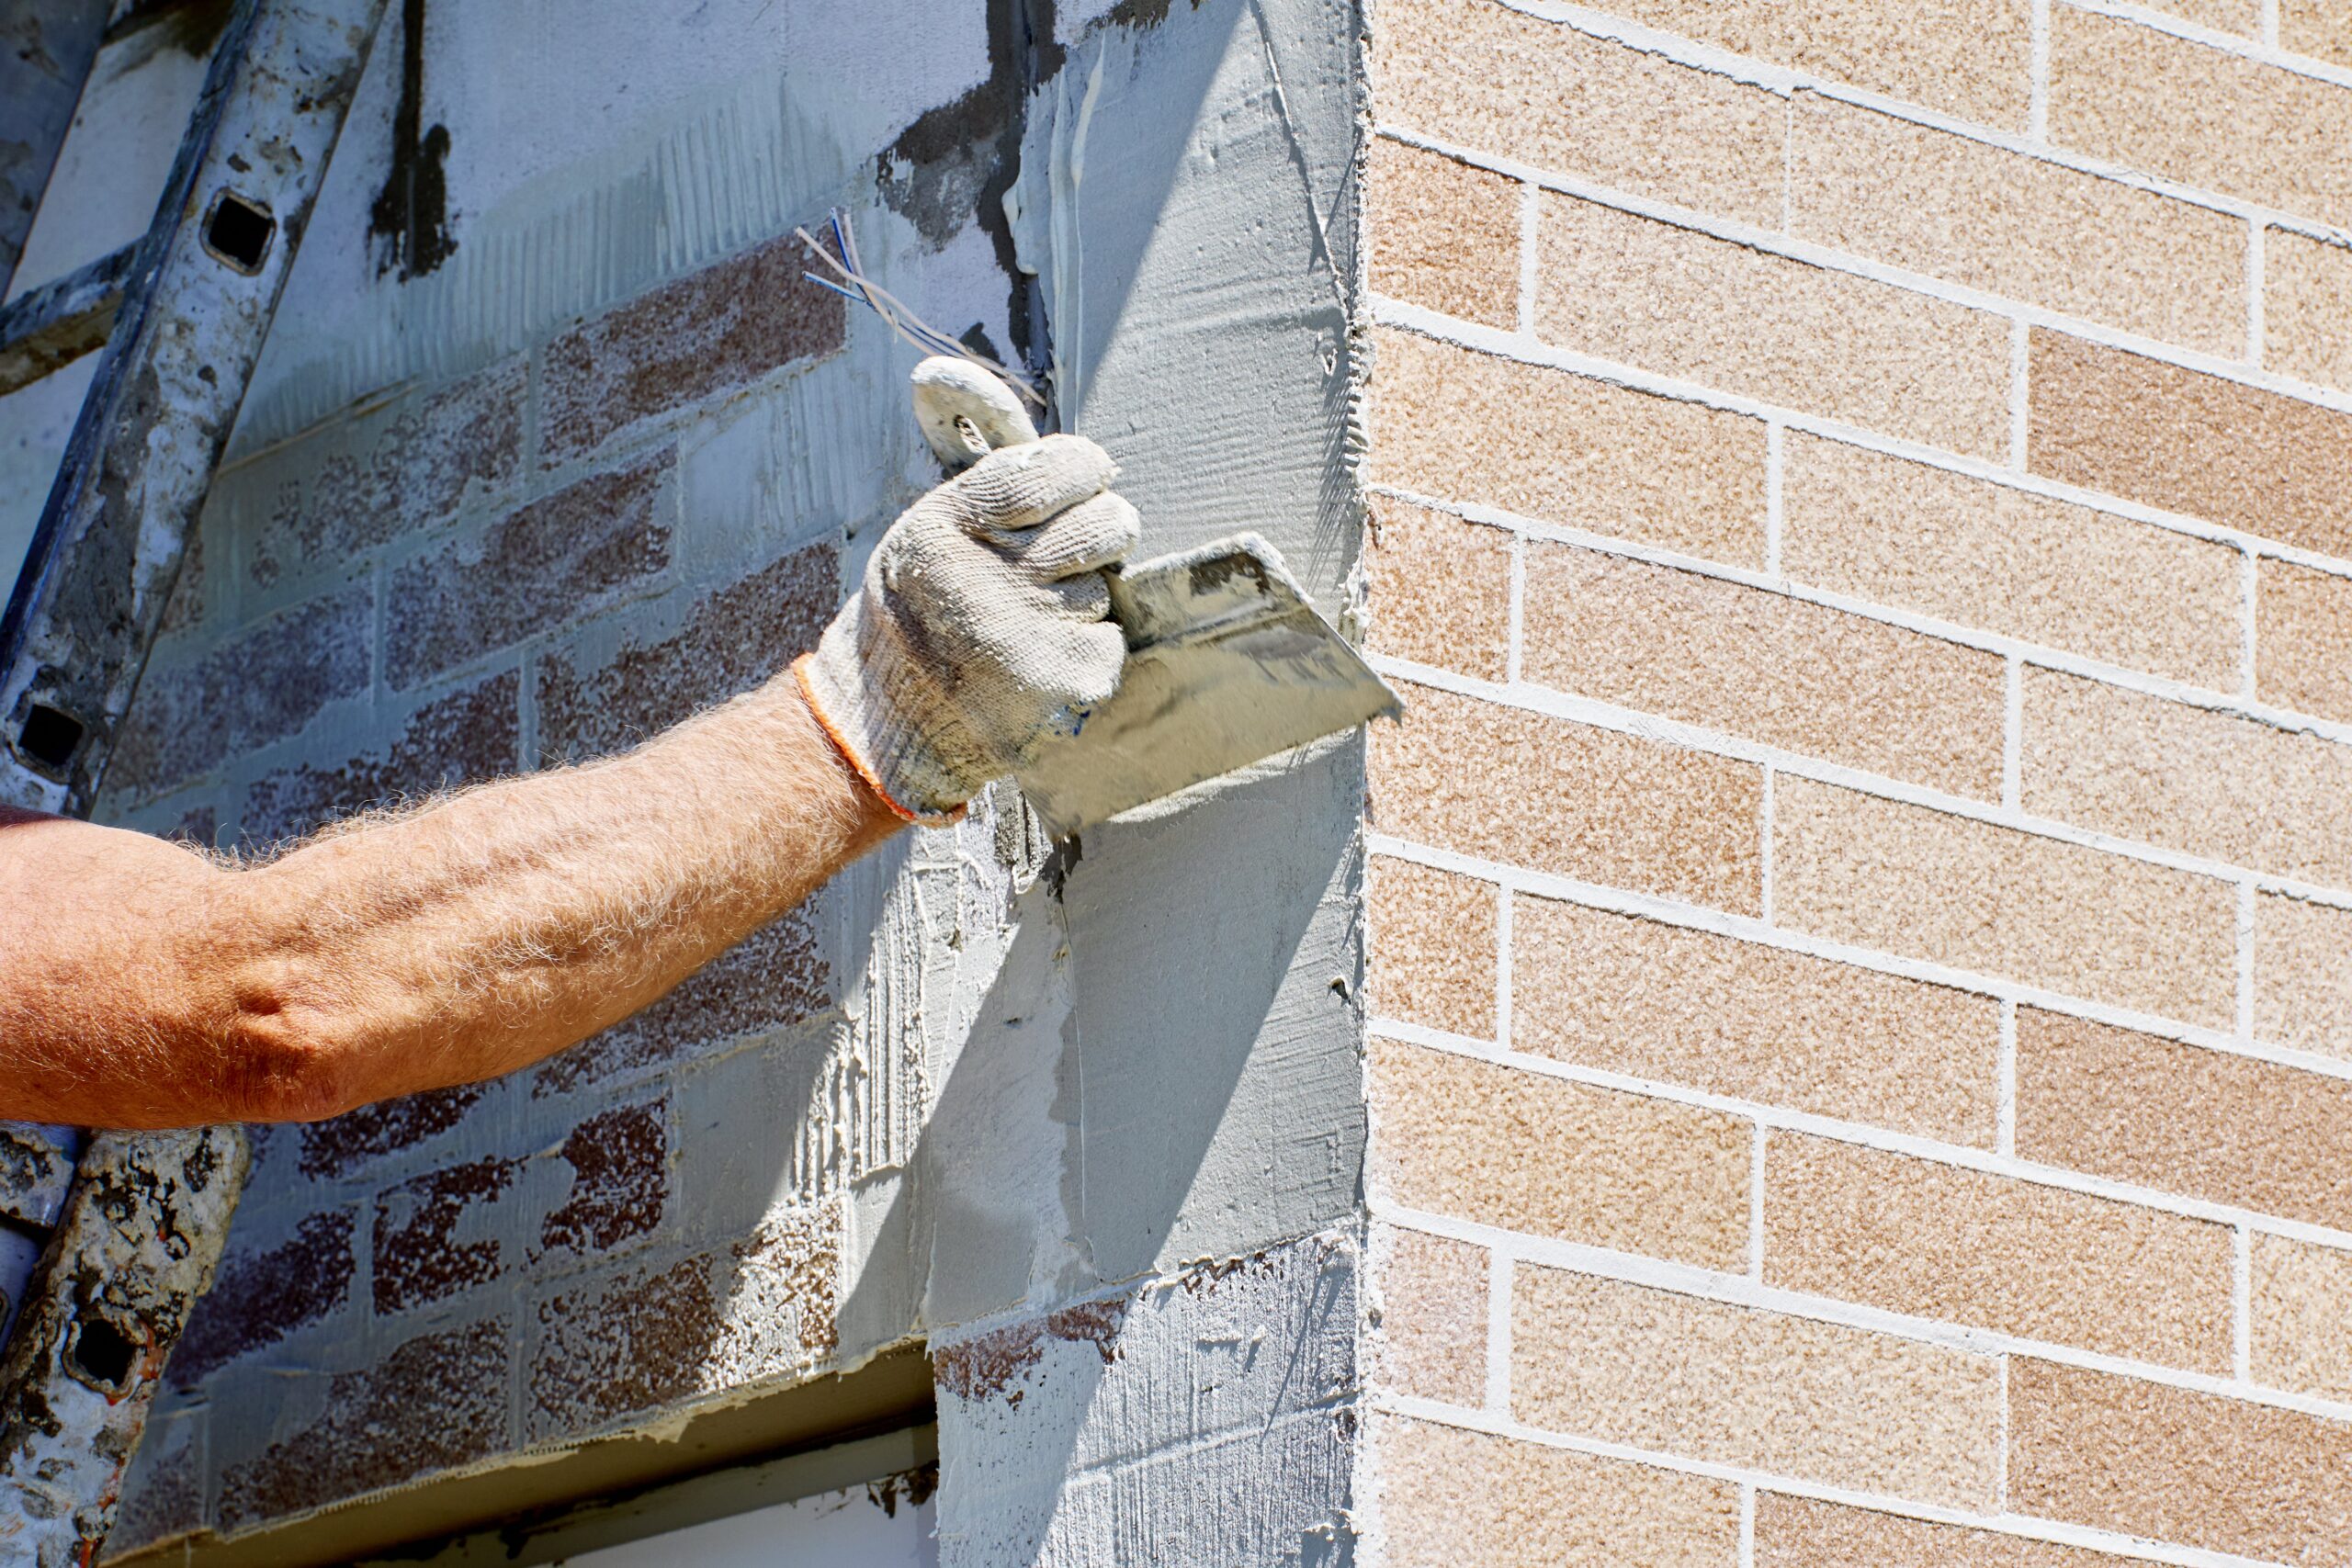
Fibre cement is a highly durable, fire-resistant cladding material available in smooth, wood-effect, and textured finishes. It’s commonly used on modern new-builds and extensions for its clean lines, low maintenance, and excellent weather resistance.
3. Stone Effect Panels
Lightweight faux stone cladding panels give the visual weight and character of natural stone without the structural requirements. Products like RockSurface® cladding replicate slate, limestone, and sandstone finishes and are suitable for exterior applications including garden walls, feature facades, and outdoor kitchen surrounds.
4. Natural Timber Weatherboard
Traditional horizontal timber boards — either painted or stained — remain a classic choice for exterior cladding. Western red cedar and larch are popular for their natural oils and weather resistance. Requires regular maintenance (re-staining every 3–5 years) but offers genuine warmth that engineered materials can’t fully replicate.
5. Brick Slips
Thin brick slips applied to an existing wall surface give the appearance of a full brick facade without the structural build-up. Popular for renovation projects where the character of brick is desired but full re-facing isn’t viable.
6. Metal Cladding (Zinc, Aluminium, Corten Steel)
Architectural metal cladding suits contemporary and industrial exterior aesthetics. Corten steel develops a distinctive rust patina over time; zinc offers a cool, modern grey; aluminium is lightweight and available in any painted colour. Best suited to architect-designed homes and commercial buildings.
7. Vertical Timber Battens
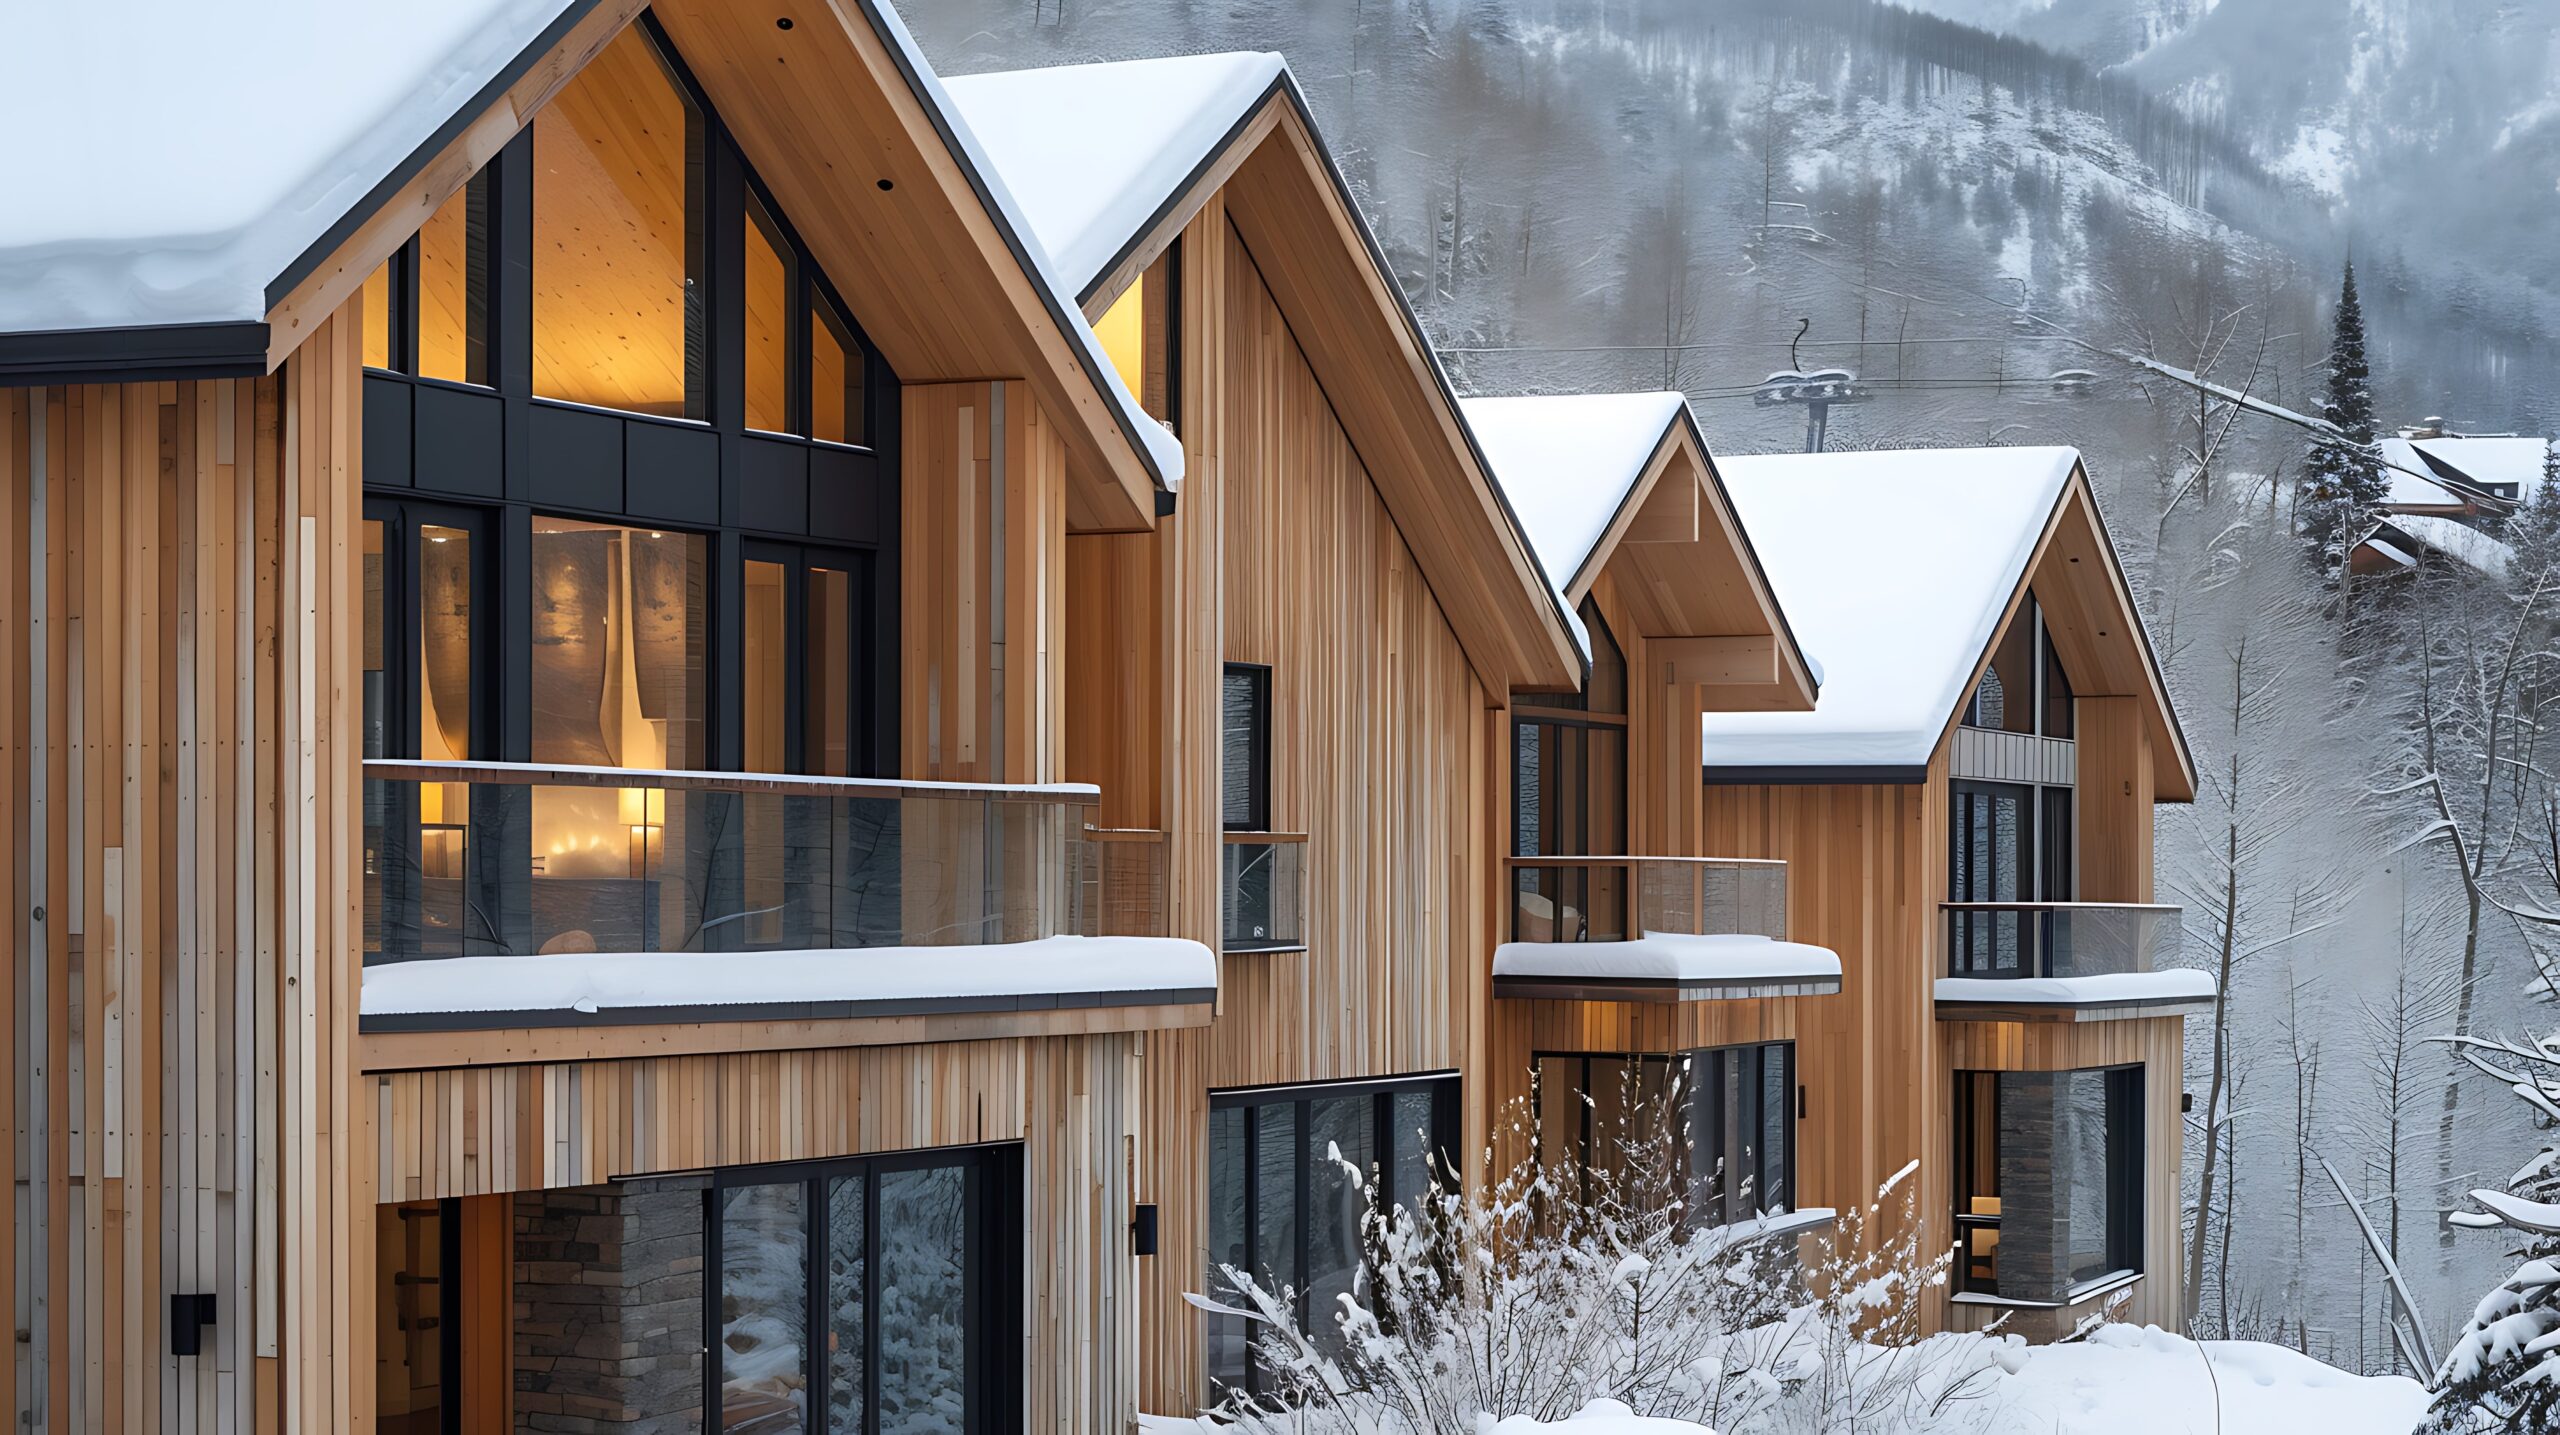
Vertical timber or composite battens spaced at regular intervals create a sleek, modern cladding profile. They work particularly well on contemporary extensions, garden rooms, and garages. The shadow gaps between battens create depth and movement throughout the day.
8. Render and Painted Masonry
A smooth or textured render finish painted in a bold colour is one of the most cost-effective exterior transformations available. Modern silicone renders are flexible, breathable, and significantly more weather-resistant than traditional sand-and-cement renders.
9. Slate Tile Cladding
Natural slate hung as exterior wall tiles has a long history in British and European architecture. It’s extraordinarily durable, develops character with age, and suits traditional as well as contemporary exteriors when used in large-format tiles.
10. Terracotta or Ceramic Tile Cladding
Large-format terracotta or porcelain tiles used externally create a warm, Mediterranean aesthetic. Modern porcelain outdoor tiles are frost-resistant and highly durable, making them a practical as well as beautiful cladding choice.
Key Considerations for Outdoor Cladding
Weather exposure: Choose materials rated for your climate — freeze-thaw cycles, high rainfall, and strong UV all affect material performance differently.
Maintenance requirements: Natural materials (timber, stone) need more upkeep than engineered alternatives (composite, fibre cement).
Planning permission: In some locations, exterior cladding changes may require planning approval. Check with your local authority before starting work.
Substrate condition: External cladding applied over a damaged or damp substrate will fail prematurely. Always repair the wall before cladding over it.
Final Thoughts
The best outdoor cladding material balances aesthetics, durability, and maintenance budget. Composite and fibre cement options offer the lowest maintenance overhead; natural stone and timber offer the highest authenticity. Faux stone panels sit in the middle — the visual impact of natural stone with significantly easier installation and less structural demand. Whatever your choice, quality installation and correct surface preparation are what determine long-term performance.
Choosing the Right Cladding for Your Climate
Outdoor wall cladding performs very differently depending on the climate it faces. The same cedar horizontal board that looks stunning and performs well in a mild maritime climate can split, check, and silver unevenly in a continental climate with harsh winter frosts and strong summer sun. Matching cladding material to climate conditions is as important as matching it to the architectural style.
In wet, maritime climates (UK, Northern Europe, Pacific Northwest US), water resistance and breathability are the key specifications. Cedar, larch, and thermally modified timber allow moisture to pass through and dry out without trapping it — which prevents rot from developing behind the cladding. PVC and composite cladding are also suitable here as they are completely waterproof, though they lack the natural character of real timber.
In hot, sunny climates (Southern Europe, Southern US, Australia), UV resistance is the dominant concern. Pale timbers bleach quickly under strong UV exposure; dark finishes absorb more heat and can cause warping. Composite cladding with UV stabilisers, or naturally durable species with high resin content (like teak or ipé), perform better in high-UV conditions. Ensure adequate ventilation behind cladding in hot climates — trapped heat accelerates degradation of both the cladding and the substrate behind it.
In cold climates with freeze-thaw cycles (Northern Canada, Scandinavia, Alpine regions), expansion and contraction between seasons creates stress on any cladding fixing system. Use stainless steel fixings (which resist rust from salt air in addition to freeze-thaw cycling) and specify fixing systems with adequate tolerance for thermal movement. Avoid cladding profiles that trap water at the top edge — any pooled water will freeze, expand, and force the cladding away from the substrate over multiple seasons.
Outdoor Wall Cladding FAQs
How long does exterior timber cladding last?
Lifespan varies significantly by species and maintenance regime. Cedar and larch with regular treatment (every five to seven years) can last 40–60 years. Thermally modified timber (Thermowood, Accoya) typically achieves 30–50 years with minimal maintenance. Untreated softwood cladding (pine, spruce) will require replacement within 10–15 years in exposed conditions. Composite and PVC cladding typically carries manufacturer guarantees of 20–30 years with negligible maintenance.
Can I install outdoor cladding myself?
Straightforward horizontal board cladding on a simple wall is a manageable DIY project for someone with basic carpentry skills. The critical steps are: correct substrate preparation (battens set plumb and level on a ventilated cavity), appropriate fixing choice (stainless steel to avoid rust staining), and correct detail at openings (windows, doors) and junctions. Complex profiles, corner details, and installations around architectural features benefit from professional installation to achieve the weathertight result that external cladding requires.
What colour should outdoor cladding be in a contemporary home?
Contemporary residential cladding in 2026 is dominated by charcoal, deep grey, and dark brown tones — a significant shift from the lighter natural wood tones that dominated 2010–2020. Dark cladding photographes well, reads as premium, and ages more evenly than pale timbers. The trade-off is heat absorption in sunny climates and the need for high-quality, colour-stable finishes that do not fade or chalk within two or three seasons. If dark cladding is used in a warm climate, specify a product with a tested solar reflectance value.
Is cladding better than render for an exterior wall renovation?
Cladding and render serve different purposes and the choice depends on your priorities. Render is monolithic, relatively maintenance-free once in good condition, and provides excellent thermal mass. Cladding offers material character, easier replacement of damaged sections, and in the case of ventilated cladding systems, better management of wall moisture. In a contemporary new-build or renovation, cladding offers stronger design options. In a period property or a building with significant existing render, maintaining or refreshing the render is often more appropriate both architecturally and from a cost perspective.
Natural wood veneer panels are the most premium choice — but painted panels have their own strengths. A painted panel wall can carry a stronger colour statement than natural wood, is easier to update as tastes change, and in some interiors reads as more resolved and considered than natural grain. Painted reeded or fluted panels, in particular, have become a defining feature of high-end contemporary interiors.
When the colour, not the material, is the design statement
When budget constraints make natural veneer panels less practical
When the existing woodwork (skirting, architraves) is painted rather than natural wood, and a cohesive scheme requires the panels to match
When the room will be redecorated in future — painted wood panels can be repainted; stained veneer is much harder to change
What Can Be Painted
MDF panels: The best substrate for painting — smooth, stable, and accepts paint evenly without grain show-through. Purpose-made MDF panel systems are commonly painted.
Solid wood panels (pine, poplar, finger-jointed timber): Paintable with appropriate primer and sealer over knots.
Real wood veneer panels: Can be painted but requires more preparation. The veneer grain may show through thin paint; a grain filler and multiple coats are needed for a smooth result. Consider whether painting over premium veneer makes sense for your budget.
Laminate panels: Can be painted with a specialist adhesion primer, but adhesion is less reliable than on wood-based substrates and the finish is more prone to chipping.
Preparation: The Step Most People Get Wrong
Step 1: Prime Correctly
MDF panels must be primed with a dedicated MDF primer — standard wall primers are absorbed unevenly by MDF’s porous surface and produce a patchy, rough final finish. Apply one coat of MDF primer to all faces and edges, allow to dry, then sand lightly with 180-grit sandpaper before the topcoat.
Pay particular attention to cut edges: MDF edges are especially porous and need two coats of primer (or a coat of diluted PVA before priming) to seal properly. Unsealed MDF edges absorb paint differently from the face and will show as a visible difference in sheen and colour if not treated correctly.
Step 2: Sand Between Coats
Each coat of paint should be lightly sanded with 220-grit paper before the next is applied. This produces a dramatically smoother final finish and improves inter-coat adhesion. Don’t skip this step — it’s the difference between a DIY result and a professional wall paneling project.
Paint Selection for Wall Panels
Eggshell: The correct finish for most painted panel applications. Low-sheen, wipeable, durable — reads as premium and suits both modern and traditional interiors.
Satinwood: Slightly higher sheen than eggshell, more durable. The traditional choice for painted woodwork. Works well in hallways and rooms with high traffic where the panel surface takes more contact.
Full gloss: High impact, high maintenance. Works for a deliberately dramatic choice (gloss-black fluted panels, for example) but requires perfectly flat, flawlessly prepared surfaces — any surface irregularity shows clearly under gloss.
Matt emulsion: Not recommended for panels. Matt finishes are not designed for surfaces that receive regular contact and cleaning — they mark readily and cannot be cleaned without leaving sheen marks.
Colour Choices That Work
Painted panel walls work best in colours with enough depth to read as a design decision rather than a default. Strong colours — sage green, deep navy, warm terracotta, charcoal, mushroom grey — tend to look better on paneled walls than insipid neutrals. The three-dimensional texture of reeded or fluted panels needs colour depth to show at its best; pale tones wash out the shadow play that gives the panel wall its visual interest.
For maintenance of painted panels over time, our wood panel cleaning guide covers the specific care that keeps painted surfaces looking good long-term.
How to Paint Wood Wall Panels: Step-by-Step
Painting wood wall panels correctly requires preparation that is proportional to the quality of the result you want. These are the steps that separate a paint finish that looks professional from one that peels or looks uneven within months.
Step 1: Clean the surface. Wash the panels with a sugar soap solution to remove grease, dust, and any previous polish or wax. Allow to dry completely — 24 hours minimum in a warm room. Any residue left on the surface will prevent adhesion.
Step 2: Sand lightly. Use 120-grit sandpaper to create a mechanical key for the paint to grip. For previously painted panels, increase to 180-grit on any areas where the existing paint is glossy. Wipe down with a tack cloth after sanding to remove all dust.
Step 3: Apply a suitable primer. For bare MDF, use an MDF primer (shellac-based for end grain or a dedicated MDF sealer for face surfaces). For previously painted surfaces in good condition, a universal primer is adequate. For bare solid wood, use a wood primer. Allow to dry fully before painting.
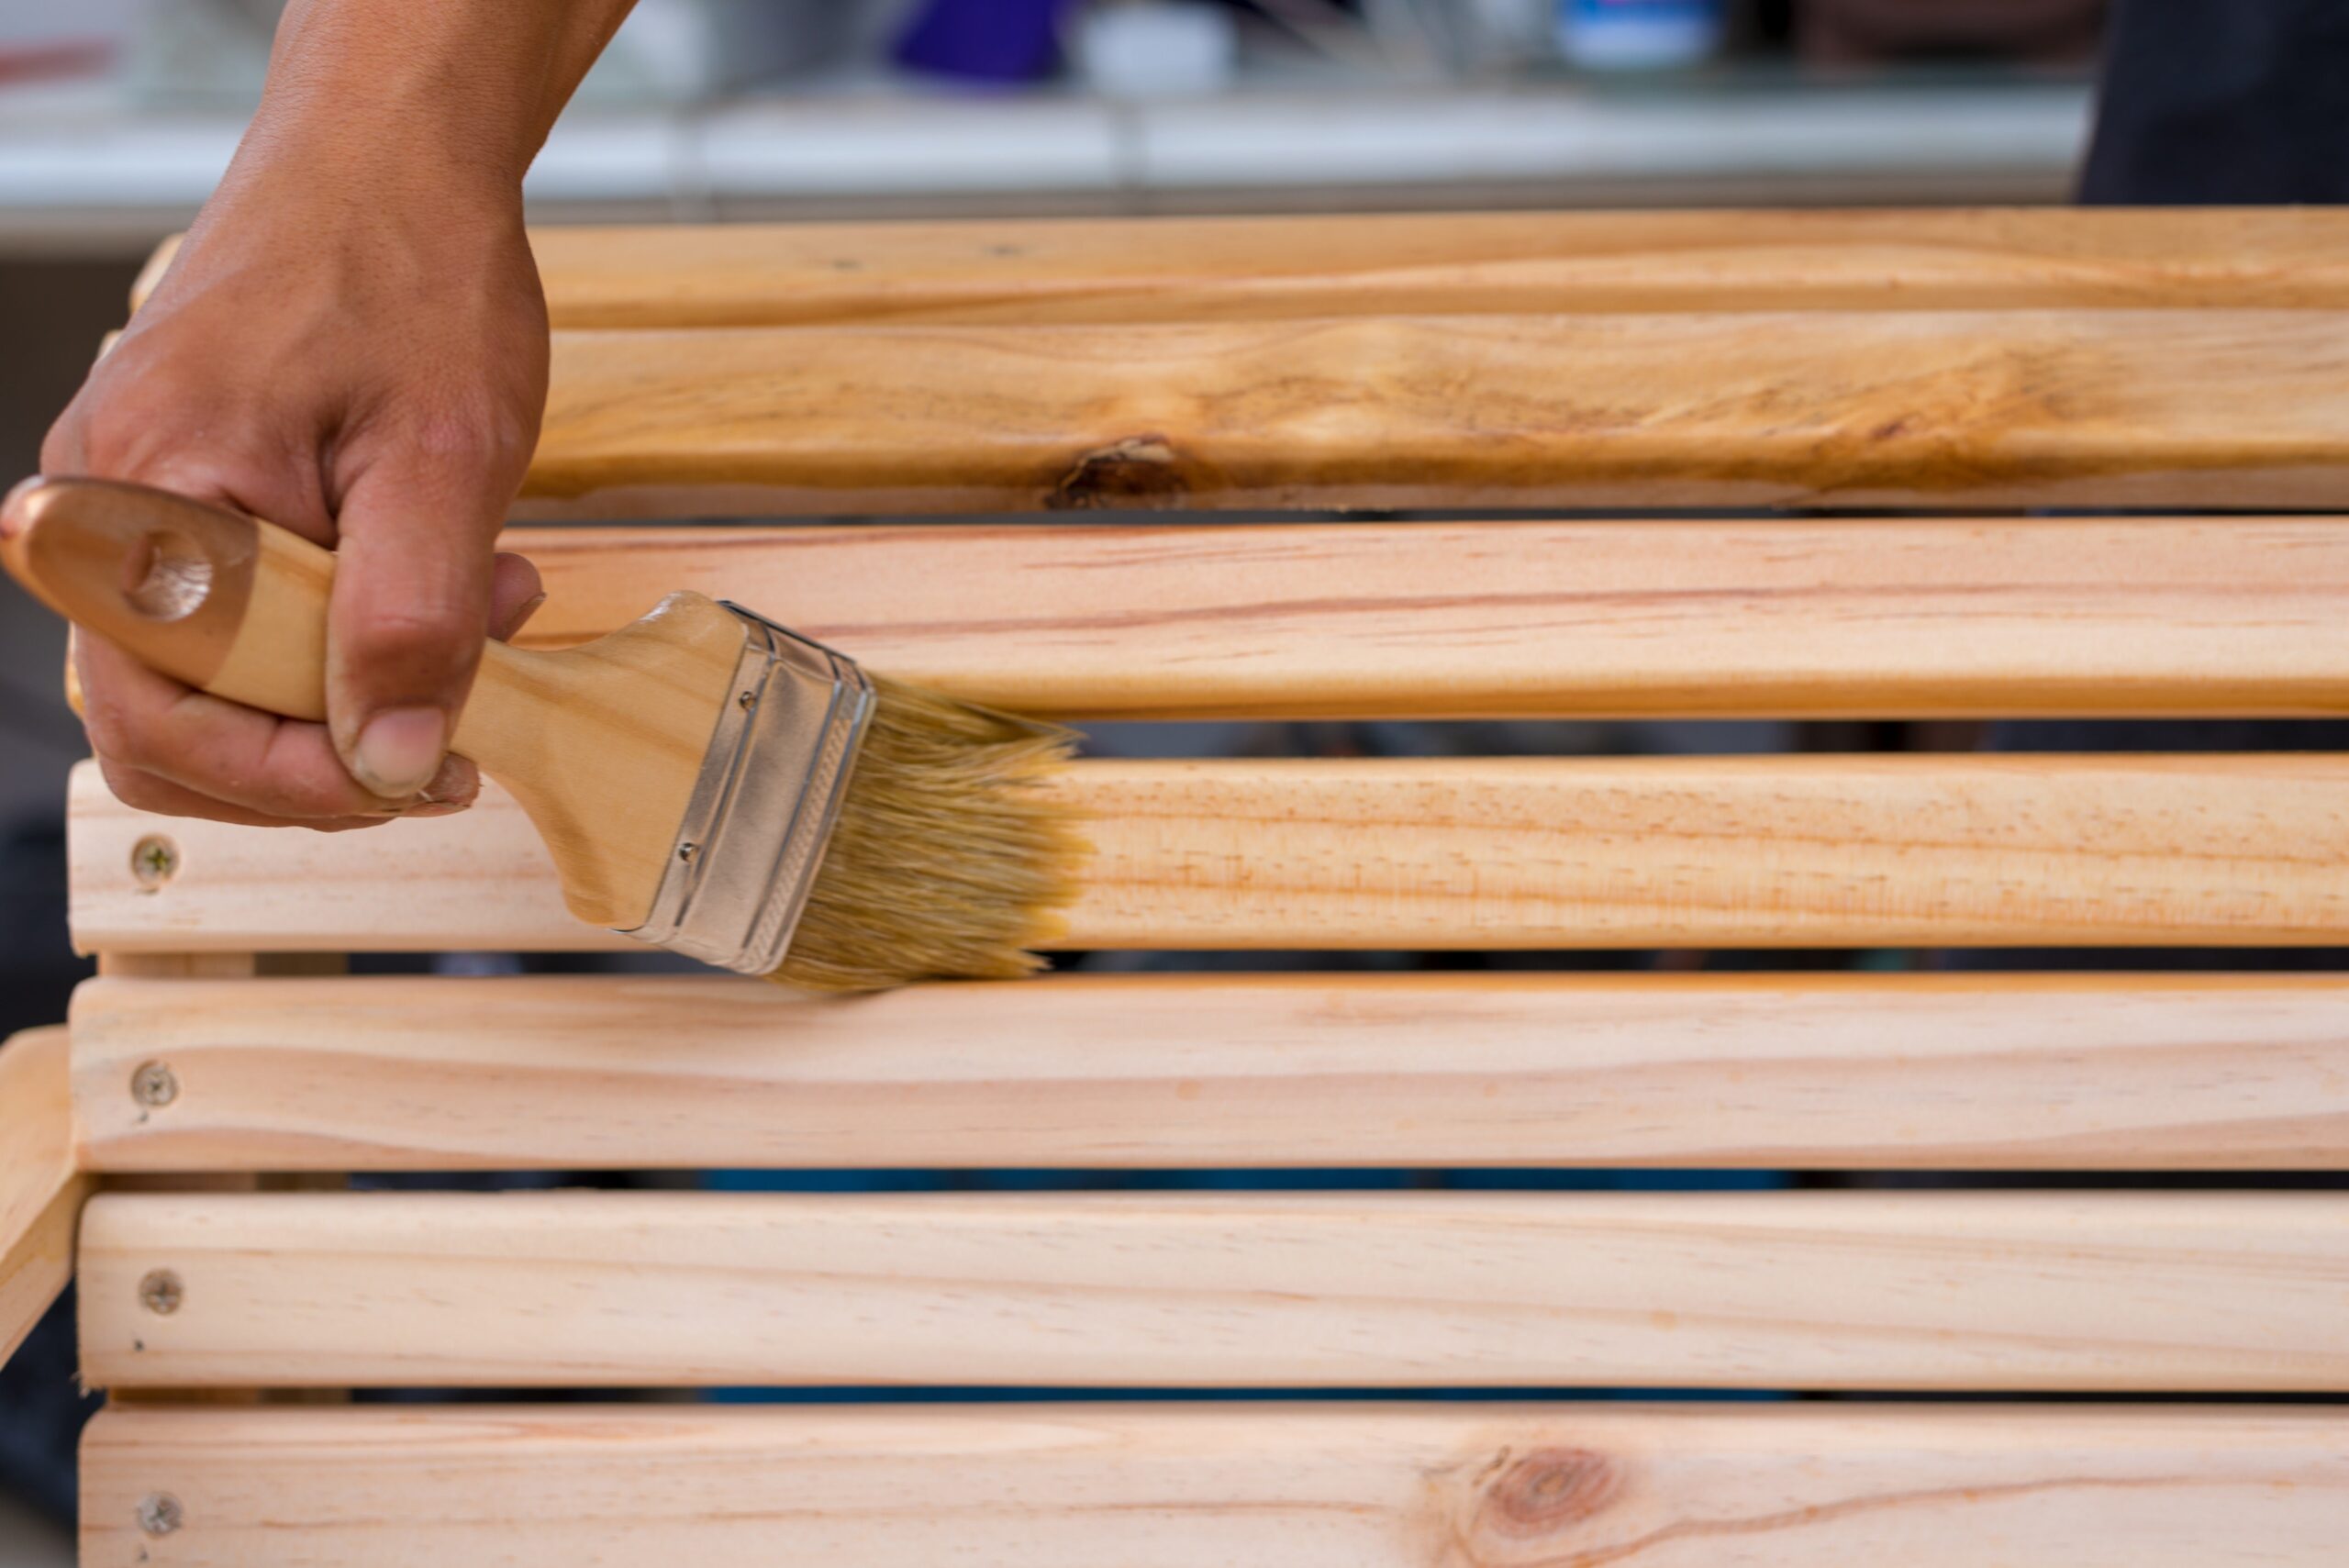
Step 4: Apply topcoat in thin layers. Two or three thin coats produce a better result than one thick coat. A thick coat sags, drips, and dries with visible texture. Use a high-quality short-pile roller for flat areas and a 25mm brush for panel edges and joints. Allow each coat to dry fully (minimum 4 hours for most water-based eggshells) before applying the next.
Step 5: Lightly sand between coats. Use 240-grit paper to key each dried coat before the next application. This removes dust nibs and ensures the next coat bonds evenly. Wipe with a tack cloth after each sanding pass.
Painted Wood Wall Panel FAQs
Can I paint MDF wall panels without primer?
Not advisably. MDF is highly absorbent, particularly at cut edges and end grain. Without primer, topcoat paint soaks into the surface unevenly, leaving a patchy, rough finish regardless of how many coats are applied. A shellac-based primer on MDF cut edges and a dedicated MDF sealer on face surfaces is non-negotiable if you want a smooth, even paint finish.
What sheen level should I use for painted wall panels?
Eggshell or satin finishes are the standard choice for wood wall panels. They are more durable than flat matt emulsions, wipe clean easily, and provide a subtle sheen that catches light without being reflective. High-gloss finishes are used in specific high-impact scenarios (Georgian-style raised panel rooms, lacquered furniture-grade finishes) but require perfectly smooth surfaces and are unforgiving of application imperfections. Flat matt finishes are best avoided on wall panels in trafficked areas — they show fingermarks and clean badly.
How long does painted MDF wall panel finish last?
In a living room or bedroom, a well-applied eggshell finish on properly prepared MDF wall panels should last 7–10 years before requiring a full repaint. In hallways or rooms with higher contact and cleaning frequency, expect 4–7 years. The key variables are surface preparation quality (panels prepared to a high standard last longer), paint quality (trade eggshell significantly outperforms DIY-grade paints in durability), and the level of daily impact the panels receive.
Should I remove wall panels before painting, or paint in situ?
In situ painting is almost always more practical — removing panels risks damaging the adhesive bond or mechanical fixings, and re-installation creates new problems. Paint in situ using a cutting brush at edges and a short-pile roller on flat surfaces. Mask adjacent surfaces (skirting, ceiling, adjacent walls) with painters’ tape before starting to protect areas you don’t want painted. Remove the tape before the final coat is fully dry to avoid peeling.
Perforated acoustic panels have a solid face — wood veneer, MDF, or timber — with a pattern of small holes, slots, or perforations punched or routed through the surface. Behind the perforated face is an acoustic backing material (typically acoustic felt) that absorbs sound passing through the perforations.
The result is a panel that looks like a continuous, solid surface from a distance — with the wood grain or painted finish reading as the dominant visual — but functions acoustically because sound can penetrate through the perforations to the absorbing material behind.
How Perforated Panels Absorb Sound
Perforated panels work through a mechanism called a Helmholtz resonator effect, combined with the standard porous absorption of the felt backing:
Sound waves strike the solid panel face. Most are reflected.
A proportion — determined by the perforation ratio (the percentage of surface that is open hole vs solid material) — passes through the perforations.
This sound enters the cavity behind the panel face and reaches the acoustic felt backing, where it’s absorbed.
The cavity depth between face and backing also influences which frequencies are most effectively absorbed.
The perforation ratio typically ranges from 10% to 25% of the panel surface area. Higher perforation ratios allow more sound through and increase absorption; lower ratios reduce the visual impact of the holes but decrease acoustic performance.
Perforated vs Slat Panels: Performance Comparison
Feature
Perforated Panels
Slat Panels
NRC range
0.55–0.80
0.65–0.85
Open area
10–25%
25–40% (gap between slats)
Visual effect
Solid surface, subtle texture
Strong directional shadow lines
Backing visibility
Not visible from front
Visible through slat gaps
Design flexibility
High (various perforation patterns)
Moderate (slat width and spacing)
When to Choose Perforated Panels
Perforated panels are the better choice when:
You want a more restrained aesthetic — the solid face reads as a continuous wood or painted surface; the perforations are subtle rather than dominant.
The backing material would look out of place if visible — in formal or traditional spaces where the open-gap look of slat panels feels too industrial.
You want design flexibility — perforation patterns can be geometric, organic, or custom, giving more design options than the standard vertical slat profile.
Curved or shaped installations — perforated solid panels can follow curves and shapes that open-slat systems handle less elegantly.
When Slat Panels Are the Better Choice
Maximum acoustic performance (higher open area = more sound through to the backing)
Strong contemporary, Scandinavian, or Japandi aesthetic
Visible acoustic backing is not a concern (black felt reads well through light-wood slats)
Design and Specification Considerations
Perforated acoustic panels involve more specification decisions than slat panels because the hole pattern is a visible design element as well as a functional one. Getting the specification right before ordering prevents the kind of mismatch that’s expensive to fix after installation.
Perforation pattern and density: Hole diameter and spacing determine both the visual rhythm and the acoustic behaviour. Smaller, more densely spaced perforations create a finer visual texture and typically increase low-frequency absorption because they allow more sound to reach the backing material. Larger perforations create a bolder graphic quality and allow more direct sound absorption at mid frequencies. Ask for the perforation percentage (the ratio of hole area to total panel area) — this is a meaningful acoustic specification, not just a design choice.
Backing material: The panel backing is what actually absorbs the sound after it passes through the perforations. High-density acoustic felt (like AcuFelt) provides consistent NRC performance across the speech frequency range. Thinner or lower-density backings reduce the panel’s effective NRC rating. Always confirm the backing specification, not just the face material.
Substrate and finish: Perforated panels are available in MDF, plywood, and aluminium substrates. For residential use, painted or real-wood-veneer MDF is the standard — it takes paint well, is dimensionally stable, and delivers consistent perforation geometry. Aluminium panels are more appropriate for commercial and architectural applications where moisture or physical durability is a primary concern.
Panel dimensions and layout planning: Perforated panels require careful layout planning because the visual effect of the pattern depends on how panels align at joints. Panels that abut correctly create a continuous pattern; misaligned panels create a visible grid break. Confirm whether the panels are designed for butt-joint installation or require a specific gap.
Frequently Asked Questions
Do perforated acoustic panels actually absorb sound?
Yes. The perforations allow sound waves to reach the absorptive backing material behind the panel face — the backing (typically high-density acoustic felt or fibreglass) is what provides the actual absorption. The perforation percentage affects how much sound reaches the backing, which in turn affects the effective NRC rating.
Are perforated panels better than slat panels for acoustics?
Neither is inherently better — they have different performance profiles. Perforated panels can achieve broader frequency coverage, including some bass absorption, because more sound surface area is exposed to the backing. Slat panels with high-density felt backing (NRC 0.85) perform comparably in the speech frequency range. For most residential projects, slat panels are the default choice; perforated panels are chosen when the design brief specifically requires the aesthetic.
Can perforated acoustic panels be painted?
Yes, but only with a breathable paint applied carefully to avoid filling the perforations. Filling the holes reduces the acoustic performance by blocking sound from reaching the backing. A spray application rather than roller or brush is recommended if post-installation painting is required.
What’s the NRC rating of perforated acoustic panels?
It varies significantly by product. Panels with high perforation density and high-density felt backing can achieve NRC 0.80–0.95. Panels with low perforation density or thin backing materials may achieve only NRC 0.40–0.60. Always request the published NRC rating before purchasing — don’t assume that “acoustic” in the product name guarantees a specific performance level.
Where are perforated acoustic panels most commonly used?
Commercial offices, restaurants, educational facilities, and cinema rooms are the most common applications. In residential settings, perforated panels appear primarily in home theatres and dedicated recording spaces where a specific visual aesthetic is required alongside high acoustic performance.
Common Applications for Perforated Acoustic Panels
Meeting rooms and conference spaces — subtle and professional
Dining rooms — the solid face suits formal settings better than slat profiles
Traditional interiors — perforated panels can be finished to match trim and moulding
Ceilings — perforated panels as ceiling tiles offer acoustic treatment without the visual complexity of slat systems
Walk into any home improvement store or browse wall panels online and you’ll see two very different products often described with similar language. “Wood wall panels” can mean anything from genuine real-wood-veneer over engineered MDF to a photograph of wood grain printed on PVC film. The difference in quality — and the difference in how they look, feel, and perform over time — is enormous.
Here’s a clear breakdown.
What Is Real Wood Veneer?
Real wood veneer is an ultra-thin slice of genuine timber — typically 0.6mm to 2mm thick — cut from a real log and bonded to an engineered substrate (usually MDF). The grain, colour, and character are authentic because they come from an actual tree. No two veneer panels are identical, because no two pieces of timber are identical.
The substrate provides dimensional stability and consistency, while the veneer provides the authenticity and appearance of solid timber at a fraction of the weight and cost.
What Is Laminate?
Laminate is a photographic or printed image of wood grain (or any other pattern) bonded to a substrate — typically MDF, HDF, or PVC. High-quality laminate can be convincing from a distance, but it’s a reproduction, not the real material. The same pattern repeats across every panel from the same batch because it’s printed, not grown.
How to Tell Them Apart
Touch the surface: Real veneer has micro-texture from genuine wood grain — you can feel the difference. High-gloss laminate is perfectly flat regardless of what the pattern suggests.
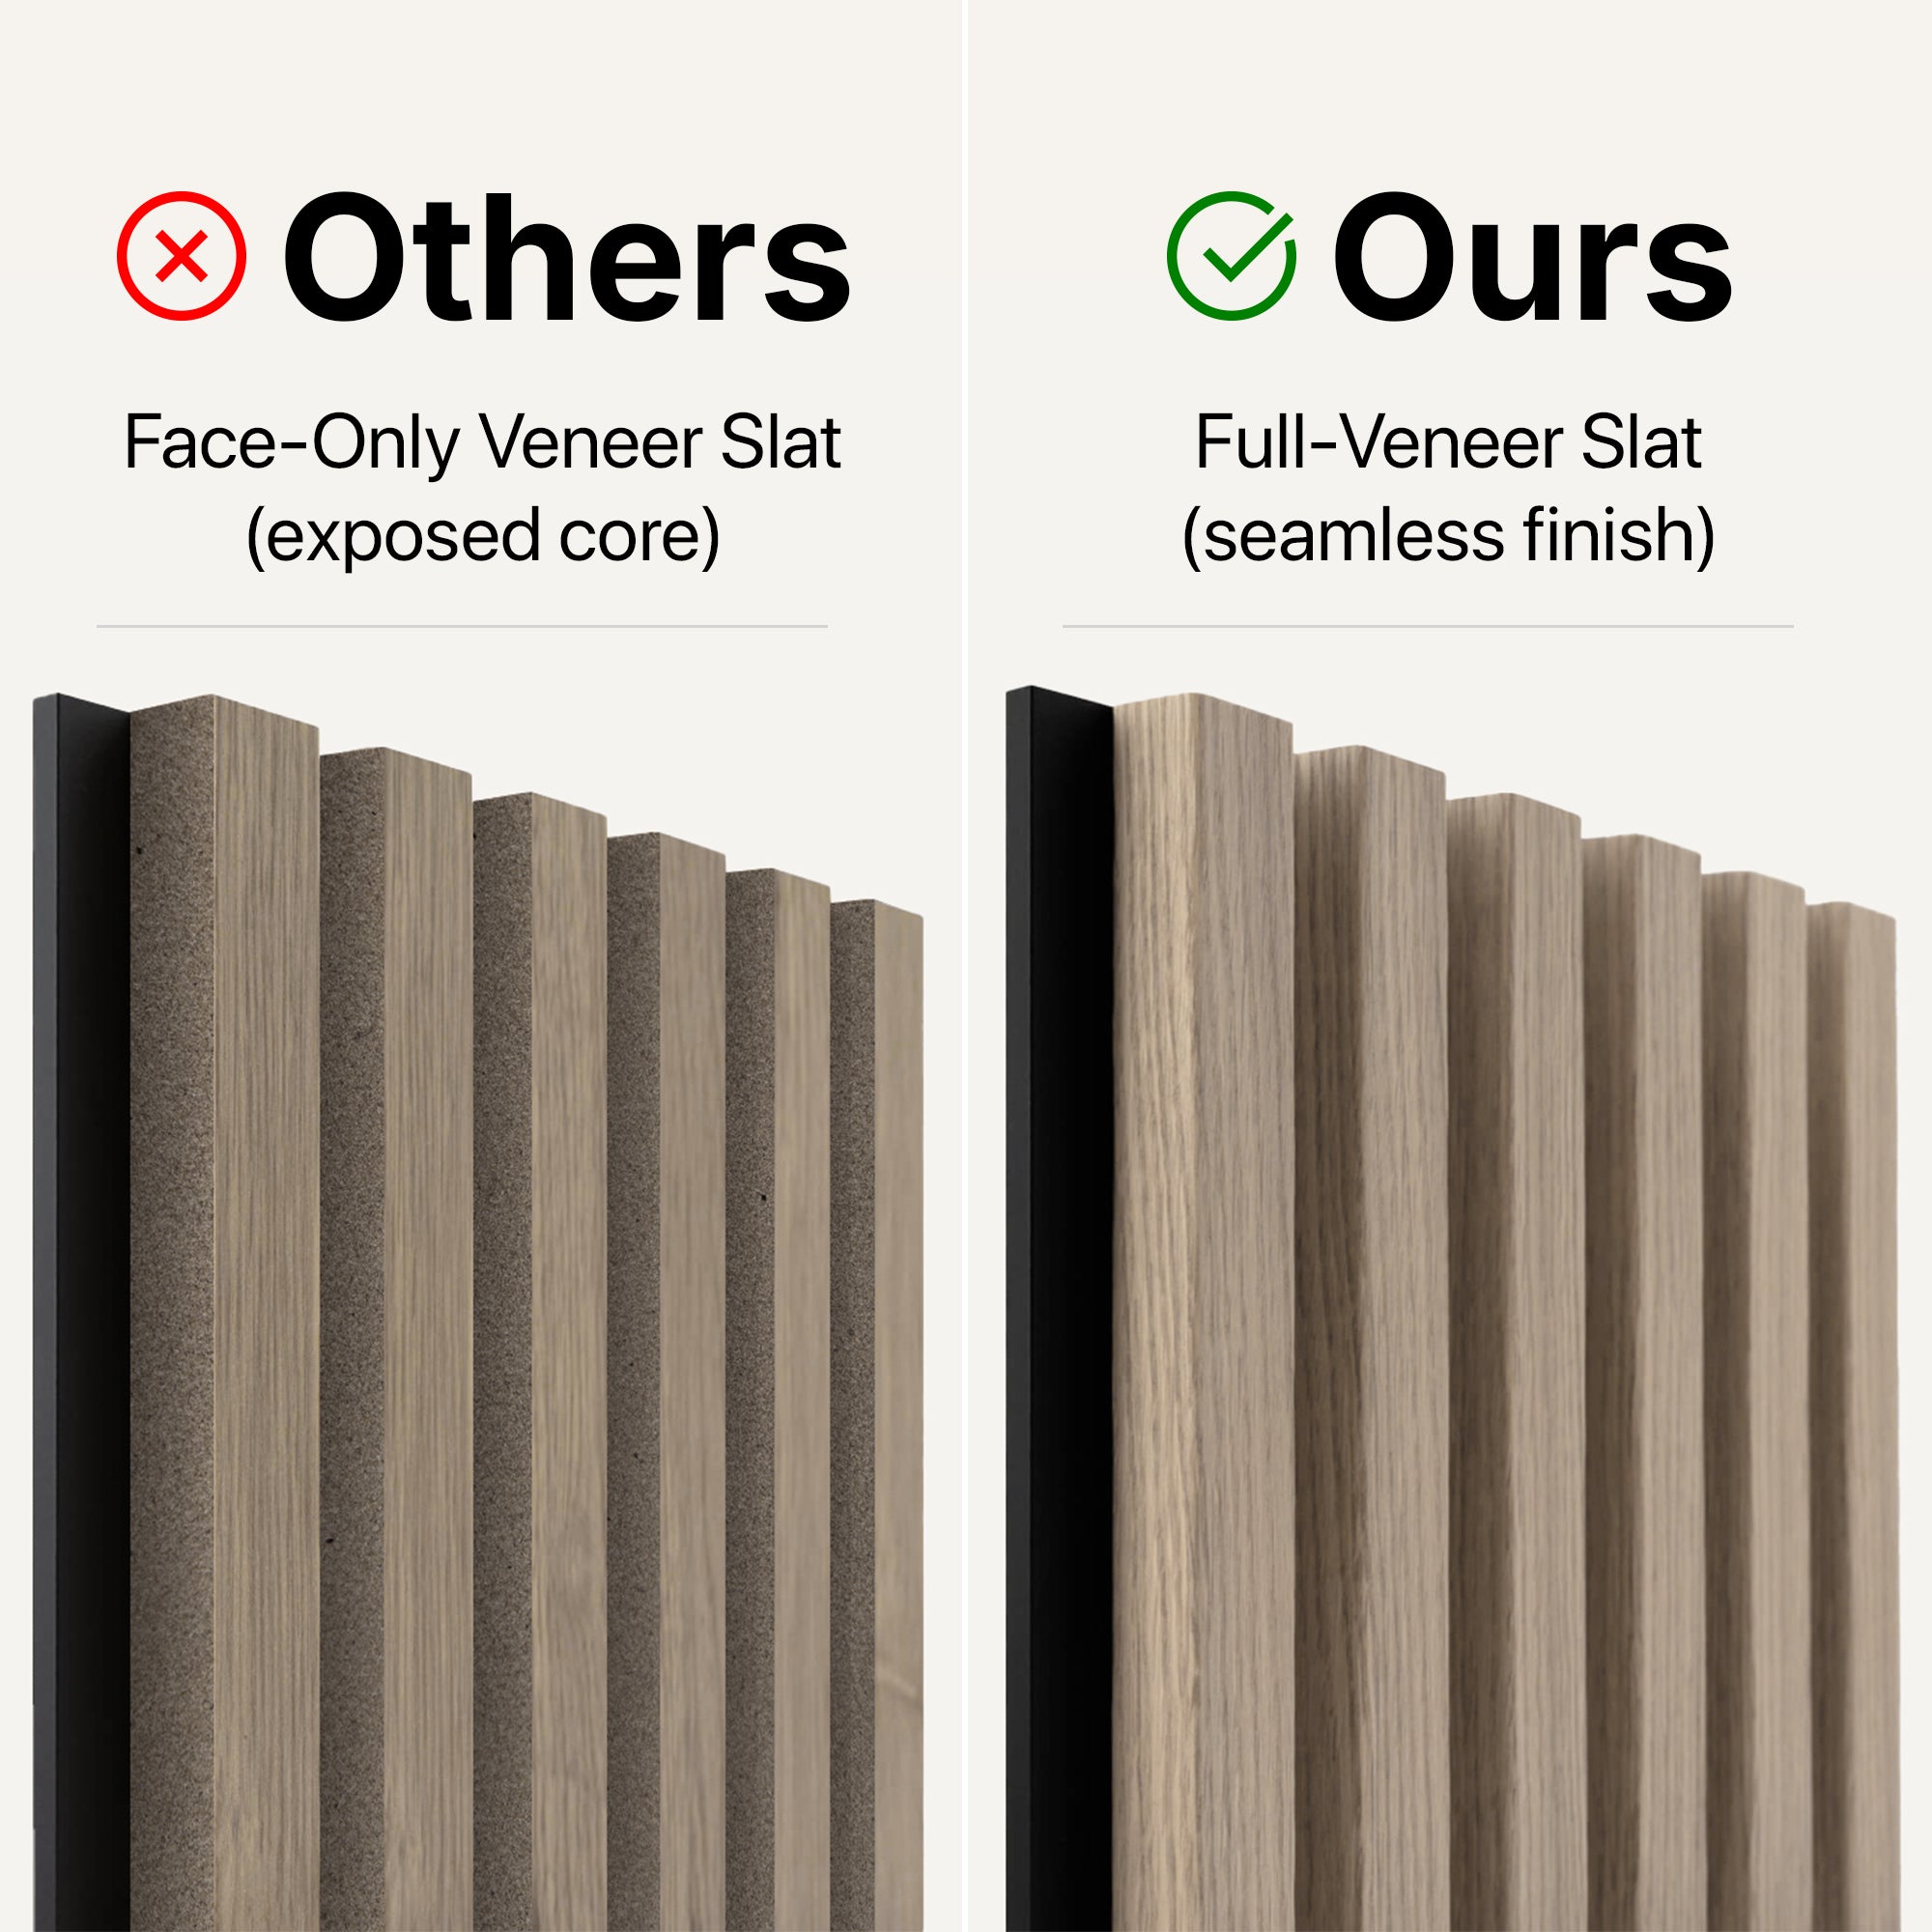
Look at the edges: Real veneer panels show the engineered core at the edge with a thin veneer layer visible. Laminate panels often show a printed edge or PVC edge tape.
Check for pattern repeat: Lay two panels side by side. If the grain pattern repeats identically, it’s laminate. Real veneer has continuous, non-repeating grain variation.
Smell it: Real wood veneer has a faint, genuine timber scent. Laminate and PVC panels have no scent or a faint plastic smell.
Head-to-Head Comparison
Feature
Real Wood Veneer
Laminate
Appearance
Authentic grain, natural variation
Printed reproduction, pattern repeat
Touch/texture
Genuine wood texture
Flat regardless of print
Durability
Can be sanded and refinished
Cannot be repaired — replace only
Ageing
Develops patina gracefully
Can peel, fade, or bubble over time
Sustainability
FSC-certified options widely available
PVC laminates are not recyclable
Cost
Higher
Lower
Weight
Slightly heavier
Lighter
When Laminate Makes Sense
Laminate wall panels aren’t inherently bad — they just need to be chosen for the right application:
High-moisture areas where real wood would be unsuitable
Temporary installations or rental properties
Very large coverage areas where budget is the primary constraint
Feature walls where the panel is viewed from a distance and touch-texture doesn’t matter
When Real Wood Veneer Is Worth the Premium
Real wood veneer panels are the right choice when:
The wall will be seen and touched at close range
You want the wall to age authentically and develop character
Acoustic performance matters (veneer panels pair properly with felt backing; laminate panels often don’t)
The installation is intended to last 10+ years
Sustainability and FSC certification are part of your decision criteria
For more on wood species choices in real veneer panels, our guide on the best wood for wall panels covers walnut, oak, ash, and others in detail. And if you’re comparing wood panels to other wall treatments altogether, the wall panel vs wallpaper vs paint comparison puts the full picture in context.
Verdict
If you’re installing a feature wall in a living room, bedroom, or office — somewhere you’ll look at and touch every day — real wood veneer panels are worth the premium. The authenticity, durability, and ageing characteristics are simply not replicable in print. For less prominent areas or budget-constrained projects, quality laminate is a reasonable second choice — but know what you’re buying before you spend.
Real Wood Veneer vs Laminate FAQs
Can laminate wall panels look as good as real wood veneer?
Modern laminate printing technology has improved dramatically — high-resolution photographic prints at 0.2mm resolution can create convincing wood-look surfaces that fool a casual observer from across a room. However, at close range, the uniformity of a printed repeat pattern becomes apparent in ways that genuine wood grain does not. Premium laminates with embossed surface texture are more convincing tactilely than flat-surface laminates. If budget allows, real wood veneer is always the more convincing and more durable specification.
Does real wood veneer add more value to a property than laminate?
Estate agents and valuers consistently distinguish between authentic and imitation materials. A real wood veneer panel installation reads as a premium finish that adds perceived value; a laminate installation in the same profile reads as a budget treatment. In a sale context, the cost premium for veneer over laminate in wall panels is typically small relative to the difference in perceived quality it communicates to prospective buyers.
How thick is a typical real wood veneer on wall panels?
Quality real wood veneer for wall panel applications runs between 0.5mm and 1.0mm. Veneers below 0.3mm are technically real wood but are too thin to be refinished, repair themselves, or show meaningful depth of grain. Veneers of 0.6mm and above are considered quality specifications — they can be lightly sanded if surface scratches develop, show genuine grain depth and colour variation, and age authentically over time. Always ask for the veneer thickness specification before ordering.
Is laminate always cheaper than real wood veneer?
At entry level, yes. Basic laminate panels are significantly cheaper than real veneer panels in equivalent profiles. However, at the premium end of the market, high-quality laminate (with embossed texture, multi-layer construction, and realistic print quality) costs nearly as much as mid-range real veneer panels. At that price point, real veneer is almost always the better specification: you get genuine material performance and ageing properties for a comparable or marginally higher investment.
Shop Real Wood Veneer Panels
Browse the complete wood wall panel collection at The Panel Hub — all products in the SoundPanel™ acoustic slat range use genuine real wood veneer, not laminate or foil wrap. Order a sample to compare the difference in your own lighting conditions before committing. For room-by-room design inspiration, our interior slat wall ideas guide covers 50+ real-room applications using veneer-faced panels. The acoustic panel buyer’s guide covers veneer specifications and what to look for in a quality acoustic slat panel product.
Reeded wall panels feature a series of parallel convex ridges — rounded protrusions that run vertically across the panel face. In cross-section, the profile looks like a row of half-cylinders or rounded bumps sitting on the surface of the panel. Unlike fluted panels (which cut into the material), reeded panels build out from it.
The effect is tactile, sculptural, and warm — the rounded ridges catch light gently and create a soft, organic texture that differs significantly from the sharper shadow lines of fluted or slat profiles.
The History of Reeding
Reeding has its origins in Regency and Federal-period furniture design (late 18th–early 19th century), where it was used on chair legs, column shafts, and furniture rail details. It was essentially the inverse of classical fluting — where fluting cuts grooves, reeding builds ridges. Both drew inspiration from ancient Greek and Roman architectural columns.
In contemporary interiors, reeding has been revived and scaled up from furniture detail to full wall treatment — one of the most striking examples of a historical craft technique finding a new application in modern design.
Reeded vs Fluted: A Quick Recap
Reeded: Convex ridges protruding from the surface. Soft, rounded, organic shadow quality.
Fluted: Concave channels cut into the surface. Sharp, defined, architectural shadow quality.
Reeded wall panels are typically manufactured in one of three ways:
MDF with routed or moulded profile — the most common and cost-effective. The reeded shape is formed in the MDF before painting or veneering.
Real wood veneer over moulded MDF — premium option. The reeded profile is formed in the core, then wrapped in real wood veneer. The grain follows the contour of the ridges for a more natural result.
Solid timber — the most expensive and authentic. Each ridge is solid wood, not a veneer over a moulded core.
Best Applications for Reeded Panels
Bedroom Feature Wall
Reeded panels behind the bed create a hotel-quality headboard wall effect. The soft, rounded ridges suit the restful character of a bedroom better than the sharper profile of fluted panels. In a walnut or warm oak veneer, the effect is immediately luxurious.
Living Room Accent Wall
A reeded panel wall in a living room — behind the sofa or as a TV wall — adds texture without the strong graphic quality of slat panels. It suits organic modern, Japandi, and contemporary transitional interiors particularly well.
Bathroom Feature Wall
In bathrooms, reeded profiles (in moisture-resistant finishes) create a spa-like quality. The tactile surface adds interest to otherwise flat-tiled spaces.
Curved Walls
Reeded panels handle curves more naturally than fluted profiles because the convex ridges can flex slightly without the joins becoming as visible. If your feature wall has a curved section, reeded panels are the more forgiving choice.
Are Reeded Panels Acoustic?
Standard reeded panels with a solid MDF face offer minimal acoustic benefit — the solid surface reflects sound rather than absorbing it. For acoustic performance, look for reeded panels with a felt or acoustic backing, or combine reeded decorative panels with acoustic treatment elsewhere in the room.
For spaces where both aesthetics and acoustics matter, our guide to acoustic wall panels explains what to look for in a product that does both.
How to Style Reeded Wall Panels: Five Design Approaches
Reeded wall panels are distinctively flexible — they read as contemporary in a minimal space and classical in a more traditional interior. Here are five approaches that consistently work.
1. Tone-on-tone with white walls: Dark-stained reeded panels against white or off-white walls create strong contrast without introducing colour. The shadow lines of the reeding become the visual interest. Works best with minimal furniture and clean architecture.
2. Half-height dado application: Run reeded panels from floor to mid-wall height (typically 900–1,100mm) and paint the upper wall in a matching tone. This treatment gives a room period character without committing to a full feature wall. Ideal for hallways, dining rooms, and stairwells.
3. Warm timber matching joinery: Use oak or walnut-toned reeded panels to tie a wall to existing timber flooring, furniture, or kitchen cabinetry. The reeding adds texture without introducing a new material palette — the room reads as cohesive.
4. Reeded panel headboard: A full-width reeded panel behind a bed functions as a built-in headboard detail. Fix floor-to-ceiling for maximum impact or mid-wall for a more restrained effect. The vertical rhythm of reeding suits portrait-orientation bedrooms particularly well.
5. Commercial and hospitality settings: Reeded panels are increasingly used in boutique hotels, restaurant interiors, and retail spaces to add material richness without high maintenance costs. The profile works at scale — a full reeded wall in a large dining room reads powerfully from across the room.
FAQs: Reeded Wall Panels
What is a reeded wall panel? A reeded wall panel features a surface profile of parallel, rounded, convex ridges running along its length. The term comes from architectural reeding — a classical decorative motif used on columns and pilasters. Modern reeded wall panels apply this profile to engineered wood or MDF at interior wall scale.
Are reeded panels the same as fluted panels? No. Fluted panels have concave channels cut into the surface (grooves go inward). Reeded panels have convex ridges that project outward. Both create parallel shadow lines, but the cross-sectional profile is opposite. See our fluted vs reeded comparison for a full breakdown.
Can reeded wall panels be painted? Yes. MDF-core reeded panels accept paint well and are commonly used in painted joinery applications. Wood veneer reeded panels can also be painted, but the grain will show through without proper priming. A professional finish typically requires two coats of primer and two topcoats.
Do reeded panels work in small rooms? Yes, in the right application. Vertical reeded panels in a narrow hallway can draw the eye upward and make the space feel taller. Avoid applying them to all four walls of a small room — one feature wall or a half-height dado gives the texture presence without making the space feel enclosed.
Shop Reeded and Fluted Panels
Browse reeded and fluted panel options in the complete wood wall panel collection at The Panel Hub. For design inspiration showing how reeded panels look in finished rooms — dining rooms, bedrooms, entrance halls — our interior slat wall ideas guide covers real-room applications across different profile types. The acoustic panel buyer’s guide explains the acoustic difference between solid-face reeded panels and open-slot acoustic slat panels — useful context if sound performance is part of your brief alongside aesthetics. For those drawn to geometric pattern rather than a linear profile, the GroovePanel® geometric wood wall panel range offers solid wood mosaic, concentric square, and 3D relief formats as a distinct alternative to reeded and fluted profiles.
Scandinavian design is frequently reduced to “minimalism with wood” — but the principles are more specific. Nordic design prioritises function as a form of beauty: materials should do their job beautifully without ornamental additions. Natural materials are preferred because they connect the interior to the landscape, which is central to Scandinavian cultural identity. And light — the management and amplification of natural light — is a preoccupation driven by the reality of long Nordic winters.
Wall panels in a Scandinavian interior serve these principles: natural wood adds material authenticity, the vertical lines of slat panels draw light upward, and the warm grain of pale wood compensates for the lack of daylight in winter months.
Species for Scandinavian Wall Panels
Pale Ash
The most authentic Scandinavian choice. Ash is native to northern Europe and grows naturally across Scandinavia — it carries a genuine regional identity that oak (dominant in further south European design traditions) doesn’t quite match. Pale ash is fine-grained, relatively neutral in tone, and reflects light well. The purest Scandinavian panel result.
Whitened or Limed Oak
Natural oak treated with a white or light grey stain, giving a bleached, coastal quality that suits Nordic interiors and creates a strong association with driftwood and washed timber from northern coastlines. Works particularly well in rooms close to water or with marine views.
Light Birch
Very pale, almost white, with fine, even grain. The palest of commercial panel woods. Suits the brightest, most light-focused Scandinavian interiors. Less grain character than ash or oak — if you want the wood to be nearly invisible as a tonal element, birch achieves this.
What to Avoid
Walnut and dark-stained woods are specifically not Scandinavian — they belong to mid-century American and Italian design traditions. Cherry, mahogany, and tropical hardwoods are also outside the Nordic design vocabulary. The species choice matters as much as anything else in creating an authentic Scandinavian result.
Layout and Scale
Scandinavian interiors are typically restrained in their panel use — one feature wall, or even just a partial panel treatment, rather than full-room coverage. The single panel wall approach allows the materials to speak without overwhelming the space with texture.
Proportion matters: slim slat profiles (20–25mm slat with proportionate gap) suit Scandinavian aesthetics better than chunky, wide-profile panels. The overall visual effect should be light and graphic, not heavy and dominant.
The Rest of the Scandinavian Room
Wall panels in a Scandinavian interior work alongside:
White or very light grey walls: The light-maximising backdrop that amplifies natural daylight and contrasts cleanly with the wood panel feature wall
Wool and sheepskin textiles: The primary softening element in a Scandinavian room where hard materials dominate
A single striking plant: Often a large-format species (monstera, fiddle leaf) as a natural material accent
Warm-toned artificial light: Pendant lights over dining tables, floor lamps, candles — Scandinavian light design is intimate and directional, not uniform overhead light
For a deeper look at how to combine species choice with room application for the best result, our guide to wood species for wall panels covers ash, birch, and oak in detail. And for the installation specifics that produce a clean Scandinavian result — with particularly precise edge and trim treatment — our step-by-step panel installation guide covers the finishing stages in depth.
Finishing Scandinavian Wall Panels: The Treatment That Makes It Work
In Scandinavian interiors, the finish applied to wood panels is as important as the species selection. The Nordic tradition leans firmly towards oil and hardwax finishes rather than film-forming lacquers or painted surfaces. An oiled panel retains the tactile character of the wood — you feel the grain when you run your hand across it — while a lacquered panel creates a surface that reads as plastic regardless of the wood beneath it.
For pale Scandinavian panels (ash, birch, whitened oak), a clear or lightly white-pigmented hardwax oil enhances the natural colour without adding yellow warmth. A single coat is often sufficient on pre-finished boards. For darker species like smoked or grey-stained oak used in more contemporary Nordic interiors, a satin oil preserves depth without gloss.
If you are fitting panels in a room with strong natural light, be cautious of very pale, highly bleached woods — direct sunlight will continue to lighten them over time, and an already-pale panel can lose definition within two years without UV protection. A lightly tinted hardwax oil with UV stabilisers is the practical solution: it maintains the intended tone and extends the life of the finish significantly. Reapplication every three to four years keeps Scandinavian panels looking exactly as intended indefinitely.
Scandinavian Wall Panel FAQs
Do Scandinavian wall panels work in smaller rooms?
Yes — and often better than in larger ones. Pale woods expand a room visually, and vertical slat profiles draw the eye upward, making low ceilings appear higher. In a small bedroom or hallway, a single panel wall in ash or birch creates a focal point that reads as intentional design rather than an attempt to fill space.
Should Scandinavian wall panels be painted or left natural?
The purist Scandinavian approach is to leave panels in their natural state, finished with a clear or lightly white-tinted oil. Painted panels are more common in contemporary Nordic interiors where the panel is used as a colour accent — typically in a soft sage, dusty blue, or warm grey. Avoid stark white paint, which flattens the grain entirely and reads as more farmhouse than Nordic.
Can Scandinavian panels be used in bathrooms?
Yes, with the right material selection. PVC or WPC panels in pale wood-grain finishes are the practical choice for bathrooms — they are fully moisture-resistant and maintain their colour and dimension in humid conditions. Solid ash or oak panels can be used in bathrooms with good ventilation, but require proper sealing on all six faces before installation to prevent moisture ingress at the edges.
What flooring works best with Scandinavian wall panels?
Light oak or ash engineered boards are the natural companion to pale panel walls in a Scandinavian scheme. Polished concrete and large-format porcelain tiles also complement Nordic walls well by maintaining the sense of clean, uncluttered material continuity. Avoid busy patterned carpets — they undermine the considered restraint that Scandinavian design depends on.
Shop Scandinavian-Style Wall Panels
Browse the full wood wall panel collection at The Panel Hub — the SoundPanel™ acoustic slat range in pale oak and ash is the most popular choice for Scandinavian interior schemes — the White Felt edition, with white backing felt visible through the slat gaps, suits the bright, low-contrast Scandinavian palette especially well. For room-by-room Nordic panel inspiration, our interior slat wall ideas guide covers 50+ real-room applications across styles. The acoustic panel buyer’s guide explains the acoustic benefits of slat panels — a particularly relevant consideration in Scandinavian-inspired interiors where material honesty and functional performance go hand in hand.
Tiles have been the default bathroom wall finish for decades. But shower panels — large-format solid or composite panels that cover walls in a single sheet — are rapidly growing in popularity for bathrooms and wet rooms. They’re faster to install, easier to clean, and in many cases, less expensive overall.
Here’s a full comparison to help you decide which is right for your bathroom.
What Are Shower Panels?
Shower panels are large-format wall boards — typically 2400mm x 1000mm — made from PVC, acrylic, solid surface composites, or glass. They’re designed to cover entire walls in one or two pieces, eliminating grout lines entirely. Most are waterproof to a certified standard and can be installed directly over existing tiles or onto the wall substrate.
What Are Bathroom Tiles?
Ceramic, porcelain, or natural stone tiles remain the most widely used bathroom wall finish. Available in virtually limitless sizes, colours, and textures, tiles are installed in a grid pattern using adhesive and grout, with grout lines sealing the joins.
Head-to-Head Comparison
Installation Time
Panels: A typical shower enclosure can be panelled in half a day. No adhesive curing time, no grouting, no waiting.
Tiles: Tiling a shower typically takes 1–3 days including adhesive and grout curing.
Winner: Panels
Cost
Panels: Materials $200–$800 for a shower enclosure. Labour (if used) is lower due to faster installation.
Tiles: Budget tiles start at $2–$5/sq ft; premium tiles $15–$50+/sq ft. Plus adhesive, grout, and labour. Total typically higher than panels for the same area.
Winner: Panels (usually)
Cleaning and Maintenance
Panels: No grout lines means no grout to clean, no mould harbouring in grout, no regrouting every 5 years. A quick wipe keeps them clean.
Tiles: Grout is porous and discolours over time. Regular scrubbing and periodic regrouting are unavoidable in a shower environment.
Winner: Panels
Aesthetics
Panels: Limited to the formats and patterns available. High-quality panels can mimic marble, stone, and concrete convincingly, but the lack of grout lines reads differently to experienced eyes.
Tiles: Unmatched variety — subway, zellige, large-format stone, mosaic. Grout lines can be a deliberate design element. Higher aesthetic ceiling for premium bathrooms.
Winner: Tiles (for premium design)
Durability
Panels: PVC panels can scratch and dent. Solid surface and acrylic panels are more durable but still susceptible to impact. Generally last 15–25 years.
Tiles: Porcelain and stone are extremely hard and durable. Grout, however, degrades over time. Well-maintained tiles last 30–50 years.
Winner: Tiles (long-term)
DIY Suitability
Panels: Generally easier for DIYers — cut with a saw, fix with adhesive or mechanical fixings, no specialist tools required.
Tiles: Tiling requires a tile cutter, mixing adhesive, laying to consistent depth, and grouting carefully. Higher skill threshold.
Winner: Panels
Which Should You Choose?
Choose shower panels if: you’re renovating quickly, prioritising easy cleaning, working with a tight budget, or doing the work yourself.
Choose tiles if: you want premium aesthetics, high resale value, maximum durability, or a custom design that panels can’t replicate.
For most practical bathroom renovations, panels offer the better trade-off. For bathrooms designed to impress — master ensuites, luxury refurbishments — tiles remain the gold standard.
Installation: Where Shower Panels Pull Ahead
The most decisive practical difference between shower panels and tiles is the installation process — and the difference in difficulty, time, and finish quality between the two approaches is significant enough to be a genuine decision factor rather than a minor convenience.
Tiling a shower: Requires a waterproof substrate (cement board or tanking membrane over plasterboard), setting out, applying tile adhesive, laying tiles in straight courses, cutting tiles around fixtures, applying grout, sealing grout and silicone joints, and curing time before use. A professionally tiled shower typically takes 2–3 days for the tiling alone, plus drying time. DIY tiling is achievable but requires tools (tile saw, grout float, notched trowel) and skill to achieve consistent grout lines and level courses.
Installing shower panels: Requires a clean, flat substrate (plasterboard or cement board). Panels are cut to size with a jigsaw or circular saw, adhesive is applied to the panel back, panels are pressed into position and held while the adhesive sets. Joints between panels and edges are sealed with waterproof silicone. A full shower enclosure in large-format panels can typically be installed in one day by a competent DIYer, with no wet trades and no wait for grout to dry.
Avoiding grout: Grout lines are the weakest point in any tiled shower — they require annual sealing, are prone to mould growth in humid conditions, and discolour over time. Shower panels eliminate grout lines entirely. Silicone-sealed panel joints are the only maintenance point, and silicone replacement (every 7–10 years typically) is a minor task compared to grout maintenance.
FAQs: Shower Panels vs Tiles
Are shower panels cheaper than tiles? On a material-only basis, mid-range tiles and mid-range shower panels are broadly comparable per m². The cost difference becomes significant in installation: professional tiling labour costs more per m² than panel installation due to the additional time and skill required. For DIY installations, the tools required for tiling (tile saw, grout tools) add cost that panel installation doesn’t require.
How long do shower panels last compared to tiles? Quality shower panels — particularly acrylic, solid-core composite, or PVC panels — last 20–30 years without degradation in a shower environment. Ceramic and porcelain tiles have a similar or longer potential lifespan, but the grout between them typically fails within 10–15 years without maintenance. Shower panels effectively remove the most failure-prone element from the equation.
Can shower panels look like real stone or marble? Yes. Digital printing technology allows shower panels to replicate stone, marble, concrete, and other material appearances with high accuracy. For natural stone effects at a fraction of the cost and weight, large-format printed panels are the closest alternative to genuine stone tile. The repeat pattern (where the same image tiles across multiple panels) is visible on close inspection but unremarkable at normal distances.
Do shower panels work in a walk-in shower? Walk-in showers are one of the best applications for large-format shower panels. The long uninterrupted walls of a walk-in benefit from panels’ grout-free surfaces, and the single-sheet installation means fewer joins and a cleaner visual result. Ensure all panel-to-panel joints and the base junction are sealed with waterproof silicone rated for continuous wet contact.
You’ve seen slat walls in hotel rooms, design blogs, home offices, and probably your Instagram feed more times than you can count. There’s a reason they keep showing up. A slat wall does something that paint, wallpaper, and most other wall treatments can’t — it changes the spatial feel of a room through geometry. The parallel lines create direction. The shadow between each slat creates depth. The wood surface creates warmth. All three together make a room feel considered in a way that’s hard to fake with anything else.
This guide covers everything you need to go from idea to finished wall: the types available, how to choose between them, which rooms they work best in, and a step-by-step install process that works for TPH’s SoundPanel line specifically.
Slat wall panels are pre-built boards consisting of narrow wooden strips — slats — mounted at regular intervals over a backing material. You buy them as a panel, not as individual strips. One panel covers a section of wall at once, the panels connect to each other, and the result is a continuous slat surface across the full wall.
This matters more than it sounds. Buying individual slats and mounting them one-by-one means spacing 60–80 strips perfectly on a standard wall, keeping every gap identical, and dealing with any wall imperfections strip by strip. Panel-format slat walls are pre-spaced, pre-built, and connect with a clean edge. Installation is measured in hours, not days.
The backing material is where types diverge meaningfully — and where most guides stop being useful.
Not all slat wall panels are the same product. The slat face is only half of what you’re buying. The backing — what’s behind the slats — determines acoustic performance, installation method, weight, and price. Here’s a clear breakdown.
Acoustic Slat Panels (Wood Veneer + Felt Backing)
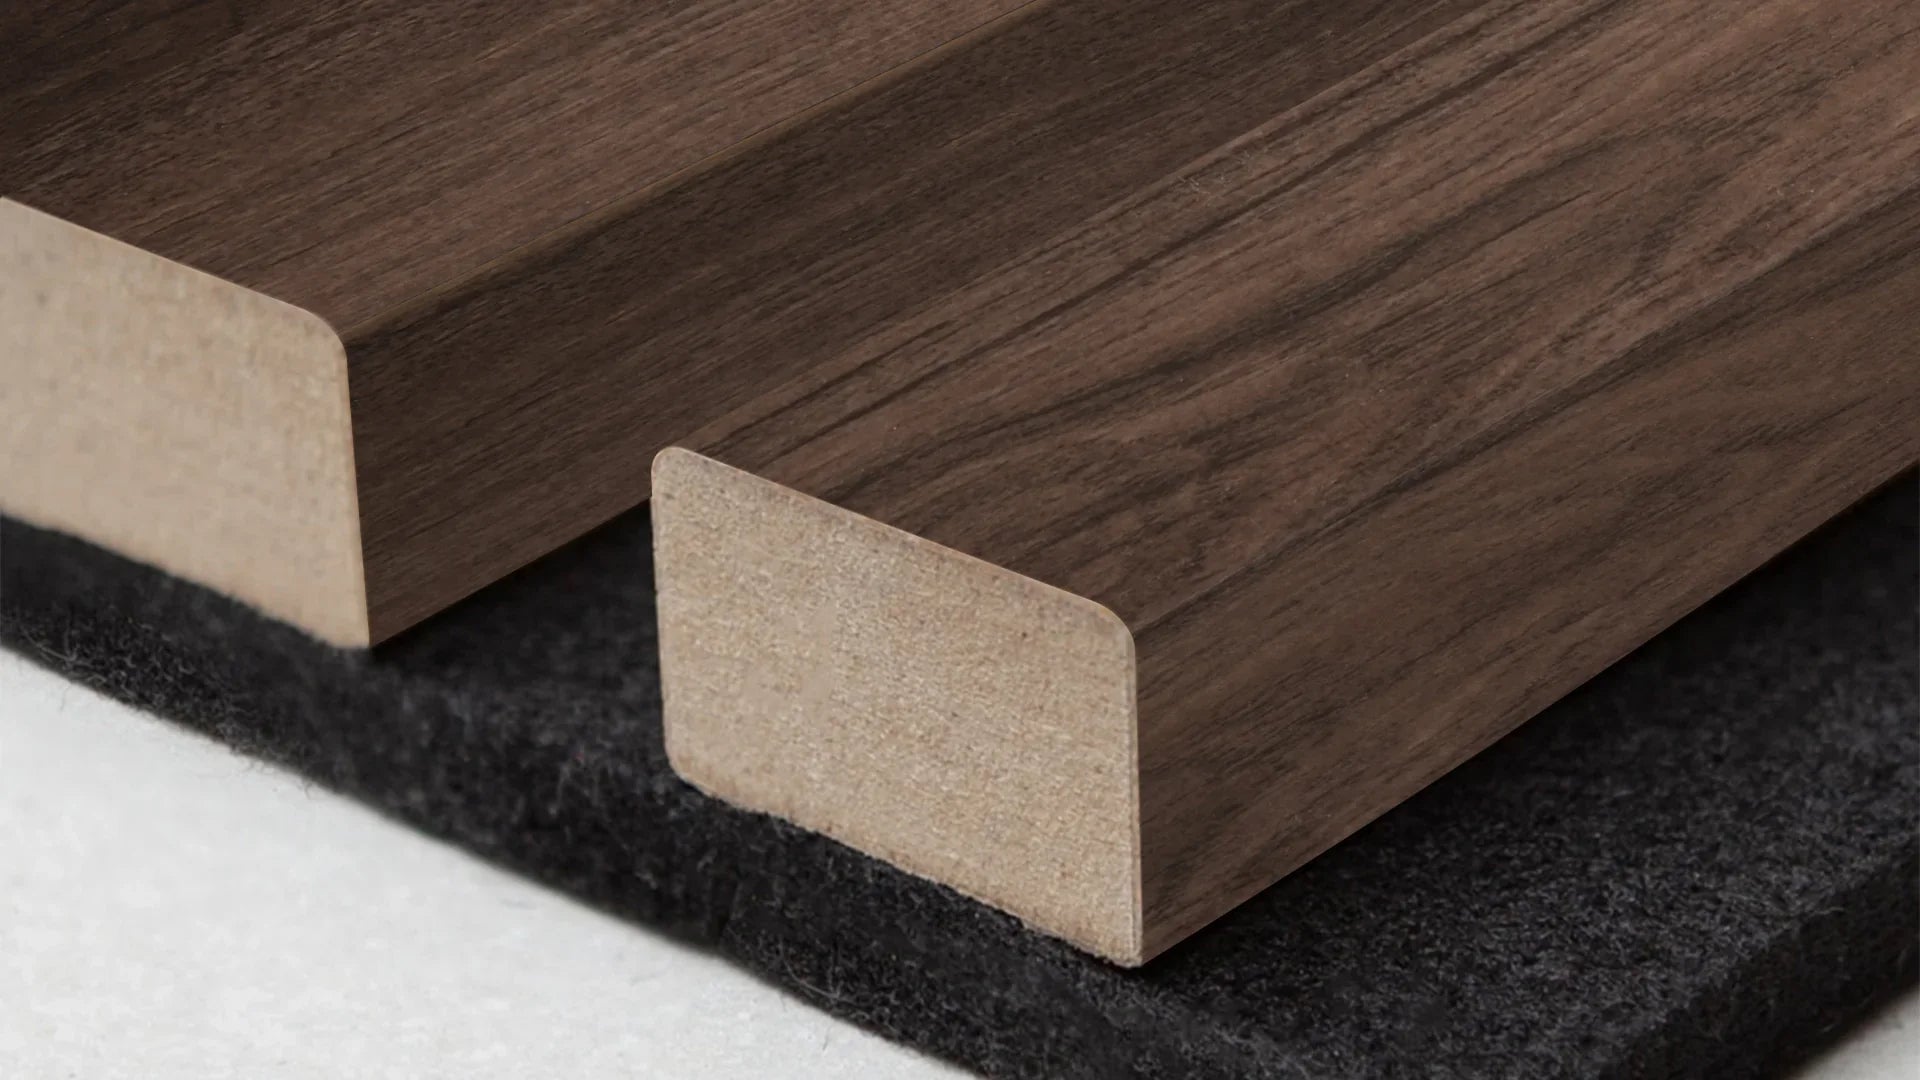
The category TPH’s SoundPanel sits in, and currently the most popular residential slat panel in the market. Real wood veneer slats over an HDF core, mounted over high-density acoustic felt backing. The gaps between slats allow sound to pass through to the felt, which absorbs it rather than reflecting it back into the room.
TPH’s SoundPanel uses AcuFelt 1500 g/m² backing — that density matters, it’s what delivers the NRC 0.85 rating. Absorbs 85% of sound energy hitting the surface. FSC-certified. 3-sided rounded edges. Ships from North Carolina. Installs in under 2 hours per wall.
Best for: Any room where both aesthetics and acoustics matter — living rooms, bedrooms, home offices, home theaters, dining rooms NRC: 0.85 Slat width: Typically 10–20mm Installation: Adhesive + optional screws through felt backing
Decorative Slat Panels (No Acoustic Backing)
Same visual profile as acoustic panels — same slat spacing, same wood veneer face — but with no felt backing. Purely visual. These are lighter and lower cost, and are the right choice when acoustics genuinely don’t matter to you.
The honest limitation: without backing, the NRC is near zero. The slats reflect rather than absorb. If you’re treating a home office or a room with echo, decorative-only slat panels won’t solve the problem.
Best for: Accent walls where visual warmth is the only goal NRC: Negligible Installation: Adhesive direct to wall
Horizontal Slat Panels
The same construction as vertical, rotated 90 degrees. Horizontal lines read differently in a space — they emphasise width rather than height, which works particularly well in narrow corridors, low-ceiling rooms, or any space where you want the eye to travel along the wall rather than up it.
Horizontal slat panels can be acoustic or decorative depending on the backing. The installation process is identical — the orientation is a design decision, not a structural one. More on horizontal wall paneling.
Best for: Hallways, rooms with low ceilings, wide feature walls
Fluted and Reeded Panels
Technically not slat panels, but frequently confused with them. Fluted panels have concave channels milled into a solid face — no gaps between elements, no backing required. Reeded panels have convex ridges. Both create a linear texture without the open-gap structure of a true slat panel.
The tradeoff: no acoustic benefit at all, since there’s no gap for sound to pass through. The aesthetic is more architectural and formal than slat panels. Works well in hallways, dining rooms, and spaces where you want texture without the warmth of visible wood grain.
Best for: Formal spaces, painted feature walls, kitchen island cladding
WPC Slat Panels (Outdoor)
Wood-plastic composite panels for exterior use. Real wood fibre combined with polymer — the slat profile is similar to interior versions but the material is weather-resistant and stable in moisture. If you’re cladding an exterior wall, covered patio, or garden room, WPC is the right material. Standard wood veneer panels are not suitable outdoors. WPC outdoor panel guide.
Best for: Exterior walls, covered patios, garden rooms, outdoor kitchens
Vertical vs Horizontal: Which Direction?
This is the most common design question about slat walls, and the answer is spatial rather than stylistic.
Vertical slats draw the eye upward. They make ceilings feel higher and rooms feel taller. This is why vertical slat walls are the default in most living rooms and bedrooms — the proportional improvement is immediate and works in almost any room. If you’re unsure, go vertical.
Horizontal slats draw the eye sideways. They make walls feel wider and rooms feel lower and more intimate. This works well in narrow corridors where you want the space to feel less like a tunnel, or in rooms with high ceilings where you want to bring the visual weight down.
There’s no wrong answer — but knowing what each direction does spatially helps you make an intentional choice rather than just copying what you’ve seen elsewhere.
The most popular application. A full slat wall behind the sofa anchors the room and gives it a focal point that doesn’t require artwork or accessories. Behind a TV it frames the screen cleanly — the parallel lines of the wall echo the rectangular geometry of the display and make the whole setup look designed rather than assembled.
Acoustic slat panels work especially well in open-plan living rooms, where hard floors and high ceilings create flutter echo that makes conversations feel louder than they are. One treated wall changes the acoustic feel of the whole room.
Best wall: Behind the sofa or as a TV feature wall Best finish: White Oak for lighter rooms, Walnut for warmer or darker schemes Orientation: Vertical — draws the ceiling up — Living room panel ideas
Bedroom
A full-width slat wall behind the bed is the single most impactful bedroom upgrade you can make for the money. It replaces the need for a headboard, creates a hotel-suite quality backdrop, and — if you use acoustic panels — makes the room measurably quieter. People sleep better in lower-reverberation environments. That’s not marketing, it’s basic acoustics.
Extend the panel wall beyond the width of the bed and add wall-mounted bedside lights directly to the slat surface for a fully integrated look.
Best wall: Full headboard wall, floor to ceiling Best finish: American Walnut — warm, dark, creates enclosure and calm Orientation: Vertical — Bedroom panel ideas
Home Office
Two problems, one solution. Slat panels behind your desk absorb the echo that makes every video call sound hollow, and they create a clean, textured backdrop that reads well on camera. A grey painted wall looks flat and forgettable on a call. A walnut slat wall looks like you made a decision about your space.
This is the strongest acoustic argument for slat panels outside of a home theater. Hard surfaces — drywall, glass desk, hard floor — create a flutter echo at the speech frequency range (500Hz–2000Hz) that NRC 0.85 panels address directly.
Best wall: Behind the desk, camera-facing Best finish: Charcoal or American Walnut — both read cleanly on camera Orientation: Vertical — Office and gaming room setups
Hallway
Hallways are narrow, usually under-lit, and mostly ignored. A slat wall panel on one side transforms them into something architectural. The directional lines of vertical slats create visual movement that makes the corridor feel intentional rather than transitional. Horizontal slats on a particularly narrow hallway push the walls apart visually.
Hallways are also one of the easiest spaces to panel — the wall area is modest, there are usually no outlets to cut around, and a single wall is often enough.
Best wall: The longer wall Best finish: White Oak brightens dark hallways; Charcoal creates drama in well-lit ones Orientation: Vertical for height, horizontal for width
Dining Room
Hard floors, glass, and painted walls make dining rooms acoustically brutal — conversations bounce off every surface and the room gets louder as more people talk. One acoustic slat wall behind a banquette or sideboard absorbs enough to drop the ambient noise level without killing the energy of a dinner table.
Darker finishes work especially well in dining rooms — walnut or charcoal creates the warm, intimate quality of a restaurant booth that makes people want to stay at the table.
Best wall: Behind a bench seat or sideboard Best finish: American Walnut or Golden Oak — Dining room wall panels
Home Theater and Gaming Room
Acoustic treatment isn’t optional in a home theater — it’s what makes the equipment investment worthwhile. Side walls are the highest priority: first reflection points from speakers are the primary source of flutter echo and image smearing. Rear wall treatment handles the echo that returns to your listening position after crossing the room.
Charcoal and dark walnut finishes also absorb light scatter and improve perceived screen contrast — a practical benefit on top of the acoustic one.
Coverage needed: Side walls + rear wall, 25–35% of total wall area Best finish: Charcoal — absorbs light, maximises contrast — Home theater guide
Floor to ceiling beats half-wall. The proportional impact of a full-height slat wall is dramatically stronger than stopping at mid-height. When you can see both the floor and the ceiling as a continuous plane, the room reads taller. Half-height panels look like a decision that ran out of budget.
Light it from the side. Raking light — from a floor lamp, a wall sconce, or morning sunlight — catches the edge of each slat and creates the shadow pattern that makes slat walls look three-dimensional. Overhead downlights flatten the effect. If you’re installing in a living room, plan a side light source to make the most of the texture.
Let the wall breathe. A slat wall doesn’t need to be covered with things. Resist the instinct to hang art or shelves in front of it. The panel is the feature. One large piece of art to one side is fine. A gallery wall on top of a slat wall is visual noise.
Use the panel as a headboard platform. Mount wall sconces or reading lights directly through the felt backing on either side of the bed position. No holes in the plaster, no wall repair if you reposition. The felt takes screws cleanly.
Integrate LED strip lighting. LED strips in the channel between panels or behind the bottom edge create ambient underlighting that makes the slat pattern visible even without a side light source. Works especially well in home theaters and gaming rooms.
TPH’s SoundPanel is designed for DIY installation. Here’s the complete process for a standard flat interior wall.
What You Need
Tape measure and pencil
Spirit level or laser level
Construction adhesive (Liquid Nails or panel-specific adhesive) — adhesive guide
Adhesive gun
Circular saw or oscillating tool
Screws (3.5mm × 35mm minimum) and drill — optional but recommended for permanent installations
Jigsaw for outlet cutouts
Before You Start
Acclimate the panels. Leave them flat in the room for 24–48 hours before installation. Wood acclimates to room humidity and temperature — installing cold panels into a warm room can cause slight movement after fixing.
Decide on orientation. Vertical or horizontal. Read the section above if you’re undecided. Commit before you start — you can’t change direction mid-wall.
Plan your layout. Measure your wall width. Divide by panel width to calculate how many panels you need and what width the end panel will be. Aim to avoid a very thin strip at one end — if the last panel would be less than a third of full width, trim a little from both the first and last panel so the margins look balanced and intentional.
Prepare the wall. Clean, dry, and reasonably flat. Remove loose paint, fix large dips or protrusions. You don’t need to skim or plaster — minor imperfections disappear behind the panel. Remove baseboards at the bottom if you’re going floor to ceiling, so panels sit flat to the floor. How to cut wall panels.
Step 1 — Mark Your Starting Line
Use a spirit level or laser to draw a true vertical line at your starting point. This is the most important step. Any drift here compounds across the wall. Take your time on this line — everything that follows references it.
If you’re starting from a corner, check whether the corner itself is plumb. Most aren’t perfectly vertical. Start your first panel against the line, not the corner, and fill any gap with a trim strip or caulk after.
Step 2 — Cut the First Panel to Height
Measure your floor-to-ceiling height. Most panels need a top cut to fit. Measure twice, mark the cut line across the full panel width, and cut with a circular saw. A straight edge clamped to the panel as a saw guide gives the cleanest cut. Cutting tips for wall panels.
If you’re going floor to ceiling without baseboards, cut the panel to the exact floor-to-ceiling measurement. If you’re leaving the baseboard in place, cut to the height from top of baseboard to ceiling.
Step 3 — Apply Adhesive
Run a zigzag bead of construction adhesive across the felt backing of the panel — not in straight lines, which can leave unbonded sections. Cover the full panel back. For permanent installations, apply adhesive to both the panel back and the wall surface for maximum bond strength.
Don’t apply adhesive to the slat faces themselves — only the felt backing contacts the wall.
Step 4 — Press and Secure
Lift the panel to the wall, align the edge with your starting line, and press firmly from top to bottom. The felt backing grips the wall immediately — you won’t need to hold it in place.
Check the edge alignment against your level line. Adjust now if needed — you have about 60 seconds before the adhesive starts to set.
For a permanent installation, drive screws through the felt backing into wall studs. 3 screws per row, roughly every 300–400mm vertically. The screws pass through the felt without splitting it and are hidden behind the slat faces — invisible from the front. For walls where you expect shelves or wall-mounted items, adhesive alone is sufficient for the panels themselves, but screw fixings give you additional load-bearing points.
Step 5 — Work Across the Wall
Butt the second panel tightly against the first. The slat lines create the visual alignment — when the slats of adjacent panels line up, the join disappears. Check the far edge of each new panel with your level before pressing to confirm you haven’t drifted.
Stagger any horizontal joins if your wall is taller than one panel height — offset by at least half a panel width so the joins don’t create a visible horizontal line across the wall.
Step 6 — Handle Outlets and Switches
Measure the position of the outlet on the wall precisely — distance from the floor and from the panel edge you’re working from. Transfer those measurements to the back of the panel. Drill a starter hole inside the marked area, then cut with a jigsaw. Test the fit before applying adhesive.
If a slat falls partly over an outlet opening, cut that slat cleanly at the edge of the opening. The small piece that falls off can be re-attached with a dab of construction adhesive after the panel is fixed to the wall.
Step 7 — Trim the Last Panel
Measure the remaining gap at the end of the wall. Rip the last panel to width with a circular saw using a straight-edge guide. The cut edge faces the wall corner or ceiling — the factory edge faces outward. If the cut edge is visible (at an external corner, for example), sand lightly and finish with a matching trim strip.
Realistic Timing
A standard 8×10 ft accent wall takes most people 1.5–2.5 hours on their first installation. The second wall is noticeably faster. A full room treatment — three or four walls — is a comfortable full-day project for two people.
Common Mistakes to Avoid
Not checking the starting line for plumb. Everything follows that first line. Spend five extra minutes getting it true with a proper level — not just eyeballing it against the wall corner.
Installing without acclimating. Panels that haven’t acclimated can shift slightly as the wood adjusts to room conditions. 24–48 hours flat in the room is all it takes.
Stopping at the baseboard height. If your baseboard is staying in place, panels sitting on top of it leave a gap at the floor that looks unfinished. Remove the baseboard first, install the panel to the floor, then reinstall the baseboard over the bottom edge of the panel. Clean result, no gap.
Rushing outlet cutouts. Measure twice before cutting. An outlet hole that’s 5mm too large can’t be undone. Mark it on the back, check the position twice, cut conservatively, and test the fit before gluing.
Covering the wall with things. The slat pattern is the feature. Give it room to breathe. One considered accessory is fine. Five things competing with the texture undermines the whole effect.
Caring for Slat Wall Panels
Low maintenance is part of the value. Here’s the short version:
Dust regularly with a dry microfiber cloth. Run it along the slats, not across them.
For marks: Damp cloth with mild soap, dried immediately. Don’t saturate the wood face.
Acoustic felt: Vacuum through the slat gaps once a year. Dust in the felt reduces its absorption performance over time, slowly — annual maintenance keeps it performing at full efficiency.
Avoid steam and sustained moisture. The wood veneer is real and responds to humidity. Not a bathroom material unless you’re using waterproof panels specifically.
Do slat wall panels actually improve acoustics? Only if they have a high-density acoustic backing. Decorative slat panels without backing have near-zero acoustic benefit — the wood reflects sound rather than absorbing it. TPH’s SoundPanel achieves NRC 0.85 because of the AcuFelt 1500 g/m² backing behind the slats. That backing is what does the acoustic work.
Can I install slat wall panels over existing wallpaper? Not recommended. Wallpaper creates an uneven, potentially unstable substrate. Strip it first, skim-coat any damage, and install onto clean flat wall.
Can I install them myself? Yes. TPH’s SoundPanel is designed for DIY. The tools you need are basic — a circular saw, a level, adhesive, and a drill if you’re screw-fixing. A standard accent wall takes 1.5–2.5 hours.
Vertical or horizontal — does it affect installation? No. The installation process is identical. Orientation is purely a design decision about how you want the room to feel spatially.
How do I deal with a wall that isn’t perfectly flat? Minor imperfections — small bumps, texture, old painted surfaces — are fine. The panel bridges across them. Large dips (more than 5mm deep over 300mm) should be filled first so the panel has enough contact area for the adhesive to hold properly.
How many panels do I need? Use the Box Calculator — enter your wall dimensions and it returns a panel count with a waste allowance factored in.
Can slat panels be painted? TPH’s wood veneer panels are pre-finished and designed to show the natural grain — painting them covers the wood character that makes them worth buying. If you want a painted slat panel, MDF-based slat panels are made for that purpose.
And if you want to explore the decorative slat options without acoustic backing: Shop all wood wall panels.
The Panel Hub’s SoundPanel uses real wood veneer over HDF cores with AcuFelt 1500 g/m² high-density backing. NRC 0.85. FSC-certified. Designed in the USA, shipped from North Carolina. 3-sided furniture-grade rounded edges.
The term “soundproof wall panels” is used loosely, and it’s worth clarifying what these products can and can’t do — because the distinction matters for your expectations and your choice of product.
Soundproofing = blocking sound from passing through a wall from one room to another. This requires mass, density, and often structural modification. You cannot soundproof a room with surface panels alone.
Sound absorption = reducing echo, reverberation, and flutter echo within a room. This is what acoustic wall panels do — and they do it very well.
Most products marketed as “soundproof wall panels” are actually sound-absorbing acoustic panels. They make a room quieter and more comfortable by reducing how much sound bounces around inside it — but they don’t prevent sound from passing between rooms.
How Acoustic Wall Panels Work
Sound travels as waves. When those waves hit a hard, flat surface — painted drywall, glass, concrete — they bounce back into the room, creating echo and reverberation. Acoustic panels interrupt this process by absorbing those waves rather than reflecting them. The softer, more porous, or more textured the surface, the more sound it absorbs.
The most effective acoustic wall panels use a combination of:
Acoustic felt or fabric backing — materials like AcuFelt™ are engineered for high sound absorption, with NRC ratings up to 0.85.
Surface texture — slat profiles, perforations, and curved surfaces break up sound waves more effectively than flat panels.
NRC stands for Noise Reduction Coefficient. It’s a scale from 0 to 1:
0.0 = completely reflective (like a glass window)
0.5 = absorbs 50% of sound hitting the surface
1.0 = absorbs 100% of sound hitting the surface (theoretical)
Quality acoustic wood slat panels achieve NRC ratings of 0.65–0.85. This is significantly better than any paint, wallpaper, or bare-panel alternative, and is sufficient to transform the acoustic character of most domestic rooms.
Where Do Acoustic Panels Make the Most Difference?
Rooms where you’ll notice the biggest improvement from acoustic panels:
Home offices: Reduces echo on video calls and makes focused thinking easier.
Living rooms: Improves music, TV, and conversation quality — especially in open-plan spaces.
Home theatres and media rooms: Reduces flutter echo and tightens bass response.
Bedrooms: Creates a quieter, more restful environment by absorbing sound from TVs, electronics, and ambient noise.
Podcast and recording studios: Minimises room sound appearing in recordings.
Acoustic Slat Wood Panels vs Foam Acoustic Panels
Feature
Acoustic Slat Wood Panels
Foam Acoustic Panels
NRC Rating
0.65–0.85
0.5–0.9 (variable by thickness)
Appearance
Premium — real wood veneer
Functional — typically black or grey foam
Durability
20+ years
5–10 years before degradation
Suitable for living spaces
Yes
Studios only
Installation
Adhesive, DIY-friendly
Adhesive, DIY-friendly
Cost
Higher
Lower
How Many Panels Do You Need?
As a general rule, acoustic treatment of 25–40% of wall surface area makes a noticeable difference to room acoustics. For a typical 12x12ft room:
Minimal treatment: One feature wall (approx. 100 sq ft)
Moderate treatment: Two walls or the primary wall plus ceiling panels
Full treatment: Three to four walls (recording/podcast grade)
Most homeowners treating a living room, bedroom, or home office see significant improvement with a single feature wall of acoustic slat panels — both acoustically and aesthetically.
What to Expect After Installation
Setting accurate expectations before you install acoustic wall panels prevents disappointment and helps you assess whether the installation is performing as it should.
What you will notice: Reduced echo and flutter echo — clap once in the room before and after installation and the difference in decay time is immediate and clear. Conversations feel less fatiguing in rooms that previously had obvious reverberation. Music and TV audio sounds cleaner and more defined. Video call quality improves noticeably for anyone on the other end of the call.
What you won’t notice: No meaningful reduction in sound entering the room from outside or from adjacent rooms. If your neighbour’s music was audible before, it will still be audible after — acoustic panels don’t block transmission. Similarly, the sound level of a TV or conversation in the room doesn’t decrease; what changes is the quality and clarity of that sound, not its volume.
How long to assess the result: The acoustic change is immediate after installation, but your brain takes 1–2 weeks to recalibrate to the new room signature. Many people find the room initially feels slightly over-damped, particularly if they’re used to a very live room. This perception normalises quickly as your listening adjusts.
Signs the installation is working: Speech intelligibility improves — you can understand conversations at a lower volume. Echo and flutter decay rapidly rather than persisting for 0.5+ seconds. Music sounds like it has more detail in the mid and high frequencies. On video calls, others comment that your audio sounds cleaner without you prompting them.
When to add more panels: If the room still sounds clearly reverberant after the initial installation, extend coverage by 10–15% and reassess. The relationship between coverage and acoustic improvement is roughly linear up to about 40% wall coverage — beyond that, additional panels provide diminishing returns.
Frequently Asked Questions
Do soundproof wall panels actually work?
“Soundproof” wall panels don’t exist as a product category — the term is a misnomer. What actually exists are acoustic panels (which absorb sound within a room, reducing echo and reverberation) and soundproofing materials (mass-loaded vinyl, resilient channels, acoustic drywall — which block sound between rooms). Acoustic panels work very well for their intended purpose; they don’t soundproof rooms.
How much does it cost to acoustically treat a room?
A single-wall treatment for a standard room (8–15 sqm of wall area) typically costs £400–£1,200 for quality wood slat acoustic panels. Full-room treatment (all four walls, 25–40% coverage target) for a living room or home office typically runs £800–£2,500 depending on room size, panel specification, and whether ceiling treatment is included.
Can acoustic wall panels replace soundproofing?
No — they solve different problems. If your issue is echo and reverberation (sound quality inside the room), acoustic panels are the solution. If your issue is sound transmission (sound moving between rooms), acoustic panels won’t help. That requires structural soundproofing — mass, decoupling, and air-sealing.
How thick should acoustic wall panels be?
For residential use, 20–28mm thickness is sufficient for mid and high-frequency absorption (the speech range). Thicker panels (40mm+) improve low-frequency absorption. TPH SoundPanel is 21mm — the optimal thickness for domestic acoustic treatment without the panel feeling visually heavy in a living space.
Are acoustic panels difficult to install?
No. Standard adhesive installation requires no specialist tools or trade skills. Most homeowners complete a single-wall installation in 3–5 hours. TPH panels come with full installation guides, and the customer service team provides pre-installation support for coverage calculations and layout planning.
Conclusion
Acoustic wood slat panels are the most effective and aesthetically superior form of “soundproofing” available for domestic spaces. They won’t stop sound passing between rooms, but they will measurably reduce echo, flutter echo, and reverberation — making your room quieter, more comfortable, and better for voice, music, and video. At NRC ratings of up to 0.85, quality acoustic panels are a genuine functional upgrade, not just a decorative one.