Author: The Panel Hub Design Studio

  • How Long Does It Take to Install Wall Panels? Realistic Time Estimates

    How Long Does It Take to Install Wall Panels? Realistic Time Estimates

    The Honest Answer

    Most panel brands claim their products install “in under two hours.” For a straightforward single feature wall with no obstructions and good wall preparation, this is achievable — but it assumes the wall is already prepared, the panels have already acclimatised, and you’ve done it before. For a first-time installer, double the headline time estimate and plan for a full day.

    Here’s a realistic breakdown of every stage and how long each takes.

    Stage 1: Preparation (1–3 hours, often done the day before)

    Task Time
    Panel acclimatisation 24–48 hours (passive)
    Wall inspection and cleaning 15–30 minutes
    Filling holes and damage 30–60 minutes + drying time
    Priming (if required) 30 minutes + 2 hours drying
    Removing skirting/switches/covers 15–30 minutes

    Note: Preparation is often the most time-consuming element, but it’s also the most important. A well-prepared wall produces a significantly cleaner result than a rushed installation on a poor surface.

    Stage 2: Layout Planning (15–30 minutes)

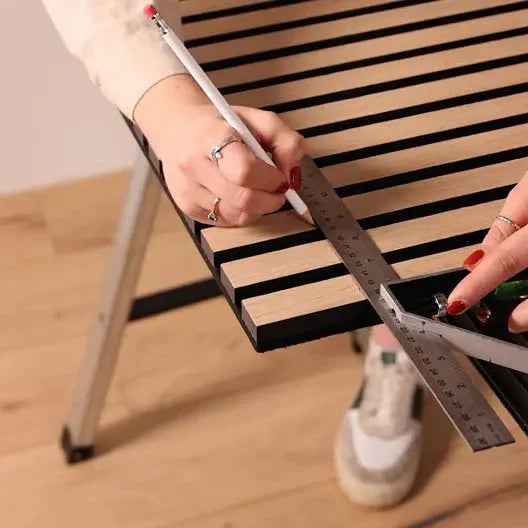
    • Measuring wall and calculating panel positions: 10–15 minutes
    • Marking reference lines: 5–10 minutes
    • Planning cut positions and obstacle workarounds: 5–10 minutes

    Stage 3: Installation (varies significantly)

    Wall Type Estimated Installation Time
    Simple rectangular wall, no obstructions (3–4m wide) 60–90 minutes
    Wall with 1–2 sockets/switches 90–120 minutes
    Wall with window or door opening 2–3 hours
    Staircase wall with angled cuts 3–5 hours
    Full room (4 walls) Full day (6–8 hours)

    Stage 4: Finishing (30–60 minutes)

    • Fitting trim strips at edges: 15–20 minutes
    • Caulking panel-to-wall joins: 10–15 minutes
    • Reinstalling covers, switches, fixtures: 10–15 minutes
    • Clean-up: 10–15 minutes

    What Slows an Installation Down

    • Discovering wall problems mid-installation (damp, severe unevenness, old wallpaper) — can add hours if remediation is needed. See our uneven wall installation guide for how to handle these situations.
    • Complex obstacle cutting — each socket cutout, pipe notch, or irregular edge adds 15–30 minutes of careful measuring and cutting.
    • Waiting for adhesive to grip — some adhesives need 10–15 minutes before releasing hand pressure. Plan this time into your sequence rather than standing holding a panel.
    • First-time installation — the first time you install any panel system involves reading instructions, test-fitting, and discovering the nuances of the specific product. Second and subsequent installs of the same system are significantly faster.

    Time-by-Phase Breakdown for a Standard Feature Wall

    Breaking the installation into phases gives you a more useful picture than a single total time estimate — and helps you plan which parts to tackle first.

    Surface preparation (1–3 hours): For a standard plastered or drywall surface in good condition, this means cleaning, patching any holes, sanding any high points, and applying primer if needed. For surfaces requiring more work (stripping wallpaper, skim-coating an uneven wall), add 4–8 hours for remedial work and drying time — often requiring an additional day.

    Layout and marking (30–60 minutes): Setting out reference lines, marking stud positions, and planning the panel layout. First-timers should allow the full hour; this is not a step to rush.

    First row installation (45–90 minutes): The first row takes disproportionately long because it establishes the reference for everything that follows. Checking and rechecking plumb and level at every stage is normal and appropriate — do not rush this phase.

    Remaining rows (20–30 minutes per row): Once the first row is established, subsequent rows proceed significantly faster. A standard feature wall typically has 4–6 rows of slat panels.

    Trimming and finishing (1–2 hours): Cut panels at ceiling and skirting, fit any cover strips or trim, fill any gaps with flexible sealant, and clean the surface. This phase is often underestimated — allow a full 2 hours for a neat, professional finish.

    Installation Time FAQs

    How long do I need to wait after installation before painting or decorating around the panels?
    Most adhesives reach handling strength within 2–4 hours but take 24–72 hours for full cure. You can typically apply sealant at the panel edges after 4–6 hours, and paint around the panels after 24 hours. Do not apply heat, humidity, or mechanical stress to the installation until the adhesive has fully cured.

    Can I install wall panels in a day?
    A single feature wall in good condition can be completed in one day by a confident DIYer — surface prep in the morning, installation in the afternoon, and finishing in the evening. Multi-wall installations, rooms requiring significant prep, or first-time installers should allow two days, with prep on day one and installation on day two.

    How much faster is a professional installer compared to DIY?
    An experienced professional installer typically works at 2–3 times the speed of a competent DIYer on the same project, mainly due to tool efficiency and pattern familiarity. For a complex installation, this time difference is significant. For a simple single feature wall, the difference is smaller — roughly 3–4 hours professional versus 5–7 hours DIY.

    Does the type of panel system affect installation time?
    Yes significantly. Click-and-lock batten systems are faster than adhesive systems (no open-time waiting, easier alignment). Adhesive systems are faster than mechanically-fixed systems (no drilling, no fixing visible on the surface). 3D geometric panels with complex patterns are slower than uniform slat systems. A flat slat system on a prepared wall is the fastest panel installation type per m².

    Planning Your Project Day

    For a typical single-wall feature installation:

    • Day before: Deliver and acclimatise panels, prep wall (fill, prime)
    • Installation morning: Layout planning, first panel installation
    • Installation afternoon: Complete installation, trimming, finishing
    • Following day: Full adhesive cure — avoid any contact with panels for 24 hours

    The SoundPanel™ acoustic slat panels include full installation guidance with every order. Browse the complete panel collection to find the right product for your project timeline.

    One final note on timing: wall panel installations do not need to be completed in a single continuous session. Adhesive-based systems can be paused between rows — apply a section, allow it to set, and continue the next day if needed. This is particularly useful for first-time installers who benefit from reviewing the work with fresh eyes before committing the remaining panels. The adhesive on already-installed panels will be fully set, and new panels adhesively bonded to an already-set panel edge perform just as well as a continuous installation.

  • How Many Wall Panels Do I Need? A Simple Calculator Guide

    How Many Wall Panels Do I Need? A Simple Calculator Guide

    The Basic Calculation

    Calculating how many panels you need is straightforward — but two common mistakes (not accounting for waste and not measuring accurately) lead to either running short mid-installation or over-ordering significantly. Here’s the correct method.

    Step 1: Measure the Wall Area

    Measure the wall width and height in metres. Multiply to get the total square metres (m²).

    Example: Wall 4.2m wide × 2.4m high = 10.08m²

    If the wall has a window or door, subtract its area: a standard door is approximately 2.0m × 0.9m = 1.8m². A standard window is approximately 1.2m × 1.0m = 1.2m².

    Step 2: Find Your Panel Coverage Area

    Check the product specification for the panel’s coverage area per unit. Panel sizes vary significantly by brand and product:

    • Standard full-height slat panels: typically 2.4m × 0.6m = 1.44m² per panel
    • Modular tile panels: typically 0.6m × 0.6m = 0.36m² per panel
    • Groove/mosaic panels: typically 0.5m × 0.5m = 0.25m² per panel

    The SoundPanel™ acoustic slat panels and GroovePanel® mosaic panels both include coverage information in their product listings.

    Step 3: Divide and Add Waste

    Divide your wall area by the panel coverage area to get the base panel count. Then add a waste allowance:

    • Simple rectangular wall, no cuts: Add 5–8% waste
    • Wall with one or two obstructions (sockets, etc.): Add 10–12% waste
    • Angled cuts (staircase), multiple obstructions: Add 15–20% waste

    Example continued: 10.08m² wall ÷ 1.44m² per panel = 7 panels base. Add 10% waste = 7.7 → order 8 panels.

    Step 4: Check Against Panel Width

    Don’t just calculate by area — also check the panel count against your wall width. If your wall is 4.2m wide and each panel is 0.6m wide, you need 4.2 ÷ 0.6 = 7 panels across. If this doesn’t match your area calculation, the discrepancy is likely due to ceiling height variation — resolve by using the higher number.

    The Two Most Common Ordering Mistakes

    Under-ordering by Not Accounting for Waste

    The most costly mistake. Running out of panels mid-installation means waiting for a reorder — and if the batch changes (dye lots, grain variation), the new panels may not match perfectly. Always round up and add the appropriate waste percentage. The cost of one extra panel is far less than the cost of a mismatched reorder.

    Not Ordering Samples First

    Ordering a full wall of panels based on product photography alone is a risk. Screen colour rendering varies, and the way wood grain reads in your specific room lighting can differ significantly from the product image. Order a sample first, live with it in the room for a few days under different lighting conditions, then place the full order. The Panel Hub offers sample ordering for exactly this reason.

    Quick Reference Table

    Wall Size Panel Size (0.6m × 2.4m) Panels Needed (incl. 10% waste)
    3m × 2.4m (7.2m²) 1.44m² 6
    4m × 2.4m (9.6m²) 1.44m² 8
    5m × 2.4m (12m²) 1.44m² 10
    6m × 2.4m (14.4m²) 1.44m² 12

    Common Calculation Mistakes and How to Avoid Them

    Panel quantity calculations go wrong in predictable ways. Knowing these in advance prevents the two worst outcomes: running out of panels mid-installation, or significantly over-ordering.

    Forgetting the waste factor. Even experienced installers add a 10–15% waste allowance for cut panels, offcuts at edges, and any damaged panels discovered after opening boxes. For a pattern-matched system (where panels need to be aligned), increase the waste factor to 15–20%. For standard slat panels with no pattern matching, 10% is typically sufficient.

    Measuring net area instead of gross area. Calculate the full wall area including any window or door openings, then subtract the openings at the end. This gives you the gross area plus a ready supply of offcuts for use above doors and in awkward corners. Calculating net area only can leave you short when small sections around openings require cut pieces that would otherwise have been offcuts.

    Ignoring panel direction. Most slat panels have a top and a bottom (the felt backing direction, or the bevel direction of the slat edges). If you accidentally install a row inverted, you will need additional panels to replace the wrong-way-round sections. Confirm the installation direction with the supplier before opening boxes.

    Calculating panels but not adhesive or fixings. It is easy to focus on the panel order and forget that you need approximately one 290 ml cartridge of adhesive per 1.5–2 m² of panels. Order adhesive, trim, sealant, and any fixing screws at the same time as your panels — sourcing these separately later adds delays and often shipping costs.

    Panel Quantity FAQs

    How many panels do I need for a standard living room feature wall?
    A standard 3 m × 2.4 m feature wall requires 7.2 m² of panels. With a 10% waste factor, order for 8 m². Most panel systems are sold in m² or per panel, so convert using your specific panel’s coverage per unit (shown on the product page).

    What happens if I run out of panels halfway through installation?
    If you can reorder from the same batch, the main risk is slight colour or grain variation between production batches. For natural wood veneer systems, batch variation is almost always visible. Always over-order slightly rather than relying on being able to reorder an exact match — keep any unused panels for future repairs.

    Should I order extra panels for future repairs?
    Yes — keeping 5–10% of your order in storage is strongly recommended for real wood and veneer systems. Matching panels from a later production run is difficult for natural materials. For painted MDF systems where an exact match is not required, spare panels are less critical.

    Can I return unused panels?
    Most panel suppliers accept returns of unopened boxes within 30 days. Check the supplier’s returns policy before ordering and keep unused boxes unopened until you are certain the installation is complete and no additional panels are needed.

    Also Order: Trim and Adhesive

    Don’t forget consumables in your order calculation:

    • Trim strips: One per exposed edge. Measure all edges where the panel meets a wall, ceiling, or floor without a continuous panel run.
    • Adhesive: One 290ml cartridge typically covers 2–3 panels. Order enough for your full panel count plus one spare.

    Browse the full wood wall panel collection to check coverage specs for your chosen panels before calculating.

  • How Much Do Wall Panels Cost? (2026 Price Guide)

    How Much Do Wall Panels Cost? (2026 Price Guide)

    The honest answer is: it depends entirely on which type you buy. Wall panels span a range from $1 per square foot for basic MDF to $40+ for solid hardwood — and those numbers reflect completely different products that shouldn’t be compared directly. A guide that just says “wall panels cost $7 to $25 per square foot” isn’t useful because it mixes materials that serve different purposes at different quality levels.

    This guide breaks down actual 2026 pricing by material type, gives you realistic project budgets by room, explains what drives cost up or down, and tells you where DIY saves real money versus where it doesn’t. All prices are US materials costs unless noted, current as of April 2026.

    The Short Answer: Cost by Panel Type

    If you’re here for a quick number, here it is. These are material costs per square foot — what you pay for the panels themselves before installation.

    Panel Type Materials (per sqft) What You’re Getting Typical Lifespan
    Paintable MDF (fluted, ribbed) $7–$11 Engineered wood, no grain, needs painting 10–15 years
    PVC / WPC panels $7–$15 Waterproof, lightweight, printed wood-look 10–20 years
    Shiplap / beadboard $2–$7 Traditional pine or MDF planks 10–20 years
    Wainscoting / board and batten $7–$20 Classic paneling style, painted finish 15–25 years
    Wood veneer slat (decorative) $12–$18 Real wood face, no acoustic backing 15–25 years
    Acoustic slat panels (SoundPanel) $14–$22 Real wood veneer + NRC 0.85 felt backing 15–25 years
    Solid wood planks / cladding $15–$40+ Through-and-through timber, ages beautifully 30+ years
    3D mosaic / geometric (solid wood) $18–$35 Solid wood cut into patterns, statement walls 20+ years
    Faux stone / textured panels $6–$14 Lightweight composite, stone-look finish 10–15 years
    WPC outdoor cladding $10–$18 Weather-resistant wood-plastic composite 20–25 years

    Add labor if you’re hiring a professional: $3–$10 per square foot for standard flat-wall installations, rising to $8–$15 for complex layouts, high ceilings, or intricate patterns. 

    What Drives the Price Up (and Down)

    The material type explains most of the cost variation, but these five factors also shift your final number significantly.

    1. Real Wood vs Engineered vs Synthetic

    This is the biggest cost driver in the category. Real wood — solid or veneer — costs more than MDF, which costs more than PVC. The price premium is real and justified: solid wood lasts decades, improves with age, and has grain character no printed surface replicates. Wood veneer gives you real wood appearance at lower cost and weight. MDF and PVC give you shape and texture at the lowest cost but without genuine wood material.

    If you see two “wood panels” priced at $8/sqft and $18/sqft, they are almost certainly different materials — not the same product at a markup. Solid wood vs MDF: full comparison.

    2. Acoustic Backing

    Acoustic slat panels cost $2–$5 more per square foot than the same panel without acoustic backing. That premium pays for high-density felt (AcuFelt 1500 g/m² in TPH’s case) that delivers NRC 0.85 — absorbing 85% of sound energy hitting the surface. If acoustics matter to your room, this is one of the most cost-effective upgrades available. If acoustics genuinely don’t matter, decorative slat panels at the lower price point are the right call.

    3. Wood Species

    Within real wood panels, species is a major price variable:

    • Pine: Lightest cost. Pale, knotty, casual aesthetic.
    • Oak (white or red): Mid-range. Clean grain, highly versatile, the default choice for good reason.
    • Walnut: Premium. Darker, richer, more dramatic — and priced accordingly. American Walnut is among the most expensive domestic hardwood species.
    • Charcoal / ebonized: Treated or deeply stained — can be any underlying species, but the finishing process adds cost.

    4. Pre-finished vs Unfinished

    Pre-finished panels arrive ready to install — no priming, painting, or staining required. Unfinished panels (most MDF, some solid wood) need finishing after installation, which adds material cost (primer, paint, or stain) and time. Factor at least $1–$3/sqft in finishing materials for unfinished panels, plus the labor time if you’re hiring it out.

    TPH’s wood veneer panels are pre-finished. No on-site painting required.

    5. Coverage per Panel and Waste

    Panels that cover more wall per unit are cheaper to install because you’re handling fewer pieces and making fewer cuts. Always add 10–15% to your square footage measurement for waste — cuts, mistakes, and off-cuts that can’t be reused. Use the Box Calculator to get an accurate panel count with waste factored in.

    Real Project Costs: Room by Room

    These are realistic all-in estimates for single-accent-wall installations at each room size — materials only unless noted. Measurements assume standard 8ft ceiling height.

    Home Office Accent Wall (approx. 80–100 sqft)

    Panel Choice Materials Pro Install (est.) Total DIY Total with Pro
    Paintable MDF fluted $560–$1,100 $240–$1,000 $560–$1,100 $800–$2,100
    Decorative wood veneer slat $960–$1,800 $240–$1,000 $960–$1,800 $1,200–$2,800
    Acoustic slat (SoundPanel) $1,120–$2,200 $240–$1,000 $1,120–$2,200 $1,360–$3,200

    The home office is where acoustic panels pay for themselves fastest. One wall treated with NRC 0.85 panels removes the flutter echo that makes video calls sound hollow — a quality-of-life improvement you notice every working day. Office and gaming room setups.

    Bedroom Headboard Wall (approx. 90–120 sqft)

    Panel Choice Materials Pro Install (est.) Total DIY Total with Pro
    Paintable MDF fluted $630–$1,320 $270–$1,200 $630–$1,320 $900–$2,520
    Decorative wood veneer slat $1,080–$2,160 $270–$1,200 $1,080–$2,160 $1,350–$3,360
    Acoustic slat (SoundPanel) $1,260–$2,640 $270–$1,200 $1,260–$2,640 $1,530–$3,840
    Solid wood cladding $1,350–$4,800 $450–$1,800 $1,350–$4,800 $1,800–$6,600

    A full-height slat panel behind the bed replaces the need for a headboard and creates a hotel-suite quality backdrop at a fraction of custom millwork cost. Bedroom panel ideas.

    Living Room Feature Wall (approx. 120–160 sqft)

    Panel Choice Materials Pro Install (est.) Total DIY Total with Pro
    Paintable MDF fluted $840–$1,760 $360–$1,600 $840–$1,760 $1,200–$3,360
    Decorative wood veneer slat $1,440–$2,880 $360–$1,600 $1,440–$2,880 $1,800–$4,480
    Acoustic slat (SoundPanel) $1,680–$3,520 $360–$1,600 $1,680–$3,520 $2,040–$5,120
    3D mosaic (solid wood) $2,160–$5,600 $960–$3,200 $2,160–$5,600 $3,120–$8,800

    Living room panel ideas.

    Home Theater (approx. 200–300 sqft across 2–3 walls)

    Panel Choice Materials Pro Install (est.) Total DIY Total with Pro
    Acoustic slat (SoundPanel) $2,800–$6,600 $600–$3,000 $2,800–$6,600 $3,400–$9,600
    Fabric-wrapped acoustic panels $600–$2,400 $600–$3,000 $600–$2,400 $1,200–$5,400

    Fabric-wrapped panels are cheaper but purely functional — grey rectangles on your wall. Acoustic slat panels at higher cost also redesign the room. For a home theater you’re investing in anyway, the look matters. Home theater guide.

    DIY vs Professional Installation: Where the Difference Is Real

    Labor is the most controllable variable in your total cost. Here’s where DIY genuinely saves money and where it doesn’t.

    Where DIY saves significantly

    Acoustic slat panels on flat drywall walls. This is the easiest possible installation scenario — adhesive, level, saw for the end cuts. TPH’s SoundPanel is specifically designed for this. Most people finish a standard accent wall in under 2 hours on their first installation. Skipping professional install on a $2,000 materials project saves $300–$800 in labor. That’s a meaningful number. Full slat panel install guide.

    Single accent walls without complex cuts. No outlets, no corners, no ceiling angles — straightforward rectangular walls are where DIY is fastest and cleanest.

    Where professional installation is worth the cost

    Full room treatment across multiple walls. Once you’re covering three or four walls with precise alignment and corner joins, a professional finishes faster and cleaner. The cost difference narrows when you account for your own time.

    Solid wood planks. Heavier material, more precise fitting required, no felt backing to absorb minor wall imperfections. Solid wood on an uneven wall needs skilled preparation work.

    Complex spaces. Stairwells, vaulted ceilings, arched walls, lots of outlets and switches — complexity multiplies DIY time and error risk.

    What You’re Really Comparing: Cost Per Year

    The per-square-foot number is not the whole story. Lifespan changes the real cost significantly.

    A $9/sqft MDF panel that needs replacement in 12 years costs $0.75/sqft/year. A $18/sqft wood veneer acoustic panel that lasts 20 years costs $0.90/sqft/year. A $30/sqft solid wood panel that lasts 35 years costs $0.86/sqft/year. The differences in annualised cost are smaller than the upfront price gap suggests — and the real wood options add value to the property in a way MDF doesn’t.

    This doesn’t mean always buy the most expensive option. It means the $9/sqft vs $18/sqft comparison isn’t as straightforward as it looks when you account for what you’re actually buying and how long it lasts.

    Hidden Costs to Factor In

    These are the line items that surprise people mid-project.

    Adhesive: $8–$20 per tube, one tube covers roughly 30–40 sqft of panel. A standard accent wall needs 2–4 tubes. Budget $20–$60 for adhesive on a single wall. Adhesive guide.

    Trim and edge strips: Internal corners, external corners, and top/bottom trim strips give panels a finished edge. Budget $2–$5 per linear foot of trim, and measure your perimeter before ordering.

    Baseboard removal and reinstallation: If you’re going floor-to-ceiling, the baseboard needs to come off first and be reinstalled against the panel face. Simple DIY task — pry bar and a few nails — but plan for it.

    Paint and primer for MDF panels: Unfinished MDF needs at minimum one coat of primer and two coats of paint. A litre of quality primer runs $15–$25, a litre of wall paint $20–$40. Budget $50–$100 in finishing materials per accent wall for MDF panels.

    Waste allowance: Always order 10–15% more than your measured square footage. Cuts produce off-cuts you can’t always reuse, and measuring errors happen. It’s significantly cheaper to have a panel left over than to place a second order and wait for shipping.

    Samples: TPH sample boxes let you test finishes in your actual room under your actual lighting before committing to a full order. A $20–$40 sample cost that prevents a $2,000 material mismatch is money well spent. Order samples.

    How to Calculate Your Project Cost

    Three steps:

    Step 1 — Measure your wall area. Height × width of each wall you’re panelling. Subtract any large fixed openings (doors, windows) if they take up more than 20% of the wall area. For most accent walls, measure the full rectangle — the material cut around an outlet is wasted but the calculation is simpler.

    Step 2 — Add 12% for waste. Multiply your square footage by 1.12. That’s your material order quantity.

    Step 3 — Apply the per-sqft rate for your chosen panel type. Use the tables above for a realistic range, or use the Box Calculator for a precise panel count based on TPH’s specific panel dimensions.

    Example: a 10ft × 9ft bedroom headboard wall.

    • Raw area: 90 sqft
    • With 12% waste: 101 sqft
    • At $18/sqft (acoustic slat panels): $1,818 in materials
    • DIY install: your time (1.5–2 hours)
    • Pro install: add $270–$900 depending on your area

    Is It Worth It? Wall Panels vs the Alternatives

    The honest comparison is not just material vs material — it’s what you get per dollar spent relative to alternatives.

    vs Paint: Paint a room for $200–$500 including labor. It changes the color but not the texture, adds no acoustic benefit, and has no impact on how the space feels spatially. Wall panels at $1,500–$3,000 for an accent wall do all three things paint can’t. They’re not competing products — they solve different problems.

    vs Wallpaper: Good wallpaper runs $3–$12/sqft plus $3–$7/sqft professional installation — comparable mid-range cost to wood veneer panels. Wallpaper adds pattern and some texture but remains a flat surface with no acoustic benefit, and removal is a project. Wood panels are permanent in the best sense: they age well, they’re repairable, and they add genuine material value to the room.

    vs Custom millwork: A custom built-in wood panel wall from a finish carpenter runs $50–$150/sqft installed — three to eight times the cost of TPH’s pre-finished acoustic panels at comparable visual quality. The difference is manufacturing: TPH panels are precision-engineered in a factory and arrive ready to install. Custom millwork is built on-site, priced accordingly.

    vs doing nothing: A bare drywall room with hard floors reflects sound, looks unfinished, and adds no value to the property. One well-chosen accent wall — $1,200–$2,500 all-in for a typical room — is one of the highest return-per-dollar improvements available in interior finishing.

    Frequently Asked Questions

    What’s the cheapest way to panel a wall?
    Paintable MDF panels at $7–$11/sqft materials, installed DIY. Shiplap pine is cheaper still at $2–$7/sqft but the aesthetic is more rustic and the install is more time-intensive. For a clean, modern look at the lowest cost, MDF fluted or ribbed panels are the entry point.

    How much does it cost to panel a 12×12 room entirely?
    A 12×12 room has approximately 384 sqft of wall area (four 12ft × 8ft walls). Subtract doors and windows — realistically around 300 sqft of panellable surface. At $14–$22/sqft for acoustic slat panels: $4,200–$6,600 in materials. Most people panel one or two walls, not full rooms.

    Does professional installation cost the same for all panel types?
    No. Flat MDF and simple slat panels on drywall are the quickest to install — $3–$5/sqft labor. Solid wood, complex patterns, mosaic panels, or high-ceiling work run $8–$15/sqft. Always get a quote for your specific material and room.

    Do I need to pay for samples?
    TPH sample boxes are available and worth ordering before committing to full panels. Finishes look different on screen than in your room under your lighting. A sample cost of $20–$40 that prevents a materials mismatch is straightforward insurance on a $1,500+ order. Order a sample.

    Can panels increase home value?
    Real wood panelling — veneer or solid — is generally considered a value-adding finish in real estate. MDF painted panels are more neutral. The impact depends on quality, installation standard, and whether the style suits the property. There’s no universal figure, but well-executed real wood accent walls are consistently cited as a positive by buyers and agents.

    What’s the most cost-effective acoustic panel option?
    For residential use, acoustic slat panels at $14–$22/sqft materials deliver NRC 0.85 — professional-grade performance — combined with a finished wood aesthetic that works in any visible room. Fabric-wrapped panels achieve higher NRC (up to 1.00) at lower material cost ($3–$8/sqft) but look clinical. For a living room, bedroom, or office, the slat panel is the better value. For a dedicated recording studio or podcast room where pure performance matters more than appearance, fabric-wrapped panels are the cost-efficient choice. Acoustic panel guide.

    Where to Start

    Use the Box Calculator to get a precise material cost for your specific wall dimensions. Calculate your project.

    Order samples to see finishes in your room before committing. Order a sample box.

    Browse the full range of wood wall panels across all price points: Shop wood wall panels.

    Or go straight to the acoustic slat range if performance is your priority: Shop SoundPanel.


    All prices in this guide are US market estimates current as of April 2026. Material costs vary by region, supplier, and order volume. Labor rates reflect national averages and will differ by location.

    Get an Accurate Price for Your Project

    Browse the complete wood wall panel collection at The Panel Hub with live pricing across every panel type and species. The SoundPanel™ acoustic slat range represents the best value-to-quality ratio in the acoustic slat panel category — worth comparing directly against the price points covered in this guide. For design inspiration that helps you decide what to budget for, our interior slat wall ideas guide shows 50+ real-room applications. The acoustic panel buyer’s guide explains how to evaluate acoustic panel specifications alongside price.
  • How to Clean Wood Wall Panels: A Simple Maintenance Guide

    How to Clean Wood Wall Panels: A Simple Maintenance Guide

    The Good News: Wood Panels Are Low Maintenance

    Real wood veneer wall panels — particularly slat panels installed at head height or above — accumulate very little dirt in normal use. Dust settles on horizontal surfaces, not vertical ones. Fingermarks and smudges are the most common cleaning task, and in most cases a dry or barely damp cloth is all that’s needed.

    The risk isn’t under-cleaning — it’s using the wrong cleaning product or too much moisture and damaging the veneer or MDF core in the process.

    Regular Maintenance: Dusting

    Dust the panels monthly or as needed using:

    • A dry microfibre cloth — the most effective and safest option for real wood veneer
    • A soft brush attachment on a vacuum cleaner — particularly effective for slat panels where dust can settle in the gaps between slats and on the felt backing
    • A feather duster — quick and gentle, though less thorough than a microfibre cloth

    For slat panels specifically: run the cloth or brush along the direction of the slats, not across them. Cleaning across the slat direction can push dust into the gaps rather than removing it.

    Spot Cleaning: Fingermarks and Smudges

    For fingermarks and light surface marks on oiled or lacquered veneer finishes:

    1. Dampen a microfibre cloth with clean water — wring out until the cloth is barely damp, not wet.
    2. Wipe the affected area gently in the direction of the wood grain.
    3. Immediately follow with a dry cloth to remove any residual moisture.
    4. Do not let water sit on the surface — even sealed veneer will absorb moisture at the grain level if left wet.

    Deeper Cleaning: Kitchen or High-Traffic Areas

    For panels near a kitchen island or in high-traffic areas where grease or more stubborn marks accumulate:

    • Use a solution of mild washing-up liquid diluted heavily in water (a few drops per 500ml). Apply with a barely damp cloth, wipe with the grain, then dry immediately.
    • Never use undiluted cleaning products — the concentrated surfactants in household cleaners strip wood oils and lacquer over time.
    • For panels near cooking areas, a monthly wipe with the diluted solution prevents grease buildup from becoming difficult to remove.

    What Not to Use

    • Steam cleaners: The heat and moisture penetrate veneer and cause delamination. Never use on wood veneer panels.
    • Bleach or ammonia-based cleaners: Strip wood finishes and bleach veneer colour. Even diluted bleach causes irreversible damage to wood surfaces.
    • Abrasive cleaners or scouring pads: Scratch the veneer surface — a scratch in 0.6mm veneer goes straight through to the MDF core.
    • Excessive water: The enemy of MDF-core panels. Any water left on the surface or allowed to penetrate at edges causes swelling and surface delamination.
    • Furniture polish with silicone: Silicone-based polishes build up over time and create a sticky, difficult-to-remove residue that attracts more dust.

    Maintaining the Wood Finish

    Depending on the panel’s surface treatment, periodic maintenance may be required:

    • Oiled veneer finish: Apply a thin coat of matching wood oil once a year. Wipe on with a cloth, allow to absorb for 15 minutes, then buff off the excess. This nourishes the veneer and maintains the surface protection.
    • Lacquered veneer finish: No maintenance oil required. If the lacquer is scratched, touch-up with a matching lacquer pen or consult the manufacturer for a compatible product.
    • Natural/unfinished veneer: Requires more regular oiling (2–3 times per year) and is less forgiving of water exposure. Not recommended in high-humidity rooms.

    The SoundPanel™ range uses a pre-finished veneer that requires minimal ongoing maintenance — routine dusting and occasional damp-cloth spot cleaning is all that’s needed in normal domestic use. Explore the full panel collection for finish specifications on each product.

  • How to Cut Acoustic Slat Panels: Tools, Techniques, and Avoiding Mistakes

    How to Cut Acoustic Slat Panels: Tools, Techniques, and Avoiding Mistakes

    Why Cutting Slat Panels Is Different

    Acoustic slat wall panels have a layered construction — real wood veneer on the face, MDF or engineered wood core, and acoustic felt on the back. Each layer behaves differently when cut. The veneer is the most vulnerable: it’s thin, it splinters easily, and a torn veneer edge ruins the finished appearance of the cut. Getting clean cuts requires the right tool, the right technique, and a bit of preparation.

    Tools: What Works and What Doesn’t

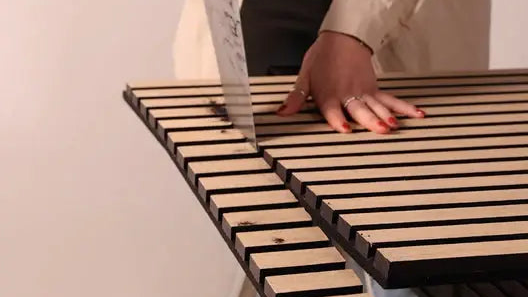
    A Japanese-style pull saw or any hand saw with 20–25 teeth per inch is the most controllable tool for cutting slat panels. The fine tooth pitch produces minimal tear-out on veneer surfaces. Advantages: no power required, no risk of chipping from vibration, full control of cut speed.

    Use: Score the veneer surface with a utility knife along your cut line first. Cut on the waste side of the line, letting the saw do the work — don’t force it.

    Circular Saw with Fine-Tooth Blade (Best for Multiple Cuts)

    For cutting multiple panels to the same length, a circular saw with a 60-tooth (or higher) fine-tooth blade is faster and more consistent than a hand saw. The key technique: cut with the veneer face down — the blade exits through the veneer face when cutting downward, causing tear-out. Cut face-down so the blade enters through the veneer face (where tear-out is minimised by the cut direction).

    Alternatively, place masking tape over the cut line on the face side and cut with the face up — the tape supports the veneer fibres and dramatically reduces tear-out.

    Jigsaw

    Best for irregular cuts — around sockets, pipes, and irregular wall edges. Use a fine-tooth downstroke blade (the tooth points downward so the cutting action is on the downstroke, minimising tear-out on the face). Cut slowly and let the blade do the work.

    Table Saw

    Ideal if you have access to one — produces the cleanest, most consistent straight cuts of any tool. Use a fine-tooth combination blade and feed the panel slowly and steadily. Requires outfeed support for long panels.

    What Not to Use

    • Coarse-tooth hand saws: Rip through veneer, producing a ragged edge
    • Standard wood blades on circular saw: Too coarse for veneer — tear-out on every cut
    • Angle grinder: Produces excessive heat and damage to veneer and felt

    Step-by-Step Cutting Technique

    1. Measure twice: Mark your cut line in pencil. Double-check the measurement, particularly for angled cuts where a small error compounds.
    2. Score the veneer: Run a sharp utility knife along your marked line, scoring through the veneer layer. This severs the wood fibres before the saw reaches them, producing a clean edge rather than a torn one.
    3. Apply masking tape: Place masking tape along the cut line on the veneer face side. This provides additional support to the veneer fibres during cutting.
    4. Cut on the waste side: Keep your saw blade just on the waste side of the marked line — the kerf (blade width) removes material, so cutting on the wrong side makes the piece too short.
    5. Sand the edge: After cutting, sand the cut edge with 120-grit sandpaper to remove any remaining splinters or rough fibres. For panels where the cut edge will be visible, finish with a matching wood oil, stain, or edge tape.

    Cutting Acoustic Felt Backing

    The felt backing on acoustic slat panels is easy to cut but tends to pull and compress if sawn directly. For clean felt cuts:

    • Cut through the wood/MDF first, then use a sharp utility knife to finish the felt layer
    • Alternatively, cut all the way through with a fine-tooth saw in a single pass — the felt compresses but usually springs back without damage
    • Never use a blunt blade on acoustic felt — it tears rather than cuts

    Angled Cuts for Staircase Installations

    Staircase panel installations require cuts at the stair pitch angle. Use a sliding compound mitre saw set to the stair angle for clean, consistent angled cuts. Alternatively, mark the angle on the panel face using a bevel gauge and cut with a circular saw guided along a clamped straight edge.

    Always make a test cut on a scrap piece at the required angle before cutting your final panel.

    For the broader context of panel installation — where cuts fit in the overall sequence — our step-by-step wall panel installation guide covers the full process. And for specific installation methods that minimise the need for difficult cuts (like starting from the centre of the wall), our complete wood panel guide has layout planning covered.

    Common Cutting Mistakes and How to Avoid Them

    Cutting acoustic slat panels is straightforward when you understand the material’s characteristics, but several consistent mistakes show up in DIY installations. Avoiding them is largely about preparation.

    Cutting without acclimatising the panels first. Wood panels absorb moisture from the surrounding air and expand or contract slightly as a result. Panels cut before acclimatisation and then left in a different humidity environment for a day may measure differently by the time you install them. Acclimatise panels in the installation room for 24–48 hours before cutting. Any edge cuts made after acclimatisation will be accurate for the final installed position.

    Cutting from the wrong face. Circular saws and jigsaws cut on the upstroke — the teeth enter the material from below and exit through the top face. This means the face-up side when cutting is the side with the cleaner edge, and the tear-out occurs on the underside. For slat panels, cut face-down if using a circular saw or jigsaw, so any tear-out occurs on the back (AcuFelt side) rather than the visible veneer face.

    Not scoring the veneer before cutting. Real wood veneer cuts cleanly when scored with a sharp knife along the cut line before the saw passes through. The score line severs the wood fibres at the surface and prevents the blade from lifting and tearing the veneer. This single step is the most reliable way to get a clean edge on a hardwood veneer panel without specialist tooling.

    Using a blade with too few teeth. A general-purpose circular saw blade (24T) cuts too aggressively for veneer panels. Use a fine-tooth blade (60T+) for any cut on a finished face. The slower material removal is worth it for edge quality on a visible cut line.

    Not measuring twice. Edge panels and cut-around-obstruction panels typically require measurements that account for the slat spacing as well as the overall panel dimension. A cut that lands in the middle of a slat looks different from one that falls at a slat edge — plan the cut position in relation to the slat layout, not just the raw measurement.

    Frequently Asked Questions

    What is the best tool for cutting acoustic slat panels?
    A circular saw with a fine-tooth blade (60T+) is the best all-around choice for straight cuts on acoustic slat panels. A mitre saw provides more precise repeatable cuts for edge panels. A jigsaw handles curves and cut-outs around sockets and switches. For occasional cuts without power tools, a hand saw with fine teeth (20TPI+) and a sharp scoring knife works well on smaller panels.
    Can acoustic slat panels be cut with a box cutter or utility knife?
    The AcuFelt backing can be cut cleanly with a sharp utility knife using a straightedge guide. The timber core and veneer face require a saw for clean results — a utility knife alone will split or tear the core material on anything thicker than about 10mm.
    How do I cut around a light switch or socket on an acoustic slat panel?
    Mark the switch position on the panel face using a pencil template. Drill a pilot hole at each corner of the cutout (just inside the marked line), then use a jigsaw to cut between the pilot holes. Work slowly and support the panel firmly — small internal cutouts are more prone to tear-out than edge cuts. Test the fit in the dry run before adhesiving.
    Does cutting change the acoustic performance of slat panels?
    Cut panels perform acoustically identically to full panels — the absorption is a function of the felt backing area, and cut panels retain their full backing area minus the removed section. There’s no acoustic reason to avoid cutting; it’s purely a dimensional adjustment.
    How much should I add for cutting waste when ordering acoustic slat panels?
    Add 10% over the measured coverage area for rooms with straight walls and no complex cut-arounds. Add 15% for rooms with multiple doors, windows, or obstacles that require detailed cutting. This buffer also accommodates the occasional mis-cut panel — replacing a single tile from a future order is more expensive and slower than ordering slightly generous the first time.

    Ready to Order?

    Browse the complete wood wall panel collection at The Panel Hub — all panels are supplied with cutting guidance specific to the product. The SoundPanel™ acoustic slat range is designed for clean cutting with standard fine-tooth saws. Order your panels, then apply the cutting techniques in this guide for a professional result. For design inspiration, our interior slat wall ideas guide shows 50+ finished room applications. The acoustic panel buyer’s guide covers product specifications and construction in detail.

  • How to Fill Gaps in Slat Wall Panels: Causes, Fixes, and Prevention

    How to Fill Gaps in Slat Wall Panels: Causes, Fixes, and Prevention

    Understanding the Two Types of Gaps

    Before trying to fix gaps, it’s important to distinguish between two different types that look similar but have different causes and solutions.

    • Intentional slat gaps: The open space between individual slats within a single panel — this is by design, not a defect. The gaps reveal the acoustic felt backing and are part of the product’s aesthetic and acoustic function. These don’t need fixing.
    • Panel-to-panel gaps: Gaps that open between adjacent panels at the join line — where the edge of one panel meets the edge of the next. These are the gaps that need attention.

    This guide addresses panel-to-panel gaps.

    Why Gaps Form Between Panels

    Insufficient Acclimatisation

    The most common cause. Panels installed before fully adjusting to the room’s humidity contract after installation as they lose moisture, opening gaps at the joins. The solution is prevention: always acclimatise for 48 hours before installing. See our full guide on wall panel acclimatisation and installation.

    High Humidity Variation

    Rooms with significant seasonal humidity swings — older houses without central heating, rooms adjacent to kitchens or bathrooms — cause panels to expand and contract cyclically. Over time this can cause joins that were tight at installation to open slightly.

    Panel Edge Damage During Installation

    Chips or splinters on panel edges prevent panels from sitting fully flush against each other. Even a 1mm imperfection on an edge creates a visible gap across the full height of the panel.

    Wall Not Flat

    If the wall has a bow or bulge behind one panel, that panel sits proud of the adjacent one — creating a step at the join rather than a flush surface. The visual result is similar to a gap.

    How to Fix Existing Gaps

    For Small Gaps (Under 2mm)

    Small gaps can be filled with a flexible wood filler or decorator’s caulk in a colour matching the panel’s felt backing (typically black) or the wood tone (if filling at the veneer face). Apply with a fine nozzle or spatula, smooth flush, and allow to cure. Flexible filler is essential — rigid filler cracks as panels move seasonally.

    For Medium Gaps (2–5mm)

    Fill with a two-stage approach: first pack the gap loosely with a thin strip of matching foam backer rod (available from builders merchants), then apply flexible caulk or wood filler over the top. The backer rod prevents the caulk from sinking into the gap and provides a stable substrate to caulk against.

    For Large Gaps (Over 5mm)

    Large gaps that open after installation typically indicate a more serious moisture movement issue. The most effective fix is to remove the affected panel, allow it to fully re-acclimatise, and reinstall with proper adhesive coverage. Filling a 5mm+ gap cosmetically is a temporary solution that will reopen as panels continue to move.

    Preventing Gaps: The Right Steps at Installation

    1. Acclimatise panels for 48 hours in the installation room before fitting
    2. Ensure wall surface is flat — check with a spirit level and address any deviation over 3mm
    3. Leave a 1–2mm expansion gap at the wall edges (hidden behind trim) to allow for seasonal panel movement without panels pushing against each other
    4. Apply adhesive coverage of at least 60% of panel back — insufficient adhesive allows panel edges to lift slightly, opening joins

    For the SoundPanel™ slat panels, the panel join system is machined to close tolerances — panels that are properly acclimatised and installed on a flat wall will sit perfectly flush with no visible join. Browse the full panel collection to find the right fit for your installation.

    Finishing Touches After Gap Repair

    Once gaps are filled and filler or caulk has fully cured, a few final steps will make the repair invisible rather than obvious.

    Sanding: Lightly sand any filler that sits proud of the panel surface using 180-grit paper wrapped around a small block. Sand parallel to the grain direction — sanding across the grain scratches the surface. Wipe clean with a dry cloth before finishing.

    Staining and colour-matching: Filled gaps won’t absorb stain the same way bare wood does. Use a matching wood touch-up marker or a small brush with diluted wood stain to blend the filler colour to the surrounding timber. Test on an inconspicuous section first. Multiple thin layers blend better than one heavy application.

    Clear coat: If your panels have an oil or lacquer finish, reapply a thin coat over the repaired section to restore the surface sheen and seal the filler from moisture. Use the same finish product as the original specification — a matte finish on a satin-finished panel will look patchy.

    Final inspection: After filling and finishing, examine the wall from a 45-degree angle in natural light. Raking light reveals surface irregularities that aren’t visible in direct light. Address any remaining proud areas before the finish fully hardens.

    FAQs: Filling Gaps in Slat Wall Panels

    What is the best filler for slat wall panel gaps?
    For gaps between panel modules, use a flexible paintable caulk that can accommodate minor wood movement. For splits within a panel, use fine wood filler that can be sanded and stained. Avoid rigid plaster fillers on wood — they crack as the timber moves with humidity changes.

    How long should I wait before filling gaps on new panels?
    Allow new panels to acclimatise for 48–72 hours in the room before fixing them to the wall. This lets the timber stabilise to the ambient humidity level. Gaps appearing within the first few weeks of installation are typically the result of skipping this step.

    Can I use silicone sealant to fill panel gaps?
    Only in areas that won’t be painted or stained, such as where panels meet skirting or trim. Standard silicone is not paintable. Use a paintable acrylic caulk for any section you intend to colour-match or finish over.

    Should I leave a gap between slat wall panels at installation?
    Yes. A 1–2mm expansion gap between modules allows for natural wood movement without buckling. Panels installed tightly butted will always develop gaps eventually as humidity changes — a planned gap is better than an unplanned one.

  • How to Install Acoustic Wall Panels Without Nails: Damage-Free Methods That Work

    How to Install Acoustic Wall Panels Without Nails: Damage-Free Methods That Work

    Why Nail-Free Installation?

    The most common reasons for wanting to install wall panels without nails: rental properties where wall damage must be avoided, drywall that’s too thin or damaged for secure nailing, a desire to keep installation fully reversible, or simply not owning a nail gun. All are valid — and there are genuinely effective nail-free installation methods available.

    The honest caveat: no nail-free method is as mechanically robust as screws-and-anchors for heavy panels. Each method has weight limits and substrate requirements. Matching the right method to your specific panels and wall type is the key to a successful installation.

    Method 1: Construction Adhesive (Most Common)

    For most acoustic wood slat panel systems, the manufacturer-recommended installation method is construction adhesive — no nails or fixings involved. A hybrid polymer or polyurethane adhesive creates a bond strong enough for panels up to approximately 15–20kg per panel on sound drywall or plaster.

    Best for: Standard-weight wood slat panels (most residential panel systems); permanent or semi-permanent installations.

    Limitations: Not fully reversible — removal will typically damage paint and may damage plaster. Not suitable for very heavy panels or substrate surfaces in poor condition.

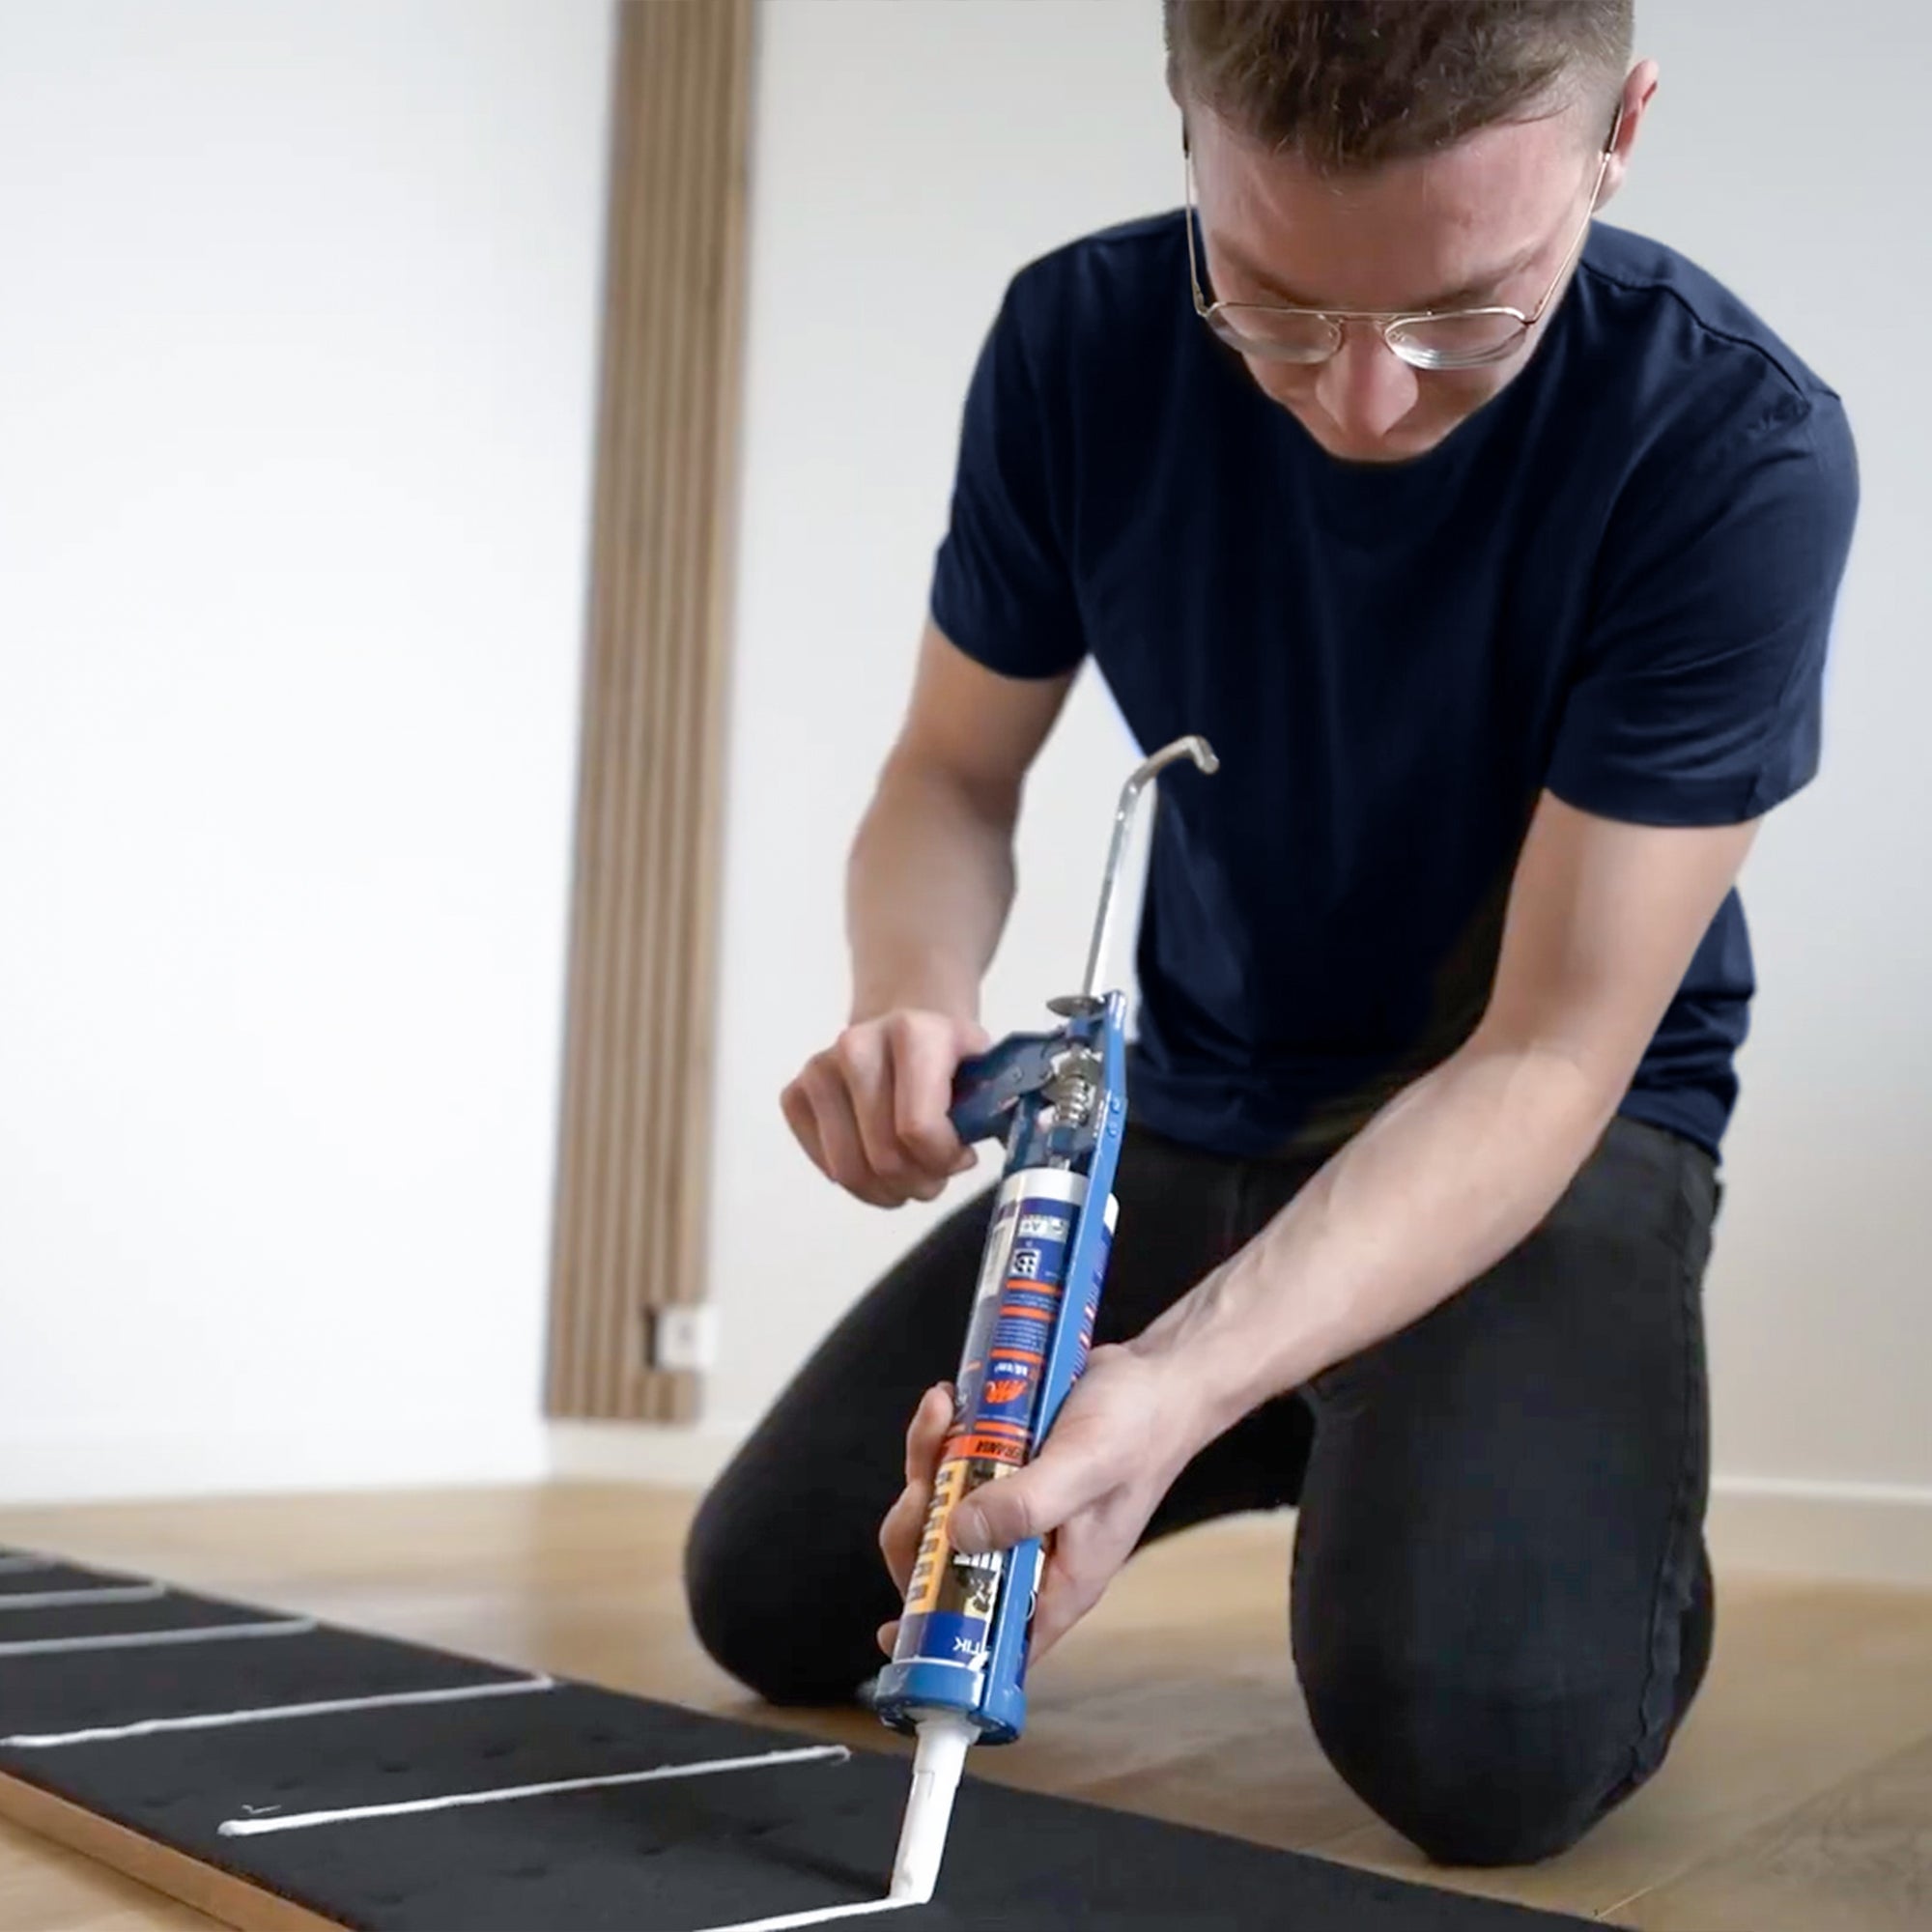
    Application: Zigzag bead across the panel back, 5cm from each edge and two runs across the middle. Press firmly for 60 seconds. Use painters’ tape to hold the panel while adhesive cures (typically 10–30 minutes to initial grab).

    Method 2: Heavy-Duty Command Strips

    3M Command Damage-Free strips are designed to hold significant weight and release cleanly by stretching. The standard large picture-hanging strips hold 7.3kg per strip pair; heavy-duty versions hold up to 11.3kg. For lightweight acoustic panels or fabric acoustic panels, multiple strip pairs provide secure mounting that removes cleanly.

    Best for: Lightweight fabric acoustic panels, thin decorative panels under 5kg per panel.

    Limitations: Standard wood slat panels typically exceed Command strip weight ratings. Not suitable for humid rooms (adhesive weakens in high humidity).

    Application: Follow manufacturer instructions exactly — surface preparation (clean, dry, room temperature) is critical to the adhesive performing at rated capacity.

    Method 3: Hook-and-Loop (Industrial Velcro)

    Industrial-grade hook-and-loop tape in 25mm width provides approximately 1.8–2kg of holding force per centimetre of tape. For a panel with 50cm of tape applied, that’s approximately 90–100kg of holding force — far more than needed for any residential wall panel.

    Best for: Panels of any weight where full reversibility is required; situations where panels may need to be repositioned.

    Limitations: The adhesive backing of the hook-and-loop must bond to the wall — if wall surfaces are weak or painted with low-adhesion paint, the tape will pull the paint rather than the panel.

    Application: Apply hook side to the wall, loop side to the panel. Use a batten fixed to the wall (with removable adhesive) as the substrate for the hook side — this protects the wall surface and provides a stronger bonding base.

    Method 4: French Cleat System

    A French cleat uses two interlocking angled timber battens — one fixed to the wall, one to the back of the panel — that interlock and support the panel’s weight mechanically. The wall batten can be fixed with a small number of wall anchors (two or four screws), while the panel itself hangs without touching the wall.

    Best for: Heavy panels where other methods don’t provide sufficient holding force; situations where panels need to be easily removed and re-hung.

    Limitations: Does require fixing the wall batten (2–4 small screws). Not fully hole-free, but the number of fixings is minimal and easily filled.

    Method 5: Freestanding Systems

    Some panel systems are available with floor-to-ceiling tension poles or freestanding frames — zero wall contact required. Panel coverage is limited and repositioning flexibility is high. Best for renters or temporary installations where any wall contact is prohibited.

    For the full context on renter-friendly panel installation across different tenancy situations, our wall panels for renters guide covers the legal and practical considerations in detail. And for a general step-by-step on standard panel installation (with fixings), our wall panel installation guide is the complete reference.

    Choosing the Right Method for Your Wall Substrate

    The single most common installation mistake is choosing a fixing method without checking whether the wall substrate can support it. Different wall constructions require different approaches — and the consequences of getting this wrong range from panels that slowly slide down to a full wall that pulls away in one piece.

    Plasterboard (drywall) on timber studs: The most common wall type in UK residential builds. Adhesive methods work well for panels under 8kg/tile. For heavier panels, mechanical fixing into the studs using a stud finder and timber screws is the most secure option. Hook-and-loop systems rated for the panel weight are a good damage-free alternative — confirm weight ratings carefully.

    Solid plaster on masonry: Older properties with solid brick or block walls and plaster finish. Adhesive performs reliably on clean plaster — the plaster surface is stable and provides good bond area. Avoid adhesive that requires a porous substrate if the plaster is sealed or painted. Construction adhesive (Method 1) is the standard approach for this wall type.

    Smooth painted walls: Paint finish affects adhesive bonding. Gloss or semi-gloss paint may have low enough surface energy to prevent reliable adhesion. In these cases, key the surface lightly with fine sandpaper before applying adhesive, or use mechanical fixing. Test adhesive bond with a small tile before committing to full installation.

    Tiled, panelled, or textured surfaces: Irregular surfaces reduce the contact area available for adhesive. Heavy-duty construction adhesive applied in multiple beads and pressed firmly can work on lightly textured surfaces. For significantly irregular substrates, a French cleat system (Method 4) provides a flat installation surface independently of the underlying wall finish.

    Panel weight is the critical variable. Every damage-free installation method has a weight limit per tile. Exceed it and the installation is at risk regardless of how carefully it’s applied. Confirm the panel weight per tile from the manufacturer’s specification before selecting a fixing method — most TPH panels are well within the capacity of quality adhesive systems, but verification takes 60 seconds and prevents a costly failure.

    Frequently Asked Questions

    What is the strongest way to install acoustic panels without nails?
    Construction adhesive (Method 1) provides the highest bond strength for permanent damage-free installation. A quality panel adhesive like Gripfill or Stixall applied in beads across the panel back and pressed firmly to a clean, dry wall creates a bond stronger than the wall substrate in most residential applications.
    Can acoustic panels be removed after adhesive installation?
    Panels installed with construction adhesive are not intended for removal. Removal typically damages either the panel or the wall finish, or both. If you need a removable installation — rental property, temporary installation, or future relocation — use hook-and-loop (Method 3) or a French cleat system (Method 4), which both allow clean removal.
    How long does construction adhesive take to cure for acoustic panels?
    Most panel adhesives achieve handling strength within 24 hours and full cure within 48–72 hours. During the curing period, temporary support props or tape can be used to hold panels in position while the adhesive sets. Do not apply full load (e.g., stacking panels or pressing them hard) during the initial curing window.
    Will Command strips hold acoustic slat panels?
    Standard Command strips are rated for 450g–4kg per strip. TPH SoundPanel tiles typically weigh 4–9kg each depending on size, so a single Command strip is insufficient. Heavy-duty Command strips (rated to 7.5kg) may work for smaller, lighter tiles — always confirm the panel weight and use multiple strips with the combined capacity exceeding the tile weight by at least 50% margin.
    Is damage-free installation suitable for all wall types?
    No. Very irregular or textured surfaces, loose or damaged plaster, and low-grip paint finishes may prevent reliable adhesive bonding. For these substrates, a French cleat system — which screws the cleat directly to the wall regardless of surface condition and provides a clean installation surface for the panel — is the reliable alternative.

    Browse Panels Suited to Damage-Free Installation

    Explore the full wood wall panel collection at The Panel Hub — the SoundPanel™ acoustic slat range is the most popular choice for adhesive-based, nail-free installations. For design inspiration on what’s achievable without fixings, our interior slat wall ideas guide shows 50+ real-room results. The acoustic panel buyer’s guide covers panel weight and construction — important factors when choosing a panel type for damage-free mounting methods.

  • How to Install Wall Panels on an Uneven Wall: Prep, Methods, and Tips

    How to Install Wall Panels on an Uneven Wall: Prep, Methods, and Tips

    The Most Common Installation Challenge

    Perfectly flat walls are rarer than people expect. Older homes have plaster walls that bow, settle, and crack over decades. Even new drywall installations have joints, screws, and patches that create a surface with more variation than it appears under paint. When you’re installing rigid panels, surface irregularities that were invisible under emulsion become significant problems.

    The good news: every level of wall unevenness has a solution. Here’s how to assess your wall and choose the right approach.

    Assessing Your Wall

    Before ordering panels, assess the wall condition honestly. Hold a long spirit level or straight edge (2m is ideal) against the wall at multiple angles. Measure the maximum deviation:

    • Under 3mm: Acceptable for direct adhesive panel installation. Minor variation this small is within the tolerance of most adhesive panel systems.
    • 3–8mm: Surface preparation required. Skim coat with filler, or use adhesive with gap-filling properties. Most walls fall into this category.
    • 8–15mm: Significant variation. Requires either substantial skim coat repair or a batten framework installation.
    • Over 15mm: Batten framework is the only practical solution for panel installation.

    Solution 1: Skim Coat and Fill (Minor Unevenness)

    For walls with 3–8mm variation and no significant structural issues, a skim coat of finishing plaster or flexible wall filler brings the surface flat enough for direct panel adhesion.

    Process:

    1. Apply a bonding agent (PVA diluted 3:1 with water) to the wall. Allow to become tacky.
    2. Mix finishing plaster or flexible filler to a smooth, creamy consistency.
    3. Apply with a wide plasterer’s trowel, feathering out thin over the high spots and filling into the low spots.
    4. When partially set, polish with a damp trowel to close the surface.
    5. Allow to dry fully (typically 24–48 hours), then prime before panel installation.

    Solution 2: Gap-Filling Adhesive (Moderate Unevenness)

    Polyurethane adhesives (Gorilla Glue and equivalents) expand as they cure, filling gaps between the panel back and the uneven wall. Applied generously and combined with firm clamping pressure during cure, PU adhesive can bridge gaps of up to 10–12mm.

    Critical caution: PU adhesive expansion can bow panels outward if there isn’t enough pressure during curing. For each panel, apply pressure with temporary screws through the panel into the wall (remove when cured) or use multiple ratchet straps pulling the panel against the wall. Do not leave PU-adhered panels unattended during the 24-hour cure period.

    Solution 3: Batten Framework (Significant Unevenness)

    For walls with significant deviation, or where the substrate isn’t suitable for direct adhesion (masonry, concrete, damp walls), a timber batten framework provides a level, flat surface to fix panels to regardless of what the wall underneath is doing.

    Process:

    1. Cut 38mm x 25mm (or similar) timber battens to wall height.
    2. Fix battens vertically to the wall at spacing matching your panel width — typically at panel edges plus one intermediate batten per panel.
    3. Use a long spirit level to check each batten. Pack behind with washers or timber shims to bring each batten to a common plane. All battens should be in the same plane — check by holding a straight edge across multiple battens simultaneously.
    4. Fix battens to masonry using frame fixings (masonry anchor screws); to timber stud walls using long wood screws into studs.
    5. Fix panels to the batten framework using construction adhesive plus screws through the panel face into the battens. Counter-sink screws to slightly below the panel surface; fill with a coloured wood filler for a clean finish.

    The batten void between wall and panel also provides an air gap that helps manage condensation — particularly valuable in rooms with significant humidity variation.

    Solution 4: Self-Levelling Compound (Floor-Level Only)

    If the unevenness is primarily at the floor level — where the skirting board has been removed and the bottom edge of the wall is rough — apply self-levelling compound along the floor-wall junction before panel installation. This isn’t a full wall solution, but it addresses the specific issue of panels not sitting flat at the base.

    What Not to Do

    • Don’t force panels flat with adhesive alone: Panels under flex stress will eventually pull away from the wall or crack.
    • Don’t assume the problem is small without measuring: Walls that look flat under paint often have significant variation. Measure before ordering panels and deciding on your installation method.
    • Don’t skip the preparation: An hour spent levelling a wall saves hours of remedial work after installation.

    For the full installation sequence that surface preparation fits into, our complete step-by-step panel installation guide covers every stage. And if your uneven wall also has old wallpaper to remove, our guide to removing wallpaper before installing panels covers that preparation stage in detail.

    Keep Exploring: Wall Panel Installation Guides

    After You’ve Levelled the Wall: Final Installation Checks

    Once the surface is prepared, there are a few checks to run before committing panels to the wall. First, do a dry-fit with at least three or four panels to verify the layout. Check that the first panel is plumb using a spirit level — a slight misalignment at the start compounds over every subsequent panel. In a 3 m wall, even 1 mm of lean per panel produces a visibly skewed result by the time you reach the far edge.

    Second, check the panel top and bottom edges against the ceiling and skirting. If the ceiling has any bow or the floor is not level, you will need to scribe the first row of panels rather than cutting them square. A scribing block (any small piece of wood the width of the gap) run along the irregular surface while marking the panel gives you the cut line needed for a clean fit.

    Third, test the adhesive on a small section of prepared wall before committing. Apply adhesive to a small piece of offcut, press firmly for 30 seconds, and check the bond after 10 minutes. On a correctly prepared surface, the adhesive should resist removal cleanly. If it pulls away easily, the wall needs additional preparation — typically either a bonding primer or mechanical fixings to supplement the adhesive.

    Uneven Wall Installation FAQs

    How uneven does a wall have to be before panels fail?
    As a rule of thumb, walls with more than 3–4 mm of deviation over a 1-metre span need either skim-coating or a batten framework before panel installation. Adhesive systems can bridge minor unevenness (up to 2–3 mm), but beyond that the adhesive load is concentrated on the high points and the panel will eventually pull away at the unsupported sections.

    Do I need to remove wallpaper before installing panels?
    Yes. Wallpaper — particularly old paper with powdery paste behind it — provides a poor bonding surface for adhesive systems. It can also trap moisture behind the panels over time. Remove all wallpaper, repair and prime the bare plaster or drywall, and allow it to fully dry before installing panels.

    Can I use a batten framework on a damp wall?
    No. A batten framework on a damp wall traps moisture behind the panels and will cause both the batten fixings and the panels to degrade. Always address the moisture source first. A damp-proof coating or physical DPC (damp-proof course) repair must come before any panel system, regardless of installation method.

    What is the best adhesive for uneven walls?
    Gap-filling hybrid polymer adhesives (such as Stixall or equivalent) are the most forgiving for minor surface variation. They remain flexible after curing, which means they can bridge small gaps without cracking under the normal movement of a building. For moderate-to-significant unevenness, use a batten framework and mechanical fixings — no adhesive reliably compensates for a wall that is more than 5 mm out of true.

    Choose Your Panels

    Once your wall is prepared and levelled, browse the complete wood wall panel collection at The Panel Hub. The SoundPanel™ acoustic slat range is the most popular DIY panel system — designed for installation on properly prepared walls using construction adhesive. For design inspiration on what to install, our interior slat wall ideas guide covers 50+ real-room applications. The acoustic panel buyer’s guide explains how panel construction affects installation requirements.

  • How to Install Wood Slat Wall Panels: A Step-by-Step DIY Guide

    How to Install Wood Slat Wall Panels: A Step-by-Step DIY Guide

    What You’ll Need Before You Start

    Gather everything before opening your panels. Stopping mid-installation to find a tool disrupts the process and risks panels drying in the wrong position.

    Tools:

    • Tape measure and pencil
    • Spirit level (1m or longer)
    • Fine-tooth hand saw or circular saw with fine-tooth blade (40–60 tooth)
    • Utility knife
    • Caulking gun
    • Rubber mallet
    • Sandpaper (120 grit)
    • Damp cloth

    Materials:

    • Your slat wall panels (acclimatised for 24–48 hours in the room)
    • Panel-compatible construction adhesive (solvent-free, hybrid polymer or PU-based)
    • Matching trim strips or flexible caulk for edges
    • Painters’ tape for temporary positioning

    Step 1: Prepare the Wall

    This is the most important step and the one most often rushed. A poorly prepared wall produces a poor installation regardless of panel quality.

    • Remove anything on the wall: picture hooks, socket covers, skirting board if paneling to the floor
    • Check for damp: tape a square of plastic sheeting to the bare wall for 48 hours; moisture on the wall-facing side indicates a damp problem to fix before proceeding
    • Clean the surface: wipe down with a damp cloth to remove dust, grease, and any loose paint. Allow to dry fully.
    • Repair damage: fill holes and cracks with interior filler; sand flush when dry
    • Check flatness: hold a long spirit level or straight edge against the wall. Any deviation greater than 3–4mm over a panel width needs attention — either fill low spots or sand/plane high spots.

    Step 2: Acclimatise Your Panels

    Leave panels flat in the room for 24–48 hours before installation. Wood-based panels expand and contract with humidity, and installing before they’ve adjusted to the room’s conditions can cause bowing or gap changes after installation.

    Store flat — never leaning against a wall, which causes bowing in panels that haven’t fully cured to room conditions.

    Step 3: Plan Your Layout

    1. Measure the wall width and divide by your panel width to calculate how many panels you need and what the cut widths at each end will be.
    2. Mark the centre of the wall. Starting from the centre produces symmetrical end cuts on both sides. Starting from one corner is simpler but produces a different-width cut on the far side.
    3. Mark vertical reference lines at your starting position using a spirit level and pencil — these ensure your first panel is perfectly plumb, which all subsequent panels depend on.
    4. Plan around obstructions: mark the positions of sockets, switches, and any wall fixtures that panels will need to be cut around.

    Step 4: Apply Adhesive and Install the First Panel

    1. Run a zigzag bead of construction adhesive across the back of the panel, approximately 5cm from each edge and in two or three runs across the middle. Avoid the very edge to prevent squeeze-out.
    2. Press the panel firmly against the wall at your reference line.
    3. Check immediately with a spirit level — both vertical and horizontal.
    4. Hold firmly for 60 seconds. Use painters’ tape to pin the panel in place while the adhesive develops initial grab (typically 10–15 minutes for most construction adhesives).

    Step 5: Continue Across the Wall

    Work outward from your starting panel. Butt each subsequent panel tight against the previous one — quality panel systems with machined edges will sit flush with no visible gap. Check level on every second or third panel; don’t assume the wall is flat enough to maintain level automatically.

    Step 6: Cut Panels to Fit

    At the ends of the wall and around obstructions:

    • For straight end cuts: measure the remaining gap, mark on the panel face, score the veneer with a utility knife, then cut with a fine-tooth saw. The scored line prevents veneer tear-out.
    • For socket cutouts: mark the socket position on the panel back, drill a starter hole in each corner, then use a jigsaw to cut the opening.
    • For ceiling or floor cuts: if the wall has a slight slope or the floor/ceiling isn’t perfectly level, scribe the panel to the surface using a compass set to the maximum gap.

    Step 7: Finish Edges and Trim

    • Apply matching timber trim strips to all exposed edges — where panels meet walls at corners, at the top edge if panels don’t reach the ceiling, and at the bottom if panels don’t meet the floor.
    • Run a bead of flexible caulk where panels meet the ceiling and skirting board, smooth with a wet finger, and allow to dry before painting if required.
    • Reinstall socket covers and switch plates over their cutout positions.

    For the full context on what makes slat panel installations succeed or fail, our complete wood wall panel guide covers material selection and common pitfalls. And if your wall has specific challenges — old wallpaper, significant unevenness — our removing wallpaper before panel installation guide covers wall preparation in depth.

    Troubleshooting: Common DIY Slat Wall Installation Problems

    Even well-planned installations encounter issues. Here’s how to address the most common ones without starting over.

    Panel drifting out of vertical after several rows: Caused by a wall that’s out of plumb or inconsistent spacers between panels. Solution: snap a fresh plumb line as a reference and re-check each panel against it before the adhesive sets. If panels have already set slightly off, introduce a thin correction shim behind the next panel to bring the run back to vertical.

    Adhesive squeeze-out between panels: Excess adhesive that oozes into the gaps between slats is difficult to remove once cured. Prevention: apply adhesive in beads across the panel back, staying 20–30mm from panel edges. If squeeze-out occurs before curing, use a thin plastic card or spatula to remove the excess immediately. After curing, a sharp chisel carefully worked into the gap removes most adhesive without damaging the slat face.

    Gap opening between panel modules after installation: Usually caused by skipping the acclimatisation period or installing in an unusually dry or damp environment. If gaps are minor (1–2mm), flexible wood-tinted caulk can be worked into the gap to close it visually. For significant gaps, remove and reinstall the affected panels with a 48-hour acclimatisation window first.

    Cut panel edges looking rough: A circular saw or jigsaw with a fine-tooth blade will leave a cleaner cut edge than a coarse wood blade. For the cleanest finish, score the cut line with a sharp utility knife before cutting to prevent tear-out on the face side. Sand cut edges with 120-grit paper before installation — rough edges are visible in the finished wall.

    FAQs: Installing Wood Slat Wall Panels

    Do I need to remove skirting boards before installing slat wall panels?
    Not always. Panels can be installed above skirting boards, with the panel base sitting on top of the skirting — this is the more common DIY approach. For a cleaner finished look, removing skirting boards and reinstating them in front of the panels after installation gives a more furniture-quality result.

    What do I do about electrical sockets and switches?
    Turn off power before working near electrical fittings. Cut the panel to fit around the socket box, leaving the socket accessible. Because the panels add 18–22mm of thickness to the wall surface, standard socket boxes will sit recessed behind the new panel surface. Use socket extender boxes (available from electrical suppliers) to bring the socket face flush with the new panel surface.

    Can slat wall panels be installed over tiles?
    Yes, but adhesive alone is not sufficient over a tiled surface. Mechanical fixing — screwing through the panel backing into the substrate behind the tiles — is required. This involves drilling through tiles, which requires a tile drill bit and careful technique to avoid cracking. Adhesive can be used as a secondary bonding layer, but shouldn’t be relied upon as the primary fixing method over tiles.

    How do I install slat wall panels around a fireplace or chimney breast?
    Panel installation around a chimney breast is a common application. The key considerations: maintain a minimum clearance from the fire opening as specified by the fireplace manufacturer (typically 150–300mm), use only non-combustible adhesive in areas near the heat source, and check that the timber species used has adequate fire resistance for the application. Consult the panel manufacturer’s installation guidelines for fireplace proximity requirements.

    Get Your Panels

    Browse the complete wood wall panel collection at The Panel Hub — including the SoundPanel™ acoustic slat range and the individual SoundPanel™ American acoustic slat panels, the most popular DIY installation product in the range. For room-by-room design inspiration before you install, our interior slat wall ideas guide covers 50+ applications. The acoustic panel buyer’s guide covers material specifications and acoustic performance in detail if you’re still choosing between panel types.

  • How to Remove Wallpaper and Install Wall Panels: Step-by-Step Guide

    How to Remove Wallpaper and Install Wall Panels: Step-by-Step Guide

    Why Replace Wallpaper with Wall Panels?

    Wallpaper is beautiful when it’s new. But peeling seams, faded prints, and outdated patterns can make a room look tired quickly — and stripping it is notoriously difficult. Wood wall panels offer a longer-lasting, lower-maintenance alternative with the added benefit of acoustic performance, genuine material texture, and a look that doesn’t date the way patterns do.

    This guide covers the full process from wallpaper removal to finished panel wall.

    Can You Install Wall Panels Over Wallpaper?

    In some cases, yes — but it’s not recommended. Adhesive-backed panels installed over wallpaper are only as secure as the wallpaper itself. If the wallpaper ever lifts, the panels lift with it. Additionally, old wallpaper can harbour moisture and mould that will be sealed in behind your new panels.

    The correct approach: remove the wallpaper first, repair the wall, then install panels on a clean, stable substrate.

    Tools and Materials You’ll Need

    • Scoring tool or wallpaper scorer
    • Warm water and wallpaper stripping solution (or fabric softener)
    • Large sponge or sprayer
    • Wide scraper / stripping knife
    • Bucket
    • Fine-grain filler and filling knife
    • Sandpaper (120 grit)
    • Primer (for bare plaster)
    • Wall panel adhesive
    • Caulking gun
    • Spirit level
    • Fine-tooth saw

    Step 1: Score the Wallpaper

    Use a scoring tool to perforate the wallpaper surface. This allows the stripping solution to penetrate through the facing layer to the paste beneath. Score evenly across the whole wall — don’t press too hard or you’ll damage the plaster underneath.

    Step 2: Soak and Strip

    Mix warm water with wallpaper stripping solution at the manufacturer’s recommended ratio. Soak a section of wall (roughly 1m²) and allow the solution to penetrate for 3–5 minutes. Using a wide scraper at a low angle (30°), work the wallpaper off in sheets. Rewet stubborn sections.

    Work in small sections and keep the wall wet throughout — dried solution is harder to remove.

    Step 3: Remove the Backing Layer

    Most modern wallpapers have two layers — a decorative face and a backing paper. After removing the face, the backing often stays on the wall. Soak this too and scrape it away carefully. Don’t rush: backing paper left on the wall can cause adhesion problems for your new panels.

    Step 4: Clean and Dry the Wall

    Once stripped, wash the wall down with clean warm water to remove all paste residue. Any paste left on the surface will prevent your primer and panel adhesive from bonding properly. Allow the wall to dry completely — typically 24–48 hours depending on room temperature and humidity.

    Step 5: Fill and Sand

    Inspect the wall for damage: holes, cracks, uneven patches. Fill all defects with interior filler, allow to dry, and sand flush with 120-grit sandpaper. The flatter the wall surface, the better your panels will sit.

    Step 6: Prime the Wall

    Apply a coat of wall primer to bare plaster. This seals the surface, reduces suction, and ensures your panel adhesive bonds correctly. Allow to dry fully.

    Step 7: Acclimatise Your Panels

    Leave your panels flat in the room where they’ll be installed for at least 24 hours. This allows them to adjust to the room’s temperature and humidity, reducing the risk of warping or movement after installation.

    Step 8: Install the Panels

    1. Plan your layout — measure the wall width and calculate panel positions. Mark the centre point.
    2. Apply adhesive — run a zigzag bead of panel-compatible construction adhesive across the back of the first panel.
    3. Position and level — press the panel firmly against the wall, check it’s plumb with a spirit level, and hold for 60 seconds.
    4. Continue across the wall — butt each subsequent panel tight against the last.
    5. Cut to fit — trim panels at corners, edges, sockets, and switches with a fine-tooth saw.
    6. Finish edges — apply matching trim strips or flexible caulk at wall edges and ceiling/floor joins.

    Common Problems and How to Avoid Them

    • Panels not sticking: Almost always caused by paste residue or damp on the wall. Thorough cleaning and drying before installation prevents this.
    • Panels warping: Caused by installing before acclimatisation or on a damp wall. Allow 24–48 hours’ acclimatisation and check for damp before installing.
    • Visible gaps between panels: Caused by uneven wall surface. Fill and sand the wall thoroughly before installation.

    The Finished Result

    Done correctly, the transition from wallpaper to wood wall panels transforms both the look and feel of a room. Real wood veneer panels are more durable, easier to maintain, and more acoustically comfortable than any wallpaper — and they don’t peel at the seams after five years. The effort of proper wall preparation is always worth the result.

    Choose Your Panels

    Once your wall is prepared, browse the complete wood wall panel collection at The Panel Hub. The SoundPanel™ acoustic slat range is the most popular choice for DIY installations — designed for adhesive fixing on a properly prepared wall. For ideas on what to install once the wallpaper is gone, our interior slat wall ideas guide covers 50+ looks across every room. The acoustic panel buyer’s guide is useful if you’re still deciding between panel types.