Author: The Panel Hub Design Studio

  • Wood Paneling for Hallways: How to Make a Narrow Space Feel Designed

    Wood Paneling for Hallways: How to Make a Narrow Space Feel Designed

    Why Hallways Deserve More Attention

    The hallway is the first and last space you experience in your home — the room that sets the tone for everything beyond it. And yet it’s routinely the most neglected space in any renovation budget. Paint is applied, a coat hook is installed, and the design conversation moves on to more “important” rooms.

    Wood paneling changes this. Even a modest hallway with well-chosen wall panels becomes a space that signals quality and care throughout the whole home. It’s also one of the most practical panel installations you can do: hallways are high-traffic areas where paint marks and scuffs accumulate rapidly, and a paneled wall is far more durable and easier to maintain than painted plaster.

    The Unique Challenges of Hallway Paneling

    Narrow Width

    Most hallways are 90–120cm wide. In this space, large-format panels can feel overwhelming and installation access is tight. Work with the proportions: vertical slat panels elongate a narrow hallway visually; horizontal treatments (shiplap, board-and-batten) can make it feel even narrower. When in doubt, go vertical.

    High Traffic and Impact

    Hallways take more physical abuse than any other room — doors opening, bags brushing walls, children and pets passing through at speed. Choose panels with a hard, sealed surface finish that wipes clean easily. Real wood veneer with a lacquered or hard-oil finish is significantly more durable than paint in this context.

    Often No Natural Light

    Many hallways, particularly internal ones, have no windows. This means species and finish choice matters: very dark panels (ebonised or deep walnut) can make an already dim hallway feel cave-like. Opt for light oak, ash, or a mid-tone with plenty of artificial lighting to compensate.

    Multiple Interruptions

    Hallway walls are riddled with doors, light switches, sockets, coat hooks, and radiators — all of which require precise panel cutting. Factor in additional time and material for all the notching and fitting required compared to an open feature wall.

    Best Panel Styles for Hallways

    Wainscoting (Chair Rail Height)

    The most practical hallway panel choice. Wainscoting at 90–100cm protects the lower wall from the traffic that damages it most — bags, bike handlebars, children’s hands — while keeping the upper wall lighter. Our wainscoting ideas guide has the full range of style options and material details.

    Full-Height Slat Panels on the End Wall

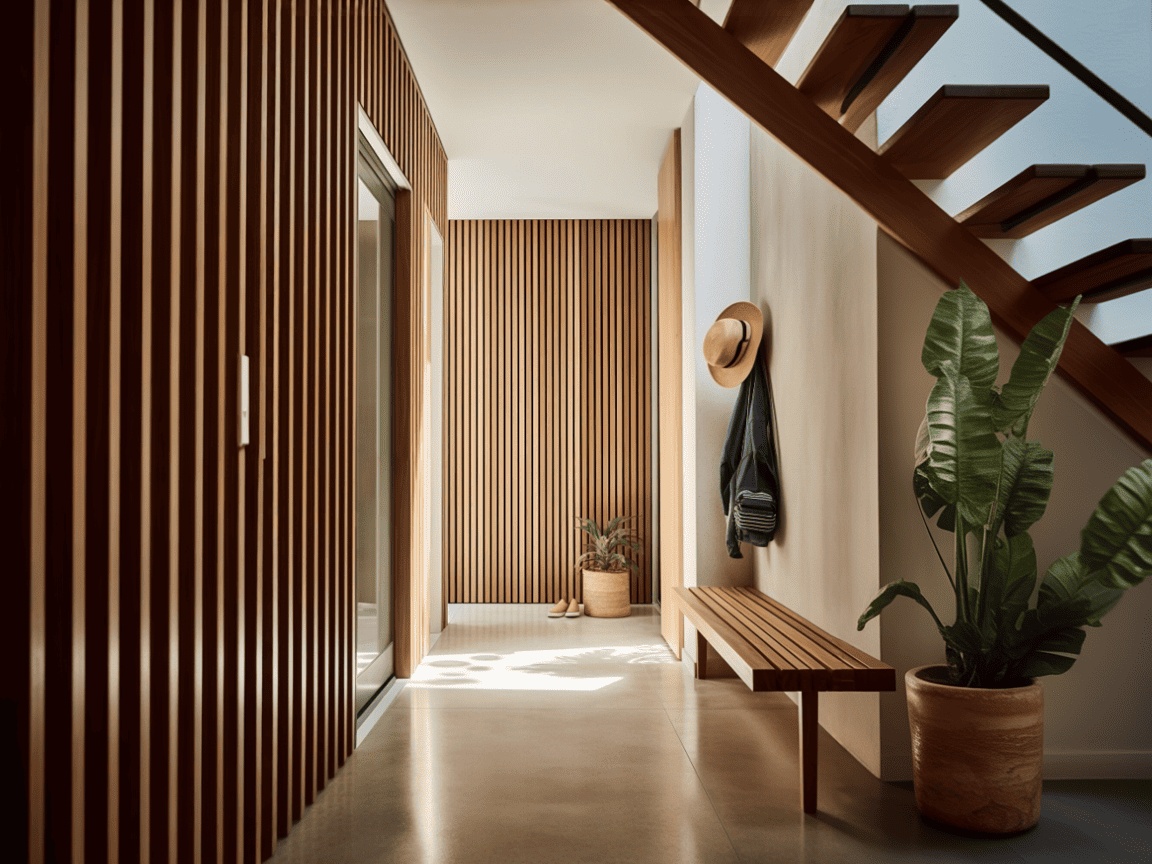
    If the hallway terminates in a wall (rather than opening into a room), treat that end wall with floor-to-ceiling acoustic slat panels. It creates a focal point that draws the eye down the corridor and makes the hallway feel designed rather than merely functional.

    Board and Batten

    Full-height board-and-batten paneling on both hallway walls creates a cohesive, architectural look that suits traditional and transitional homes. More graphic and bold than wainscoting; works particularly well in entrance halls with enough width to carry the visual weight.

    Fluted Panels on One Side

    In a hallway wide enough to treat one wall as a feature, fluted panels on the longer wall create a hotel-corridor quality that makes a utilitarian space feel considered. Keep the opposite wall plain to avoid closing the space in further.

    Colour and Finish Strategy

    • Light oak or ash: Best for dark hallways with no natural light — maximises the warmth of wood without adding visual weight
    • Painted MDF panels in a warm off-white: Budget-friendly, practical, and timeless — particularly effective with brass hardware
    • Mid-tone walnut: Suitable for hallways with good artificial light and enough width to carry a darker material

    For a broader view of panel options across the home, our accent wall ideas guide and the wood panel wall complete guide are both worth reading before committing to a style.

    Shop Hallway Wall Panels

    Browse the full wood wall panel collection at The Panel Hub — the SoundPanel™ acoustic slat range is a popular choice for hallway feature walls and end-wall treatments. Vertical slat panels are particularly effective in narrow hallways: the lines draw the eye upward and elongate the perceived height of the space. For further hallway and entrance design inspiration, our interior slat wall ideas guide covers corridor and entrance applications. The acoustic panel buyer’s guide covers panel construction and specifications in detail.

    How to Install Wood Paneling in a Hallway: Key Considerations

    Hallway installations present specific technical challenges compared to living rooms or bedrooms. The main issue is depth: most hallways have limited wall space between doors, light switches, sockets, and other interruptions. Before ordering panels, map every obstruction on the wall with masking tape — you will almost certainly need to cut panels around these features, and the more precisely you plan, the cleaner the result.

    In narrow hallways, avoid leaving thin slivers of panel at corners or doorframes. Work the panel layout from the most visible centre point of the hall and calculate outward, adjusting the starting offset so that any cut panels at the edges are roughly equal in width on both sides.

    Panel adhesive is sufficient for most hallway applications, but in high-traffic areas near the door — where bags are dropped, children run, and wall contact is frequent — supplementary fixings along the top and bottom edges add insurance against impact-related delamination. Small panel pins filled and painted over are invisible on a finished installation.

    Finally, consider sealant at floor and ceiling joints. Hallways experience more humidity variation than interior rooms — cold air from an opening door, warmth from radiators — and this cycling can cause gaps at panel edges over time. A flexible, paintable sealant at both joints takes five minutes to apply and prevents the most common long-term maintenance issue.

    Wood Paneling for Hallways FAQs

    What type of wood paneling works best in a hallway?
    Tongue-and-groove, shiplap, and vertical slat panels are all highly suited to hallways. Vertical profiles are preferred because they elongate the wall visually. For paneling that extends to dado height only, MDF-based systems with a painted finish offer excellent durability and are easier to touch up when scuffed than real wood.

    How high should dado rail paneling be in a hallway?
    Standard dado height is 90–100 cm — approximately the height of a door handle. In hallways with standard 2.4 m ceilings, dado paneling at this height divides the wall in a visually balanced way. In hallways with lower ceilings, a lower dado (75–80 cm) can actually make the room feel taller by increasing the amount of visible upper wall.

    Can I panel a hallway with real wood if it gets damp?
    Most hallways are fine for real wood panels, as they do not have direct water exposure. However, if the hallway has an external door that opens to rain or significant cold air ingress, apply a sealing finish to the panels and ensure the wall behind is dry before installation. Engineered wood or MDF-core panels are more resistant to moisture cycling than solid wood.

    How do I clean wood-paneled hallway walls?
    Wipe down with a barely damp microfibre cloth for regular cleaning. For marks and scuffs, a mild soap solution works on most sealed finishes. Avoid abrasive cleaners, which damage the surface finish. Lacquered panels are the easiest to maintain in high-traffic areas like hallways because the lacquer resists fingerprints and surface marks better than oil or wax finishes.
  • Wood Panels for Basement Walls: How to Upgrade a Difficult Space

    Wood Panels for Basement Walls: How to Upgrade a Difficult Space

    The Basement Challenge

    Basements are the hardest room in the house to panel well. The combination of below-grade moisture risk, cold concrete or masonry walls, and often uneven surfaces creates conditions that will destroy the wrong panel choice and compromise even good panels if the installation isn’t done carefully.

    But done right, wood panels transform a basement from a utilitarian storage space or unfinished room into a genuinely liveable, warm, and architecturally resolved space. The key is solving the moisture and substrate problems before you think about aesthetics.

    Step One: Assess for Moisture

    Before ordering a single panel, spend time understanding your basement’s moisture behaviour. The most common failure mode in basement paneling is installing on a wall that has intermittent moisture intrusion — which isn’t visible during a dry period but causes panels to swell and delaminate within months.

    The tape test: tape a 30cm square of plastic sheeting directly to the bare basement wall, sealing all four edges with tape. Leave for 48–72 hours. Check both sides:

    • Moisture on the room-facing side: Condensation from the room air — manageable with ventilation and vapour barriers.
    • Moisture on the wall-facing side: Water moving through the wall from outside. This needs to be addressed structurally before any wall treatment goes on.

    Do not panel a basement wall with active moisture intrusion. Remediate first — tanking, drainage, waterproof render — then panel once the wall is confirmed dry over a full wet-weather cycle.

    Panel Types Suitable for Basements

    • WPC (Wood Plastic Composite) panels: The safest choice for basements with any residual moisture risk. Fully waterproof core, wood-look surface. Less premium visual quality than real veneer but completely appropriate for the environmental conditions.
    • MR-MDF core with sealed veneer: Suitable for dry basements with good ventilation. Significantly better moisture resistance than standard MDF. All cut edges must be sealed.
    • PVC panels: Practical and highly moisture-resistant. Often used for utility areas and workshops within basements rather than finished living spaces.
    • Real wood planks (pine, cedar): Solid wood handles humidity better than MDF because it can absorb and release moisture without structural failure — but it will move seasonally. Allow for expansion gaps and avoid if moisture levels are significant.

    Dealing With Uneven Concrete Walls

    Poured concrete and masonry walls are rarely flat enough for direct panel adhesion. Options:

    • Batten framework: Fix a grid of timber battens to the concrete wall using masonry anchors, level them, then fix panels to the battens. The void between batten and wall also allows airflow, which reduces condensation risk significantly. Recommended for most basement installations.
    • Skim coat and prime: For concrete walls that are structurally sound but surface-uneven, a skim coat of appropriate filler brings the surface flat enough for direct adhesion. More labour-intensive but eliminates the depth added by a batten system.

    For specific advice on working with uneven walls, we’ve covered this in detail in our guide on installing wall panels on difficult surfaces.

    Design Approaches for Basement Spaces

    Home Cinema Basement

    Basements are naturally good cinema rooms — below-grade construction provides inherent sound isolation from the rest of the house. Add acoustic wood slat panels on three walls and you have both the acoustic treatment and the visual character of a dedicated theatre space. Our home theater acoustic panel guide covers placement strategy in detail.

    Home Office Basement

    A panelled wood wall behind the desk transforms a bare basement into a professional workspace. In WPC or sealed MR-MDF, a slat panel or fluted panel feature wall creates the warmth and texture that makes a below-grade space feel designed rather than utilitarian.

    Games Room or Bar Area

    Wood panels — particularly darker species like walnut — create a warm, immersive character well-suited to social basement spaces. Combine with recessed lighting to compensate for the lack of natural light typical in below-grade rooms.

    The Most Important Rule

    Sort the moisture before you think about aesthetics. A $1,000 panel installation on a damp wall is a $1,000 loss within 18 months. A properly waterproofed basement wall with a $400 WPC panel system will look good for 20 years. Moisture remediation isn’t glamorous — but it’s the most important investment in any basement renovation.

    Shop Panels for Basement Spaces

    Browse the full wood wall panel collection at The Panel Hub for panels suited to basement environments — including moisture-resistant options for below-grade applications. The SoundPanel™ acoustic slat range is a popular choice for basement cinema rooms, home offices, and social spaces where acoustic treatment adds functional value alongside the visual upgrade. For basement-specific design inspiration, our interior slat wall ideas guide covers media room and utility space applications. The acoustic panel buyer’s guide explains acoustic performance specifications in detail.

  • Wood Slat Panels for Living Room: Design Ideas and Practical Tips

    Wood Slat Panels for Living Room: Design Ideas and Practical Tips

    Why Wood Slat Panels Dominate Living Room Design Right Now

    Scroll through any interior design platform and you’ll see the same wall treatment appearing in living rooms across every style and budget tier: vertical wood slat panels, typically floor-to-ceiling, typically behind the sofa or framing the TV. The reason for their dominance isn’t trend for trend’s sake — it’s that slat panels solve multiple living room problems simultaneously.

    They add warmth to rooms dominated by hard, cold surfaces. They provide genuine acoustic improvement in open-plan spaces. They create a focal point and frame furniture without requiring structural work. And they install in an afternoon without professional help.

    The Three Main Living Room Applications

    1. Behind the Sofa

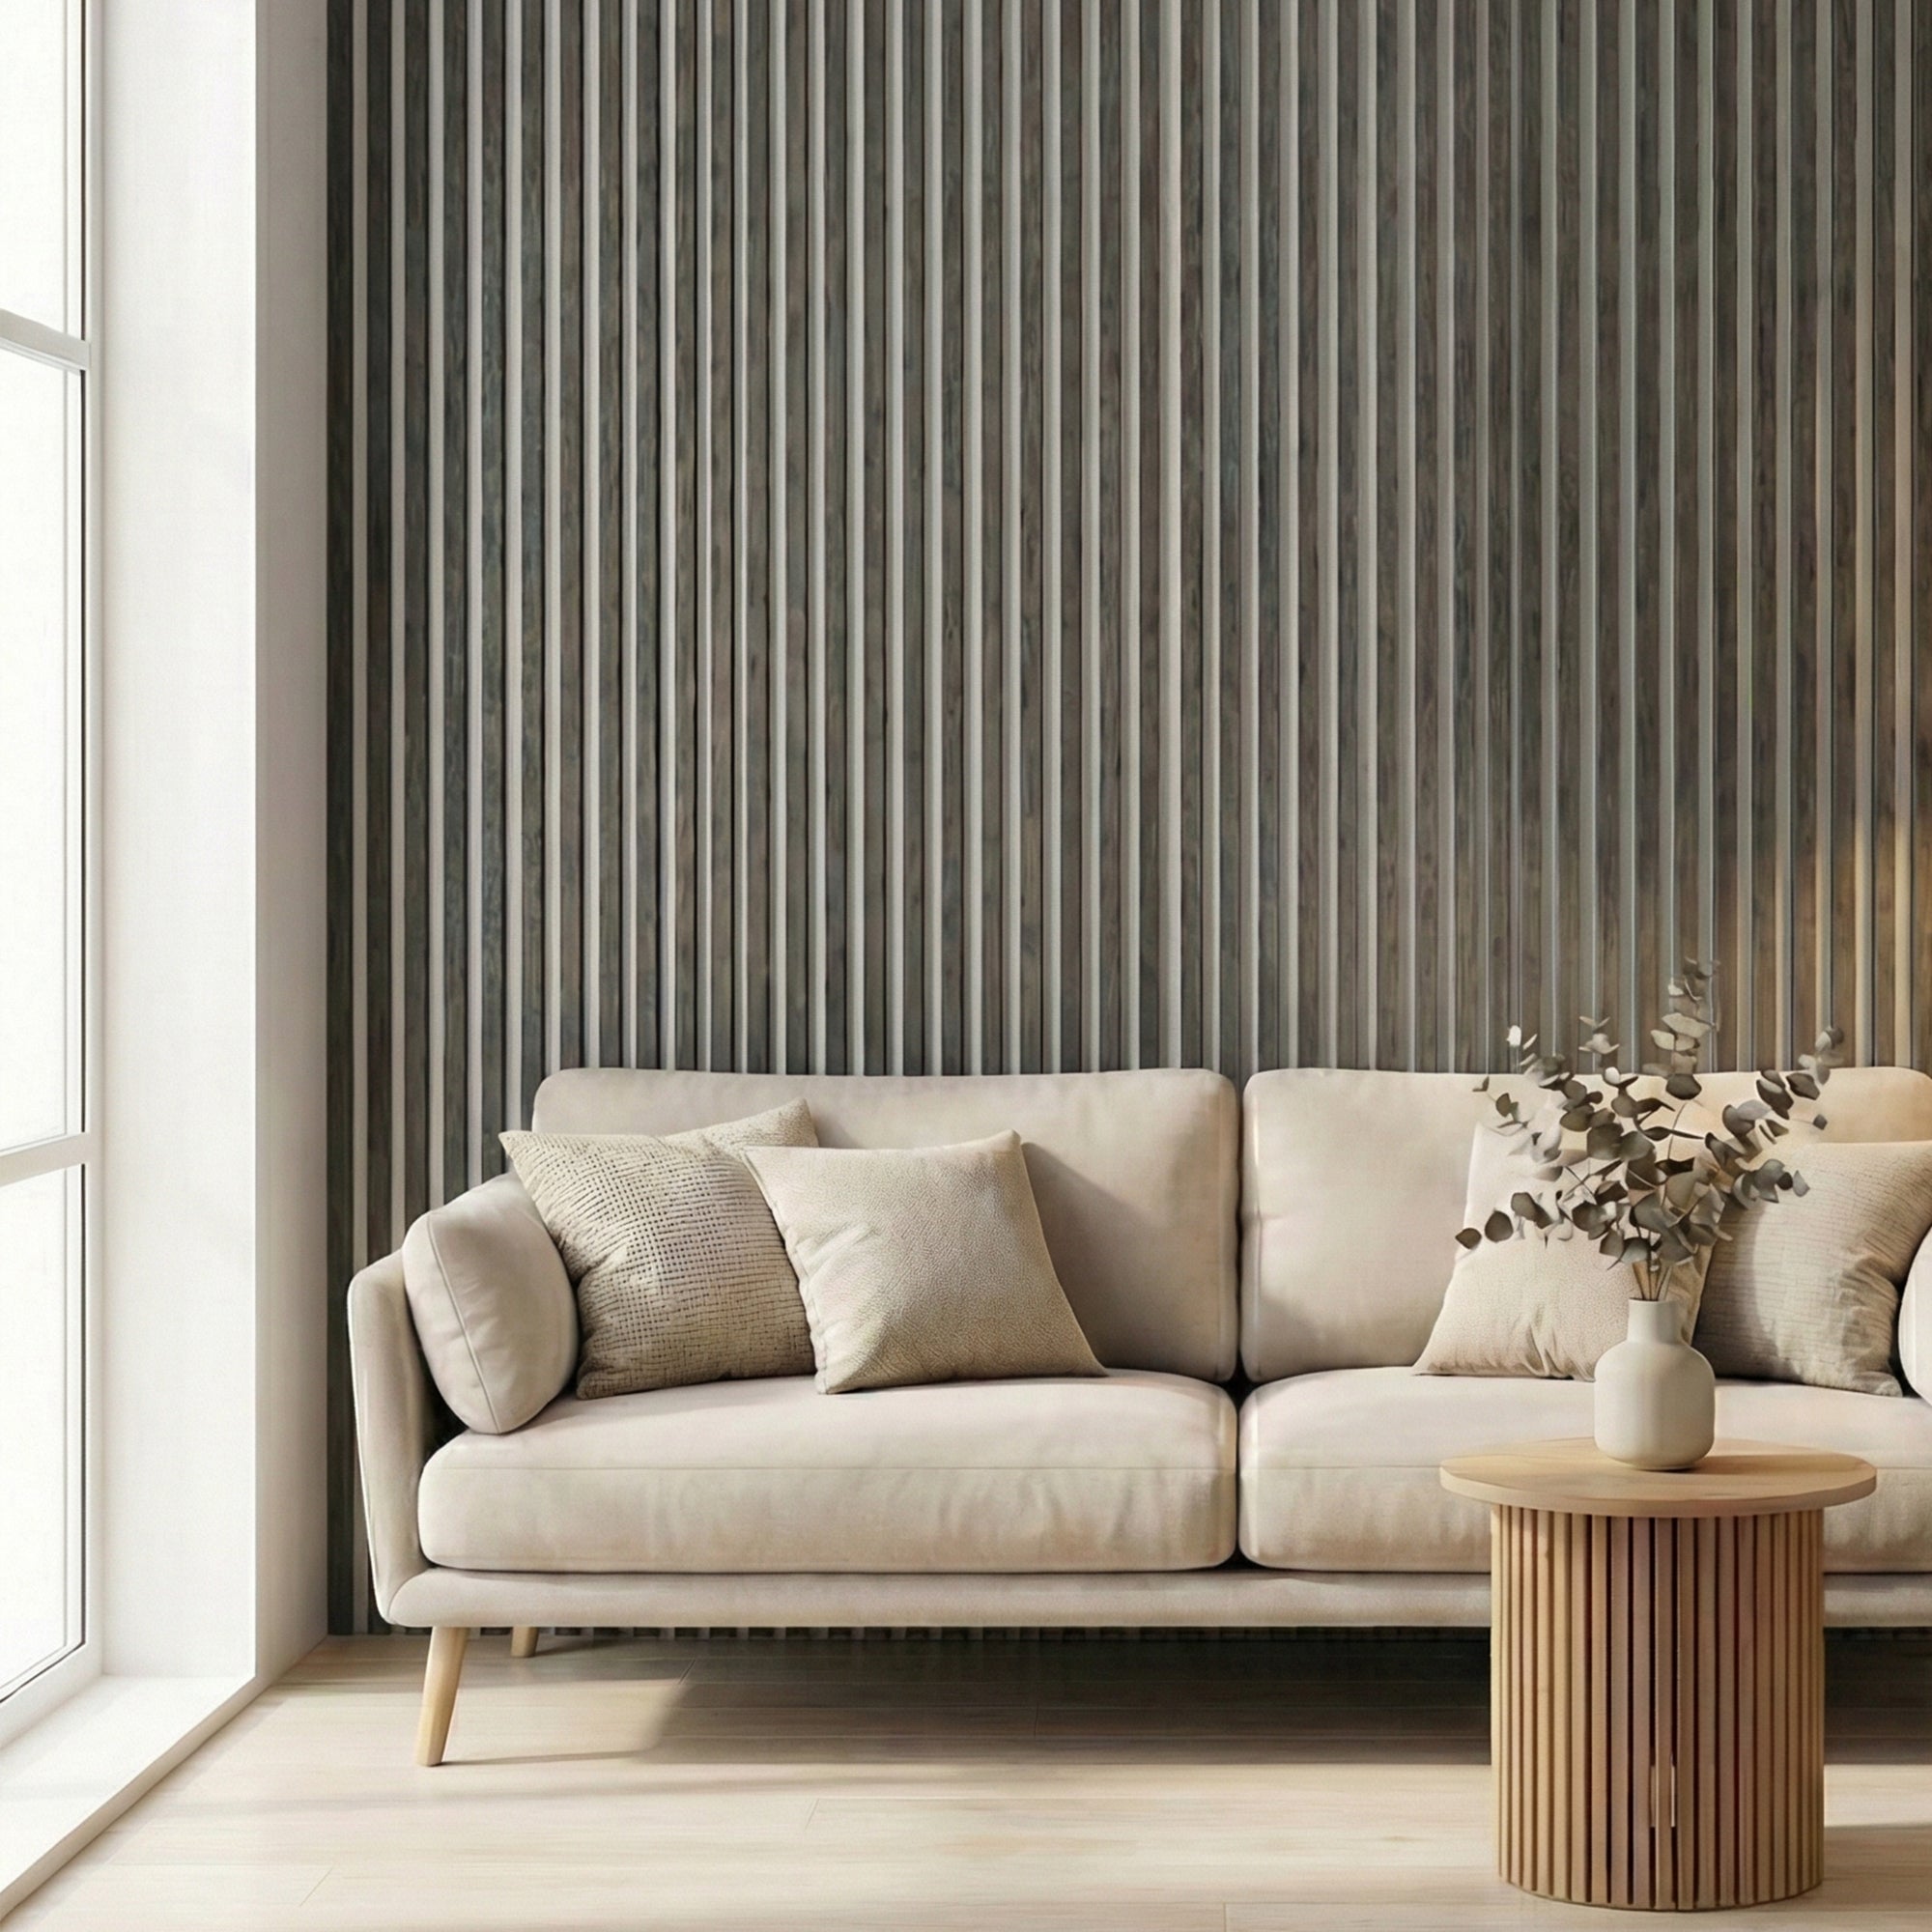
    The most common and most effective placement. A full wall of acoustic slat panels behind the main sofa creates an immediate focal point, frames the seating area, and — critically — absorbs the sound that bounces from the opposite wall and creates the echoey quality that open-plan living rooms suffer from.

    Floor-to-ceiling coverage reads as more intentional and architecturally resolved than stopping at dado height or mid-wall. Go the full height.

    2. TV Wall

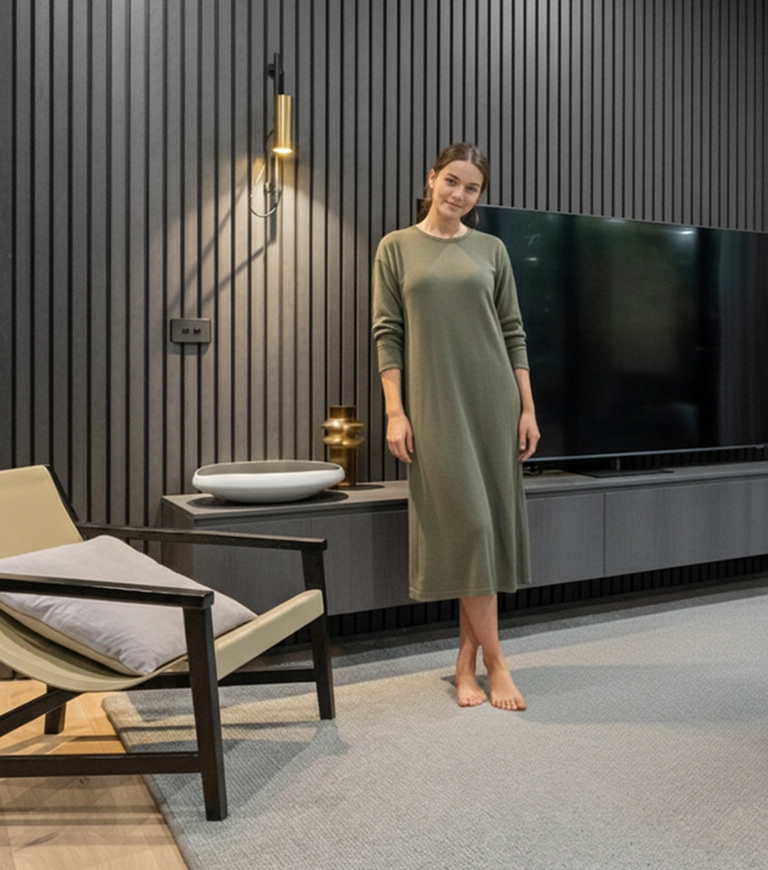
    Framing the TV in slat panels rather than leaving it on a plain painted wall transforms the media wall from functional to designed. The slats provide a natural backdrop for the TV and associated equipment while visually anchoring the media unit or console table below. Add LED strip lighting behind the panel edge for a backlit effect that reduces eye strain during evening viewing.

    3. Alcove or Chimney Breast

    Living rooms with chimney breasts or alcoves have a natural feature wall candidate that many homeowners leave plain. Slat panels within the chimney breast or across the alcove back wall create a deliberately framed feature — particularly effective if the alcoves house shelving or cabinetry.

    Acoustic Benefits in Open-Plan Living

    Open-plan kitchen-living-dining spaces suffer from significant acoustic challenges: hard kitchen surfaces, dining chairs on hard floors, and no room divisions to absorb sound all contribute to a noisy, echoey environment. A single wall of acoustic slat panels in the living zone can make a measurable difference — reducing the echo that makes conversation difficult and the acoustic fatigue that makes extended time in the space tiring.

    NRC ratings of 0.75–0.85 on quality acoustic slat panels mean 75–85% of sound striking the panel surface is absorbed rather than reflected. For a room with large, flat, hard surfaces on three sides, this is transformative. For the full explanation of how this works, see our guide to acoustic wall panels and sound absorption.

    Choosing the Right Species for Your Living Room

    • Walnut: Warm chocolate tones that suit modern, Japandi, and dark-accented living rooms. Creates depth and richness — particularly effective paired with cream or warm grey upholstery.
    • Oak: The most versatile option. Works in every living room style from contemporary to farmhouse. Light enough to suit pale interiors; rich enough to add warmth to neutral schemes.
    • Ash: Very pale and fine-grained — best for strongly Scandinavian or minimalist living rooms where you want wood warmth without visual weight.

    Colour and Finish Combinations That Work

    The species sets the undertone; what you pair with it determines whether the room feels cohesive or disconnected. These combinations are proven to work across different living room styles.

    Walnut panels

    • Walls: Warm white, soft terracotta, dusty rose, deep charcoal
    • Textiles: Camel, burnt orange, forest green, off-white linen
    • Floors: Light concrete, pale tile, cream carpet
    • Best style match: Modern, Japandi, dark-accented contemporary

    Oak panels

    • Walls: Almost any colour — oak is the genuinely versatile option
    • Textiles: Navy, sage, dusty blue, warm grey, deep teal
    • Floors: Dark hardwood, concrete, stone tile, mid-tone carpet
    • Best style match: Contemporary, Scandinavian, transitional, farmhouse

    Ash panels

    • Walls: Very pale grey, pure white, warm ivory
    • Textiles: Natural linen, raw cotton, undyed wool — keep textures pale and organic
    • Floors: Light oak, pale limestone, off-white tile
    • Best style match: Strongly Scandinavian, minimalist, Nordic-inspired

    As a general rule: match the wood panel undertone to your floor temperature. Warm-toned floors call for walnut or warm-oiled oak panels. Cool-toned floors in grey or pale stone pair better with ash or white-oiled oak.

    Frequently Asked Questions: Wood Slat Panels for Living Rooms

    Do wood slat panels make a living room feel smaller?
    No — when installed correctly, they make rooms feel taller. Vertical slats draw the eye upward, increasing perceived ceiling height. In rooms under 200 sq ft, limit slat panels to one or two walls rather than all four to avoid an enclosed feeling.
    How long do wood slat panels last in a living room?
    Quality acoustic slat panels with a hardwood veneer face are built for 20+ years in interior environments. The main considerations are prolonged direct sunlight (which can fade lighter veneers — UV window film helps significantly in south-facing rooms) and proximity to high-humidity areas.
    Can I hang artwork or shelves on a slat panel wall?
    Yes. Use picture rails that hook over individual slats, adhesive hanging strips rated for the weight of the item, or small command hooks between the slat gaps. Avoid drilling directly through the veneer surface unless the anchor lands on a solid slat strip.
    Are wood slat panels in living rooms easy to maintain?
    Yes. Dust with a soft cloth or vacuum brush attachment. For marks on lacquered panels, a lightly damp cloth removes most stains. Avoid saturating the panels or using harsh chemical cleaners, particularly on natural oil finishes. Re-oil oil-finished panels every 2–3 years to maintain the depth and protection of the finish.
    What width slats look best in a living room?
    For most living rooms, slat widths between 12mm and 25mm produce the best visual result — fine enough to create a refined texture when viewed up close, substantial enough to read from across the room. Very narrow slats (under 10mm) can look almost like a solid surface from a distance, losing the characteristic depth of the slat wall look.

    Lighting the Panel Wall

    The right lighting makes the difference between a slat wall that looks flat and one that reads as three-dimensional:

    • Floor lamps with uplighting: Placed in front of the panel wall, uplighting grazes the surface and creates dramatic shadow depth in the slat gaps.
    • LED strip at ceiling cornice: Indirect downlighting washes the panel surface evenly.
    • Picture lights above art hung on the panel: Yes, you can hang artwork on slat panels — use picture rails or adhesive hanging strips on the solid slat strips.

    What to Expect From Installation

    A living room feature wall typically covers 80–150 square feet. At standard panel sizes, this requires 4–10 panels depending on dimensions. Installation takes 2–4 hours for most DIYers on a standard wall. The main variable is wall condition — perfectly flat walls install faster; textured or uneven walls need more preparation time.

    For detailed installation guidance, see our step-by-step wall panel installation guide. For living room feature wall design ideas beyond slat panels, our feature wall ideas for living rooms guide covers 12 different options. For broader styling advice spanning the full room — colour, lighting, and panel combinations — see how to decorate a living room with wood paneling.

    Shop Living Room Wall Panels

    Explore the living room panel collection at The Panel Hub, or browse the full wood wall panel range for every option. Our interior slat wall ideas guide covers 50+ living room panel applications across styles, room sizes, and budgets — useful if you’re still exploring what direction to take. If you’re weighing the acoustic benefit of slat panels — a meaningful improvement in a hard-floored, open-plan living space — the acoustic panel buyer’s guide explains the performance specifications clearly.

  • Wood Slat Panels vs Peel and Stick Panels: An Honest Comparison

    Wood Slat Panels vs Peel and Stick Panels: An Honest Comparison

    The Appeal of Peel-and-Stick

    Peel-and-stick wall panels — featuring a pressure-sensitive adhesive backing that bonds directly to the wall — have grown significantly in popularity as a budget-friendly, renter-friendly alternative to proper panel installations. The promise is compelling: real wood aesthetic, no construction adhesive, fully removable, and no professional help required. The reality is more nuanced.

    What Peel-and-Stick Panels Are

    Peel-and-stick wood panels come in two main types:

    • Real wood veneer peel-and-stick: Genuine wood veneer (0.5–1mm) mounted on a flexible backing with pressure-sensitive adhesive. The real thing — just with a different installation method.
    • Printed wood-effect peel-and-stick: A photographic or printed pattern on vinyl or paper with adhesive backing. Not real wood — a reproduction. The most common type found at budget price points.

    The distinction matters enormously for appearance and longevity.

    Head-to-Head Comparison

    Appearance

    • Wood slat panels (real veneer): Authentic grain, natural variation, three-dimensional slat profile with genuine shadow-line depth. Looks premium in person.
    • Real veneer peel-and-stick: Authentic grain — looks genuinely good in person. Limited slat profile depth compared to proper slat panels.
    • Printed peel-and-stick: Convincing from a distance; unconvincing close-up. Pattern repeats are visible. No genuine texture.

    Installation

    • Wood slat panels: Construction adhesive, slightly more complex, 2–4 hours for a feature wall, more permanent.
    • Peel-and-stick: Faster, simpler, less permanent — ideal for renters and those who may want to change the wall within a few years.

    Acoustic Performance

    • Acoustic wood slat panels: NRC 0.65–0.85 with AcuFelt™ backing. Genuine, measurable sound absorption.
    • Peel-and-stick panels: Essentially zero acoustic performance. The backing materials provide no meaningful sound absorption. Purely decorative.

    Durability

    • Wood slat panels: 20+ years with proper installation. Adhesive bond is permanent and panels don’t degrade under normal conditions.
    • Real veneer peel-and-stick: 5–10 years before adhesive degrades or edges begin lifting, especially in rooms with temperature variation.
    • Printed peel-and-stick: 2–5 years before visible fading, edge lifting, and surface wear become apparent.

    Cost

    • Premium acoustic slat panels (factory-direct): $109–$259 per panel. Higher upfront, lower cost-per-year over a 20-year lifespan.
    • Real veneer peel-and-stick: $40–$120 per panel. More accessible upfront, but shorter lifespan and no acoustic performance.
    • Printed peel-and-stick: $15–$50 per panel. Very accessible, short lifespan, decorative only.

    Which Should You Choose?

    • Choose acoustic wood slat panels if: you want acoustic improvement, a permanent installation, real material quality, or are treating a living room/bedroom/office where the wall will be seen close-up daily. The SoundPanel™ range is the benchmark.
    • Choose real veneer peel-and-stick if: you’re renting, need a fully reversible installation, or want the real wood look with simpler installation and no acoustic requirement.
    • Choose printed peel-and-stick if: budget is the primary constraint, you don’t expect to be in the space long-term, and the wall will be viewed primarily from a distance.

    For renters specifically, our wall panels for renters guide covers all damage-free options in detail, including the peel-and-stick alternatives worth considering.

    Long-Term Value: What the Numbers Actually Show

    The price-per-panel figure in a product listing doesn’t tell the full story. When you compare total cost of ownership over five and ten years, premium acoustic slat panels consistently come out ahead of printed peel-and-stick — even when the upfront difference looks substantial.

    Scenario: 6m² feature wall in a living room

    Printed peel-and-stick: At approximately £25/m², 6m² costs around £150–£180. Average lifespan: 3–4 years before visible degradation. Over 10 years, that’s two to three replacement cycles — total spend of £450–£600 plus removal and re-installation time.

    Premium acoustic slat panels (SoundPanel™): Higher upfront cost, but lifespan exceeds 20 years with no degradation under normal conditions. Over 10 years: the same one-off installation cost — significantly lower per-year, plus continuous acoustic benefit (NRC 0.65–0.85) throughout the period.

    The acoustic value add: Acoustic treatment in a living room or home office typically costs several hundred pounds through a specialist contractor. Acoustic slat panels deliver both the visual upgrade and measurable sound improvement in one installation. Peel-and-stick delivers neither permanence nor acoustic performance — the two product categories are solving fundamentally different problems.

    If budget is the primary constraint and you’re renting short-term, real veneer peel-and-stick (not printed) at mid-tier price points is a reasonable compromise. For any permanent installation where quality matters, acoustic slat panels are the more rational choice over a three-year horizon.

    FAQs: Wood Slat Panels vs Peel-and-Stick Panels

    Are peel-and-stick wood panels real wood?
    It depends on the product. Real wood veneer peel-and-stick panels use genuine veneer (0.5–1mm) bonded to a flexible backing — they are real wood. Printed peel-and-stick uses a photographic pattern on vinyl or paper. Read the description carefully: “wood effect” or “wood look” typically means printed, not veneer.

    Will peel-and-stick panels damage my walls?
    Real veneer peel-and-stick with pressure-sensitive adhesive should remove cleanly from painted plasterboard in most cases. However, adhesive residue and minor surface damage are common, particularly on older or lower-quality paint. Always test a small section before committing to a full wall.

    How long do peel-and-stick wood panels last?
    Real veneer versions typically last 5–10 years before adhesive degradation and edge lifting become apparent. Printed versions typically show visible wear within 2–5 years. Both lifespans are significantly shorter than properly installed acoustic slat panels.

    Can peel-and-stick panels go over existing wallpaper?
    Not recommended. Wallpaper surfaces are unstable for adhesive bonding — the adhesive pulls at the wallpaper rather than the wall, and the whole assembly eventually fails. For best results, apply to clean, smooth, painted plasterboard or primed walls.

    Shop Real Wood Slat Panels

    Browse the full wood wall panel collection at The Panel Hub — including the SoundPanel™ acoustic slat range, the benchmark for real wood veneer slat panel quality. For design inspiration showing how genuine slat panels look in finished interiors, our interior slat wall ideas guide covers 50+ real-room applications — a useful comparison to the digital renderings typically used to market peel-and-stick alternatives. The acoustic panel buyer’s guide explains why acoustic felt backing — standard on quality slat panels, absent from most peel-and-stick products — makes a measurable difference in room acoustics.

  • Wood Slat Wall Panels Explained: Types, Materials, and How to Choose

    Wood Slat Wall Panels Explained: Types, Materials, and How to Choose

    What Are Wood Slat Wall Panels?

    Wood slat wall panels consist of parallel vertical strips of real wood (or wood veneer) arranged at even spacing across a backing board or panel. The slat profile — thin vertical lines separated by regular gaps — creates a strong directional rhythm that draws the eye upward and adds depth to flat walls.

    They’ve become the defining wall treatment of contemporary and Scandinavian-influenced interiors in the 2020s, appearing in everything from high-end hotel lobbies to DIY bedroom makeovers.

    Acoustic vs Decorative Slat Panels

    This is the most important distinction in the category:

    • Acoustic slat panels have a felt or fabric backing (such as AcuFelt™) that absorbs sound. NRC ratings of 0.65–0.85 make them genuinely functional acoustic products, not just decorative ones. If you want the wall to both look good and sound better, these are what you need.
    • Decorative slat panels have the same visual profile but no acoustic backing. They’re lighter, cheaper, and easier to handle — but they won’t reduce echo. Fine for purely aesthetic applications; a poor choice for living rooms, offices, or bedrooms where acoustic quality matters.

    Always check the product specification for NRC rating before purchasing if acoustic performance is part of your brief.

    Types of Wood Slat Wall Panels

    Standard Vertical Slat Panels

    The most common format. Panels typically measure 96″–100″ in height and 12″–24″ in width, with individual slats running the full panel height. Designed to be installed flush together to create a seamless slat wall across the full width of the wall.

    Curved Slat Panels

    Panels where the slats follow a gentle arc rather than a straight line. Creates an organic, undulating surface texture that suits biophilic and organic modern interiors. Harder to find and more expensive than standard flat panels.

    Perforated Acoustic Panels

    Instead of an open slat profile, these panels use a solid wood or MDF face with regular perforations (holes or slots) that allow sound to pass through to the acoustic backing. More surface coverage, slightly different aesthetic — suits spaces where you want the warmth of wood without the strong shadow-line effect of slats.

    Hexagonal Slat Panels

    Slat panels cut to a hexagonal shape and arranged as individual tiles rather than full wall panels. Create a graphic, geometric pattern with the warmth of real wood. Popular for accent walls with a more playful or architectural character.

    Wood Species for Slat Panels

    The species determines colour and grain character. The most common options:

    • Walnut — rich chocolate brown, premium feel, suits contemporary and Japandi interiors
    • Oak — warm honey tone, versatile grain, universally applicable
    • Ash — pale and fine-grained, best for light Scandinavian aesthetics

    For a full comparison of wood species and their characteristics, see our guide on the best wood for wall panels.

    How to Choose the Right Slat Panel

    1. Decide if you need acoustic performance — if yes, look for NRC 0.65+ and confirm the product has genuine felt backing, not just a paper backing.
    2. Choose your species — match to your room’s existing tones and furniture. Order samples before committing.
    3. Check slat width and spacing — narrow slats (10–15mm) with close spacing create a dense, textural effect; wider slats (20–30mm) with more spacing create a bolder, more graphic look.
    4. Check panel dimensions vs wall dimensions — calculate coverage before ordering to avoid running short.

    For guidance on putting them up once you’ve chosen, our wall panel installation guide covers everything from wall preparation to finishing edges.

    And for inspiration on how slat panels translate across different rooms, the slat wall panels ideas guide has 20 real applications worth browsing.

    Are They Worth the Investment?

    Yes — with caveats. Cheap decorative slat panels (under $50/panel) are often laminate-faced MDF with paper backing that looks and feels nothing like the product photography suggests. Premium acoustic slat panels with real wood veneer and genuine felt backing are a significant step up in both quality and price — and deliver correspondingly better results. Buy once, install correctly, and the result lasts 20+ years.

    Choosing the Right Slat Panel for Your Project

    With multiple types, wood species, and finish options available, the choice narrows considerably once you’ve answered three questions: what is the primary purpose, what is the room’s humidity level, and what is the viewing distance?

    Purpose: If acoustic improvement is a requirement alongside the visual finish, specify panels with acoustic backing (AcuFelt™ or equivalent). If the installation is purely decorative, standard decorative slat panels offer a wider range of face profile options and are typically more affordable.

    Humidity: Bathrooms, kitchens, and other damp environments require timber species with higher natural stability — or engineered panels specifically rated for damp conditions. Standard solid wood slat panels are not suitable for rooms where moisture levels regularly exceed 70% RH. Engineered or composite-core panels handle humidity better.

    Viewing distance: For installations viewed close-up daily — bed heads, TV walls, home office features — material quality is immediately perceptible. Real wood veneer panels justify the premium over printed or vinyl-faced alternatives in these locations. For corridor walls, high-level feature walls, or commercial spaces viewed from several metres, mid-tier engineered options are often indistinguishable from premium versions in everyday use.

    Colour and finish: Natural oiled finishes show wood grain most faithfully and can be refreshed with a periodic application of the same oil. Lacquered finishes are more durable in high-traffic areas but harder to repair if scratched. Stained options offer the most flexibility in matching existing joinery and furniture.

    FAQs: Wood Slat Wall Panels

    What are wood slat wall panels made from?
    Wood slat wall panels consist of timber strips (slats) mounted onto a backing board or felt substrate. The slats are typically made from solid hardwood, engineered wood, or wood veneer over an MDF or HDF core. The backing provides structural stability and, in acoustic versions, sound absorption.

    How thick are wood slat wall panels?
    Total thickness varies by product but is typically 18–22mm for standard slat panels including the backing. The timber slat itself is usually 8–12mm proud of the backing surface. This overall thickness is important when planning around electrical sockets, which may need extension boxes to bring them flush with the new wall surface.

    Can wood slat wall panels be used on ceilings?
    Yes, when mechanically fixed rather than adhesive-only. Ceiling installations require fixing through the panel backing into joists or a batten framework. The visual result is striking — ceiling slat panels work especially well in living rooms, home cinemas, and dining rooms where acoustic improvement alongside the aesthetic is valuable.

    How do I clean wood slat wall panels?
    For routine cleaning, a dry or very slightly damp microfibre cloth is sufficient. Avoid soaking the surface or using abrasive cleaners. For oiled finishes, periodic re-oiling (typically annually in normal use) will restore the surface and protect the timber from drying out.

    Browse the Full Slat Panel Range

    Explore every slat panel type in the complete wood wall panel collection at The Panel Hub — including the SoundPanel™ acoustic slat range and the GroovePanel® mosaic tiles. For visual inspiration showing how each type looks in finished rooms, our interior slat wall ideas guide covers 50+ real-room applications. The acoustic panel buyer’s guide goes deeper on acoustic slat panel specifications — NRC ratings, backing systems, and how to calculate the coverage you need.

  • Wood Wall Panel Installation Mistakes to Avoid: 10 Lessons Learned the Hard Way

    Wood Wall Panel Installation Mistakes to Avoid: 10 Lessons Learned the Hard Way

    Why Mistakes Happen

    Most wall panel installation mistakes aren’t caused by lack of skill — they’re caused by skipping preparation steps that seem minor but aren’t, and by making assumptions about the wall, the adhesive, or the panels that turn out to be wrong. Here are the ten most common mistakes and exactly how to avoid them.

    Mistake 1: Not Acclimatising the Panels

    Wood-based panels absorb moisture from the air and expand or contract accordingly. Installing panels that haven’t adjusted to the room’s humidity is the most common cause of post-installation warping, bowing, and gap changes. Fix: Leave panels flat in the room for 24–48 hours before installation. Non-negotiable.

    Mistake 2: Skipping the Moisture Check

    Installing over a damp wall traps moisture behind the panel, destroys adhesive bonds over time, and creates conditions for mould. Fix: Tape a square of plastic sheeting to the bare wall for 48 hours. Moisture on the wall-facing side means you have a damp problem to solve first. See our guide to wall preparation for the full process.

    Mistake 3: Wrong Adhesive

    Solvent-based adhesives dissolve MDF cores and veneer bonding layers. Using the wrong product destroys the panel from the inside. Fix: Use a solvent-free hybrid polymer or PU-based construction adhesive. Always check compatibility with MDF and real wood veneer before buying. Our adhesive comparison guide covers every option.

    Mistake 4: Not Checking the First Panel for Plumb

    If the first panel isn’t perfectly vertical, every subsequent panel follows the same error — and by the time you reach the far end of the wall, the deviation is obvious. Fix: Use a spirit level on every panel, not just the first. Check both the vertical and horizontal planes.

    Mistake 5: Starting from a Corner

    Corners are almost never perfectly square or perfectly vertical. Starting from a corner means your reference point is the least reliable point on the wall. Fix: Start from the centre of the wall and work outward. Cut panels to fit at both ends — symmetrical end cuts look far more intentional than one full panel and one sliver.

    Mistake 6: Applying Too Little Adhesive

    Spot application — small dabs rather than a continuous bead — creates pressure points rather than a distributed bond. Panels flex between the adhesive spots and can eventually pull away. Fix: Apply a continuous zigzag bead covering at least 60% of the panel back surface area, avoiding only the very edges to prevent squeeze-out.

    Mistake 7: Not Sealing Cut Edges

    Cut MDF edges are raw and absorb moisture rapidly. In any room with moderate humidity, unsealed cut edges will swell over time and cause visible panel deformation at the trim points. Fix: Seal all cut edges immediately after cutting with a matching wood oil, wax, or edge tape. Don’t skip this step even in dry rooms.

    Mistake 8: Installing Over Wallpaper

    Panels adhered over wallpaper are only as secure as the wallpaper itself. If the wallpaper ever lifts — and old wallpaper eventually does — the panels come with it. Fix: Always remove wallpaper before installing panels. Our guide to removing wallpaper before panel installation covers the full process.

    Mistake 9: Ignoring the Wall Surface Condition

    Panels adhered to flaking, dusty, or grease-contaminated walls will fail regardless of adhesive quality. The adhesive bonds to the surface layer — if that layer is weak, the panel pulls it off the wall. Fix: Clean, prime, and repair the wall surface before installation. Sand back any flaking paint to a stable surface.

    Mistake 10: Rushing the Trim and Finish

    The difference between a DIY result and a professional result is usually in the edges — whether corners are tight, whether the top trim is straight, whether caulk lines are clean. Fix: Allocate at least 30 minutes for finishing and trimming per wall. Take time with caulk lines — a damp finger run along fresh caulk produces a cleaner finish than any tool.

    How to Recover from the Most Common Installation Mistakes

    Even with careful planning, mistakes happen. Knowing how to recover cleanly is as valuable as knowing how to avoid problems in the first place.

    Panel not plumb after adhesive sets: If you notice a panel has gone out of plumb before the adhesive fully cures (typically within the first two hours), remove it carefully using a wide scraper or pry bar, clean both surfaces, and reinstall with fresh adhesive. After full cure, removal risks wall damage. Prevention — checking plumb before the adhesive grabs — is far easier than any fix.

    Visible adhesive squeeze-out between slats: Immediately wipe away any adhesive that squeezes out between slats before it cures. A damp cloth removes most construction adhesives within the first few minutes. Cured adhesive in gaps requires careful trimming with a craft knife and can still leave a visible mark. Preventing squeeze-out by keeping adhesive beads 3–4 cm back from panel edges eliminates this issue entirely.

    Short panel at the end of a row: If your final panel needs to be less than 5 cm wide, adjust your starting position before installation begins. A tiny final sliver looks unfinished and is also structurally weak. Recalculate the layout from the centre of the wall and work outward so that any cut panels at both ends are roughly equal width.

    Panels not flush at joints: A slight step between adjacent panels is usually caused by one panel being pushed harder against the wall than the other. Check with a straightedge laid across two adjacent panels before the adhesive sets. A slight flex of the protruding panel while the adhesive is still workable is usually enough to bring them level.

    Installation Mistakes FAQs

    What is the number one installation mistake with wood wall panels?
    Skipping surface preparation. More installations fail because of inadequate wall prep — dusty surfaces, flaking paint, damp plaster — than any other single cause. The panels themselves rarely fail; it is the substrate that lets them down. A wall that is clean, dry, primed, and reasonably flat will accept almost any panel system reliably.

    How do I fix a gap between a panel and the ceiling or skirting?
    A flexible, paintable sealant applied with a caulking gun fills gaps up to 5–6 mm cleanly. Smooth with a damp finger and paint over once dry. For gaps larger than 6 mm, a slim timber batten can be used as a cover strip, painted to match the wall or the panel.

    My panels have gaps appearing between slats — what went wrong?
    This is almost always a failure to acclimatise. Wood panels installed without adequate acclimatisation time will expand or contract after installation as they adjust to the room’s humidity, opening gaps between slats. There is no easy fix once it happens — the panels need to be removed, acclimatised for 48 hours, and reinstalled. Prevention is the only practical solution.

    Can I paint over a panel installation that went wrong?
    Paint can cover minor surface imperfections and fill small gaps, but it cannot fix structural issues like loose panels, significant misalignment, or moisture behind the panels. If the installation is fundamentally sound but aesthetically poor, painting is a reasonable recovery. If the panels are moving, loose, or showing moisture damage, the installation needs to come down regardless of cosmetic treatment.

    The Panels That Minimise These Risks

    Quality panel systems are engineered to make installation forgiving — consistent dimensions, machined edges, and specified adhesive compatibility. The SoundPanel™ acoustic slat range is designed for DIY installation with clear guidance on adhesive, acclimatisation, and finishing. Browse the full wood wall panel collection to find the right system for your project.

  • Wood Wall Panel Installation Tools: Everything You Need Before You Start

    Wood Wall Panel Installation Tools: Everything You Need Before You Start

    The Complete Tools List

    The good news: installing wood wall panels doesn’t require specialist tools. Most homeowners will have the majority of what’s needed already. Here’s a complete list — split into essential and optional — so you can shop for gaps before your panels arrive.

    Essential Tools (You Cannot Install Without These)

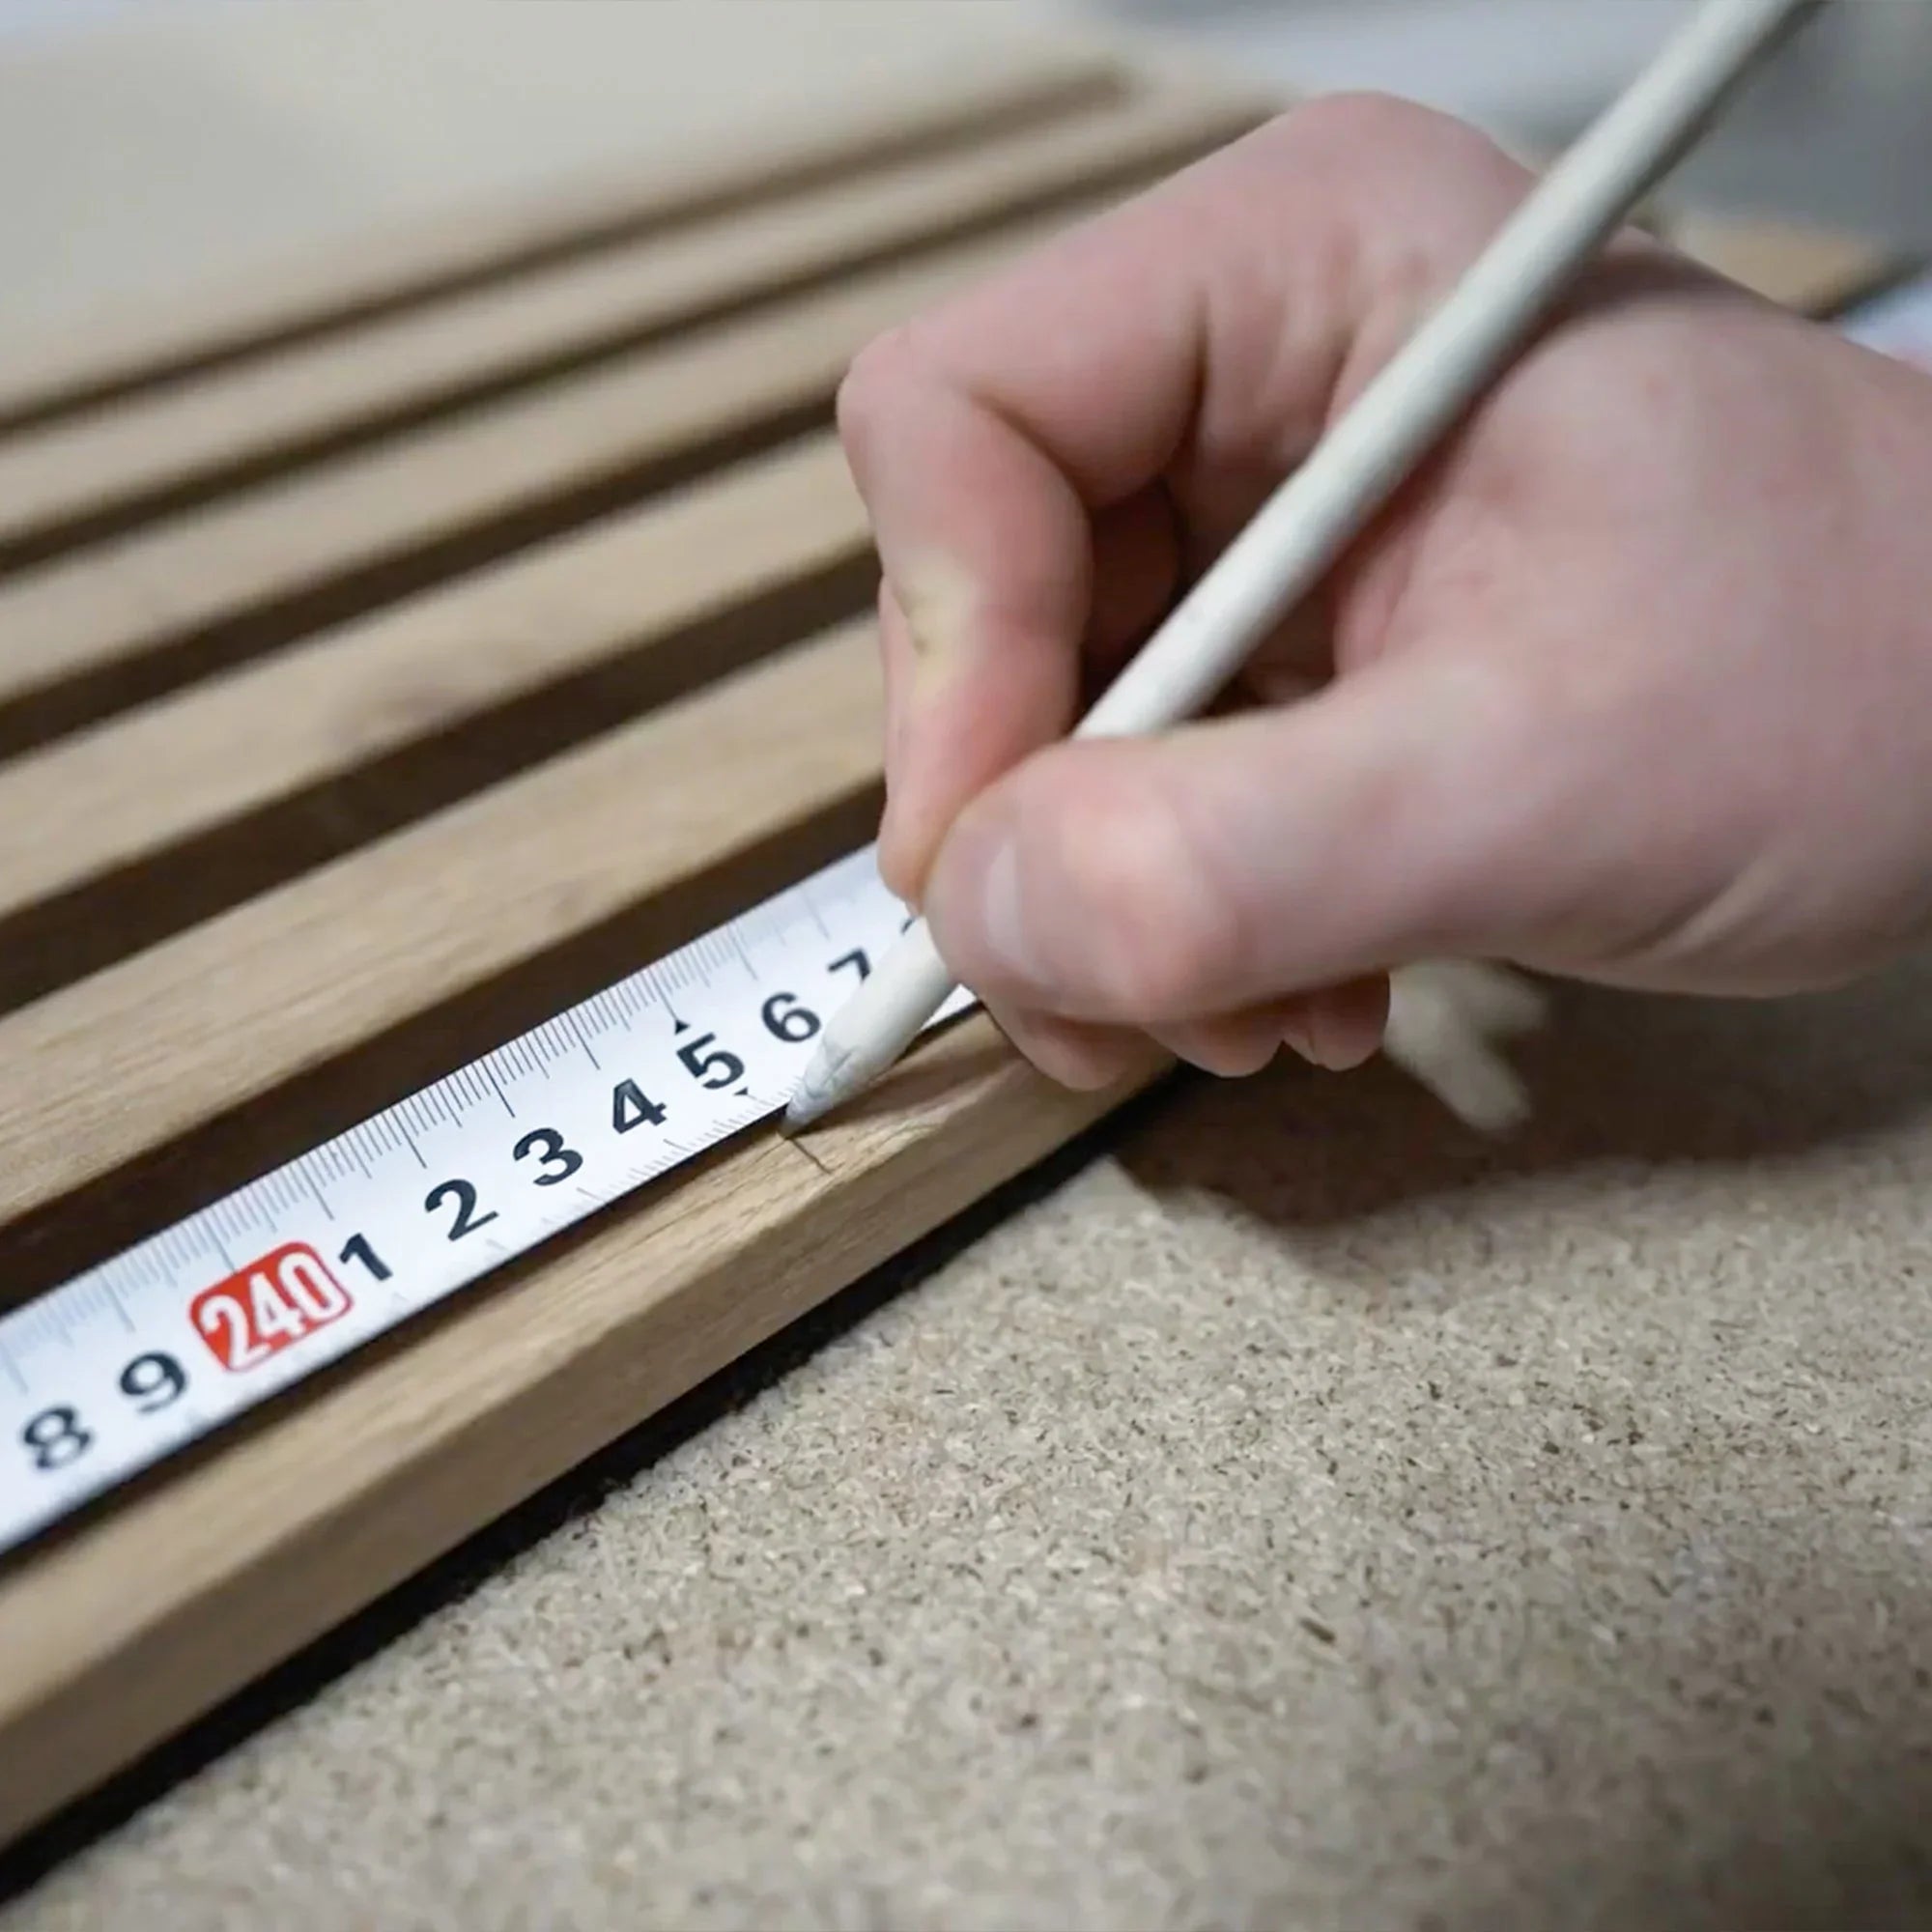
    Tape Measure

    A 5m steel tape measure is sufficient for most domestic panel installations. The key is measuring both wall dimensions multiple times — walls are rarely the same height at both ends, and rooms are rarely perfectly rectangular.

    Spirit Level

    The single most important tool for panel installation. A 1m level is the minimum; a 1.2m or longer level is better because it spans the full width of most panels, allowing you to check an entire panel for plumb in one reading. A digital level makes this even faster but isn’t necessary.

    Pencil

    For marking cut lines, panel positions, and reference lines on the wall. Never use pen or marker directly on panels — ink bleeds through veneer.

    Caulking Gun

    For applying construction adhesive cartridges. A standard skeleton gun works for occasional use; a ratchet-release gun (slightly more expensive) releases adhesive pressure when you stop squeezing, preventing waste and drips. Worth the small extra cost if you’re installing multiple panels.

    Fine-Tooth Saw

    For cutting panels to size. A Japanese pull saw (20+ TPI) or any hand saw with a fine tooth pitch works well. See our dedicated guide to cutting acoustic slat panels for specific technique advice.

    Utility Knife and Spare Blades

    For scoring veneer before cuts, trimming acoustic felt backing, and cutting caulk lines. Always use sharp blades — a dull blade drags and tears rather than cuts cleanly.

    Sandpaper (120 Grit)

    For smoothing cut edges and spot-sanding any wall patches before panel installation. A sanding block or pad provides more consistent pressure than sandpaper alone.

    Circular Saw with Fine-Tooth Blade

    Much faster than a hand saw for multiple identical cuts. Use a 60-tooth or higher blade for veneer surfaces. A guide rail or clamped straight edge ensures consistent, straight cuts. See our cutting guide for technique.

    Rubber Mallet

    For tapping panels into position without damaging the face. Never use a steel hammer directly against a panel face — even with a block, the risk of denting veneer is too high.

    Painter’s Tape

    For holding panels in position while adhesive develops initial grab (typically 10–15 minutes). Also useful for protecting adjacent surfaces during caulking.

    Damp Cloth

    For cleaning adhesive squeeze-out immediately. Construction adhesive is very difficult to remove once cured — wipe it off while still wet.

    Clamps or Temporary Supports

    For holding panels flat against the wall during the full adhesive cure time (typically 24 hours). Temporary screw fixings (removed when cured) or ratchet straps work well.

    Optional but Useful

    • Jigsaw: Best for irregular cuts around sockets, pipes, and shaped wall edges
    • Laser level: Projects a continuous level line across the wall, making panel alignment significantly faster for long walls
    • Heat gun: For warming adhesive during cold-weather installation and for removing panels cleanly if needed later
    • Profile gauge/contour gauge: For scribing panels to complex shapes like skirting board profiles

    Tools You Don’t Need

    • Nail gun — adhesive installation doesn’t require nails
    • Tile cutter — not applicable for wood panels
    • Specialist veneer tools — not needed for pre-finished panels

    With these tools ready before your panels arrive, the installation process is straightforward. Browse the SoundPanel™ acoustic slat range or the GroovePanel® mosaic collection to find your panels — both include full installation guidance with every order.

    Tool Checklist for a Standard Feature Wall Installation

    For a typical 3 m × 2.4 m feature wall using adhesive-mounted wood panels, here is the complete tool list — split by essentials and useful extras.

    Essentials:
    Spirit level (at least 600 mm long) — for checking plumb and level throughout installation
    Tape measure — 5 m minimum
    Pencil and marking gauge — for layout lines and panel marking
    Circular saw with fine-tooth blade, or handsaw — for straight cuts
    Jigsaw — for cutouts around sockets, switches, and obstacles
    Caulking gun — for applying construction adhesive
    Notched trowel or adhesive spreader — for even adhesive distribution
    Rubber mallet — for tapping panels into alignment without surface damage
    Clean cloths or rags — for wiping adhesive squeeze-out before it cures

    Useful extras:
    Laser level — significantly faster than a spirit level for marking long horizontal reference lines
    Combination square — for checking panel corners
    Pull saw — for cutting installed panels in place where a circular saw cannot reach
    Brad nailer — optional supplement to adhesive in areas where additional mechanical hold is needed
    Suction cups — for handling large, heavy panels without edge contact

    Wall Panel Installation Tools FAQs

    Can I install wall panels without a circular saw?
    Yes — a handsaw and mitre box produces acceptable cuts for most straight-cut situations, and a jigsaw handles curves and cutouts. The quality difference is in cut finish: a circular saw with the right blade gives a noticeably cleaner edge, particularly on real wood veneer where tearout is more visible. For painted MDF systems, a good handsaw cut, sanded lightly, is perfectly acceptable.

    Do I need specialist tools for slat panel installation?
    No. Slat panels (both adhesive-backed and batten-mounted) require only the standard tools above. The only adjustment for slat systems is that a fine-toothed blade is important — coarser teeth tear the slat edges and can split thin timber strips. A blade with at least 40 teeth per 250 mm (TPI equivalent) produces clean slat cuts.

    What is the best way to cut around electrical sockets?
    Mark the socket position on the back of the panel before cutting — transfer the position from the wall using a plumb bob or measuring directly. Use a jigsaw to cut the socket recess, then test-fit before applying adhesive. Electrical socket covers (surface-mounted extensions) that bring the socket face flush with the panel are available and make for a much cleaner finish than cutting around the existing fitting.

    How do I prevent scratching the panel surface during installation?
    Keep the panel face-up when marking and face-down when cutting. Use clean, soft surfaces (a sheet of foam underlay works well) as a worksurface. When tapping panels into alignment, always use a rubber mallet through a scrap offcut rather than tapping directly on the panel face. Suction cups or panel handles avoid edge contact entirely when moving large panels.

    Get Your Panels

    Once your tool kit is ready, browse the complete wood wall panel collection at The Panel Hub. The SoundPanel™ acoustic slat range is designed for straightforward DIY installation with the standard tool set covered in this guide. For design inspiration, our interior slat wall ideas guide shows 50+ finished room applications. The acoustic panel buyer’s guide covers product specifications and what to look for when comparing panel systems before ordering.

  • Wood Wall Panels Cost Comparison 2026: What You’ll Pay at Every Budget Level

    Wood Wall Panels Cost Comparison 2026: What You’ll Pay at Every Budget Level

    The Wide Price Range

    Wood wall panels in 2026 range from $15 per panel to $350+ per panel. That’s a 20x price gap for products that ostensibly do the same thing. Understanding what drives the price at each level — and what you lose by going cheaper — is the most useful thing you can know before starting your research.

    Budget Tier: $15–$60 per Panel

    What you typically get:

    • Printed laminate or paper-thin “veneer” surface (not real wood)
    • Paper or non-woven backing — no acoustic performance
    • Standard MDF core (no moisture resistance)
    • Basic edge finishing — joins may show
    • Variable quality control — panels within one order may not match perfectly

    Best for: Temporary installations, very large coverage areas where budget overrides quality, utility spaces. Not recommended for living rooms, bedrooms, or any space seen and experienced daily.

    Mid-Range Tier: $60–$130 per Panel

    What you typically get:

    • Real wood veneer (0.3–0.6mm) — genuine grain, some natural variation
    • Improved MDF core — more consistent flatness
    • Basic felt or fabric backing — some acoustic performance (NRC 0.30–0.55)
    • Better edge finishing — joins are tighter
    • More consistent quality control within batches

    Best for: Bedrooms, children’s rooms, secondary spaces where quality matters but budget is limited. Acceptable in living rooms if budget is the constraint.

    Premium Tier: $130–$260 per Panel

    What you typically get:

    • Real wood veneer (0.6mm+) — genuine grain, natural variation, species-authentic character
    • Engineered acoustic felt backing (AcuFelt™ or equivalent) — NRC 0.65–0.85
    • MR-MDF or equivalent moisture-resistant core
    • Precision-machined edges — invisible joins
    • FSC certification — responsible timber sourcing
    • Professional installation guides and dedicated support

    Best for: Living rooms, home offices, bedrooms, home theatres, and any space where both aesthetics and acoustic performance matter. The correct specification for most permanent domestic installations.

    The SoundPanel™ acoustic slat collection and GroovePanel® mosaic range sit in this tier — factory-direct pricing puts premium quality at significantly below traditional retail cost.

    Ultra-Premium Tier: $260–$400+ per Panel

    What you typically get:

    • Thick real wood veneer (1–2mm) or solid wood construction
    • Premium species (figured walnut, quarter-sawn oak, exotic hardwoods)
    • Bespoke sizing and custom finishes
    • Often commercially specified or architect-grade products

    Best for: High-end residential renovation, commercial hospitality (hotels, restaurants), heritage projects, and bespoke architectural applications.

    Total Cost for a Feature Wall: A Realistic Estimate

    Wall Size (4m × 2.4m) Budget Mid-Range Premium
    Panels (approx. 7 panels) $175–$420 $420–$910 $910–$1,820
    Adhesive + trim $40–$60 $50–$80 $60–$100
    Total DIY $215–$480 $470–$990 $970–$1,920

    Factory-Direct vs Retail Pricing

    Traditional retail adds 40–75% to the factory cost. Factory-direct brands like The Panel Hub eliminate this markup — meaning premium-tier quality is available at prices that often compete with mid-range retail products.

    Browse the full wood wall panel collection with transparent pricing, and visit The Panel Hub to see how factory-direct pricing compares to traditional retail for equivalent quality.

    Reducing Wood Wall Panel Costs Without Reducing Quality

    The gap between the most and least expensive wood wall panel options in 2026 is significant — but so is the gap between what drives the cost and what drives the quality of the visual result. Understanding where cost reduction is safe versus where it compromises the outcome allows you to make smart decisions at every budget level.

    Where cutting cost is safe: panel substrate material (engineered core vs solid timber), panel width (narrower boards use less material per square metre), finishing level (pre-primed rather than pre-finished reduces cost and allows you to control the final colour), and DIY installation rather than professional fitting.

    Where cost reduction compromises quality: wood face authenticity (real veneer or solid timber vs printed laminate), panel dimensional stability (particularly important in humid environments), and installation precision. A cheap panel installed perfectly will look better than an expensive panel installed poorly.

    The most consistent way to reduce overall project cost without compromising the result is to reduce the area covered rather than the quality of material. A smaller panel installation in premium material will look significantly better than a large installation in budget material, and it will remain visually better for longer. Plan the feature wall rather than the whole room if budget is a constraint — and then extend the installation when budget allows.

    Wood Wall Panel Cost FAQs

    Why do some wood wall panels cost so much more than others at the same size?
    The main cost drivers are the wood face authenticity (real veneer vs printed laminate), the species of wood used (walnut and oak cost more than pine or MDF), the precision of the panel machining (consistent dimensions allow faster installation with fewer adjustments), and the country of manufacture. Panels manufactured to European quality standards with genuine wood faces are more expensive than budget alternatives from lower-cost manufacturing countries, and the difference is visible in both the immediate result and how the panels hold up over years of use.

    Is it worth buying sample panels before ordering in bulk?
    Yes — this is one of the most cost-effective steps you can take in a panel project. Samples allow you to assess the species colour accurately in your specific lighting conditions, confirm that the grain character is what you expected, check the dimensional accuracy against your planned installation, and test the finish before committing. The cost of a sample is negligible compared to the cost of returning an order of unsuitable panels.

    What additional costs should I budget for beyond the panels themselves?
    Panel adhesive and fixing hardware typically add 5–10% to the panel cost. Battening and substrate preparation (if required) can add £100–£300 for a feature wall. Trim and moulding at panel edges typically adds £50–£150. Finishing materials (oil, paint, filler, caulk) add £40–£100. Installation labour, if using a professional, adds £200–£500 for a single feature wall. Allow a 15% contingency on the total material cost for cuts, waste, and unforeseen preparation requirements.

    Are factory-direct panel suppliers actually cheaper than retailer prices?
    Factory-direct pricing is typically 20–35% lower than retail pricing for equivalent quality panels, with the trade-off being longer lead times (3–8 weeks rather than 1–5 days), minimum order quantities, and less product variety. Factory-direct purchasing makes most sense for large renovation projects where the volume justifies the lead time and you have the confidence to specify without seeing the product in a showroom first. For smaller projects or first-time buyers, the convenience and assurance of a specialist retailer with samples and returns policies often justifies the price premium.

  • Wood Wall Panels for Bedroom: How to Design a Restful, Beautiful Space

    Wood Wall Panels for Bedroom: How to Design a Restful, Beautiful Space

    Why Wood Wall Panels Work So Well in Bedrooms

    The bedroom has one primary function: rest. And yet most bedrooms are acoustically harsh — painted drywall, glass windows, hard floors — all surfaces that reflect sound rather than absorbing it. Wood wall panels address this directly. The warmth of real timber calms the visual environment; the acoustic backing reduces the subtle but fatiguing background of reflected noise that makes a room feel less restful than it should.

    Beyond acoustics, the visual effect of a wood panel wall behind the bed is one of the most transformative bedroom upgrades available. It frames the bed, eliminates the need for a traditional headboard, and creates a sense of designed intention that painted walls rarely achieve.

    Best Panel Styles for Bedrooms

    Acoustic Slat Panels (Top Recommendation)

    wall_panel_bedroom_collection_1-The Panel Hub

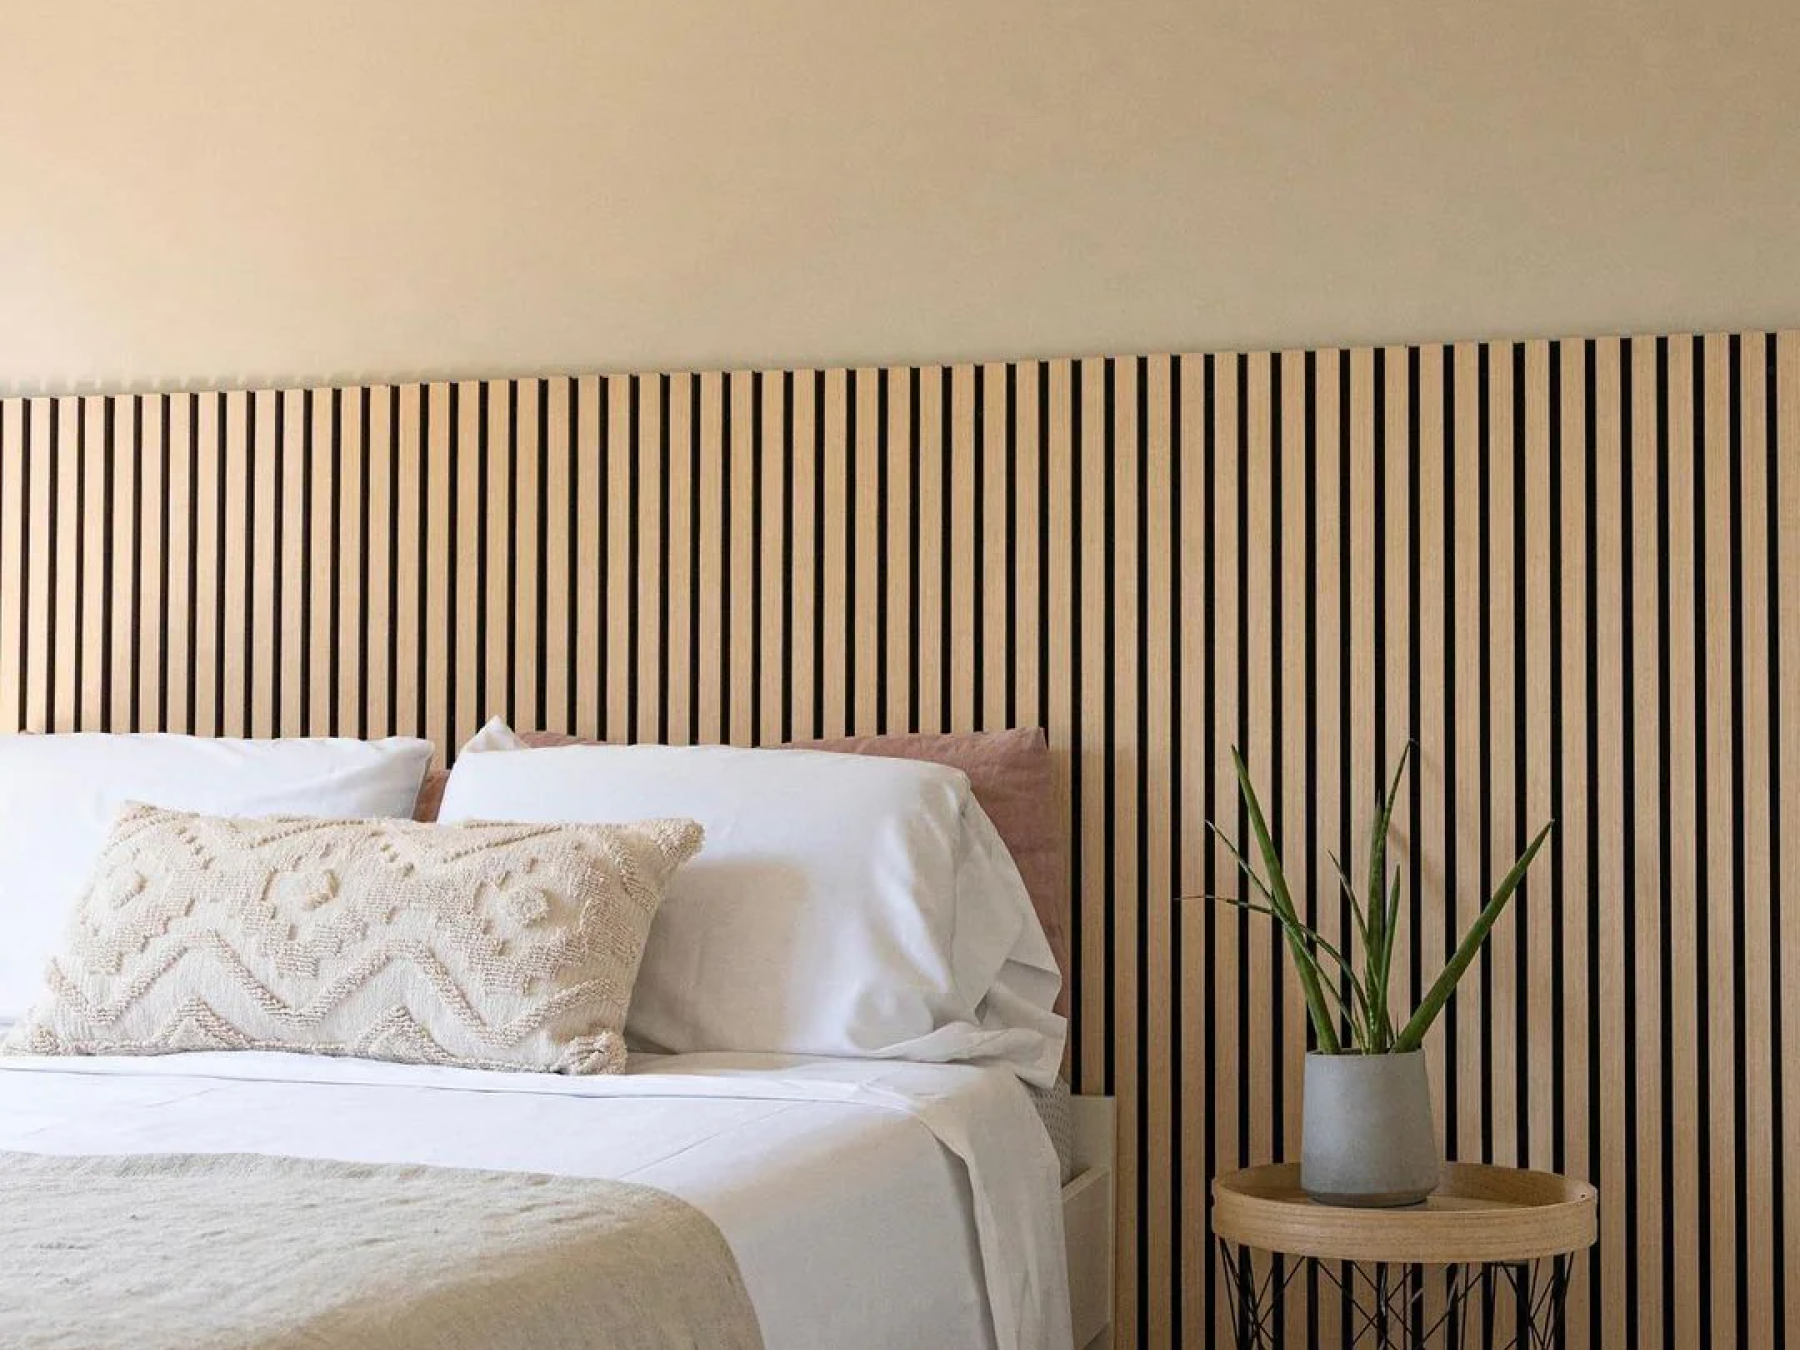
    Floor-to-ceiling acoustic slat panels on the headboard wall are the highest-impact, most versatile bedroom panel choice. The vertical lines elongate the room visually; the felt backing absorbs sound. In walnut for warmth, or oak for a lighter, more Scandinavian feel. Install from floor to ceiling for maximum effect — stopping at headboard height creates a more contained, graphic statement.

    Fluted Panels

    Fluted panels — with their solid face and vertical grooves — create an architectural, sculptural effect that suits contemporary and formal bedroom aesthetics. Less acoustic performance than slat panels, but the fully-covered surface gives a more substantial, complete feel.

    Reeded Panels

    Reeded panels with their soft, convex ridges suit the warmth and tactility appropriate to a bedroom. The rounded profile feels less sharp and industrial than fluted channels — better suited to the restful character a bedroom requires.

    Geometric Wood Tile Panels

    Solid wood tile panels in herringbone, concentric square, or mosaic patterns are a premium alternative to slat-format panels. More expensive but unmatched in the authenticity and craftsmanship they convey.

    Placement Strategy

    The Full Headboard Wall

    The most popular bedroom panel installation. Cover the wall behind the bed from floor to ceiling, wall to wall. Works in any bedroom size; particularly effective in rooms where the ceiling height allows the vertical lines to read fully.

    Headboard-Height Panel

    Panel the wall from the floor (or just above the skirting board) up to approximately 150–180cm — the top of a typical headboard. Leave the upper wall in a complementary paint colour. Creates a more contained, graphic effect and suits rooms where floor-to-ceiling paneling might feel heavy.

    Behind-Headboard Only

    If you want panels as a backdrop rather than a dominant feature, install them at headboard width only — behind the bed rather than wall-to-wall. Frame this with a painted or plastered border for a more formal result.

    Colour and Species Choices

    • Walnut: Rich, warm, deeply restful. Best for bedrooms with neutral or warm-toned soft furnishings.
    • Oak: Versatile and light. Works with almost any bedroom colour scheme.
    • Ash: Pale and fine-grained — best for very light, airy Scandinavian bedroom aesthetics.
    • Charcoal or ebonised finishes: Dramatic and moody — suited to dark, immersive bedroom aesthetics.

    Lighting the Panel Wall

    Good lighting transforms a panel wall from attractive to exceptional:

    • Wall sconces flanking the bed: Cast warm light across the panel surface, creating shadow depth in the slat gaps or flute channels.
    • LED strip at the top of the panel: Indirect uplighting creates a warm glow above the panel and emphasises the ceiling height.
    • Floor uplighting: Grazing light from below dramatically increases texture depth in slat and fluted profiles.

    For more bedroom panel inspiration, our guide on bedroom accent wall ideas covers 10 different design approaches with practical guidance. And for help choosing between slat, fluted, and reeded profiles, our fluted vs reeded panels guide makes the distinction clear.

    Installation in a Bedroom

    Bedroom panel installations are typically straightforward because headboard walls are usually uninterrupted — no doors, windows, or sockets to work around. Standard adhesive installation takes under two hours for most single walls. Allow 24–48 hours for panels to acclimatise to the bedroom’s temperature before installing.

    Full installation guidance is in our step-by-step wall panel installation guide.

    Common Mistakes to Avoid in Bedroom Panel Design

    The bedroom is the most personal room in the house — which means panel mistakes are both more visible and more expensive to undo. These are the pitfalls worth avoiding.

    Panelling all four walls: A full-room panel treatment in a bedroom typically reduces the sense of space and can feel claustrophobic rather than restful. The exception is a very large master bedroom where the scale absorbs the texture. In standard-sized bedrooms, one feature wall — almost always the bed head wall — is the right scope.

    Mismatched species with existing furniture: Bedroom furniture typically has a strong timber character — bed frames, wardrobes, chests of drawers. Installing wall panels in a species or finish that clashes with the existing furniture creates visual dissonance. Match the panel tone to the furniture’s undertone: cool grey furniture suits ash or light oak panels; warm brown furniture suits walnut or oiled oak.

    Ignoring panel height relative to bed height: A panel wall behind a bed needs to work with the bed’s visual height, not against it. For beds with low platform frames (bed height 300–400mm), floor-to-ceiling panels read well and give the wall full height. For beds with high upholstered headboards (600mm+), running panels behind and above the headboard looks awkward. In this case, start the panel above the headboard height, or choose a profile that complements rather than competes.

    Choosing panels before confirming lighting: Wall panels in bedrooms are often experienced primarily by lamplight and bedside lighting — not overhead light. The shadow-line quality that makes slat and fluted panels so appealing requires directional light to show properly. If the room has only a central pendant and no directional lighting, the panel’s three-dimensional quality won’t read. Confirm the lighting plan before finalising panel selection.

    FAQs: Wood Wall Panels for Bedroom

    Are wood wall panels suitable for a bedroom?
    Yes — bedrooms are one of the best applications for wood wall panels. The warm, natural character of timber suits the restorative function of a bedroom. Acoustic slat panels actively improve the room’s sound quality. The installation process is clean and creates no dust or wet trades once the adhesive is applied. All advantages align for bedroom use.

    What wood species works best for a bedroom wall?
    Oak is the most versatile choice — it suits both contemporary and transitional bedrooms and is available in a wide range of finish tones from natural to dark-stained. Walnut creates a richer, more dramatic effect suited to larger bedrooms and darker palettes. Ash and birch are lighter options that suit Scandinavian-influenced interiors. The choice should be led by the existing furniture and flooring species to ensure tonal coherence.

    How long do bedroom wood wall panels last?
    Quality panels installed correctly in a bedroom environment should last 20+ years without degradation. Bedrooms are low-humidity, low-traffic environments — the most benign conditions for timber panels. The main factors affecting longevity are UV exposure from windows (use UV-filtering window film on south-facing windows), physical impact, and whether the initial installation was done correctly.

    Can I remove bedroom wall panels if I change my mind?
    Construction adhesive creates a permanent bond. Removal is possible but typically causes some damage to the underlying plasterboard and is labour-intensive. If there’s a realistic chance you’ll want to remove the panels — renting, planning to renovate — consider a panel system that uses a concealed clip-and-rail fixing method, which allows panels to be removed and re-installed without adhesive.

    Shop Bedroom Wall Panels

    Browse the bedroom wall panel collection at The Panel Hub, or explore the full wood wall panel range to compare every option available. For further design inspiration across bedroom panel styles and species, our interior slat wall ideas guide covers headboard walls, full-room treatments, and complementary pairings in detail. And if you want to understand the acoustic benefits of slat panels in a bedroom before buying — reduced echo, a softer ambient sound that supports sleep — the complete acoustic panel buyer’s guide explains what different panel types actually deliver.

  • Wood Wall Panels for Garage Gym: Durable, Practical, and Better Than Bare Concrete

    Wood Wall Panels for Garage Gym: Durable, Practical, and Better Than Bare Concrete

    Why Your Garage Gym Walls Matter

    Most garage gyms are functionally equipped and aesthetically miserable. Bare concrete or drywall, exposed garage door mechanisms, fluorescent tubes — the environment does nothing to motivate training and everything to make you want to go back inside. Wall panels change this without a significant renovation budget, and they’re more practical in a garage gym than people expect.

    Unique Garage Gym Requirements

    A garage gym has requirements that differ from every other room in the house:

    • Impact resistance: Barbells get dropped, plates get racked hard, bags get punched. Panels need to handle accidental impact better than standard interior wall panels.
    • Moisture and temperature variation: Garages are typically uninsulated, meaning they experience significant temperature swings and higher humidity than living spaces. This rules out standard MDF panels without moisture-resistant specification.
    • Easy cleaning: Sweat, chalk, and rubber dust accumulate on gym wall surfaces. Panels need to be wipeable.
    • Functional compatibility: Wall panels shouldn’t prevent you from mounting mirrors, racks, or equipment on the wall.

    Best Panel Types for Garage Gyms

    OSB (Oriented Strand Board) — The Practical Choice

    Not a traditional “wall panel” in the decorative sense, but OSB sheeting is the most practical and durable garage gym wall surface available. Impact-resistant, moisture-tolerant, cheap, and easy to paint. Mount equipment directly into it without worrying about finding studs. Paint in a dark tone for a functional, intentional look.

    WPC Slat Panels

    Wood Plastic Composite slat panels in a gym context offer the visual warmth of wood with the moisture resistance a garage needs. Use on a feature wall (behind the rack, the mirror wall, or the main filming wall for training videos) rather than covering every surface. More expensive than OSB but significantly better aesthetics for content creators or those who want the space to feel genuinely designed.

    Rubber Wall Panels

    Rubber wall panels — the same material as gym flooring — provide maximum impact resistance and sound absorption. Practical and indestructible in a high-impact zone (behind the rack, beside the dumbbell wall). Not decorative, but supremely functional.

    Acoustic Slat Panels on a Feature Wall

    If part of your garage gym is used for filming content, online coaching, or virtual training sessions, one well-chosen acoustic slat panel wall transforms the background. In a walnut or oak finish, a slat panel wall behind your filming position creates a background that reads as premium and professional — signalling that you take training seriously without looking like a commercial gym.

    The acoustic benefit is also genuine: garage gyms are acoustically terrible spaces, and acoustic slat panels reduce the echo that makes every set sound like it’s happening in a shipping container.

    Installation Considerations for Garages

    • Damp-proof membrane first: If the garage walls are concrete or masonry, apply a damp-proof membrane or waterproof paint before installing any wood-based panels. Ground-level concrete walls can transmit rising moisture that destroys panel adhesive bonds over time.
    • Batten framework on masonry: Fix timber battens to the masonry wall, level them, and fix panels to the battens. This creates an airflow void that reduces condensation risk and gives you a level surface regardless of how irregular the underlying wall is.
    • Mechanical fixings over adhesive-only: In a garage with temperature cycling and humidity variation, adhesive-only installation is risky. Screw through panels into battens for a permanent, secure fixing.

    For installation guidance on uneven surfaces (very common in garage situations), our dedicated article on installing panels on problem walls is worth reading before you start. And for the broader context of choosing the right panel material for your specific requirements, our MDF vs solid wood wall panel comparison and complete wood panel guide cover the material decisions in detail.

    Shop Gym and Utility Wall Panels

    Browse the complete wood wall panel collection at The Panel Hub for panels suitable for garage and utility environments. The SoundPanel™ acoustic slat range is a popular choice for gym feature walls — particularly for the filming wall behind a rack or filming position. For design inspiration on training space applications, our interior slat wall ideas guide includes dedicated workspace and studio applications. The acoustic panel buyer’s guide explains why acoustic slat panels are worth considering in a garage gym — the echo reduction is significant in a hard-surfaced concrete space.