Author: The Panel Hub Design Studio

  • Are Wall Panels Easy to Install? Everything You Need to Know

    Are Wall Panels Easy to Install? Everything You Need to Know

    The Short Answer

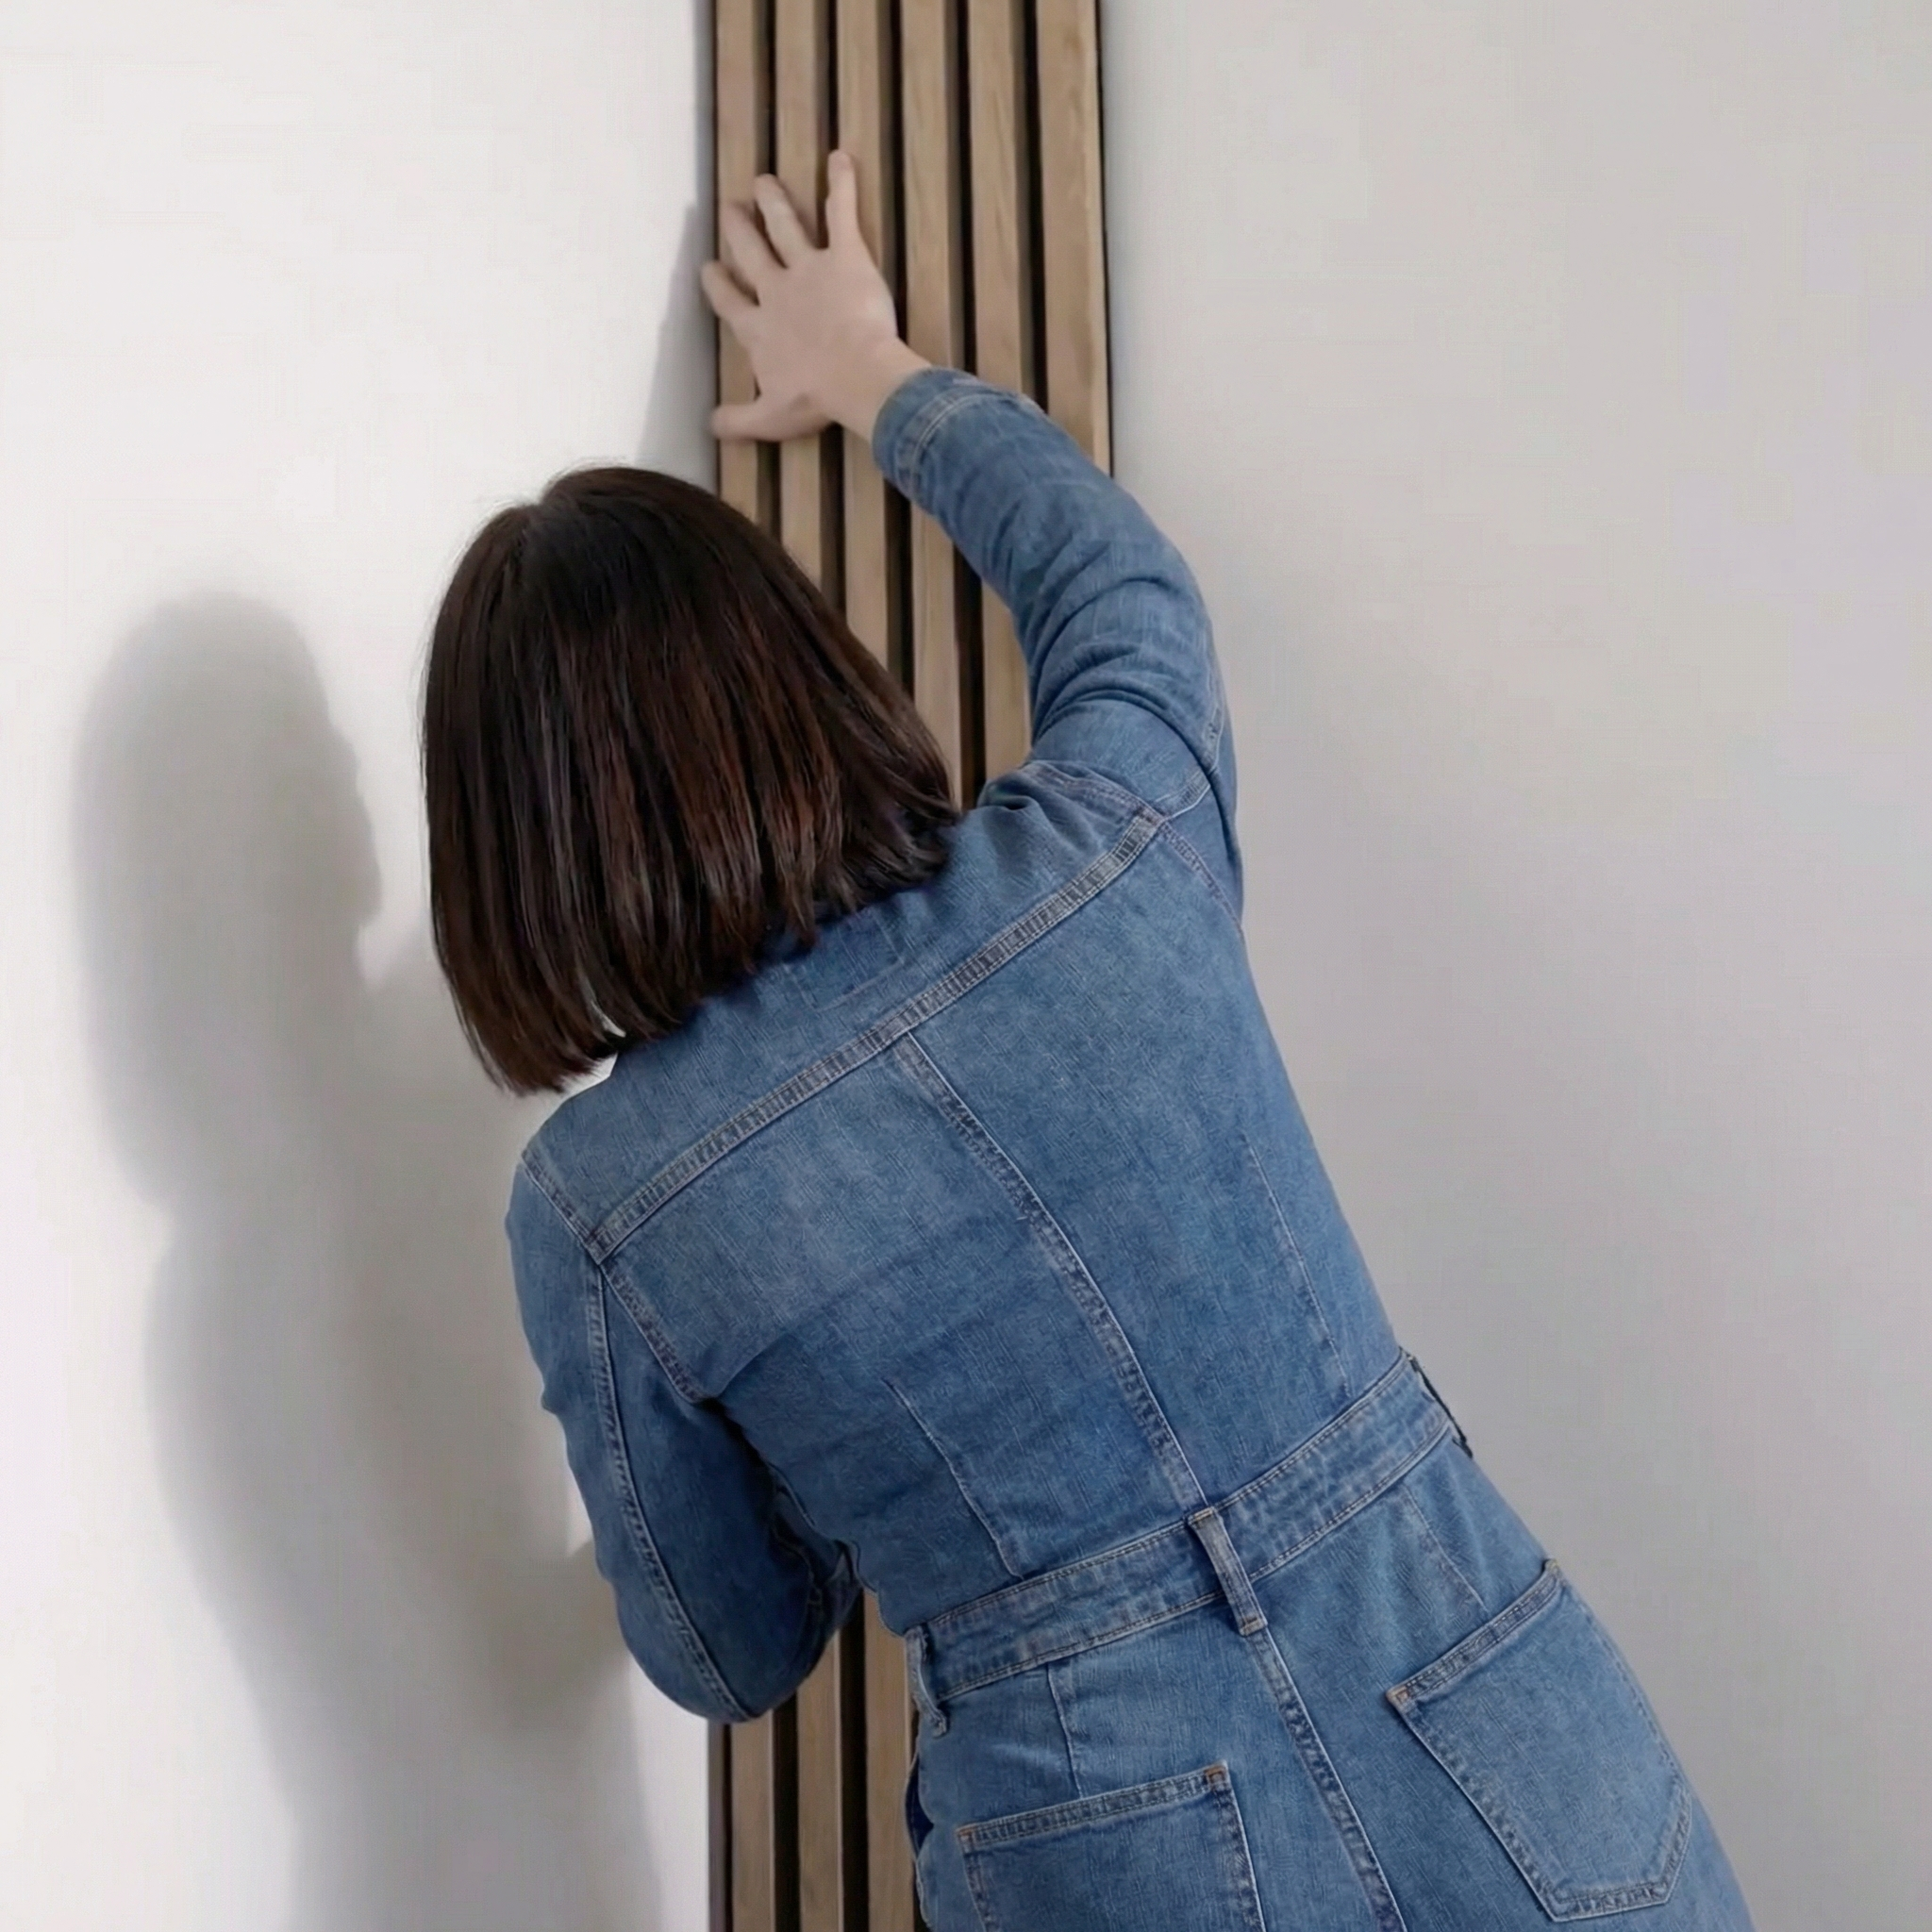
    Yes — modern wall panels are designed for DIY installation, and most homeowners with basic tools can complete a feature wall in under two hours. But the difficulty does depend on the panel type, your wall condition, and your tools.

    Here’s everything you need to know before you start.

    What Makes Modern Wall Panels DIY-Friendly?

    Unlike traditional timber cladding or tiled walls that required trades and specialist tools, today’s engineered wood panel systems are built with the DIYer in mind:

    • Lightweight construction — MDF-core panels weigh a fraction of solid timber
    • Adhesive installation — most systems use construction adhesive rather than nails or fixings
    • Consistent sizing — panels are manufactured to tight tolerances, so they align predictably
    • Trimmed edges — quality panels have finished, rounded edges that don’t require additional trimming where panels meet

    Tools You’ll Need

    • Tape measure
    • Spirit level
    • Pencil
    • Construction adhesive (check compatibility with your panel type)
    • Caulking gun
    • Fine-tooth hand saw or circular saw with fine blade
    • Sandpaper (120 grit)
    • Rubber mallet
    • Painter’s tape (for positioning)

    You do not need a nail gun, power drill, or professional-grade equipment for most panel systems.

    How Long Does Installation Take?

    For a standard single feature wall (approx. 10–15 square feet):

    • Wall preparation: 15–30 minutes
    • Measuring and planning layout: 15–20 minutes
    • Panel adhesion and placement: 45–60 minutes
    • Finishing (trimming, edges, clean-up): 15–30 minutes

    Total: 90 minutes to 2 hours for most homeowners on a standard feature wall.

    Step-by-Step Installation Overview

    1. Prepare the wall — the surface must be clean, dry, and reasonably flat. Remove flaking paint, wash off dust, and fill any large holes.
    2. Find your starting point — measure the wall width and mark the centre. Start from the centre for symmetrical layouts, or from one corner for edge-to-edge coverage.
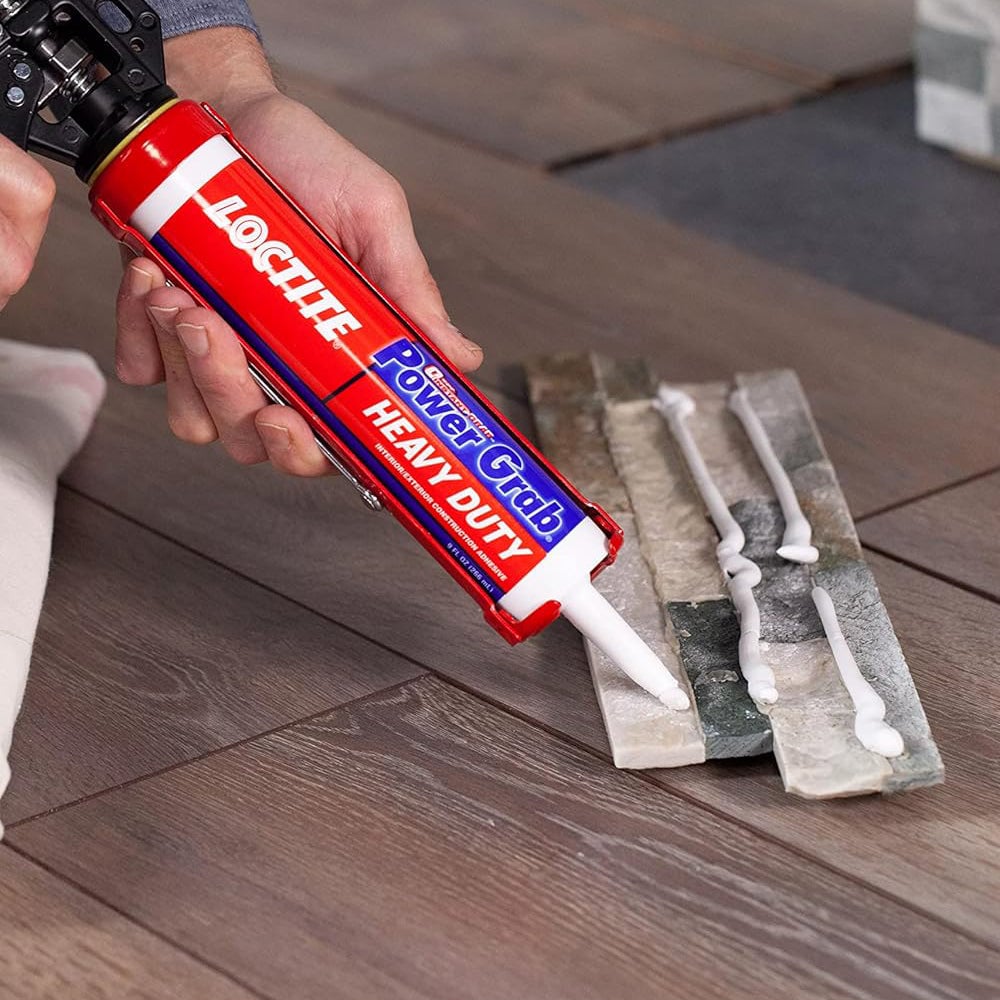
    3. Apply adhesive — run a zigzag bead of construction adhesive across the back of the panel. Avoid the very edges to prevent squeeze-out.
    4. Press and hold — press the panel firmly against the wall and hold for 30–60 seconds. Use a spirit level to check vertical alignment before the adhesive grabs.
    5. Work outward — continue placing panels left and right from your starting point, butting them snugly together.
    6. Cut to fit — use a fine-tooth saw to trim panels at corners, sockets, and edges. Score first with a utility knife for veneer surfaces.
    7. Finish edges — use matching trim strips or caulk to neaten exposed edges and the join between panels and ceiling/floor.

    Common Mistakes to Avoid

    • Not letting panels acclimatise — leave panels in the room for 24–48 hours before installing so they adjust to the room’s temperature and humidity.
    • Skipping the spirit level — even a small deviation early on compounds across the wall. Check level on every panel.
    • Using the wrong adhesive — use a solvent-free, panel-compatible adhesive. Solvent-based adhesives can damage MDF cores and veneer finishes.
    • Installing on damp walls — moisture trapped behind panels causes warping and mould. Always check for damp before installing.
    • Cutting too fast — slow, controlled cuts reduce splintering on veneer surfaces. A fine-tooth blade and steady pace give clean edges.

    Are Some Panels Harder Than Others?

    Yes. Here’s a rough difficulty guide:

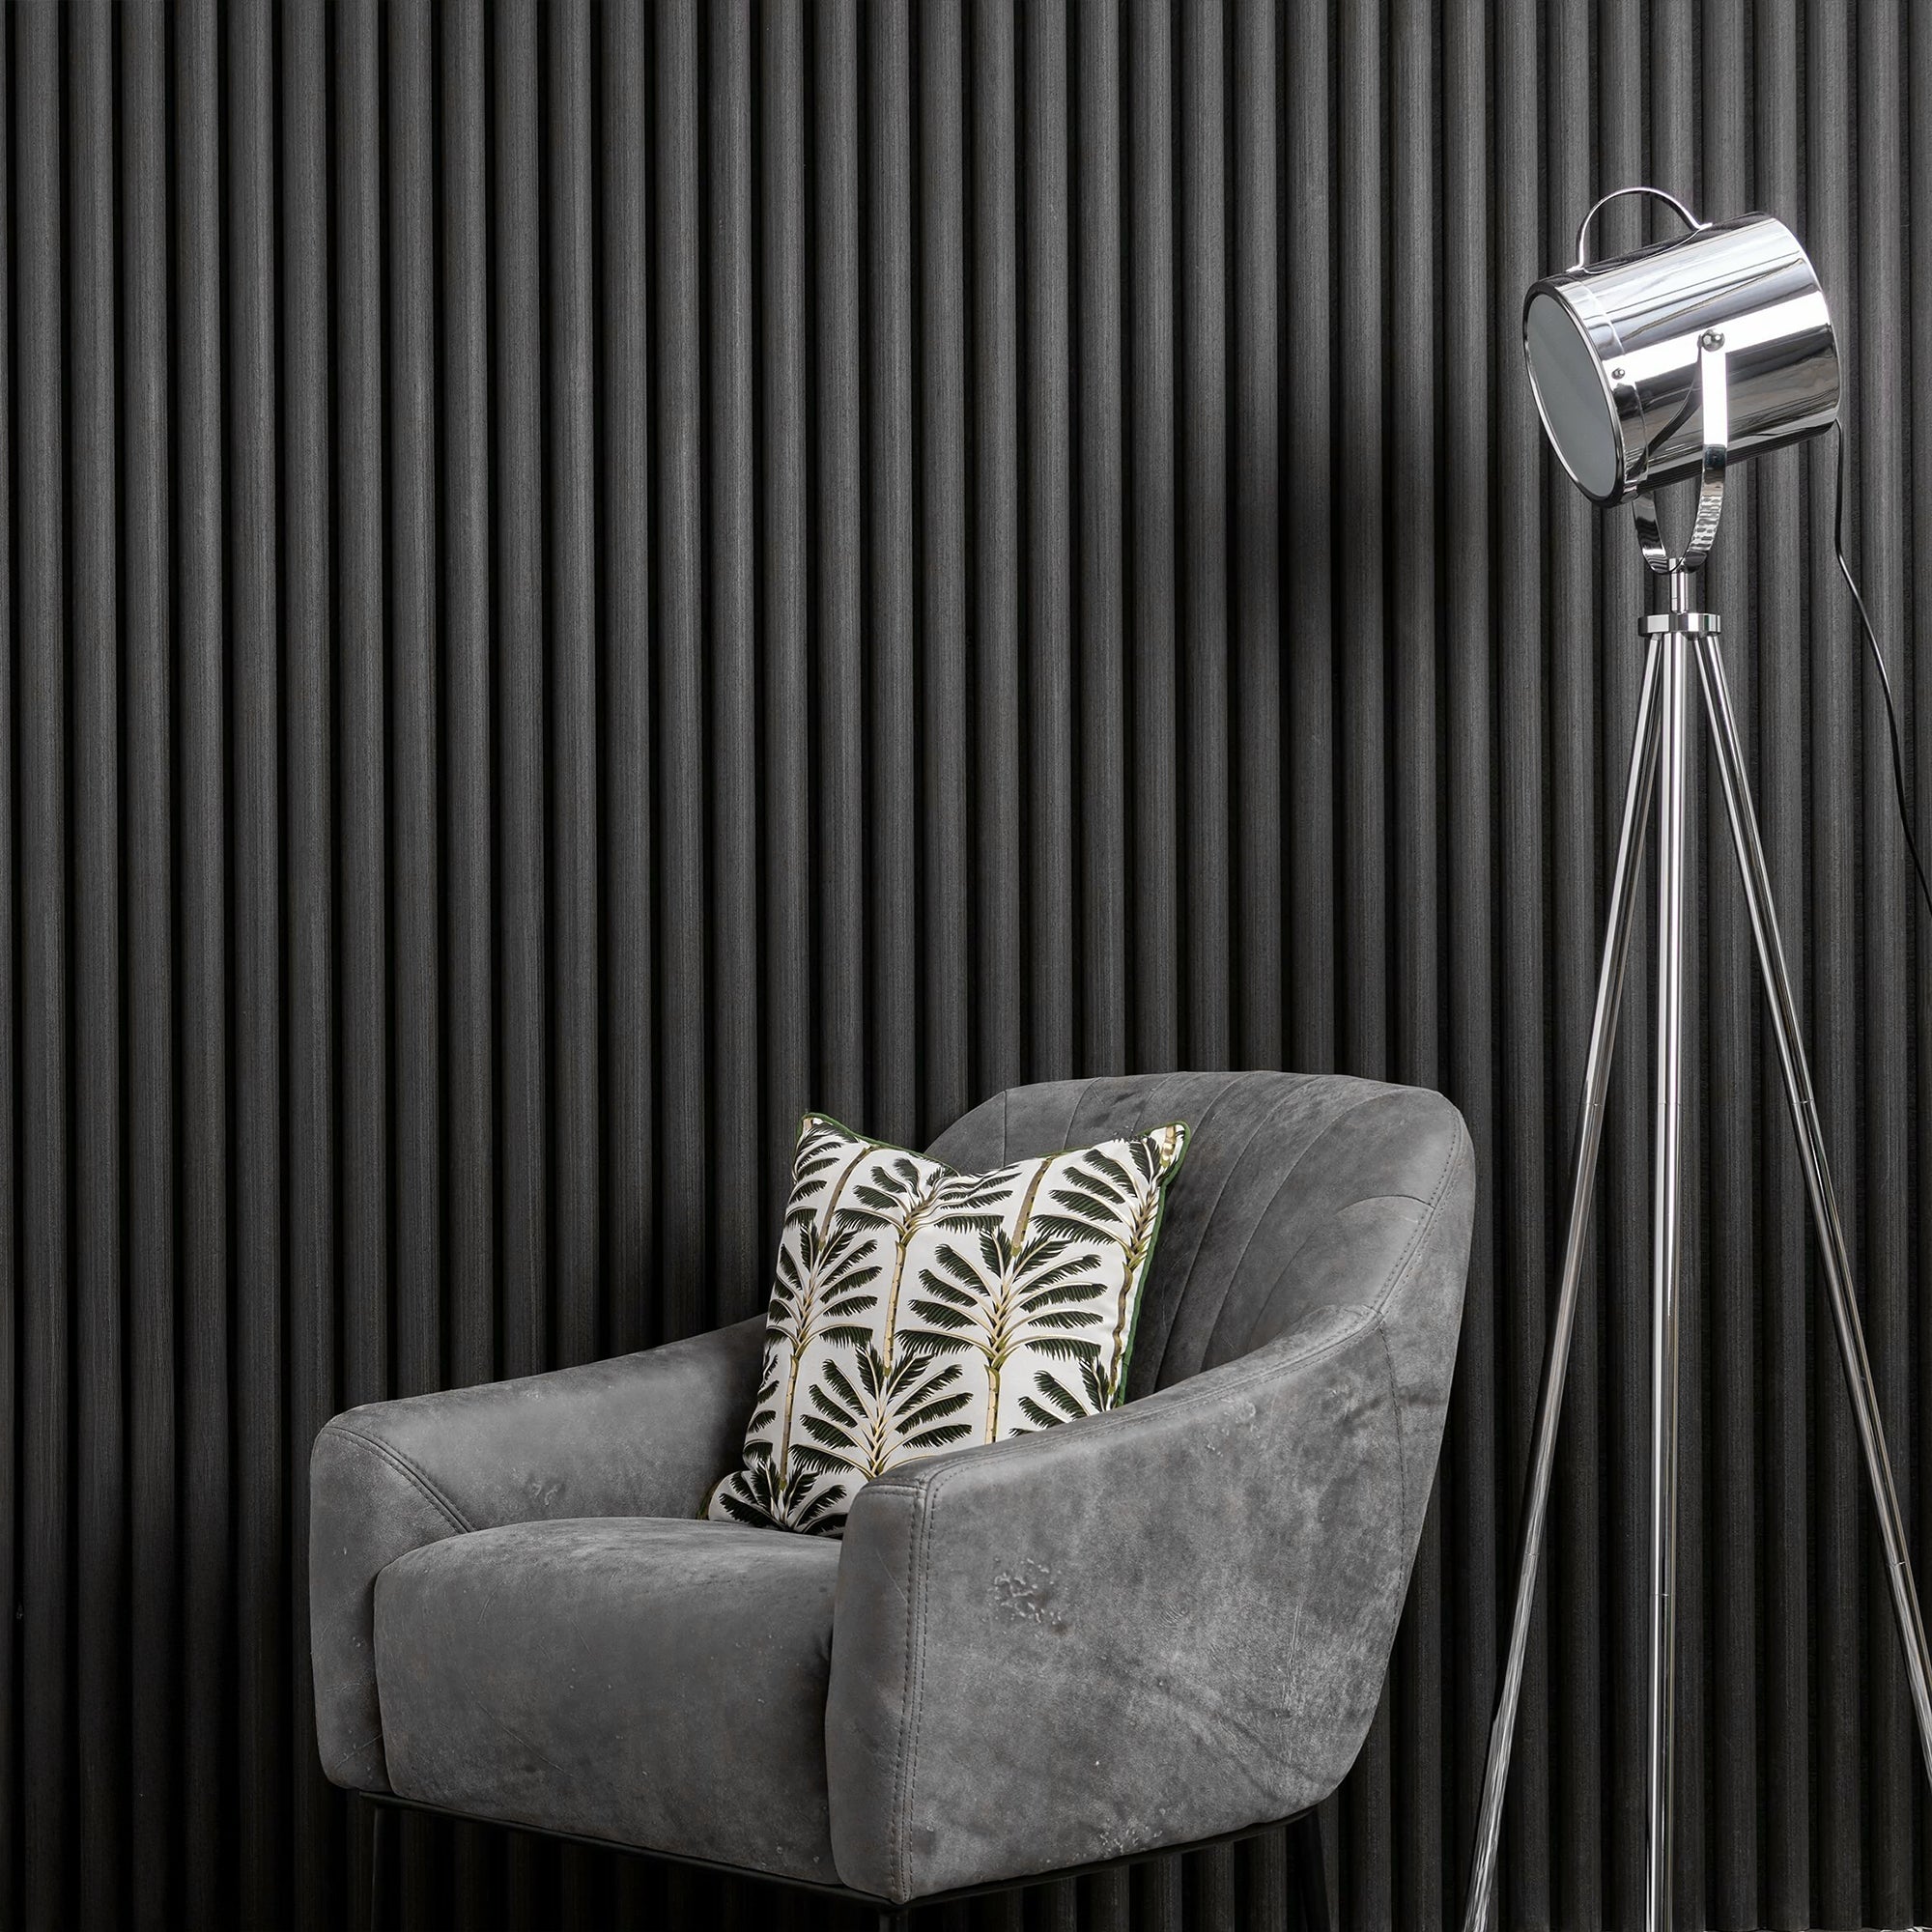
    • Acoustic slat panels (adhesive): Beginner-friendly ✓
    • Tongue-and-groove shiplap: Beginner–intermediate ✓
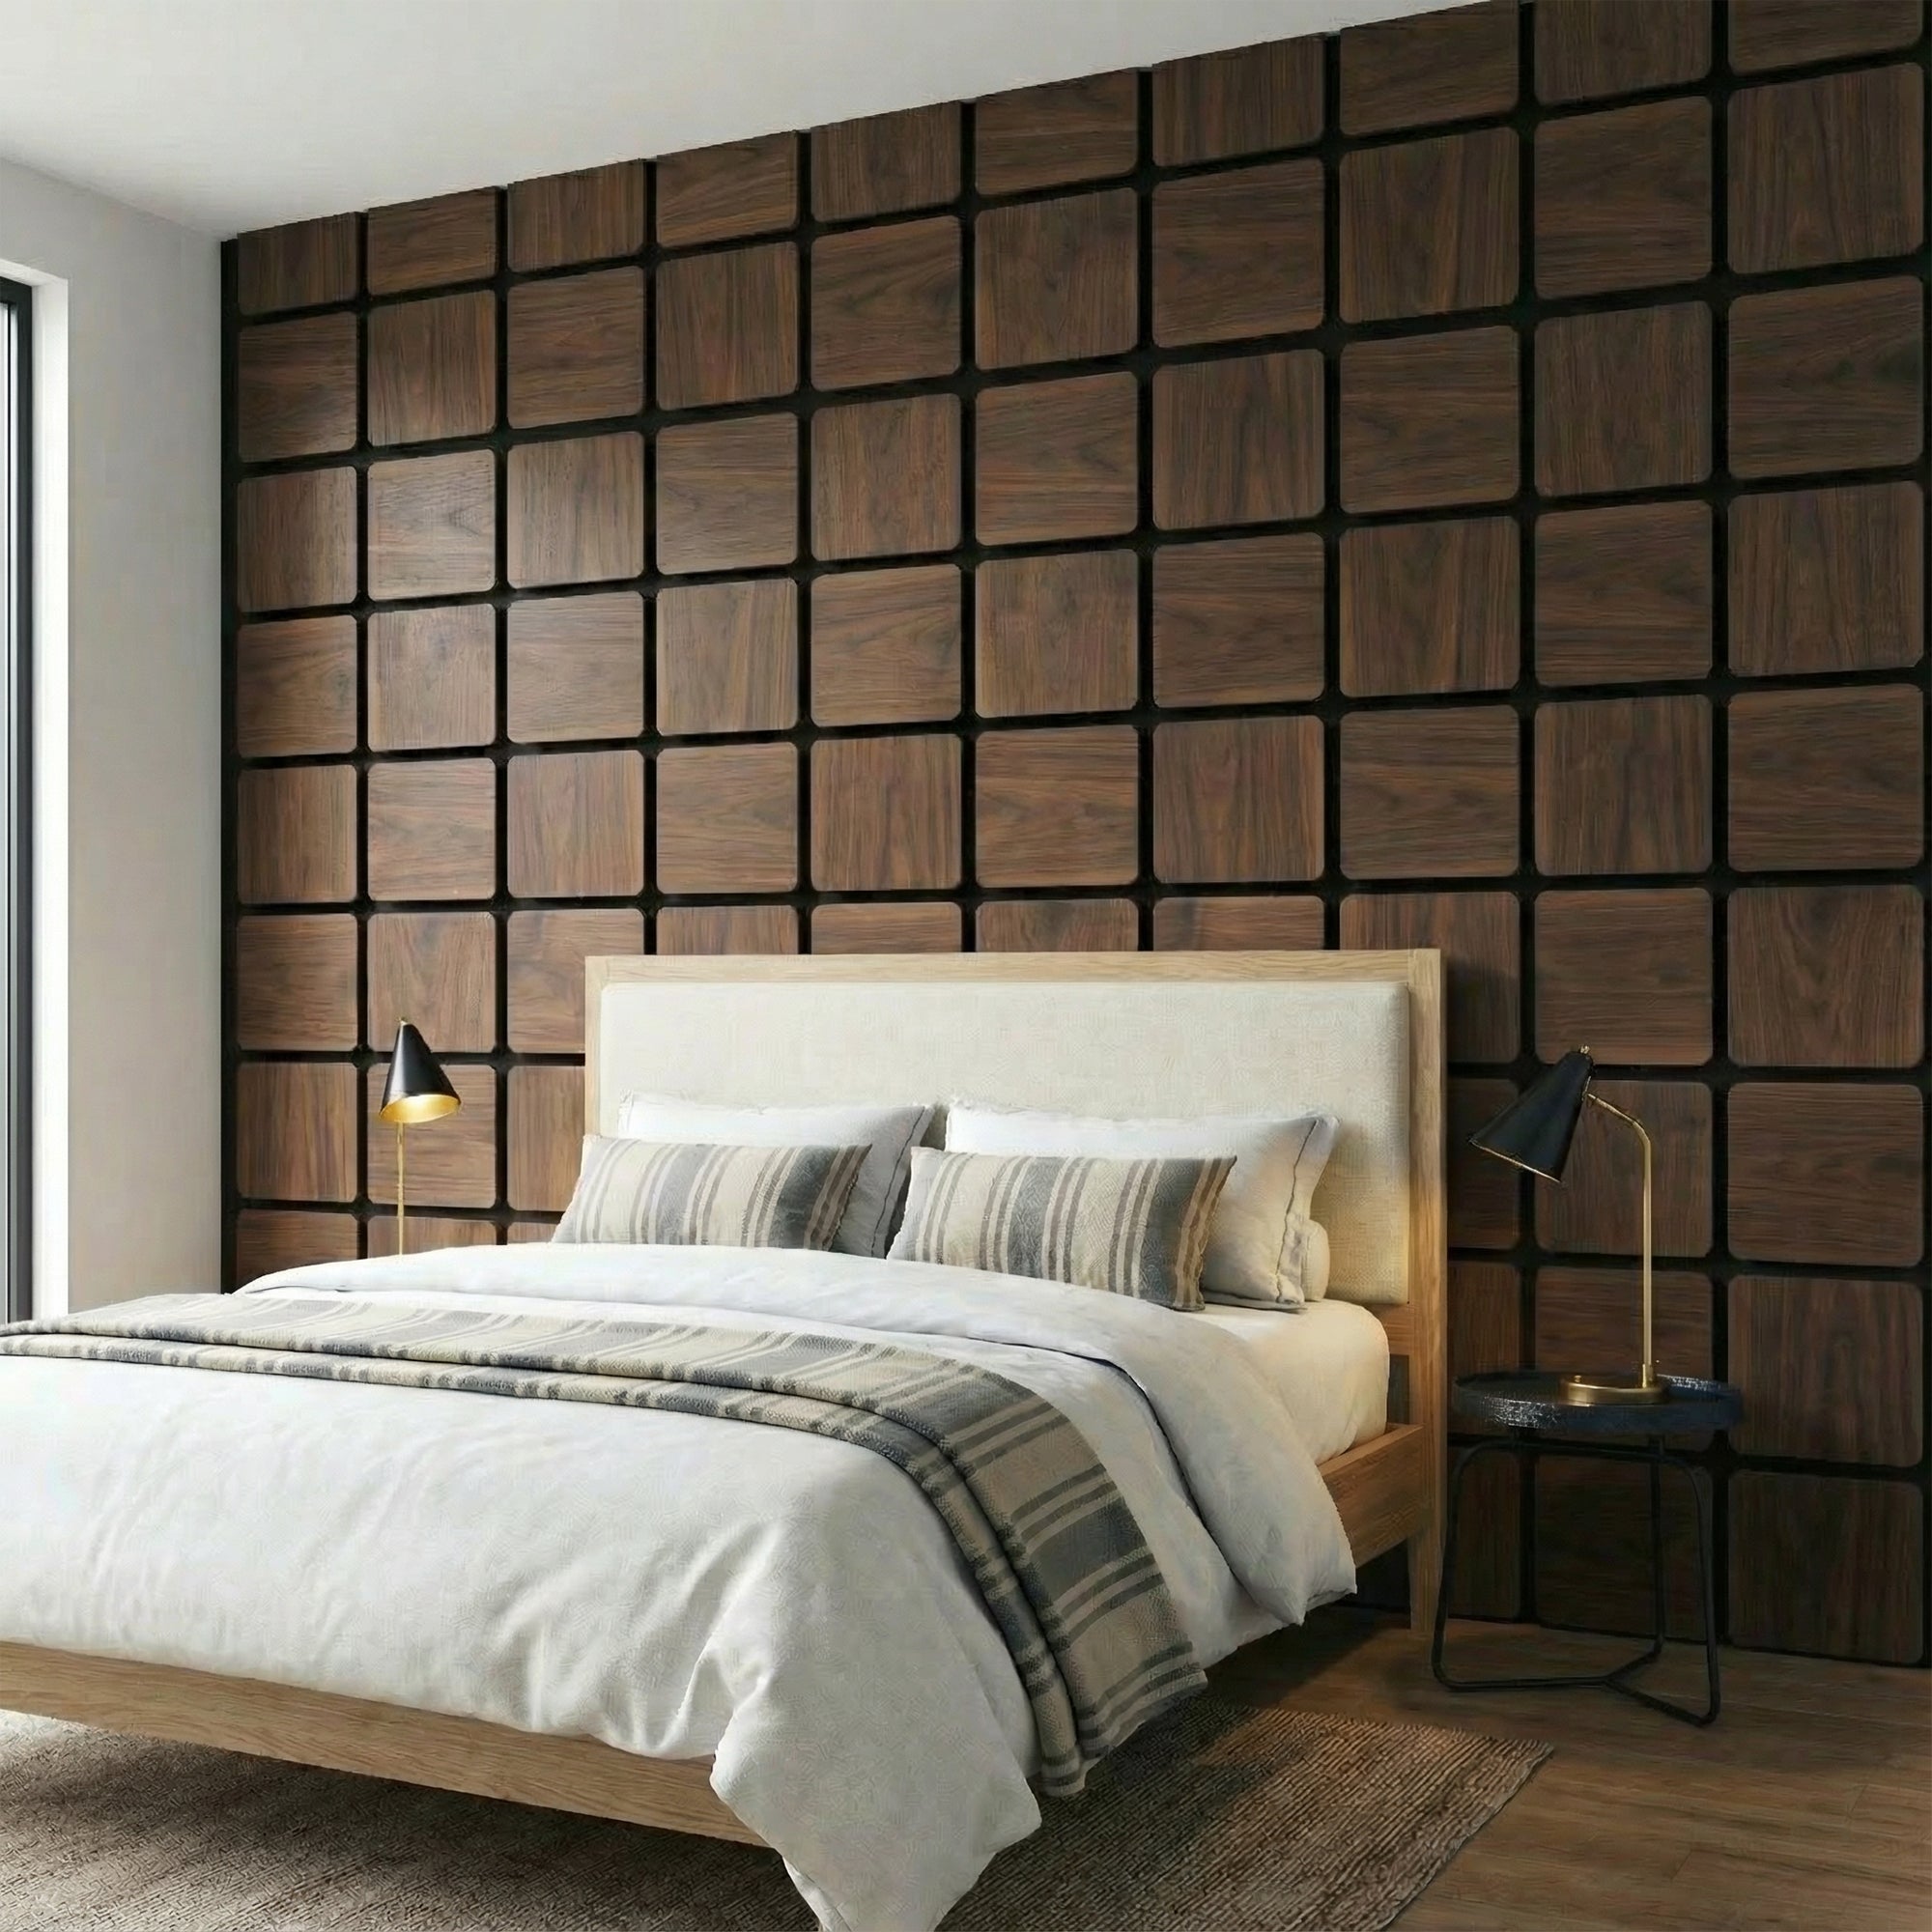
    • Geometric tile panels: Intermediate (pattern alignment matters)
    • Stone cladding panels: Intermediate (heavier, requires correct adhesive)
    • Traditional timber board cladding: Intermediate–advanced (nailing, spacing)

    Conclusion

    Modern wall panel systems — particularly adhesive-backed acoustic and decorative panels — are genuinely accessible to DIYers. With the right preparation, the right adhesive, and a spirit level, most homeowners can complete a professional-looking feature wall in a single afternoon. If in doubt, order a sample panel first to test the adhesive and fitting before committing to a full wall.

    DIY vs Professional Installation: How to Decide

    Wall panel installation sits comfortably within the capability of a confident DIYer — but not every installation project is the same. Here is a simple framework for deciding whether to DIY or hire a professional.

    DIY-friendly conditions: Standard plasterboard walls in good condition; adhesive panel systems (not mechanical fixing with noggins); single feature wall rather than a whole room; panels under 15 kg per m²; no complex obstacles like curved walls, chimney breasts, or high ceilings requiring scaffolding.

    Consider professional installation for: Old properties with plaster on lath, lime plaster, or walls with significant unevenness; rooms requiring wall preparation work (replastering, moisture treatment); installations on brick, block, or stone substrates; rooms requiring multiple walls or full-room paneling; panels over 15 kg per m² that need mechanical fixing to wall studs.

    The cost difference between DIY and professional installation is typically £15–£35 per m² for labour. For a standard 3 m × 2.4 m feature wall (7.2 m²), that is roughly £100–£250 in labour savings — worth taking if you are confident in the result, but a poor trade-off if a poor installation means redoing the work.

    Wall Panel Installation FAQs

    What skills do I need to install wall panels myself?
    You need to be comfortable with measuring and marking accurately, cutting with a jigsaw or circular saw, applying adhesive, and using a spirit level. Carpentry experience is helpful but not essential for most adhesive panel systems. The cut quality is the most skill-dependent part — accurate, clean cuts at doorframes and ceiling junctions make the difference between a professional-looking result and an amateur one.

    How do I cut wood wall panels neatly?
    For straight cuts, a circular saw with a fine-toothed blade gives the cleanest result. A jigsaw works for curves or cutouts around obstacles. Always cut panels face-down with a circular saw (to prevent tearout on the visible surface) or face-up with a jigsaw. Support the panel fully on both sides of the cut line and use a straightedge guide for straight cuts.

    What is the biggest challenge for a first-time panel installer?
    Getting the first panel perfectly plumb and level. Every subsequent panel follows the first, so a slight error compounds across the whole wall. Take twice as long as feels necessary on the first panel — check plumb in both directions, double-check, and only then commit the adhesive.

    Are there panel systems specifically designed for beginner DIYers?
    Yes — click-and-lock slat panel systems that mount to horizontal wall battens are among the most DIY-friendly. Panels slot together without needing adhesive or precise cuts at every joint. They are also fully reversible, making them a good choice for anyone concerned about committing to a permanent installation.

    Ready to Get Started?

    Browse the complete wood wall panel collection at The Panel Hub — all products come with full installation guidance. The SoundPanel™ acoustic slat range is designed specifically for straightforward DIY installation using construction adhesive. For design inspiration on what to install, our interior slat wall ideas guide covers 50+ room applications, and the acoustic panel buyer’s guide helps you choose between panel types before ordering.
  • Are Wood Wall Panels Waterproof? What You Need to Know

    Are Wood Wall Panels Waterproof? What You Need to Know

    The Direct Answer

    Standard wood wall panels — MDF core with real wood veneer face — are not waterproof. They are moisture-resistant to varying degrees depending on the core material and surface finish, but they are not designed for wet area use and will be damaged by direct water contact or sustained high humidity without appropriate specification.

    That said, genuinely waterproof panel options exist, and the right choice depends entirely on where you’re installing and what level of moisture exposure the panels will face.

    The Moisture Spectrum: How Much Water Will the Panels Encounter?

    Zone 0: Direct Water Contact (Inside Shower/Bath)

    Fully waterproof panels only: WPC (Wood Plastic Composite), PVC foam board, or tile. Standard wood veneer panels, regardless of surface finish, are not suitable inside a shower enclosure or bath surround. Water enters through joints, edges, and any surface imperfection and destroys the core rapidly.

    Zone 1: High Humidity / Splash Zone (Bathroom, Near Sink)

    Moisture-resistant panels: MR-MDF core (moisture-resistant MDF, identified by its green colour) with sealed veneer and all cut edges sealed with waterproof sealant. This specification can withstand the ambient humidity of a bathroom and occasional splash contact — but not sustained direct wetting.

    Zone 2: Ambient Humidity (Remainder of Bathroom, Kitchen Walls, Utility Rooms)

    Standard MDF with sealed veneer face performs adequately in Zone 2 — away from direct water contact and with good ventilation. An additional coat of water-resistant oil or lacquer on the veneer face provides extra protection against steam and condensation.

    Living Areas and Bedrooms

    Standard specification panels are completely fine. Residential interior humidity levels do not present a meaningful challenge for quality panel products with sealed veneer faces and proper edge treatment.

    WPC Panels: The Genuinely Waterproof Option

    Wood Plastic Composite (WPC) panels have a core of wood fibre and polymer resin — a combination that is genuinely waterproof throughout, not just at the surface. WPC panels can be used in direct-water applications (shower surrounds, wet rooms, pool surrounds) without the risk of moisture damage.

    The trade-off: WPC panels typically have a less premium visual quality than real wood veneer. The surface texture is consistent and uniform in a way that real wood grain is not — the “wood look” is there but the organic variation of genuine veneer is absent.

    What Happens When Standard Panels Get Wet

    Understanding the failure mode helps you specify correctly:

    • Swelling: MDF absorbs moisture and expands — primarily through edges. The first sign is panel edges swelling visibly, which then lifts the panel face away from adjacent panels or from trim strips.
    • Delamination: Moisture behind the veneer layer breaks down the adhesive bond between veneer and substrate. The veneer begins to bubble and peel.
    • Mould: Moisture trapped between the panel back and the wall creates ideal mould growing conditions — warm, dark, and humid. By the time mould is visible, it has often been growing for months.

    Protecting Standard Panels in Higher-Humidity Areas

    For panels in kitchens, bathrooms (Zone 2 only), and utility rooms:

    • Apply a waterproof sealant or silicone to all cut edges immediately after cutting
    • Apply an additional coat of water-resistant oil or lacquer to the veneer face before installation
    • Use waterproof panel adhesive throughout
    • Ensure adequate ventilation in the room — an extractor fan or operable window to prevent sustained high humidity

    For the full guide to bathroom-specific panel installation — including zone guidance and the specific panel systems that work in each zone — our bathroom wood wall panel guide is the most detailed reference. And for understanding the core materials that affect moisture resistance, our MDF vs solid wood panel comparison covers the different core materials and their moisture behaviour.

    Find the Right Panel for Your Space

    Browse the complete wood wall panel collection at The Panel Hub to find the right specification for your room and moisture environment — from sealed veneer panels for dry areas to fully waterproof options for wet zones. The SoundPanel™ acoustic slat range covers the most popular residential applications. For design inspiration showing how panels look across different room types, our interior slat wall ideas guide is a useful companion, and the acoustic panel buyer’s guide covers material specifications in full detail.

  • Bathroom Wood Wall Panels: What Works, What Doesn’t, and How to Install Safely

    Bathroom Wood Wall Panels: What Works, What Doesn’t, and How to Install Safely

    Can You Use Wood Panels in a Bathroom?

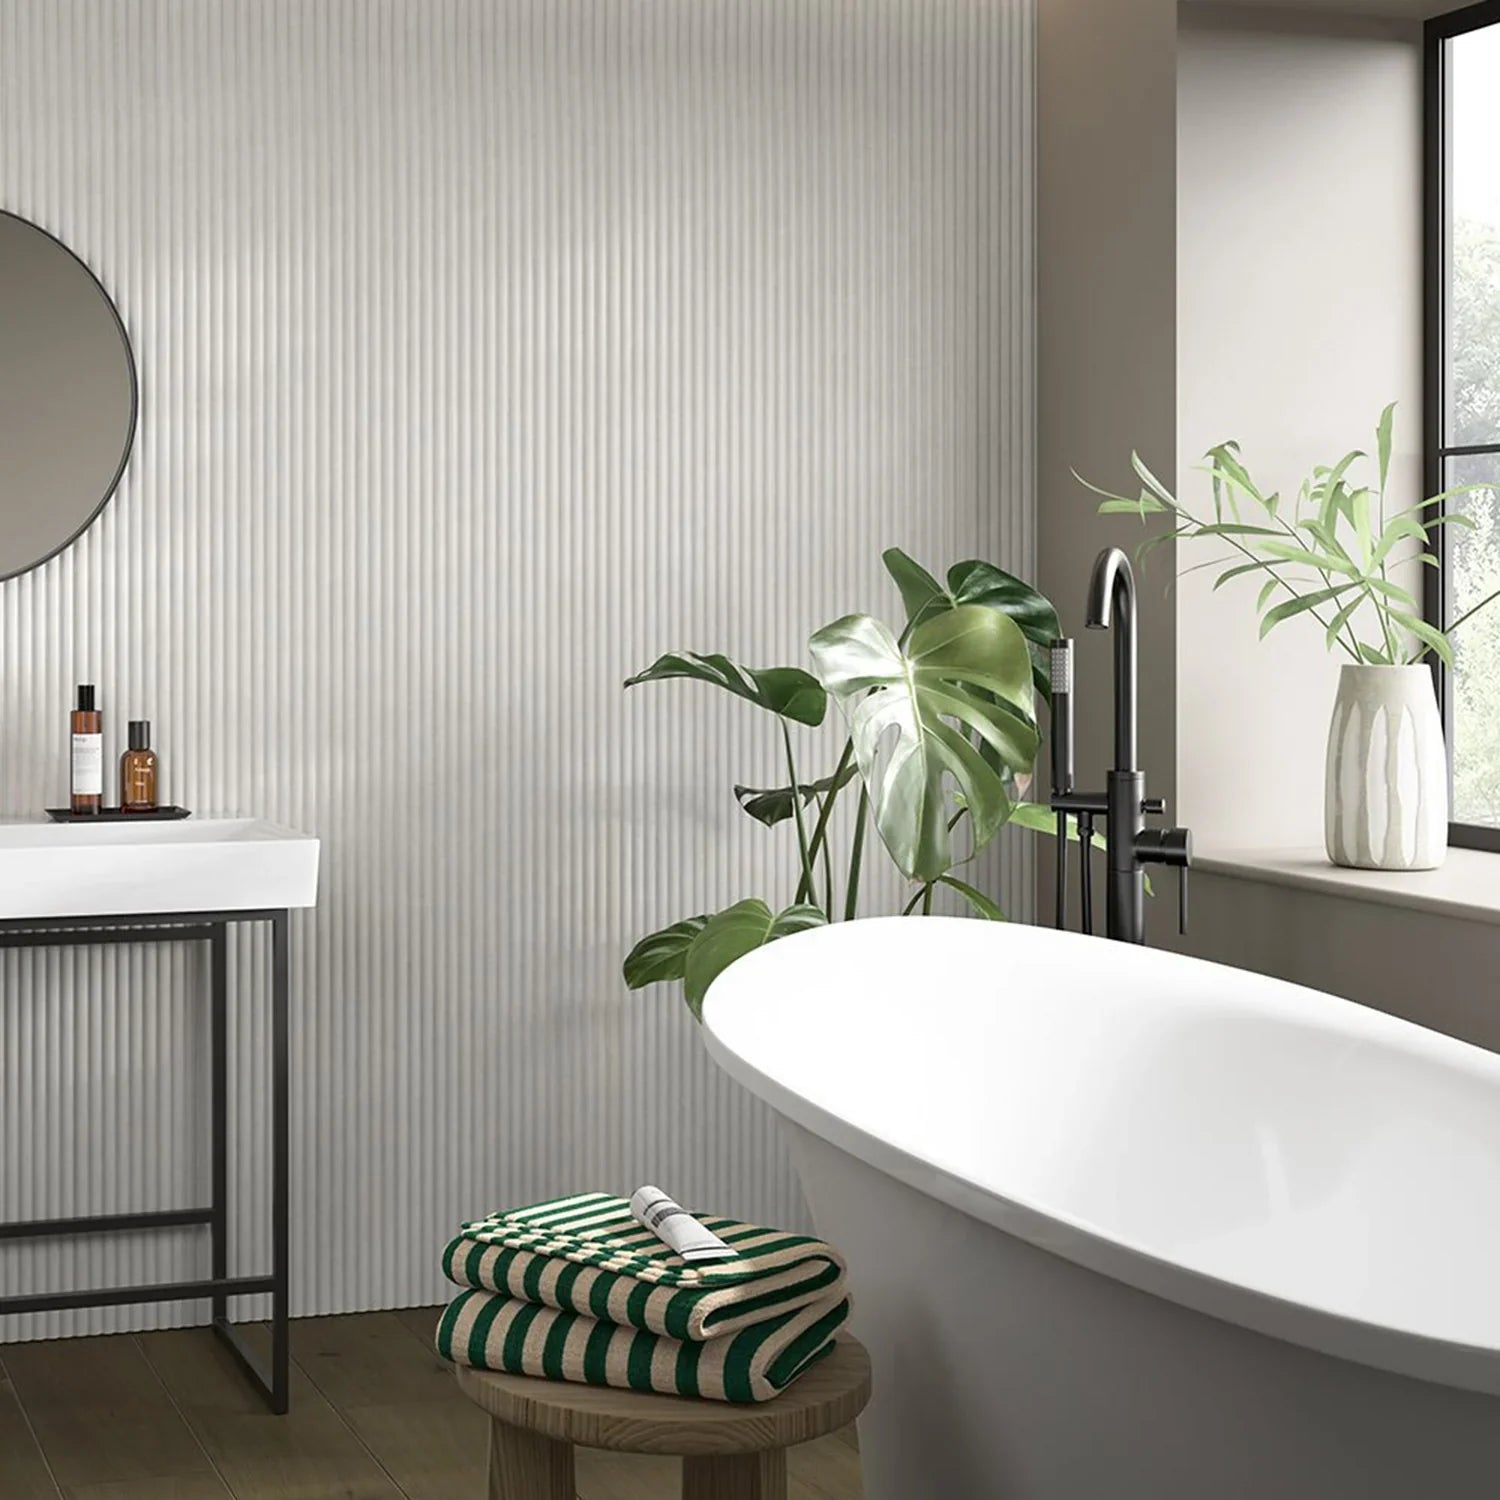
    Yes — but the choice of panel and installation method matters significantly more in a bathroom than anywhere else in the home. Bathrooms are the highest-humidity environment in a typical house. Steam from showers, condensation on cold surfaces, and splashing around sinks all create conditions that will destroy a standard MDF panel within months if it isn’t properly specified and sealed.

    Done correctly, bathroom wood panels look exceptional and last for years. Done incorrectly, they warp, swell, and delaminate. Here’s how to get it right.

    The Moisture Problem — and How to Solve It

    Standard MDF expands and loses structural integrity when it absorbs moisture. The edges are the most vulnerable point — moisture enters through cut edges and wicks into the core. For bathroom applications, you need panels built to resist this:

    • MR-MDF core (Moisture-Resistant MDF): The green-coloured MDF manufactured with moisture-resistant resin. Significantly better than standard MDF in humid environments — specified for wet area applications.
    • WPC panels (Wood Plastic Composite): A composite of wood fibre and plastic resin. Fully waterproof core, though typically with a less premium surface finish than real wood veneer.
    • PVC foam board: Fully waterproof, lightweight, and easy to install. Less authentic in appearance than wood but highly practical in shower enclosures and wet zones.
    • Sealed real wood veneer on MR-MDF: Premium option. Genuine wood veneer face with moisture-resistant core, all edges sealed with waterproof sealant or edge tape during installation.

    Zones: Where Wood Panels Work in Bathrooms

    Not all bathroom walls are equal in terms of moisture exposure. Think in zones:

    • Zone 0 (inside the shower/bath): The wettest zone — direct water contact. Only fully waterproof materials (WPC, PVC, tiles) are appropriate here. Real wood veneer panels are not suitable.
    • Zone 1 (within 600mm of shower/bath edge): High splash risk. MR-MDF with sealed veneer is the minimum spec. Many designers still prefer solid WPC or tile in this zone.
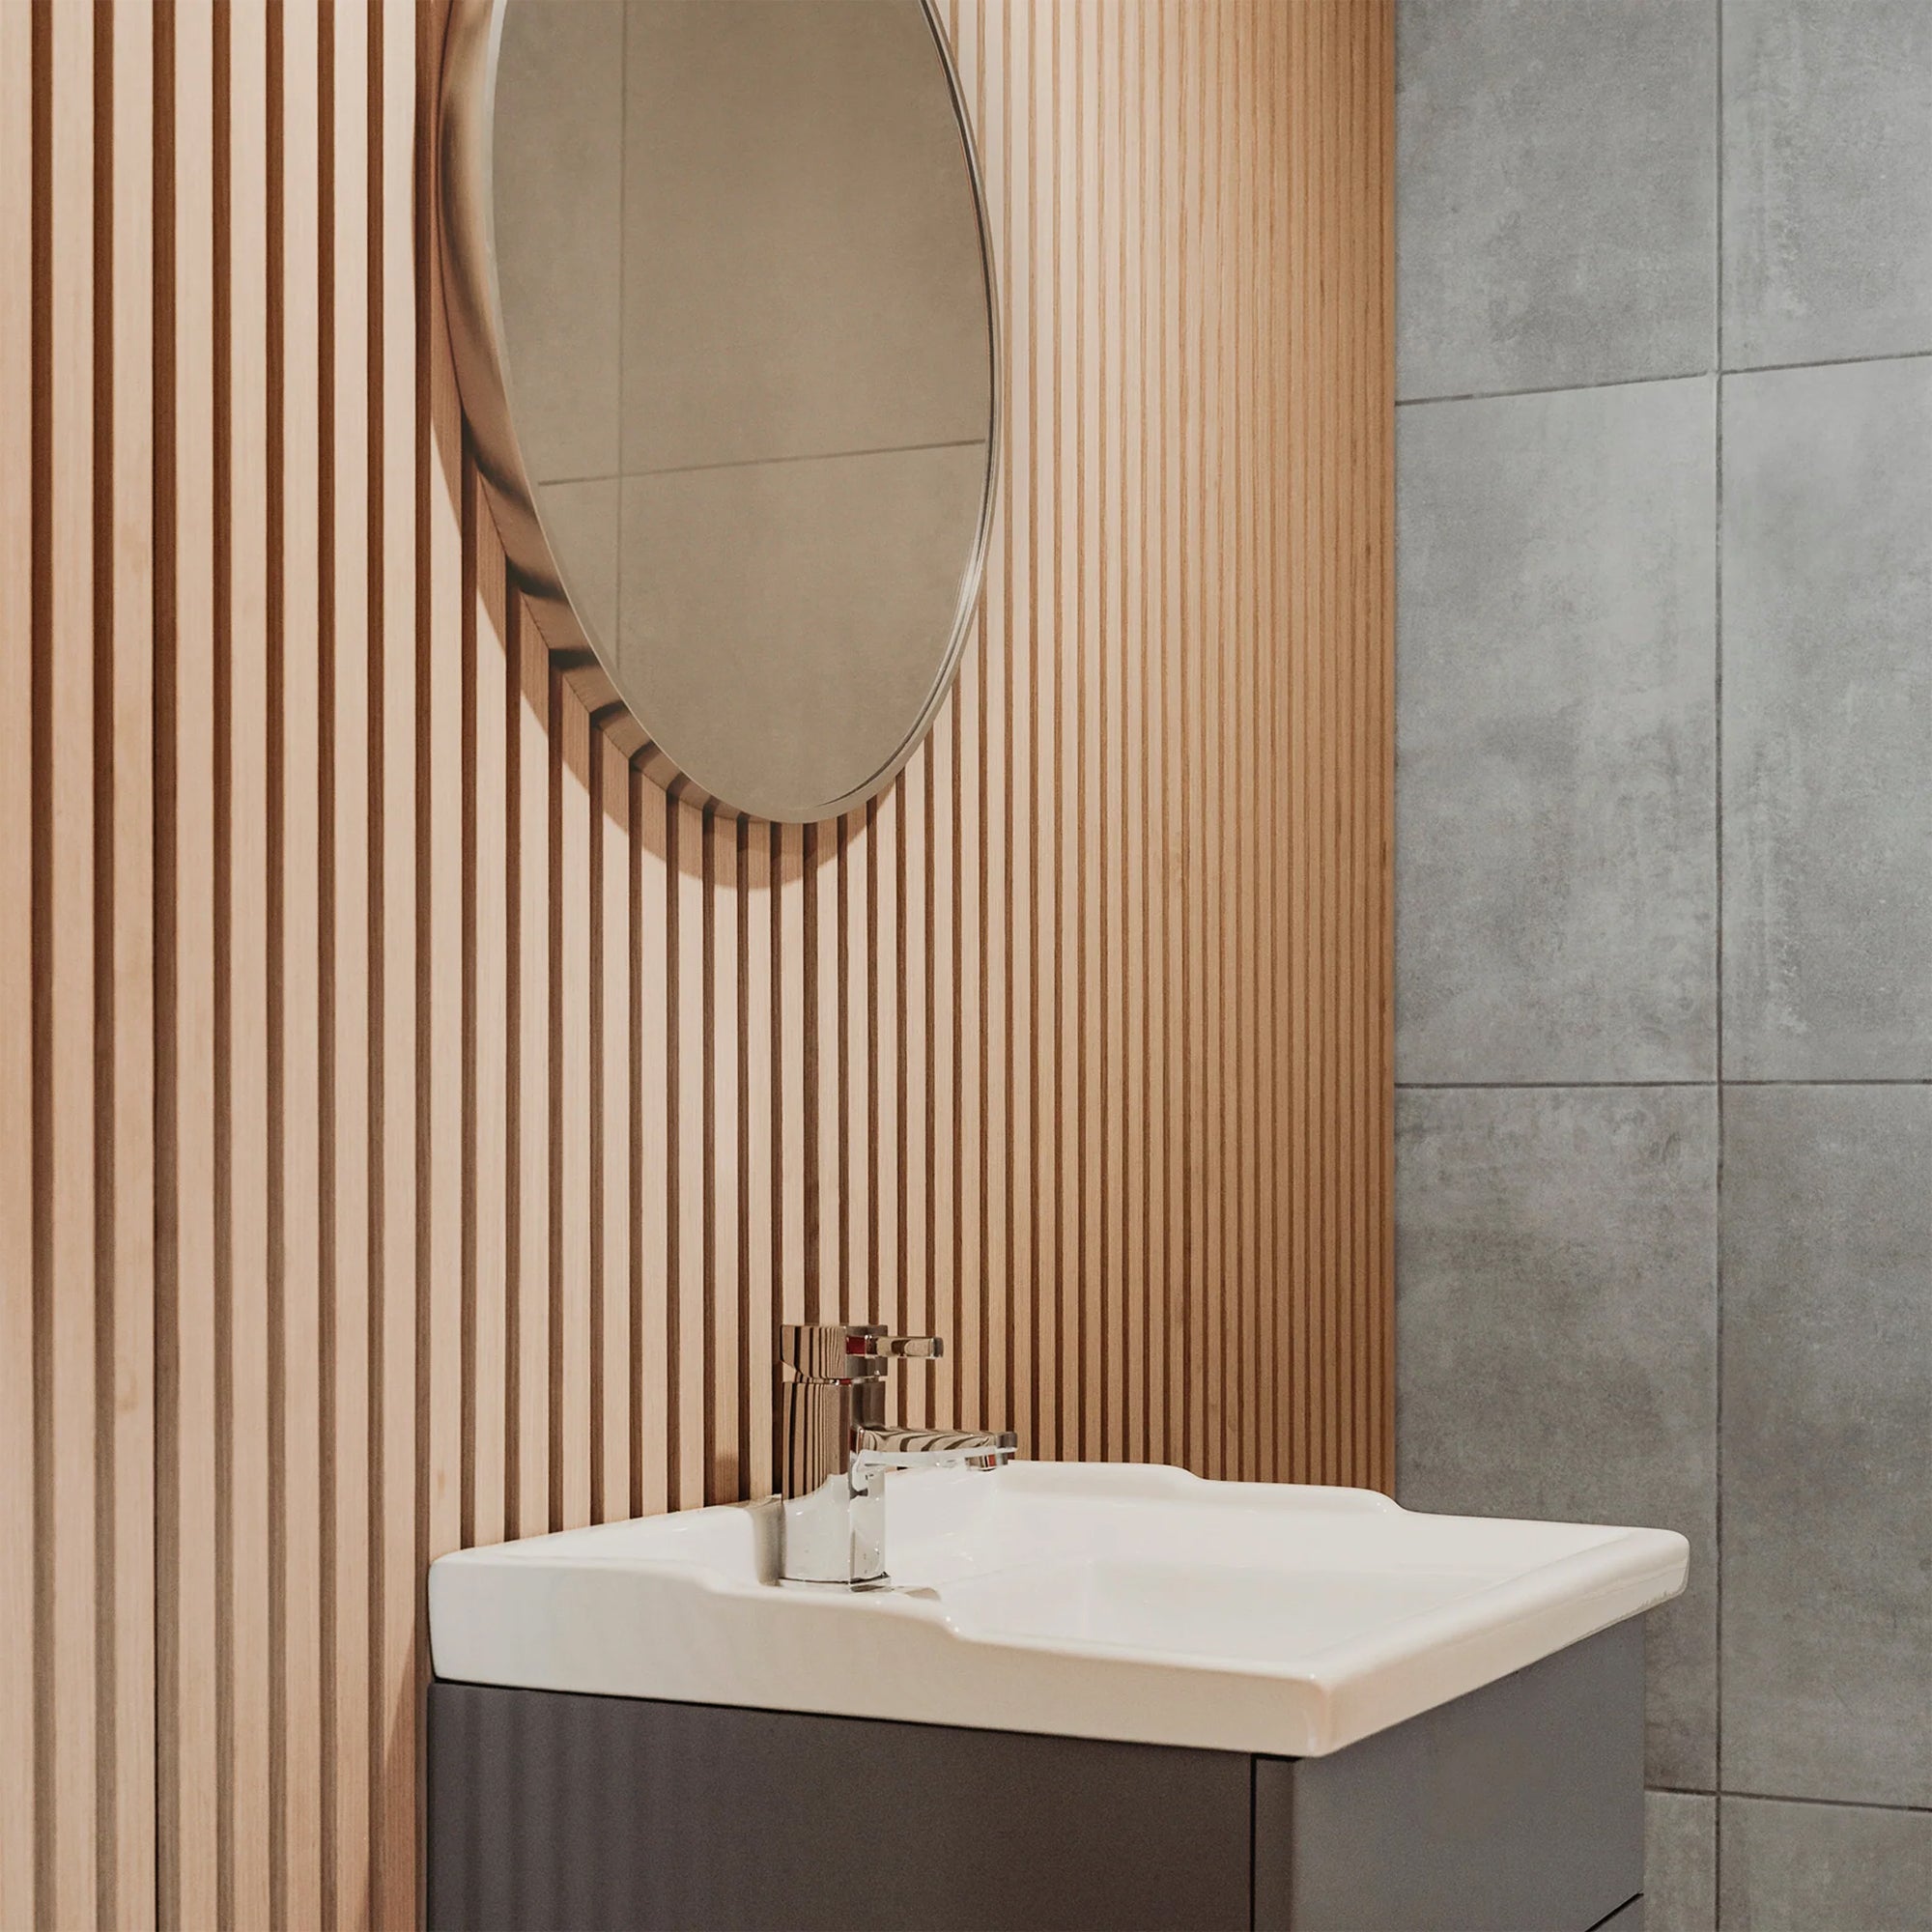
    • Zone 2 (remainder of bathroom): Ambient humidity but no direct water. MR-MDF with sealed wood veneer works well. This is where wood slat panels shine — on the wall opposite the shower, the wall behind the vanity, or as a feature wall visible from the bath.

    Design Ideas for Bathroom Wood Panels

    Slat Panel Feature Wall Behind the Freestanding Bath

    A wall of acoustic wood slat panels behind a freestanding bath creates a spa-quality backdrop. The vertical lines elongate the wall visually; the warm wood tones contrast beautifully with white or stone-coloured sanitaryware. Keep the panel wall in Zone 2 (away from direct water contact) and use a sealed veneer finish.

    Fluted Panel Vanity Wall

    Clad the wall behind the vanity and mirror in fluted panels — in a light oak or painted finish — to create an architecturally composed vanity unit backdrop. The solid face of fluted panels handles splashing from the sink better than open-gap slat panels in close proximity to water.

    Wainscoting with Panels

    Panel the lower half of the bathroom wall up to dado height — using WPC or sealed MR-MDF — with a contrasting tile or painted finish above. This is the most practical approach for bathrooms where moisture exposure on the lower wall is a real concern. Our wainscoting ideas guide covers the design principles behind this approach.

    Full-Wall Slat Panels in a Low-Humidity Bathroom

    In bathrooms with excellent ventilation (powerful extractor fan, operable window) and where the shower is fully enclosed with a glass screen, Zone 2 effectively extends to most of the room. In this configuration, full-wall wood slat panels in sealed MR-MDF are genuinely achievable and look outstanding.

    Installation Tips Specific to Bathrooms

    • Seal all cut edges immediately after cutting with a waterproof edge sealant or matching silicone. This is the most critical step in bathroom panel installation — unsealed edges are where moisture enters.
    • Use waterproof adhesive — standard construction adhesive works, but ensure it’s rated for humid environments. Some adhesives lose bond strength when repeatedly wetted.
    • Ventilate the room during curing — adhesive and sealant off-gas during curing. Keep the extractor running for 24 hours post-installation.
    • Apply a top coat — an additional coat of water-resistant oil or lacquer on the veneer face provides extra protection against steam and condensation.

    For a general panel installation walkthrough, our guide to installing wall panels covers the core steps that apply in any room. For comparing panel finishes and materials in detail, see our real wood veneer vs laminate panel comparison.

    Design Ideas: How Bathroom Wood Panels Look in Practice

    Knowing a product is technically suitable is different from knowing how to make it look intentional. These four approaches deliver consistently strong results with wood panels in bathrooms.

    Vertical slat panels behind a freestanding bath: A wall of vertical slat panels behind a freestanding bath creates an immediately recognisable luxury bathroom moment. The slats’ linear vertical rhythm suits the taller proportion of a bathroom wall, and the natural timber contrast against white sanitaryware is a classic material pairing. Acoustic slat panels are unnecessary here (acoustics aren’t a priority in a bathroom), but the visual effect is identical.

    Half-height panel behind a basin and mirror: A full-wall panel treatment in a small bathroom can feel heavy. A half-height treatment — panels from floor to approximately 1,100mm — below a painted upper wall and mirror is a proportionate choice that adds warmth without reducing the sense of space. Works particularly well in en-suite bathrooms where the vanity wall is the primary design focus.

    Single panel strip as a feature border: For bathrooms that already have tiling on the primary wet surfaces, a vertical strip of timber panels on a dry wall — behind a towel rail, beside a window, or framing a doorway — introduces a warm material contrast without requiring full-wall coverage. This treatment bridges the gap between a tiled bathroom and a panel bathroom without committing to a full installation.

    Ceiling panel treatment: Timber panels on a bathroom ceiling — particularly slat panels installed perpendicular to the longest room dimension — add unexpected warmth overhead. The ceiling is outside all wet zones in most bathrooms, so standard timber panels are appropriate. Ensure adequate ventilation is in place to prevent condensation accumulation above the panels.

    FAQs: Bathroom Wood Wall Panels

    Which wood species is best for a bathroom?
    Oak with a sealed oil finish or lacquered MR-MDF core panels are the most practical bathroom choices. Teak is naturally moisture-resistant but expensive. Engineered panels with a moisture-resistant core (MR-MDF or HDF) and a sealed veneer face are the most predictable performers in bathroom humidity conditions. Avoid untreated softwood species — pine and spruce absorb moisture readily and are unsuitable for bathroom applications without thorough sealing.

    Can bathroom wood panels be used near a steam shower?
    Adjacent to a steam shower enclosure (zone 1, within the enclosure), only products specifically rated for steam environments should be used — most timber panels are not. On the exterior wall of a steam shower (zone 2, within 600mm), sealed engineered panels can work if the room has adequate ventilation. For the shower interior itself, non-porous panels (acrylic, composite, stone effect) are more appropriate than timber.

    How do I prevent mould behind bathroom wood panels?
    The key is edge sealing — every cut edge, every joint between panels, and every junction with floor, ceiling, and adjacent surfaces must be sealed with waterproof silicone. Unsealed edges allow moisture to migrate behind the panel where it can’t dry out, creating conditions for mould. Adequate bathroom ventilation (extractor fan running during and after showering) reduces the overall moisture load in the room.

    Can existing bathroom tiles be panelled over?
    Yes, in most cases. Check that the existing tiles are firmly bonded — tap the surface to check for hollow spots. Adhesive panels over hollow tiles will eventually fail at the tile, not the panel. On solid, well-bonded tiles, construction adhesive can bond directly to the glazed tile surface. Mechanical fixings (screws into the substrate) may be required for heavier panel products over tiles.

    Find the Right Panels for Your Bathroom

    Browse the complete wood wall panel collection at The Panel Hub to find panels appropriate for your specific bathroom zone — from sealed veneer panels for ambient humidity areas to fully waterproof options. The SoundPanel™ acoustic slat range in sealed MR-MDF is suitable for Zone 2 bathroom applications with proper installation. For design inspiration showing how wood panels look in bathroom and adjacent spaces, our interior slat wall ideas guide covers relevant applications. The acoustic panel buyer’s guide covers material construction and specifications across the full panel range.

  • Bedroom Accent Wall Ideas: 10 Designs for Every Style

    Bedroom Accent Wall Ideas: 10 Designs for Every Style

    Why a Bedroom Accent Wall Changes Everything

    The bedroom is the most personal room in the home — and yet it’s often the most neglected when it comes to design. A bedroom accent wall behind the bed is one of the most high-impact, relatively low-cost upgrades you can make. It frames the bed, creates a sense of enclosure, and signals intentional design rather than unfinished walls.

    Here are 10 bedroom accent wall ideas ranging from weekend DIY projects to statement investments.

    10 Bedroom Accent Wall Ideas

    1. Wood Slat Panels Behind the Bed

    The headboard wall with acoustic wood slat panels is one of the most Instagrammed bedroom looks of the decade — and for good reason. The vertical lines draw the eye upward, the warm wood tones create a calm and restful atmosphere, and the felt backing quietly absorbs sound so the room feels genuinely quieter. Install floor-to-ceiling for maximum impact, or from headboard height to ceiling for a more graphic approach.

    2. Velvet or Fabric Wall Panels

    Upholstered fabric panels bring softness, tactility, and luxury to a bedroom wall. Ideal for maximalist and glamour-inspired interiors, they also absorb sound like acoustic wood panels.

    3. Dark Paint with Picture Rail Moulding

    Paint the headboard wall in a deep, moody colour — charcoal, midnight blue, forest green, or deep plum — and add a simple picture rail or panel moulding frame for architectural detail. The contrast between dark wall and light bedding creates a deeply restful space.

    4. Limewash Texture

    Limewash on the headboard wall creates a soft, organic texture that suits earthy, Japandi, and Mediterranean bedroom styles. It photographs beautifully in natural light and ages gracefully.

    5. Fluted Wood Panels

    Fluted panels — with their repeated vertical grooves — create a sculptural, light-responsive texture that elevates a bedroom without overwhelming it. In a light oak finish, they suit almost any bedroom colour palette.

    6. Herringbone Wood Tiles

    Small solid wood tiles arranged in a herringbone or chevron pattern behind the bed create a statement that feels crafted and intentional. Best in mid-toned woods that don’t compete with bedding colours.

    7. Wainscoting with Wallpaper Above

    Use wainscoting to panel the lower half of the headboard wall, then add a botanical or geometric wallpaper above. The combination creates a layered, sophisticated look that suits traditional and eclectic bedrooms.

    8. Arched Plaster or Paint Effect

    Paint a large Moroccan or organic arch shape behind the bed in a contrasting tone. It’s budget-friendly, architectural in feel, and highly adaptable to different bedroom styles.

    9. Brick-Effect Panels

    For industrial, loft, or urban bedroom aesthetics, a brick-effect panel wall adds texture and character without the weight or cost of real brick. Pair with raw wood furniture and pendant lighting.

    10. Mirror Panels

    Large-format or frameless mirror panels behind the bed expand the room visually and amplify natural light. Best in smaller bedrooms or spaces with limited windows.

    Tips for Getting It Right

    • Always use the headboard wall — this is the natural focal point of any bedroom.
    • Match the scale of the treatment to room size — large rooms suit floor-to-ceiling panels; smaller rooms may benefit from a more restrained approach.
    • Consider sound first — bedrooms benefit enormously from acoustic treatment. Wood slat panels with felt backing are the most practical dual-purpose solution.
    • Lighting matters — warm wall sconces or uplighting against a wood panel wall turns the atmosphere from functional to luxurious.

    The Best Overall Bedroom Accent Wall Option

    If you want impact, practicality, and acoustic improvement in one product, acoustic wood slat panels remain the strongest choice. They install in under two hours, work in any bedroom style from Japandi to contemporary, and create a room that not only looks better but feels quieter and more restful — which is exactly what a bedroom should do.

    Choosing the Right Panel Type for Your Bedroom Accent Wall

    The ten ideas above span a range of styles, but the underlying panel choice — profile, material, finish — determines whether the finished wall looks considered or generic. Here’s how to narrow down the selection for a bedroom specifically.

    Acoustic slat panels for bedrooms: The most popular bedroom panel choice in 2026. The vertical or horizontal rhythm of the slats creates a calm, linear backdrop that suits the function of a bedroom — rest and quiet. Acoustic slat panels with felt backing also improve the room’s acoustic character, reducing the hard reflections that make a room feel cold. Relevant in rooms with hard floors, high ceilings, or minimal soft furnishings.

    Fluted and reeded panels for headboard walls: Fluted and reeded profiles create strong architectural shadow lines that suit portrait-orientation walls behind a bed. The profile depth — typically 15–25mm — gives the wall three-dimensional presence without the mass of a built-in headboard. Works best in rooms with directional lighting that rakes across the panel surface.

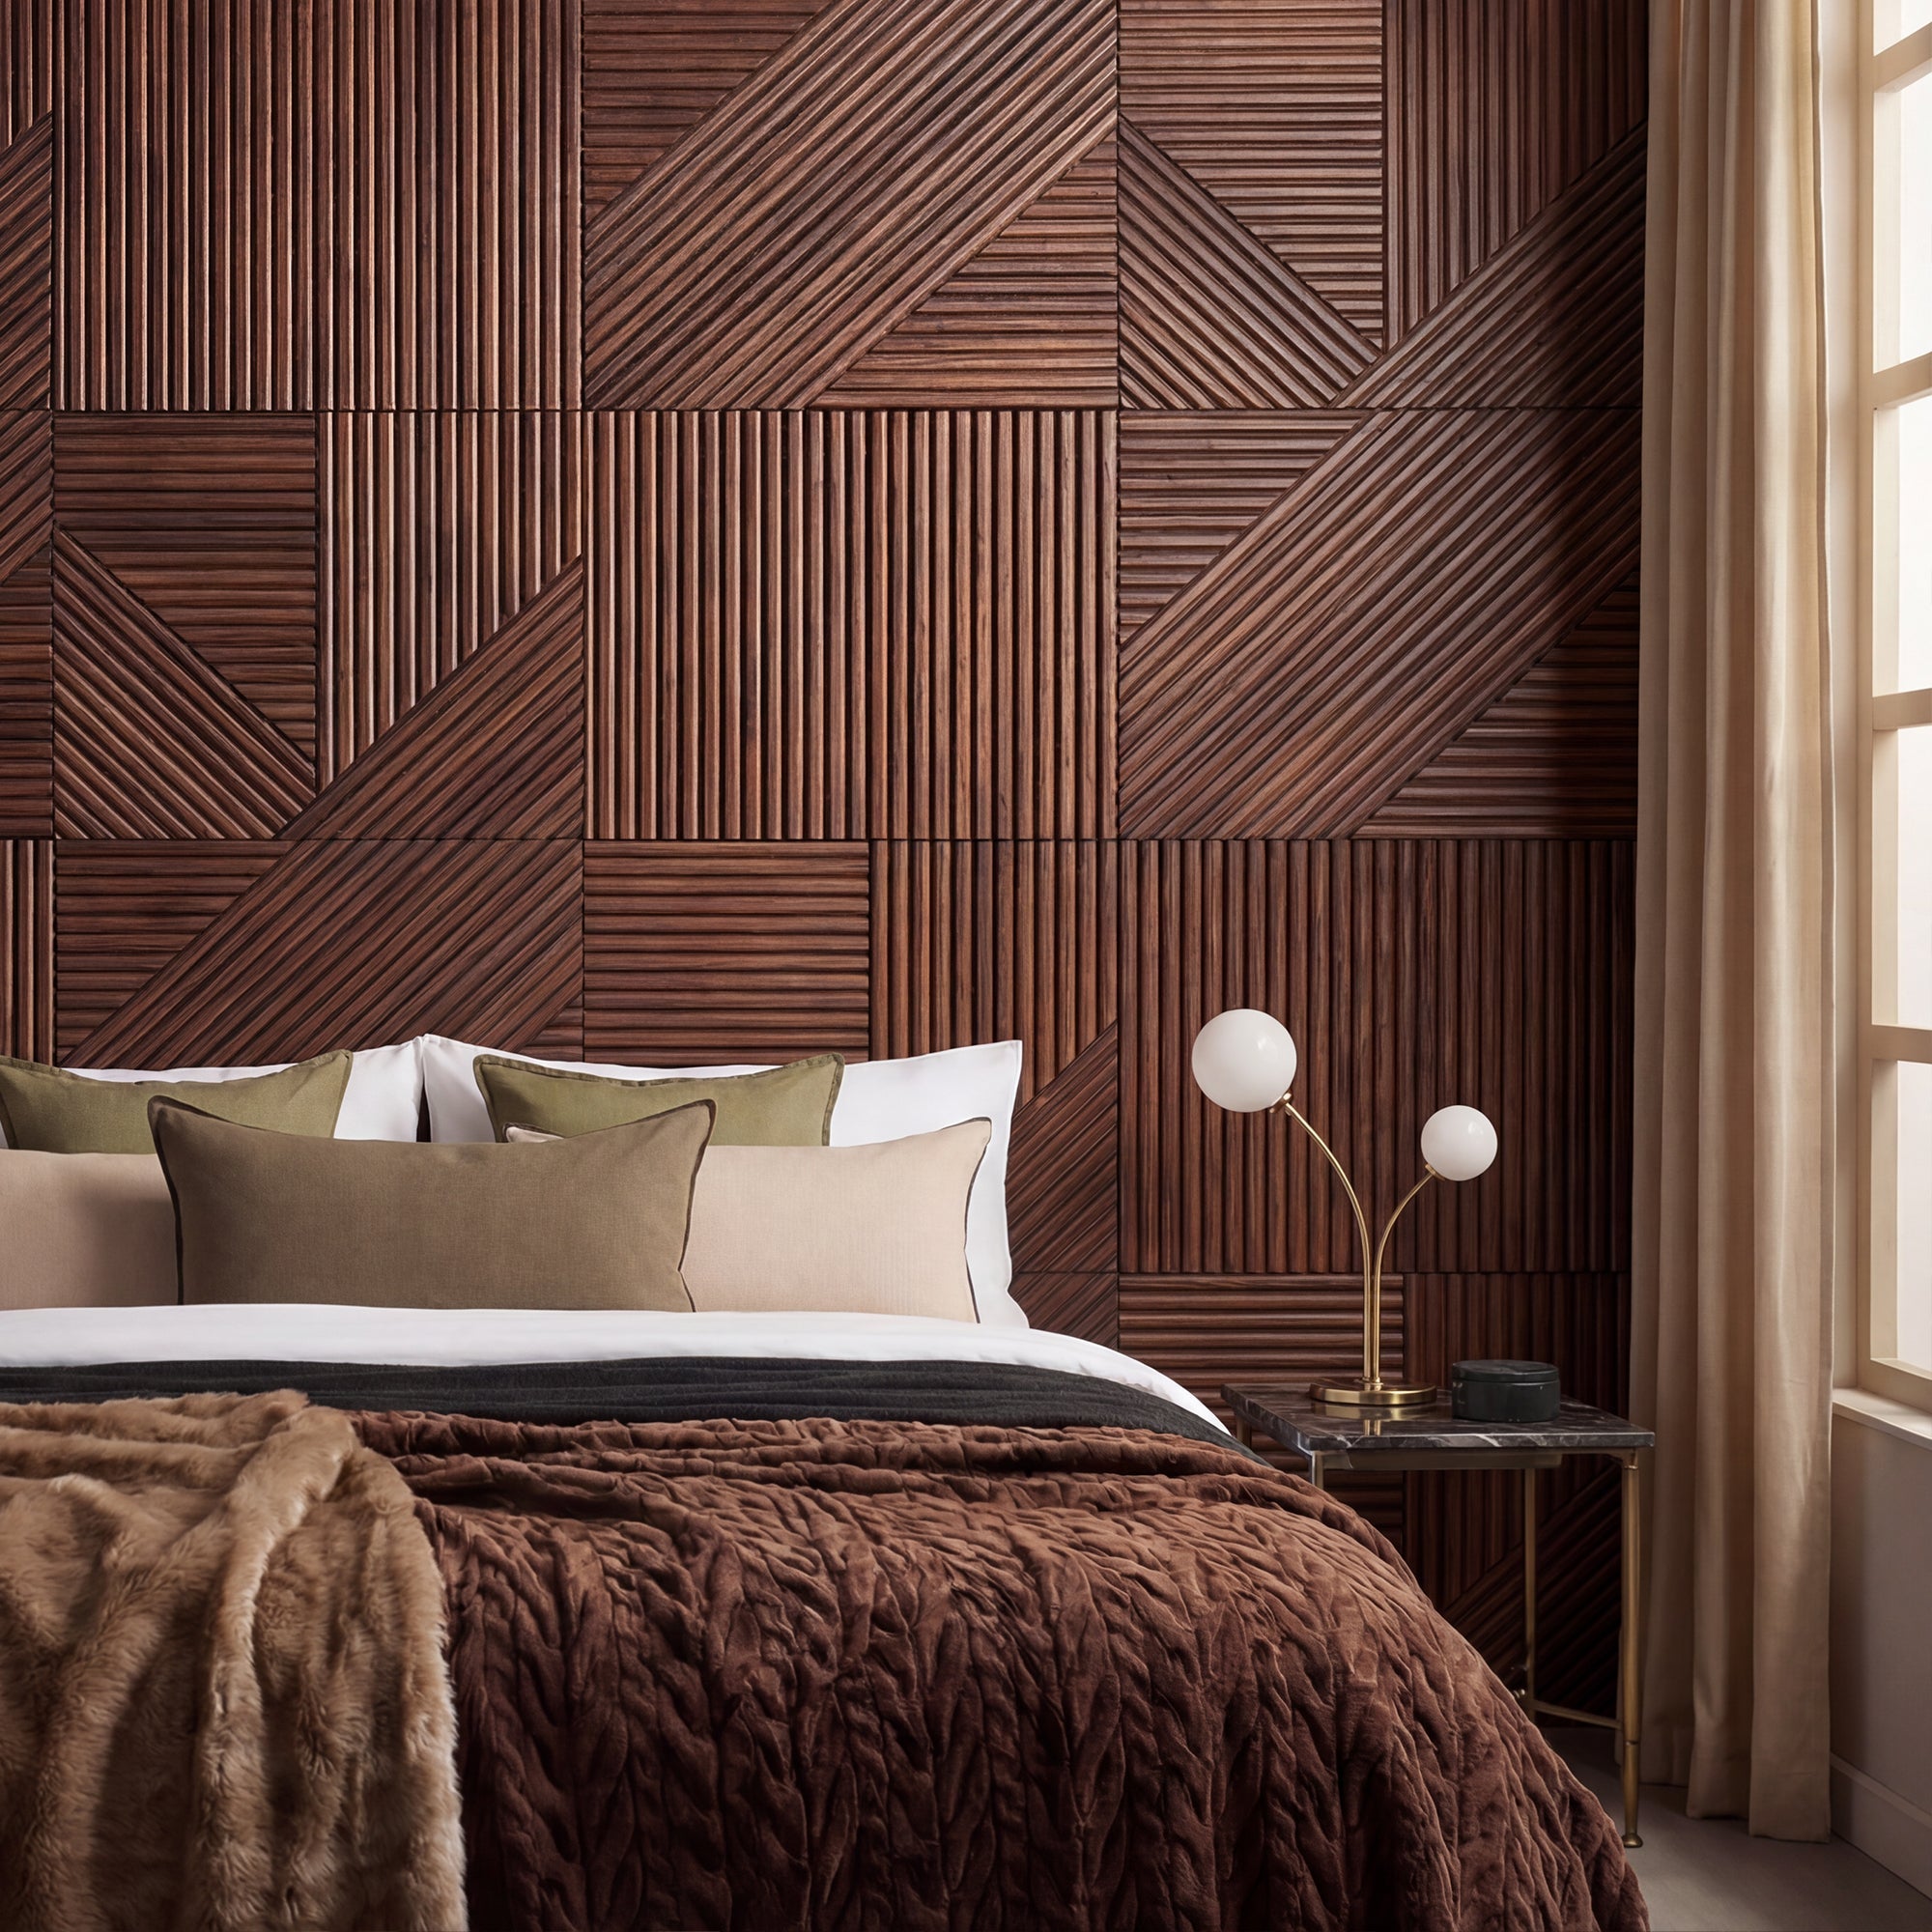
    Geometric and mosaic panels for statement walls: GroovePanel® mosaic patterns — concentric square, crossing lines, triangular arrangements — suit bedrooms where the wall is a genuine design statement rather than a quiet backdrop. Better suited to larger bedrooms where the wall isn’t competing with furniture for visual attention. In smaller rooms, a geometric panel can overwhelm — slat panels give the textural interest without the visual weight.

    Panel colour and bedroom lighting: Bedroom lighting is typically warmer and lower-intensity than living room lighting. Dark-toned panels (charcoal, deep walnut, forest green finishes) work well under warm LED lighting — they create depth rather than appearing flat. Lighter tones (natural oak, ash) maximise the sense of space in smaller bedrooms and suit north-facing rooms where natural light is limited.

    FAQs: Bedroom Accent Wall Ideas

    What is the best bedroom accent wall idea?
    The most consistently successful bedroom accent wall treatment is a full-height slat panel behind the bed — floor to ceiling, bed-width to full-wall width. It functions as a built-in headboard detail, creates strong visual depth, and works in almost any bedroom size. Acoustic versions add measurable sound improvement in a space where quiet matters.

    Should a bedroom accent wall be lighter or darker than the other walls?
    Either works, but the most resolved results tend to use contrast deliberately. A dark timber panel against light painted walls creates maximum visual presence for the panel wall. A mid-tone panel against slightly lighter walls creates a subtler layered effect. Matching the accent wall exactly to the other walls loses the point of an accent wall entirely.

    How much does a bedroom accent wall panel installation cost?
    For a typical double bedroom feature wall (approximately 8–12m²), materials typically cost £400–£1,000 depending on panel quality. DIY installation eliminates labour costs; professional installation adds £300–£500 typically. The total project cost including accessories and wall preparation usually lands at £700–£1,500 for a quality result.

    Do bedroom panel walls need special ventilation?
    No. Bedrooms have normal ambient humidity levels that don’t affect timber wall panels. Standard timber panels installed with construction adhesive on plasterboard don’t require ventilation gaps. The only exception is if panels are installed in a bedroom en-suite — wet zone specification applies to any surface within 600mm of a shower or bath.

    Shop Bedroom Wall Panels

    Explore the bedroom wall panel collection at The Panel Hub, or browse the full wood wall panel range for every option. For more bedroom panel ideas, our interior slat wall ideas guide covers headboard walls, full-room treatments, and design pairings across styles. The acoustic benefit of slat panels in a bedroom — reduced echo, softer room sound — is also worth understanding before you buy: the acoustic panel buyer’s guide covers it clearly.

  • Best Acoustic Wall Panels for Home 2026: What to Buy and Why

    Best Acoustic Wall Panels for Home 2026: What to Buy and Why

    What Makes an Acoustic Wall Panel “The Best”?

    The best acoustic wall panel for your home depends on three variables: acoustic performance (NRC rating), visual quality (material and finish), and practical fit (size, installation method, budget). A panel that’s excellent for a podcast studio may be wrong for a living room. This guide focuses on home applications — living rooms, bedrooms, home offices, and media rooms.

    The Key Specifications to Look For

    NRC Rating: 0.65 Minimum, 0.80+ Ideal

    For residential applications, look for panels with a published NRC rating of at least 0.65. Below this threshold, the acoustic benefit is negligible in normal room sizes. Panels rated 0.75–0.85 deliver noticeably quieter, more comfortable rooms with standard coverage. Our guide to NRC ratings explains what these numbers mean in practice.

    Real Acoustic Felt Backing, Not Paper

    The felt backing is what absorbs sound — not the wood slats. Confirm the product uses engineered acoustic felt (like AcuFelt™) rather than a thin paper backing that’s marketed as “acoustic” but provides negligible performance. See our AcuFelt backing guide for what to look for in the spec sheet.

    Real Wood Veneer, Not Laminate

    For living rooms and visible spaces, real wood veneer over MDF is the benchmark. Laminate prints look convincing in product photography and poor in person. For home installations where the panel is seen and touched, veneer quality matters. Our veneer vs laminate comparison has the full breakdown.

    Best Panel Types by Room in 2026

    Living Room: Acoustic Slat Panels

    For living rooms, acoustic wood slat panels in walnut or oak remain the definitive choice in 2026. The combination of real wood warmth, strong vertical line aesthetic, and NRC 0.75+ performance makes them the highest-impact single upgrade available. The SoundPanel™ acoustic slat range hits all three criteria — real veneer, published NRC rating, AcuFelt™ backing.

    Bedroom: Acoustic Slat or Reeded Panels

    Bedrooms benefit from acoustic panels that create a restful rather than graphic effect. Slat panels in lighter species (oak, ash) suit most bedroom aesthetics. Reeded panels with their softer profile are an excellent alternative for organic modern or Japandi bedrooms where sharp lines feel out of place.

    Home Office: Maximum NRC Coverage

    Home offices prioritise NRC performance over aesthetics (though the two don’t need to conflict). Cover the primary wall — behind the desk — with the highest-NRC panel you can budget for. The SoundPanel® American Acoustic Slat panel at NRC 0.85 is the best-performing aesthetic option for office applications.

    Home Theatre: High-NRC Multi-Wall

    For home theatres, prioritise coverage over unit NRC. Multiple walls at 40–50% coverage with NRC 0.75 panels outperforms one wall at 100% coverage with NRC 0.85 panels. Combine slat panels on side walls with perforated panels on the front wall for varied absorption characteristics. The Rectangle panel is worth considering for front-wall coverage in home theatres — its solid face gives a cleaner visual plane than the slat profile from close viewing positions.

    What to Avoid in 2026

    • Panels marketed as “acoustic” without a published NRC rating
    • Very cheap slat panels with paper backing — they’re decorative, not acoustic
    • Foam panels in living spaces — they degrade in 5–7 years and look unprofessional from day one
    • PVC “wood-look” slat panels — the texture and appearance don’t hold up close-range in domestic spaces

    How to Calculate Coverage for Your Room

    Getting the coverage calculation right is the practical step most buyers skip — and it’s the reason installations sometimes underdeliver. The rule of thumb for domestic acoustic treatment is 25–40% of total wall area, but that’s a starting point, not a formula. Here’s how to think about it more precisely.

    Start with a hard surface audit. Count the wall surfaces that are bare — painted drywall, plaster, brick. Each of these reflects sound. Rooms with predominantly hard surfaces (open-plan spaces with polished concrete floors, rooms with large windows, minimal soft furnishings) need coverage toward the upper end of the range. Rooms with carpet, curtains, and upholstered furniture are already absorbing some sound — aim for the lower end.

    Identify the primary reflection points. Stand at your most-used position in the room. The walls directly opposite and to the sides of you are the primary reflection surfaces. Treating these delivers more improvement per panel than covering a back wall you’re rarely facing.

    Use the TPH Box Calculator. Rather than estimating, the coverage calculator on The Panel Hub takes your room dimensions and returns a panel count based on room volume and target NRC performance. This is more accurate than any rule-of-thumb calculation because it accounts for room geometry, not just wall area.

    Budget for a sample first. Before ordering full coverage, order a sample tile. Assess the actual colour, grain direction, and texture in your room’s lighting conditions. Acoustic panels read differently under warm incandescent light versus cool daylight — a walnut that looks rich online may look orange in a room with south-facing windows. The sample step takes one extra week but saves costly returns.

    The most common mistake is over-ordering the first time to “make sure” and then being left with excess panels. The second most common mistake is under-ordering and having to wait for stock replenishment mid-project. The calculator eliminates both problems.

    Frequently Asked Questions

    What are the best acoustic wall panels for a home office in 2026?
    Wood slat acoustic panels with AcuFelt backing rated NRC 0.80 or higher are the best choice for home offices in 2026. They improve call quality, create a professional on-camera backdrop, and are available in neutral finishes (charcoal, dark oak, American walnut) that suit any existing decor.
    Are acoustic wall panels worth the investment?
    For rooms with noticeable echo or reverberation — home offices, living rooms with hard floors, home theatres — yes. The improvement is objectively measurable (RT60 reduction) and immediately perceptible on calls, during music playback, and in general conversation.
    What’s the difference between decorative and acoustic wall panels?
    Decorative panels are designed to look good. Acoustic panels are designed to absorb sound, verified by a certified NRC test. The two are not mutually exclusive — quality acoustic slat panels do both — but “acoustic” in a product name without a published NRC rating is a marketing term, not a specification.
    How long does a panel installation take?
    A single feature wall (typically 12–16 sqm) takes 3–6 hours for a competent DIY installer. The main time investment is surface preparation and layout planning. The panel fixing itself is faster than most people expect.
    Do acoustic panels require professional installation?
    No. TPH SoundPanel is designed for DIY installation with adhesive or mechanical fixing. Full installation guides and video tutorials are available, and most customers complete the installation without any trade involvement.

    Browse the full wood wall panel collection at The Panel Hub — every acoustic panel in the range comes with published NRC ratings and real wood veneer specification. Factory-direct pricing means premium panels at up to 75% below retail.

  • Best Adhesive for Wood Wall Panels: A Practical Comparison

    Best Adhesive for Wood Wall Panels: A Practical Comparison

    Why Adhesive Choice Matters More Than Most People Think

    The adhesive is the only thing holding your wall panels up. Choose incorrectly and panels slip during installation, fail to bond properly, or damage the wall surface or panel veneer when you eventually need to remove or adjust them. Choose correctly and the installation is clean, permanent, and trouble-free.

    There are five main adhesive types used for wood wall panel installation. Here’s a clear comparison of each.

    Hybrid polymer adhesives — sold under names like Stixall, CT1, Fix All, and others — are the current gold standard for wood wall panel installation. They combine the strength of polyurethane with the flexibility of silicone, resulting in a bond that is:

    • Extremely strong (tensile strength typically 2–5 N/mm²)
    • Flexible — accommodates minor wood movement without cracking
    • Solvent-free — safe for use with MDF, veneer, and acoustic felt backing
    • Paintable when cured
    • Resistant to water and temperature variation

    Best for: All wood slat panel types, acoustic panels, engineered wood panels on drywall or plaster. The safest all-round choice for any residential panel installation.

    Application: Zigzag bead across panel back; press and hold 60 seconds; full cure 24 hours.

    2. Polyurethane (PU) Adhesive

    Polyurethane adhesives (Gorilla Glue and equivalents) are extremely strong and expand slightly as they cure, filling minor surface irregularities. They bond well to wood, MDF, and most substrates.

    Cautions:

    • Expansion during cure can cause panels to bow away from the wall if insufficient pressure is applied during curing
    • Foams aggressively if too much is applied — use sparingly
    • Very difficult to remove from surfaces once cured

    Best for: Situations where gap-filling is needed; solid timber panels to masonry substrate.

    3. Grab Adhesive (Panel Adhesive)

    Solvent-based grab adhesives (No More Nails, Liquid Nails, and similar) are widely available and affordable. They provide fast initial grab and strong final bond.

    Critical warning: Many solvent-based panel adhesives damage or dissolve MDF cores, veneer adhesive layers, and acoustic felt backing. Always check the product label for MDF and veneer compatibility before use. If in doubt, use a hybrid polymer adhesive instead.

    Best for: Solid timber planks and boards where solvent compatibility isn’t a concern. Avoid on veneer-faced engineered panels unless explicitly confirmed compatible.

    4. Contact Adhesive

    Contact adhesive is applied to both surfaces, allowed to partially dry, then the surfaces are pressed together — bonding instantly on contact. Used professionally for laminate and veneer work.

    Limitations for wall panel installation: The instant-bond characteristic means panel positioning must be perfect first time — there is no adjustment window once the surfaces touch. Not recommended for DIY installation of large panels.

    Silicone is flexible and moisture-resistant, but its tensile strength is lower than purpose-made panel adhesives. It also remains flexible when cured rather than forming a rigid bond — panels can creep over time under their own weight.

    Best use: Edge sealing and gap filling after installation; not as the primary adhesive for panel fixing.

    Application Best Practices

    • Clean both surfaces: Dust, grease, or old paint significantly reduces bond strength. Wipe the wall with a damp cloth and allow to dry before applying adhesive.
    • Don’t apply to the edges: Leave 2–3cm clear at all panel edges to avoid squeeze-out. Adhesive pressed out at the slat gaps is very difficult to clean.
    • Apply enough: Insufficient adhesive is a common failure mode. Use a continuous zigzag bead, not spots — spots create pressure points that can cause panels to bow.
    • Hold during initial cure: Most adhesives need 30–90 seconds of firm contact pressure. Use painters’ tape to hold panels in position while adhesive develops initial grab.

    For the full installation sequence that adhesive fits into, see our complete wall panel installation guide. For specific installation challenges like working without nails on rental properties, our wall panels for renters guide covers damage-free adhesive options in detail.

    Application Technique: Getting the Most from Your Adhesive

    Choosing the right adhesive is only half the equation — how you apply it determines the actual bond quality. The most common mistake is applying too little adhesive and then pressing the panel flat without allowing the adhesive to build any tack.

    For most construction adhesives and hybrid polymers, the correct application is a serpentine bead (S-shape) across the back of the panel, starting 10 cm from each edge and running through the centre. Press the panel firmly into position, then pull it away from the wall for 5–10 minutes to allow the solvent or water to flash off. This step — called “open time” — is what builds the adhesive’s tack before the final bond. Re-pressing the panel after open time produces a much stronger initial grip than pressing immediately.

    For panels on drywall, avoid applying adhesive right to the edges of the panel. Leave 5 cm clear at the top and bottom edges to prevent squeeze-out that can stain the wall surface around the panel joints. The adhesive bead should also be kept 3–4 cm back from any panel grooves or slats where squeeze-out would be visible between the slats.

    Temperature affects working time significantly. Below 10°C, most adhesives slow down considerably — both initial tack and final cure. In cold conditions, warm the adhesive to room temperature before use and ensure the wall surface is not cold to the touch. Applying adhesive to a cold wall surface delays tack and can result in panels slipping before they hold.

    Wall Panel Adhesive FAQs

    How long does panel adhesive take to cure fully?
    Initial grab typically occurs within 30–60 minutes for most construction adhesives. Full cure — the point at which the bond reaches its maximum strength — takes 24–48 hours for most solvent-based adhesives and up to 72 hours for water-based formulations in cooler conditions. Panels should not be subjected to impact, weight, or moisture during the curing period.

    Can I use no-nails adhesive for wall panels?
    Yes — “no-nails” type adhesives (like Evo-Stik No More Nails or similar) work well for lighter panel systems such as thin slat panels and MDF panels under 6 mm thick. For heavier or thicker panels, use a purpose-made construction adhesive with a higher grab strength. Always check the manufacturer’s weight recommendation for the adhesive against your panel weight per square metre.

    What removes wall panel adhesive if I need to take a panel down?
    For hybrid polymer adhesives, a heat gun softened the adhesive, and a wide plastic scraper helps remove the panel without damaging the wall. Solvent-based adhesives can be softened with acetone or panel adhesive remover, then scraped off. Always test any solvent on an inconspicuous area of the wall surface before applying widely.

    Do I need primer before using panel adhesive?
    On new, unpainted plasterboard — yes. New plasterboard absorbs adhesive into the paper surface, reducing the effective bond. A coat of diluted PVA or a purpose-made bonding primer seals the surface and gives the adhesive a consistent bonding substrate. On already-painted walls, primer is typically not needed unless the paint is flaking or powdery.

    Find the Right Panels for Your Project

    Once you’ve confirmed your adhesive, browse the complete wood wall panel collection at The Panel Hub — all products include guidance on the recommended adhesive type for each substrate. The SoundPanel™ acoustic slat range is designed for hybrid polymer adhesive installation on standard drywall and plaster. For design inspiration, our interior slat wall ideas guide covers 50+ room applications. The acoustic panel buyer’s guide is useful if you’re still deciding between panel systems before placing an order.

  • Best Panels for Reducing Echo in a Room: What Actually Works

    Best Panels for Reducing Echo in a Room: What Actually Works

    Understanding What’s Causing Your Echo

    Echo in a room is caused by sound waves reflecting off hard surfaces and arriving at your ears with a delay after the direct sound. The longer the delay and the stronger the reflection, the more pronounced the echo. Rooms with all-hard surfaces — painted walls, hard floors, glass windows, high ceilings — have the worst echo because there are no soft, absorptive materials to intercept the reflections.

    The solution is adding absorptive surface area — materials that convert sound energy to a tiny amount of heat rather than reflecting it back into the room.

    Types of Echo and What Causes Each

    • Flutter echo: A rapid, metallic-sounding echo created by sound bouncing back and forth between two parallel reflective walls. Most obvious when you clap in an empty room. Common in square rooms with no soft furnishings.
    • Slap echo: A single distinct echo from a far wall — most obvious in long, narrow spaces like corridors and large open-plan rooms.
    • Reverberation (reverb): The persistence of all room sound after the source has stopped — creates a “washy,” indistinct sound quality. The overall “loudness” of a room that makes extended occupancy tiring.

    Panel Placement Strategy for Echo Reduction

    Identifying the right wall to treat is as important as selecting the right panel. Echo in a room follows predictable reflection paths — and treating the primary reflection surfaces delivers results that random coverage placement can’t match.

    Identify the first reflection points. Stand at your primary listening or working position in the room. The walls directly opposite you and to each side receive the first-order reflections — the initial bounces of sound from your voice or audio source. These are the surfaces that cause the most noticeable echo. Treating them first (even if it means less total panel coverage) gives you faster results per pound spent.

    The clap test. Stand in the centre of the room and clap once loudly. The ringing, metallic decay you hear after the clap is flutter echo — the sound bouncing back and forth between two parallel hard surfaces. If the flutter is strong, the room has two facing hard walls that need treatment. Treat one of them (the one more accessible or the one with more wall area) and repeat the clap test — the flutter should reduce significantly.

    Don’t underestimate ceiling height. In rooms with high ceilings (3m+), the ceiling becomes a significant reflection surface. Wall panel coverage alone may not fully resolve echo in these rooms. Ceiling-mounted panels or acoustic baffles add vertical absorption that supplements wall treatment — particularly effective in open-plan spaces and large living rooms.

    Coverage percentage matters more than placement precision. Once the primary reflection surfaces are treated, adding more panels anywhere on the remaining wall area continues to reduce reverberation time. The relationship between coverage and echo reduction is roughly linear up to about 40% wall coverage — after that, diminishing returns set in. Target 25–35% for most domestic rooms; 40–50% for home theatres and studios.

    Frequently Asked Questions

    What panels are best for reducing echo in a room?
    Wood slat acoustic panels with high-density felt backing rated NRC 0.80–0.85 are the best choice for domestic echo reduction. They provide effective broadband sound absorption in the speech frequency range — the range most responsible for the echo that makes rooms feel reverberant — while looking like an intentional interior design feature.
    How many acoustic panels do I need to remove echo from a room?
    For a standard room (20–30 sqm floor area, 2.4m ceiling, hard floors), 15–25 sqm of wall panel coverage at NRC 0.80+ eliminates most noticeable echo. This typically corresponds to one full feature wall plus a partial treatment on the adjacent wall. Use the TPH Box Calculator with your room dimensions for an accurate count.
    How quickly do acoustic panels reduce echo?
    Immediately. The change in room acoustics is audible from the moment the first panels are installed. You don’t need to wait for adhesive to fully cure to hear the difference — though final assessment should wait until the full coverage is in place, since partial coverage gives a misleading impression of the finished result.
    Can rugs reduce echo as effectively as acoustic panels?
    Rugs absorb high-frequency sound at floor level and help with flutter echo, but they don’t replace wall panels. Wall surfaces have a larger total area than floor surfaces in most rooms, and the primary reflection paths run wall-to-wall. Rugs and acoustic panels work best together — the rug handles the floor plane, the panels handle the wall surfaces.
    Why does my room still echo after adding acoustic panels?
    Usually one of three reasons: insufficient coverage (under 25% of wall area), panels with NRC below 0.75, or untreated parallel surfaces. Check the published NRC of the panels you’ve installed, calculate your current wall coverage as a percentage of total wall area, and identify whether you have two facing hard surfaces that aren’t yet treated.

    Acoustic panels address all three when installed correctly. Flutter echo — the most common problem in domestic rooms — is the easiest to fix; a single panel wall typically resolves it. See our acoustic panel vs soundproofing guide for the full technical explanation.

    Which Panels Reduce Echo Most Effectively?

    Best: Acoustic Slat Panels with High-Density Felt Backing (NRC 0.75–0.85)

    The most effective echo-reducing wall panel for domestic spaces. The open slat profile allows sound to reach the high-density felt backing directly, maximising absorption efficiency. NRC ratings of 0.75–0.85 mean 75–85% of sound striking the panel surface is absorbed rather than reflected.

    One full feature wall (covering 20–25% of total wall surface area) reduces reverberation time in a typical living room by 40–60% and eliminates flutter echo almost completely. The SoundPanel™ acoustic slat panels achieve NRC 0.85 — the highest available in an aesthetically premium format.

    Good: Perforated Acoustic Panels (NRC 0.60–0.80)

    Effective echo reduction with a more restrained aesthetic than slat panels. The solid perforated face reduces open area available for sound absorption compared to slat panels, but the performance is still significant. Better suited to formal spaces where slat profiles feel out of place. Browse the SoundPanel® Perforated Acoustic Wood Wall Panels at The Panel Hub.

    Moderate: Thick Fabric Acoustic Panels (NRC 0.80–0.95)

    Maximum acoustic performance but aesthetically limited to studio and utility environments. For living spaces, the aesthetic cost is too high relative to the marginal NRC gain over wood slat panels.

    How Much Coverage to Eliminate Echo

    For flutter echo elimination: treating one wall — the primary reflection surface — is usually sufficient. Flutter echo requires two parallel reflective surfaces; treating one breaks the flutter loop.

    For overall reverberation reduction to a comfortable level:

    • Small room (under 150 sq ft): 20–25% wall coverage
    • Medium room (150–300 sq ft): 25–35% wall coverage
    • Large/open plan (300+ sq ft): 35–50% wall coverage

    Start with one feature wall and assess the improvement before adding more. Most homeowners find that a single wall of acoustic slat panels resolves the most noticeable echo problems in a domestic room. Explore the full wood wall panel range with published NRC ratings to find the right product for your room size.

  • Best Wall Panels for Sound Absorption: A Ranked Comparison

    Best Wall Panels for Sound Absorption: A Ranked Comparison

    Sound Absorption: How It’s Measured and What to Look For

    Sound absorption is measured by the NRC (Noise Reduction Coefficient) — a number from 0 to 1 representing the proportion of sound energy absorbed by a material. Higher is better. For domestic acoustic treatment, look for NRC 0.65 as a practical minimum and 0.80+ for spaces where acoustic quality significantly matters.

    Our full guide to NRC ratings explains the measurement methodology and how to interpret product specifications.

    Panel Types Ranked by Sound Absorption

    1. Thick Fabric Acoustic Panels (NRC 0.85–1.00)

    High-density fabric-wrapped panels with 50–100mm mineral wool or fibreglass core. The highest NRC performance available in a wall panel format. Used in recording studios, home theatres, and commercial spaces. Limited aesthetic range — typically available in fabric colours only.

    Best for: Recording studios, dedicated home theatres, spaces where maximum NRC is the sole criterion.

    2. Acoustic Wood Slat Panels with AcuFelt™ Backing (NRC 0.65–0.85)

    The best-performing aesthetically acceptable option for domestic spaces. Real wood veneer slats over engineered acoustic felt deliver NRC ratings of 0.65–0.85 depending on panel specification and coverage. The open slat profile allows sound to reach the felt backing directly without the additional resistance of a perforated face.

    Best for: Living rooms, bedrooms, home offices, media rooms, any space where aesthetics and acoustic performance must coexist. The SoundPanel™ acoustic slat collection is the benchmark for this category.

    3. Perforated Acoustic Wood Panels (NRC 0.55–0.80)

    Solid wood face with perforations allowing sound through to felt or mineral wool backing. Lower open area than slat panels means slightly reduced sound passage to the absorbing material, but the solid face suits formal or traditional aesthetics where open slat profiles feel out of place.

    Best for: Dining rooms, traditional interiors, commercial meeting rooms, ceilings. Browse the SoundPanel® Perforated Acoustic Wood Wall Panels at The Panel Hub.

    4. Acoustic Foam Panels (NRC 0.50–0.90)

    Variable performance depending on thickness and profile. Thin foam (25mm) has lower NRC than quality wood slat panels. Thick foam (100mm) can match or exceed them. Degrades in 5–10 years. Not suitable for domestic living spaces from an aesthetic standpoint.

    Best for: Utility studios and recording booths.

    5. Mineral Wool/Fibre Board (NRC 0.65–0.90)

    High performance when left exposed. Usually covered in fabric for domestic applications. A core ingredient in professional fabric acoustic panels.

    6. Decorative Slat Panels Without Acoustic Backing (NRC 0.05–0.20)

    Essentially no acoustic value. Wood reflects sound. Paper or non-woven backing reflects sound. These are decorative products regardless of the “acoustic” label they may carry. Always verify with a published NRC rating.

    How Much Coverage Do You Need?

    NRC rating × coverage percentage = effective acoustic impact. For a room with NRC 0.80 panels covering 30% of wall surface:

    • 0.80 × 30% = 24% of total sound energy absorbed per reflection cycle
    • Over multiple reflection cycles, this compounds — reducing reverberation time by approximately 40–60% in a typical room

    For living rooms and bedrooms, 25–35% wall coverage with NRC 0.75+ panels delivers clearly noticeable acoustic improvement. For home theatres and studios, target 40–60%.

    Room-by-Room Sound Absorption Guide

    The right level of sound absorption depends on the room’s use and how much natural absorption already exists from furnishings. These practical recommendations are based on rooms with hard floors and minimal soft furnishings — adjust down if the room has carpet, heavy curtains, or upholstered seating.

    Home office (10–15 sqm): Target NRC 0.80+ panels covering 20–30% of wall area. One full wall behind the monitor is the most effective placement — it absorbs the sound bouncing off the wall your camera faces, which is the primary source of echo on calls. Expected improvement: RT60 reduction from 0.6–0.8 seconds to 0.2–0.3 seconds.

    Living room (20–35 sqm): Target NRC 0.75–0.85 panels covering 25–35% of wall area. Focus on the longest bare wall and any wall directly opposite large windows. A feature wall running the full length of one side achieves both the coverage target and the visual centrepiece most clients are looking for.

    Home theatre (15–25 sqm): Target NRC 0.85+ panels covering 40–55% of wall area. Side walls and rear wall are the priority — these are where the first-order reflections from the speaker array arrive. Treating the ceiling adds further control and is worth including in larger home cinema builds.

    Open-plan kitchen/dining/living (40–70 sqm): This is the most challenging room type. Hard floors, high ceilings, minimal furnishings, and no acoustic breaks between zones create cumulative reverberation. Target 30–40% coverage of vertical wall surfaces, concentrating panels in the dining and living zones rather than kitchen. Ceiling baffles or floating panels can supplement wall coverage where additional treatment is needed.

    Bedroom (12–18 sqm): Target NRC 0.70–0.80 panels covering 20–25% of wall area. The headboard wall and any wall that faces a window are the primary treatment zones. The goal here is general noise reduction and sleep quality — not studio-level absorption.

    Frequently Asked Questions

    What type of wall panel absorbs the most sound?
    Panels with dense acoustic felt or fibreglass backing absorb the most sound, typically achieving NRC 0.85–1.00. For domestic use, wood slat panels with high-density felt backing (like TPH SoundPanel at NRC 0.85) achieve the same performance tier with a finish suitable for living spaces.
    Do thicker acoustic panels absorb more sound?
    Generally yes, especially at lower frequencies. A 25mm panel absorbs mid and high frequencies effectively. A 50mm panel extends absorption further into the bass range. For most domestic applications, 25mm panels are sufficient — true bass frequency problems require treatment beyond standard wall panels.
    How do I know if my room needs acoustic panels?
    Clap once loudly in the room. If you hear a clear flutter or decay (the echo dying slowly over 0.5+ seconds), the room has too much reverberation and will benefit from acoustic treatment. Rooms with only carpet and soft furnishings usually don’t need panels; rooms with bare walls and hard floors almost always do.
    Can acoustic panels be used on ceilings as well as walls?
    Yes. Ceiling installation is particularly effective in open-plan spaces and home theatres. The fixing method needs to account for the additional structural requirement — French cleat systems and purpose-designed ceiling brackets are the most reliable options.
    What’s the difference between sound absorption and sound insulation?
    Sound absorption reduces echo and reverberation within a room. Sound insulation (soundproofing) blocks sound from passing between rooms. Acoustic wall panels provide absorption; they do not provide meaningful insulation.

    Browse the full acoustic panel range at The Panel Hub with published NRC ratings for every product — the most important number to look for when choosing panels for sound absorption. The SoundPanel™ range includes acoustic slat, rectangle, and perforated formats — each achieving NRC 0.85 with the same AcuFelt™ backing system.

  • Best Wood for Wall Panels: A Comparison of 7 Popular Species

    Best Wood for Wall Panels: A Comparison of 7 Popular Species

    Does Wood Species Matter for Wall Panels?

    Yes — but perhaps less than you’d think for most applications. Modern wood wall panels use real wood veneer over an engineered MDF core, which means the structural performance comes from the core, and the aesthetic character comes from the veneer species. The wood species determines colour, grain pattern, and character rather than structural strength.

    That said, if you’re using solid wood planks or solid wood tile panels, the species matters considerably more for durability, workability, and behaviour over time.

    1. Walnut

    Colour: Deep chocolate brown to rich golden brown, often with purple undertones.
    Grain: Straight to slightly wavy with occasional figured grain. Very consistent and elegant.
    Best for: Premium, modern, Japandi, and dark-toned interiors. Walnut is the most sought-after species for contemporary wood wall panels.
    Cost: High
    Verdict: The gold standard for premium wall panels. Rich, warm, and versatile enough for almost any modern interior.

    2. Oak

    Colour: Light honey to warm amber. Ages gracefully to a richer tone over time.
    Grain: Pronounced, open grain with attractive ray fleck in quarter-sawn cuts.
    Best for: Virtually any interior style — Scandinavian, farmhouse, contemporary, transitional.
    Cost: Mid–high
    Verdict: The most universally applicable wood for wall panels. If you’re unsure, oak is almost always the right choice.

    3. Ash

    Colour: Very pale, almost white, with subtle golden tones.
    Grain: Fine and consistent with a subtle texture.
    Best for: Scandinavian, minimalist, and light-toned interiors. Ideal where you want wood warmth without dark contrast.
    Cost: Mid
    Verdict: A lighter alternative to oak with a clean, contemporary feel. Less dramatic, more airy.

    4. Pine

    Colour: Pale yellow to warm amber. Knotty pine is darker with prominent character knots.
    Grain: Straight with visible knots (knotty pine) or fine and clear (clear pine).
    Best for: Rustic, farmhouse, cabin, and budget-conscious interiors.
    Cost: Low–mid
    Verdict: The most affordable solid wood option. Great character but suits specific aesthetics — less suited to sleek contemporary interiors.

    5. Bamboo

    Colour: Natural pale cream to carbonised dark brown depending on treatment.
    Grain: Fine and regular — technically a grass, not a hardwood, but behaves similarly.
    Best for: Eco-conscious interiors, biophilic design, contemporary and Asian-influenced aesthetics.
    Cost: Mid
    Verdict: Sustainable, fast-growing, and harder than many traditional hardwoods. A strong choice for those prioritising environmental credentials.

    6. Cedar

    Colour: Reddish-brown with prominent dark streaks. Weathers to silver-grey outdoors.
    Grain: Straight with occasional knots. Fine texture.
    Best for: Outdoor cladding, saunas, and feature walls in rustic or organic interiors. Natural oils make it resistant to moisture and insects.
    Cost: Mid
    Verdict: The go-to for outdoor applications. Its natural oils and weather resistance make it the best all-round choice for external cladding.

    7. Teak

    Colour: Golden to dark brown. Uniform and rich with subtle colour variation.
    Grain: Straight, medium texture with a slightly oily surface.
    Best for: High-end interior applications and outdoor settings where durability is paramount.
    Cost: Very high
    Verdict: Premium and extremely durable but expensive. Most relevant for wet areas and outdoor cladding where durability justifies the cost.

    Which Wood Is Best for Acoustic Wall Panels?

    Acoustic Curve Wood Wall Panels - Oak - View 16

    For acoustic wood slat panels, the veneer species affects aesthetics only — the acoustic performance comes from the felt backing. With this in mind:

    • Walnut — best for high-end, contemporary spaces
    • Oak — best all-rounder for any room
    • Ash — best for light, minimalist interiors

    When choosing a species, consider the room’s existing tones and furniture. A dark walnut panel wall next to dark furniture creates a cave-like feel; in a room with light floors and neutral upholstery, it creates depth without heaviness.

    Wood Species FAQs for Wall Panels

    Can I mix two different wood species on the same feature wall?
    You can — but the result works best when the species are tonally related rather than strongly contrasting. Mixing oak and ash (both pale, fine-grained species) in alternating boards creates subtle variation without visual conflict. Mixing walnut and pine in the same panel installation creates a tonal clash that is difficult to resolve. If mixing species, do so within a warm-toned family (walnut/oak/chestnut) or a cool-toned family (ash/birch/maple) rather than across families.

    Does the wood species affect acoustic performance in slat panels?
    The species has minimal impact on acoustic performance compared to the density and thickness of the backing material. Acoustic slat panels absorb sound primarily through the backing (felt, foam, or mineral wool) rather than the wood face. Species with naturally higher density (hardwoods like oak or walnut) have marginally better intrinsic sound-damping properties than softwoods, but this difference is negligible compared to the backing specification. Choose species for acoustic panels based on aesthetic preference rather than expecting acoustic performance differences between species.

    How long do wood veneer wall panels last compared to solid wood?
    Quality veneer-faced panels typically last as long as solid wood installations in normal interior conditions — the structural stability of the engineered core (MDF or plywood) actually makes them more dimensionally stable than solid wood, particularly in rooms with humidity variation. Solid wood planks expand and contract across the grain with seasonal moisture changes; engineered panels are largely immune to this movement. For longevity, veneer-faced panels over a stable engineered core are often the superior choice.

    Which species ages most gracefully without re-finishing?
    Oak ages very gracefully with a clear oil finish — it deepens and enriches in colour over years of exposure to light and air in a way that reads as character rather than deterioration. Walnut is similar, developing a warm patina. Pine, by contrast, can develop an orange cast under UV exposure that many people find unappealing after several years without UV-protective finishing. Ash stays relatively stable but can develop a slight yellow tinge. If longevity with minimal maintenance is a priority, oak or walnut with a quality UV-protective hardwax oil is the most reliable specification.

    Final Recommendation

    For most homeowners, oak acoustic slat panels offer the best combination of versatility, availability, and value. For those seeking premium warmth and a distinctively contemporary look, walnut is the clear upgrade. Order sample panels in both species before committing — the difference in real light conditions can be significant.

    Browse Panels by Species

    Ready to choose? Explore the full wood wall panel collection at The Panel Hub — available in oak, walnut, ash, and more across the SoundPanel™ slat range and GroovePanel® mosaic tiles. Our interior slat wall ideas guide shows how each species reads in a finished interior. And if acoustic performance is part of the brief, the complete acoustic panel buyer’s guide covers how species choice interacts with acoustic specifications.

  • Biophilic Design with Wood Wall Panels: Bringing Nature Indoors

    Biophilic Design with Wood Wall Panels: Bringing Nature Indoors

    What Biophilic Design Actually Does

    Biophilic design is the practice of incorporating elements of the natural world into built environments — not as decoration, but as a design philosophy rooted in the idea that humans are psychologically and physiologically improved by proximity to nature. Research consistently shows that exposure to natural materials (wood, stone, plant life) reduces cortisol levels, lowers blood pressure, and improves cognitive function and mood.

    Wood wall panels are one of the most effective biophilic design tools available for residential interiors. Real wood veneer — with its visible grain, natural variation, and organic warmth — activates the same neurological responses as exposure to actual timber in a natural environment. Unlike paint, wallpaper, or synthetic materials, genuine wood reads as organic to the human perceptual system.

    Why Real Wood Matters (Not Laminate)

    For biophilic design to work, the materials need to be genuine. Laminate wood-effect panels, vinyl wall coverings, and printed wood-look materials do not produce the same psychological response as real wood. The irregularity of grain, the subtle variation in tone, the tactile warmth of wood — these are the specific characteristics that trigger the biophilic response.

    This is one context where the premium of real wood veneer over laminate alternatives is genuinely justified by function, not just aesthetics. Our real wood veneer vs laminate wall panel comparison covers this distinction in detail.

    The Acoustic Dimension

    Biophilic design addresses more than visual stimuli. Sound environment matters: natural environments are characterised by soft, diffuse sound — the absence of sharp echoes and hard reverberation. Acoustic wood slat panels contribute to this directly. By reducing echo and reverberation in a room, they create a sonic environment that is calmer and more restorative — closer to the acoustic profile of a natural space than a typical hard-surfaced interior.

    This is perhaps the most underappreciated biophilic benefit of acoustic slat panels: they don’t just look natural, they make rooms sound more natural. Our guide to acoustic wall panel performance explains how absorption works and what NRC ratings mean in practical terms.

    Biophilic Panel Design Principles

    Maximise Natural Grain Visibility

    Choose species and finishes that show grain clearly — natural oil or hardwax finishes rather than thick lacquer that creates a plastic-like film over the wood. Wire-brushed or lightly textured finishes emphasise grain character and add tactile interest.

    Allow for Natural Variation

    Biophilic interiors embrace natural variation rather than engineering it out. Species with pronounced grain movement, knots (where appropriate), and natural colour variation are preferable to uniformly figured, perfectly consistent panels. Each panel being slightly different is a feature, not a flaw.

    Combine with Other Natural Elements

    Wood panels work best in biophilic schemes when combined with other natural materials: stone (real or high-quality faux), linen, jute, cotton, living plants, and natural light. Isolating wood panels in an otherwise synthetic interior delivers some benefit but limits the cumulative biophilic effect.

    Consider the View

    Where possible, position panel walls to be visible from primary seating and resting positions — where you spend the most time. A panel wall visible from a sofa, a bed headboard, or from a home office desk creates ongoing, passive exposure that accumulates over time.

    For specific room applications, our wood wall panels for bedroom guide and wood slat panels for living room guide cover the layout principles that maximise both visual and acoustic impact in the spaces where biophilic benefit is most valuable.

    Specifying Wood Panels for Maximum Biophilic Impact

    Not all wood wall panels deliver the same biophilic benefit. The research on biophilic design consistently points to natural material authenticity as the key variable — a photographic wood-print laminate does not produce the same physiological response as genuine veneer or solid timber, even when they appear visually similar from across a room. The brain processes material authenticity at close range in ways that affect how restful a space actually feels, even if the conscious observer cannot articulate why one panel is different from another.

    For maximum biophilic impact, specify panels with real wood faces — either solid timber slats or veneer-faced boards with visible grain movement. The grain should be natural and varied rather than the unnaturally consistent repeat patterns common in lower-grade panels. Species with distinctive grain character — oak, ash, walnut, cedar, pine with its wide annual rings — are particularly effective because the grain variation gives the eye somewhere to move and settle. Highly uniform grain, or printed grain patterns with a visible repeat, does not produce the same calming effect.

    Tactile quality matters as well. A panel with a natural oil or hardwax finish retains the genuine surface texture of the wood — micro-ridges, pore depth, the slight variation across the grain. This is the texture your hand and your peripheral vision process as authentically natural. A high-gloss lacquered panel, by contrast, creates a smooth, reflective surface that blocks tactile authenticity entirely. In a space intended for rest or concentration, the natural finish is not just aesthetically preferable — it is functionally better for the biophilic outcome.

    Biophilic Wood Panel FAQs

    Does the type of wood species matter for biophilic design?
    Yes, though perhaps not in the way you might expect. Species with visible grain movement — oak, ash, walnut, cedar — tend to produce stronger biophilic responses than very tight-grained or highly uniform woods. The presence of natural imperfection (knots, grain variation, slight tonal shifts across the board) is a positive signal of authenticity that the brain associates with natural environments rather than manufactured surfaces.

    Can biophilic panels work in a commercial office environment?
    Research specifically supports the use of biophilic design in workplaces. Studies show measurable improvements in concentration, reported wellbeing, and reductions in stress markers when natural materials — including timber — are present in office environments. Slat panels on a single feature wall, or timber ceiling panels above a work zone, are practical and cost-effective ways to introduce biophilic benefit into commercial interiors without a full refurbishment.

    Do plants enhance the effect of wood wall panels in a biophilic scheme?
    Yes. The combination of living plants and natural wood materials amplifies the biophilic effect of both elements individually. Plants introduce movement, scent, and genuine living-organism cues that static materials cannot replicate. Trailing plants positioned in front of or adjacent to a wood panel wall create a layered nature reference — material and living organic together — that produces the most complete biophilic interior environment.

    Is bamboo a suitable alternative to wood for biophilic panels?
    Bamboo is a viable biophilic material with genuine natural credentials — it is technically a grass rather than a timber, but it grows in natural environments and has authentic grain character. Bamboo panels are suitable for biophilic interiors, particularly where sustainability is a priority, as bamboo reaches harvestable maturity in three to five years compared to decades for hardwood species. The aesthetic reads as more tropical or Japandi-influenced than mainstream oak or walnut panels.