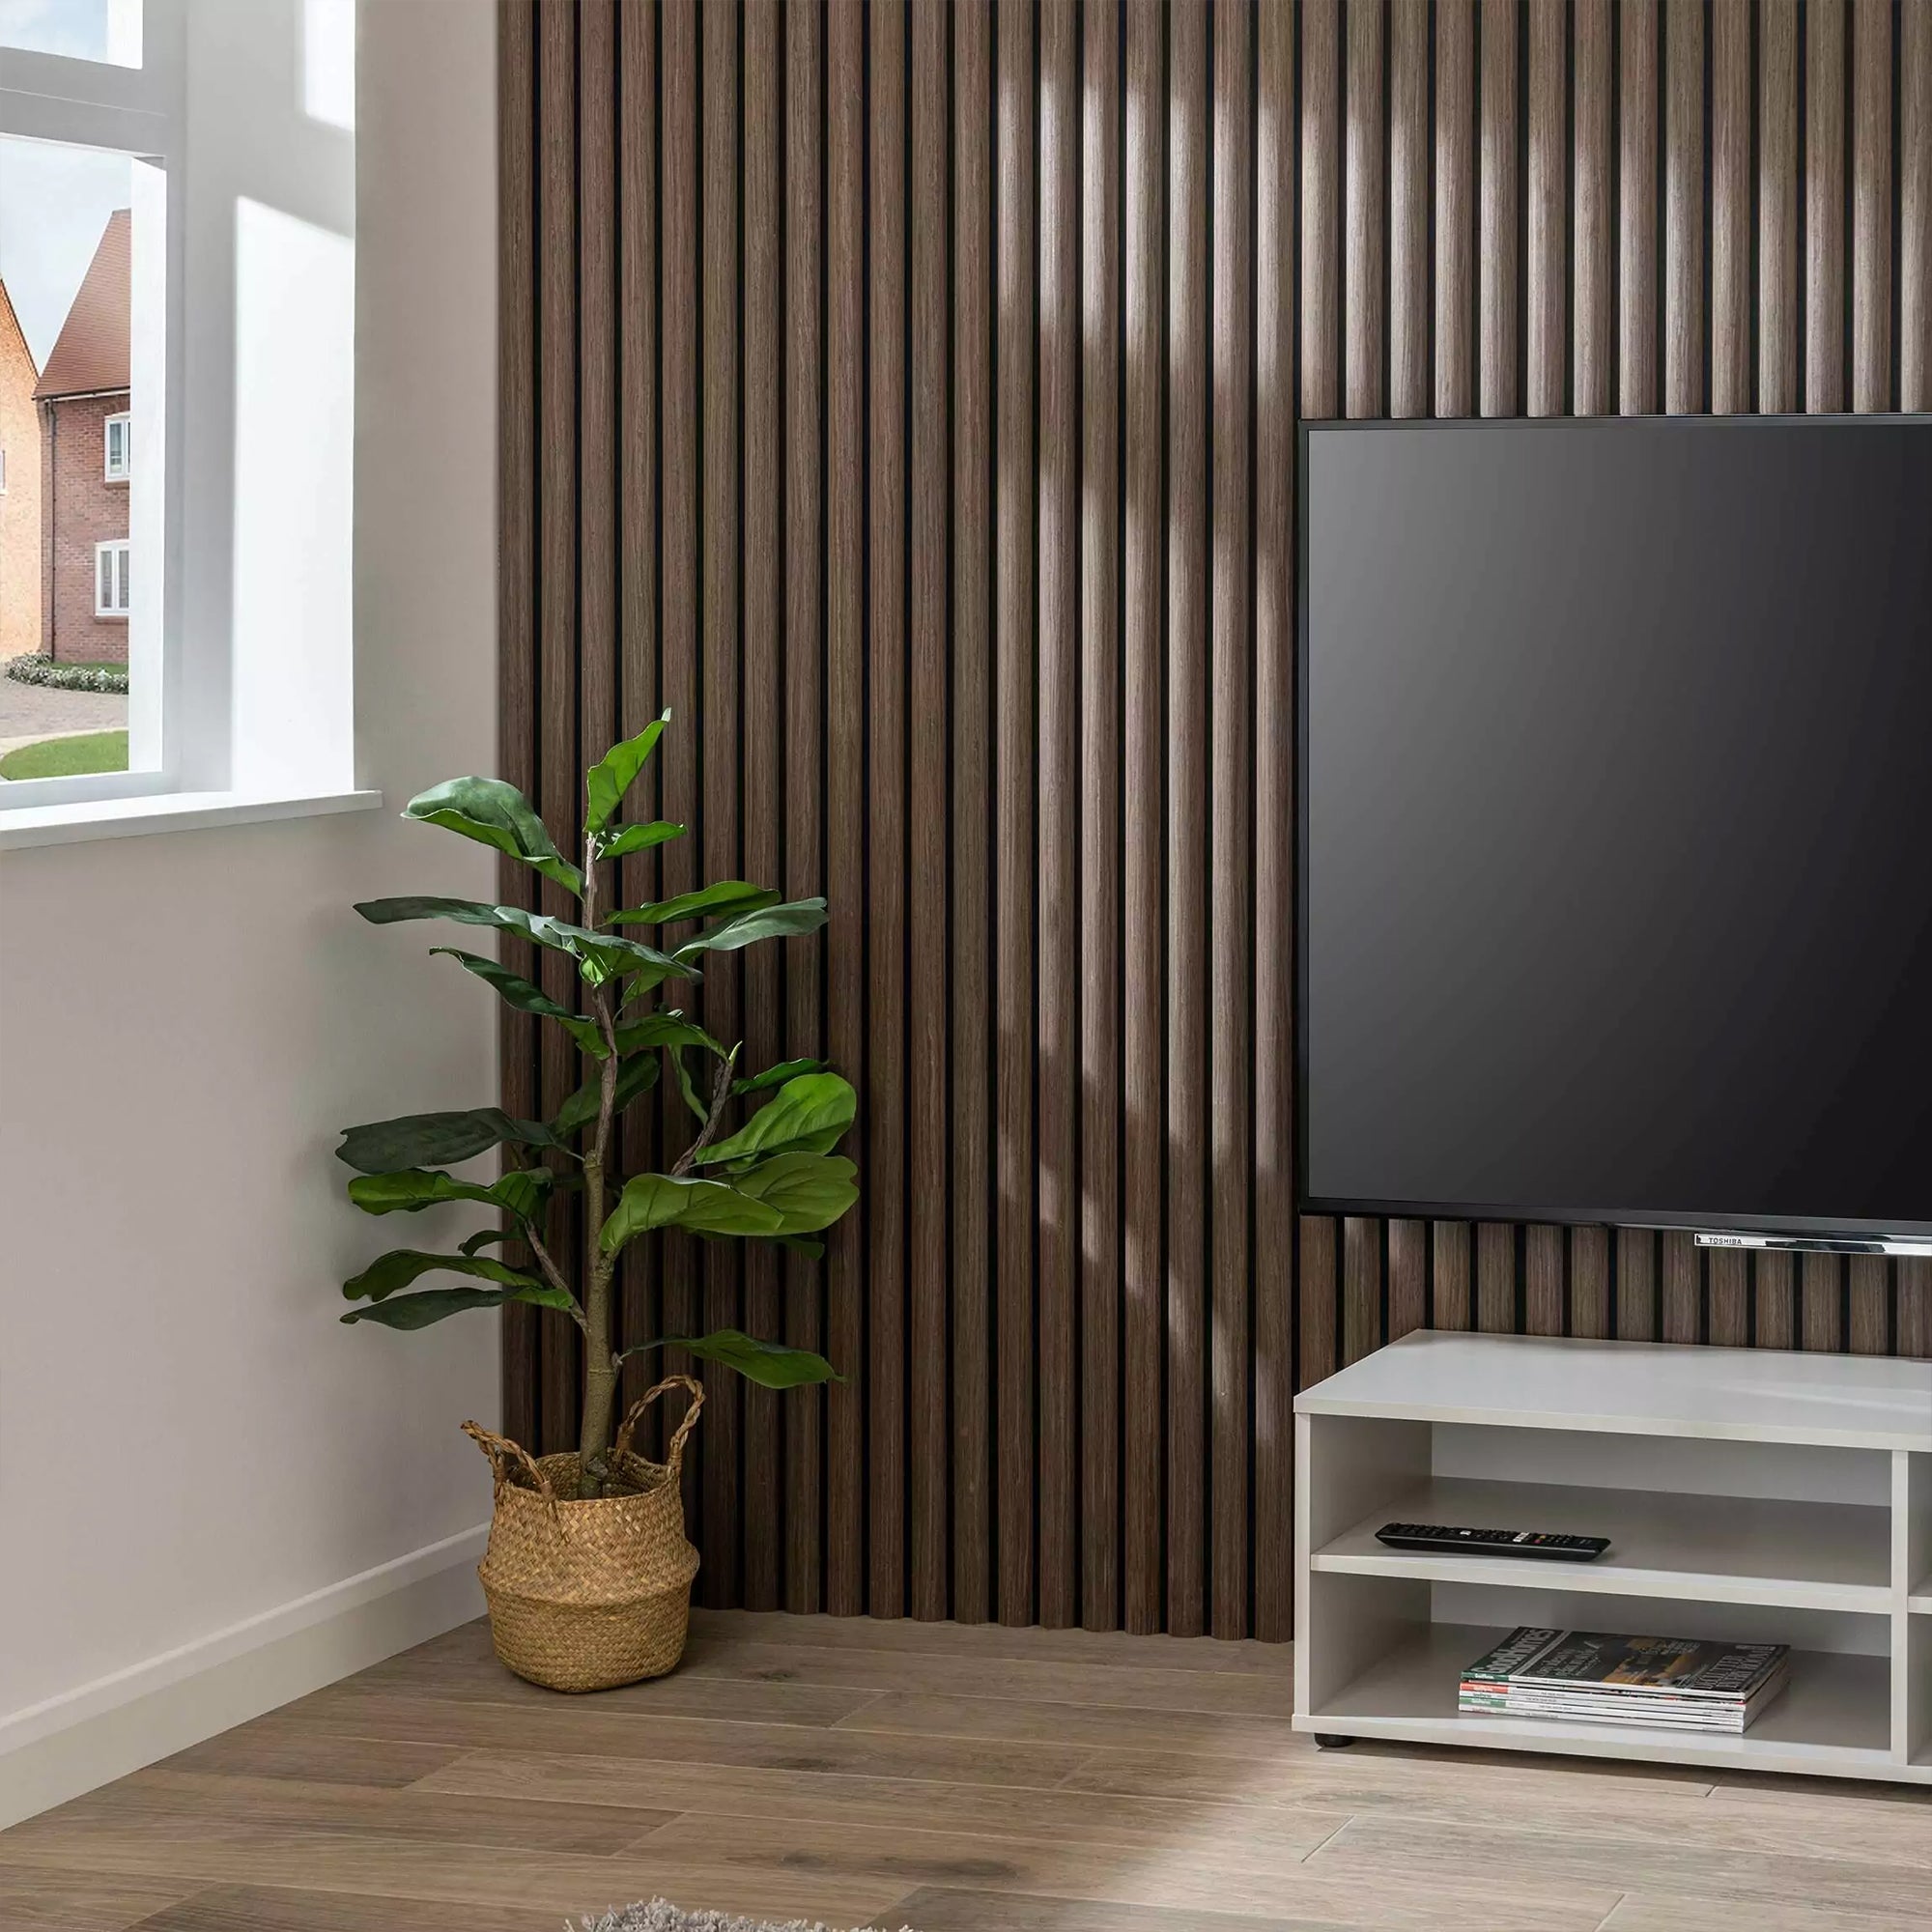
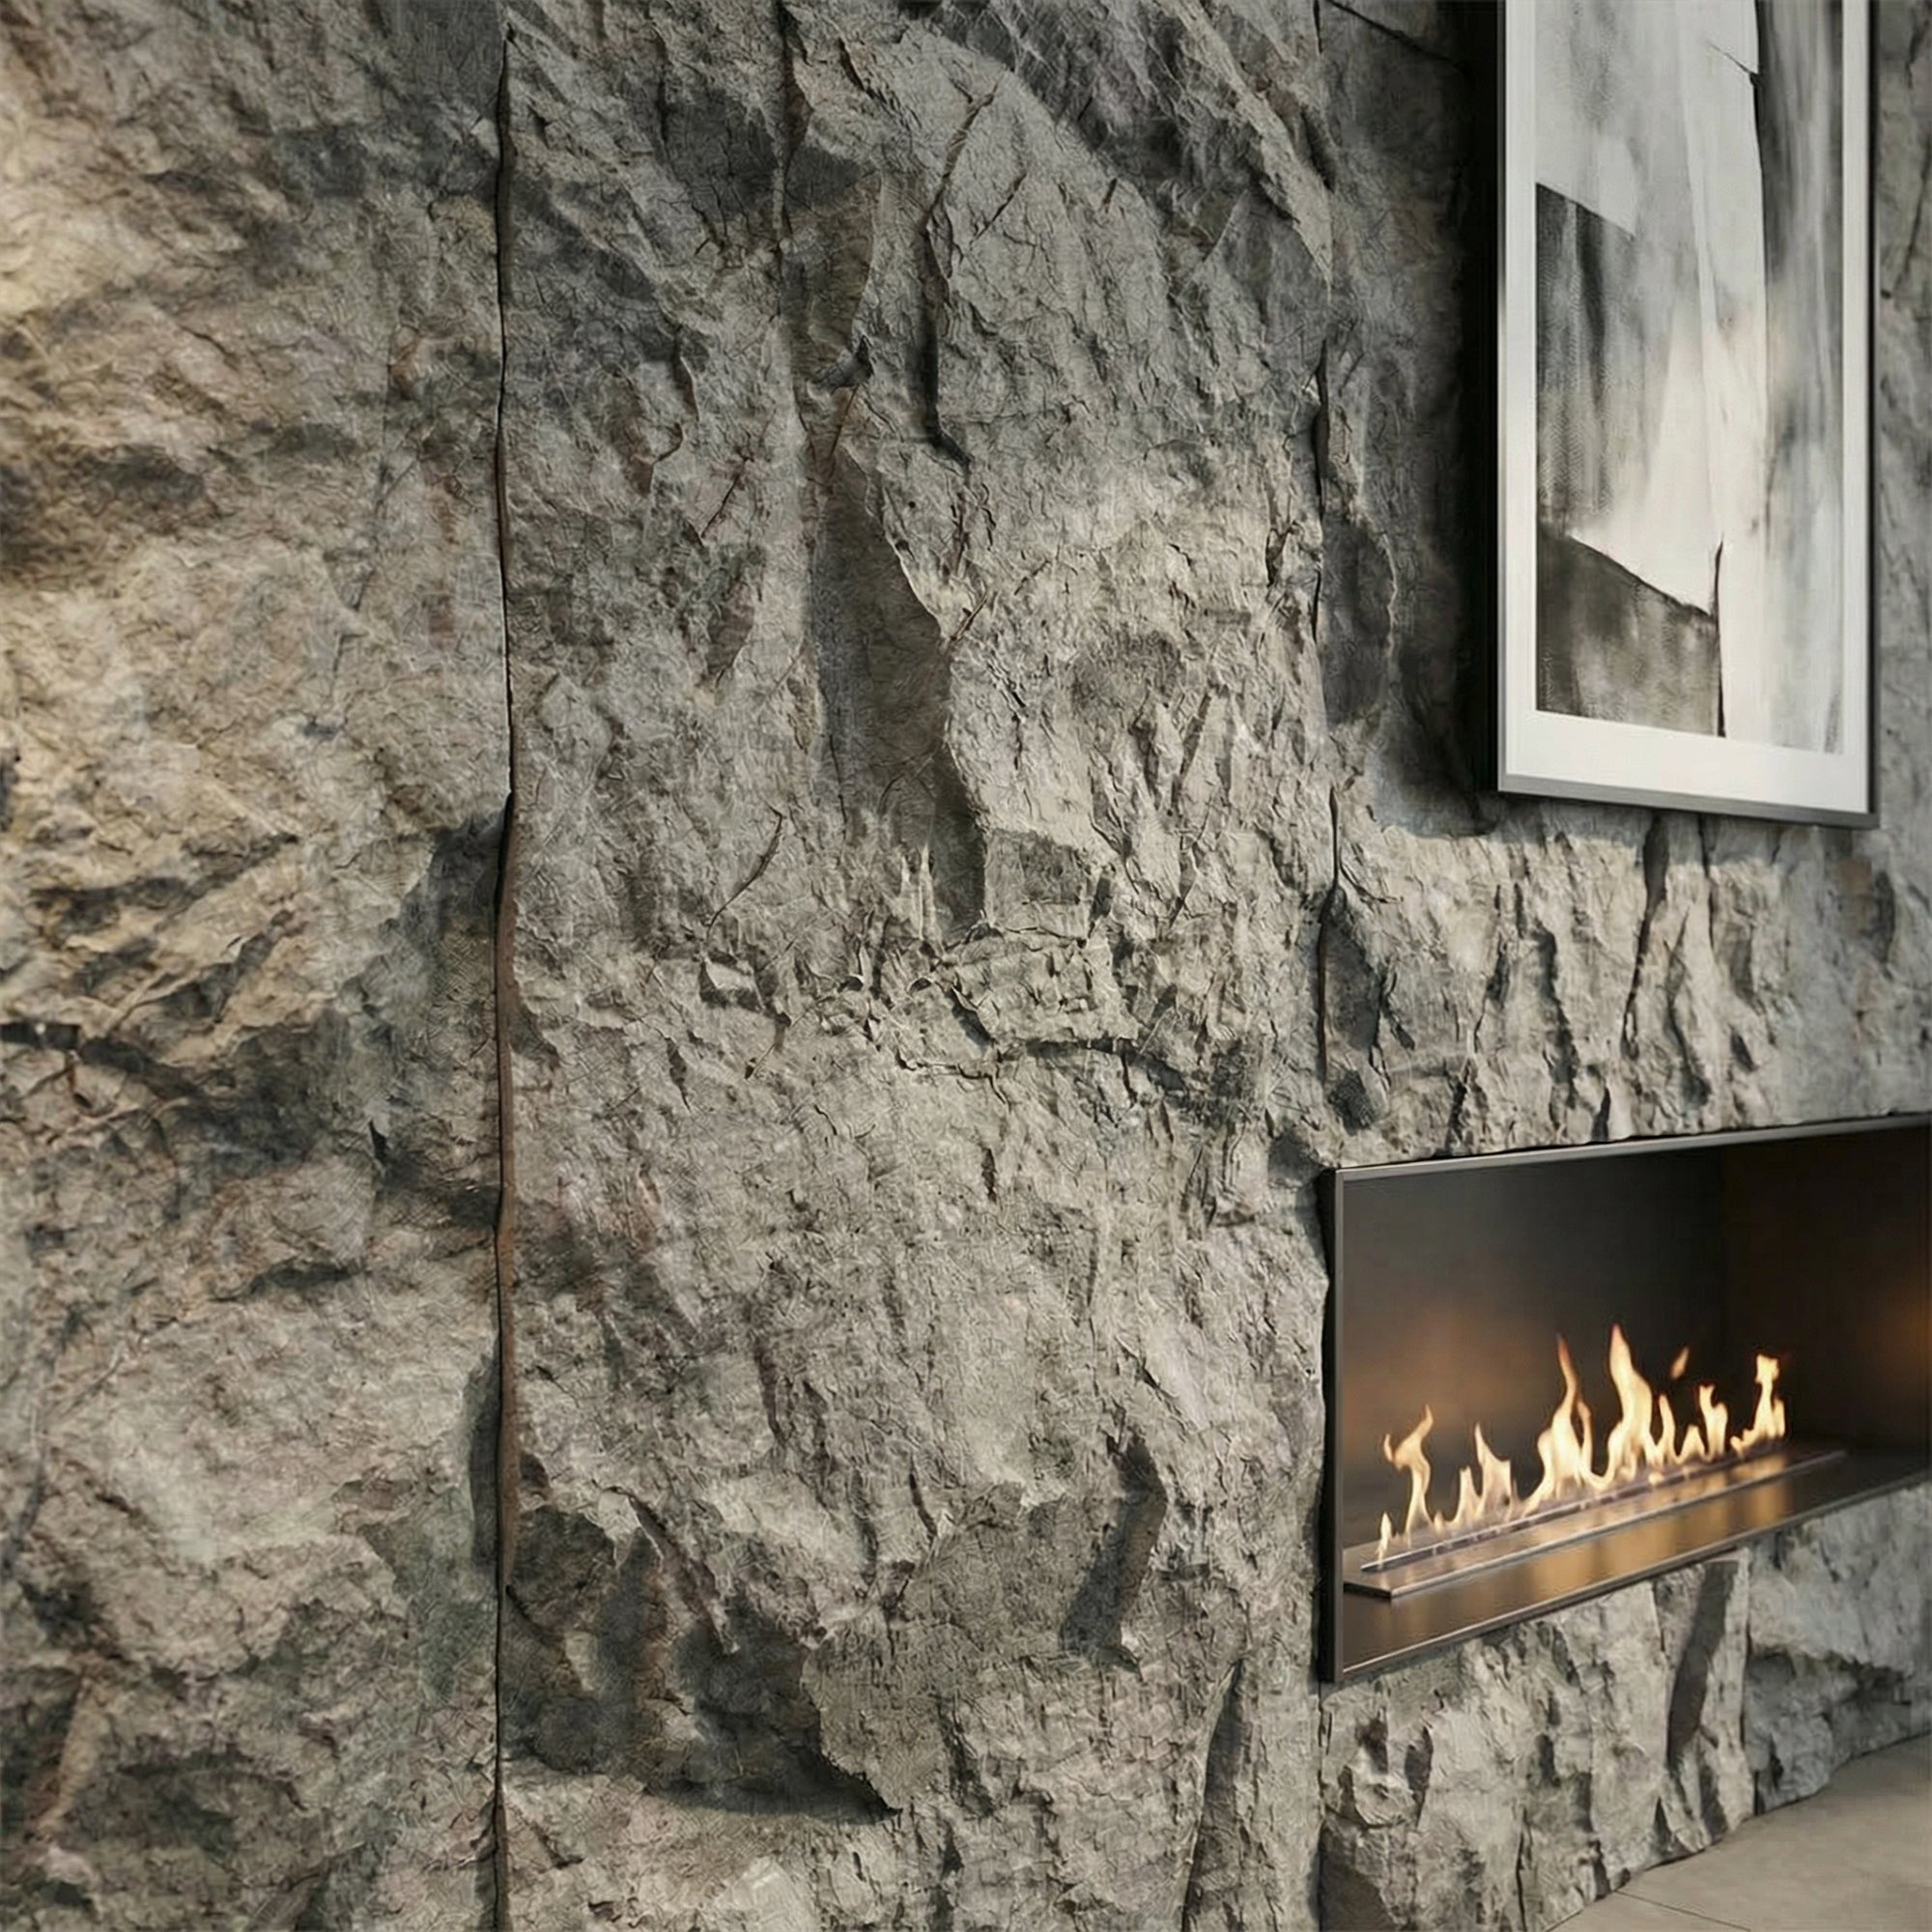
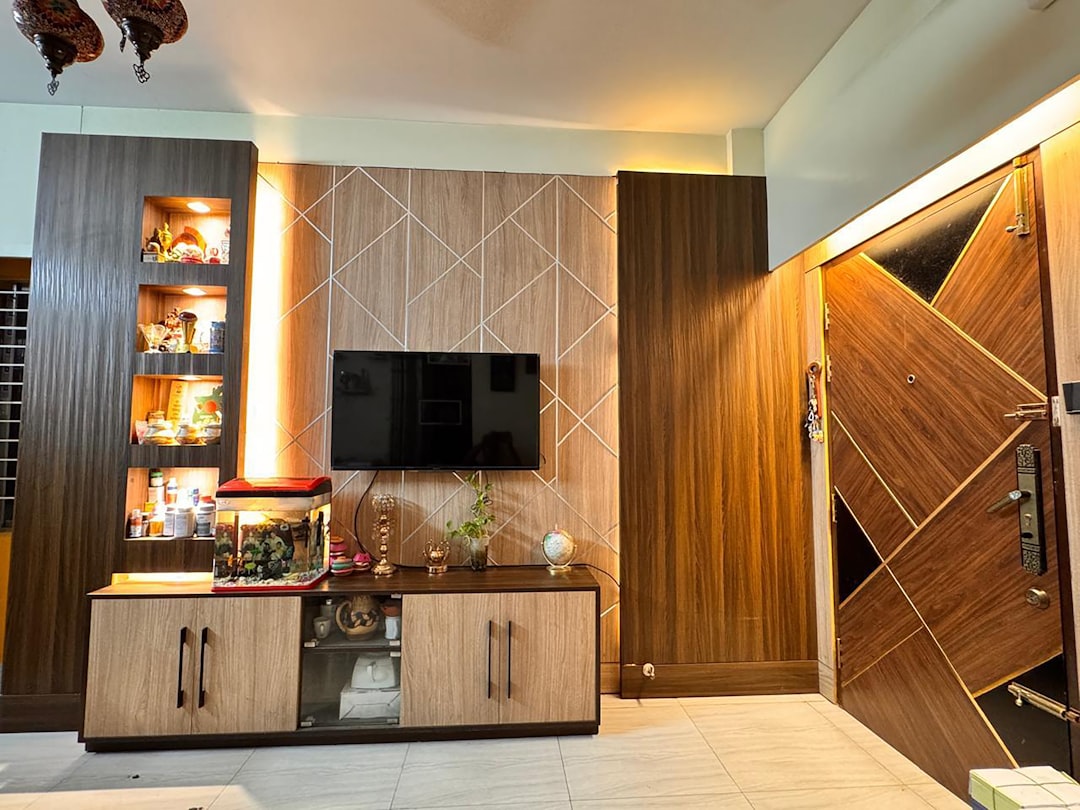
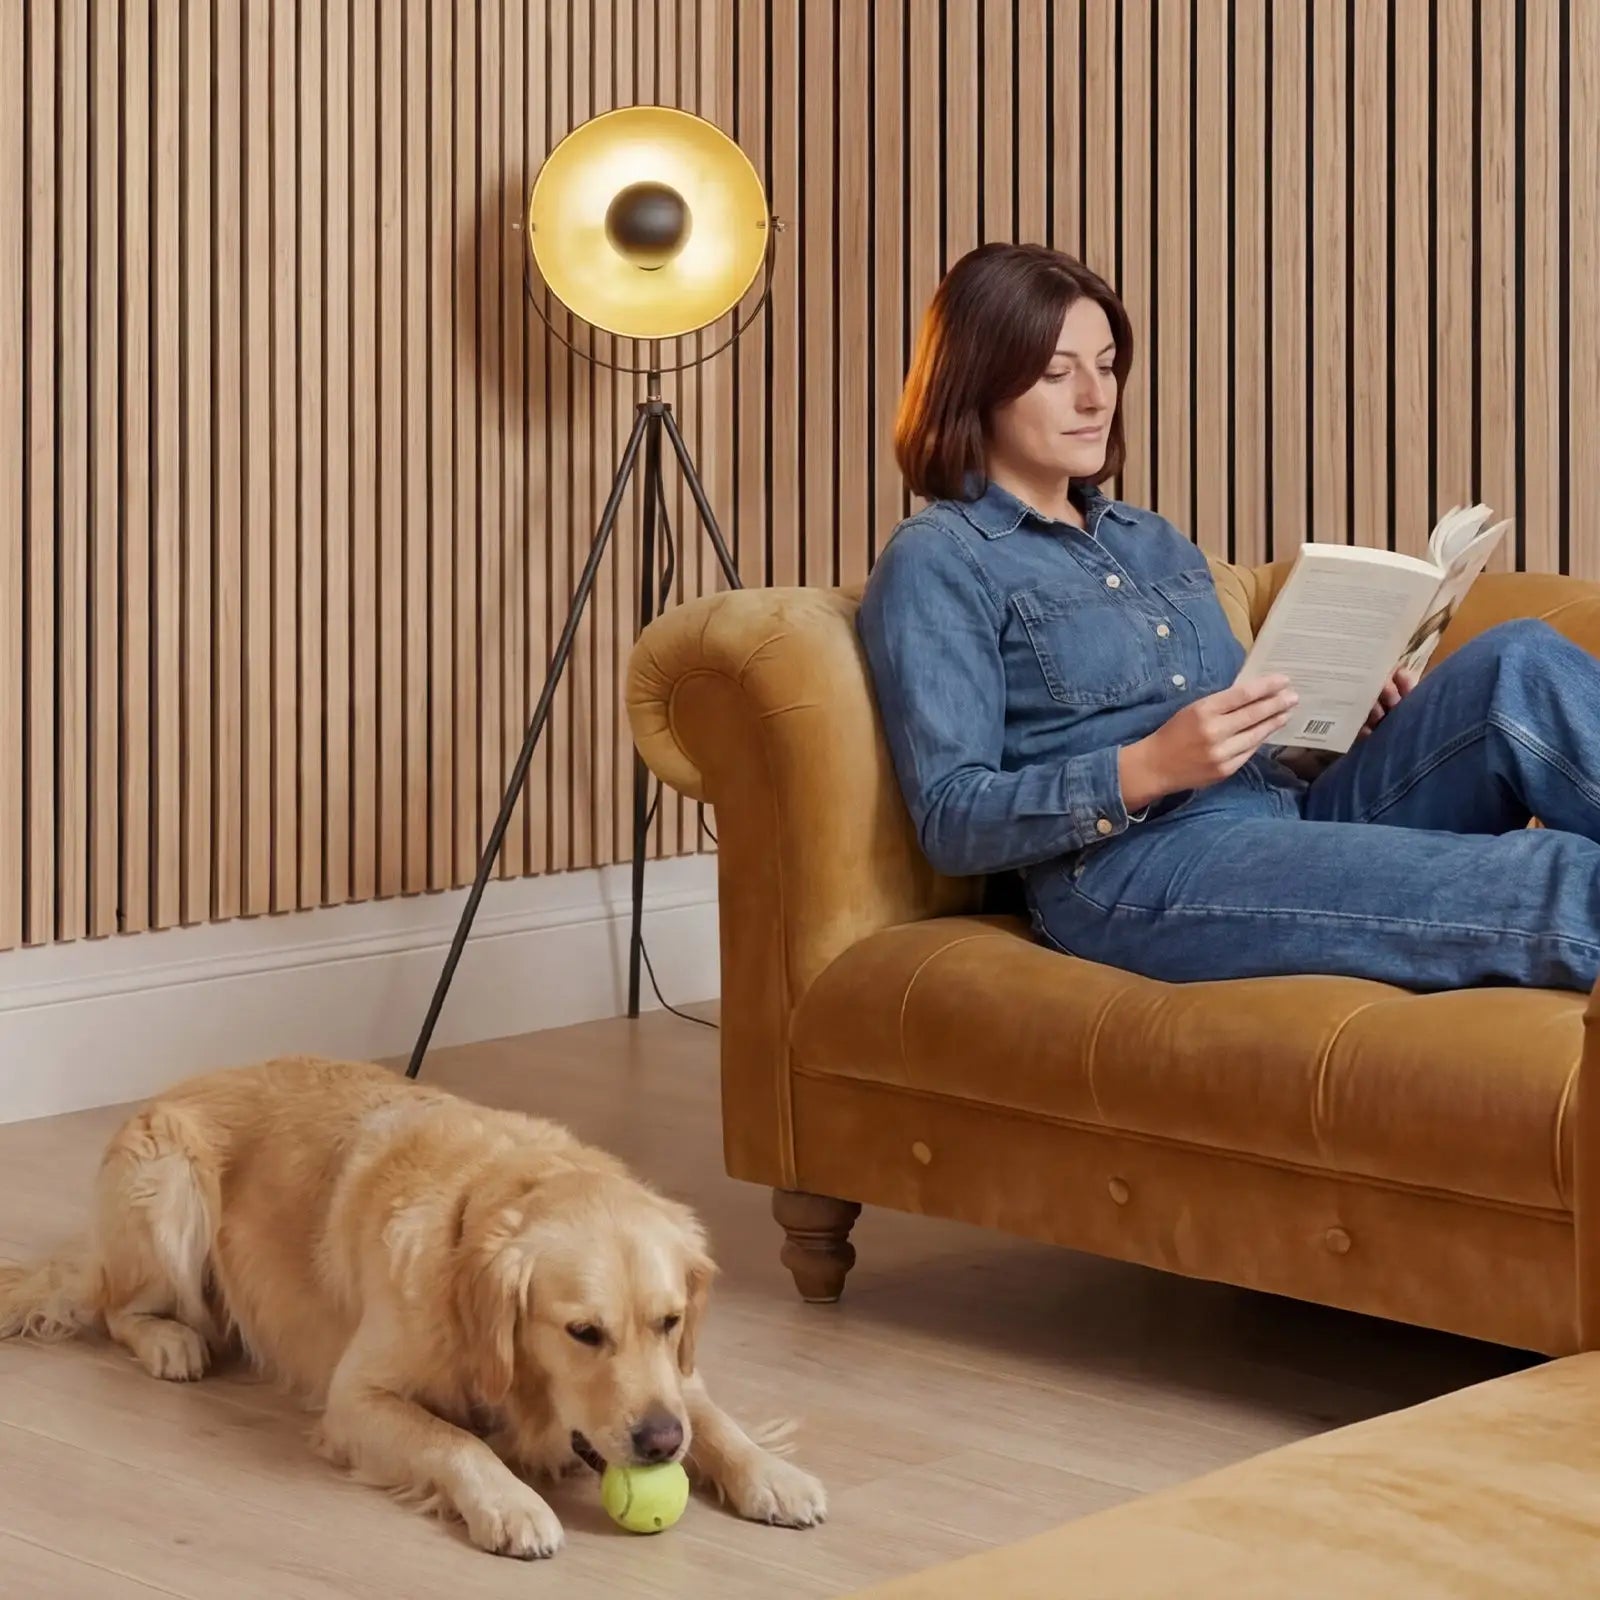
Author: The Panel Hub Design Studio

  • Do Wood Wall Panels Add Value to Your Home? An Honest Assessment

    Do Wood Wall Panels Add Value to Your Home? An Honest Assessment

    The Honest Answer

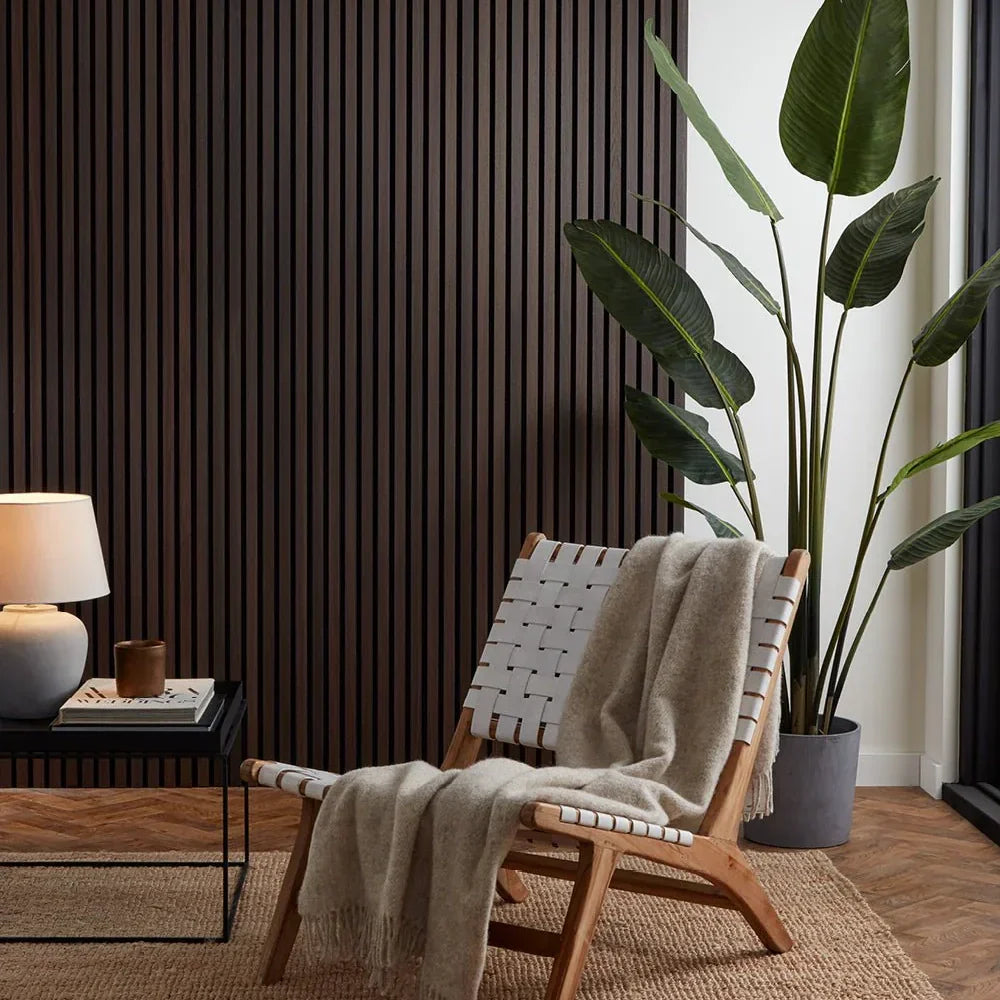
    Wood wall panels can add value to a home — but they can also detract from it. The difference lies in quality, execution, and whether the panels suit the property. A poorly installed, low-quality panel system in the wrong room of a traditional property will be seen as something to remove, not a selling point. A beautifully installed acoustic slat panel feature wall in a living room of a contemporary property will be photographed by the estate agent and mentioned in the listing description.

    The question isn’t whether wall panels in general add value — it’s whether your specific panels, in your specific property, will be viewed positively by prospective buyers.

    What Estate Agents and Buyers Look For

    From the buyer’s perspective, the evaluation of any installed feature is essentially: “Is this something I want, or is this something I’ll need to remove?” Factors that push toward the positive:

    • Quality of materials: Real wood veneer reads as premium and permanent. Cheap laminate or foil-wrapped MDF reads as budget decoration that needs replacing.
    • Quality of installation: Clean edges, consistent gaps, precise cutouts around sockets, proper trim — a professionally finished installation signals craftsmanship throughout the property. A poorly finished one raises questions about what else was done badly.
    • Appropriateness to the property type: Contemporary acoustic slat panels suit contemporary properties. Traditional wainscoting suits period properties. Mismatched aesthetics — modern panels in a Victorian terrace, traditional paneling in a glass-box new-build — are harder to sell.
    • Neutral enough to work with different tastes: A walnut slat panel feature wall in a living room is broadly appealing. An ebonised black panel on all four walls of a bedroom is a more specific taste that will polarise buyers.

    How to Maximise the Value Impact of Wall Panel Installations

    If increasing or protecting home value is part of the rationale for installing wall panels, the choices you make during specification and installation matter significantly. These are the decisions that separate panel installations that add value from those that remain neutral or detract from it.

    Choose natural materials over printed alternatives. Estate agents and valuers can distinguish between real wood veneer and photographic laminate at a glance, and so can informed buyers. A genuine veneer-faced panel signals quality throughout the property in a way that a foil-faced budget panel does not. The cost difference per square metre is modest compared to the total project budget — always prioritise the real material at the surface.

    Commission professional installation, or match professional standards. The margin between a panel installation that photographs as a premium feature and one that reads as a DIY project often comes down to edge finishing — tidy trim, consistent gaps, clean cutouts around electrical points. If you are fitting panels yourself, invest time in the details that are visible at normal viewing distance. A slow, careful installation is indistinguishable from a professional one; a rushed installation is immediately obvious.

    One room done correctly outperforms three rooms done quickly. Buyers respond to clear evidence of quality more than to quantity of features. A single impeccably finished panel installation — properly lit, photographed well in the estate agent’s images — adds more perceived value than multiple rooms with panels that are functional but unremarkable.

    Wall Panel Home Value FAQs

    Do estate agents specifically recommend wall panels for sale preparation?
    Increasingly, yes — particularly in contemporary properties and new-build developments where wood slat panels have become associated with premium finishes. Some agents specifically suggest panel installations in hallways and living rooms as pre-sale upgrades that photograph well and attract buyer interest at a disproportionate cost-to-impact ratio. The caveat is always quality: estate agents are equally quick to flag poor panel installations as a negative.

    Do wall panels add value in all property types?
    No. Appropriate panel type and property character need to align. Architectural slat panels add perceived value in contemporary apartments and modern new-builds; they can look out of place in Victorian terraced houses where buyers expect period-appropriate features. Traditional wainscoting or panel moulding adds value in period properties; it looks contrived in modern ones. Match the panel aesthetic to the building’s architectural character.

    Can removing bad wall panels add value to a property?
    Yes. Dated, poorly installed, or taste-specific panel installations are often better removed before sale. The cost of removal is lower than the negative impact of a panel that prospective buyers see as a project — something they will need to undo before the property feels like theirs. A freshly plastered and painted wall is a neutral backdrop that costs less to produce than a panel removal and replastering project viewed as a problem by buyers.

    What is the typical ROI on quality wall panel installations?
    Direct ROI calculation for interior features is imprecise because it varies by property type, local market, and buyer demographics. As a general principle, quality feature wall installations in the right locations (living room, master bedroom, entrance hall) in appropriate properties are viewed by many agents as positive cost-neutral-to-positive features: they rarely cost more to install than they add to perceived value in the right context, and they can meaningfully differentiate a property from similar listings in a competitive market.

    Where Panels Add the Most Value

    Living Room Feature Wall

    The primary living room feature wall is the most photographed and highest-traffic space in any property listing. A quality panel here — well-installed, well-lit — is the single panel installation most likely to be viewed positively by buyers and agents.

    Master Bedroom Headboard Wall

    A panel headboard wall in the master bedroom creates an obvious “hotel room” quality that buyers consistently respond to positively. It’s contained (one wall), immediately understood, and adds a sense of considered luxury to the room that buyers associate with quality throughout.

    Entrance Hall

    First impressions drive property valuation. Wainscoting or slat panels in a well-finished entrance hall signal that the property has been looked after and designed throughout. Estate agents specifically note that entrance halls set expectations for everything that follows.

    Where to Be More Cautious

    • Bedrooms in properties likely to sell to families: Very design-specific panel choices may need to be undone before sale if the target market is broad family buyers rather than design-conscious buyers
    • Properties in value-led markets: In areas where buyers are primarily driven by price-per-square-foot, premium finishes are rarely captured in the sale price
    • DIY installations: A visible DIY installation — uneven lines, visible adhesive squeeze-out, panel gaps — is actively negative in a sale context

    For the cost context — understanding what you’re investing before assessing the return — our wall panel cost guide and panel cost comparison by budget level are the right starting points.

  • Do Wood Wall Panels Make a Room Look Smaller? The Truth

    Do Wood Wall Panels Make a Room Look Smaller? The Truth

    The Short Answer

    Wood wall panels, used correctly, do not make rooms look smaller. In many cases — particularly with acoustic slat panels installed floor-to-ceiling — they make rooms feel larger. The fear that paneling reduces perceived room size is based on a misunderstanding of how visual perception works in interior spaces.

    Here’s the full explanation, plus the specific circumstances where panels can reduce perceived size (and how to avoid them).

    Why Vertical Panels Enlarge Rather Than Shrink

    The visual effect of a surface depends on what it does to the eye’s movement through the room. Strong vertical lines — the defining feature of acoustic slat panels — draw the eye upward. When your eye travels upward, it registers height. A room that makes you look upward feels taller, and a taller room always feels larger overall.

    This is the same principle that makes vertical stripes on clothing elongate a silhouette. Applied to walls, it’s even more powerful: floor-to-ceiling vertical slat panels in a room with a 2.4m ceiling create the perception of a room with a 2.7m or 2.8m ceiling — not because the ceiling is higher but because the eye’s path through the space makes it feel that way.

    Factors That Affect the Spatial Impact

    Panel Orientation

    • Vertical slat panels: Elongate perceived ceiling height. Make rooms feel taller and therefore larger. Recommended for rooms with standard ceiling heights.
    • Horizontal panels (shiplap, board-and-batten installed horizontally): Widen perceived room width but reduce apparent height. Can make a tall, narrow room feel better proportioned — but in a room that’s already low-ceilinged or small, horizontal panels work against you.

    Species and Tone

    • Light wood (pale oak, ash): Reflects light rather than absorbing it. Light-reflective panels in a small room actively contribute to perceived size by keeping the room feeling bright and open.
    • Dark wood (walnut, ebonised oak): Absorbs light. In a small room, a dark panel wall on a north-facing wall with limited natural light will feel oppressive. In the same small room with a large south-facing window and good artificial lighting, a single dark feature wall can add drama without reducing the sense of space.

    How Many Walls You Panel

    One panel wall: creates a focal point that draws the eye, which can make the room feel more defined and spacious rather than smaller. Three or four panel walls in a small room: the visual complexity starts to reduce perceived space, particularly if the panels are in dark tones or heavy profiles. In small rooms, stick to one panel wall.

    The Counter-Intuitive Truth About Small Rooms

    The instinct in small rooms is to do less — less texture, less feature, lighter colours throughout. But this often produces rooms that feel unresolved and — paradoxically — smaller. A small room with a single, well-executed feature wall has a defined sense of scale; a small room treated entirely in safe, neutral magnolia has no definition at all and feels uncertain in its dimensions.

    Our advice for small rooms: choose a panel wall on the primary feature wall (the wall you face from the main seating position), use vertical slat panels in a light-to-mid tone, and treat the remaining walls in a complementary neutral. The result will feel larger, not smaller, than an entirely unpaneled room.

    For the design principles behind successful accent wall placement in rooms of all sizes, our accent wall ideas guide covers the decision-making process. And for which panel types suit smaller spaces best, our slat wall panel ideas guide has 20 approaches with specific applications.

    Find the Right Panels for Your Room Size

    Browse the full wood wall panel collection at The Panel Hub — including the SoundPanel™ acoustic slat range, whose slim vertical profile is one of the most space-enhancing panel formats available. For inspiration showing how panels read in rooms of different sizes and proportions, our interior slat wall ideas guide covers 50+ real-room applications. The acoustic panel buyer’s guide is worth reading if acoustic performance is also part of your brief.

    When Panels Can Make a Room Feel Smaller (And How to Avoid It)

    While wood panels generally help a room feel larger, there are specific circumstances where the wrong installation can reduce perceived space. Understanding these situations helps you make better decisions about where and how to panel.

    Horizontal paneling in a low-ceiling room is the most common mistake. Horizontal lines draw the eye sideways, which emphasises width but actively suppresses apparent height. In rooms with standard or below-standard ceiling heights, horizontal paneling should be avoided or limited to a low wainscoting treatment where the horizontal element is clearly below the room’s main visual zone.

    Dark panels in an already dark room can reduce perceived volume. Dark surfaces absorb light rather than reflecting it, which makes the room feel smaller and more enclosed. In rooms without good natural light, or with few windows, dark panel materials need to be compensated with stronger artificial lighting or restricted to a single feature wall with much lighter treatment on all other surfaces.

    Busy, highly textured patterns in a small room can feel overwhelming at close viewing distance. The same 3D geometric panel that looks dramatic in a large living room can feel claustrophobic in a narrow hallway or small bathroom. In tight spaces, subtler textures — shallow grooves, gentle relief — are more effective than deep, dramatic three-dimensional profiles.

    Panel Size and Room Perception FAQs

    Do vertical or horizontal panels make a room look bigger?
    Vertical panels make rooms look taller. Horizontal panels make rooms look wider but shorter. For most small or average-sized rooms, vertical orientation is preferable because ceiling height is the greater constraint. Horizontal orientation suits rooms that are taller than they are wide — an unusual proportion, but it exists in some older buildings and converted properties.

    What colour panels make a small room look bigger?
    Light colours — pale oak, whitened ash, washed birch — reflect more light and reduce the apparent mass of the wall. White-painted MDF panels or paneling finished in a white or off-white paint are the most space-enhancing option. Light reflective value (LRV) is the metric to look for: anything above 70 LRV is considered highly light-reflective.

    Do floor-to-ceiling panels make ceilings look higher?
    Yes — particularly with vertical slat profiles. Floor-to-ceiling coverage eliminates the visual break at cornice or ceiling junction level, creating an uninterrupted vertical line that reads as height. This effect is most pronounced with narrow slat profiles (18–22 mm). Wider boards with strong horizontal joints can counteract the effect.

    Is paneling one wall or all four walls better for a small room?
    One wall is almost always the better choice for small rooms. Paneling all four walls of a small space introduces visual weight from every direction, which can feel overwhelming. A single-wall treatment creates depth and interest while leaving the other three walls receding — this is the most space-efficient use of panels in any compact room.

  • Do Wood Wall Panels Need to Acclimatise? Yes — Here’s Why It Matters

    Do Wood Wall Panels Need to Acclimatise? Yes — Here’s Why It Matters

    What Is Acclimatisation?

    Acclimatisation — also called conditioning or acclimation — is the process of leaving your wall panels in the room where they’ll be installed for a period before fitting them. During this time, the panels adjust to the temperature and relative humidity of that specific room, expanding or contracting until they reach equilibrium with their environment.

    Skip this step and you risk panels that bow, warp, or develop gaps after installation — not because the product is faulty, but because the panels are still moving in response to environmental conditions they haven’t yet stabilised to.

    Why Wood-Based Panels Move

    Wood and engineered wood products (MDF, plywood, OSB) are hygroscopic — they absorb and release moisture from the surrounding air. As moisture content changes, the material expands (when moisture increases) or contracts (when it decreases).

    A panel manufactured in a climate-controlled factory and shipped in a sealed package arrives at your home in a different state to the conditions it will experience on your wall. Even a 2–3% change in moisture content can cause a 96-inch panel to expand or contract by several millimetres — enough to create visible bowing or open gaps between panels.

    How Long Do Panels Need to Acclimatise?

    • Minimum: 24 hours — sufficient for rooms with stable temperature and humidity similar to the delivery vehicle/warehouse conditions
    • Standard: 48 hours — recommended for most domestic rooms
    • Extended: 72+ hours — recommended for rooms with higher humidity variation (bathrooms, kitchens, basements) or if panels have been stored in significantly different conditions (cold garage, heated warehouse)

    How to Acclimatise Panels Correctly

    • Store flat — never lean panels against a wall during acclimatisation. Leaning causes gravity-induced bowing that can be difficult to correct during installation, especially in panels that have begun to take a set.
    • Keep in the installation room — acclimatising in a different room (hallway, garage) doesn’t help. The panels need to be in the specific environment they’ll be installed in.
    • Remove packaging — leave panels loosely covered or uncovered so air can circulate around them. Keeping panels sealed in packaging prevents the moisture exchange that acclimatisation relies on.
    • Maintain normal room conditions — don’t heat or dehumidify the room more aggressively than usual during acclimatisation, and don’t install in a room that’s been freshly plastered or painted (high moisture content in fresh plaster needs to dry fully first).

    Signs You Didn’t Acclimatise Long Enough

    If panels weren’t fully acclimatised before installation, you may notice:

    • Gaps opening between panels in the weeks after installation
    • Panels bowing slightly away from the wall in the centre
    • Raised edges where panels meet (the “cupping” effect)

    In most cases, panels that were only slightly under-acclimatised will stabilise over time as the adhesive constrains further movement. Severely bowed panels may need to be removed, allowed to fully acclimatise, and reinstalled.

    Does This Apply to All Panel Types?

    Wood veneer over MDF: yes, acclimatisation required.
    WPC (Wood Plastic Composite): minimal movement, but 24 hours is still recommended.
    PVC panels: no acclimatisation required — PVC doesn’t absorb moisture.
    Solid timber planks: most critical — allow 5–7 days for solid wood.

    The SoundPanel™ acoustic slat panels use a real wood veneer over MDF core — 48 hours acclimatisation is the standard recommendation before installation. For the full installation process this fits into, see our step-by-step slat panel installation guide.

    Order Your Panels

    Browse the complete wood wall panel collection at The Panel Hub — order early enough to allow the recommended 24–48 hour acclimatisation period before installation day. The SoundPanel™ acoustic slat range includes acclimatisation guidance in the product specification. For design inspiration, our interior slat wall ideas guide covers 50+ room applications. The acoustic panel buyer’s guide covers material construction — useful context for understanding why wood-based panels need time to adjust to room conditions.

  • Faux Stone Wall Panels vs Real Stone: An Honest Comparison

    Faux Stone Wall Panels vs Real Stone: An Honest Comparison

    The Fundamental Question

    Real stone walls have been status symbols in architecture for thousands of years — and for good reason. But the weight, cost, and structural requirements of natural stone make it inaccessible for most residential interior and exterior applications. Faux stone panels offer the visual character of natural stone at a fraction of the weight and cost. The question is: how close is the result, and when is the real thing still worth it?

    What Are Faux Stone Panels?

    Faux stone panels — also called stone effect panels, stone cladding panels, or composite stone panels — are lightweight panels moulded from high-density polyurethane, concrete composites, or other materials to replicate the texture, pattern, and colour of natural stone. Products like RockSurface® are designed to deliver slate, limestone, or sandstone aesthetics without the structural or weight demands of the real material.

    Head-to-Head Comparison

    Weight

    • Real stone: 30–100+ kg per square meter depending on species and thickness. Requires structural support — not suitable for standard drywall without engineering assessment.
    • Faux stone panels: 2–8 kg per square meter. Can be installed on standard drywall, timber framing, and most interior wall substrates without structural modification.

    Winner: Faux stone — dramatically

    Cost

    • Real stone: $30–$150+ per square foot installed, depending on species, cut, and labour. Premium natural stones (marble, travertine, slate) considerably more.
    • Faux stone panels: $5–$30 per square foot installed. Significant savings even at the premium end.

    Winner: Faux stone

    Installation

    • Real stone: Requires structural assessment, specialist adhesive, professional installation in most cases. Tile cutting requires wet saw and experience. Days of work for a feature wall.
    • Faux stone panels: DIY-friendly adhesive installation. Panels cut with a regular saw. A feature wall typically completes in a day.

    Winner: Faux stone

    Aesthetics (Close Range)

    • Real stone: Irreplaceable. Each piece unique. Genuine texture, variation, and the quality of a material with geological history. Experienced eyes always recognise real stone.
    • Faux stone: High-quality polyurethane panels are convincing from 3–5 feet. Pattern repeat becomes visible on close inspection. The texture is real; the material is not.

    Winner: Real stone (at close range)

    Durability (Interior)

    • Real stone: Essentially permanent. Resists impact, moisture, and heat. Will outlast the building in most cases.
    • Faux stone (high-quality): 15–25 years with normal interior care. Quality polyurethane panels resist impact and moisture well. Less durable than real stone but more than adequate for most domestic applications.

    Winner: Real stone (long-term)

    When to Choose Faux Stone Panels

    • Drywall or timber stud walls that can’t support stone weight
    • Budget-constrained projects where real stone is cost-prohibitive
    • DIY installations where professional tiling is not feasible
    • Exterior accent walls where lightweight panels are essential
    • Feature walls viewed primarily from mid-range distances

    When Real Stone Is Worth It

    • Fireplace surrounds where material authenticity is the design centrepiece
    • High-end renovations where close-range inspection is expected
    • Exterior applications in high-UV, high-rainfall climates where polymer panel longevity is uncertain
    • Heritage or architecturally-specified projects requiring genuine materials

    For most homeowners looking to add stone character to a feature wall, faux stone panels deliver an outstanding result at a fraction of the real-stone investment. For context on other material options for feature walls, our wood panel wall guide covers the timber alternatives — and our outdoor wall cladding guide covers the exterior options across all material types.

    Longevity and Maintenance: A Realistic Comparison

    The longevity debate between faux and real stone is often framed as faux stone being the inferior choice — but the reality is more nuanced once you account for real-world maintenance requirements.

    Real stone can technically last centuries in the right conditions. But practical longevity depends on correct installation, proper sealing, and ongoing maintenance. Natural stone is porous — it absorbs moisture, staining agents, and in exterior applications, freeze-thaw cycles cause spalling over time. Professional resealing every 2–5 years is standard for real stone in exposed conditions. Grout lines between individual stone pieces require pointing maintenance. Efflorescence (white mineral deposits) is a common issue on exterior real stone installations.

    Faux stone panels made from high-density polyurethane are non-porous, UV-stabilised, and require no sealing. Cleaning is straightforward — a damp cloth or low-pressure hose removes most surface dirt. The main vulnerability is UV exposure over extended periods (15–20 years) affecting colour vibrancy, and physical impact from objects (panels can dent under direct impact, unlike real stone which chips). For interior applications, faux stone panels have an effectively unlimited lifespan under normal conditions.

    The maintenance cost comparison: Over a 10-year period, the ongoing maintenance cost for real stone (sealing, repointing, professional cleaning for larger areas) often exceeds the original cost difference between faux and real stone. For most residential applications, the total cost of ownership over a decade or longer favours quality faux stone panels.

    FAQs: Faux Stone Panels vs Real Stone

    Can faux stone panels really look like real stone?
    Quality polyurethane faux stone panels — particularly three-dimensional profiles like Ridge Rock and Highland Rock — closely replicate the colour variation, surface texture, and dimensional depth of real stone. From normal viewing distances (1.5m+), the distinction is minimal. Close inspection reveals smoother surfaces between texture peaks compared to natural stone’s mineral grain structure.

    Are faux stone panels safe for exterior use?
    High-quality faux stone panels designed for exterior use — specifically those with UV-stable pigments and weather-resistant polyurethane construction — are suitable for external applications. Not all faux stone products are rated for exterior use; check the manufacturer’s specification before installing outdoors. Interior-only products will fade and degrade in UV exposure and moisture cycles.

    How heavy are faux stone panels compared to real stone?
    Faux stone panels are significantly lighter — typically 2–4 kg/m² compared to 30–80 kg/m² for real stone cladding. This weight difference means faux stone panels don’t require structural reinforcement of the wall behind them, can be installed on standard plasterboard, and are manageable for single-person DIY installation.

    Do faux stone panels feel hollow when tapped?
    Solid polyurethane panels feel more hollow than real stone when tapped, which is noticeable on close contact. In practice, once installed against a wall and viewed from normal room distances, this difference is imperceptible. The three-dimensional texture and visual depth of quality faux stone panels dominate the visual experience.

    Shop Stone Effect Wall Panels

    Browse the RockSurface® faux stone panel collection at The Panel Hub — the most popular faux stone option for feature walls and exterior cladding. Explore the full wood wall panel range for the complete picture of panel types available, including wood veneer alternatives where a warmer aesthetic is preferred. For design inspiration showing how stone effect panels combine with other materials in finished interiors, our interior slat wall ideas guide covers multi-material feature wall applications. The acoustic panel buyer’s guide covers the performance differences between panel types.

  • Feature Wall Ideas for Living Room: 12 Looks That Actually Work

    Feature Wall Ideas for Living Room: 12 Looks That Actually Work

    Why Your Living Room Needs a Feature Wall

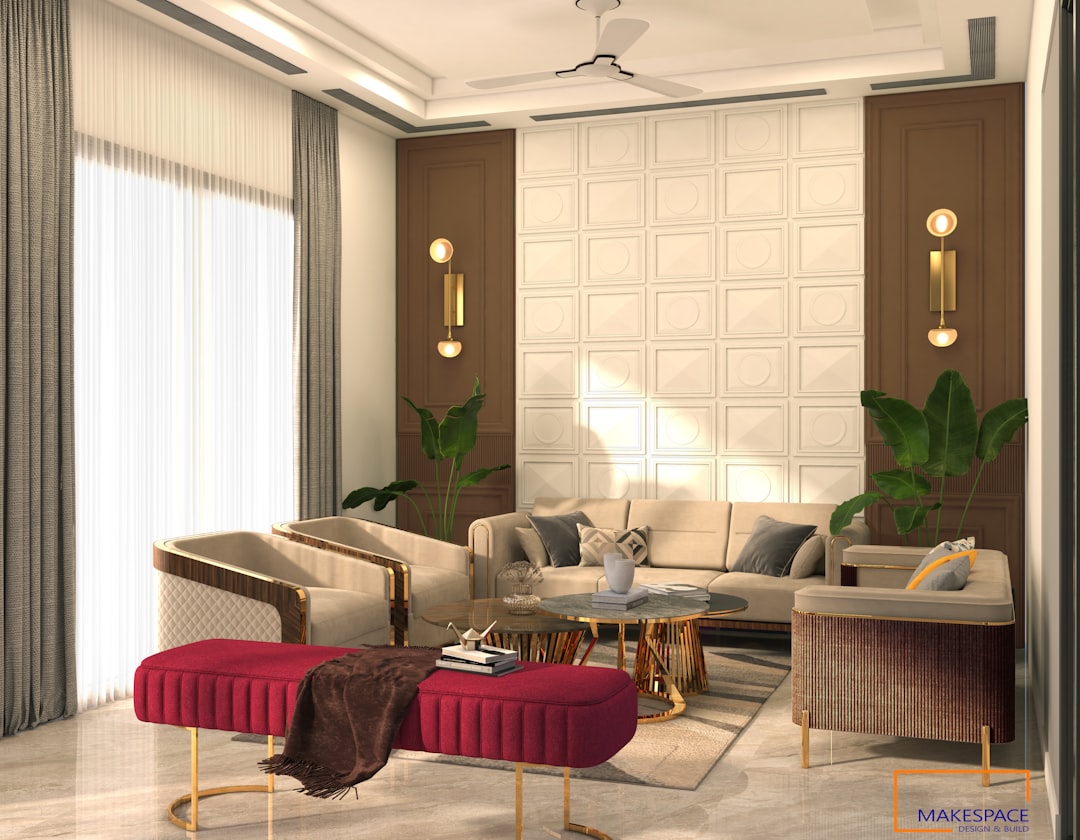
    Panel Hub living room feature wall with natural wood panels adding warmth and depth
    Photo by Makespace Design on Unsplash

    A feature wall turns a plain room into a designed space. In the living room — typically the largest, most-used room in the home — a well-chosen feature wall creates a focal point, frames your furniture, and gives the room a sense of intention. Without one, even a well-furnished living room can feel unfinished.

    The good news: feature wall ideas for living rooms range from a single afternoon’s work (paint, panels) to more involved projects (stone cladding, built-in shelving) — so there’s a budget-appropriate option for everyone.

    12 Feature Wall Ideas for Living Rooms

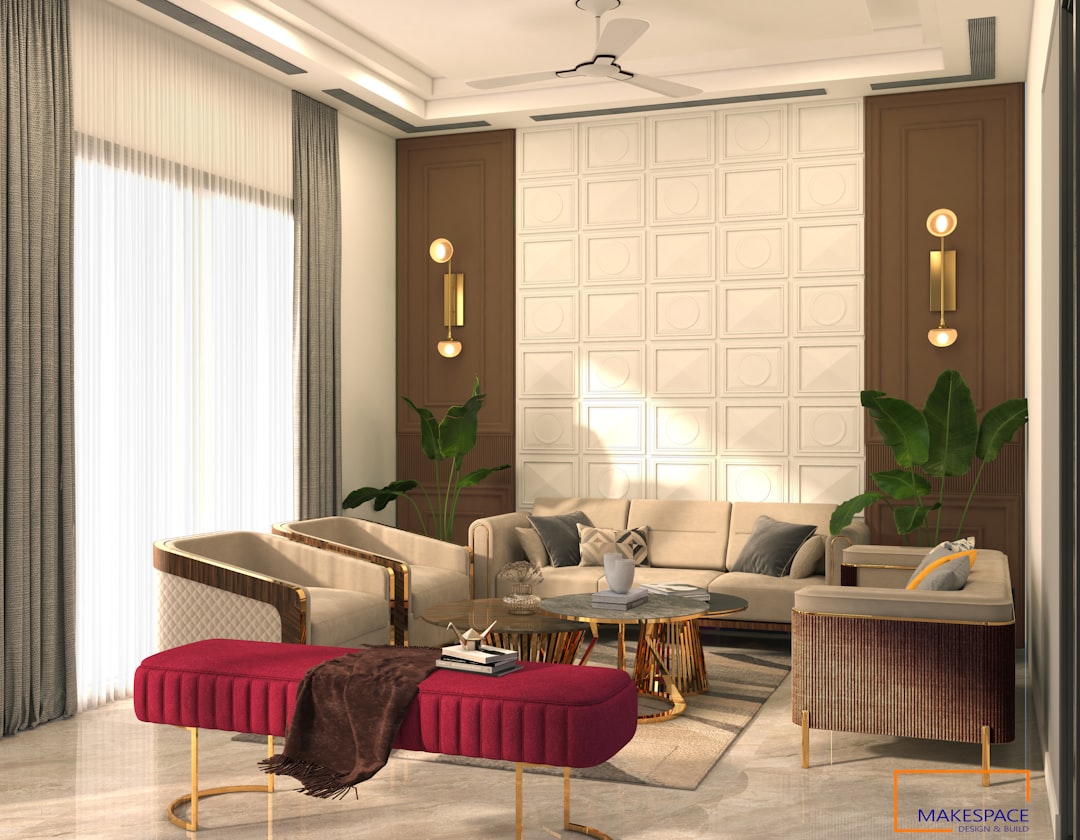
    Panel Hub 12 feature wall ideas for living rooms including geometric and slat panels
    Photo by Makespace Design on Unsplash

    1. Acoustic Wood Slat Panels Behind the Sofa

    American Acoustic Slat Wood Wall Panels - Oak - View 29

    The most sought-after living room feature wall right now. A full wall of vertical wood slat panels behind the sofa creates instant architectural character, adds warmth, and — thanks to felt-backed acoustic technology — reduces the echo that plagues hard-surfaced living rooms. Pair with warm lighting for a cosy, hotel-lobby feel.

    2. TV Wall with Wood Panels

    Acoustic Curve Wood Wall Panels - Oak - View 13

    Frame your TV in wood panels rather than leaving it floating on a painted wall. Floor-to-ceiling wood slat panels with the TV recessed or surface-mounted transforms the media wall from an afterthought into a design feature. Add LED strip lighting behind the panels for ambient depth.

    3. Painted Arch Feature

    Paint a large arch shape in a contrasting colour on one wall. It costs almost nothing, requires no materials beyond paint, and creates a bold, graphic statement. Works especially well in minimal or Bauhaus-inspired living rooms.

    4. Limewash or Textured Paint

    Limewash paint builds up layers of chalky texture that absorb light differently at different times of day. It suits earthy, organic, and Mediterranean-inspired interiors and adds texture without any 3D materials.

    5. Full-Height Stone Panel Wall

    Highland Rock Wall Panel - Grey - View 7

    Faux stone panels — like RockSurface® cladding — bring natural stone aesthetics without the structural demands or cost of real stone. Ideal for fireplace walls or living room feature walls with an outdoor or industrial edge.

    6. Fluted Wood Panel Wall

    Fluted panels with their vertical grooves create a sculpted, light-catching texture that adds architectural drama. Popular in contemporary and transitional living rooms, especially in walnut or oak finishes.

    7. Bookshelf Wall

    Built-in bookshelves that span an entire wall make a room feel curated and lived-in. Combine with a contrasting back-panel colour for added depth — or use wood panels as the backboard behind the shelves.

    8. Wallpaper Mural

    A botanical, landscape, or abstract mural wallpaper on a single wall is a dramatic option that requires no structural work. Best for bold personalities and rooms with simple, clean furniture so the wall isn’t competing.

    9. Wainscoting with Paint Above

    Wainscoting covers the lower third of the wall in panels, with a contrasting paint colour above. It’s traditional, practical, and works beautifully in formal or transitional living rooms.

    10. Brick Effect Panels

    Industrial, loft-style living rooms benefit from the warmth and texture of exposed brick — but you don’t need the real thing. Lightweight brick-effect panels give the look without the mess or cost.

    11. Vertical Garden Wall

    A living plant wall brings biophilic design into the living room. Even a modular faux-plant version creates warmth, colour, and an organic focal point that photographs beautifully.

    12. Mirror Panel Wall

    Mirrored or partially mirrored panels expand the perceived size of the room and bounce natural light. Best in smaller living rooms or dark spaces that need visual breathing room.

    How to Choose a Feature Wall in Your Living Room

    Panel Hub guide to choosing a feature wall for your living room interior
    Photo by Studio Archifiction on Unsplash

    Always choose the wall your eye falls on first when entering the room. In most living room layouts, that’s either:

    • The wall behind the main sofa
    • The wall the TV sits on
    • The chimney breast wall

    For acoustic comfort, choose a textured material — wood slat panels are the most practical because they combine aesthetics with real sound performance.

    Budget Guide

    • Under $100: Limewash paint, painted arch
    • $100–$500: Wallpaper mural, wainscoting with moulding
    • $500–$1,500: Acoustic slat panels, faux stone cladding
    • $1,500+: Built-in shelving, solid wood feature walls

    For the best value-to-impact ratio, acoustic wood slat panels remain the single most transformative living room upgrade available. They’re tangible, tactile, and deliver both visual and functional benefits in a single installation.

    For styling advice that goes beyond the feature wall — furniture placement, colour, lighting, and panel combinations throughout the full room — read how to decorate a living room with wood paneling.

    How to Style Your Living Room Around a Feature Wall

    A feature wall only works when the rest of the room responds to it. Once you commit to a bold or textured wall treatment, every other decision — furniture, lighting, colour — should reinforce it rather than compete.

    • Keep the opposite wall quiet. If your feature wall uses stone cladding, dark wood panels, or a mural, the wall directly opposite should be plain and neutral. Two competing feature walls cancel each other out.
    • Float the sofa slightly away from the wall. Pulling the sofa 6–10 inches forward from a panelled feature wall creates visual breathing room between the furniture and the material, making both read better.
    • Match the material’s undertone. Walnut slat panels carry warm, reddish-brown undertones — pair them with camel, burnt orange, or deep green textiles. Cool-toned stone panels call for grey, dusty blue, or sage soft furnishings. Undertone harmony is what separates a designed room from an assembled one.
    • Light the wall deliberately. Without directional lighting, a textured feature wall disappears at night. A floor lamp with uplighting placed in front of the panel wall grazes the surface and creates dramatic shadow depth in the slat gaps or stone texture. Even a single well-placed lamp transforms how the room reads after dark.
    • Let the feature wall set the room’s accent colour. Pull one tone from the wall material and use it as the accent colour in cushions, artwork, or a throw. This creates visual continuity without making the room feel monotonous.

    Common Feature Wall Mistakes to Avoid

    Feature walls fail for predictable reasons. Knowing these in advance saves an expensive or time-consuming reversal.

    • Choosing the TV wall instead of the sofa wall. The wall behind the TV competes visually with the screen every evening. The feature wall should be the one your guests face and you look toward — typically the wall behind the main sofa.
    • Stopping below the ceiling. Panels or wallpaper that stop a foot below the cornice look unresolved and make ceilings feel lower. Go floor to ceiling, or at minimum to the top of the door frame height. Half-height feature walls only work on walls with deliberate dado rail or wainscoting detailing.
    • Overloading a textured wall with accessories. The wall itself is the feature. Adding fifteen frames, shelves, and decorative objects to a stone or slat panel wall turns a statement into clutter. Let the material do the work.
    • Ignoring the acoustic consequences. Hard feature wall materials — stone panels, brick effect, mirrored tiles — increase the echo and reverberation in the room. If you choose a hard-surface feature wall, balance it with an acoustic treatment elsewhere: soft furnishings, rugs, curtains, or acoustic slat panels on an adjacent wall.
    • Mismatching scale to room size. Fine-grain textures and small-scale patterns disappear on a wall viewed from 12 feet away. Choose materials with a scale — slat width, stone block size, pattern repeat — that reads clearly at the viewing distance of your room.

    Shop Living Room Wall Panels

    Explore the living room panel collection — for geometric and 3D relief options, the GroovePanel® geometric wood wall panel collection covers solid wood mosaic, crossing lines, and concentric square formats that work especially well as living room statement walls. at The Panel Hub, or browse the full wood wall panel range for every option. For more living room ideas, our interior slat wall ideas guide shows 50+ looks across styles and budgets. If you’re considering a panel with acoustic properties, the acoustic panel buyer’s guide explains what to look for.

  • Fluted vs Reeded Panels: What’s the Difference and Which Should You Choose?

    Fluted vs Reeded Panels: What’s the Difference and Which Should You Choose?

    Fluted vs Reeded: Why the Confusion?

    The terms “fluted” and “reeded” are used interchangeably by many retailers — which causes genuine confusion when you’re trying to make a specific design decision. They are actually distinct profiles with different visual characteristics, different historical origins, and subtly different effects in a room. Here’s a clear breakdown.

    What Are Fluted Panels?

    Fluted panels feature a series of parallel concave channels (grooves that curve inward) cut or moulded into the panel surface. When you look at a fluted panel in cross-section, the ridges between channels have a sharp or flat top, and the grooves cut into the material.

    Fluting has its roots in classical architecture — specifically the vertical grooves carved into Greek and Roman columns. In modern interiors, this translates to wall panels with a series of parallel vertical grooves that create strong, directional shadow lines across the surface.

    Visual Characteristics of Fluted Panels

    • Sharp, clean shadow lines
    • Crisp, architectural feel
    • Light reflects off the flat or slightly curved ridges; shadows fall into the grooves
    • More graphic and defined than reeded profiles

    Best Applications for Fluted Panels

    • Feature walls in contemporary and minimalist interiors
    • Kitchen island cladding and cabinetry fronts
    • Hallways where strong directional lines elongate the space
    • Furniture fronts — wardrobes, drawer fronts, cabinet doors

    What Are Reeded Panels?

    Reeded panels are essentially the reverse of fluted — they feature parallel convex ridges that protrude from the surface rather than cutting into it. In cross-section, reeded profiles look like a row of rounded bumps or half-cylinders sitting on the panel face.

    Reeding is historically associated with furniture — particularly the legs of Regency and Federal-style pieces — and has a softer, more organic character than fluting.

    Visual Characteristics of Reeded Panels

    • Soft, rounded shadow lines
    • Warmer, more tactile feel than fluted profiles
    • Light wraps around the convex ridges, creating a gentler play of light and shadow
    • More organic and sculptural than fluted profiles

    Best Applications for Reeded Panels

    • Bedroom feature walls — the soft profile suits restful, warm spaces
    • Living room walls in Japandi and organic modern interiors
    • Bathroom walls where a tactile, spa-like quality is desired
    • Curved wall installations — reeded profiles follow curves more naturally than sharp-groove fluting

    Side-by-Side Comparison

    Feature Fluted Panels Reeded Panels
    Profile shape Concave channels (inward grooves) Convex ridges (outward bumps)
    Shadow quality Sharp, defined lines Soft, curved shadows
    Aesthetic feel Architectural, graphic, modern Organic, soft, tactile
    Historical reference Classical columns Regency furniture
    Best room type Contemporary, minimalist, commercial Bedroom, living room, spa-like bathrooms
    Curved surfaces More difficult Handles curves better

    In the 2025–2026 interior design landscape, both profiles are trending — but for slightly different reasons:

    • Fluted panels are driving the “architectural feature wall” trend in contemporary apartments, kitchen renovations, and home offices. Their graphic clarity suits the clean lines of modern Scandi and minimalist interiors.
    • Reeded panels are associated with the organic modern and Japandi movements — warmer, less severe, and increasingly popular in bedrooms and living spaces where tactility and comfort are prioritised over architectural clarity.

    How to Choose Between Them

    Ask yourself two questions:

    1. Is the room contemporary and angular, or warm and organic? Contemporary → fluted. Organic → reeded.
    2. Do you want the wall to make a statement or create atmosphere? Statement → fluted. Atmosphere → reeded.

    If you genuinely can’t decide, order samples of both. The difference in person, under your room’s actual lighting, is usually immediately apparent — one profile will suit the space and the other won’t.

    Final Word

    Fluted and reeded panels are both beautiful, both on-trend, and both available in real wood veneer for premium wall applications. The choice ultimately comes down to the room’s existing character and the effect you want to create. Neither is objectively better — they’re just right for different spaces.

    Mixing Fluted and Reeded Panels in the Same Space

    Using both profiles in a single interior is possible — and can look intentional — but it requires a clear design logic. Random mixing reads as indecision; deliberate contrasting reads as sophistication.

    The logic that works: Use one profile as the dominant surface treatment and the other as an accent or detail. For example: fluted panels on the main feature wall with reeded panels used as furniture cladding on a built-in unit, kitchen island, or bath panel. The profiles are related enough to feel cohesive, distinct enough to have purpose.

    Material and finish consistency: When mixing profiles, keep the timber species and finish identical across both. The same oak stain on fluted and reeded panels in the same room creates a material family. Changing species as well as profile creates visual noise rather than layered texture.

    Scale separation: Mixing profiles works best when the applications are physically separated — different walls, different furniture pieces, different zones. Adjacent panels in alternating profiles on the same wall surface rarely work unless the spacing and scale have been designed very precisely.

    When to stick to one profile: In rooms with under 2.4m ceiling height, a limited floor area, or existing strong architectural features, one profile executed well is almost always better than two profiles competing for attention.

    FAQs: Fluted vs Reeded Panels

    What is the main difference between fluted and reeded panels?
    Fluted panels have concave channels — the grooves go inward into the surface. Reeded panels have convex ridges that project outward from the surface. Both create a parallel shadow-line effect, but the cross-sectional profiles are geometrically opposite.

    Which profile is more durable?
    Both profiles are equally durable when made from the same base material. The ridges and grooves don’t create structural weakness. Reeded profiles may accumulate slightly more dust in the convex ridges, but this is a cleaning consideration rather than a durability one.

    Can I use fluted or reeded panels on a ceiling?
    Yes. Both profiles work on ceilings, particularly in rooms with high ceilings or in compact spaces where a ceiling feature wall adds visual interest without consuming floor area. Ensure the panels are mechanically fixed (not adhesive-only) for overhead applications.

    Are fluted and reeded panels available in acoustic versions?
    Acoustic backing can be added to many slat and fluted profiles. The acoustic performance comes from the backing material (typically felt), not the face profile. If sound absorption is a requirement alongside the decorative finish, specify panels with an acoustic backing when ordering.

    Shop Fluted and Reeded Panels

    Compare both profiles side by side in the full wood wall panel collection at The Panel Hub — and order samples before committing. For broader design inspiration showing how different panel profiles look in finished rooms, our interior slat wall ideas guide covers 50+ real-room applications. If acoustic performance is also part of your decision — slat panels with felt backing absorb sound in a way that solid-face fluted and reeded panels don’t — the acoustic panel buyer’s guide explains the difference clearly. For those drawn to geometric pattern over a linear profile, the GroovePanel® geometric wood wall panel range offers 100% solid wood mosaic, concentric square, and 3D relief formats as a distinct alternative to both fluted and reeded.

  • Fluted Wood Panels vs Slat Panels: What’s the Difference?

    Fluted Wood Panels vs Slat Panels: What’s the Difference?

    Two Terms, Two Different Profiles

    If you’ve been browsing wood wall panels, you’ve almost certainly seen “fluted panels” and “slat panels” used to describe what appear to be similar products. They’re not identical — and understanding the distinction helps you choose the profile that actually suits your space.

    What Are Slat Panels?

    Slat panels consist of individual strips of real wood (or wood veneer) mounted at evenly-spaced intervals across a backing board, with open gaps between each slat. The open gap is a defining characteristic — you can see the backing (usually black felt) between each strip.

    Key characteristics:

    • Open profile — genuine gaps between slats
    • Strong shadow-line effect — dramatic light and shadow play
    • Acoustic performance from the felt backing visible through the gaps
    • Lighter visual weight — the gaps create breathing room in the design

    What Are Fluted Panels?

    Fluted panels have a solid face with parallel concave channels (grooves) carved, routed, or moulded into the surface. There are no open gaps — the entire panel face is covered in timber, with alternating ridges and channels creating the textural effect.

    Key characteristics:

    • Solid profile — no gaps, fully covered surface
    • More architectural, sculptural character
    • Less inherent acoustic performance (though can be paired with felt backing)
    • Heavier visual weight — denser and more formal

    Visual Effect Side by Side

    Feature Slat Panels Fluted Panels
    Surface coverage Partial (open gaps) Full coverage
    Shadow quality Deep, strong shadow lines Softer, graduated shadows
    Aesthetic feel Contemporary, airy, Scandinavian Architectural, classical, formal
    Acoustic backing visible Yes (between slats) No
    NRC performance potential High (with felt backing) Moderate (thinner felt options)

    Common Confusion Points

    Many manufacturers use the terms interchangeably in marketing — particularly calling slat panels “fluted” to invoke architectural associations. When in doubt:

    • Ask whether the panel has an open profile (gaps between slats) or a solid face with carved channels
    • Request a sample — the difference is immediately apparent in person
    • Look for the product’s NRC rating — slat panels with felt backing should have a rated NRC value; purely decorative fluted panels typically won’t

    Where Each Profile Works Best

    Knowing the distinction matters most when committing to a full feature wall. The two profiles create different spatial effects, and choosing the wrong one can flatten a room rather than enhance it.

    Slat panels suit: Rooms where you want warmth without overwhelming visual texture — living rooms, bedrooms, and dining areas where the horizontal or vertical rhythm reads as calm and ordered. Works particularly well on TV walls, bed heads, and behind built-in shelving.

    Fluted panels suit: Spaces where you want stronger architectural presence. Entryways, stairwells, and statement walls in reception rooms. The rounded ridges catch light differently through the day and create shadow-line depth that photographs exceptionally well. Also works as a furniture detail — fluted kitchen island cladding, wardrobe surrounds, and bath panels.

    Ceiling height and proportion: In lower-ceiling rooms, slat panels with a strong vertical orientation visually draw the eye upward. Fluted panels work in taller spaces where their vertical rhythm amplifies height. Both profiles are available in the same wood species and finish options at The Panel Hub, so this decision comes down to architecture and visual effect.

    FAQs: Fluted Panels vs Slat Panels

    Are fluted panels and slat panels the same thing?
    No. Slat panels have flat-faced timber strips separated by grooves or gaps. Fluted panels have rounded, convex ridges running continuously along the surface. Both use similar profile widths, but the cross-sectional shape is different.

    Which profile is more popular in 2025?
    Both remain strong interior trends. Slat panels dominate residential installations due to their familiarity and the availability of acoustic versions. Fluted panels have grown rapidly in high-end residential and boutique commercial settings for their architectural quality and shadow-line depth.

    Can you mix fluted and slat panels in the same room?
    Yes, but with intention. A common approach: slat panels on the main feature wall and fluted panels as a detail on an adjacent partial wall or built-in unit. Mixing them on the same surface typically looks busy rather than considered.

    Do fluted panels work acoustically?
    Standard fluted panels are decorative. For acoustic performance, look for panels with felt or acoustic backing — the same construction as SoundPanel™ acoustic slat panels. The backing absorbs sound; the face profile is aesthetic.

    Which Should You Choose?

    • Choose slat panels if acoustic performance matters, if you want the lighter, more open look, or if your interior style is Scandinavian, contemporary, or Japandi.
    • Choose fluted panels if you want full surface coverage, a more architectural or classical character, or are cladding furniture and cabinetry fronts where an open-gap profile would look unfinished.
    • Consider geometric mosaic or relief panels if neither linear profile suits your brief — the GroovePanel® geometric range offers solid wood 3D relief, crossing lines, and mosaic formats as a bolder alternative to both.

    For a deeper dive into the closely related distinction between fluted and reeded profiles, our guide on fluted vs reeded panels breaks down those two options with the same clarity. And for the full acoustic slat panel picture — types, NRC ratings, and installation — the acoustic wall panel buyers’ guide is the right next read.

  • Hexagon Acoustic Panels: Uses, Benefits, and Design Ideas

    Hexagon Acoustic Panels: Uses, Benefits, and Design Ideas

    What Are Hexagon Acoustic Panels?

    Hexagon acoustic panels are individual panel tiles cut to a six-sided hexagonal shape, designed to be arranged in a tessellating grid on a wall surface. Unlike full-width rectangular slat panels that cover a wall in continuous runs, hexagonal panels are modular — each tile is a discrete piece that can be arranged in different configurations, densities, and patterns.

    They’re available in acoustic versions (with felt backing) for sound absorption and decorative versions for purely visual impact.

    How They Differ from Standard Slat Panels

    Standard acoustic slat panels are installed wall-to-wall in a continuous installation that typically covers an entire feature wall. Hexagonal panels offer a different design language:

    • Modular: Each tile is independent. You can install a sparse arrangement, a tight grid, or a shaped cluster rather than a full wall.
    • Graphic: The hexagonal tessellation creates a geometric pattern layer on top of the wood grain texture.
    • Flexible placement: Tiles can be clustered around a specific area (above a desk, behind a sofa) rather than requiring a full wall installation.
    • Scalable: Add tiles over time as budget allows, rather than committing to a full installation upfront.

    Acoustic Performance

    Acoustic hexagonal panels with felt backing achieve NRC ratings in the 0.55–0.75 range — effective, though typically slightly lower than full-coverage slat panel systems because the modular installation leaves untreated wall area between tiles.

    Coverage strategy matters: a tightly packed hexagonal installation covering 30–40% of wall area will deliver meaningful acoustic improvement. A loose decorative scatter of 6–10 tiles will deliver minimal acoustic benefit despite the acoustic backing.

    Design Ideas for Hexagon Panels

    Statement Cluster Behind a Desk

    A tight cluster of 12–20 hexagonal tiles directly behind a home office desk creates a focal point, identifies the work zone, and provides targeted acoustic treatment exactly where your voice projects during video calls. More visually dynamic than a rectangular panel installation for the same coverage area.

    Bedroom Headboard Arrangement

    Hexagonal tiles arranged in a honeycomb grid behind the bed create an architectural headboard wall effect. In a walnut finish against a light wall, the effect is graphic and premium. Allows you to vary the depth of coverage — wider at the centre, tapering toward the edges — for a shaped installation that a rectangular panel system can’t achieve.

    Children’s Room Accent Wall

    The hexagonal format suits children’s rooms and playrooms, where the geometric pattern adds visual interest appropriate to the space. Mix species or finishes within the tessellation for a more playful result.

    Partial Coverage with Intentional Gaps

    Rather than full tessellation, leave deliberate gaps between tiles to create a scattered, organic arrangement that feels more decorative than installed. Works particularly well in creative studios and informal living spaces.

    Installation

    Individual hexagonal tiles are typically lighter than full wall panels, making them easier to handle solo. Most use adhesive mounting — applying construction adhesive or heavy-duty double-sided tape to the back of each tile. The modular format means mistakes are easier to correct than with full-run slat installations.

    Use a level and a consistent spacing guide for the first row — the hexagonal tessellation will compound any misalignment as you add rows.

    Coverage Planning for Hexagon Panel Installations

    Hexagon panels introduce a geometry that standard rectangular coverage calculations don’t account for. Getting the count right before ordering your wood wall panels prevents both shortfalls and expensive excess.

    Account for edge geometry. A hexagonal tile grid creates irregular edges at wall boundaries — the partial tiles needed to fill the edge zone can account for 10–20% of your total tile count, depending on wall proportions. When measuring your wall and estimating tile count, add 15% over the theoretical coverage to account for edge cuts.

    Map the layout before ordering. Unlike rectangular tiles that align automatically to a grid, hexagonal tiles require a defined centre-point for the installation. The visual balance of the finished panel arrangement depends heavily on where the first tile is placed. Mark the centre of your target wall, then plot the tile layout on paper or use a visual planning tool before you commit the first tile with adhesive. Changes to hexagon installations are disproportionately difficult — the interlocking geometry makes partial replacements visually obvious.

    Consider the shadow gap effect. Hexagonal tiles installed with a consistent 2–3mm gap between tiles create a shadow line effect that adds visual depth and helps disguise minor alignment variations. Tiles installed flush (zero gap) require extremely precise alignment — any deviation is immediately visible. The gap installation method is more forgiving and typically looks better at larger scales.

    Mixing colour and texture. Hexagon panels lend themselves to mixed-finish arrangements — alternating walnut and oak tiles, or a gradient from light to dark across the panel cluster. Plan the colour distribution before installation rather than making it up as you go; random-looking arrangements usually require deliberate planning to look genuinely balanced.

    Frequently Asked Questions

    What are hexagon acoustic panels used for?
    Hexagon acoustic panels are primarily used as feature wall installations in living rooms, bedrooms, home offices, and home theatres. They serve the same acoustic function as rectangular acoustic panels (absorbing echo and reverberation) but with a distinctive geometric aesthetic that makes them a visual centrepiece rather than a flat treatment wall.
    Do hexagon acoustic panels absorb as much sound as regular panels?
    Performance depends on the backing material, not the shape. Hexagon panels with high-density acoustic felt backing achieve comparable NRC ratings to rectangular slat panels — typically NRC 0.75–0.85. The shape affects coverage pattern (more gaps between tiles than rectangular panels) but the felt backing absorbs sound effectively wherever it’s exposed.
    How are hexagon acoustic panels installed?
    Most hexagon panels are installed with construction adhesive applied to the back of each tile. The lightweight construction makes them suitable for adhesive-only installation on smooth plaster or drywall. Some systems include interlocking edge connectors that allow dry installation — tiles clip together before the assembled cluster is fixed to the wall.
    Can hexagon acoustic panels be removed and reinstalled?
    Adhesive-installed hexagon tiles are not easily removed without damage to the tile or the wall. Hook-and-loop (industrial Velcro) backing systems allow removal and reinstallation — useful in rental properties or where the installation may need to move. Check the manufacturer’s specification for whether this option is available.
    What size do hexagon acoustic panels come in?
    The most common residential hexagon tile size is 200mm or 300mm point-to-point (the distance between opposite corners). Larger tiles (400mm+) are typically used in commercial applications. For most domestic feature walls, 200–300mm tiles provide a well-proportioned visual scale relative to standard ceiling heights.

    Are They Right for Your Project?

    Hexagonal panels are the right choice when you want modularity, geometric character, and the ability to create a shaped or clustered installation rather than a wall-to-wall coverage. For maximum acoustic performance or the classic contemporary slat look, full-run rectangular panels remain the stronger choice.

    For acoustic treatment ideas across different rooms, our accent wall ideas guide has broader inspiration, and the acoustic wall panel buyers’ guide will help you compare all panel types on performance. Browse the SoundPanel® Hexagon Acoustic Wall Panel at The Panel Hub for dimensions, finishes, and NRC data.

  • Home Renovation Ideas 2026: Top Wall Trends Transforming Interiors

    Home Renovation Ideas 2026: Top Wall Trends Transforming Interiors

    Why Wall Design Is Leading Home Renovation in 2026

    Walls are no longer just a backdrop—they’re becoming the focal point of modern interiors. In 2026, homeowners are prioritizing wall upgrades that combine aesthetics, functionality, and easy installation. Whether you’re planning a full remodel or a simple refresh, updating your walls delivers one of the highest visual impacts with relatively low effort.

    This shift is driven by three key factors: the rise of personalized interiors, demand for multifunctional spaces, and the growing popularity of DIY-friendly materials.

    Top Wall Trends for Home Renovation in 2026

    1. Textured Wall Panels Take Center Stage

    Flat, plain walls are quickly being replaced by dimensional surfaces. Textured wood wall panels—especially 3D geometric designs—add depth, shadow, and visual interest without overwhelming a space.

    Popular styles include:

    • 3D geometric patterns
    • Concentric designs
    • Linear and ribbed textures

    These panels work particularly well in living rooms, dining areas, and entryways where a statement wall can instantly elevate the ambiance.

    2. Acoustic Wood Slat Walls for Style + Function

    Acoustic wall panels are no longer limited to offices or studios. In 2026, they’re a staple in residential design—especially in open-plan homes.

    Wood slat panels not only create a warm, modern aesthetic but also help reduce echo and noise, making them ideal for:

    • Dining rooms
    • Home offices
    • Living rooms with high ceilings

    They strike the perfect balance between decorative and functional design.

    3. Earthy and Natural Finishes Dominate

    Nature-inspired interiors continue to influence renovation trends. Walls are embracing organic tones and materials that create a calming, grounded environment.

    Trending finishes include:

    These elements bring softness and depth, making spaces feel more inviting and timeless.

    4. Statement Walls with Bold Geometry

    Accent walls are evolving beyond paint. In 2026, bold geometric paneling is redefining statement design.

    Instead of relying on color alone, homeowners are using:

    • Crossing line patterns
    • Hexagon panel layouts
    • Sculptural wall installations

    This approach adds architectural interest and transforms walls into art pieces.

    5. Seamless, Floor-to-Ceiling Wall Coverage

    Partial wall treatments are fading out. Full-height installations are becoming the new standard, creating a cohesive and high-end look.

    Floor-to-ceiling wall panels:

    • Make ceilings appear taller
    • Create a clean, continuous design
    • Enhance modern and minimalist interiors

    This trend works especially well in compact spaces where visual flow is essential.

    6. DIY-Friendly Wall Solutions Are on the Rise

    Homeowners are increasingly choosing renovation options that don’t require heavy construction. Wall panels designed for easy installation are booming in popularity.

    Key features driving this trend:

    • Lightweight materials (MDF, PVC, composite)
    • Interlocking systems or adhesive backing
    • Minimal tools required

    This makes it easier than ever to upgrade a space over a weekend.

    7. Multi-Functional Walls for Modern Living

    As homes adapt to hybrid lifestyles, walls are becoming more than decorative elements.

    In 2026, expect to see walls that:

    • Improve acoustics
    • Add insulation
    • Conceal storage or wiring

    This blend of form and function is especially valuable in smaller homes and apartments.

    Best Rooms to Apply 2026 Wall Trends

    Living Room

    A feature wall with textured or geometric panels creates a strong focal point and enhances the overall design.

    Dining Room

    Wall panels add warmth and intimacy, making dining spaces feel more refined and inviting.

    Bedroom

    Soft textures and acoustic panels help create a calm, restful environment.

    Home Office

    Functional wall treatments improve sound quality while maintaining a professional aesthetic.

    How to Choose the Right Wall Trend for Your Home

    When selecting a wall renovation idea, consider:

    • Room function: Acoustic panels for noisy areas, decorative panels for social spaces
    • Lighting: Textured walls look best with directional or natural light
    • Color palette: Stick to cohesive tones for a modern finish
    • Installation level: DIY vs. professional installation

    The goal is to balance style with practicality.

    Home Renovation Wall Panel FAQs

    How do I prioritise which room to panel first in a home renovation?
    The room where you spend the most time and that visitors see first should be the priority — typically the main living space or the primary bedroom. Hallways are also a strong first choice because they affect the first impression of the entire home and are high-traffic areas where the protective qualities of panels (scuff resistance, durability) justify the investment practically as well as aesthetically.

    Do wall panels add measurable value to a property?
    Quality wall panels — particularly natural wood slat installations and architectural wainscoting in period properties — are consistently associated with higher valuations in residential property assessments. They signal that a property has been considered and invested in beyond the cosmetic. The qualifier is quality: poorly fitted panels or panels in obviously low-grade materials can have the opposite effect, so material and installation standards matter significantly.

    Can I install wall panels while living in the property?
    Yes — wall panel installation is one of the least disruptive renovation activities. Most panel installations generate minimal dust (compared to plastering or tiling), create no structural disruption, and can be completed room by room without rendering areas uninhabitable. A typical feature wall installation takes one day from delivery to finished surface. Plan for access disruption during delivery of large panel sheets, and arrange adequate ventilation if using solvent-based adhesives.

    What is the maintenance commitment for newly installed wall panels?
    Natural oil-finished wood panels should be re-oiled annually for the first two years and every two to three years thereafter. Painted panels need touch-up painting as wear develops and a full repaint every seven to ten years. PVC and WPC panels require only cleaning — no finishing maintenance. The overall maintenance commitment for quality panels is lower than for painted plaster walls, which require regular filling and repainting to maintain a good appearance over time.

    Final Thoughts: Elevate Your Home with 2026 Wall Trends

    The biggest home renovation ideas for 2026 focus on transforming walls into standout design elements. From textured panels and acoustic solutions to full-height installations, modern wall trends offer a powerful way to upgrade your space without a complete overhaul.

    If you’re planning your next renovation, start with your walls—it’s one of the fastest ways to create a high-impact, designer-level interior.

    FAQs: Home Renovation Ideas 2026 Wall Trends

    What is the most popular wall trend in 2026?
    Textured wall panels and acoustic wood slat walls are among the most popular trends due to their combination of style and functionality.

    Are wall panels better than paint for renovations?
    Wall panels offer more durability, texture, and design impact compared to paint, making them a preferred choice for modern interiors.

    Can I install wall panels myself?
    Yes, many modern wall panels are designed for DIY installation with simple tools and minimal experience required.

    Which wall designs make a room look bigger?
    Vertical slats, light-colored panels, and floor-to-ceiling installations help create the illusion of height and space.

  • Home Theater Acoustic Treatment: A Panel Guide

    Home Theater Acoustic Treatment: A Panel Guide

    You’ve invested in a screen, a projector or TV, a receiver, and speakers. The room is killing it. Sound bouncing off bare drywall creates flutter echo that muddies dialogue, smears surround imaging, and makes bass sound bloated in one seat and thin in another. The equipment is doing its job. The room isn’t doing its job.

    This is the most common and most fixable problem in home theater. Acoustic treatment — specifically, panels that absorb rather than reflect sound — costs a fraction of what you’ve already spent on equipment, and the improvement is immediate. This guide covers what’s actually happening acoustically in an untreated room, which surfaces need treatment and why, how to find the exact placement points that matter, what panels to use, how much coverage you need, and how wood slat acoustic panels specifically change the calculation for residential rooms where the space has to look good as well as sound good.

    What’s Actually Happening in an Untreated Room

    Sound from your speakers travels outward in all directions. Some of it goes directly to your ears at your listening position — that’s the direct sound, and it’s the sound your speakers were designed to produce. The rest of it hits a wall, bounces, and arrives at your ears a few milliseconds later. That delayed copy of the direct sound is what creates the problems.

    The technical term is RT60: the time it takes for sound to decay by 60 decibels after the source stops. In a bare drywall room with hard floors, RT60 is typically 0.5–0.8 seconds at mid frequencies. For a home theater, the target is 0.2–0.4 seconds. Every tenth of a second above that target is audible as smeared dialogue, imprecise imaging, and a general sense that the sound is in the room rather than coming from the screen.

    The three specific problems that acoustic treatment solves:

    • Flutter echo — the rapid, repeated bounce between two parallel hard surfaces (side walls, front and rear walls). Audible as a metallic “zing” after a sharp transient. Clap once in an untreated room and you’ll hear it immediately.
    • First reflection interference — sound from your speakers bouncing off side walls, ceiling, or rear wall and arriving at your listening position 5–20 milliseconds after the direct sound. Your brain hears both versions and the result is blurred imaging and reduced clarity.
    • Bass buildup in corners — low frequencies (below 250Hz) have long wavelengths that accumulate in corners and room modes, making bass response uneven across seats. This is the “boomy in one spot, thin in another” effect.

    Each problem has a different treatment solution, placed in a different location.

    The Three Types of Treatment and What Each Does

    Absorption Panels

    The primary treatment for home theaters. Panels made from porous material — acoustic felt, fiberglass, mineral wool, or a combination — that convert sound energy into a tiny amount of heat rather than reflecting it. NRC rating tells you how effective: NRC 0.85 absorbs 85% of mid-frequency sound hitting the surface. NRC 1.00 absorbs essentially all of it.

    Absorption panels address flutter echo and first reflection interference. They’re placed at reflection points — the specific wall locations where sound from your speakers bounces toward your listening position. They work across mid and high frequencies (roughly 250Hz–8000Hz), which covers the critical speech intelligibility range.

    TPH’s SoundPanel is an absorption panel: real wood veneer slats over AcuFelt 1500 g/m² high-density felt backing. NRC 0.85. It achieves acoustic performance equivalent to professional fabric-wrapped panels while looking like a considered design decision rather than a sound treatment installation. Shop SoundPanel acoustic wood panels!

    Diffusion Panels

    Where absorption removes sound energy, diffusion scatters it. A diffuser breaks up sound waves and distributes the reflected energy evenly in multiple directions, reducing the intensity of any single reflection without deadening the room. The result is a space that sounds open and spacious rather than dampened.

    Diffusion is most useful on rear walls that are far from the listening position (6 feet or more), where absorption alone would make the room feel overly dead. For most residential home theaters — especially smaller rooms — absorption is the higher priority. A fully treated room typically uses absorption at side walls and ceiling, with a combination of absorption and diffusion at the rear.

    Bass Traps

    Standard absorption panels don’t significantly affect frequencies below 250Hz — the wavelengths are too long. Bass traps are thicker, denser treatment designed specifically for corners, where low frequencies accumulate. They smooth out the uneven bass response that makes one seat sound boomy and another thin.

    In practice, for most residential home theaters, bass traps in all four floor-to-ceiling corners plus adequate absorption at reflection points delivers the large majority of the improvement. You don’t need corner-to-corner bass treatment to hear a dramatic difference — two to four corner treatments makes the subwoofer track tighter and more consistent across the room.

    Where to Treat: The Five Priority Surfaces

    Not all walls are equal. Here’s how to prioritise, in order of acoustic impact.

    Priority 1 — Side Walls (First Reflection Points)

    The single highest-impact treatment location in any home theater. Sound from your left and right speakers bounces off the side walls and arrives at your ears a few milliseconds after the direct sound, creating a phantom image that blurs stereo and surround localisation. Treating these reflection points is the difference between “I can hear roughly where the sound is coming from” and “I can pinpoint exactly where every sound is placed in the soundstage.”

    The exact location on each side wall depends on your speaker and seating positions. The mirror trick finds it precisely: sit in your listening position and have someone hold a mirror flat against the side wall, sliding it forward and back along the wall until you can see the speaker in the mirror from your seated eye position. Where you see the speaker in the mirror is exactly where the reflection arrives. That’s where the panel goes.

    Treat both side walls symmetrically. Asymmetric treatment creates an asymmetric sound field that pulls the image to one side. One panel per side wall at each reflection point is a minimum — two panels per side wall (front and rear reflection points) is better.

    Priority 2 — Rear Wall

    The rear wall behind your seating position reflects sound from the front speakers back toward the listening position, arriving well after the direct sound. In a small or medium room, this late reflection is audible as a distinct spatial confusion — as if there’s a second version of the front speakers behind you.

    Treatment strategy depends on distance from seating to rear wall. If your seating is within 4 feet of the rear wall, absorption is the right choice — reflections arrive too quickly for diffusion to work effectively. If seating is 6 feet or more from the rear wall, a combination of absorption at ear level and diffusion above creates envelopment without deadening. If you have surround speakers on the rear wall, treat the areas between and beside them rather than blocking the speakers themselves.

    Priority 3 — Front Wall (Behind the Screen)

    The front wall reflects sound from your main speakers — left, center, and right channels — directly back toward the listening position, reinforcing first reflections and blurring dialogue clarity. In a dedicated theater room with a full-width screen, the screen itself provides some absorption. In rooms with a TV on a bare wall, front wall treatment is more important.

    Panels behind and around the screen — at screen height on either side, and between speakers if there’s exposed wall — bring the most benefit. Full-wall absorption behind the screen is ideal but rarely practical in residential rooms.

    Priority 4 — Ceiling

    Ceiling reflections from your front and surround speakers blur vertical imaging and reduce the precision of overhead audio in Dolby Atmos and DTS:X systems. Ceiling treatment typically takes the form of acoustic clouds — horizontal panels suspended from or mounted to the ceiling above the listening position.

    This is the treatment that most residential setups skip due to installation complexity, but for rooms running Atmos height channels it makes a meaningful difference to overhead imaging. For standard 5.1 or 7.1 setups, it’s a second-phase consideration after side walls and rear wall are treated.

    Priority 5 — Corners (Bass Traps)

    Floor-to-ceiling corners are where bass energy accumulates. Even a single dedicated bass trap in each corner — or dense acoustic panels placed in corner positions — smooths out the low frequency unevenness that makes subwoofer response inconsistent across seats. If your bass sounds bloated or “one-note,” corner treatment is the fix before any EQ adjustment.

    How Much Coverage Do You Need?

    For a dedicated home theater, the target is 25–35% of total wall and ceiling surface area treated. That’s enough to bring RT60 into the 0.2–0.4 second range that delivers tight, clear, cinematic sound without over-treating and making the room feel dead.

    A practical rule of thumb from Audio Advice: calculate the total surface area of your two side walls and aim for 35–40% treatment coverage across both. For a typical 9ft × 18ft side wall, that’s roughly four panels 36 inches wide by 6 feet tall per side wall.

    For most home theaters, this is the coverage calculation by room size:

    Room Size Total Wall Area (approx.) Target Treatment (25–35%) Approximate SoundPanel sqft
    Small (10×12 ft, 8ft ceiling) ~350 sqft 88–123 sqft 100–130 sqft
    Medium (12×16 ft, 8ft ceiling) ~450 sqft 113–158 sqft 120–160 sqft
    Large (14×20 ft, 9ft ceiling) ~612 sqft 153–214 sqft 160–220 sqft

    These numbers are for absorption panels only — they don’t include corner bass traps, which are additional.

    Use the Box Calculator to get a precise SoundPanel count for your specific room dimensions.

    Why Wood Slat Acoustic Panels Change the Home Theater Calculation

    The standard acoustic treatment approach for a dedicated home theater is fabric-wrapped fiberglass panels — grey or black rectangles mounted on the walls. They work extremely well acoustically, achieving NRC 0.85–1.00. They look like a recording studio, or a commercial installation, not a room you designed.

    For a dedicated basement theater where no one sees the room except during movies, that’s fine. For most residential home theaters — rooms that exist in living spaces, media rooms, or converted spare rooms — the visual result matters as much as the acoustic result. A room that looks good and sounds good is categorically better than a room that only sounds good.

    Wood slat acoustic panels at NRC 0.85 achieve professional-grade absorption — identical to fabric-wrapped panels at the same rating. The difference is the surface: real wood veneer that reads as a designed wall rather than treatment. Dark finishes (Charcoal, American Walnut) absorb ambient light and improve perceived screen contrast. Lighter finishes (White Oak, Golden Oak) work in rooms with controlled lighting where you want warmth without the room going too dark.

    The practical result: you can treat the side walls, rear wall, and surrounding surfaces with acoustic slat panels and the room looks like a premium media room rather than a DIY studio. Guests walking in see a walnut slat wall. You hear the difference it makes every time you watch something.

    The Mirror Trick: Finding Your Exact Placement Points

    Every room is different. Speaker positions, seating positions, and room dimensions all affect where reflection points land on the walls. The mirror trick finds them exactly — no guessing, no generic diagrams that may not apply to your specific layout.

    What you need: a flat mirror, a marker or tape, and one other person.

    For side wall reflections:

    1. Sit in your primary listening position with the audio system playing.
    2. Have your helper hold the mirror flat against the side wall, facing you.
    3. They slide the mirror slowly along the wall — forward, backward, up, down — until you can see the left speaker (or right speaker for the other side) in the mirror from your seated position.
    4. Mark that point on the wall. That’s your first reflection point for that speaker on that wall.
    5. Repeat for each speaker — left front, right front, center (if applicable), and any surround speakers on the side walls.
    6. The panel goes centred on the marked point, at ear height.

    For rear wall reflections:

    1. Remain in your listening position but face the rear wall.
    2. Repeat the mirror process: your helper slides the mirror across the rear wall until you can see each front speaker in the mirror from your seated position.
    3. Mark and treat those points.

    The mirror trick works because sound obeys the same reflection geometry as light — the angle of incidence equals the angle of reflection. Where you see the speaker in the mirror is exactly where the reflected sound comes from. One afternoon with a mirror establishes a precise treatment plan specific to your room.

    Common Mistakes in Home Theater Treatment

    Treating only one side wall. Asymmetric treatment creates an asymmetric sound field. The stereo image pulls toward the untreated side. Always treat both side walls with identical coverage at matching positions.

    Using foam panels with NRC below 0.6. Budget acoustic foam typically achieves NRC 0.40–0.55, meaning it’s still reflecting 45–60% of the sound that hits it. At those absorption levels, you need significantly more coverage to achieve the same result as NRC 0.85 panels — and in most cases, the room still sounds inadequately treated. The NRC number on the product is the honest measure of what you’re getting.

    Over-treating and killing the room. A home theater doesn’t need to be an anechoic chamber. RT60 of 0.2–0.4 seconds is the target — below 0.2 seconds feels uncomfortably dead and actually reduces the sense of envelopment that makes cinema sound cinematic. Treating 25–35% of wall area and stopping there is usually the right endpoint. Don’t cover every surface.

    Skipping the bass entirely. Standard absorption panels at NRC 0.85 work above 250Hz. Bass frequencies (below 250Hz) require corner bass traps or very thick absorption material to address. If your subwoofer sounds bloated or uneven across seats, the panels alone won’t fix it — you need corner treatment and potentially subwoofer placement adjustment alongside the wall panels.

    Placing panels for symmetry rather than reflection geometry. Panels spaced evenly across a wall look neat but may not align with actual reflection points. Use the mirror trick to find where treatment goes first, then arrange panels for visual balance within that constraint.

    Sequencing Your Treatment: What to Do First

    If you’re building up a home theater treatment plan in stages, here’s the order of diminishing returns — highest impact first.

    Phase 1 — Side wall first reflection points. One to two panels per side wall at the primary reflection points identified by the mirror trick. This single step has the largest audible impact of anything you can do to the room. Dialogue clarity, imaging precision, and flutter echo all improve significantly.

    Phase 2 — Rear wall treatment. Panels at ear height on the rear wall behind the seating position. Eliminates the late reflection that blurs front stage localisation.

    Phase 3 — Front wall treatment. Panels flanking the screen and between front speakers. Reduces first reflection interference from the main channels.

    Phase 4 — Corner bass traps. Dense treatment in floor-to-ceiling corners for low-frequency smoothing. Priority if bass sounds uneven before this phase.

    Phase 5 — Ceiling treatment. Acoustic clouds above the listening position. Priority for Atmos rooms; secondary for standard surround configurations.

    Most residential home theaters reach a satisfying endpoint after Phase 2 or 3. Phase 4 and 5 are incremental improvements on an already well-treated room.

    What It Costs

    Using TPH SoundPanel at $14–$22 per square foot of material:

    Room Size Panels Needed Material Cost (est.) Pro Install Total DIY
    Small home theater (10×12 ft) 100–130 sqft $1,400–$2,860 $1,400–$2,860
    Medium home theater (12×16 ft) 120–160 sqft $1,680–$3,520 $1,680–$3,520
    Large home theater (14×20 ft) 160–220 sqft $2,240–$4,840 $2,240–$4,840

    For context: the improvement from proper acoustic treatment on a $3,000 equipment setup is larger than the improvement from upgrading that same setup to $6,000 equipment in an untreated room. Treatment multiplies the performance of everything already in the room. It’s the most cost-effective upgrade available to most home theaters.

    Full wall panel cost breakdown: Wall panel pricing guide.

    Finish Selection for Home Theaters

    The finish you choose affects both the room’s visual character and how it functions during playback.

    Charcoal — the preferred choice for dedicated theaters. Dark finish absorbs ambient light scatter, reduces reflections off panel surfaces, and improves perceived contrast on projection screens. Creates the enveloping, focused atmosphere of a commercial cinema. Best for rooms with controlled or blackout lighting.

    American Walnut — warm, dark brown. These wood panels work in rooms that also function as media rooms or living spaces where the theater can’t look clinical. Absorbs some ambient light without the full darkness of Charcoal.

    White Oak / Golden Oak — for brighter rooms or spaces where the theater needs to integrate with a living room aesthetic during the day. Lighter finishes reflect slightly more ambient light, which matters less in rooms with proper projection screen placement and no side windows.

    All SoundPanel finishes deliver identical NRC 0.85 performance — the finish choice is purely visual. Browse finishes.

    Frequently Asked Questions

    Do I need acoustic panels if I have carpet and soft furnishings?
    Carpet and soft furnishings help, but they absorb primarily at high frequencies and do very little for mid-frequency reflections in the 500–2000Hz range where speech intelligibility lives. An NRC 0.85 panel contributes roughly 17 times more absorption per square foot than bare carpet. Soft furnishings reduce the amount of treatment needed but don’t replace it.

    Will acoustic panels improve my Dolby Atmos system?
    Significantly. Atmos relies on precise overhead imaging — your brain localises height information based on subtle timing differences between direct and reflected sound. Treated side walls and ceiling reduce the reflections that blur height localisation, making the difference between Atmos that sounds gimmicky and Atmos that sounds immersive.

    How do acoustic slat panels compare to fabric-wrapped panels acoustically?
    TPH’s SoundPanel achieves NRC 0.85 — identical to 1-inch professional fabric-wrapped fiberglass panels. For a home theater, NRC 0.85 across 25–35% of wall surface area achieves RT60 targets in most residential room sizes. The performance is equivalent; the difference is visual.

    Can I put acoustic panels behind my projector screen?
    Yes, and it’s recommended. The wall behind the screen is a significant reflection source for front channel audio. Most projector screens are acoustically transparent enough to allow treatment behind them without affecting video performance.

    How do I know if my room is overtreated?
    An overtreated room sounds flat and lifeless — voices lose natural resonance and the sense of space collapses. The clap test is useful: a single hand clap should decay cleanly in under half a second without a distinct echo, but shouldn’t sound completely dead. If the room sounds anechoic — like there’s no air in the space — you’ve absorbed too much. This is uncommon in residential home theaters; most under-treat rather than over-treat.

    Do I need to treat a media room differently from a dedicated theater?
    A media room that also functions as a living space has more flexibility — furniture, curtains, bookshelves, and rugs all contribute absorption. One treated wall (side wall at the reflection points) often achieves most of the improvement in a dual-purpose room. A dedicated theater with bare surfaces benefits from the full treatment plan above.

    Where to Start

    If you know your room dimensions, the Box Calculator gives you a precise panel count. Calculate your coverage.

    If you want to feel the finish and backing material before ordering, sample boxes are available. Order a sample box.

    If you’re ready to browse finish options and configurations for the SoundPanel range: Shop SoundPanel.

    And if this article raised questions about acoustic panels more broadly — NRC ratings, types, and how they work: Acoustic panels buyer’s guide.


    The Panel Hub’s SoundPanel uses real wood veneer over HDF cores with AcuFelt 1500 g/m² high-density backing. NRC 0.85. FSC-certified. Designed in the USA, shipped from North Carolina. 3-sided furniture-grade rounded edges.