Author: The Panel Hub Design Studio

  • Best Home Office Upgrades 2026: Small Changes, Big Difference

    Best Home Office Upgrades 2026: Small Changes, Big Difference

    I stared at my home office for a year before I did anything about it. Same beige walls. Same awful Zoom echo. Same lighting that made me look like a hostage video. Then I spent a weekend fixing it, and I wish I’d started sooner.

    Here are the best home office upgrades 2026 if you actually work from home and want the room to work harder for you. No $3,000 desks. No treadmill under the monitor. Just five changes that move the needle.

    1. Fix the echo first (before anything else)

    If people on calls sound muffled or you sound thin, the room is the problem, not the mic. Bare walls bounce sound. Acoustic wood slat panels on one wall behind or beside you can absorb up to 85% of that bounce, thanks to the felt backing behind the slats.

    It’s the one upgrade every coworker will notice immediately. The SoundPanel acoustic slat collection starts at $199 per panel, and two or three panels cover the wall behind most desks.

    2. Add a real light source, not just overhead

    Overhead lighting makes you look exhausted on camera, even when you aren’t. A single warm desk lamp at 2700K, placed slightly in front of you at eye level, changes everything. Budget around $80 for a decent one.

    3. Give the camera something to look at

    A flat beige wall behind you reads as boring or unprofessional. A textured wood wall reads as intentional and put-together. This is why every creator, consultant, and executive suddenly has wood paneling behind them on LinkedIn. It’s the cheapest way to look more credible on a call.

    Pick a slat style or geometric panel that matches your personality. If you want calm, go vertical slats. If you want interesting, go geometric.

    4. Upgrade the chair (but don’t overspend)

    If your back hurts by 3pm, the chair is the problem. You don’t need a $1,500 Herman Miller. You need adjustable lumbar, real seat depth, and armrests that move. A good ergonomic chair in the $300 to $600 range will last 5 years and save your spine.

    5. Hide the cable mess

    This is the free one. Buy a $15 cable tray that mounts under the desk. Zip tie everything. It takes 20 minutes and makes the entire room feel 30% more expensive.

    Total cost breakdown

    Done right, the full list runs $700 to $1,200 depending on panel coverage and chair choice. Compare that to a $3,000 contractor-installed acoustic treatment or a $2,000 desk, and the math gets easy fast.

    Where to start

    Start with the wall behind you. It’s the one thing on every call, every day. Everything else is background. Browse the full wood wall panel collection to see slat and geometric options, or visit The Panel Hub  to use the Room Visualizer on your actual space.

    Want the 2-hour DIY install guide? We’ll send it to your inbox with a sample box recommendation based on your wall size.

  • Budget Accent Wall Ideas 2026: Style Without the Renovation Bill

    Budget Accent Wall Ideas 2026: Style Without the Renovation Bill

    Here’s the thing about accent walls. Most “budget” ideas online either look cheap in person or require more skill than people admit. You’ve seen the painted geometric shapes that look great on Pinterest and weird in real life. You’ve seen the peel-and-stick wallpaper that peels back off in six months.

    Here are budget accent wall ideas 2026 that actually hold up. Real materials, real results, all under $500 for a standard wall.

    What counts as “budget” in 2026

    A standard accent wall is roughly 8 feet tall by 10 feet wide, or about 80 square feet. Contractor-installed accent walls run $2,000 to $3,500 on that size. Anything under $500 that still looks premium counts as a real win.

    1. Real wood slat wall (under $400)

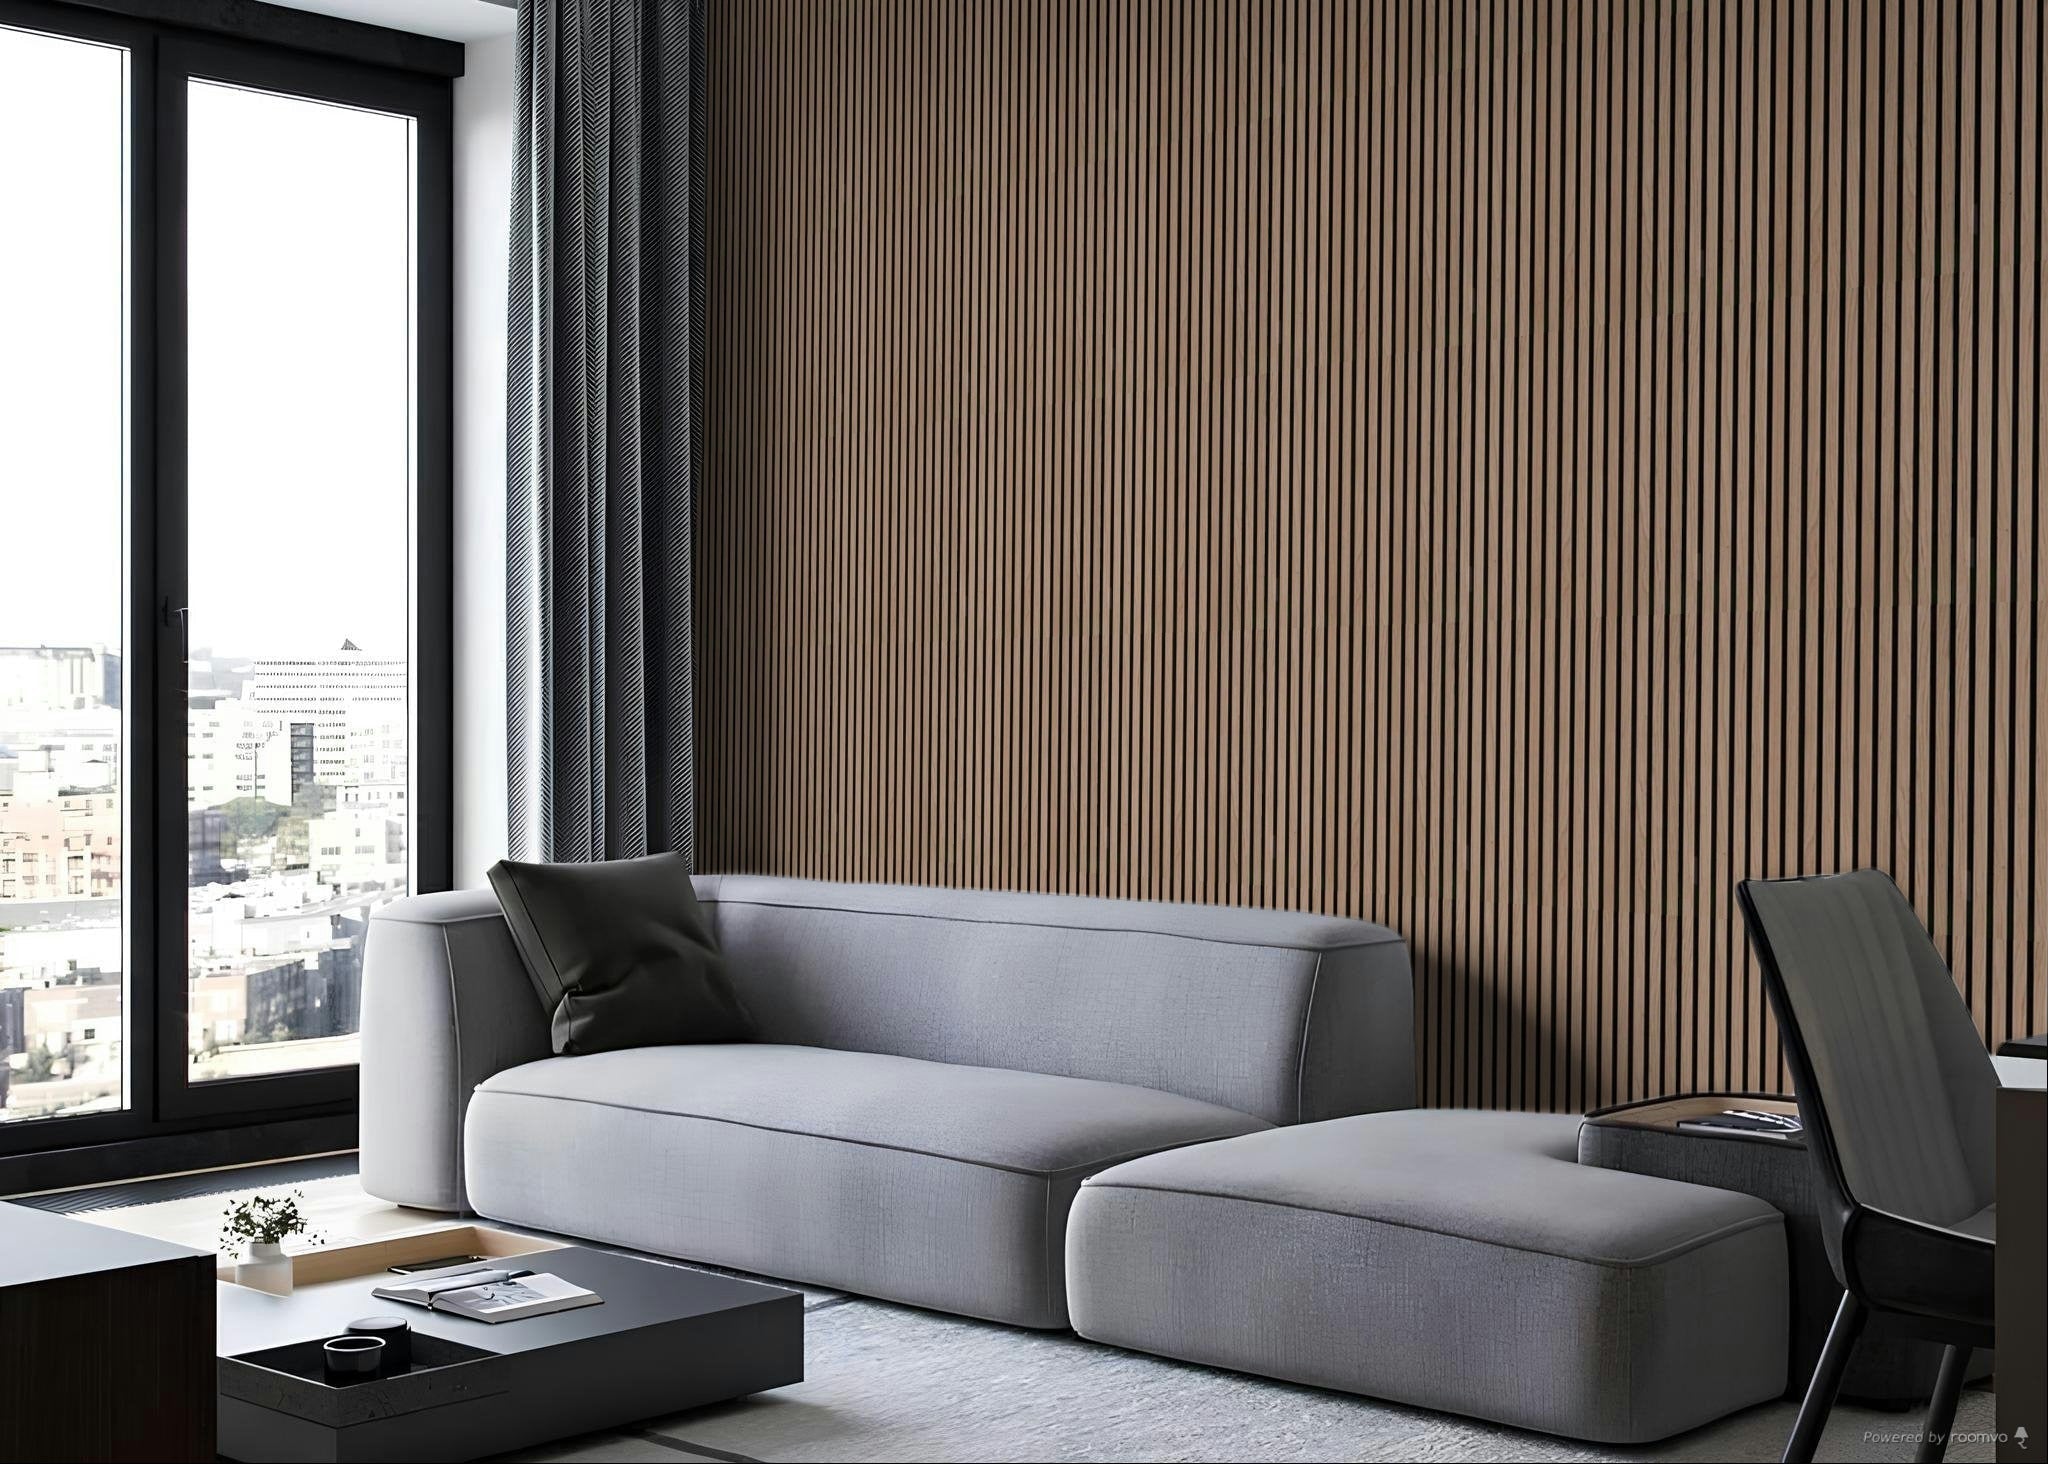
    This is the one that looks the most expensive for the money. Real wood veneer, vertical slats, clean modern look. A 10 x 8 foot wall takes about 5 boxes of acoustic slat panels, which also quiets the room. The SoundPanel acoustic slat collection is the starting point.

    2. Geometric mosaic feature wall (under $500)

    Triangles, concentric squares, or honey mosaic patterns. More personality than slats, still looks architectural. Great behind a bed or sofa. Panels are 23.6 inches square so the pattern scales predictably.

    3. Dark paint plus trim (under $200)

    If you’re truly on a tight budget, deep navy or charcoal paint with clean white trim still reads as intentional. Two coats, good painter’s tape, one weekend. The catch: this is the look everyone has seen. It works but it doesn’t surprise anyone.

    4. Half-wall wood panels (under $300)

    Panel only the bottom half, paint the top. This is wainscoting’s modern cousin. Uses half the panels, reads as custom, works especially well in dining rooms and hallways.

    5. Single textured panel moment (under $250)

    Instead of the whole wall, panel a 4 x 8 foot section behind the TV, the bed headboard, or the reading chair. It reads as designed, not cheap. Two or three boxes do it.

    6. Faux stone wall panels (under $450)

    If wood isn’t your thing, faux stone is the 2026 alternative. Real texture, no masonry, installs like regular panels. Works in living rooms, basements, or behind a fireplace.

    7. Skip the accent wall, do a 3D pattern (under $500)

    Instead of picking one wall, do a 3D geometric pattern on a smaller section. More drama per square foot, less commitment. Great for rented spaces where you want impact without repainting 4 walls when you move.

    What to avoid

    Skip printed laminate panels that fake wood grain. Skip cheap MDF boards that warp within a year. Skip anything that requires you to sand or stain after install, because you will put it off and live with it unfinished.

    Look for real wood veneer, pre-finished edges, and a fire rating if you’re in a condo or apartment building.

    Making a Budget Accent Wall Last: Installation Tips That Prevent Costly Mistakes

    Budget accent walls fail most often not because of the materials chosen, but because of shortcuts in preparation. Adhesive panel systems applied to dusty, unpainted, or damp plasterboard will delaminate within months. A proper surface — clean, dry, and primed — makes the difference between a wall that looks good for a decade and one that needs redoing in twelve months.

    Before installing any panel system, check the wall for moisture. A basic moisture meter will tell you if the wall is dry enough to bond to. Any reading above 12% means you need to identify and fix the damp source before installing.

    For budget slat panel systems, read the acclimatisation instructions carefully. Real wood panels need 24–48 hours in the room they will be installed in before fixing. This allows the timber to adjust to the room’s humidity and prevents gaps or buckling after installation.

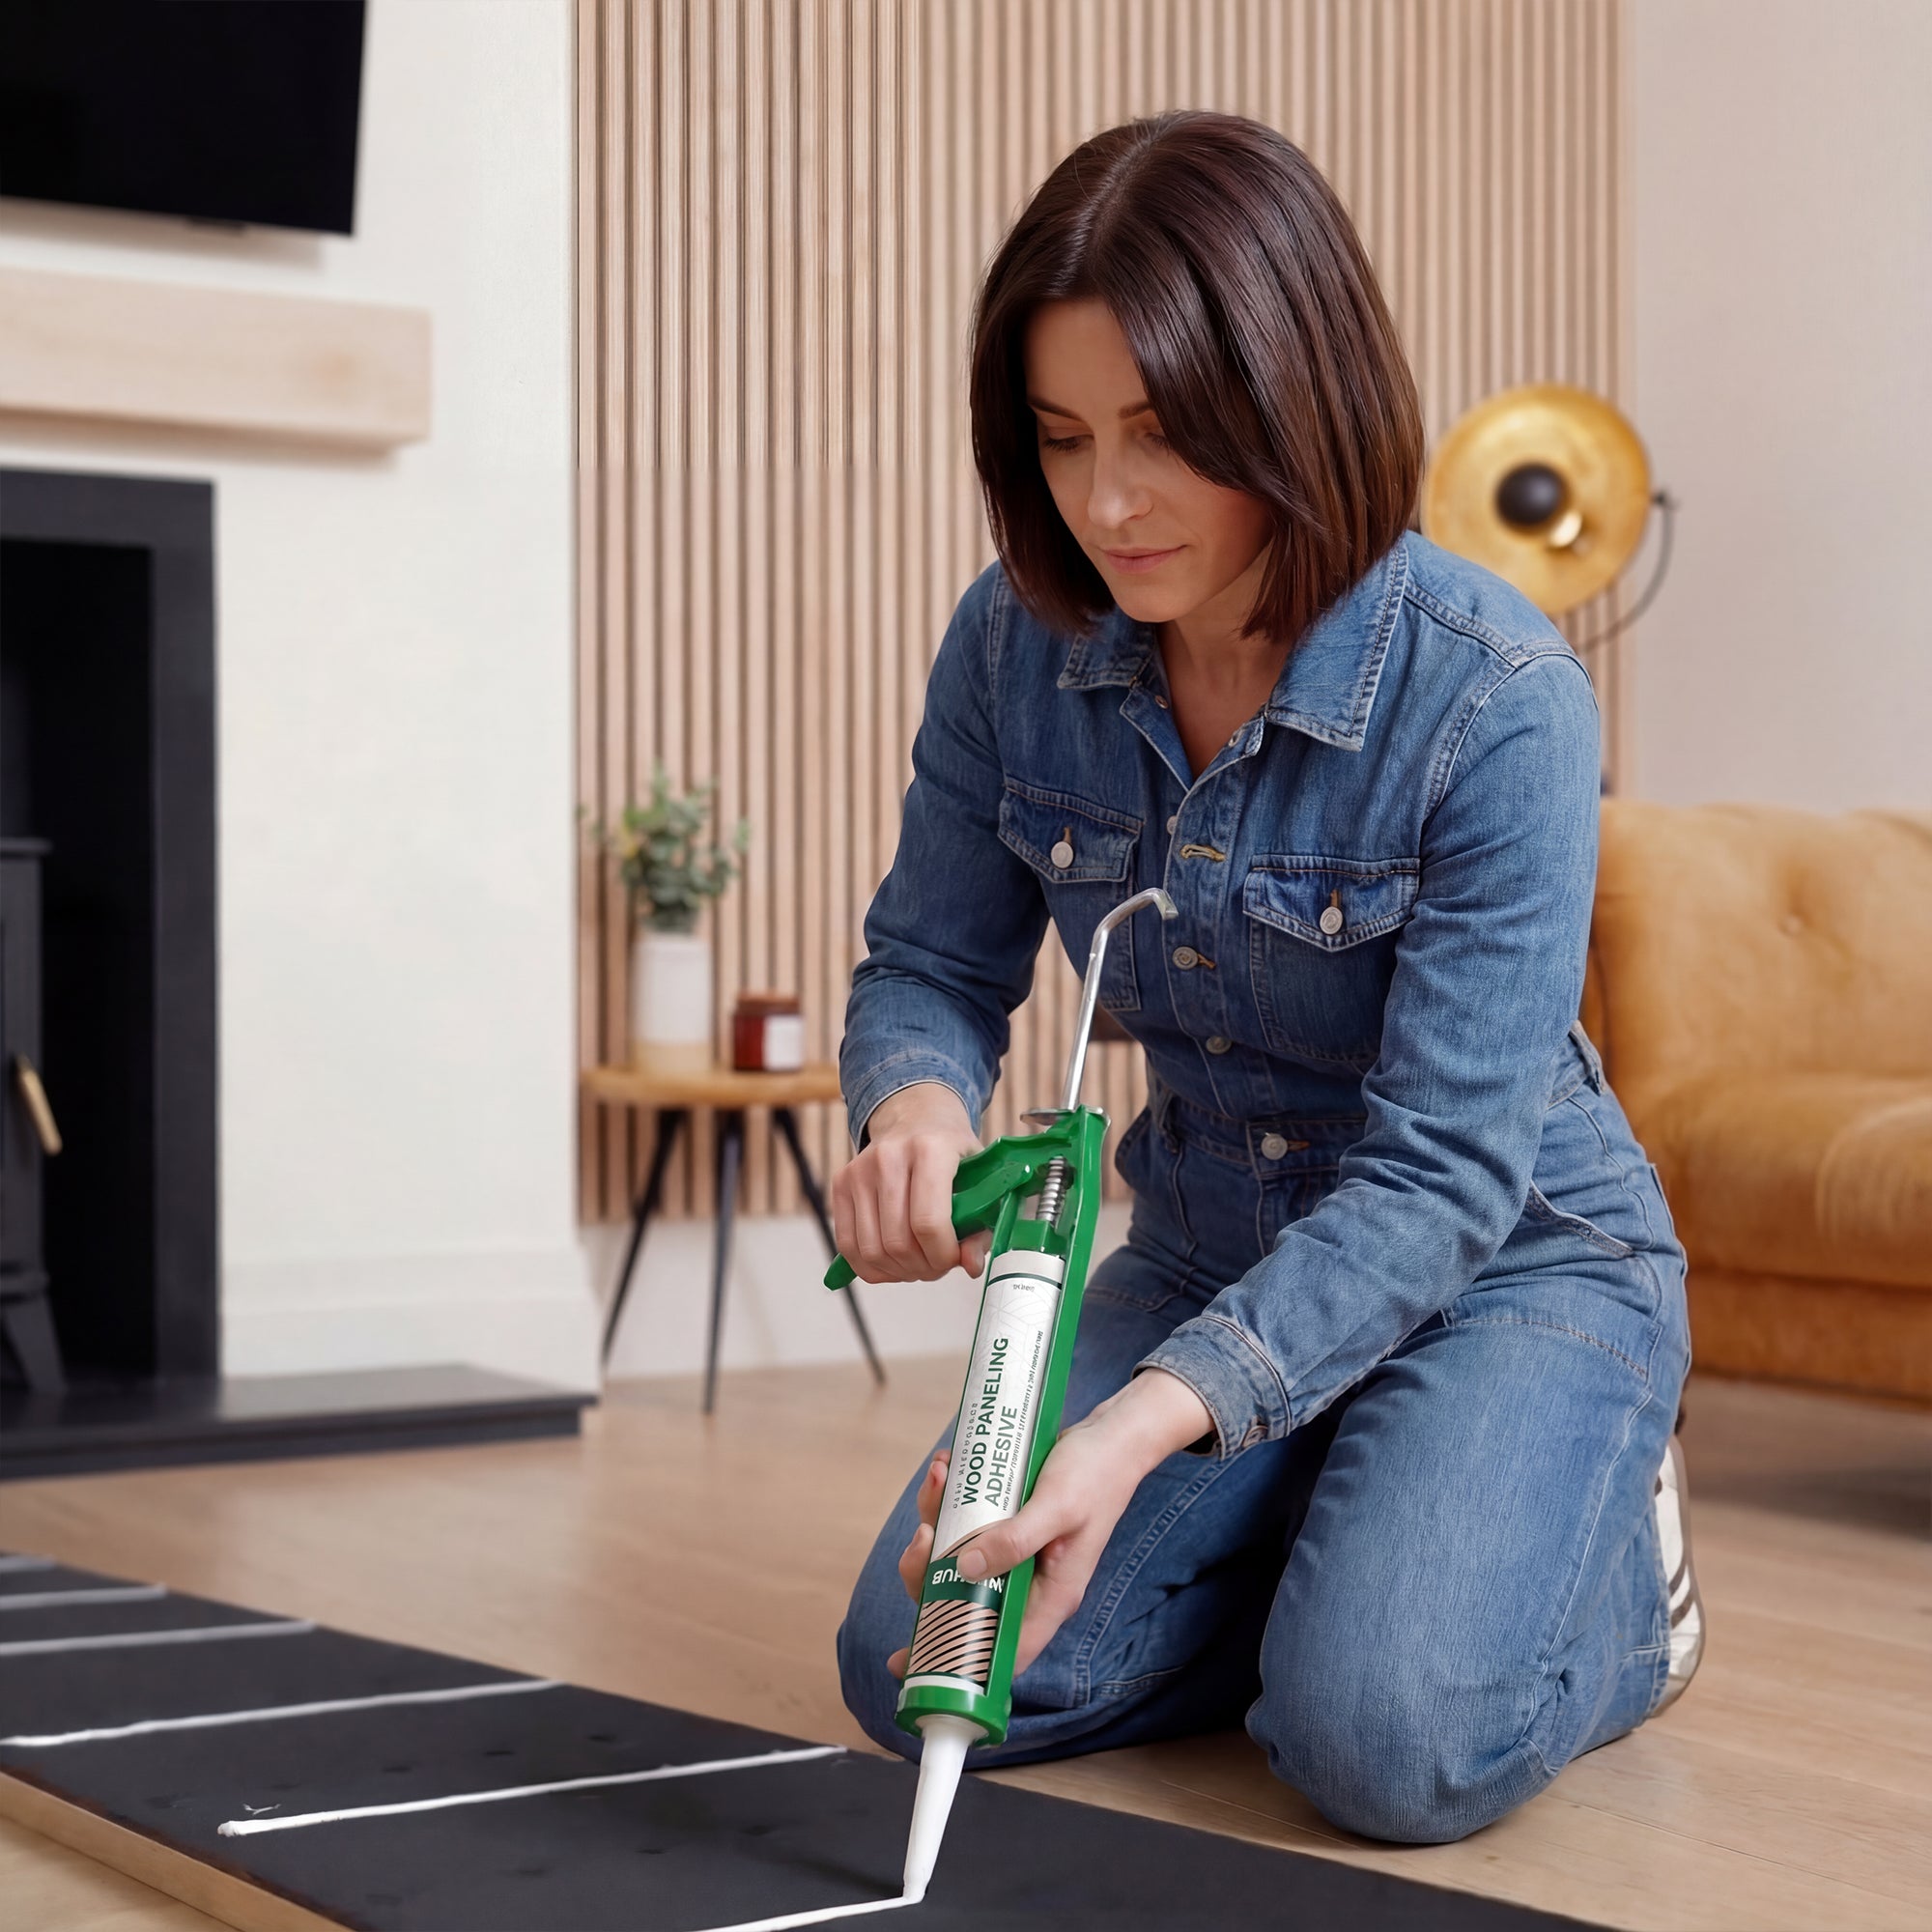
    Finally, invest in the right adhesive. Panel adhesive designed for your specific substrate (plaster, drywall, brick) and the manufacturer’s recommended adhesive for your panel material will prevent the most common failure mode: partial delamination at panel edges. It is the one area where it does not pay to cut corners on a budget install.

    Budget Accent Wall FAQs

    What is the cheapest way to create an accent wall?
    A single-colour paint treatment using a contrasting shade to the rest of the room costs £30–£80 in materials and takes a half-day. For a budget-conscious material accent wall, peel-and-stick slat panels start from around £180–£250 for a standard 3 m x 2.4 m wall.

    Are budget wood panels as durable as premium ones?
    Budget panels typically use a thinner real wood veneer or a printed wood-effect surface over MDF or HDF core. They are perfectly durable in normal conditions but may show wear faster in high-traffic areas. For bedrooms and home offices, budget panels perform almost identically to premium equivalents.

    How do I make a budget accent wall look expensive?
    The single most effective technique is full floor-to-ceiling coverage. Half-height or patchy coverage immediately reads as a budget decision. If your panel budget does not stretch to a full wall, treat a smaller complete area — a chimney breast, an alcove, a recess — rather than covering part of a large wall.

    Can I DIY a budget accent wall installation?
    Yes — most slat panel and mosaic panel systems are designed for DIY installation. The key skills required are measuring accurately, cutting panels cleanly, and applying adhesive evenly. Most suppliers include full installation guides, and the majority of panel systems take 4–6 hours for a standard accent wall.

    Start here

    The wood wall panel collection covers all four of the top picks above, with real prices and real square footage math on every listing. For something more dramatic, the GroovePanel mosaic collection is where the geometric and textured options live.

    Not sure which look fits your room? Order a sample box first. You hold the actual finish in your hand before you commit to the whole wall.

    The bottom line: spend carefully on materials, spend nothing on over-engineering the plan, and spend generously on surface preparation. That order of priorities reliably produces the best results at any budget level.
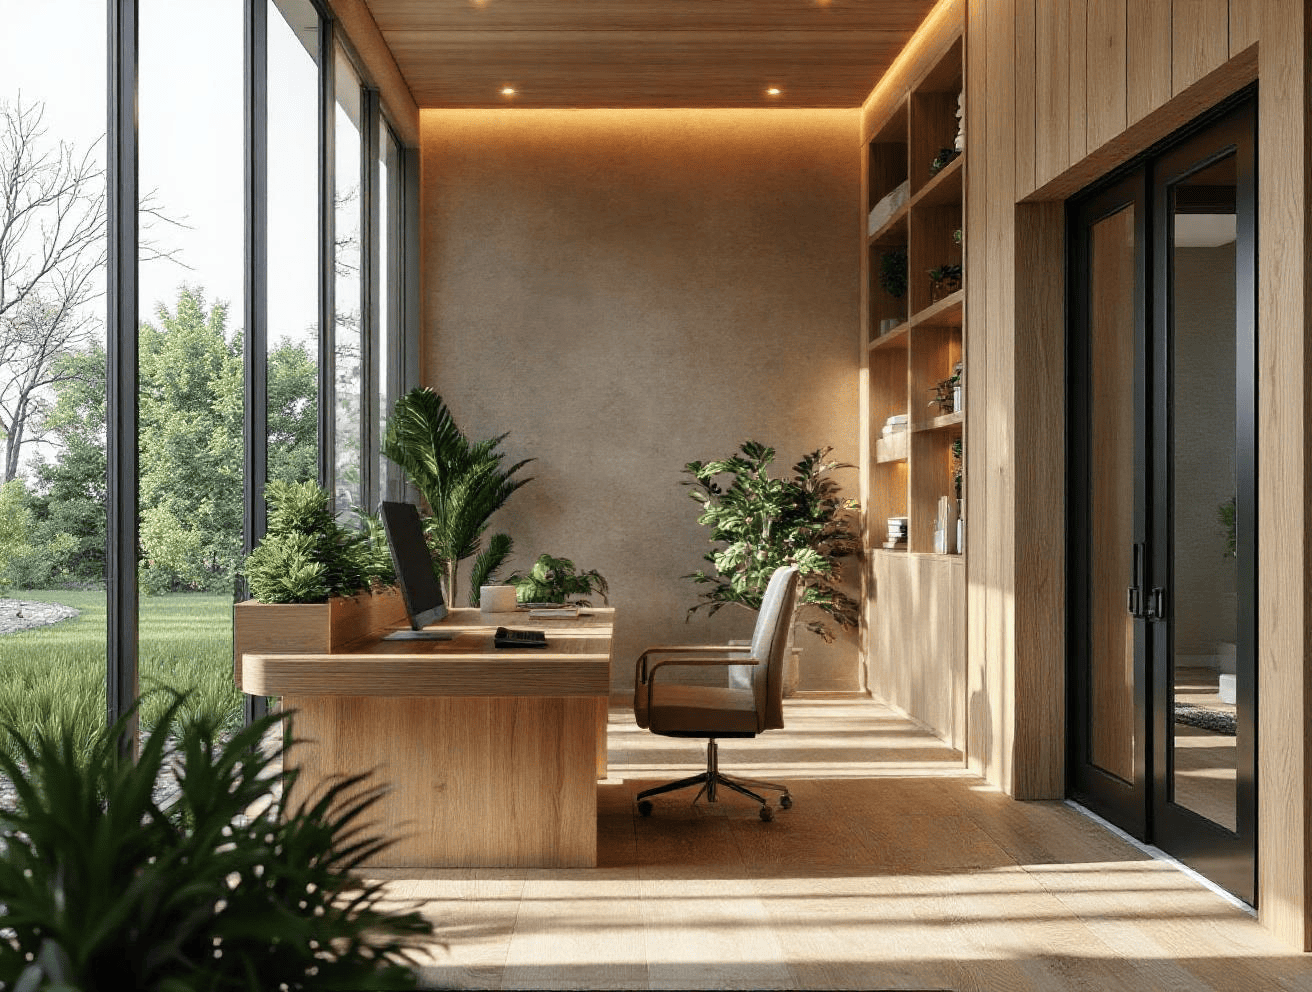
  • Wellness Home Design Ideas 2026: Rooms That Actually Rest

    Wellness Home Design Ideas 2026: Rooms That Actually Rest

    Wellness design used to mean a yoga mat in the corner and a plant on the windowsill. In 2026 it means something different. It means your house actually lowers your heart rate when you walk in the door.

    The real wellness home design ideas 2026 aren’t about aesthetics. They’re about how a room sounds, how it lights, how it smells, and how it lets your nervous system settle. Here’s what’s actually working.

    Sound is the one everyone ignores

    Your body responds to ambient noise even when your brain tunes it out. Echoey rooms keep your nervous system on low alert all day. That’s why a big modern living room with hard floors and tall ceilings can feel strangely exhausting, even when nothing loud is happening.

    Acoustic wood slat panels are the most common wellness upgrade in 2026 for exactly this reason. The felt backing absorbs the echo, drops reverberation time, and the room goes from “loud even when quiet” to actually restful. You feel the difference in the first week.

    Natural materials, not just natural colors

    Beige paint isn’t nature. Real wood is nature. There’s a growing body of research on biophilic design showing that exposure to natural textures (real wood grain, stone, linen) measurably reduces cortisol. The look matters less than the material. A real wood wall does more for your nervous system than a photo of a forest.

    This is why the real wood wall panel leans so hard into veneer over printed laminate. Your eye can tell the difference even if you can’t articulate why.

    Light that changes with the day

    One overhead fixture burning 4000K cool light from 8am to 10pm is a wellness disaster. Your body needs warmer light at night to signal wind-down. Add at least two light sources per room, one warm (2700K) for evening and one neutral for daytime. Use a plug-in smart bulb if you don’t want to rewire.

    One textured wall per room

    A room with four flat walls reads as static. A room with one textured wall, the eye lands there and settles. It’s the design equivalent of a focal point in meditation.

    Slat panels work in bedrooms. Geometric patterns work in living rooms. Stone texture works in bathrooms where you want spa energy.

    Space for nothing

    The most overlooked wellness move is leaving a corner empty. One chair, one lamp, one small side table. No TV, no laptop, no purpose other than sitting. Every room needs one of these. If yours doesn’t, that’s your weekend project.

    What to skip

    Skip the wellness trend stuff that’s mostly aesthetic. Essential oil diffusers on every surface. Crystal grids. Affirmation prints in sans-serif. None of these change the underlying sensory load of the room.

    Focus on sound, light, and real material. The rest is decor.

    Wellness Design Principles: A Practical Room-by-Room Summary

    Bedroom: Prioritise material warmth and acoustic softness. A real wood panel wall on one side of the room, combined with thick curtains and a soft rug, reduces ambient noise and creates the sensory quiet needed for genuine rest. Keep all light sources warm (2700K or below) and avoid screens on the wall — the visual associations of a bedroom are as important as the physical conditions.

    Home office: Acoustic treatment is the most impactful wellness investment in a work environment. Slat panels with felt backing behind a desk wall reduce reverberation and lower the cognitive load of background noise by several decibels. A single plant, positioned within the field of vision but not directly in front of the monitor, provides a biophilic reference point that reduces eye strain during long sessions. Natural light from the side rather than directly in front or behind the screen prevents glare without sacrificing daylight.

    Living room: Create a visual destination — one textured wall or a clearly defined seating area with a single material focus — that gives the nervous system a place to land when entering the room. Homes with no clear visual hierarchy in the main living area are unconsciously more tiring to inhabit. A wood panel wall, a stone fireplace surround, or even a single very carefully chosen piece of large-format art serves this function better than a room where every surface has equal visual weight.

    Bathroom: Temperature and texture. Warm-toned wall panels (warm wood, warm stone) shift a bathroom from a functional utility space to something genuinely restorative. PVC panels in warm wood-grain finishes are the practical choice — they are waterproof, easy to clean, and warm to the eye in the way that cold-grey ceramic tiles are not.

    Wellness Home Design FAQs

    Do wall panels genuinely improve wellbeing, or is this just marketing?
    The evidence for biophilic design — the use of natural materials like real wood in interior spaces — improving measurable wellbeing outcomes is reasonably robust. Studies published in environment and behaviour research consistently find reductions in reported stress and physiological markers (heart rate, cortisol) in spaces with natural material exposure. The caveat is that these effects are associated with authentic materials rather than printed replicas, and that they work as part of a broader sensory environment rather than in isolation.

    What is the single most cost-effective wellness upgrade for a home?
    Acoustic treatment — specifically reducing echo and reverberation in the main living areas. Hard-surfaced rooms with no soft furnishings create ambient noise conditions that are measurably more fatiguing. Adding a rug, heavy curtains, and slat panels with felt backing to a hard-surfaced room produces a noticeable improvement in how restful the space feels within days of completion. The investment is modest; the difference is significant.

    Can wellness design principles work in a small flat?
    Yes — and in some respects small spaces respond more dramatically to wellness design interventions than large ones, because the proportion of wall, floor, and ceiling to the volume of air is higher. A single real wood panel wall in a small bedroom can transform the sensory character of the entire room. Keep the treatment focused: one textured wall, one warm light source, one plant. Crowding a small space with too many wellness gestures creates visual noise that works against the intended outcome.

    How important is smell in a wellness home?
    More important than most interior design guidance acknowledges. Real wood panels off-gas low levels of volatile organic compounds that are positively associated with natural environments — the same compounds that make a forest feel calming. This is part of why authentic wood panels produce a different atmosphere to synthetic alternatives, even when they look identical. Avoid artificial fragrance products in wellness-oriented spaces; they trigger a different olfactory response than natural materials and can interfere with the calm atmosphere you are trying to create.

    Where to start

    Start with the room you spend the most time in. For most people that’s the living room or home office. Fix the echo first, then the lighting, then add one textured wall.

    The SoundPanel acoustic slat collection is where most wellness-focused customers start, because it handles the sound and the texture in one move. Visit The Panel Hub to see finish options side by side.

    Want the wellness wall planner? Tell us your room size and we’ll send a 2-minute guide with the right panel coverage for your space.

  • Boho Wall Panels: Earthy, Textural, and Layered

    Boho Wall Panels: Earthy, Textural, and Layered

    What Makes a Wall Panel “Boho”

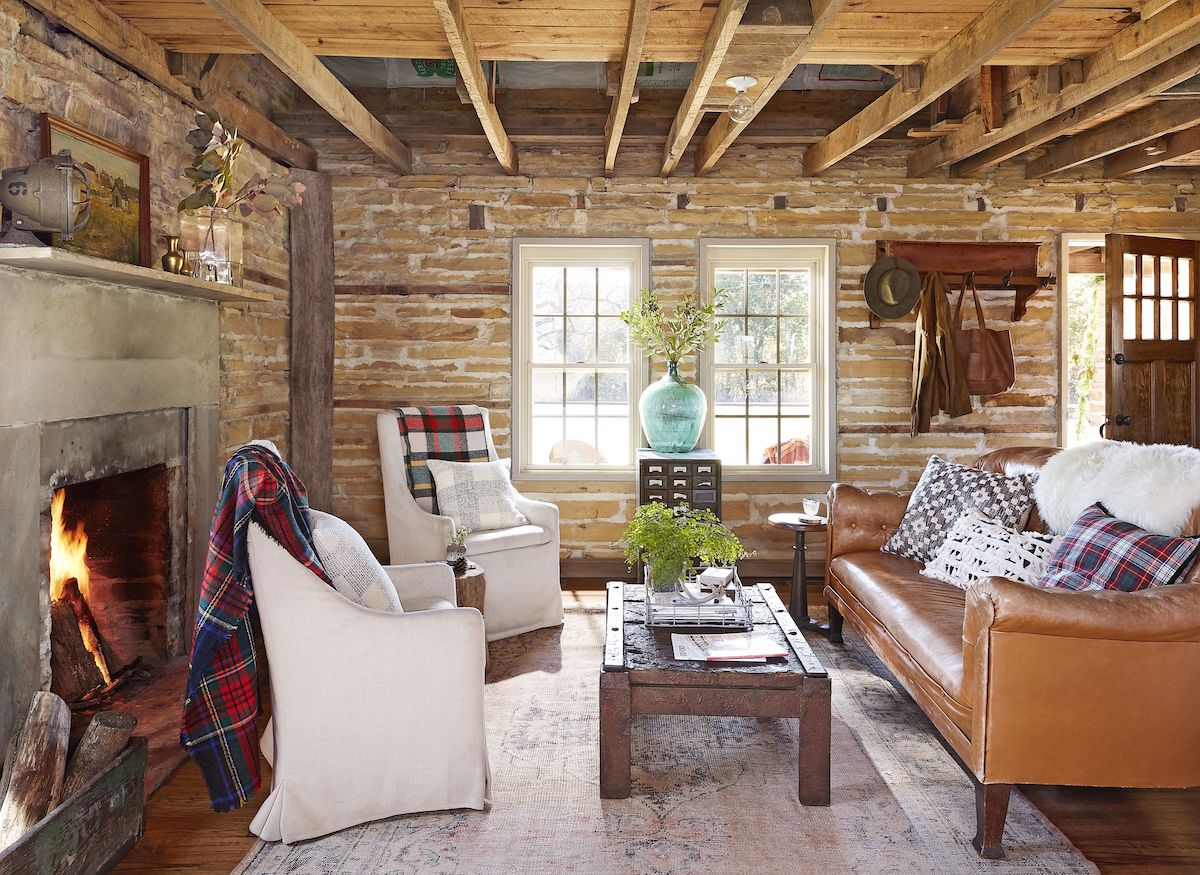
    Bohemian interior design is defined by an abundance of natural texture, warm earthy tones, a relaxed attitude to composition, and a clear sense that the space has been curated over time rather than styled in a weekend. Wall panels in a boho interior don’t aim for precision or minimalism — they aim for warmth, character, and the kind of richness that comes from layering natural materials.

    The right wood panel wall in a boho interior looks like it belongs, not like it was installed. That distinction drives every choice.

    Species and Finish for Boho Panel Walls

    Choose Warm Over Cool

    Boho palettes are built on earthy warmth — terracotta, ochre, rust, burnt orange, warm brown, sage green. Cool-toned woods (pale ash, birch, whitened oak) conflict with this palette. For boho interiors, choose species with warm undertones:

    • Natural oak (medium tone): Warm honey colour, sufficient grain character to look organic rather than engineered. The most versatile boho panel choice.
    • Walnut: Rich, warm, and characterful. Best in more sophisticated boho interpretations — global-inspired, Moroccan-adjacent, eclectic mid-century.
    • Bamboo or rattan effect: The most directly boho material association — though typically in furniture rather than wall panels specifically.

    Prefer Natural Finishes

    Boho interiors resist lacquered, highly finished surfaces. Natural oil or hardwax finishes — where the wood’s inherent surface texture is retained and the grain shows fully — suit the aesthetic far better than high-gloss lacquer or film-forming finishes that create a plastic-like surface over the wood.

    Wire-Brushed Texture

    Wire-brushed (or “cerused”) wood finishes, where the soft fibres of the grain are brushed out to create a physical texture, are one of the most boho-compatible panel surface treatments available. The tactile surface reads as organic and handmade — the right quality for an aesthetic that celebrates craftsmanship over perfection.

    Placement in a Boho Scheme

    The Layered Feature Wall

    In boho interiors, the feature wall is often genuinely layered — panels as the base, with wall hangings, macramé, plants, mirrors, and art hung over and alongside them. The panel wall is the foundation for a composition that develops over time rather than a completed statement. Choose panels that suit this role: natural oak slat panels with a warm finish create a backdrop that enhances rather than competes with what goes in front of them.

    Partial Panel + Limewash

    One of the most effective boho panel approaches: limewash the three secondary walls in a warm, earthy tone (warm white, soft terracotta, dusty sage) and install natural oak slat panels on the primary feature wall. The two materials share an organic, natural-material character that creates a cohesive boho result without any single element overpowering the others.

    What to Combine With Boho Panels

    • Rattan furniture and accessories (pendant lights, shelving)
    • Kilim, jute, or wool rugs with warm tones
    • Terracotta and earth-tone ceramics
    • Trailing and structural plants — pothos, monstera, palms
    • Woven wall hangings and macramé (hung directly on the panel wall)
    • Warm ambient lighting — Edison bulbs, warm-white LED

    For the broader context of choosing the right wood tone for your scheme, our guide to wood species for wall panels covers the specific colour and character of each major panel species. And for how to get panels up without damaging walls — useful for renters building a boho rental interior — our wall panels for renters guide covers the damage-free options.

    Combining Boho Wall Panels with Furniture and Soft Furnishings

    A boho wall panel works as the foundation of a layered scheme — it provides the texture and material weight that everything else references. The mistake most people make is treating the panel as the finished decoration and stopping there. In a boho interior, the panel is the starting point.

    Against a warm oak or walnut panel, layer rattan furniture, jute rugs, and woven cushion covers in earthy tones — terracotta, burnt orange, ochre, sage. The natural tones in the wood should inform the palette of every textile in the room. Avoid matching exactly; boho interiors thrive on variation within a tonal family, not colour-coordinated precision.

    Hang macramé or woven wall hangings on adjacent walls or within alcoves — they add softness and movement that contrasts well with the linear regularity of panelling. Plants are essential in a boho interior with wood panels: trailing varieties like pothos or philodendron cascading in front of a panel wall create the kind of layered organic depth that defines the aesthetic. Keep the rest of the room loose — mismatched cushions, stacked books, ceramics in warm neutral tones. Boho isn’t about perfection; it’s about richness.

    Boho Wall Panel FAQs

    Which wood species is most authentically boho?
    Natural medium-toned oak is the most versatile choice — its warm honey colour works across the range of earthy boho palettes. Walnut is appropriate for more sophisticated, globally-inspired boho schemes. Avoid pale birch or highly bleached woods, which read as Scandinavian or minimalist rather than boho. The grain should be visible and characterful, not fine and even.

    Can boho wall panels work in a bedroom?
    Absolutely. A warm wood panel behind the bed is one of the most effective boho bedroom treatments — it replaces a traditional headboard with a full-wall material statement. Style it with linen bedding in earthy tones, layered cushions and throws, and bedside tables in rattan or natural wood. The warmth of the wood panel creates a genuinely restful atmosphere that is difficult to achieve with paint alone.

    Do boho panels work in a rental property?
    Yes, with the right installation method. Adhesive-fixed slat panels can be installed on rental walls without permanent damage, provided the wall surface is sound. Use removable-grade panel adhesive and test on a small area first. Alternatively, fit panels to a timber frame that can be removed as a unit — this approach works well for larger feature walls in rented spaces.

    Should boho panels be lacquered or oiled?
    Oil or hardwax finishes are the more appropriate choice for a boho interior. They preserve the tactile quality of the wood and maintain the natural, slightly unpolished character that boho design values. High-gloss lacquer creates a surface that reads as overly refined and conflicts with the relaxed, organic intention of the style.

    Shop Boho Wall Panels

    Explore the full wood wall panel collection at The Panel Hub — the SoundPanel™ acoustic slat range in natural oak or walnut is the most popular choice for bohemian interior schemes. For inspiration on layering panels with other natural materials, our interior slat wall ideas guide shows how different panel types look in lived-in, curated spaces. The acoustic panel buyer’s guide is worth reading before buying — the acoustic felt backing on slat panels adds a practical benefit that complements the sensory richness of a boho interior.

  • Can Wall Panels Be Painted? Yes — Here’s How to Do It Right

    Can Wall Panels Be Painted? Yes — Here’s How to Do It Right

    Can You Paint Wall Panels?

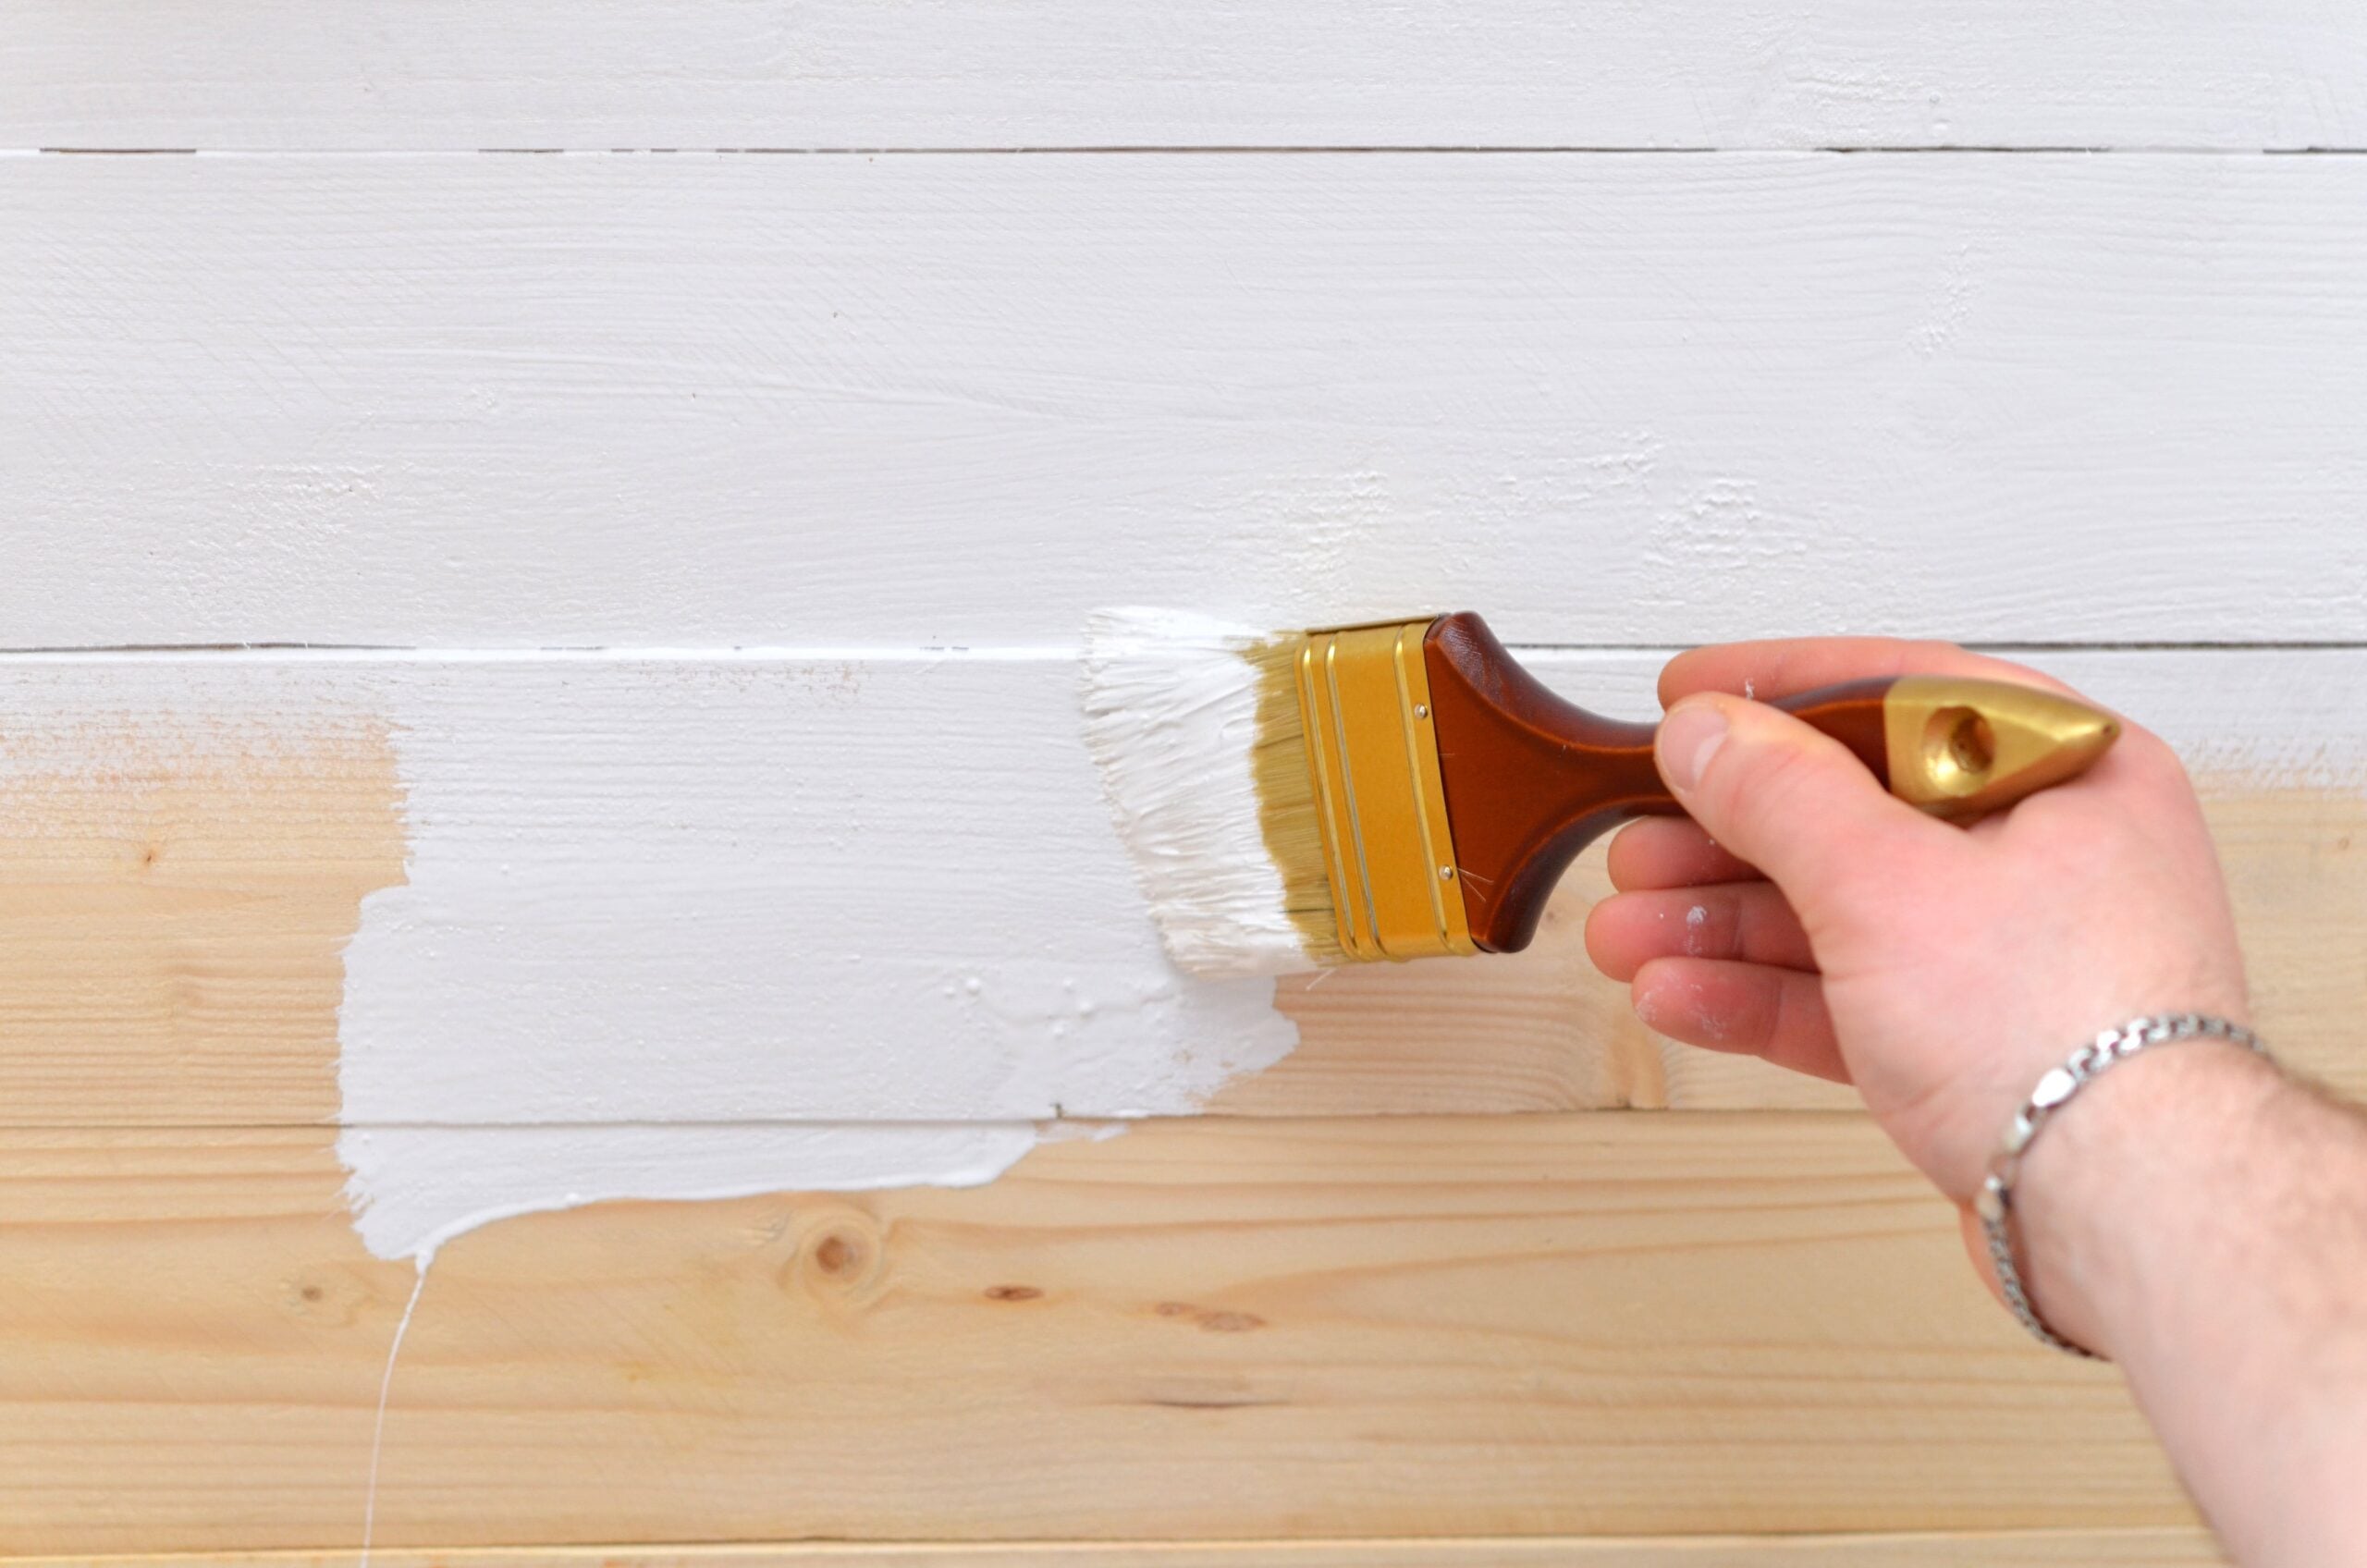
    Yes — most wood wall panel types can be painted, and painted panels can look outstanding. The challenge is that wood-based substrates (particularly MDF) behave very differently from plaster or drywall when painted. Get the preparation right and you’ll achieve a clean, durable, professional finish. Skip the preparation steps and you’ll end up with uneven sheen, peeling paint, and raised grain — all of which are harder to fix after the fact than to prevent in the first place.

    Which Panel Types Can Be Painted

    MDF Panels (Best for Painting)

    MDF is the most paintable panel substrate — smooth, stable, and consistent. It takes paint evenly without grain show-through, and the result is as smooth and professional as painted plaster. The specific preparation requirements (primer type, edge sealing) are the critical difference from plaster.

    Real Wood Veneer Panels

    Yes, but with more preparation. The veneer surface can show grain through thin paint — a grain filler coat is often required for a smooth result. Also consider whether painting over premium real wood veneer makes sense given the investment in the material. If you want a painted result, purpose-made paintable MDF panel systems are often a more cost-effective starting point than painting natural veneer.

    Existing Stained or Lacquered Panels

    Panels with an existing stain can be painted over — but the existing finish must be properly abraded (sanded back to provide adhesion) and primed with an adhesion primer before topcoating. Panels with a thick, high-gloss lacquer finish require more significant preparation — mechanical sanding down to the substrate or application of a specialist de-glosser before painting.

    Step-by-Step: How to Paint Wall Panels

    Step 1: Clean the Panel Surface

    Wipe down all panels with a damp cloth to remove dust, grease, and any residue. Allow to dry fully. Any contamination on the surface will prevent paint adhesion.

    Step 2: Sand

    Lightly sand the panel surface with 120-grit sandpaper to provide a key (a slightly roughened surface for the primer to grip). For panels with an existing finish, more aggressive sanding (80-grit) may be required to break through the existing coat.

    Step 3: Seal MDF Edges (Critical)

    MDF panel edges are highly porous — they absorb primer and paint at a different rate from the face, producing a visible sheen and colour difference in the final result. Seal all edges with a coat of diluted PVA (3 parts PVA: 1 part water), allow to dry, then apply your primer. Two coats of primer on edges may be needed.

    Step 4: Apply MDF-Specific Primer

    Standard wall primers are too thin and are absorbed unevenly by MDF’s surface. Use a dedicated MDF primer — typically oil-based or a specialist water-based MDF sealer. Apply one full coat, allow to dry, then lightly sand with 180-grit before proceeding.

    Step 5: Apply Topcoat

    Apply two coats of your chosen paint, sanding lightly with 220-grit paper between coats. Two thin coats produce a better result than one thick coat. Allow full drying time between coats — don’t rush this step.

    Paint Selection

    • Eggshell: The standard choice for painted panel walls — low sheen, wipeable, durable
    • Satinwood: Slightly higher sheen, more durable, traditional for woodwork
    • Avoid matt emulsion: Not designed for surfaces that receive contact and cleaning — marks easily and cannot be cleaned without sheen damage

    For the full context of installation — how painting fits into the overall panel installation sequence — our step-by-step panel installation guide covers the complete process. And for maintenance of painted panels once installed, our wood panel cleaning guide covers the specific care that keeps painted surfaces looking good long-term.

    Browse Paintable Wall Panels

    Explore the full wood wall panel collection at The Panel Hub — including smooth-face MDF panel systems designed to be painted. The SoundPanel™ acoustic slat range is also available to browse if you’d prefer a natural wood finish over paint. For design inspiration once you’ve settled on your finish, our interior slat wall ideas guide covers 50+ real-room applications, and the acoustic panel buyer’s guide explains which panel types combine acoustic performance with a paintable surface.

  • Can You Install Wood Panels Over Drywall? Yes — Here’s How

    Can You Install Wood Panels Over Drywall? Yes — Here’s How

    The Short Answer

    Yes — drywall (also called gypsum board, plasterboard, or Sheetrock) is one of the best substrates for wood wall panel installation. It’s flat, smooth, consistent in thickness, and has excellent adhesive bonding characteristics when properly prepared. The vast majority of residential wood panel installations happen on drywall walls, and modern panel systems are specifically designed for this substrate.

    What Makes Drywall a Good Substrate

    • Flat surface: Factory-produced drywall has consistent flatness over its face — far better than old plaster which can bow, crack, and have significant surface variation.
    • Good adhesion surface: Primed drywall paper provides excellent grip for construction adhesive. Bare or painted drywall bonds well to hybrid polymer and PU adhesives.
    • Consistent thickness: Standard 12.5mm drywall provides a stable, predictable substrate. Panels sit flat and the adhesive creates a consistent bond depth.
    • Easy to find studs: Drywall is fixed to studs at regular intervals (typically 400mm or 600mm centres), which is valuable if you want to add mechanical fixings in addition to adhesive.

    What to Check Before Installing

    Drywall Condition

    Panels can only be installed over drywall that’s in sound condition:

    • No water damage — drywall that has been wet loses structural integrity and becomes soft. Water-damaged drywall must be replaced before panel installation.
    • No delamination — if the paper face of the drywall is peeling or bubbling, the adhesive will bond to the paper rather than the board. Sand, prime, or replace affected areas.
    • Tape joints filled and flat — drywall tape joints and screw heads should be filled, sanded, and primed before panel installation. Even minor raised areas create visible panel imperfections.

    Existing Paint

    Panels can be installed over painted drywall, but the paint must be well-adhered. Test by pressing a strip of strong tape to the painted surface and pulling it away sharply. If paint comes off with the tape, the paint bond is insufficient for panel adhesive — sand back to bare drywall or apply a bonding primer before proceeding.

    Drywall Thickness

    Standard 12.5mm drywall is ideal. Thinner drywall (9.5mm) may not hold mechanical fixings securely if screw supplementation is desired. Check your wall thickness before specifying fixings.

    Installation Process on Drywall

    1. Prepare the surface: Clean with a damp cloth to remove dust. Fill any holes with drywall compound. Sand smooth when dry.
    2. Prime: A coat of PVA primer on bare drywall dramatically improves adhesive bond strength. Allow to dry fully.
    3. Mark stud positions: Use a stud finder or knock-test to locate studs. Mark their positions in pencil at the top and bottom of the wall — useful if you choose to supplement adhesive with screws.
    4. Apply adhesive and install: Follow the standard installation sequence from our step-by-step installation guide.

    Should You Add Mechanical Fixings?

    For most standard domestic panel installations on sound drywall, construction adhesive alone provides sufficient holding strength. However, consider supplementing with screws if:

    • Panels are particularly heavy (over 15kg per panel)
    • The room experiences significant temperature or humidity variation
    • You want a belt-and-braces approach for panels installed high up or in locations where a panel falling would be a safety risk

    Use 50mm wood screws into studs where studs align with panels. Counter-sink and fill screw heads with a matching wood filler.

    Ready to start? Browse the SoundPanel™ acoustic slat collection and the GroovePanel® mosaic range — both are designed for straightforward drywall installation with clear guidance included.

    Drywall-Specific Installation Tips for Wood Panels

    While drywall is one of the best panel substrates, a few specific preparation and installation steps maximise the result on this surface.

    Prime the drywall first. New, unpainted drywall absorbs adhesive into the paper facing, reducing bond quality. A coat of diluted PVA (1:4 PVA to water) or a purpose-made primer seals the surface and ensures consistent adhesive coverage. On already-painted drywall, primer is not required unless the paint is flaking.

    Locate your studs before installation. Even if you plan to rely entirely on adhesive, knowing where your studs are is useful. For heavier panels or for any installation in rooms with high humidity fluctuation (kitchens, bathrooms adjacent to the installation wall), supplementary fixings into studs provide long-term security that adhesive alone cannot guarantee.

    Keep adhesive away from drywall seams. If your wall has drywall seams (the joints between sheets), avoid placing panel adhesive directly over them. Drywall seams can flex slightly and this movement can crack the adhesive bond over time. Apply adhesive on either side of a seam rather than across it.

    Avoid installing panels over repair patches. Drywall patches (skim-repaired holes, filled screw holes) may have a different surface texture than the surrounding paper. Test your adhesive on any repaired areas before the main installation — if grip is inconsistent, a thin coat of PVA primer equalises the surface.

    Drywall Panel Installation FAQs

    How heavy a panel can drywall support with adhesive alone?
    Standard 12.5 mm drywall can support panels up to approximately 15 kg/m² with correctly applied construction adhesive. Most residential slat and engineered panel systems are well within this range. For panels over 15 kg/m², supplement the adhesive with mechanical fixings into studs.

    Can I install panels on newly plastered or skim-coated drywall?
    Only once the plaster or skim is completely dry — typically 2–4 weeks for new plasterwork, depending on humidity and ventilation. Fresh plaster is alkaline and still contains moisture; both conditions reduce adhesive bond quality. Always test moisture levels with a moisture meter before installing panels on new plasterwork.

    Will the panel adhesive damage my drywall if I want to remove panels later?
    Removal of adhesive-fixed panels almost always damages the drywall paper facing to some degree. The extent depends on adhesive type and cure time — softer adhesives removed promptly cause less damage than fully-cured rigid adhesives removed months later. If you anticipate removal (rental property, temporary installation), use a peel-and-stick panel system or a batten mounting system that uses fewer wall fixings.

    Can I use the same adhesive for drywall and for plaster walls?
    Most hybrid polymer and polyurethane construction adhesives work on both surfaces. The key difference is that old plaster walls may be softer and less stable than drywall. Test the plaster surface with tape first — if paint pulls away with the tape, the surface needs consolidating with PVA primer before adhesive will bond reliably.

    Browse Panels for Drywall Installation

    Explore the complete wood wall panel collection at The Panel Hub — the SoundPanel™ acoustic slat range is specifically designed for adhesive installation on standard drywall. For design inspiration showing what’s achievable on a drywall substrate, our interior slat wall ideas guide covers 50+ real-room applications. The acoustic panel buyer’s guide explains the acoustic felt backing system that makes slat panels one of the most effective upgrades for a standard drywall room.

  • Cheap vs Premium Wood Wall Panels: What’s the Real Difference?

    Cheap vs Premium Wood Wall Panels: What’s the Real Difference?

    The Price Range Is Wide

    Wood wall panels range from under $20 per panel to over $300. That’s a 15x price difference for products that can appear superficially similar in online product photography. The question isn’t whether the price difference exists — it’s whether the quality difference justifies it for your specific project.

    What Budget Panels Typically Compromise On

    Surface Material

    Budget panels almost always use a printed laminate or paper-thin veneer rather than a genuine real wood veneer. At 0.2–0.3mm, these surfaces look acceptable in product photography and feel obviously inferior in person. They don’t age well — the pattern is fixed and any surface wear goes straight through to the substrate below.

    Acoustic Backing

    Budget “acoustic” slat panels typically have a thin paper or non-woven fabric backing with minimal or zero acoustic performance. The NRC rating — if published at all — is often below 0.30. These panels are decorative, not acoustic, regardless of the marketing language. See our acoustic felt backing guide to understand what real acoustic backing looks and performs like.

    Core Material

    Budget panels often use standard MDF without moisture resistance treatment. Fine in dry rooms; problematic in kitchens, bathrooms, and anywhere with humidity variation. Edge quality is also typically inferior — inconsistent machining means panel-to-panel joins aren’t tight.

    Edge Finishing

    Premium panels have machined, rounded edges on all sides — meaning panels butt together cleanly and edge transitions are smooth. Budget panels often have sharp-cut edges with visible core material, requiring additional trimming or filling at joins.

    What Premium Panels Deliver

    • Real wood veneer (0.6mm+): Genuine grain, natural variation, ages authentically. The difference in person is immediately apparent.
    • Engineered acoustic felt backing (9–12mm): Published NRC 0.65–0.85. Actual acoustic improvement, not just an acoustic claim.
    • MR-MDF or CoreShield™ core: Moisture resistance appropriate for domestic environments with humidity variation.
    • Precision machined edges: Panels fit together cleanly, producing invisible joins without additional work.
    • FSC certification: Responsible timber sourcing with documented chain of custody.

    The Cost-Per-Year Calculation

    Budget panels at $25 each that last 5–7 years before visible degradation cost approximately $4–$5 per panel per year. Premium acoustic panels at $180 each that last 20+ years cost approximately $9 per panel per year. The gap is smaller than the upfront price suggests — and the premium panel delivers acoustic performance, real material quality, and a result that looks better and lasts longer.

    For most feature wall applications in living rooms, bedrooms, and home offices, the premium option is the better long-term value.

    When Budget Panels Are Appropriate

    • Temporary installations you expect to remove within 2–3 years
    • High-coverage utility applications (workshop, garage) where visual quality isn’t a priority
    • Large areas where cost per panel matters more than per-panel quality

    When Premium Panels Are Worth It

    • Any room you live in and look at every day
    • Any installation where acoustic performance matters
    • Any space used for video calls or content creation where the wall appears on camera
    • Any installation intended to be permanent

    The SoundPanel™ acoustic slat range and GroovePanel® mosaic collection represent the premium benchmark — factory-direct pricing means genuine premium quality at significantly below retail. Browse the full collection to compare options.

    What to Check Before Buying: A Practical Quality Inspection Guide

    The gap between budget and premium panels is real — but it is also navigable if you know what to assess. Before placing an order, these are the specific quality indicators worth checking:

    Veneer thickness. Request or check the specification. A real wood veneer of 0.6mm or above will show genuine grain depth and will sand lightly without breaking through. Printed laminates and very thin veneers (below 0.3mm) will not survive any sanding and show their substrate on close inspection. If the specification does not list veneer thickness, ask directly.

    Dimensional consistency. For slat panels, check whether board widths and depths are specified to a tolerance (e.g. ±0.5mm). Budget panels often carry wider manufacturing tolerances that create visible gaps and steps during installation. Request a sample board and check it against your expected profile specification before ordering.

    Backing quality. Turn a sample over. Premium acoustic slat panels will have a dense felt backing of 5mm or more with a published NRC rating. Budget “acoustic” panels will have a thin non-woven fabric or paper backing with no published performance data. If acoustic performance is part of your requirement, verify the NRC rating independently rather than accepting marketing claims.

    Edge machining. Run your finger along the tongue or groove profile. Premium panels have clean, consistent machining that fits without gaps or forcing. Budget panels often have inconsistent machining that creates either forced fits (which stress the joint) or loose fits (which create visible gaps at the board edges).

    Cheap vs Premium Wood Wall Panel FAQs

    Is there a price point where the quality difference becomes marginal?
    Yes — there is typically a plateau where additional spend delivers diminishing returns. In the UK market, panels priced between £40–£80 per square metre typically deliver genuine real wood veneer, adequate dimensional stability, and competent backing. Above this range, you are paying for premium species, unusually fine machining tolerances, or specialist finishes. Below it, compromises become increasingly visible. The £40–£80 range is where the value point is for most residential projects.

    Can budget panels be used in premium-looking installations?
    Occasionally — but only in specific situations. Budget panels with consistent dimensions and a good surface specification can look excellent in a straightforward flat wall installation, viewed at normal distances, with good lighting. They fail in installations that involve close inspection (low-level panels at eye height), high contrast lighting that reveals surface variation, or applications where durability is required (hallways, children’s rooms). Know the limitations and apply accordingly.

    Do premium panels require professional installation?
    No — premium panels are designed for consistent results regardless of installer skill, because tight tolerances and quality machining reduce the variables that make installation outcomes unpredictable. However, premium panels do benefit from proper substrate preparation, because their tight tolerances make any wall undulations more visible. Level the wall properly before fitting premium panels — the result will vindicate the investment.

    How do I verify that a supplier’s “premium” claim is accurate?
    Request a sample and check: veneer thickness (should be measurable at 0.6mm+), edge machining (should be clean and consistent), backing material (should be dense felt with a published NRC rating for acoustic panels), and dimensional accuracy (width should be consistent across the sample to within 0.5mm). A supplier who resists providing samples, or whose samples do not match these standards, should be treated with caution regardless of their marketing language.

  • Dark Wood Wall Panels: How to Use Dark Tones Without Losing Light

    Dark Wood Wall Panels: How to Use Dark Tones Without Losing Light

    The Case for Dark Wood Panels

    Dark wood — walnut, ebonised oak, dark-stained ash — is one of the most striking materials available for wall panels. The deep, rich tones create a sense of gravitas and warmth that lighter materials rarely achieve. A walnut slat panel wall reads as premium, sophisticated, and deliberately considered in a way that pale oak cannot quite match.

    The common concern is light: will a dark panel wall make the room feel smaller and darker? The answer depends entirely on how you use it. Done correctly, dark panels create atmosphere without sacrificing comfort. Done incorrectly, they make rooms feel cave-like. Here’s how to get it right.

    The Rules for Dark Panel Walls

    Rule 1: One Wall, Maximum

    In almost every domestic room, dark wood wall panels work on one wall only. Two or more dark panel walls in a room below 25m² will feel oppressive regardless of lighting. Choose the primary feature wall — the one you face from the main seating position — and leave the remaining walls in a lighter tone that bounces light back into the space.

    Rule 2: Compensate with Artificial Lighting

    Dark surfaces absorb rather than reflect light, which means you need to plan your artificial lighting before — not after — installing dark panels. The solutions:

    • Wall-grazing spotlights: Ceiling-mounted spots angled to graze the panel surface create shadow play in the slat gaps that looks spectacular on dark wood and draws the eye upward.
    • LED strip lighting integrated into the panel: Light strips at the base or top of a wood paneling create a floating effect and add indirect ambient light that compensates for the panel’s light absorption.
    • Uplighting from floor level: Floor-standing uplights aimed at the dark panel wall add dimension and create warm, flattering indirect light that bounces off the ceiling.

    Rule 3: Keep the Opposite Surfaces Light

    The ceiling, the floor, and the opposing walls need to work hard to compensate. Light-coloured ceiling, pale or natural flooring, and light walls on the other three sides create a bright room with one dramatic focal point — rather than a uniformly dark space.

    Rule 4: Choose Rooms with Natural Light

    Deep brown panels work best in rooms with natural light — a south or west-facing room, a room with large windows or glazed doors. In a north-facing room with a single small window, dark panels will make the light problem worse. If your room is naturally light, dark panels add drama without sacrificing comfort. If it’s already dark, choose a mid-tone instead.

    Best Rooms for Dark Wood Panel Walls

    • Living rooms: The primary feature wall behind the sofa or facing the sofa, in a naturally lit room, is the ideal dark panel location. Our living room slat panel guide covers how to position panels for maximum impact.
    • Bedrooms: A walnut slat panel headboard wall creates a luxurious, hotel-quality backdrop. See our bedroom wood panel guide for the full approach.
    • Home offices: A dark panel wall behind the desk creates a serious, professional environment for video calls and focused work.
    • Home cinema rooms: Darkness is a feature in cinema rooms, not a problem. Our home theater panel guide explains why dark panels are the correct choice here.

    Species for Dark Panel Walls

    Our walnut vs oak comparison covers this in depth, but briefly: walnut is the premium choice for dark panels — rich chocolate tones with warm undertones that prevent the wall from reading as black. Ebonised oak gives a near-black result with visible grain. Dark-stained ash is a more affordable option that can match walnut tone. Our guide to wood species for wall panels covers every option.

    Styling Dark Wood Panels: Light, Contrast, and Material Pairings

    Dark wood panels work best when the rest of the room actively counterbalances their weight. The simplest strategy is to keep ceilings and adjacent walls in a bright, warm white. This creates a horizontal band of dark material against lighter surfaces, which reads as bold and curated rather than heavy.

    Flooring choice matters more with dark wall panels than with any other wall treatment. Light oak, pale stone, or cream carpet creates maximum contrast against dark-panelled walls. If your flooring is already dark, dark wood panels need stronger ambient lighting to prevent the room from feeling closed-in.

    Reflective surfaces help. Mirrors, glass-front furniture, lacquered side tables, and metallic light fittings all catch and distribute light in rooms with dark wall materials. A single large mirror on the opposite wall from a dark panel feature can make a significant difference to how spacious the room feels.

    For textiles, mid-tone or warm neutrals work better than very pale or very dark fabrics alongside dark wood. Cream, warm stone, terracotta, and forest green all complement dark wood tones without either disappearing into them or competing against them.

    Dark Wood Wall Panel FAQs

    Will dark wood panels make a small room feel smaller?
    Yes — but only if used on the wrong wall. In a small room, dark panels on the wall you face as you enter can feel oppressive. On a side or rear wall, dark panels create depth without reducing the perceived length of the room. Keep ceilings and flooring as light as possible to maintain a sense of vertical space.

    Which wood species give the darkest natural tones?
    Walnut, Smoked Oak (thermally modified), and Wenge provide the deepest natural dark tones without stain. American Black Walnut has warm brown undertones. Smoked Oak has cooler grey-brown tones. Both work well as wall panel materials.

    Do dark wood panels require more maintenance than light ones?
    Not more maintenance, but different visibility. Dust shows less on dark wood. Smudges and grease marks are more visible. Regular dry dusting and an occasional wipe with a barely damp microfibre cloth keeps dark panels looking sharp.

    Can I combine dark wood panels with other dark elements?
    Yes. Dark panels, dark furniture, dark flooring, and deep colour palettes can create a luxurious, enveloping room that feels rich rather than oppressive, provided there are enough light sources and reflective surfaces to prevent the space from feeling flat. The key is layering different dark tones and textures rather than repeating the same shade everywhere.

  • Dining Room Wood Panel Wall Ideas: 8 Looks That Make Every Meal Feel Special

    Dining Room Wood Panel Wall Ideas: 8 Looks That Make Every Meal Feel Special

    Why the Dining Room Rewards a Feature Wall

    The dining room has a natural visual logic that makes it one of the most rewarding spaces for a feature wall. You sit facing the same wall — or the same direction — for every meal, which means the wall behind the table or at the head of the room is seen and appreciated more consistently than almost any other surface in the home. A well-chosen panel wall in a dining room becomes the room’s signature, the backdrop for every dinner party, and the context for years of shared meals.

    8 Dining Room Wood Panel Wall Ideas

    1. Floor-to-Ceiling Walnut Slat Panels Behind the Table

    The most impactful dining room panel installation: acoustic wood slat panels in a rich walnut finish running floor to ceiling across the wall the table sits against. The deep chocolate tones of walnut create a sense of warmth and formality appropriate to a dining space. Pair with brass or bronze light fixtures for a cohesive, high-end result. The acoustic felt backing has the practical bonus of reducing the hard echo common in dining rooms with hard floors.

    2. Wainscoting with Bold Paint Above

    Traditional wainscoting at chair-rail height (approx. 90cm) with a strong, saturated paint colour above — deep green, navy, or terracotta — is one of the most enduringly elegant dining room treatments. The wainscoting protects the lower wall from chair backs and accidental contact while the upper wall carries the colour statement. See our full wainscoting ideas guide for style variations and material choices.

    3. Fluted Oak Panels as a Head-of-Table Feature

    Treat just the wall at the “head” end of the dining table — the wall your eye goes to from the kitchen or entrance — with fluted oak panels. The vertical groove profile suits the formal character of a dining room while the natural oak tone keeps the space warm rather than heavy. Leave the remaining walls in a complementary neutral.

    4. Dark Painted Panels with Picture Moulding

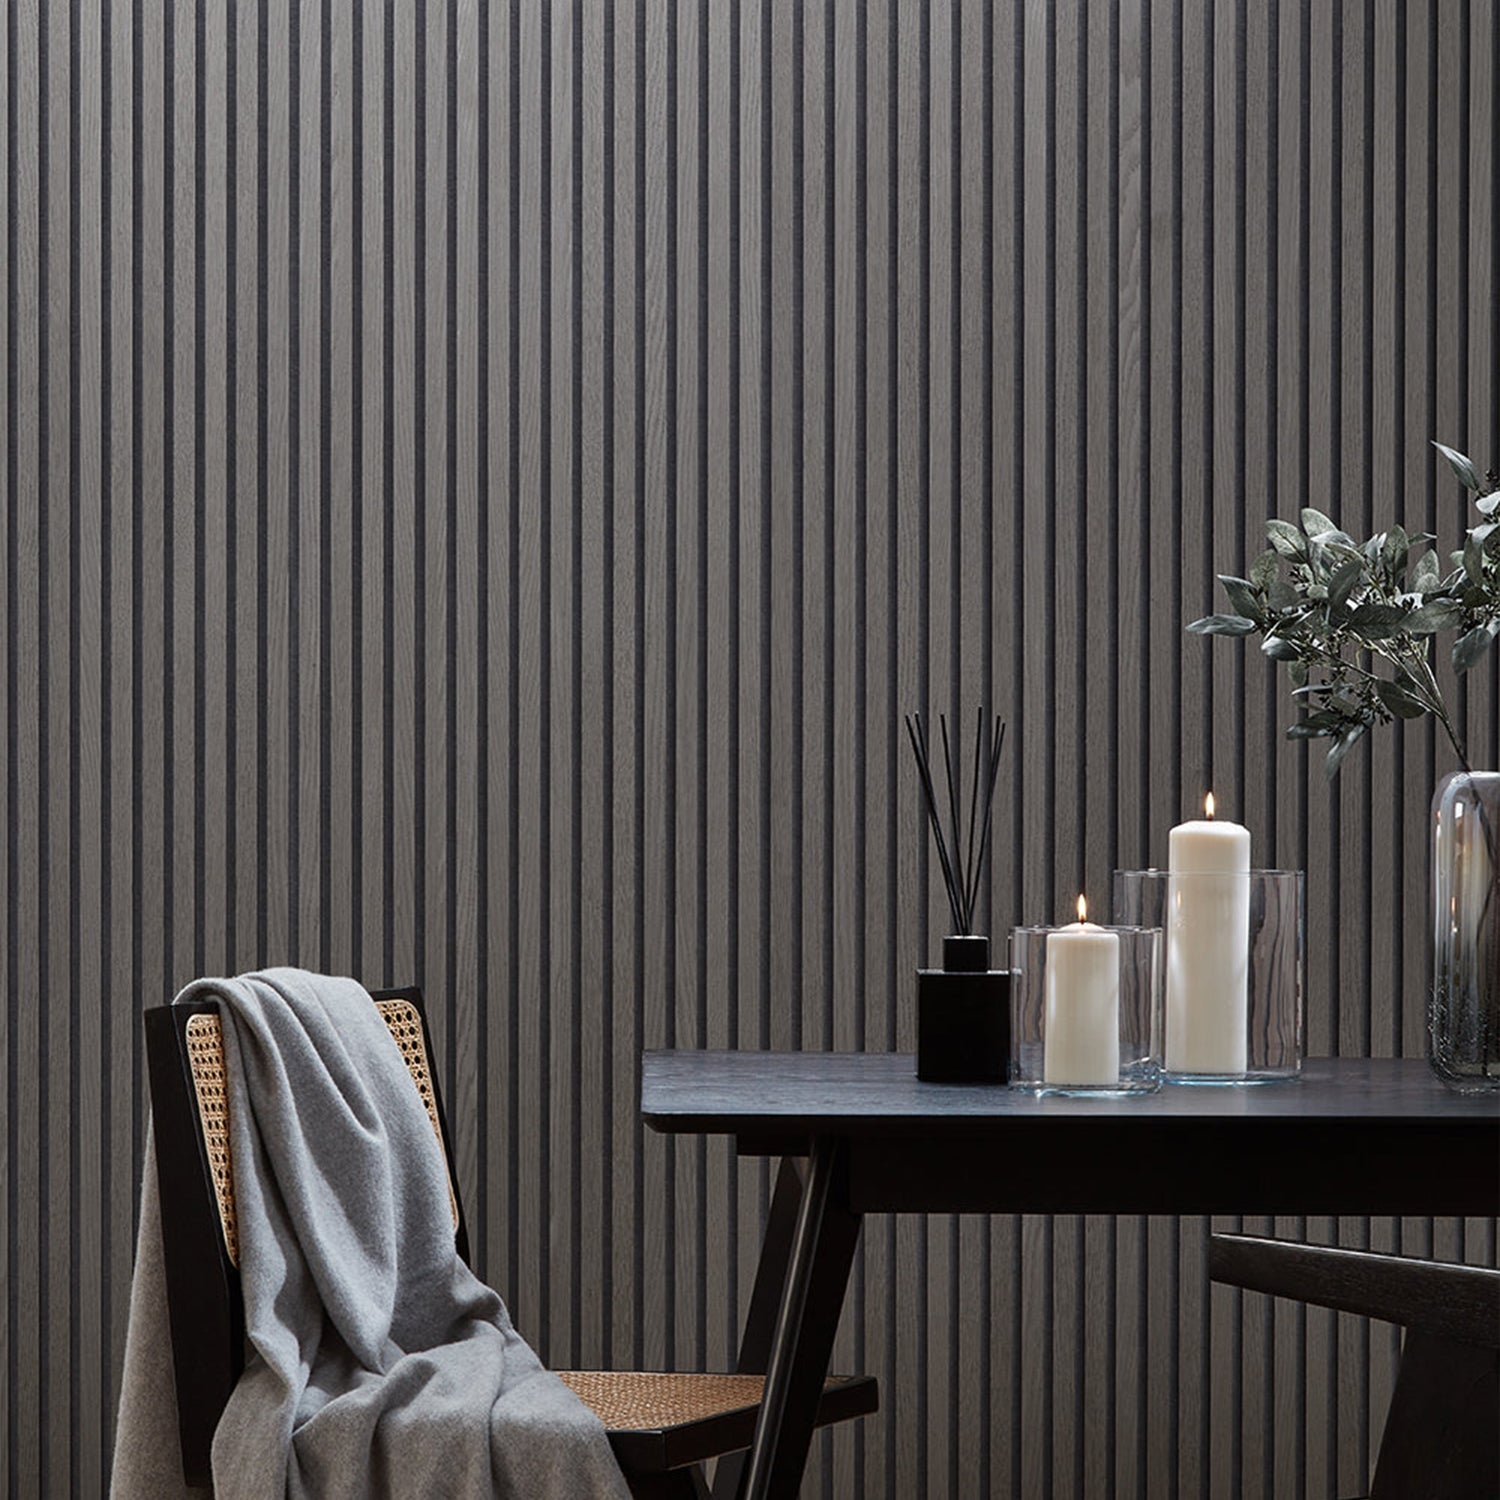
    America Grey Acoustic Wall Panels | 3-Sided Wood Veneer | SoundPanel®.

    Panel the dining room walls in a dark tone — charcoal, black, deep plum — and add painted picture moulding frames to create a classical, formal effect. Hang large art or a mirror within the moulded frames for a fully finished result. This is one of the most dramatic and cost-effective dining room treatments available.

    5. Herringbone Wood Tile Panel Wall

    Solid wood mosaic tiles arranged in a herringbone pattern create a crafted, bespoke dining room backdrop unlike anything achievable with paint or standard panels. Best in a warm oak or medium walnut that complements rather than competes with the dining table material.

    6. Reeded Panels with Integrated Shelving

    A reeded panel wall with integrated floating shelves — for glassware, ceramics, candles — creates a dining room backdrop that’s both beautiful and functional. The soft, rounded reeded profile suits a dining room’s need for warmth and hospitality better than the sharper fluted alternative.

    7. Limewash + Slat Panel Combination

    Limewash the three secondary walls in an earthy, organic tone and install slat panels on the fourth — the primary feature wall. The combination of textural limewash and the graphic vertical lines of the slat panels creates a dining room that feels designed at every angle, not just from the obvious direction.

    8. Stone Effect Panel at the Dining Room Fireplace

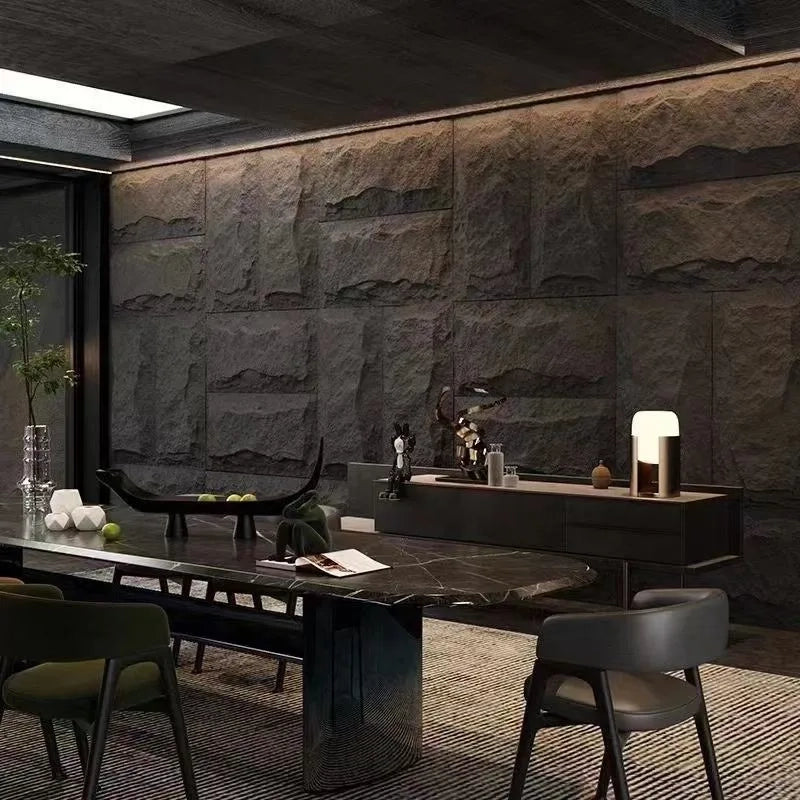
    Stone Rock Wall Panel (set of 6) | RockSurface®-Wall Panelling-The Panel Hub

    If the dining room has a fireplace or chimney breast, clad it in faux stone panels for a dramatic, anchoring focal point that suits formal dining rooms and country house aesthetics equally well.

    Design Principles for Dining Room Panel Walls

    • Warmth matters: Dining rooms are social spaces — cool, clinical materials feel inhospitable. Choose warm wood tones, rich colours, and textural materials over anything sleek or industrial.
    • Scale up: Dining rooms typically have higher ceilings than other rooms. Floor-to-ceiling panel treatments read better than half-height options at standard domestic ceiling heights.
    • Lighting is everything: Panel walls in dining rooms are experienced primarily under artificial evening light. Test your choice under warm tungsten or warm-white LED light, not just daylight.

    For broader feature wall inspiration across room types, our accent wall ideas guide covers 15 different treatments with design guidance. And for the full overview of wood panel materials and construction, the wood panel wall complete guide is the right reference.

    Practical Considerations Before Installing Dining Room Panels

    Dining rooms come with a specific challenge that most other rooms don’t: food vapour, humidity from hot dishes, and the occasional splash. Most real wood panels handle this without issue as long as they’re not installed directly adjacent to a kitchen hob or steam source. For dining rooms open to a kitchen, a sealed or lacquered finish gives the wood better resistance to ambient moisture over time.

    Chair rail height matters more in dining rooms than anywhere else. In most cases, the panel feature wall looks best when it extends from floor to ceiling. If you prefer a half-wall treatment, the standard height is 90–100 cm — roughly the height of a dining chair back. Below this line, choose a harder-wearing panel surface or include a flat skirting that protects the bottom edge from chair contact.

    Consider how lighting interacts with the panels from the dining table’s perspective. Seated diners face the feature wall at close range, meaning texture and grain are viewed at close viewing distance and eye level. Shallow grooves and subtle relief patterns read beautifully here — dramatic 3D panels can feel overwhelming at this scale.

    Dining Room Feature Wall FAQs

    Which wall should be the feature wall in a dining room?
    The wall at the head of the table, or the wall most visible from the main seating side, is the standard choice. If your table is positioned centrally, the wall your guests face when seated is the natural focal point.

    Are wood panels suitable for a dining room?
    Yes. Most wood and wood-effect panels are perfectly suitable for dining rooms. The key consideration is sealing — panels with an oil or lacquer finish resist food vapour better than untreated or raw wood. Engineered panels with a factory-applied finish require almost no maintenance in a dining context.

    How do I style the rest of the room around a panel feature wall?
    Keep the three remaining walls in a complementary neutral — soft white, warm greige, or muted sage all work well with wood tones. Matching the table’s wood species or tone to the panel creates cohesion. Use lighting above the table (pendant or chandelier) to draw the eye toward the feature wall and away from any elements you want to recede.

    Can I add lighting to a dining room panel wall?
    Yes — integrated LED strip lighting between slats or within panel grooves adds dramatic effect in a dining setting, particularly in the evening. Warm white (2700–3000K) works better than cool white in a dining context, as it flatters both food and skin tones.

    Shop Dining Room Wall Panels

    Browse the full wood wall panel collection at The Panel Hub — the SoundPanel™ acoustic slat range in walnut or dark oak is the most popular choice for dining room feature walls. For more dining room and social space panel inspiration, our interior slat wall ideas guide covers 50+ real-room applications. The acoustic panel buyer’s guide explains why acoustic slat panels make a meaningful difference in dining rooms — reducing the hard echo that makes conversation tiring in rooms with hard floors and minimal soft furnishings.

  • DIY Slat Wall Panel Accent Wall: A Complete Tutorial From Start to Finish

    DIY Slat Wall Panel Accent Wall: A Complete Tutorial From Start to Finish

    What This Tutorial Covers

    This is the all-in-one guide for anyone planning their first slat wall panel installation. It combines the planning, tools, preparation, installation, and finishing into a single linear walkthrough — so you can follow it from start to finish without jumping between guides.

    Step 1: Choose Your Wall

    Choose the wall that naturally draws the eye when entering the room. In a bedroom, that’s the headboard wall. In a living room, it’s typically the sofa wall or TV wall. In a home office, it’s the wall behind the desk and monitor. Don’t overthink this — the right wall is almost always obvious once you ask the question.

    Floor-to-ceiling installation has the most impact. If the room has a ceiling height under 2.4m, slat panels can make the ceiling feel lower — in this case, consider installing from headboard height to ceiling only, and painting the lower wall in a complementary tone.

    Step 2: Measure and Order

    Measure wall width and height. Multiply for total m². Divide by your chosen panel’s coverage area and add 10% for waste. Order a sample first if you haven’t seen the product in person — screen colour and real-world lighting can differ significantly.

    For the SoundPanel® American Acoustic Slat Wood Wall Panel, coverage and dimensions are listed on the product page. Order trim strips for all exposed edges and enough adhesive for your panel count (one 290ml cartridge per 2–3 panels).

    Step 3: Acclimatise (24–48 Hours Before)

    Unpack panels and lay them flat in the installation room for at least 48 hours before installing. This allows the wood veneer and MDF core to adjust to the room’s humidity. Skipping this step is the single most common cause of post-installation warping and panel-to-panel gaps.

    Step 4: Prepare the Wall

    • Remove socket covers, switch plates, picture hooks, and skirting board (if paneling to the floor)
    • Fill holes and cracks with interior filler — sand flush when dry
    • Wipe wall down with a damp cloth and allow to dry completely
    • Apply a coat of PVA primer to bare plaster or drywall — dramatically improves adhesive bond strength

    Step 5: Plan Your Layout

    Mark the centre of the wall. Calculate how many full panels fit either side and what the end-cut widths will be. Aim for symmetrical end cuts — equal width on both sides looks intentional; one full panel and one sliver looks accidental. Mark your starting vertical reference line with a spirit level and pencil.

    Step 6: Install the First Panel

    Apply a zigzag bead of hybrid polymer construction adhesive across the panel back, 5cm from each edge and two runs across the middle. Press firmly against the wall at your reference line. Check with a spirit level — plumb vertically, level horizontally. Hold for 60 seconds. Use painters’ tape to support the panel while adhesive grabs (10–15 minutes).

    Step 7: Continue Across the Wall

    Work panel by panel outward from your starting position, butting each panel tight against the previous one. Check level every two panels. Don’t assume the wall is flat enough to self-correct — actively check each panel. Remove painters’ tape from each panel as you move to the next to avoid adhesive curing with tape marks.

    Step 8: Cut End Panels

    Measure the remaining gap at each end. Transfer measurement to the panel face. Score veneer with a utility knife along the cut line. Cut with a fine-tooth saw on the waste side. Sand the cut edge smooth. Seal the cut edge with matching wood oil or edge tape before installing.

    Step 9: Cut Around Obstructions

    For sockets and switches: mark their position on the panel back (use the socket cover as a template). Drill a starter hole at each corner of the marked rectangle. Cut with a jigsaw. Test-fit before applying adhesive. For pipes: measure pipe position from the nearest panel edge and mark on the panel. Drill an appropriately sized hole.

    Step 10: Finishing

    • Fit matching trim strips at all exposed edges using a small bead of adhesive
    • Caulk the join between panel and ceiling — smooth with a wet finger for a clean line
    • Caulk the join between panel and side walls where panel meets an unfinished wall surface
    • Reinstall socket covers and switch plates
    • Allow 24 hours for adhesive to fully cure before hanging anything on the panels

    Troubleshooting Common DIY Installation Problems

    Even well-planned DIY slat panel installations run into issues. Here are the most common problems and how to resolve them.

    Panels not sitting flush against the wall. This is usually caused by a wall surface that’s not flat — lumps, filled holes, or uneven plaster create high points that hold the panel face away from the wall. Check the wall with a 1.2m straight edge before installing. High points above 3mm will cause visible gapping. Sand down or fill low spots, then re-check. Don’t try to use adhesive to bridge a genuinely uneven wall — the bond will fail under the tension.

    Visible colour or grain variation between panels. Wood veneer is a natural material — adjacent panels from the same batch will have grain and colour variation. If you’re installing a continuous feature wall, fan all the panels out on the floor and arrange them before fixing so you can balance the variation visually. Panels at the edges will be less visible, so put the more variable pieces there. This 10-minute pre-installation step prevents the mismatched-look problem entirely.

    Gaps opening between panels after installation. Small gaps (1–2mm) between panels are normal and expected as wood acclimatises over the first few weeks. Gaps larger than 3mm suggest the panels weren’t acclimatised before installation or were installed in conditions significantly different from normal room temperature and humidity. This is why the 24–48 hour acclimatisation step exists.

    Adhesive squeezing out at panel joints. Apply adhesive beads 25–30mm from the panel edges, not right at the edge. This leaves a zone for the adhesive to spread as the panel is pressed without squeezing to the face. Any adhesive that does appear at a joint can be removed with a wooden spatula before it cures — don’t use a metal blade as it will mark the veneer.

    First panel not straight. The first panel sets the reference line for every panel that follows — if it’s not level, the entire wall will drift. Use a long spirit level (1.2m minimum) to set the first panel, and double-check with a plumb bob on the vertical edge. Don’t rely on the floor or ceiling as a straight reference; they’re rarely truly level.

    Frequently Asked Questions

    How long does a DIY slat wall panel installation take?
    A standard feature wall (10–15 sqm) takes 4–8 hours for a first-time installer, including surface preparation. Experienced DIYers completing their second or third installation typically complete the same wall in 3–5 hours. The cut panels at the wall edges add the most time — allow 30–45 minutes for each wall edge that requires cut panels.
    Do I need special tools to install slat wall panels?
    No specialist tools are required. You’ll need: a spirit level, a tape measure, a pencil, a circular saw or mitre saw (or a hand saw for occasional cuts), a notched adhesive spreader, and temporary props or tape to hold panels while adhesive sets. A stud finder is useful if you’re using mechanical fixing rather than adhesive.
    Can I install slat wall panels over tiles or existing wall panels?
    Over tiles: yes, if the tiles are firmly bonded and the surface is flat. Adhesive bonds well to clean ceramic or porcelain tile. Over existing wood panelling: yes, if the panelling is fixed firmly to the wall and the surface is flat and smooth. Over wallpaper: not recommended — the adhesive bond to wallpaper is unreliable and wallpaper can separate from the wall under load.
    What’s the best adhesive for DIY slat panel installation?
    A solvent-free construction adhesive — Gripfill, Stixall Extra Strong, or equivalent — applied in 10mm beads at 150–200mm spacing across the panel back. Solvent-free formulations are safer to use indoors and don’t risk damaging the veneer or AcuFelt backing if minor contact occurs during installation.
    Can I install slat wall panels in a bathroom?
    Not recommended for direct wet zones (shower cubicles, directly above baths). In dry bathroom areas (feature walls, toilet walls) away from direct water splashing, installation is feasible provided the room has adequate ventilation to prevent sustained high humidity. Real wood veneer expands and contracts with moisture cycling — sealant application to all panel edges and faces before installation improves moisture resistance.

    The Result

    A correctly installed slat wall panel accent wall transforms a room in a single day. The acoustic improvement is noticeable immediately — rooms with hard floors and painted walls are dramatically more comfortable after a single panel wall of quality acoustic slat panels.

    Start with the SoundPanel® American Acoustic Slat Panel — the most popular choice for first-time and experienced installers alike. Or browse the complete wood wall panel collection to find the species and format that suits your room.