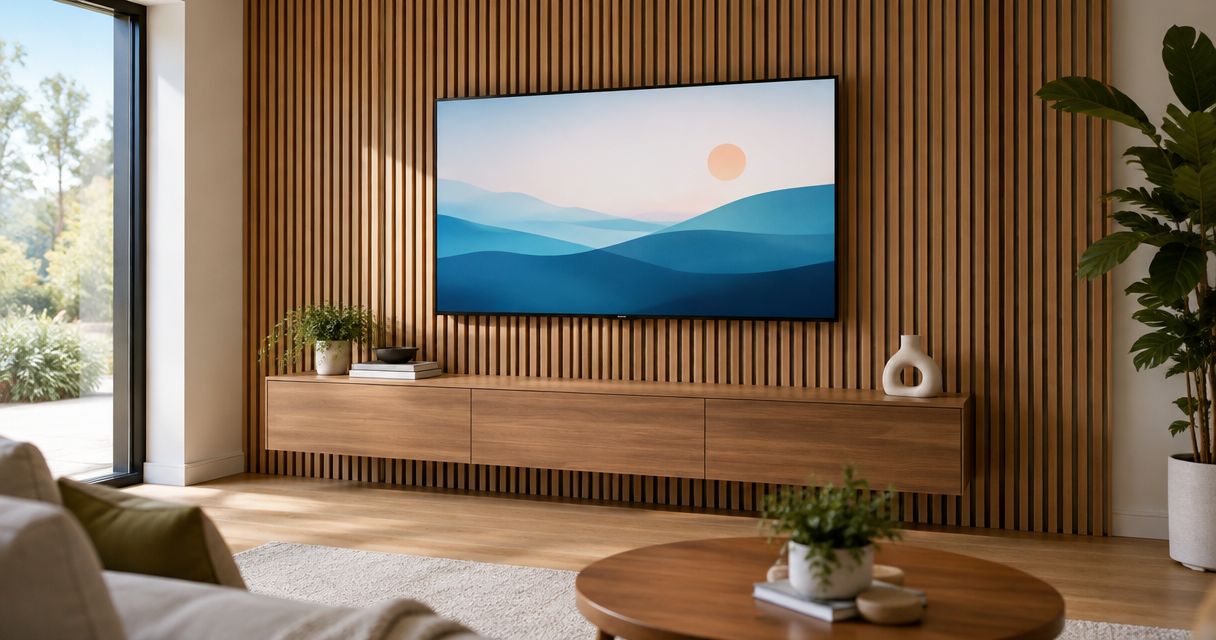
Yes, you can mount a TV on wood slat wall panels when the bracket is secured to suitable structural support behind the decorative finish—not to the slats or felt alone. For your 2026 installation, account for the panel thickness, bracket seating, hidden wiring, and the TV mount manufacturer’s fastening requirements before drilling.
- Can you mount a TV on wood slat wall panels? Yes—secure the bracket to suitable structural support.
- The Panel Hub acoustic wall panels provide a decorative finish, not structural TV support.
- Choose the mounting arrangement before panel installation so fasteners, clearances, and cables fit.
- Never treat decorative slats, felt backing, or panel adhesive as the TV’s load-bearing attachment.
Why this matters
A wood slat TV wall combines two separate jobs: decorating the room and supporting equipment. Mixing them up puts the screen, panel finish, and people nearby at risk. A firmly attached decorative panel is not proof that it can carry a TV bracket.
The Panel Hub’s Acoustic Slat Wood Wall Panels | SoundPanel™ belong in the finish plan; the bracket needs its own verified attachment plan. The Panel Hub acoustic wall panels are best for homeowners seeking a decorative TV backdrop, not structural TV support.
For a 2026 project, decide how the bracket attaches before ordering fasteners or covering the wall. That sequence also prevents a finished feature wall from hiding the framing and cable routes you still need to inspect.
Can you mount a TV on wood slat wall panels?
Yes—but the mounting connection must carry the load independently of the decorative panel’s attachment. On a wood-framed wall, that commonly means fastening into suitable studs or properly installed structural blocking. Masonry and metal-framed walls need attachment methods approved for those substrates and the mount.
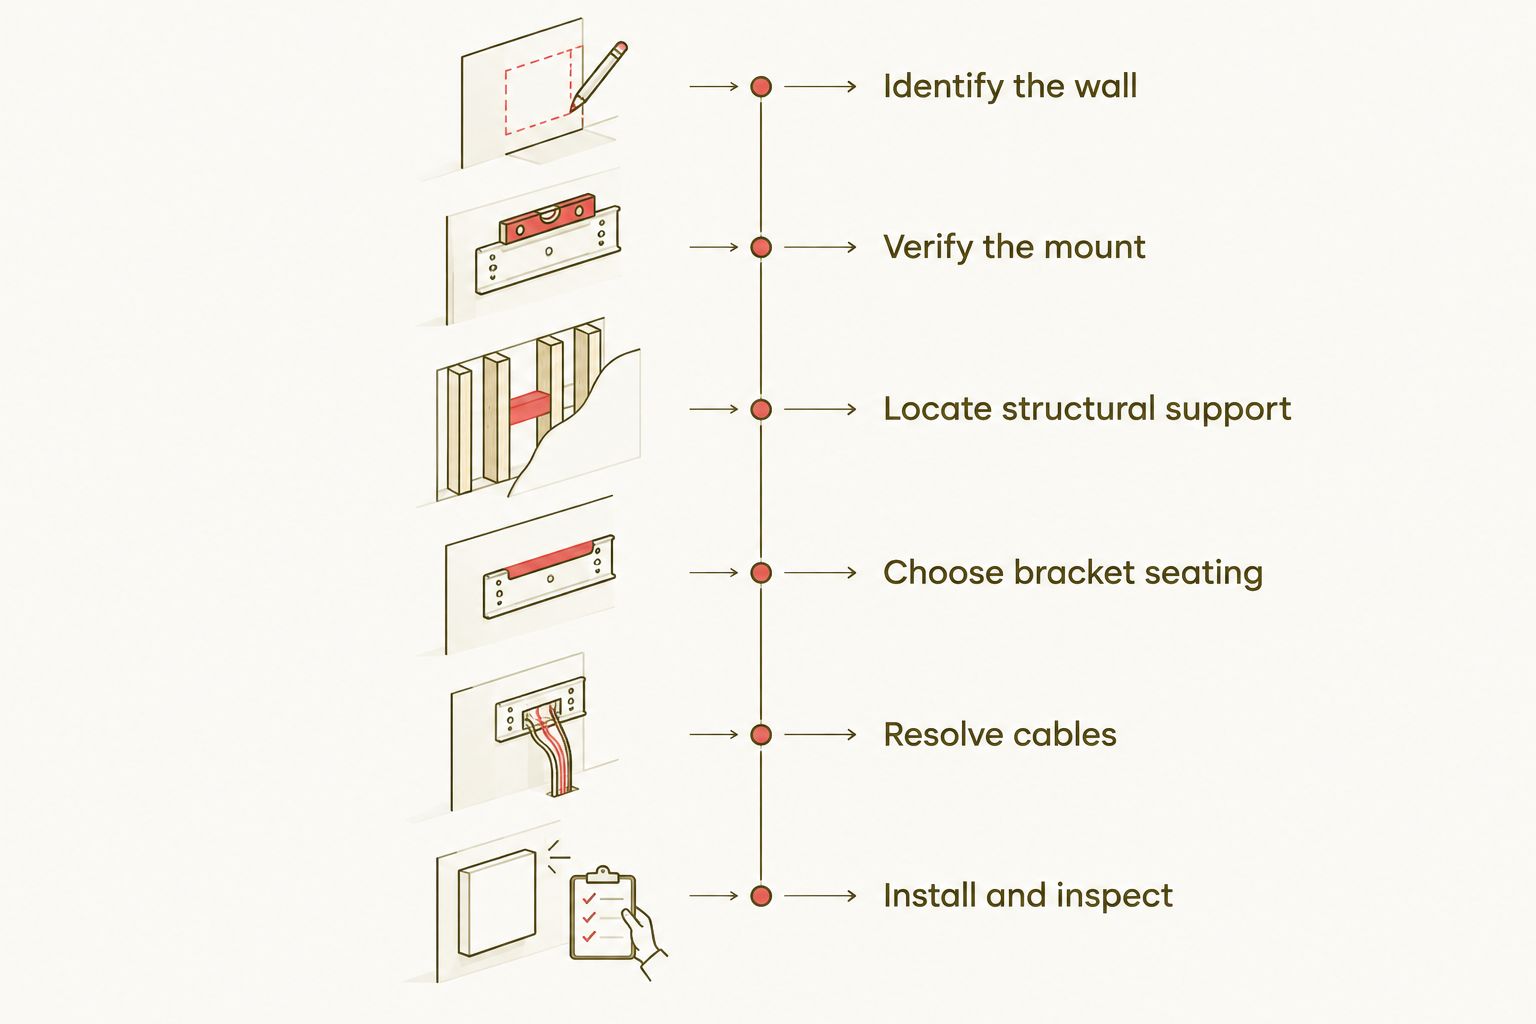
Follow this sequence rather than choosing screws by appearance or whatever remains in your toolbox:
- Identify the wall. Establish whether you have wood studs, metal framing, concrete, masonry, or another construction. Check the wall’s condition before covering it.
- Verify the mount. Confirm that the bracket suits the TV’s weight, mounting pattern, and intended movement. Use the TV and mount manuals together.
- Locate structural support. Mark verified attachment positions and check the drilling area for concealed services. Do not assume panel battens are structural blocking.
- Choose bracket seating. Decide whether the wall plate sits through the finished panel arrangement or within a concealed panel cutout. Follow the mount manufacturer’s requirements.
- Resolve cables and ventilation. Keep connections accessible and maintain the TV manufacturer’s required clearances.
- Install and inspect. Use the specified attachment method, engage the bracket’s locking features, and check operation before considering the installation complete.
A stud finder is a locating aid, not proof that every apparent detection is safe to drill. If the wall construction or concealed services remain uncertain, stop and have a qualified installer verify them.
Mounting through the panels: best for an uninterrupted finish
Mounting through the panel arrangement keeps the slat pattern continuous behind the screen. It works only when the bracket manufacturer permits the resulting installation and the fasteners reach suitable structural support with the required engagement.
The difficulty is bracket seating. A wall plate spanning raised slats and recessed gaps does not automatically have the flat, firm bearing surface it needs. Felt can compress, and decorative slats are not a substitute for a specified mounting surface.
Do not solve rocking by tightening harder. That can damage the finish without making the attachment correct. Use only a manufacturer-approved arrangement for bridging the finish or transferring the clamping force to a suitable substrate; ask the mount manufacturer when its instructions do not address decorative cladding.
Choose this approach when you want continuous paneling and can verify the complete mounting detail. Its advantage is visual continuity; its drawback is the extra care needed to accommodate an uneven, layered surface.
A concealed panel cutout: best for direct bracket access
A concealed cutout leaves the bracket’s wall plate outside the decorative panel layer. You finish the surrounding wall with slats while keeping the mounting area accessible behind the TV.
This approach separates the bracket from the panel’s uneven face, but it does not eliminate structural requirements. The exposed underlying wall still needs the correct support and attachment method. Drywall alone does not become suitable simply because the slats are absent.
Before cutting, outline the TV, bracket, and its full movement envelope. A cutout hidden by a screen pushed flat against the wall can become visible when the screen tilts or swings outward. Check the view from doorways and adjacent seating, not just directly in front.
Choose a concealed cutout when direct bracket access matters more than continuous panel coverage. The trade-off is an unfinished-looking area if the screen position changes or a future TV is smaller.
| Arrangement | Best for | Main advantage | Main limitation |
|---|---|---|---|
| Through the panel arrangement | Continuous slat coverage | Keeps the decorative pattern behind the screen | Requires an approved seating and fastening detail |
| Concealed panel cutout | Direct access to the mounting area | Separates the bracket from the slat surface | Opening can show when the screen moves |
| Structural blocking before paneling | Walls already open for work | Lets you plan support around the bracket | Requires access to the framing and proper installation |
Structural blocking: best for planning before the wall is finished
Structural blocking can provide a suitable attachment location when the existing framing does not match the bracket position. Have its size, connections, and placement specified for the wall and intended mounting load. A loose piece of wood behind drywall is not structural blocking.
This is easiest to address while the wall is open. Record the blocking location before closing the wall, then confirm that the chosen bracket’s attachment points fall within it.
Do not confuse panel-support battens with TV-mount support. Battens installed to hold acoustic panels have a different purpose unless their construction and attachment have also been verified for the TV installation.
Choose properly designed blocking when you need to establish support before installing the finish. Its benefit is planned attachment placement; its drawback is the additional wall work, especially in an already decorated room.
Why TV mounting details vary
There is no universal screw length or panel cutout that fits every installation. These factors determine the correct detail:
- Wall construction: Wood framing, metal framing, and masonry require different attachment methods. Identify the actual substrate rather than relying on the visible finish.
- Mount movement: An extending arm changes the forces applied to the attachment. Verify the mounting requirements for the bracket’s full operating position.
- Finish depth: Slats, backing, drywall, and any cavity affect the distance between the bracket and structural support. Measure the actual assembly.
- Support location: Stud or blocking positions determine where an approved connection is possible. Decorative panel joints do not establish those positions.
- Bracket geometry: Wall-plate dimensions, attachment slots, and locking access affect how the mount fits around the slats.
- Services and clearances: Outlets, wiring, ventilation openings, and cable plugs compete for space behind the screen. Resolve them before drilling or cutting.
For a 2026 installation checklist, record these details alongside the mount’s instructions. A list of actual conditions is more useful than a generic fastener recommendation.
Does the TV’s mounting pattern tell you which wall screws to use?
No. The TV’s mounting pattern describes the spacing of attachment holes on the back of the screen, not the wall attachment. Common VESA patterns include 100 mm × 100 mm, 200 mm × 200 mm, and 400 mm × 400 mm; confirm your TV’s pattern in its manual.
Those measurements do not specify the wall substrate, required structural engagement, or hardware for attaching the bracket to the building. Keep the TV-side hardware and wall-side hardware requirements separate.
Plan the hidden bracket, cables, and access together
A clean feature wall depends on what you can still reach after the screen is installed. Mark the bracket footprint, power connection, signal connections, and locking mechanism on the wall before fixing the panels. Check that your hand can reach the release system without removing slats.
The decision to hide a TV mount bracket affects more than appearance: the screen must conceal the hardware without trapping connectors or blocking access to its locking mechanism. Verify the arrangement with the bracket in its viewing and service positions, not only folded flat.
Do not run an ordinary TV power cord inside the wall. Have a qualified electrician install a suitable receptacle or use a listed in-wall power system where permitted by local requirements. Signal cables routed inside a wall must also be suitable for that use.
Keep cable routes clear of fastener paths. Label or photograph those routes before covering them, and leave the cable movement required by the bracket manufacturer. A cable pulled tight with the screen flat can become strained when an arm extends.
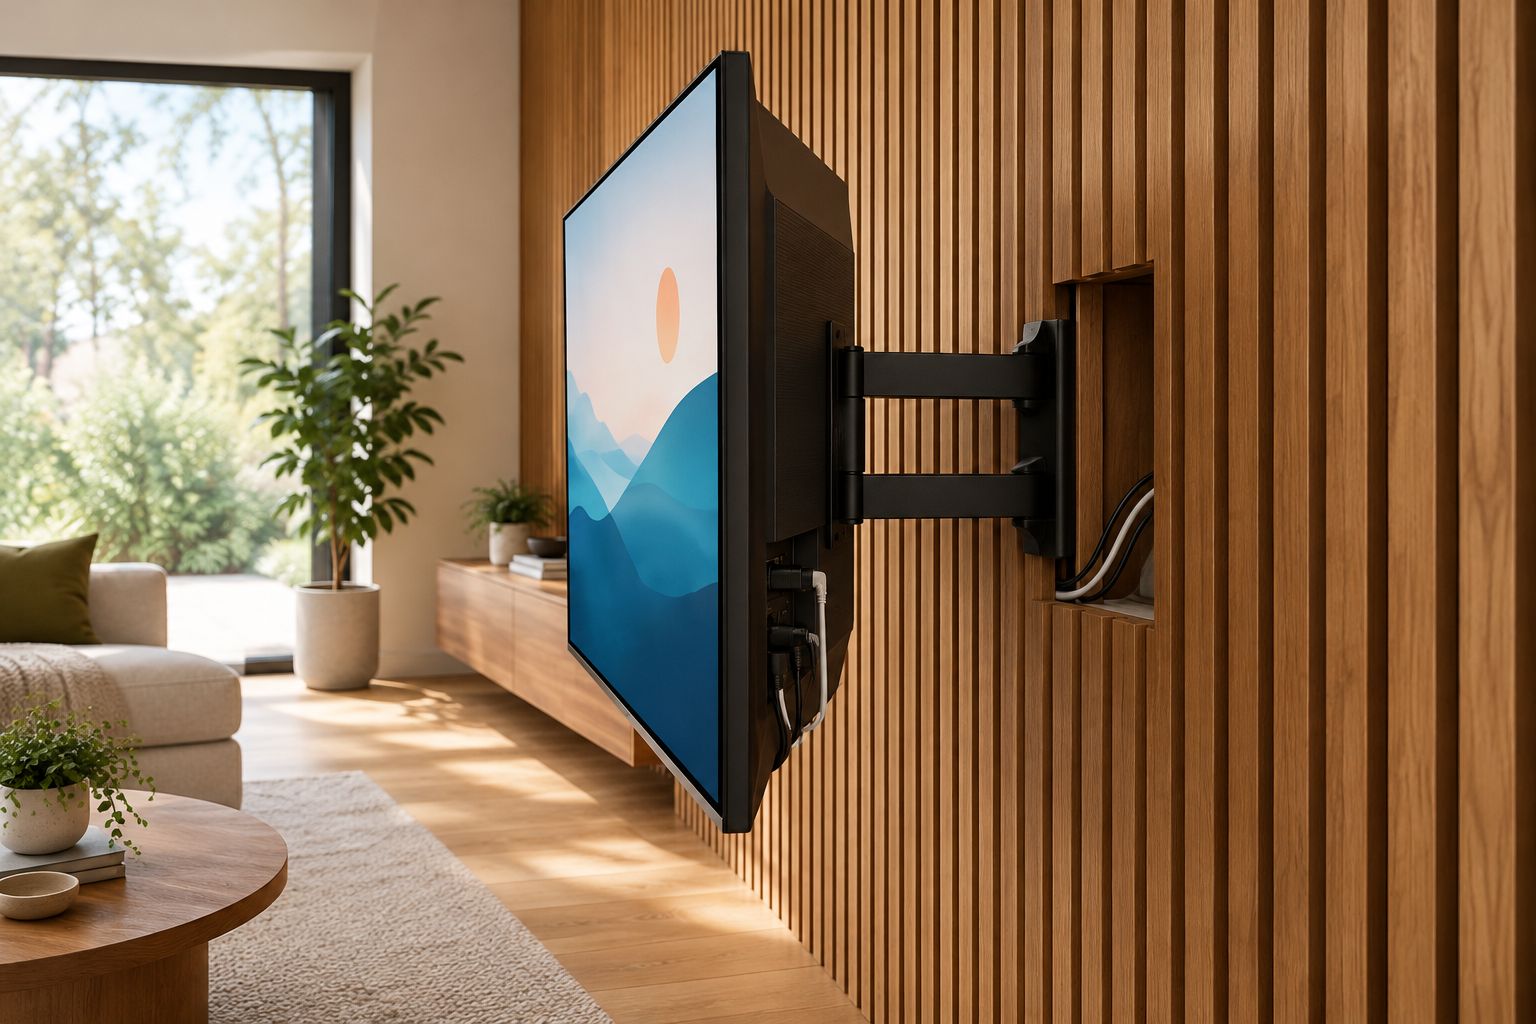
Can you conceal everything behind a very slim TV mount?
Not automatically. The TV’s plugs, wall plate, locking mechanism, and ventilation requirements still need room. Check the actual connector positions and manufacturer clearances before selecting a close-to-wall arrangement.
A slim appearance is not a reason to bend connectors sharply or squeeze the screen against raised slats. If the layout cannot accommodate the equipment safely, change the mounting arrangement rather than forcing the fit.
Check the panel finish before tightening the mount
Inspect the wall surface before attaching the bracket. A bowed substrate or uneven panel installation can leave the wall plate rocking, even when the structural attachment positions are correct. Address that condition rather than using the bracket to pull the finish flat.
If the underlying surface is questionable, address uneven or bowed walls before installing panels. Decorative coverage does not correct a mounting surface that fails the bracket manufacturer’s requirements.
Use the specified tightening method and torque where the manufacturer provides one. Excessive tightening is not an upgrade: it can crush intervening materials, damage hardware, or conceal an unsuitable seating arrangement.
After hanging the TV, verify that the locking system is engaged and inspect the permitted range of movement. Stop if the wall plate shifts, the finish compresses visibly, or cables become trapped. Do not keep operating the bracket while investigating the cause.
Will acoustic slat panels improve a TV room?
Acoustic panels address sound absorption within a room; structural mounting addresses the TV’s weight and movement. Treat those as separate decisions. Decorative wood texture alone does not establish acoustic performance, and an acoustic rating does not establish load-bearing capacity.
The Panel Hub sells acoustic wall panels for decorative, sound-dampening interiors. For your 2026 TV wall, select the finish for its documented properties and appearance, then verify the bracket installation independently.
Keep panels clear of ventilation openings and other required access points. If the TV sits above a heat source, follow the appliance, TV, and panel requirements rather than assuming a decorative backdrop makes that location suitable.
FAQ
Can I screw a TV bracket directly into wood slats?
Do not rely on decorative wood slats alone to support a TV bracket. Secure the mount to suitable structural support using the mounting method specified for the bracket and wall construction.
Do I need longer screws when mounting a TV over acoustic panels?
The added finish depth affects the required fastener length, but longer screws alone do not establish a safe connection. Confirm the complete wall assembly and the mount manufacturer’s required structural engagement.
Can I use drywall anchors behind slat panels for a TV?
Do not substitute generic drywall anchors for the mount’s specified attachment system. Use an installation method explicitly approved for the bracket, wall construction, and intended load.
Can I put a full-motion TV mount on a wood slat wall?
Yes, when the structural attachment and bracket installation are suitable for full-motion use. Check the extended position, cable movement, and visibility of any panel cutout before installation.
Should I install the TV bracket before or after the wood panels?
Plan and verify the bracket attachment before installing the panels. The final installation order depends on whether the bracket passes through the finish or sits within a concealed cutout.
Will mounting a TV damage the wood slat panels?
Mounting through the finish requires holes, and a concealed mounting opening requires cuts. Keep spare finish material when possible, but do not assume a later repair will make those changes invisible.
Does an acoustic panel rating mean the panel can support a TV?
No, an acoustic rating describes sound absorption rather than structural load capacity. The TV bracket still needs a separately verified attachment to suitable support.
One last thing
Before finishing your 2026 TV wall, photograph the verified framing, blocking, and cable routes with a tape measure visible. Keep those photos with the mount manual. That record helps you locate concealed features during future work, though you must still check for services before drilling.
Make the bracket secure first and the wall beautiful second. The best-looking installation is one you can inspect, service, and use without relying on decorative slats to do structural work.
Related guides
- Can you install wall panels over drywall?
- Wiring outlets behind wood wall panels
- Running speaker cable behind wood wall panels
Leave a Reply